Once your character hits the level 45 cap in AION 2, your overworld level stops mattering and gear level takes over. Enhancing equipment is how you keep pushing that number up, and it is also the biggest Kina drain in the game. The system is more forgiving than most MMOs — most upgrades are guaranteed, and a failed attempt almost never costs you a level — but the Kina adds up fast, so knowing the rates and the order to spend in saves you a lot of grinding.
Quick answer: Open the Enhancement menu, pick a piece, and spend Enhance Stones plus Kina. Enhancement is guaranteed to +10 on Unique gear, then can fail from +11 to +15 with a +5% pity bonus per miss. Enhance the Revelation Amulet and Noble Belt first, your weapon second.
The five systems inside the Enhancement menu
The Enhancement window groups five separate upgrade tracks under one roof. Each one has its own materials and its own purpose, so treat the menu as a set of tools rather than a checklist to max out all at once.
- Growth raises an item’s enhancement level with Enhance Stones and Kina, adding flat stats per rank.
- Manastone sockets grant random substats on weapons and armor.
- Theostone sockets add attack procs on weapons and guards.
- Soul Binding rerolls and locks in an item’s inherent substats.
- Transfer moves an item’s enhancement and Soul Binding onto another piece.
How Growth enhancement works
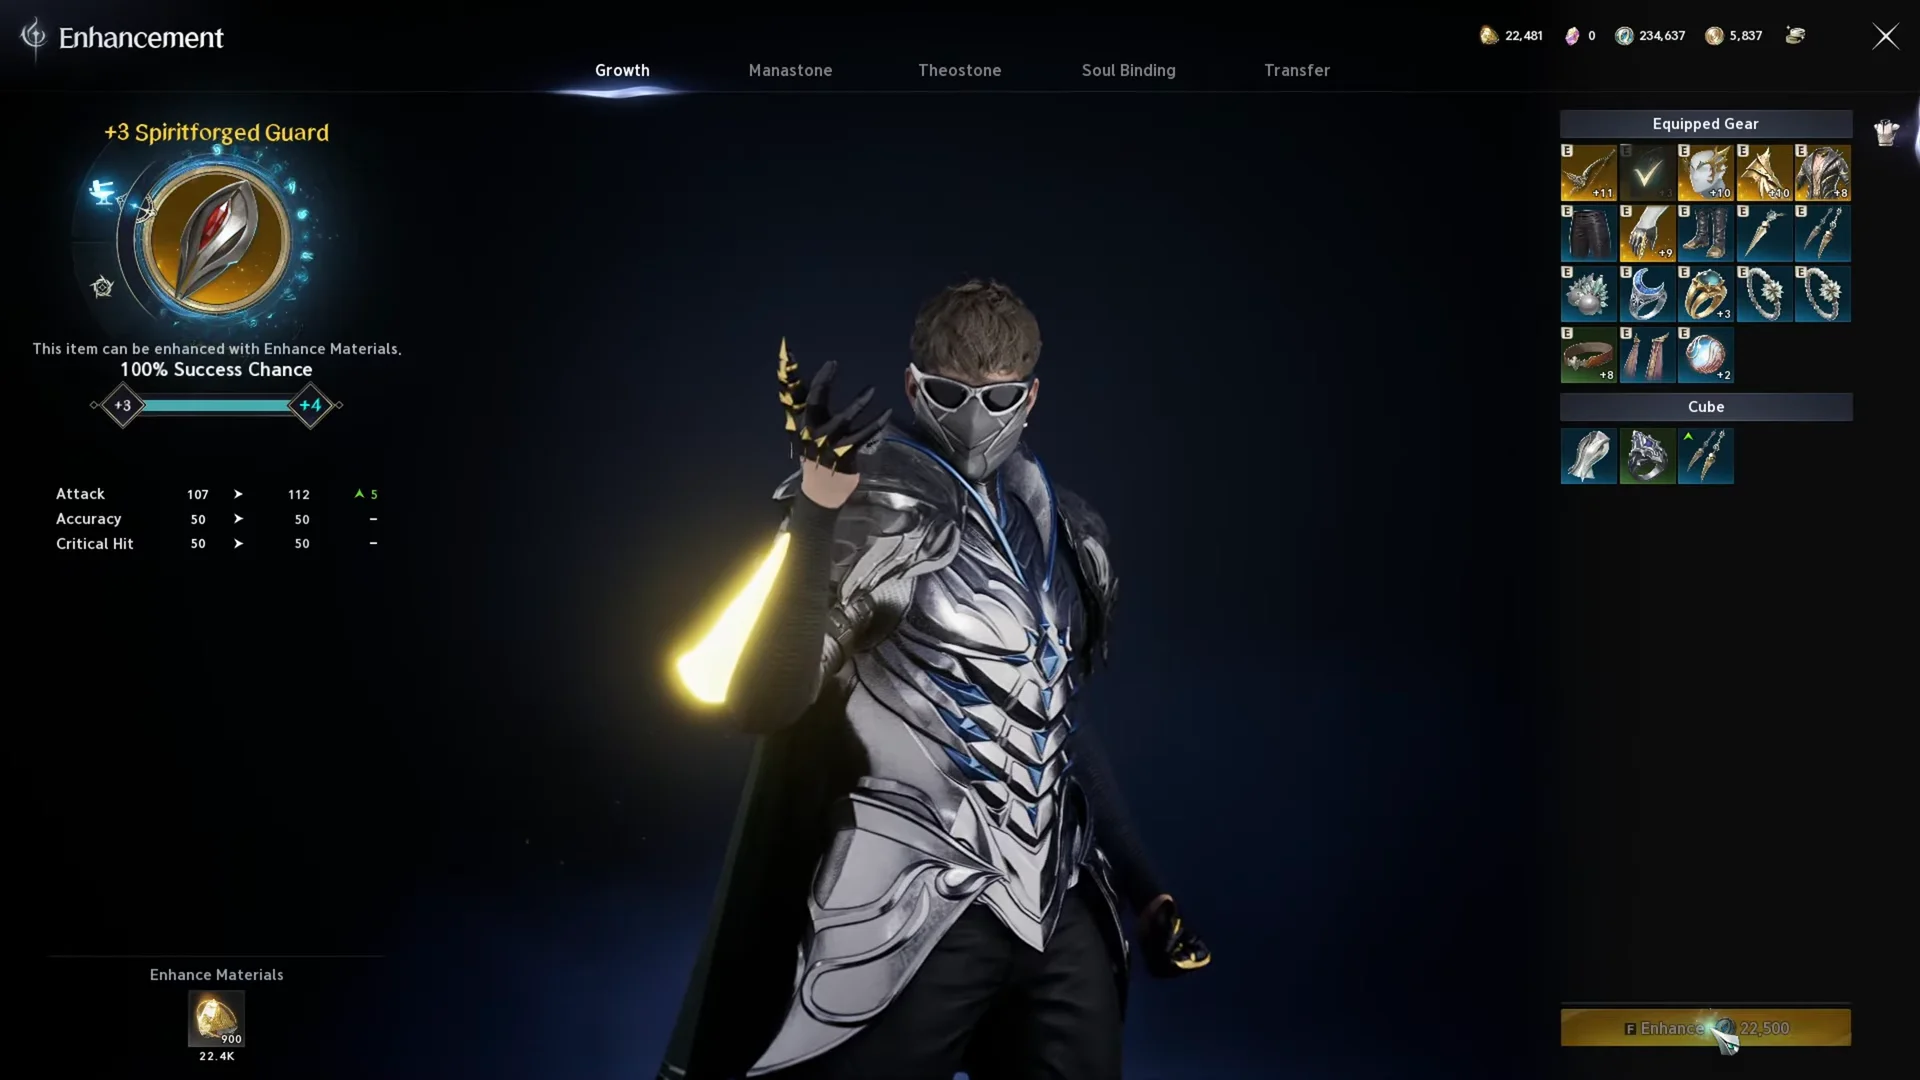
From the main menu, open the “Enhance all” option to bring up the enhancement screen. It lists every piece you own, equipped or sitting in your cube, alongside your available materials. Pick the item you want to raise, confirm you have enough Enhance Stones and Kina, and commit the upgrade. Each rank increases the item’s base gear level, which feeds into your overall gear score and opens the door to higher-level zones, trials, and dungeons.
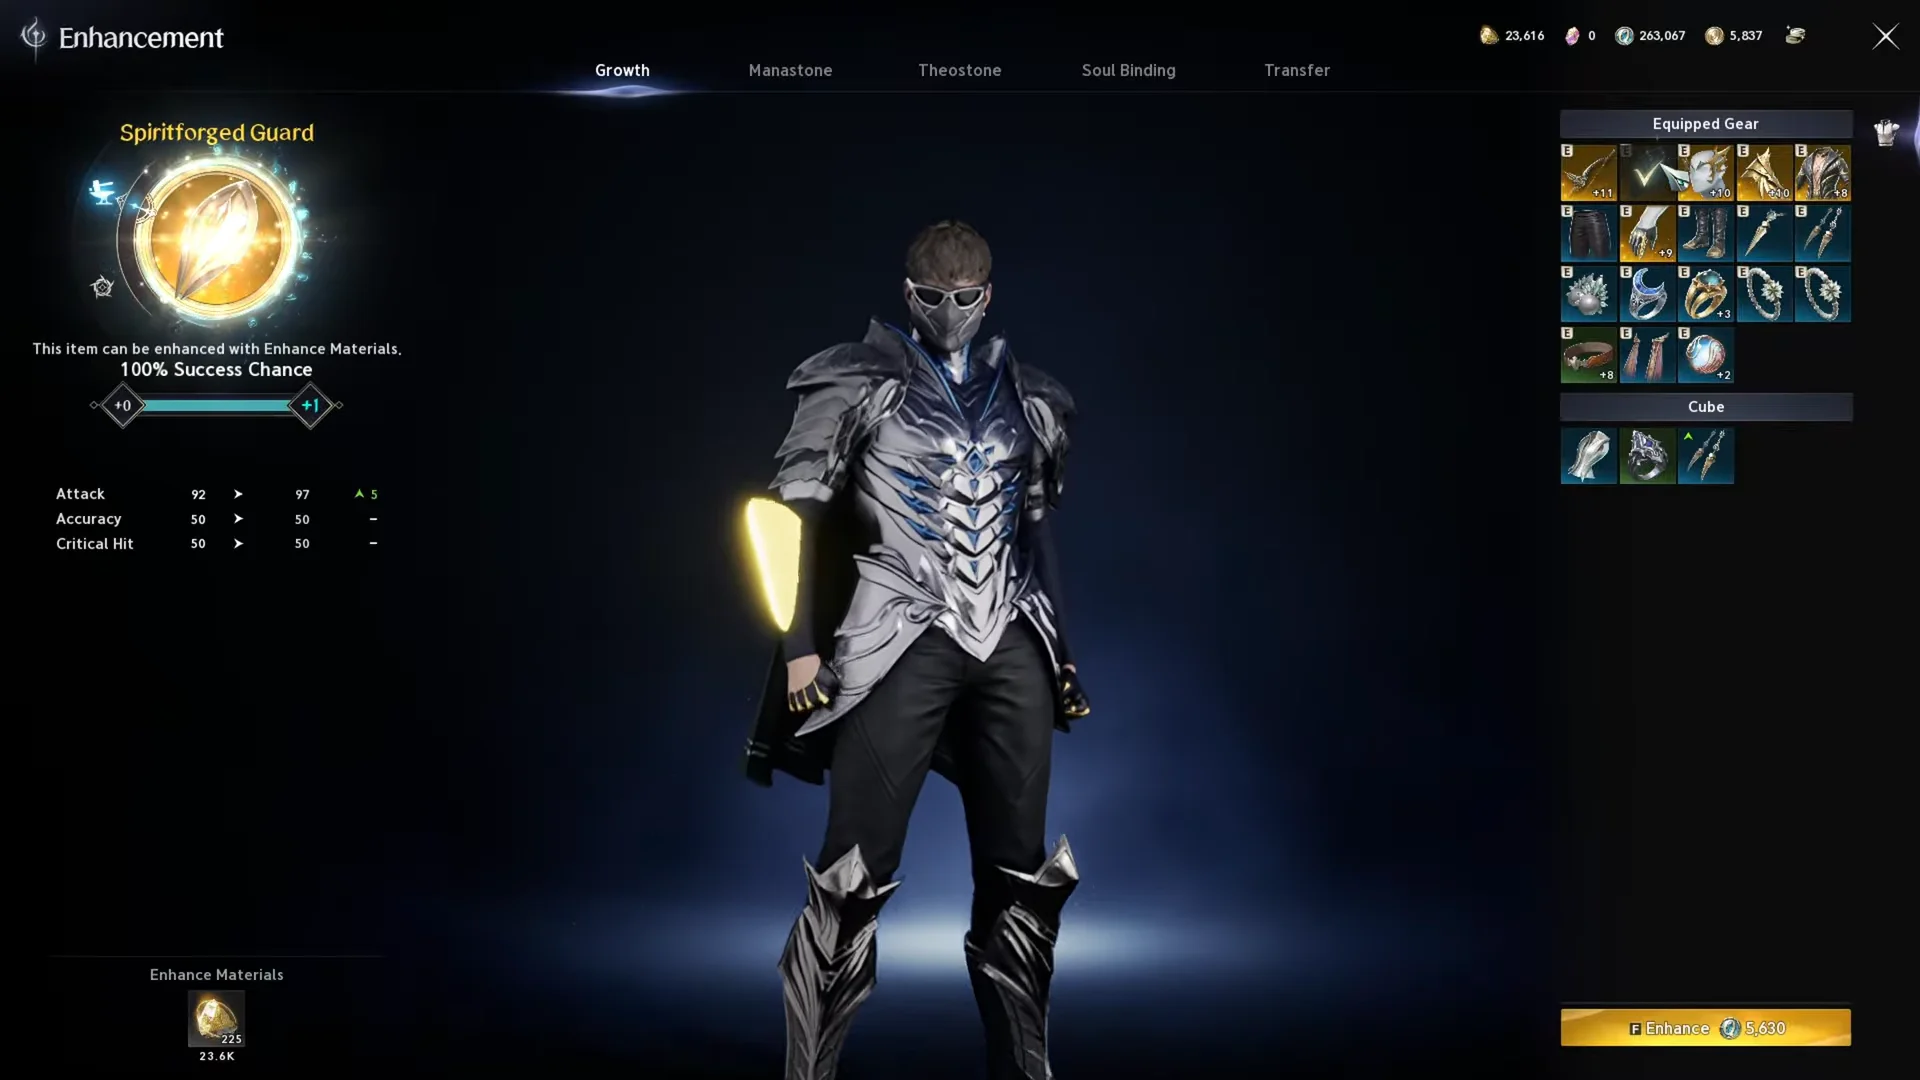
Gear-level gains are small per rank, so the payoff comes from stacking many upgrades across your whole kit. On a single piece, a few ranks might only move your gear score by a point or two, which is why it is worth picking targets you will keep rather than spraying stones across temporary gear.
Extracting an enhanced item refunds your Enhance Stones, but not the Kina, Manastones, or Theostones you spent on it. Spend those carefully on gear you plan to replace.
Enhancement success rates by grade
How far an item enhances depends on its grade. Common and Rare cap at +5, Epic at +10, and Unique at +15. Everything up to +10 on a Unique piece succeeds every time, so the only risky steps in the entire system are the final five Unique ranks. A failure there never lowers your level — it only burns the materials — and it adds +5% to your next attempt at that rank.
| Grade | Max level | Guaranteed up to | Risky steps |
|---|---|---|---|
| Common | +5 | +5 | None |
| Rare | +5 | +5 | None |
| Epic | +10 | +10 | None |
| Unique | +15 | +10 | 65% → 50% → 35% → 25% → 20% |
The pity bonus caps your bad luck. Because each failure raises the odds, there is a hard limit on how many tries a step can take before it reaches 100%. The +14 to +15 step starts at 20% and tops out at 17 attempts in the worst case.
The Clash Rune is the one exception to the no-downgrade rule. It needs a Clash Rune Enhance Scroll every attempt, has no pity, and drops one level on any failed attempt. Its odds fall sharply from 100% at the first rank down to 10% for +9 to +10, so treat it as a slow, long-term project.
Pushing past +15 with Amplified Enhancement
Once a Unique item reaches +15, it can go up to five ranks further with Amplify Stones. The odds start a touch higher than the final Enhancement steps but drop fast, and the pity bonus shrinks as you climb. A failed Amplified attempt does not lower the level.
| Amplified step | Base rate | Pity per fail | Cost per attempt |
|---|---|---|---|
| +1 | 66% | +5% | 600,000 Kina + 6 Amplify Stones |
| +2 | 50% | +4% | 900,000 Kina + 9 Amplify Stones |
| +3 | 33% | +3% | 1,400,000 Kina + 12 Amplify Stones |
| +4 | 25% | +2% | 2,000,000 Kina + 15 Amplify Stones |
| +5 | 20% | +1% | 3,000,000 Kina + 20 Amplify Stones |
The +5 step is the real wall. With only a 1% pity bump per failure, an unlucky run can take dozens of tries, so most players stop short of the final Amplified rank on anything but their main weapon.
Enhance the Revelation Amulet and Noble Belt first
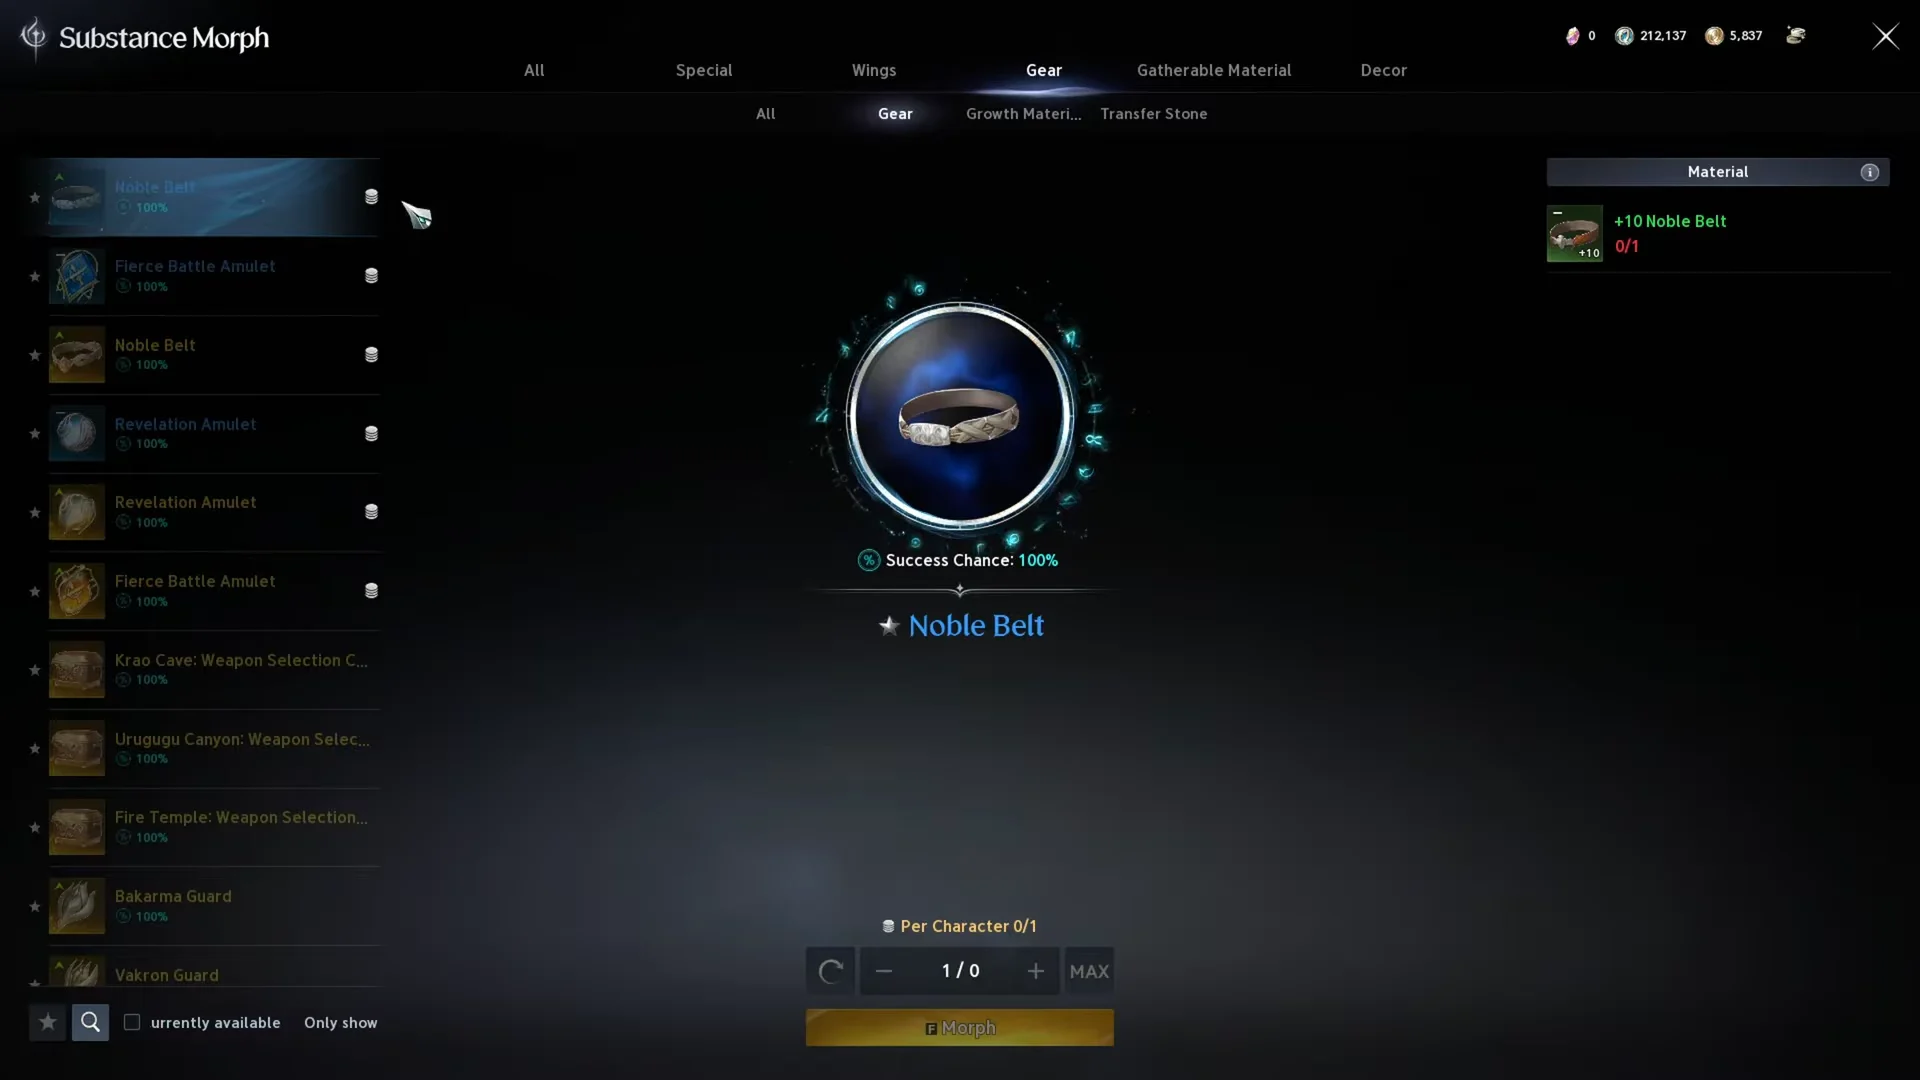
Almost every weapon and armor piece you own early on will be replaced by a better drop, so pouring stones into them is wasted the moment the upgrade arrives. The two exceptions are the Revelation Amulet and the Noble Belt. You keep these for the entire game, and both improve through Substance Morph rather than being swapped out.

Both pieces enhance to +10 at every grade and need their own scroll for each attempt — a Noble Belt Enhance Scroll and a Revelation Amulet Enhance Scroll. Belt scrolls and materials come from the strongholds marked on the world map, while amulet scrolls come from collecting Empyrean Traces and trading them at a Monolith.
The loop is straightforward. Take the Rare version to +10, open Substance Morph under the Gear tab, and convert it to the Epic version at +0. Enhance that to +10 and morph again to Unique, then enhance the Unique to +10. A Unique Noble Belt and Unique Revelation Amulet at +10 are a large chunk of the gear score you need to clear the 1,400 wall and reach Transcendence content.
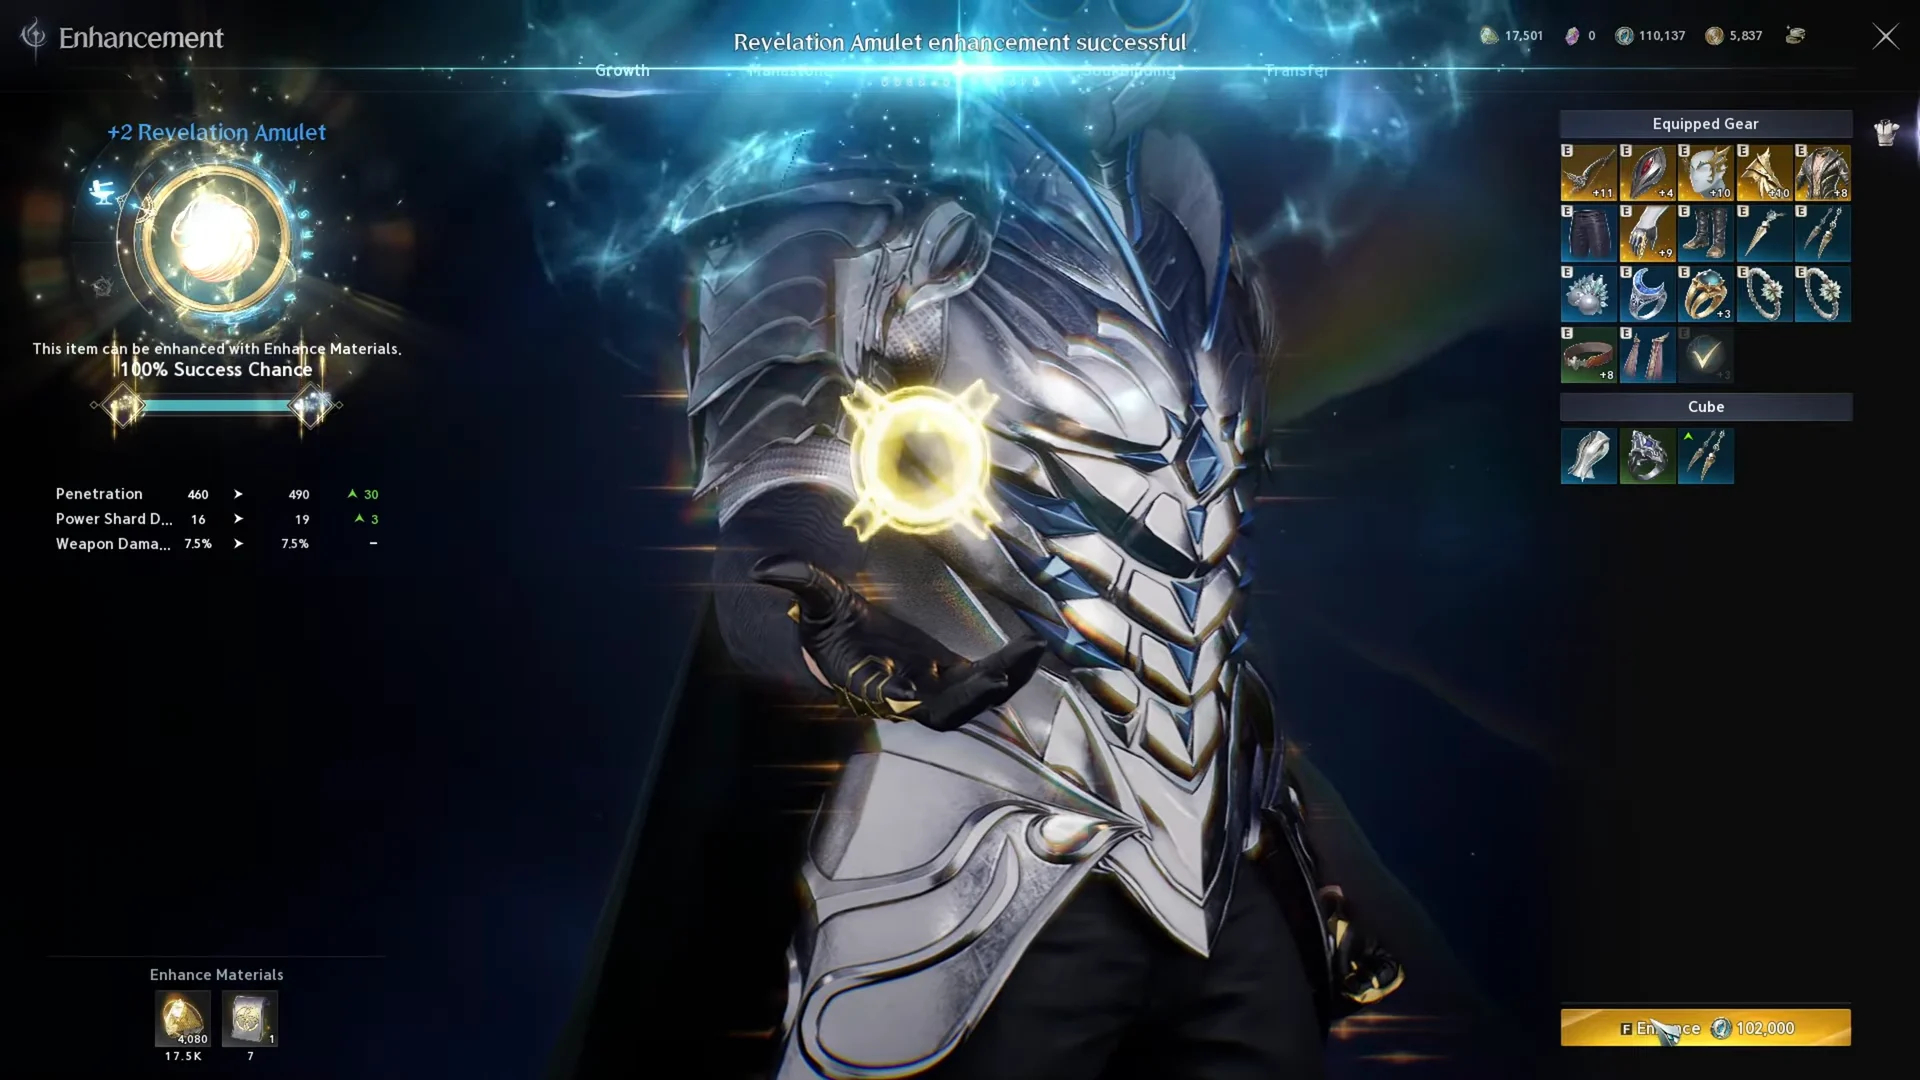
Amulet enhancement also shows a 100% Success Chance on screen for every guaranteed rank, so you can commit without gambling. Once the belt and amulet stall, shift your stones to your weapon — it has the biggest effect on active damage and drops less often than armor.
Where to farm Enhance Stones
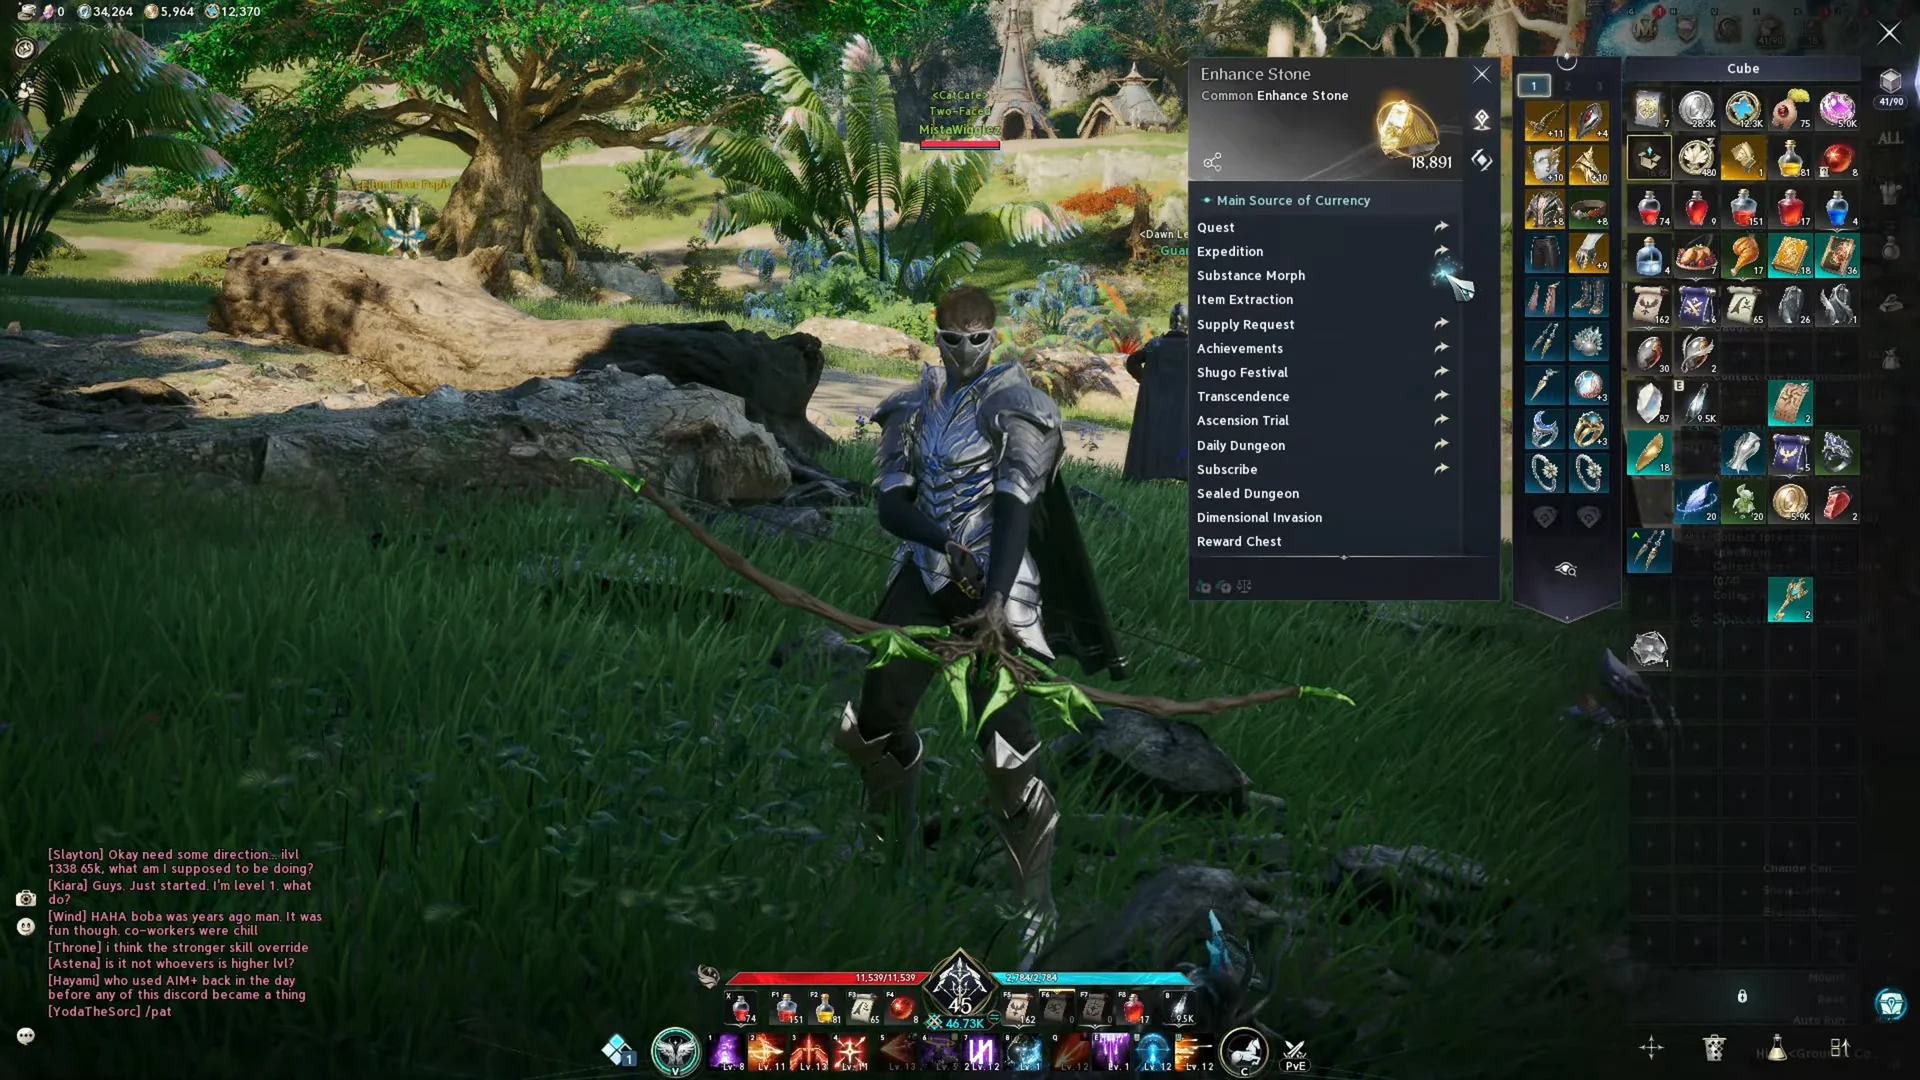
Enhance Stones are the core material behind every Growth upgrade. They come from a wide spread of content, but a few activities pay out far more per run than the rest.
| Source | Stones per run |
|---|---|
| Daily Dungeons | Up to 10,000 |
| Ascension Trials | Up to 3,500 |
| Transcendence (per boss) | 2,000 |
| Dimensional Invasion (per cube) | 700 or more |
| Sealed Dungeons | ~1,200 |
| Shugo Festival | 1,200 |
| Expeditions (per boss) | 1,000 |
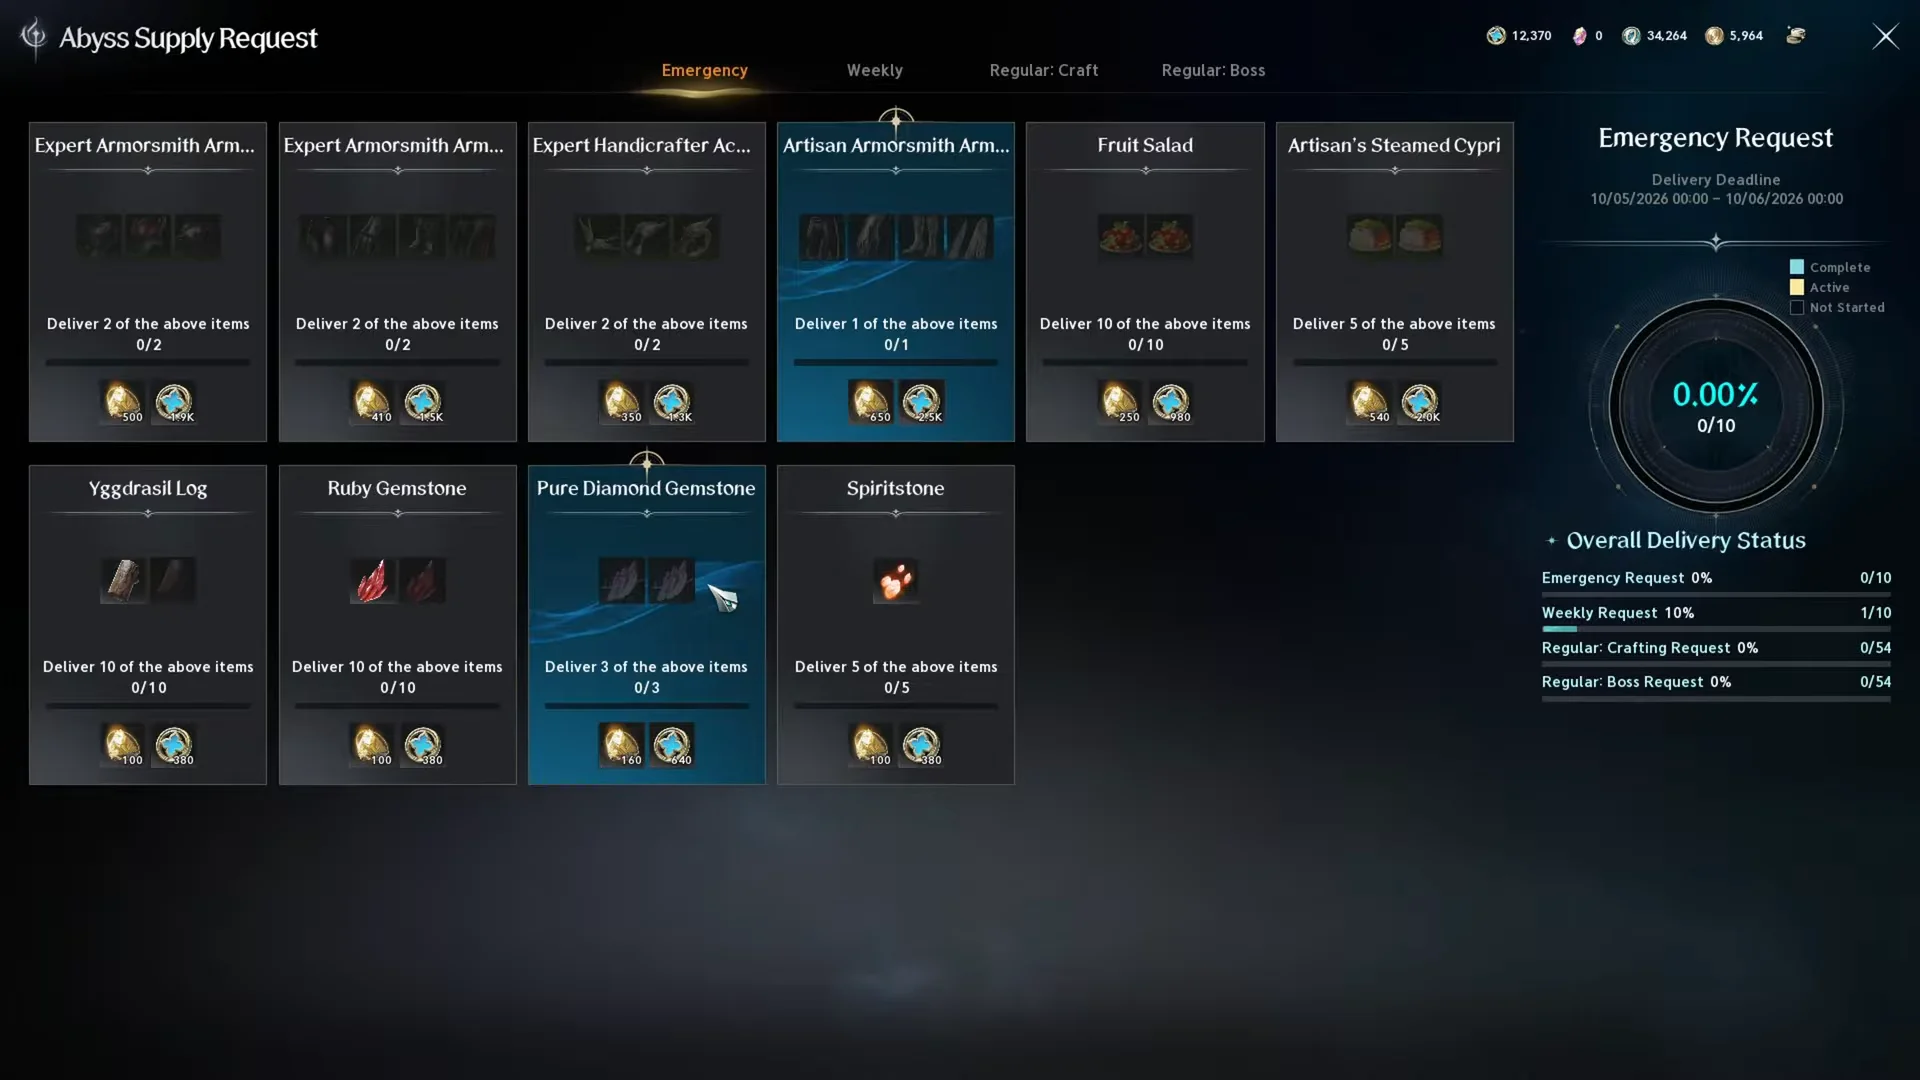
| Abyss Supply Requests | 100 to 1,500 |
Daily Dungeons such as Daeva Bio-Research Base are the heaviest source — clear as many enemies as you can and use every entry. On top of these, quests are the single biggest well of stones over a character’s lifetime, and the Daeva Pass hands out bundles as you climb its track, with more on the Premium side.
If you have gear you will never use, run it through Item Extraction instead of leaving it in your cube. You get stones back and unlock the skin at the same time.
Manastones, Theostones, Soul Binding, and Transfer
Manastone engraving
Manastones socket into weapons and armor to add random substats like Defense, HP, Accuracy, or Critical Hit Resist. Because the rolled stat is random, you can re-engrave with more Manastones to reroll it. Higher-grade stones have a better chance of landing the rarer stats, and accessories use Soulstones for the same effect.
Theostone engraving
Theostones slot into weapons and guards and grant an activation proc on your attacks — elemental burst damage or a crowd-control debuff, depending on the stone. Engraving one through the Enhancement Hub costs 10,000 Kina. Removing an equipped Theostone destroys it permanently, so socket deliberately.
Soul Binding
Soul Binding uses Kina and Soul Codices to reroll and raise a piece’s inherent substats, chosen at random from that item’s list. It has three functions: reset to reroll everything, sync to reroll a single stat when you own two of the same item, and bind to push the stats toward their full potential. A Soul Codex: Reset lets you reroll again.
Gear Transfer
Transfer moves the enhancement level, amplification, and Soul Binding from one piece onto another identical gear type, using Transfer Stones. The source piece is consumed in the process. This is how you carry hard-won enhancement progress onto a fresh drop instead of starting from +0 again.
Amplify Stone Fragment sources and the Fierce Battle Amulet
Amplified Enhancement eats Amplify Stones, and the bound Amplify Stone Fragments that build toward them drop from a handful of party dungeons and raids. If you are planning a push past +15, these are the runs that feed it.
| Dungeon | Boss | Amplify Stone Fragment drop |
|---|---|---|
| Shattered Arkanis | Siliator, Ruthilis, Talisra | 20% each |
| Krao Cave | Enhanced Harcon, Neglected Gadioton | 20% each |
| Krao Cave |  Ultimate Berk | 20% |
| Abyssal Forge: Ludra |  Eternal Ludra | Amplify Stone Fragment (Unique) |
Shattered Arkanis gates its stages behind rising gear score — 1,600, 1,900, 2,200, and 2,500 — so it doubles as a yardstick for how far your enhancement has carried you. Krao Cave runs on a 60-minute timer for parties of up to five, and the Abyssal Forge: Ludra raid is a 10-player Conquest fight with a two-hour limit and two revives.
Not every amulet uses the Revelation Amulet’s scroll. The Fierce Battle Amulet, a Unique item-level 65 amulet, is enhanced with Amulet Enhance Scrolls earned through the Abyss Shop. It enhances to +10, adding Penetration and Power Shard Damage Bonus at the +5 and +10 breakpoints on top of its base Penetration, Perfect Chance, and PvP Damage Boost. It cannot be traded.
You know an enhancement worked the moment the success animation plays and the item’s level ticks up on the enhancement screen, with its gear level feeding straight into your total. Keep that total climbing by fixing your weakest functional slot first, keeping the belt and amulet permanently in progress, and saving your heaviest stone investment for the Unique gear you will actually keep.