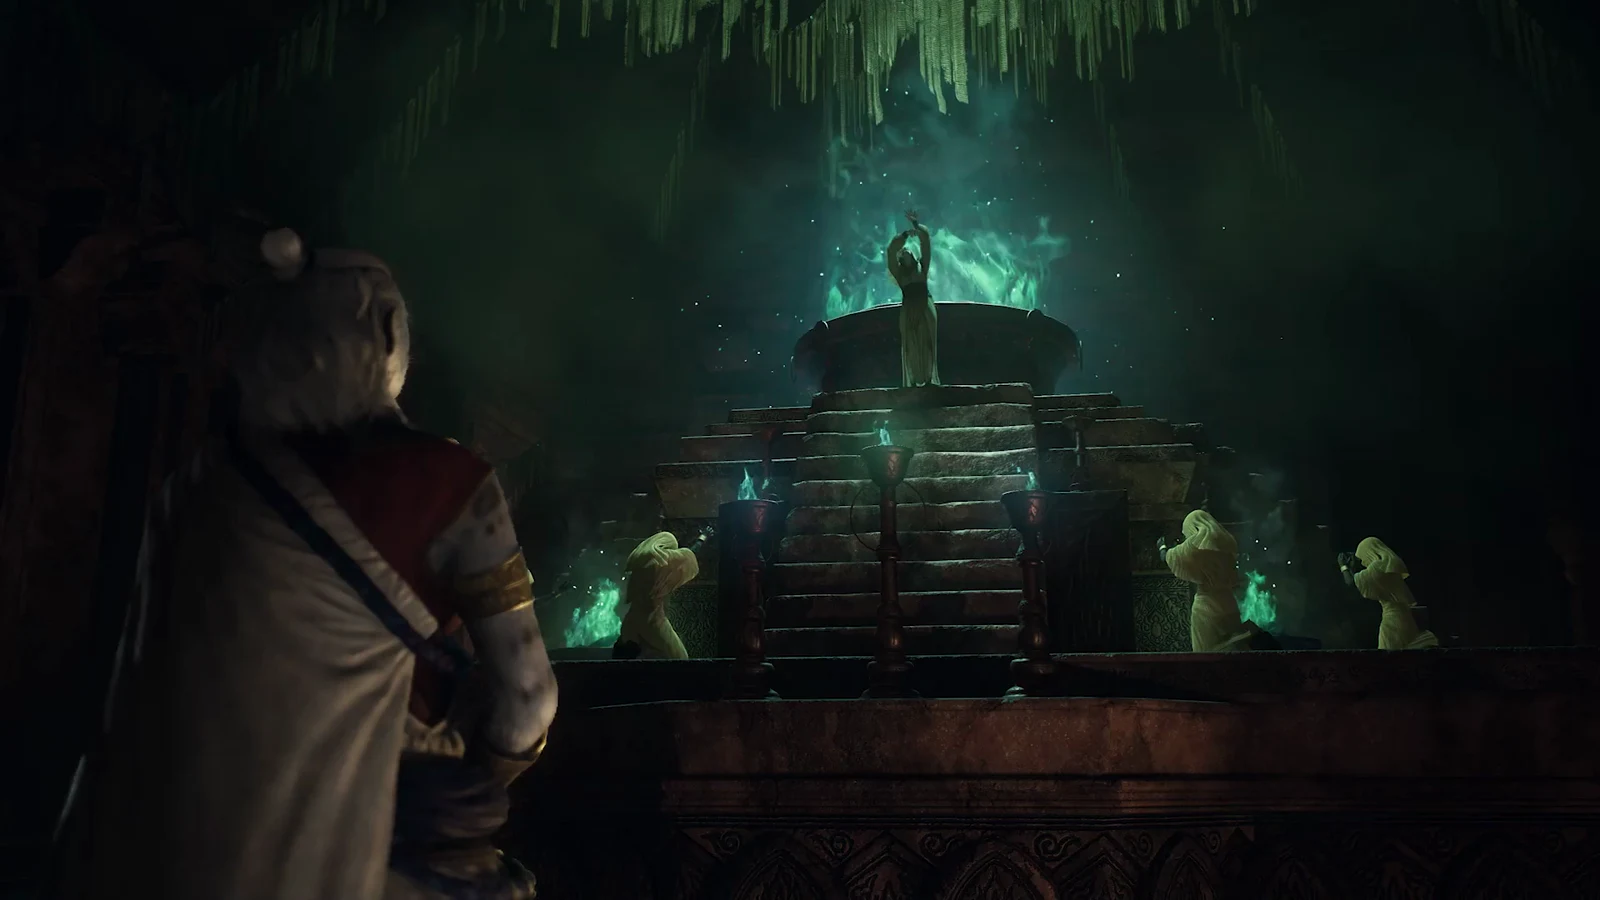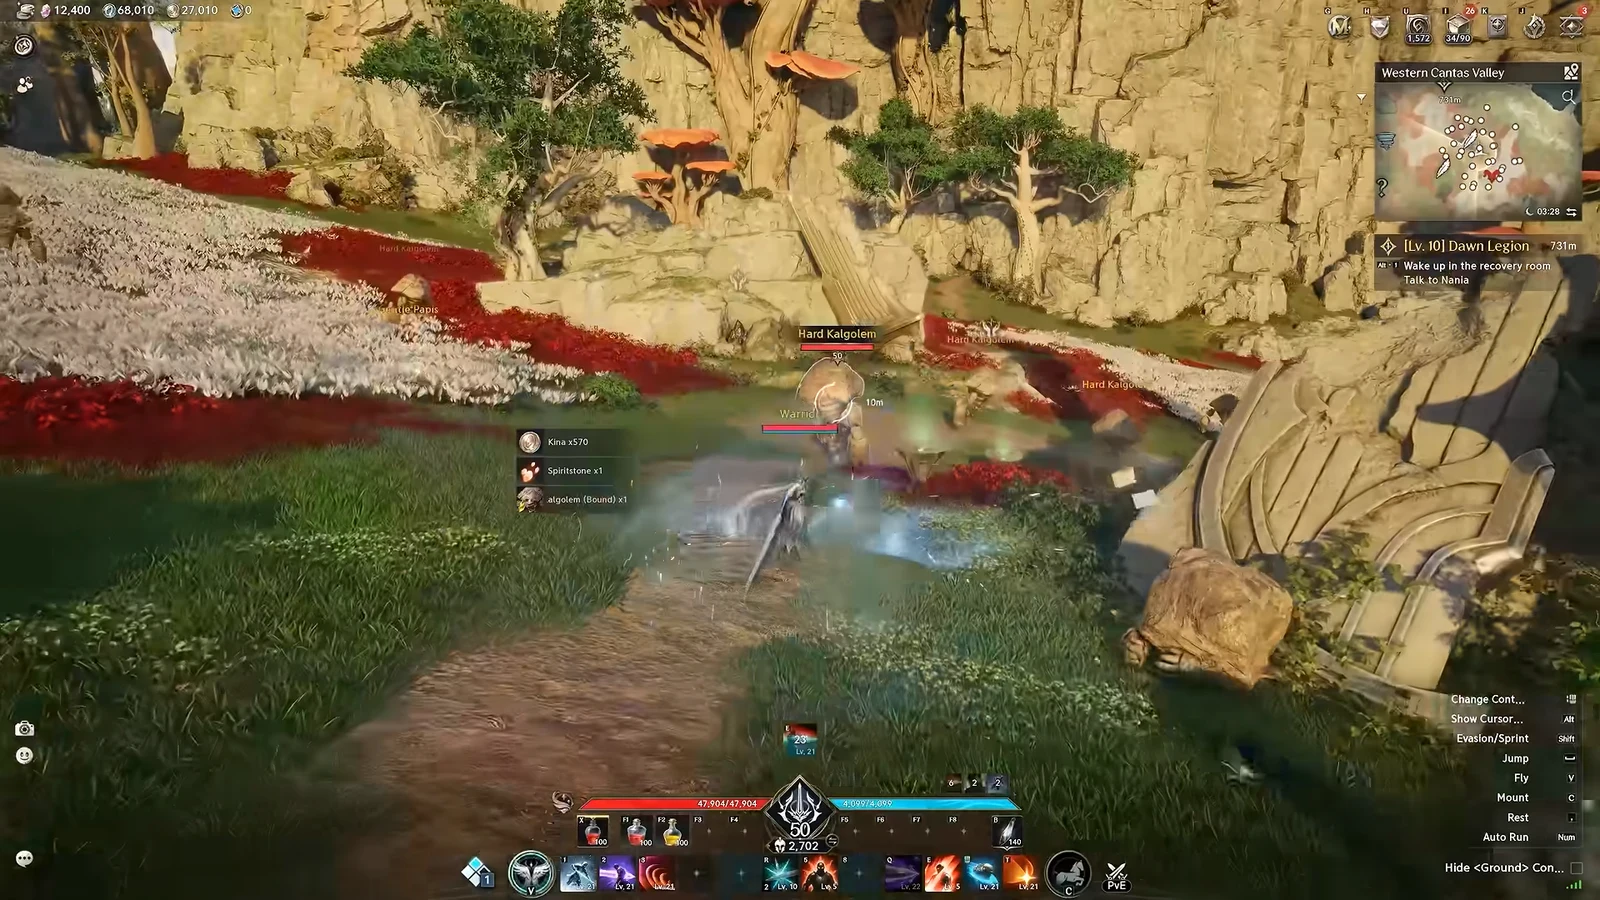
The default interface in Aion 2 parks every skill bar, cooldown, and status tracker along the very bottom edge of the screen. That forces your eyes down and away from your character and from boss telegraphs, which costs you reactions in both dungeons and the Abyss. Rebuilding the layout and remapping your keys fixes both problems, and the game ships with the tools to do it.
Quick answer: Press Escape, choose Edit HUD, group your combat bars with Ctrl+LMB and raise them toward center, then rebind the higher skill slots to Q, E, R, T, G, and X under Settings > Key Settings > Quickslot.
Open the Edit HUD editor
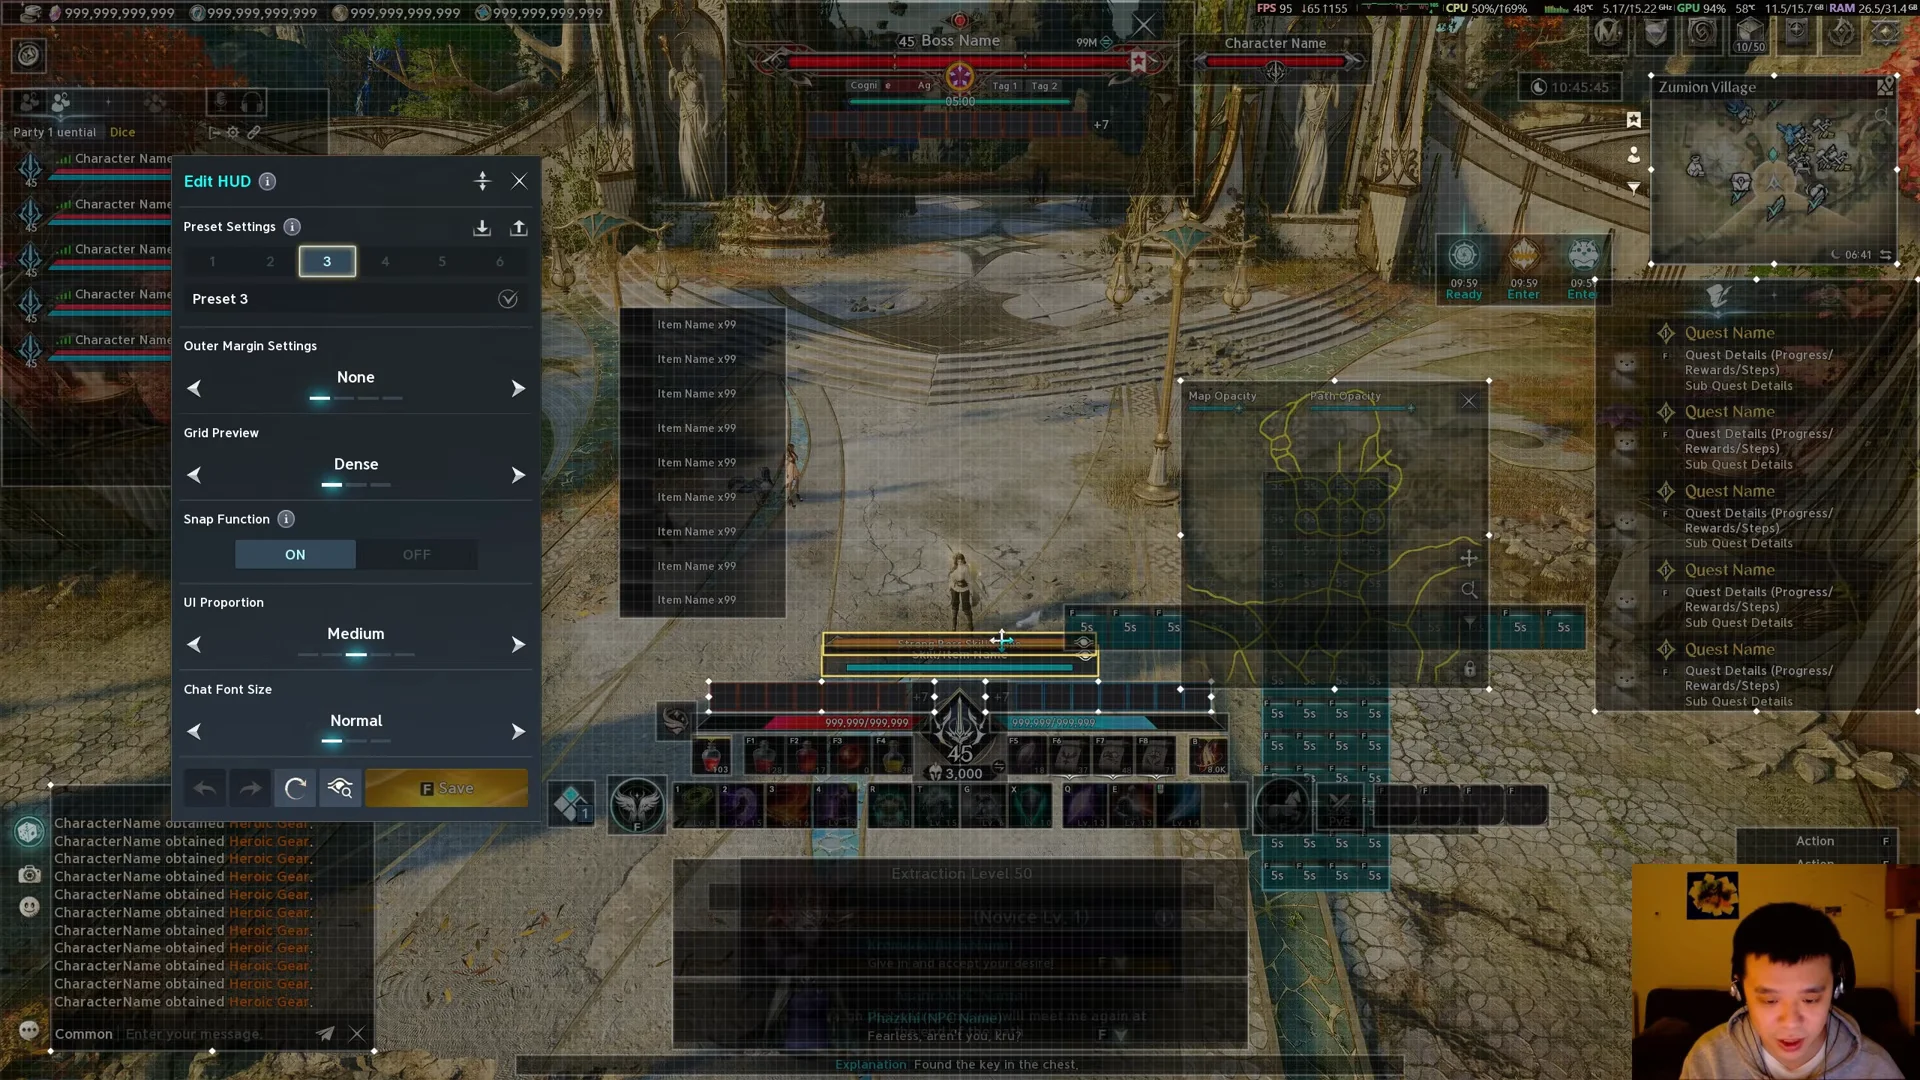
Press Escape to open the game menu, then select Edit HUD. The screen switches to a layout editor that overlays every movable interface element on top of your current view. A grid appears behind the elements, and a Snap Function keeps pieces aligned as you drag them. You can set the grid density, outer margin, and overall UI proportion from the same panel, and each preset slot saves its own arrangement so you can keep separate layouts for different content.
The editor supports multiple preset slots. Keep one layout tuned for group dungeons and another for open-world leveling, and switch between them instead of rebuilding from scratch.
Group the combat cluster and raise it toward center
Hold Ctrl + Left Mouse Button to batch-select interface elements. Click your skill hotbar, health bar, mana, buffs, and debuffs while holding the modifier, then use the Group button so they move together as a single block. Grouping means you shift the whole combat cluster in one drag instead of nudging each piece and re-aligning them one by one.
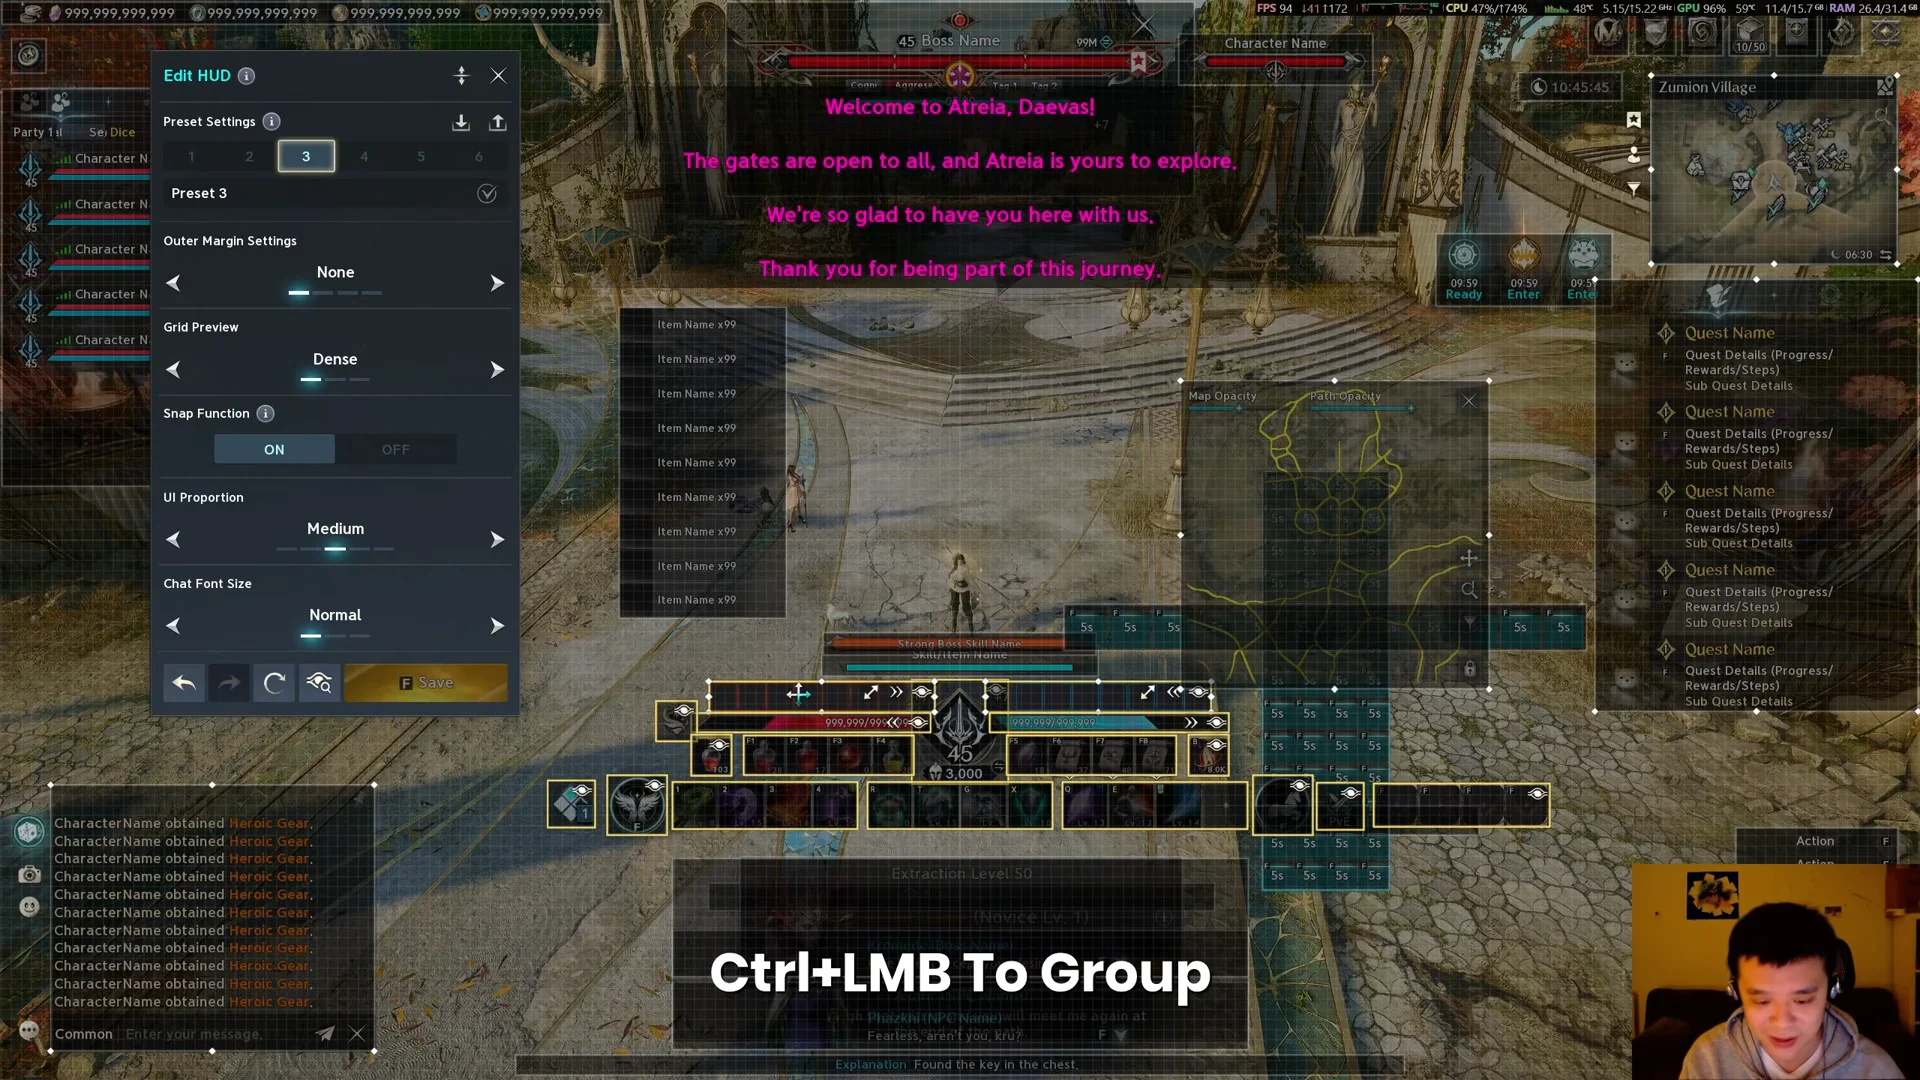
Drag the grouped block upward so it sits closer to the center of the screen, just below your character model, without covering the character itself. With the bars that high, you read your cooldowns, remaining health, and active buffs in the same glance you use to watch the fight. Keep the elements compact so they inform you without blocking your line of sight.
Reposition alerts, charge bars, and cooldowns
Not everything belongs near center. Sort each element by whether it affects combat awareness, then place it accordingly.
- Strong boss skill names and attack warnings go above your character near center-screen, where you cannot miss them.
- Charge skill bars sit close to the character so you can watch charge timing while you move.
- The Active Skill Cooldown display sits beside the center bar, on its right.
- Boss dialogue text, gathering notifications, and extraction messages drop to the bottom edge, since they do not change what you do in a fight.
Save, export, and import HUD presets
Once a layout works, save it before you touch anything else. The editor includes Export and Load controls, plus an Import Code box where you can paste a layout string. Export produces a code you can store or share, and Import Code or Import File brings someone else’s layout straight into one of your preset slots.
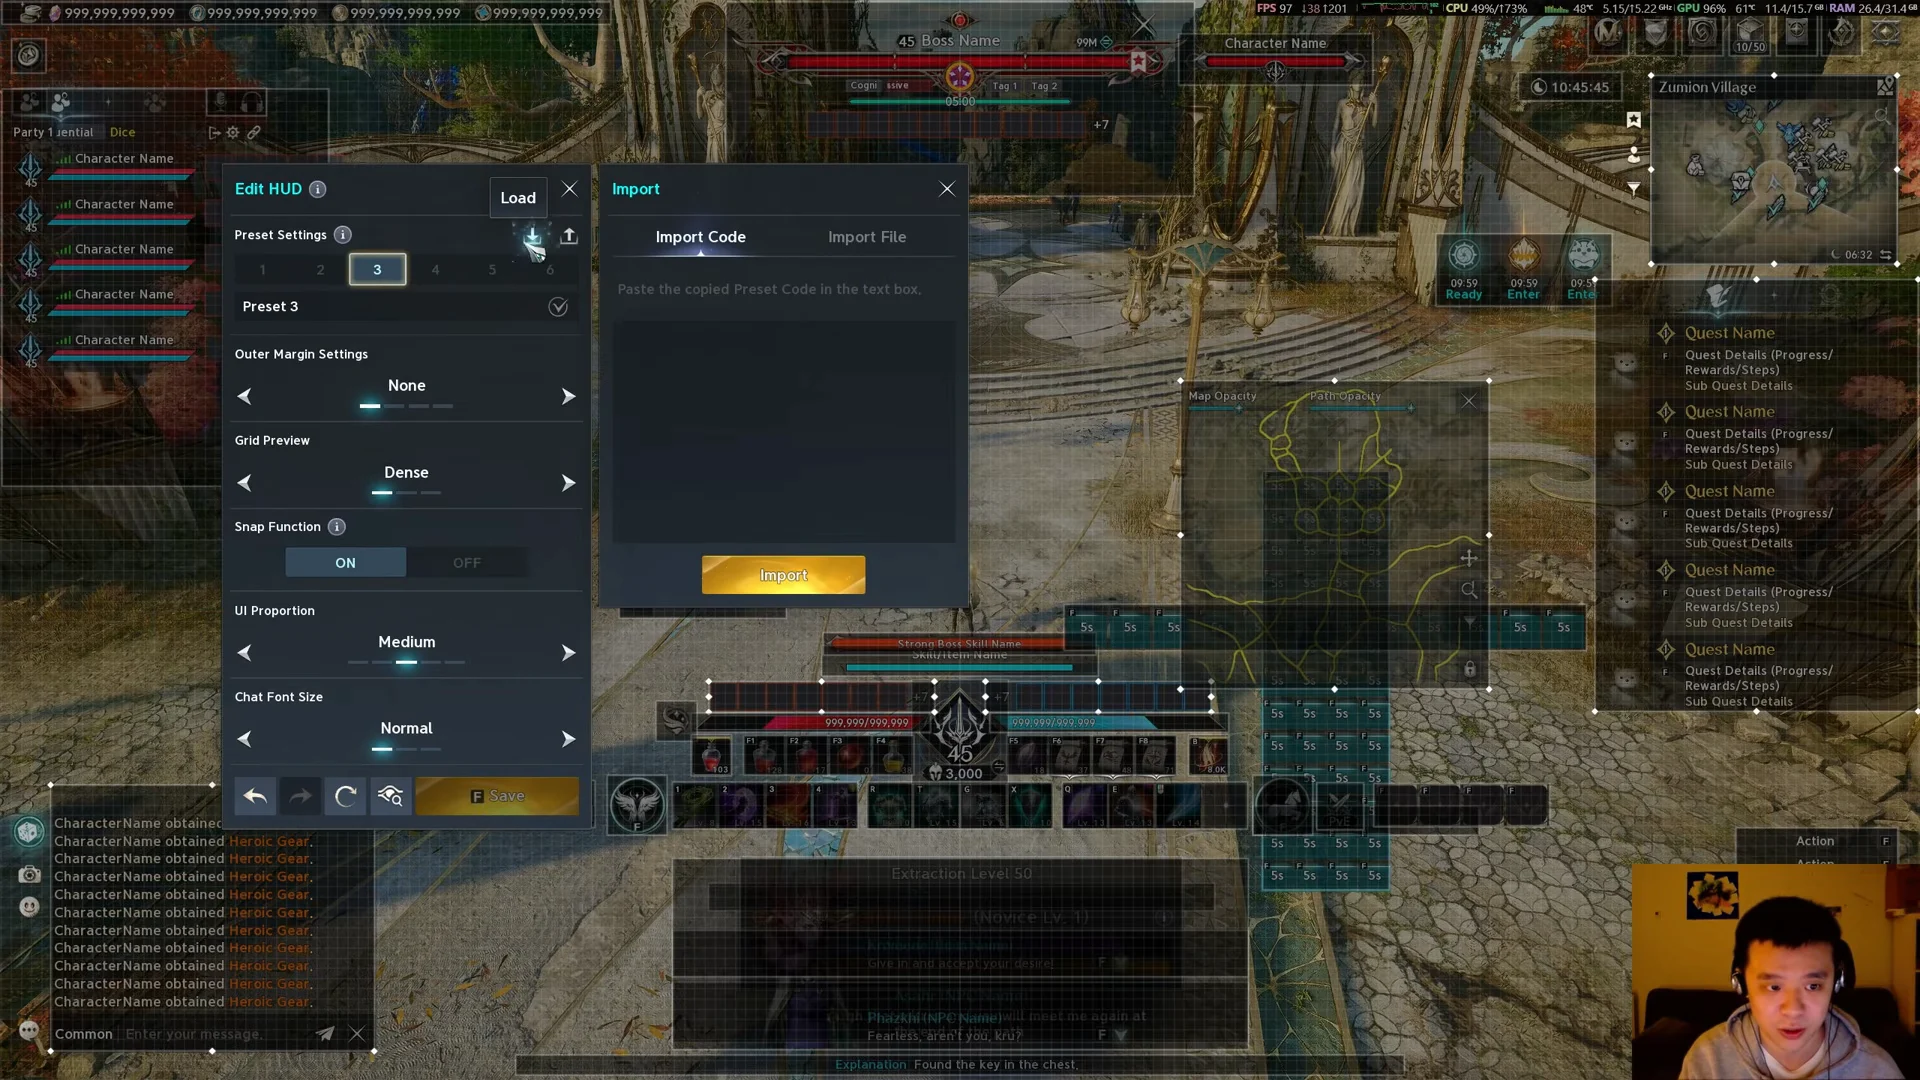
You know the import worked when the pasted layout replaces your current arrangement on screen inside the editor. Save it to a preset slot afterward so a reset on another page does not undo it.
Remap quickslots near WASD
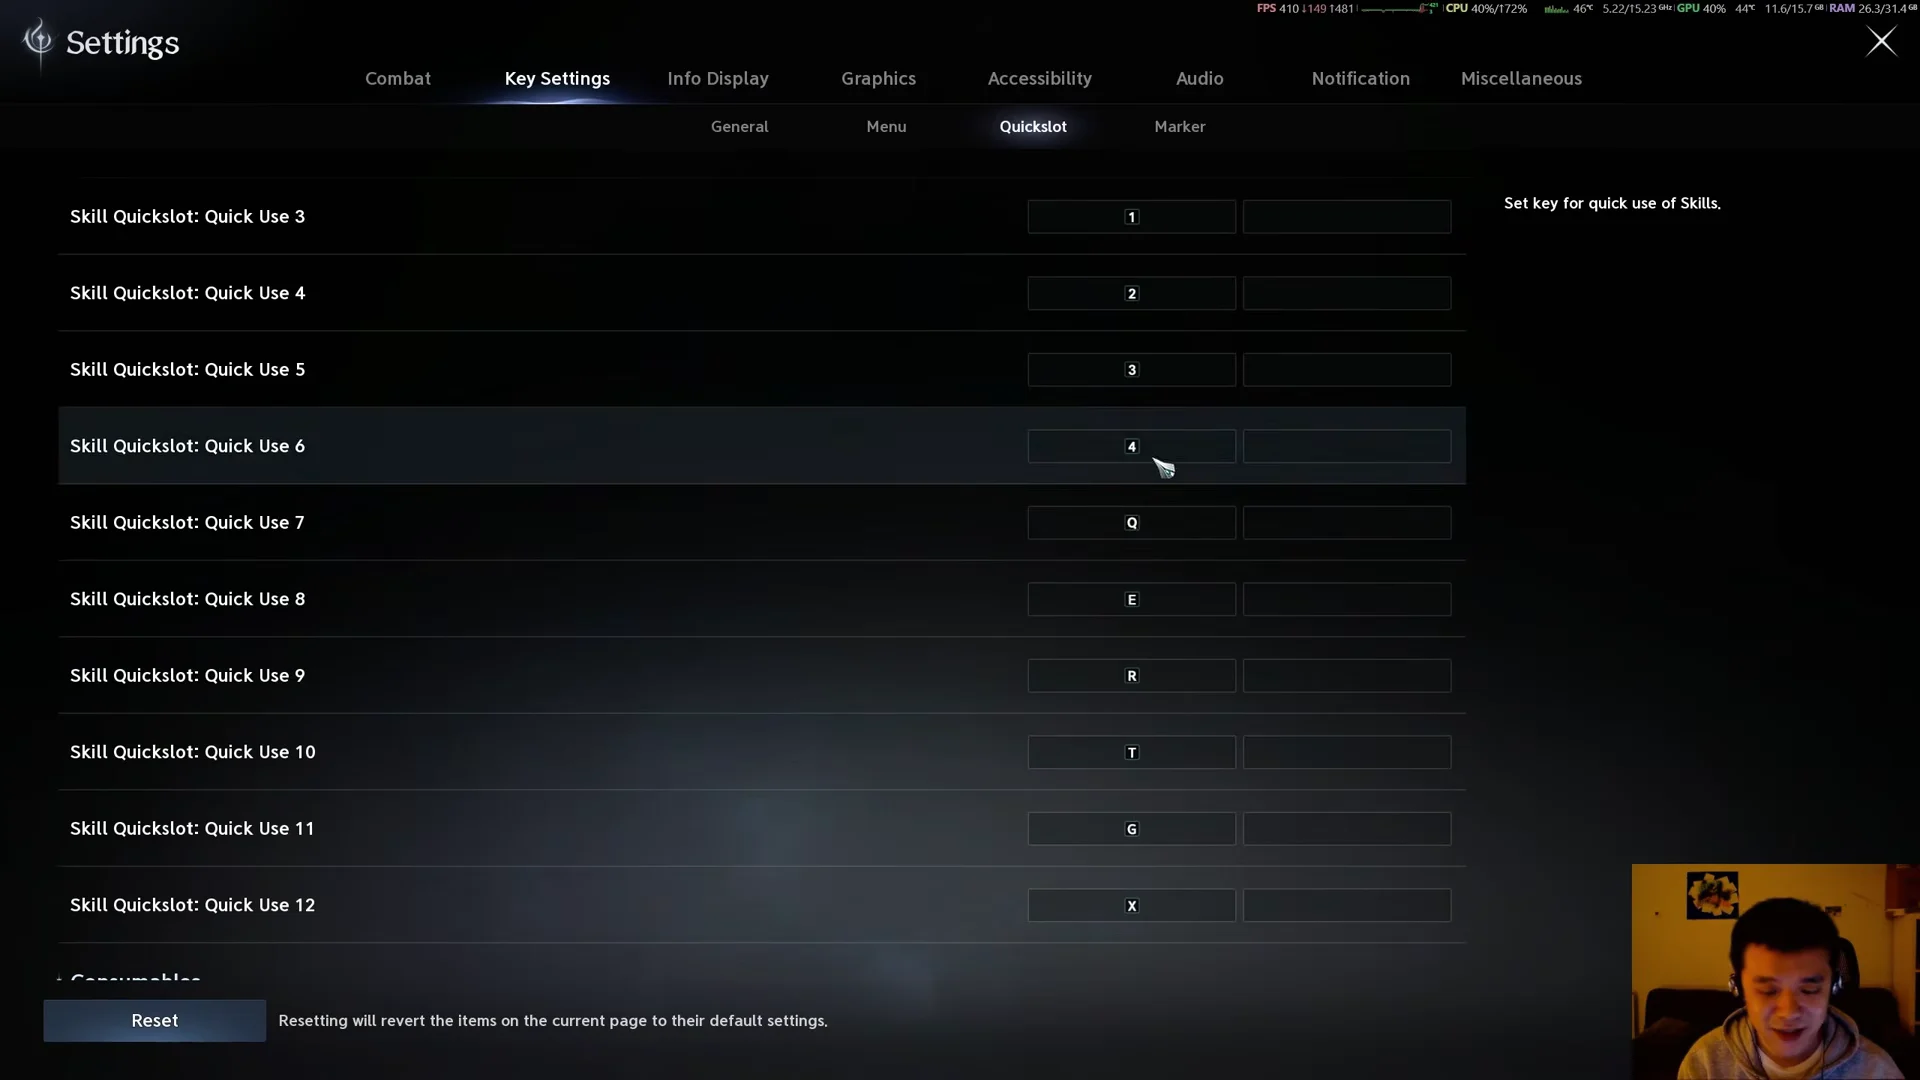
Go to Settings > Key Settings > Quickslot. The problem with the defaults is reach. Slots 1 through 4 are fine, but pressing 5 and higher drags your fingers off WASD, so you either stop moving or fumble the cast. Keep the first several slots on the number row, then move everything beyond it to keys your hand already rests near.
A practical layout assigns slots 3 through 6 to 1, 2, 3, 4, then maps the remaining slots to Q, E, R, T, G, and X. If your mouse has extra buttons, Mouse 4 and Mouse 5 work well for overflow. Keep potions on the default F-keys if you prefer, or bind them to G, X, Mouse 4, or Mouse 5 for quick access during PvP emergencies.
Bind the Macro key
Open Settings > Key Settings > General and find the Macro entry under Gameplay. Setting the Macro hotkey to the Right Mouse Button lets you hold it down continuously during combat, which keeps a rotation flowing without hammering a letter key. B also works as an alternative, and you can rebind the default right-click basic attack slot through the Skill menu if you want the macro in its place.
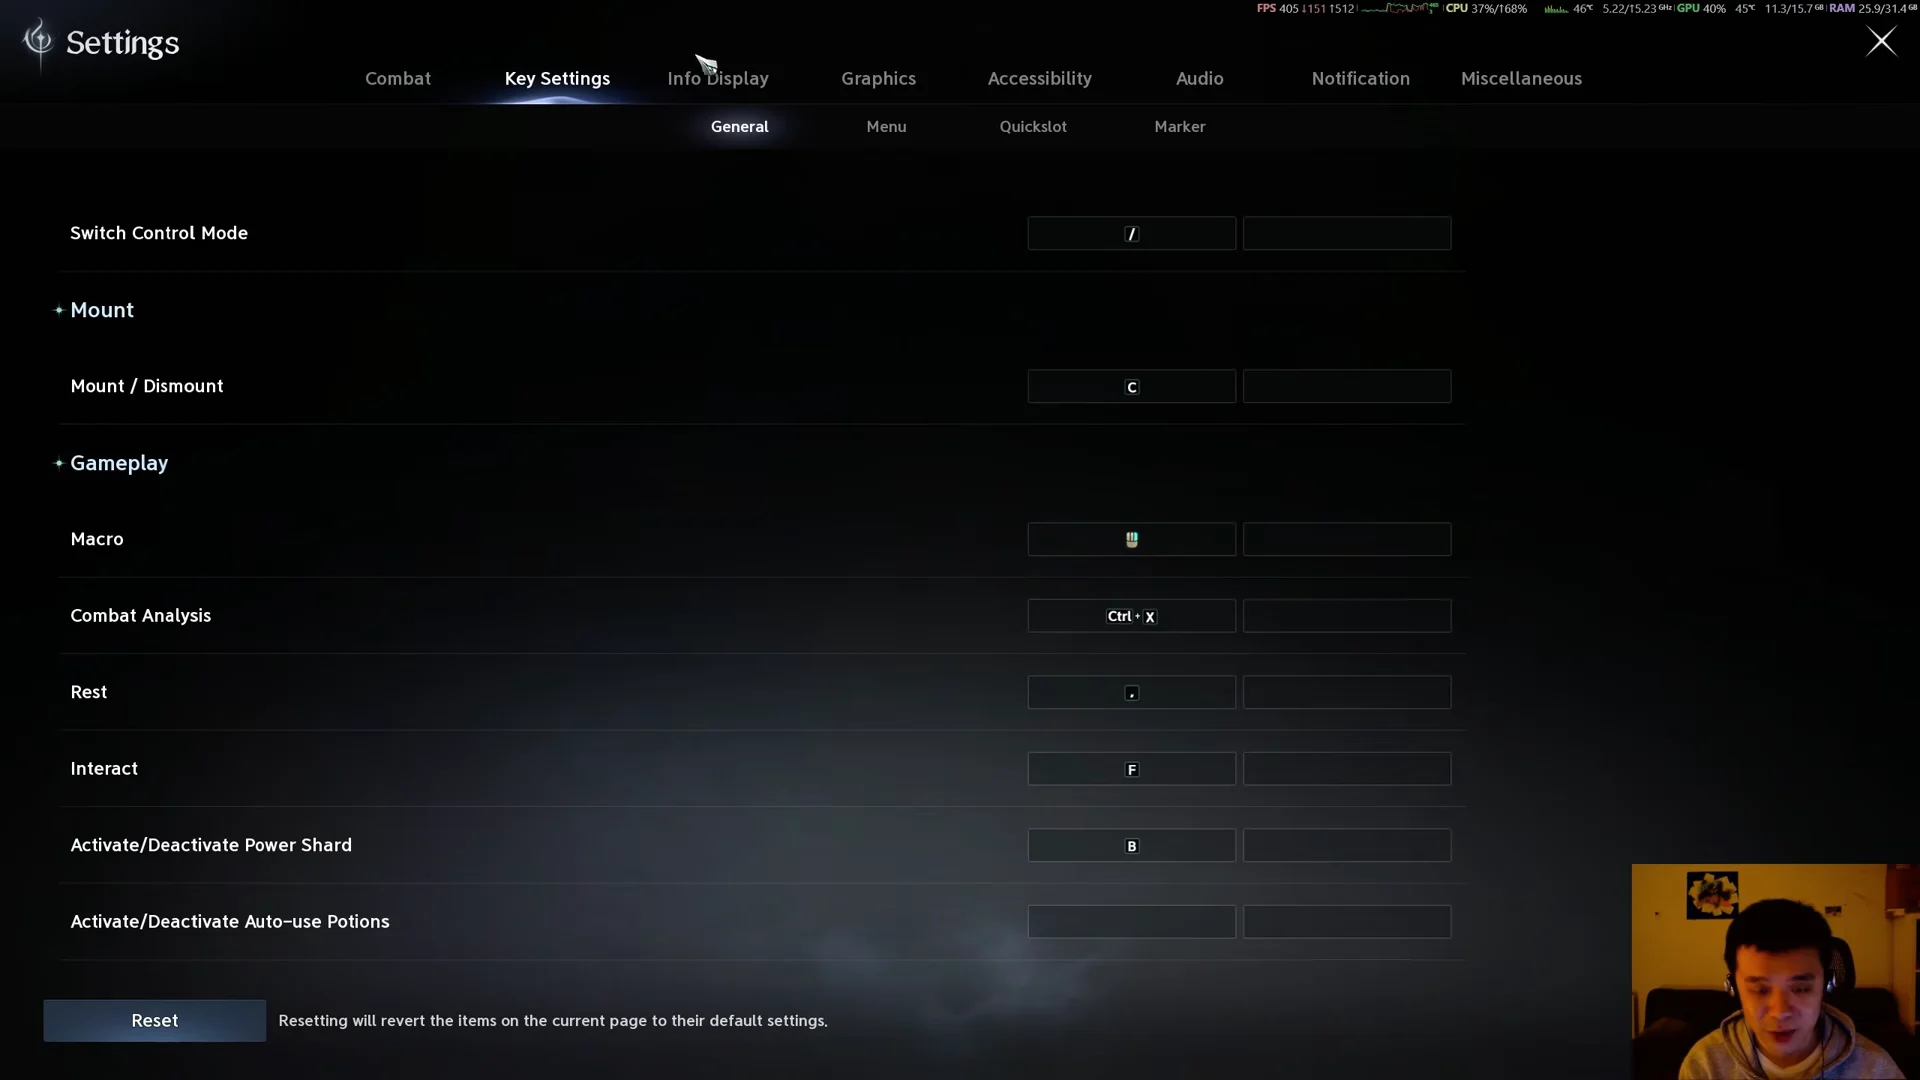
A macro only pays off once you have enough skills in rotation to automate. Stigma skills, which come later, are what give it something to cycle through, so set the macro up around the point they unlock rather than at the very start.
Templar skill reference for slot planning
When you decide which skill goes on which key, it helps to know each one’s cooldown and when it becomes available. The Templar’s core attacks and shields break down like this.
| Skill | Type | Required level | Cooldown |
|---|---|---|---|
 Vicious Strike Vicious Strike | Regular | 1 | None |
 Debilitating Smash Debilitating Smash | Regular | 7 | 10s |
 Doom Shield Doom Shield | Stigma | 22 | 30s |
 Nezekan’s Shield Nezekan’s Shield | Stigma | 22 | 60s |
 Second Skin Second Skin | Stigma | 22 | 90s |
Vicious Strike is your level-one filler, a short-range hit that strikes up to four enemies, builds Enmity, and restores MP, so it belongs on an easy-reach key you press constantly. Debilitating Smash is another close-range hit that lands a Defense-reducing effect on Block; its short cooldown means it stays in near-constant use once you have it.
The three Stigma skills all open up at the same level and cost one Stigma point each, which is why macro setup naturally lines up with reaching that point. Doom Shield is a 20-meter gap-closer with a knockdown chance and a protective shield on hit. Nezekan’s Shield grants a party-wide shield worth a share of your maximum HP, and Second Skin is a damage-tolerance buff that ignores cooldown-increase effects. Their longer cooldowns mean they are better suited to the keys you reach for deliberately rather than spam, so keep them off your most frequent slots and reserve those for your filler attacks.