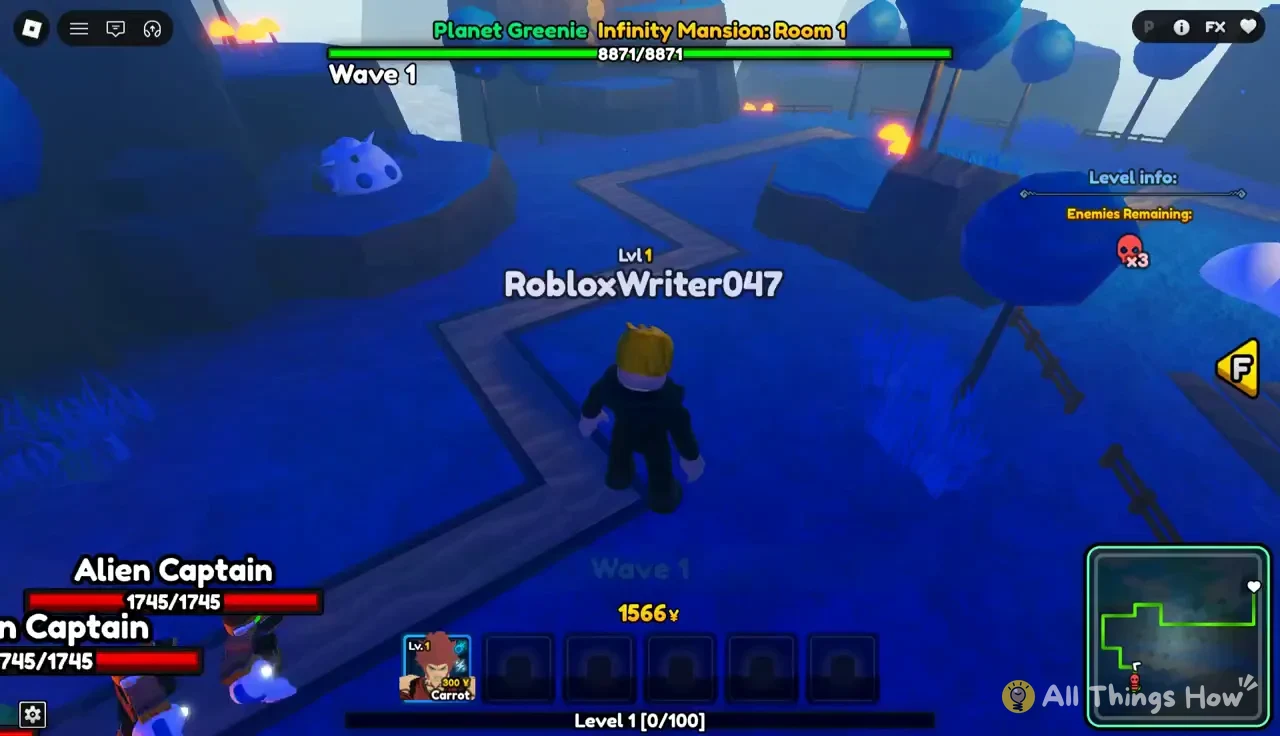
Infinity Castle in Anime Adventures is a tower defense gauntlet built from numbered rooms. The game labels its opening stage Planet Greenie Infinity Mansion: Room 1. It is a straight test of economy. You get a small starting pile of Yen, three types of alien enemies, and a base that falls apart quickly once a single fast enemy slips through. A cheap Rare unit like Carrot can hold the early waves. Waves 2 and 3 are where weak placements get punished.
Quick answer: Start Room 1 with 1566¥, fill the path with Carrot units at 300¥ each up to the cap of six, and upgrade them for 400¥. Each cleared wave pays +3917 Yen.
Infinity Castle Room 1 enemies and base health
Room 1 sends three enemy types down a single winding track on Planet Greenie. Each enemy has a name and a health bar over its head, so you can spot the tanky ones before they reach your units. Your base sits at the end of the route. Its health bar runs along the top center of the screen and starts at 8871/8871.
| Enemy | Health | Threat |
|---|---|---|
| Alien Soldier | 969 | Light filler |
| Alien Captain | 1745 | Mid-weight, leaks in Wave 2 |
| Alien Brawler | 2909 | Tankiest, leaks in Waves 2 and 3 |
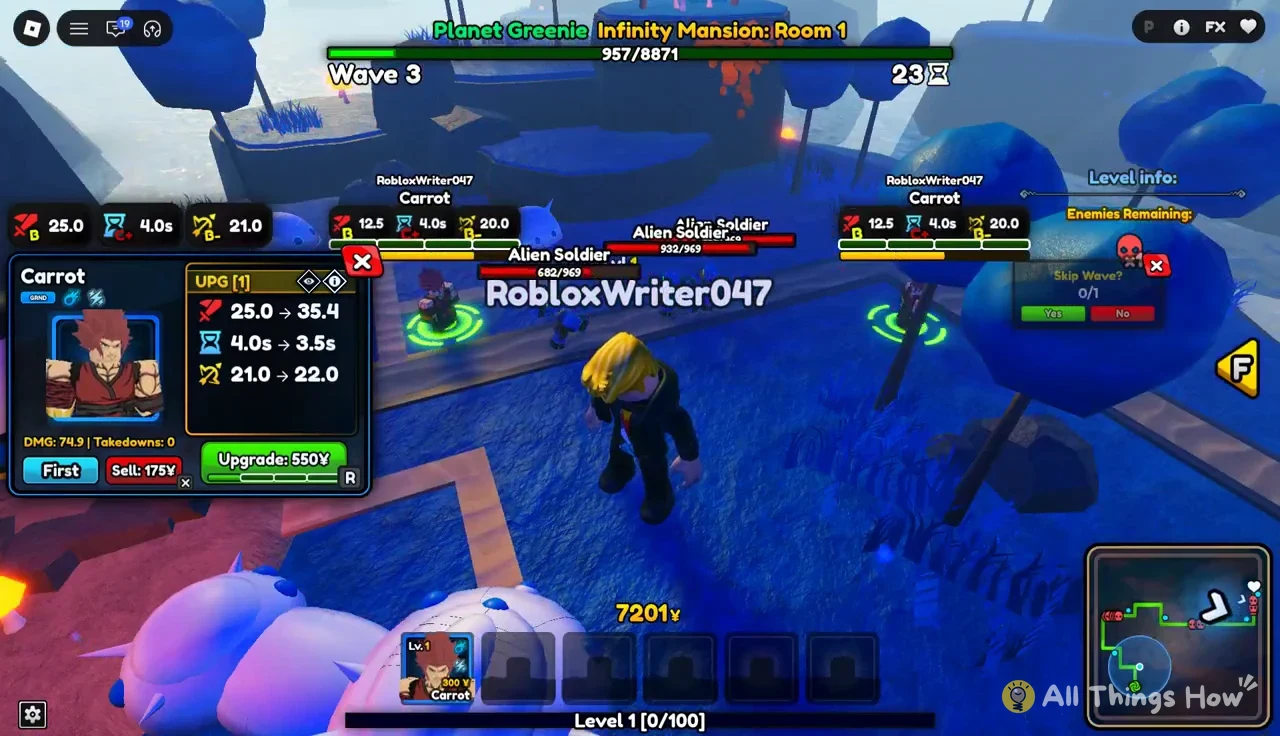
Alien Brawlers and Alien Captains do the damage. A Brawler has three times the health of a Soldier, and a single base-level Carrot hits for 12.5 every four seconds. That works out to well over 200 hits to drop one Brawler alone. Room 1 is won by stacking enough overlapping damage along the path that every enemy gets hit by several units at once.
A minimap in the bottom-right corner tracks the route. It is the fastest way to see how far an enemy has pushed toward your base without panning the camera.
Carrot stats and upgrade costs
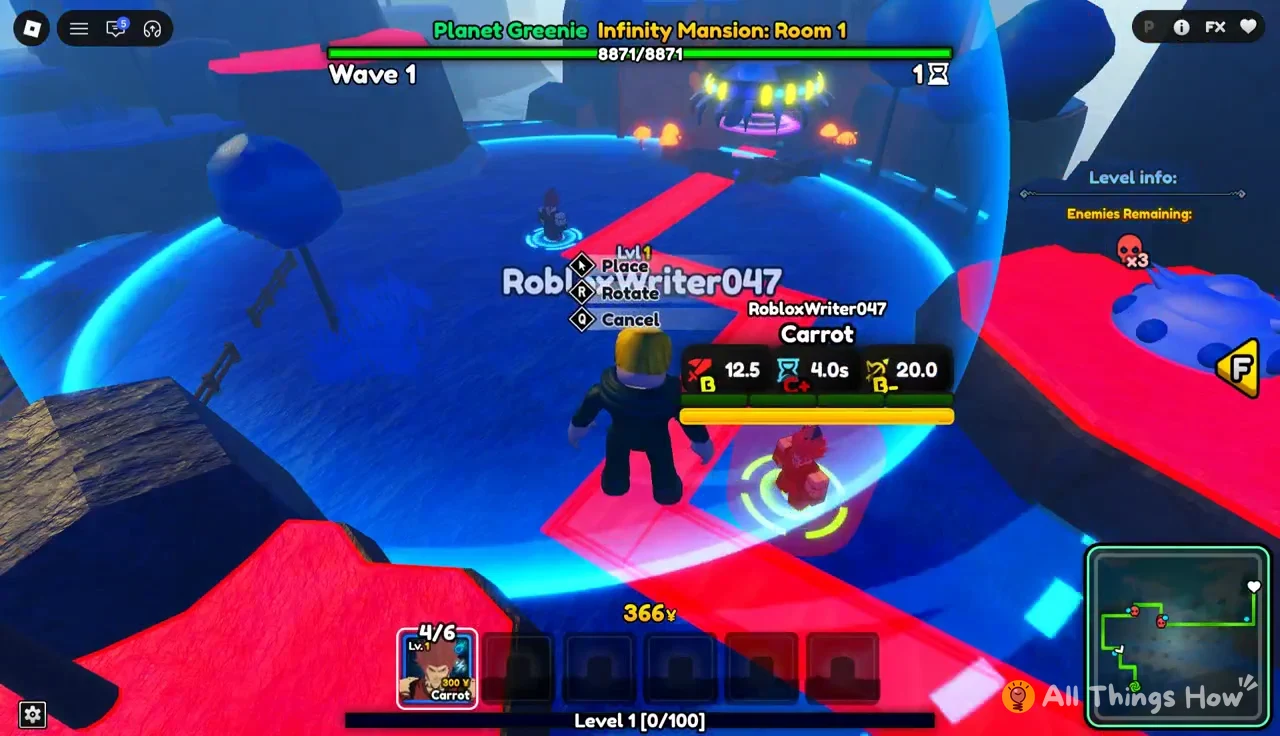
Carrot is a Rare ground unit, marked GRND on its card. It costs 300¥ to deploy, and the placement counter caps it at six copies (the counter runs from 0/6 to 6/6). It is cheap enough to spam in Wave 1. That matters because your opening budget can’t afford much else.
| Level | Damage | SPA | Range |
|---|---|---|---|
| Placed (UPG [0]) | 12.5 (B) | 4.0s (C+) | 20.0 (B-) |
| Upgrade 1 — 400¥ | 25.0 | 4.0s | 21.0 |
| Upgrade 2 — 550¥ | 35.4 | 3.5s | 22.0 |
SPA is seconds per attack, so a lower number means faster hits. Upgrade 1 doubles Carrot’s damage and adds a point of range, but it attacks no faster. Upgrade 2 is where the attack speed improves, dropping from 4.0s to 3.5s alongside another damage bump.
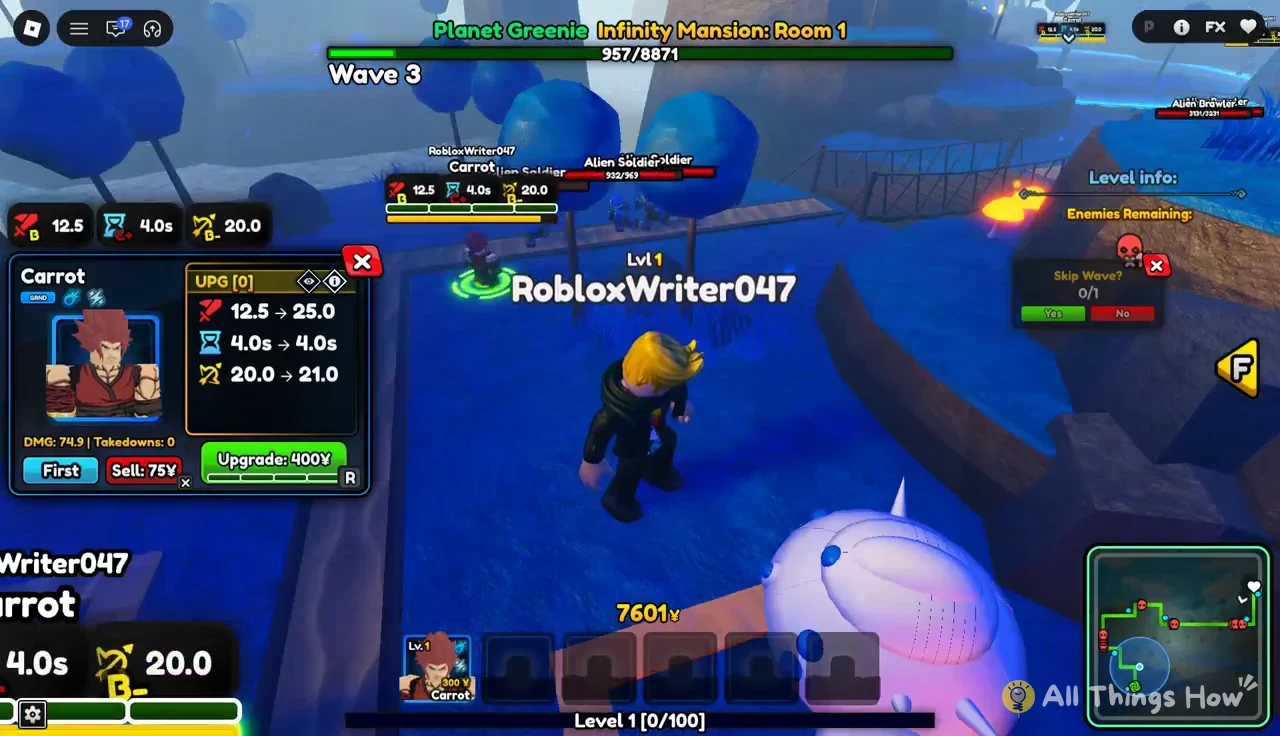
Click any placed Carrot to open its panel. The panel shows its current upgrade tier, the cost of the next upgrade, a live damage and takedown counter, its targeting mode (set to First), and what you would get back for selling it.
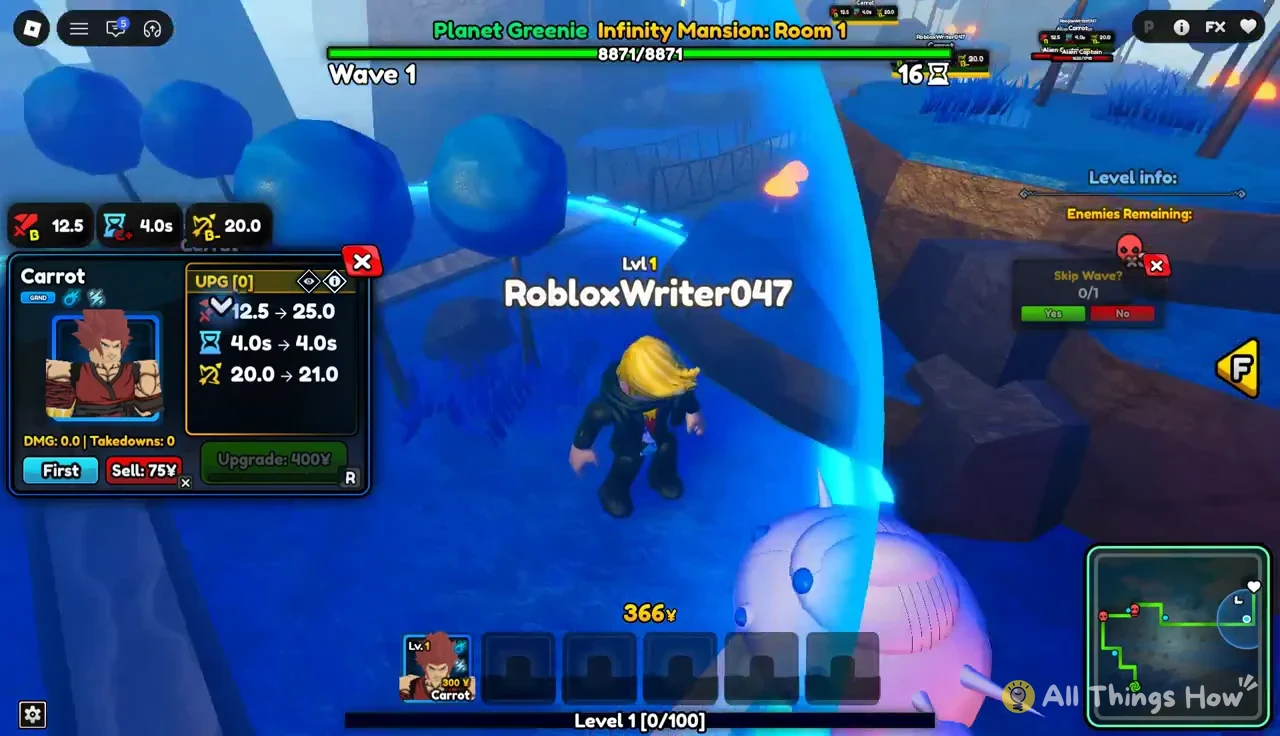
The stat lines in the upgrade panel preview the change before you pay. An entry like 12.5 -> 25.0 shows the current value on the left and the post-upgrade value on the right. Read those arrows before you spend, especially on Upgrade 2, where the speed gain is the reason to buy it.
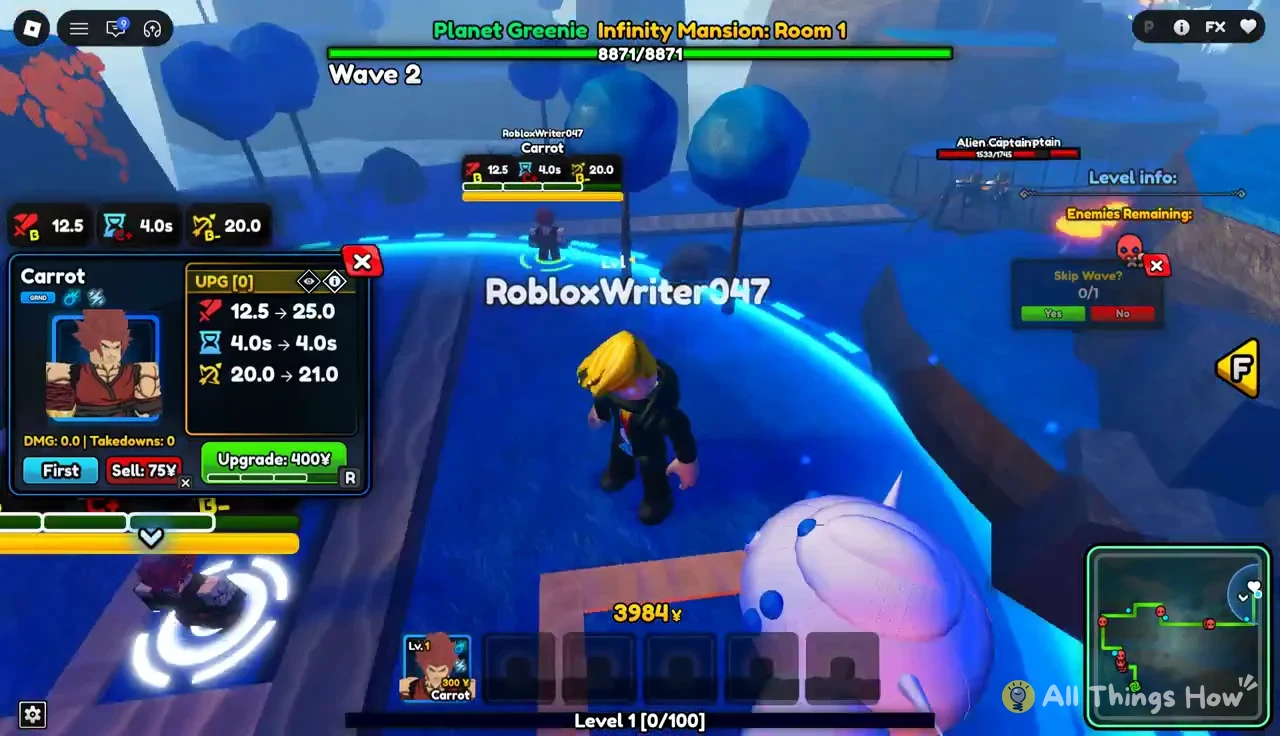
The sell price is small. A base Carrot sells for 75¥, and one with its first upgrade sells for 175¥. Selling rarely pays off in Room 1, so place each Carrot where you intend to keep it.
How to clear Planet Greenie Infinity Mansion: Room 1
The steps below follow the order that Room 1 forces on you. You get a tight opening budget, then a large payout after each wave, then a fight to keep fast enemies off your base. They apply to any ground unit, but the costs listed are Carrot’s.
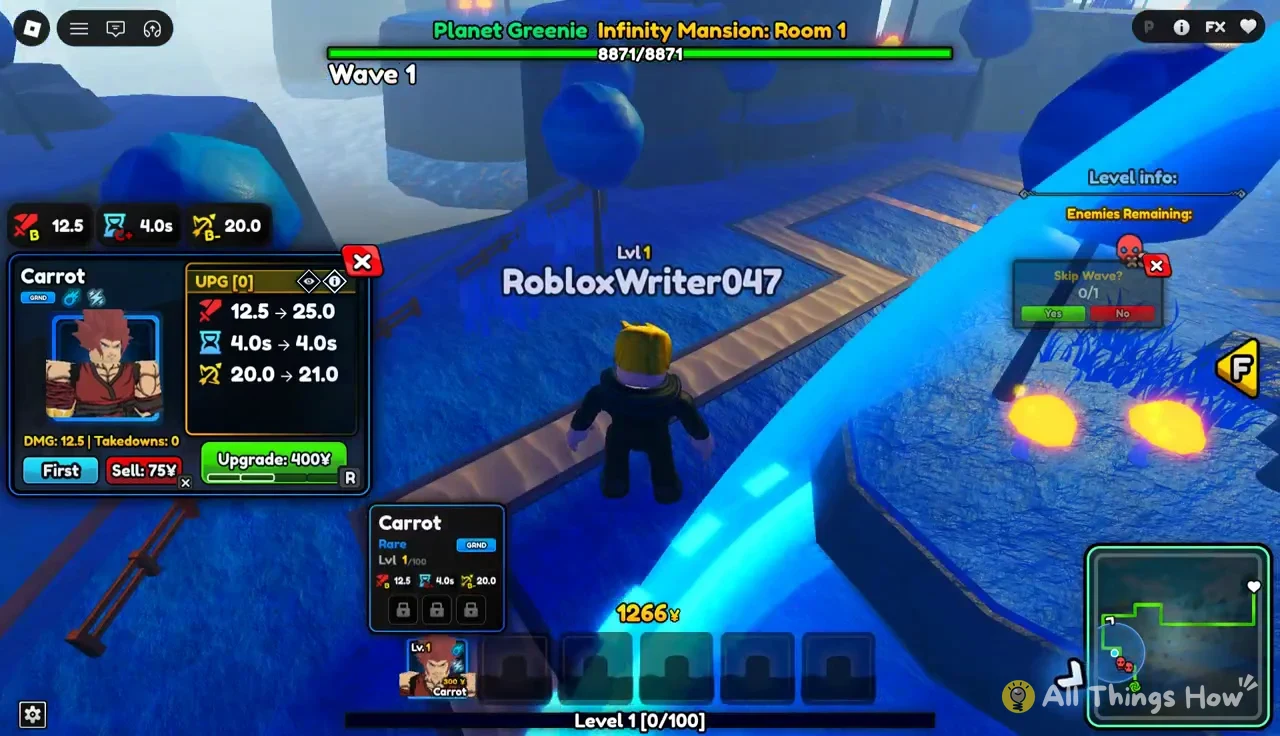
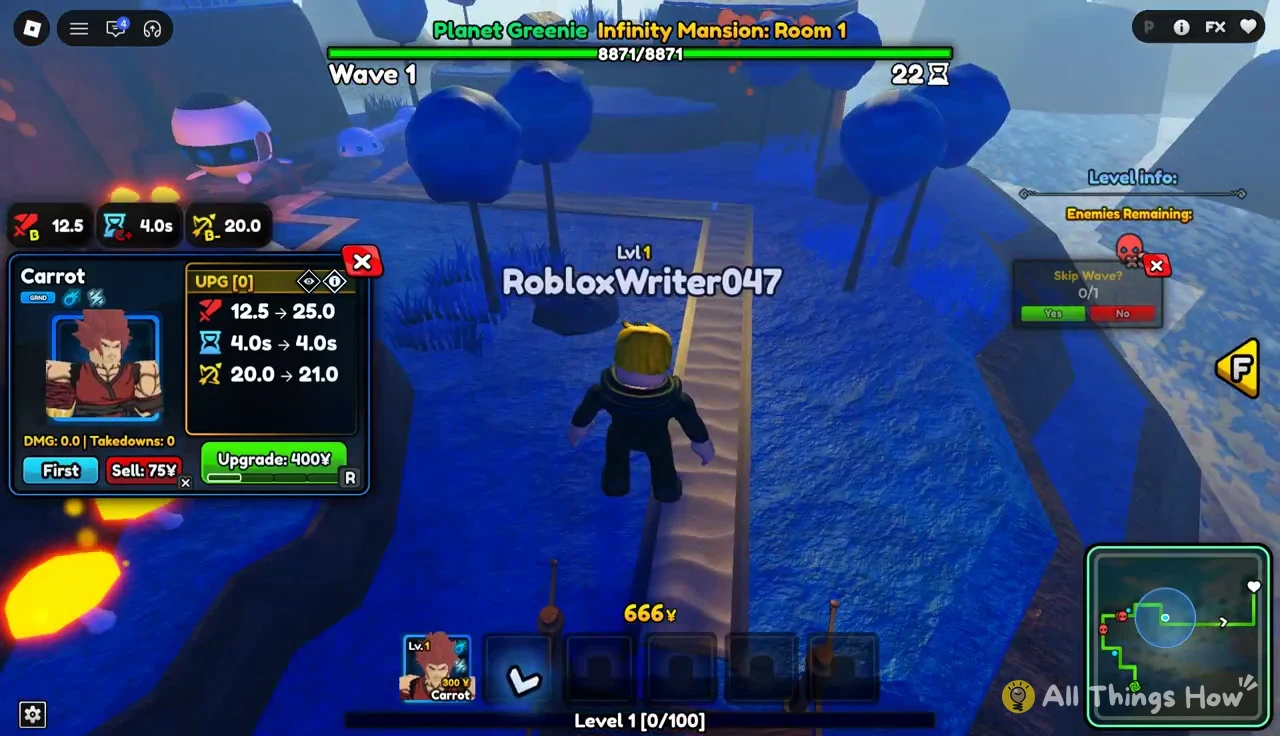
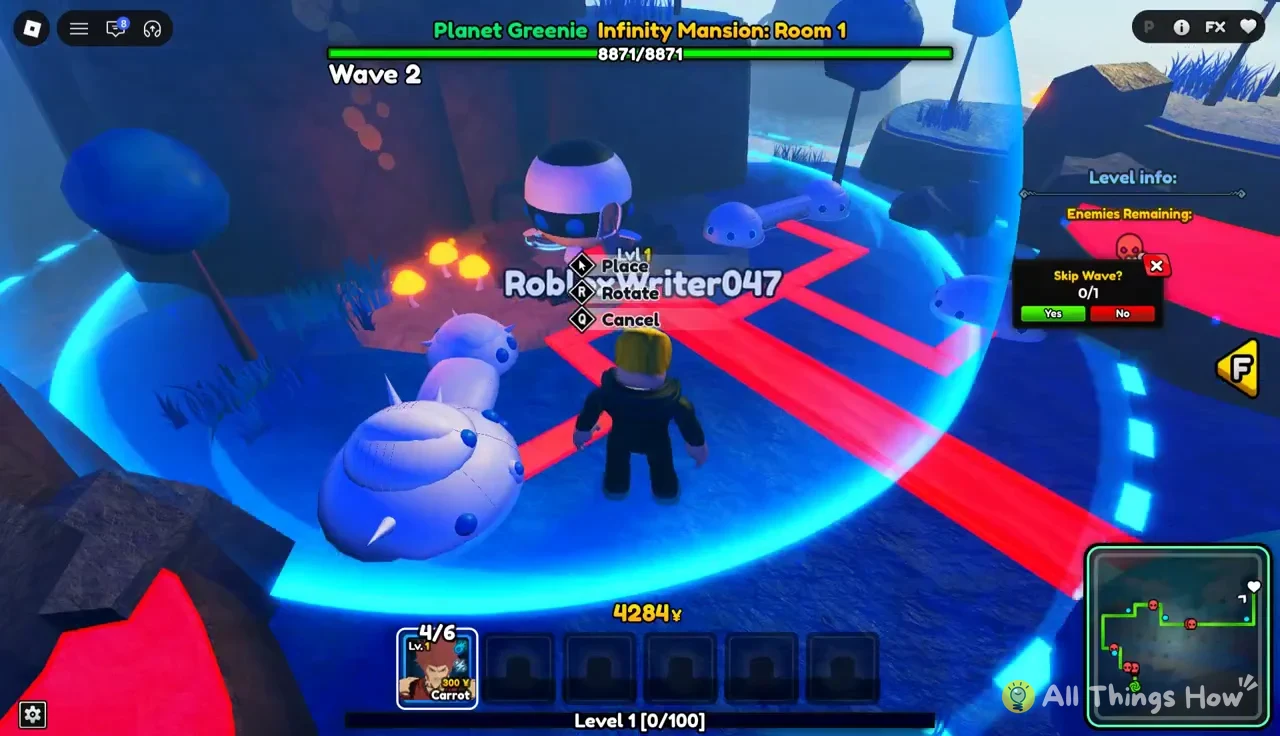
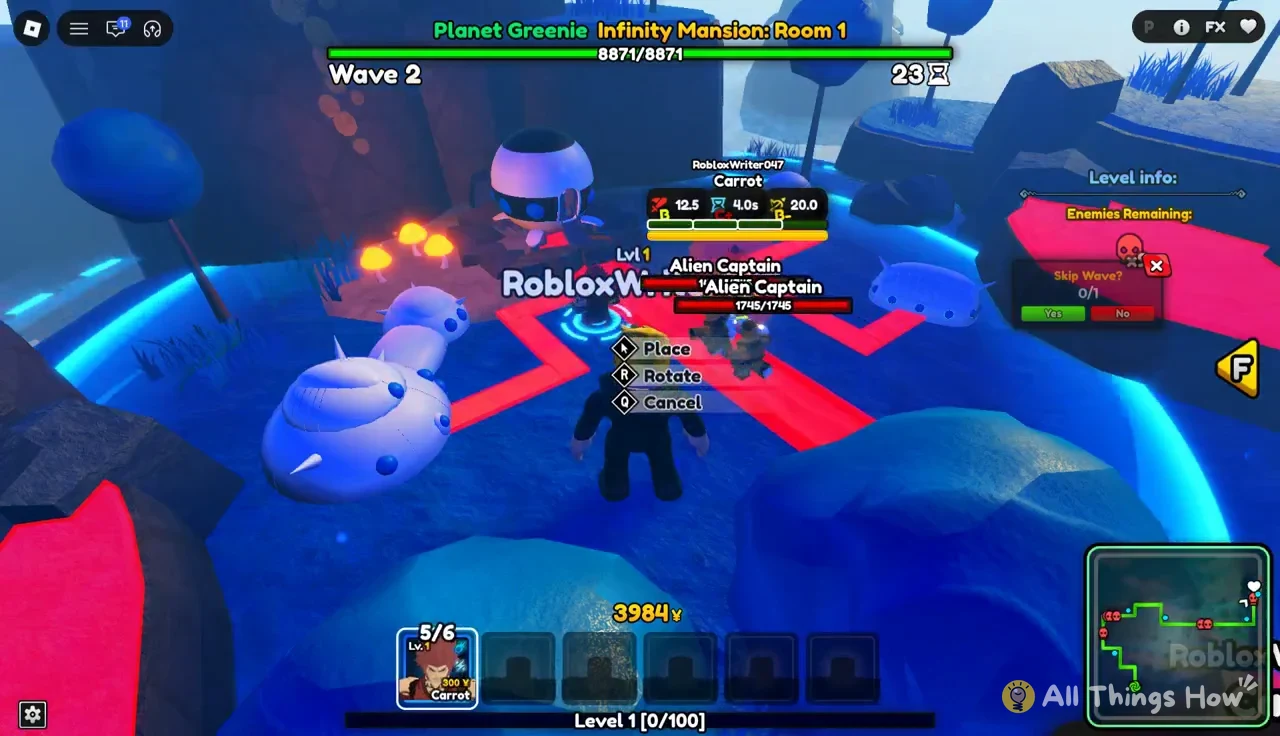
Between waves, a Skip Wave? prompt appears with Yes and No buttons and a 0/1 vote count. Skipping only helps if your line is already holding, so pick No while enemies are still leaking.
Yen income across Room 1 waves
Room 1’s economy is lopsided. The starting budget barely covers five Carrots, while every completed wave hands you more than double that amount. Plan your spending around the wave payouts.
| Moment | Yen change | Balance |
|---|---|---|
| Wave 1 start | — | 1566¥ |
| Four Carrots placed | −1200¥ | 366¥ |
| Wave 1 completed | +3917 | 4284¥ |
| Wave 2 completed | +3917 | 7601¥ |
The practical takeaway is to spend down almost to zero in Wave 1. Unspent Yen does nothing for you, and the +3917 payout covers your next round of placements and upgrades anyway.
Why the base loses health in Waves 2 and 3
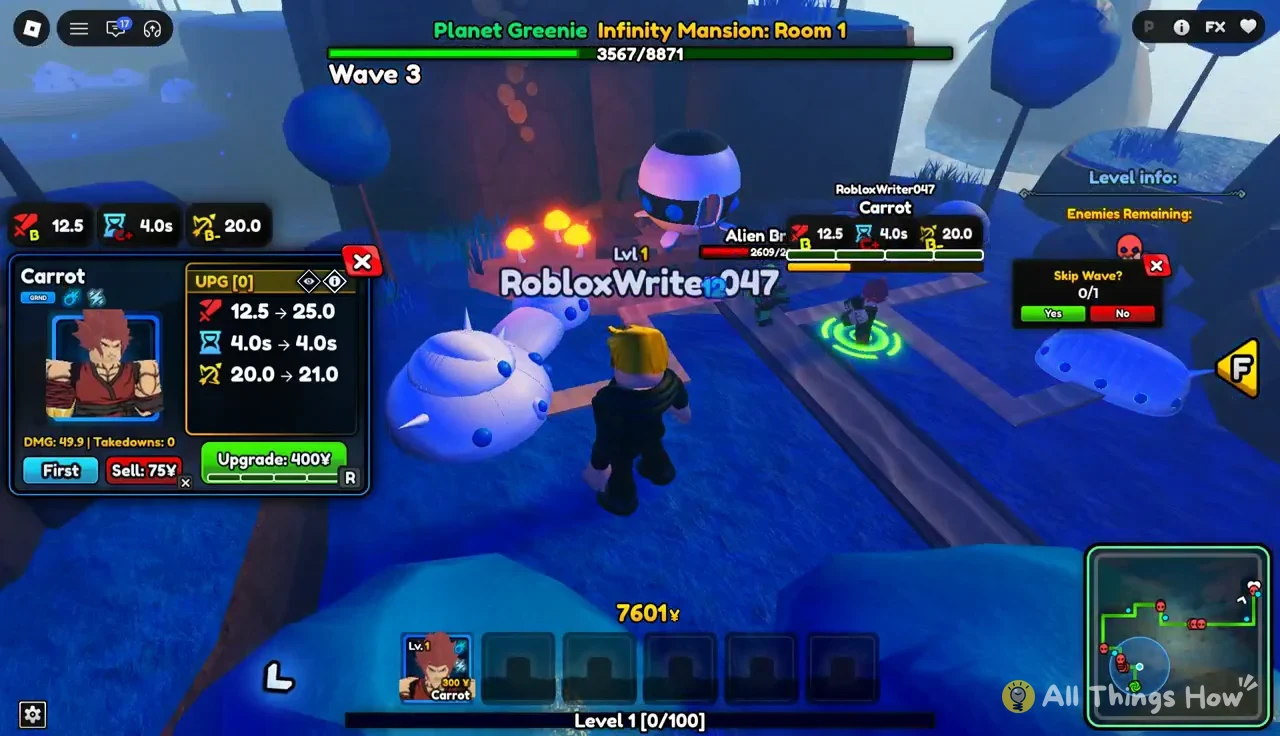
Room 1’s difficulty spikes after Wave 1. Fast-moving Alien Captains and Alien Brawlers outpace a line of base-level Carrots, push past them, and hit the base directly. When that happens, a red warning reads “An enemy is rapidly approaching your base!!!” That is your cue to drop a unit near the end of the route or upgrade whatever is closest to the base.
Leaks add up quickly. An under-upgraded line of six Carrots loses most of the base’s health across two waves:
- Wave 2 leaks take the base from 8871 to 7450, then 5704, then 3567.
- Alien Brawlers reaching the base in Wave 3 drop it to 957/8871.
- The losses come from Captains and Brawlers, the two highest-health enemies.
Placing more units can’t fix this once you hit the six-Carrot cap. Only upgrades raise your damage from there, so the 400¥ first upgrade should go on every Carrot as soon as Wave 1 pays out, not late into Wave 3. The DMG counter on each unit’s panel shows which Carrots are actually landing hits. Upgrade the busy ones first.
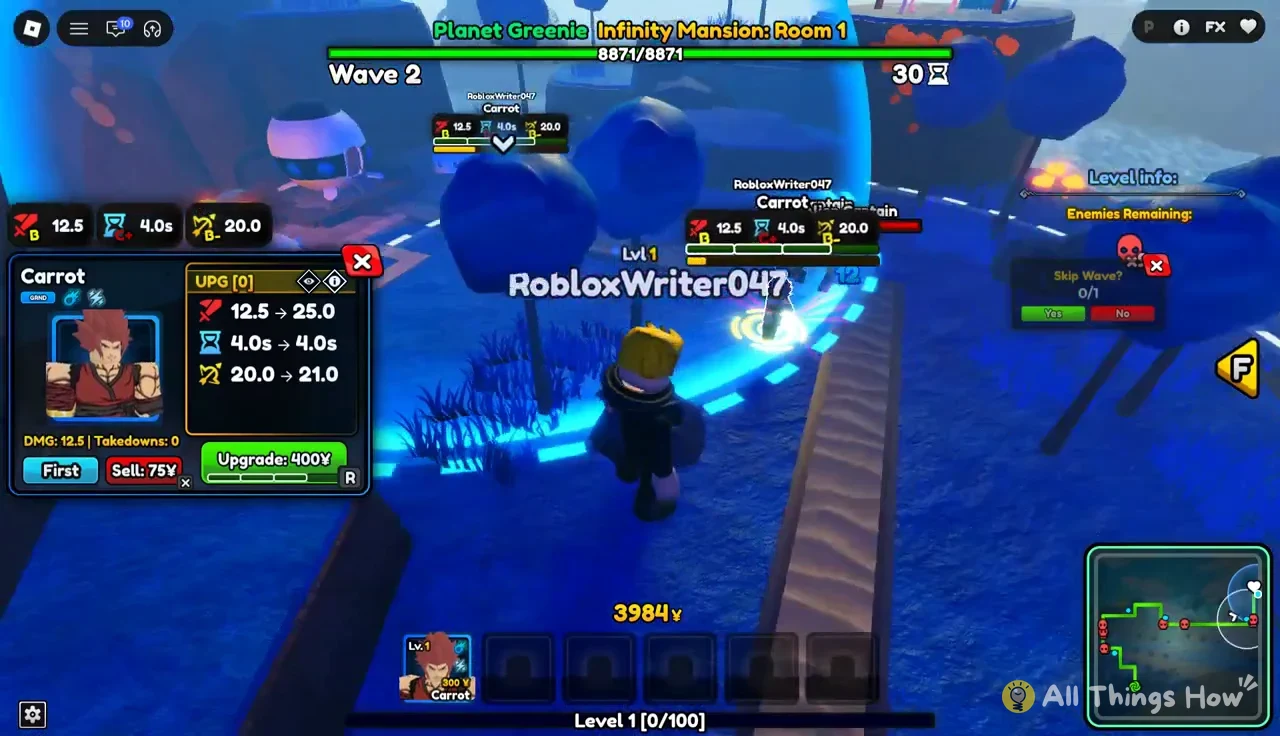
You can tell Room 1 is going well from three signals. The Wave Completed! banner fires with its +3917 payout, the wave counter advances, and the base health bar at the top holds steady instead of ticking down. If that bar is still near 8871 heading into Wave 3, your Carrot line and its upgrades are doing their job.