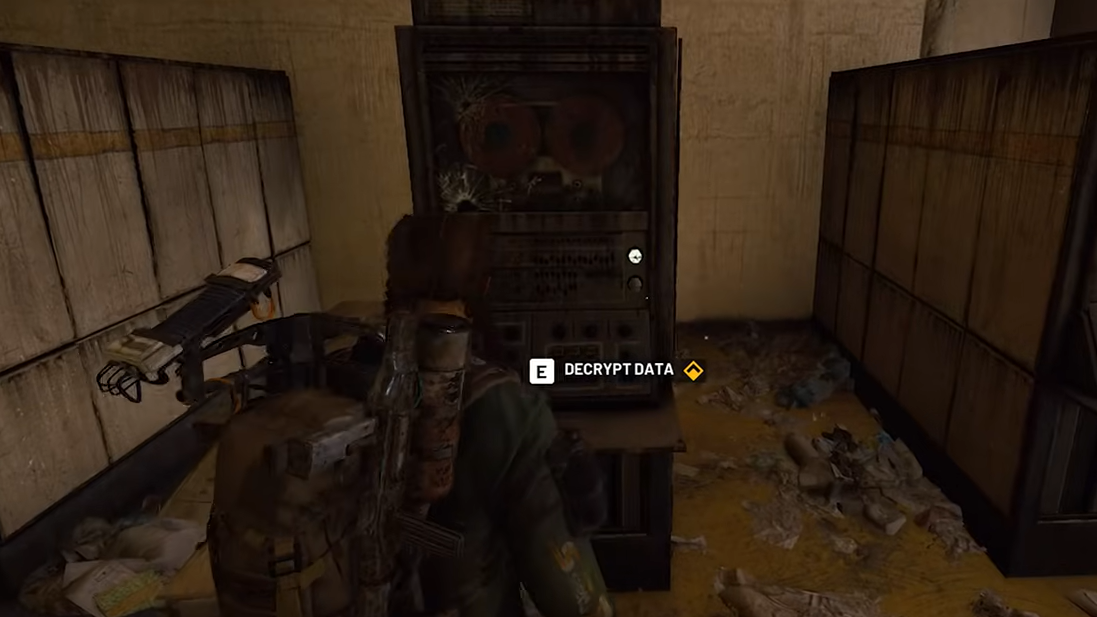
Shani’s “Deciphering the Data” quest in Arc Raiders sends you to Spaceport to push old-world computers well past their intended lifespan. The task is simple on paper: plug your Magnetic Decryptor into two working consoles and let it chew through ARC research data. In practice, both machines are buried in dark, cluttered interiors that are easy to overshoot if you don’t know exactly what to look for.
The quest plays out entirely in Spaceport and can be completed without extracting, so it’s a good candidate for a low-risk run with a free kit. You can also split it across multiple raids if you die or extract early; progress is saved after each successful console interaction.
Quest overview and requirements
“Deciphering the Data” is one of Shani’s early quests. The objective chain is straightforward:
- Travel to Spaceport.
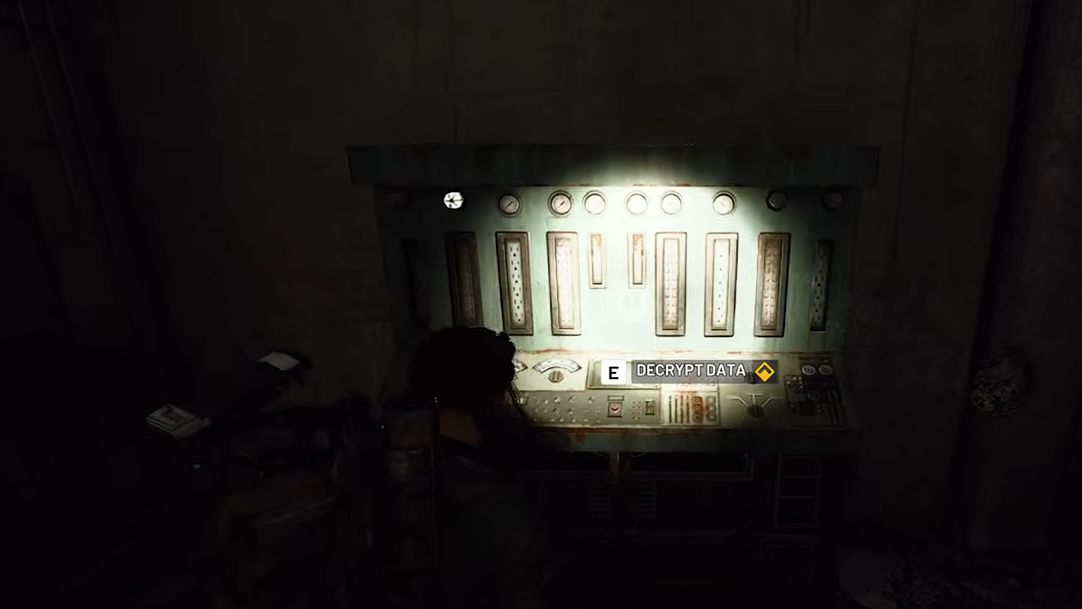
- Use the Magnetic Decryptor at a console in the Fuel Control Building.
- After that console fails, use the Magnetic Decryptor at a second console in the Arrival Building.
- Return to Speranza and talk to Shani.
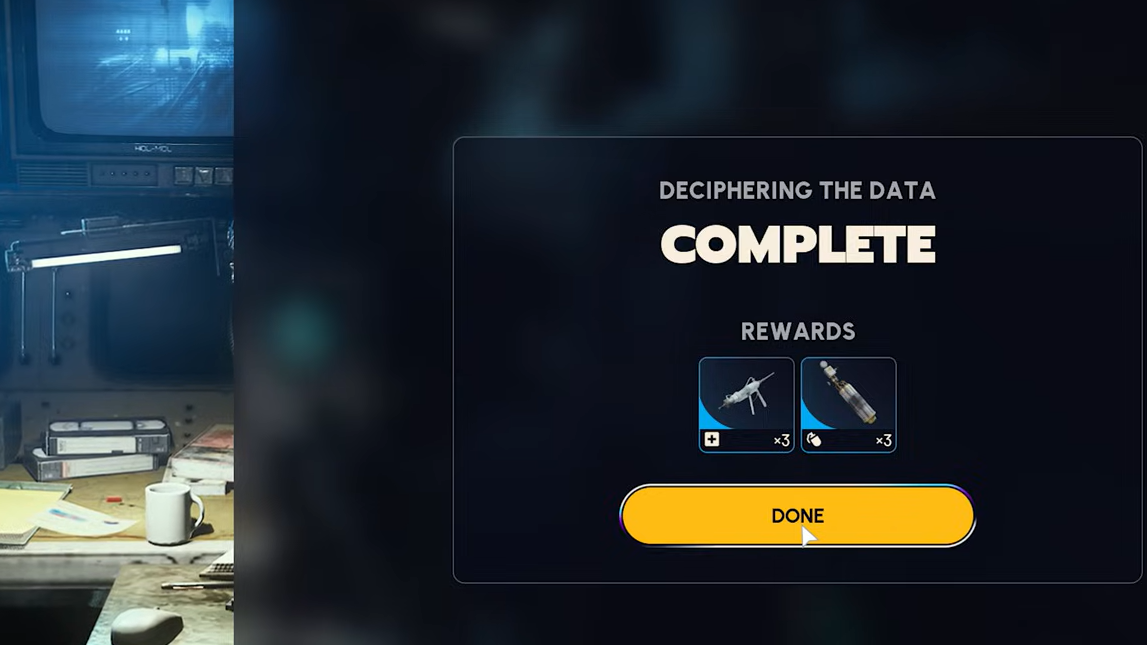
Rewards for turning the quest in include experience, three Defibrilators, and three Trailblazer grenades, which are particularly strong in tight PvP layouts such as Stella Montis.
There is no requirement to extract after using either console. Once the second decryption attempt is complete and the objective ticks over, you are free to leave Spaceport however you like or even die and still keep the quest progress.

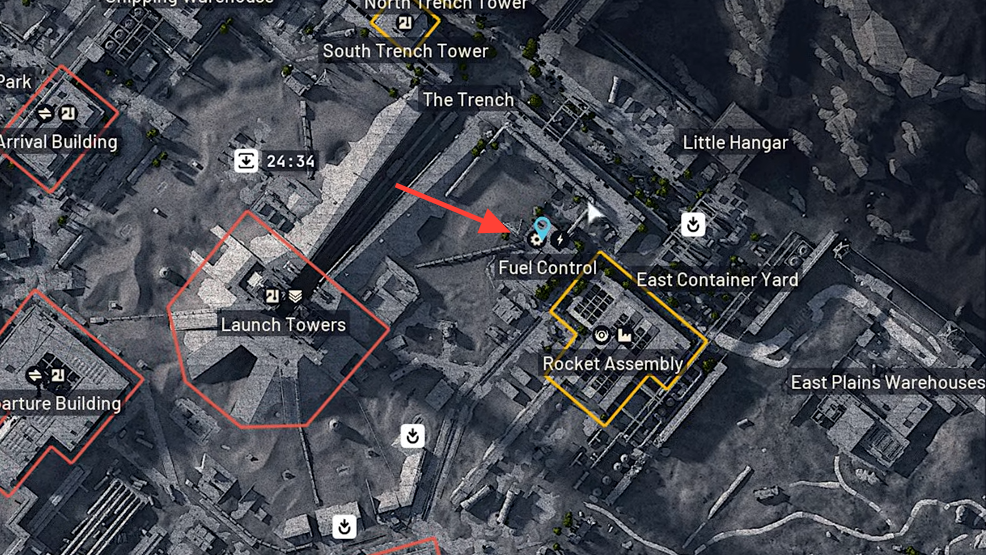
First decryption: Fuel Control Building console location
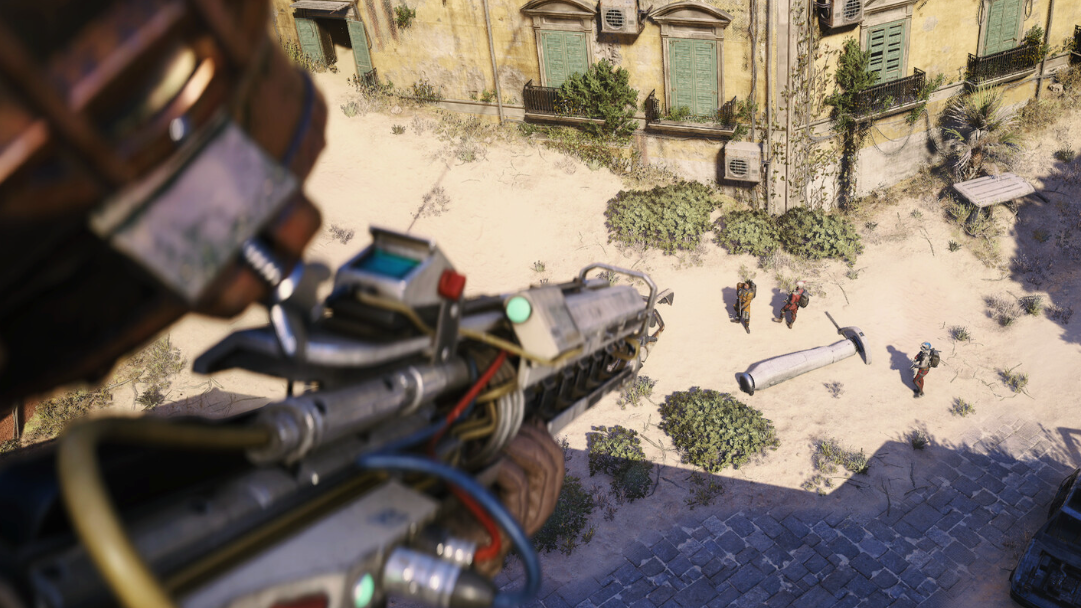
The first half of the quest focuses on Spaceport’s Fuel Control Building. This structure sits close to the center–northeast of the map, in the same cluster of infrastructure as Rocket Assembly and the Launch Towers. Multiple descriptions place it either slightly east of the central Launch Towers or on the northeastern side next to Rocket Assembly; in both cases, you are looking for the Fuel Control Building label on the map.
Inside, Fuel Control is a dark industrial hall full of machinery and computer banks. The console you need is a single, interactable terminal at the far end of the room.
Once this interaction is complete, you never need to return to Fuel Control for this quest. If another player kills you on the way out or you choose to extract, the first half of the objective stays finished for future raids.
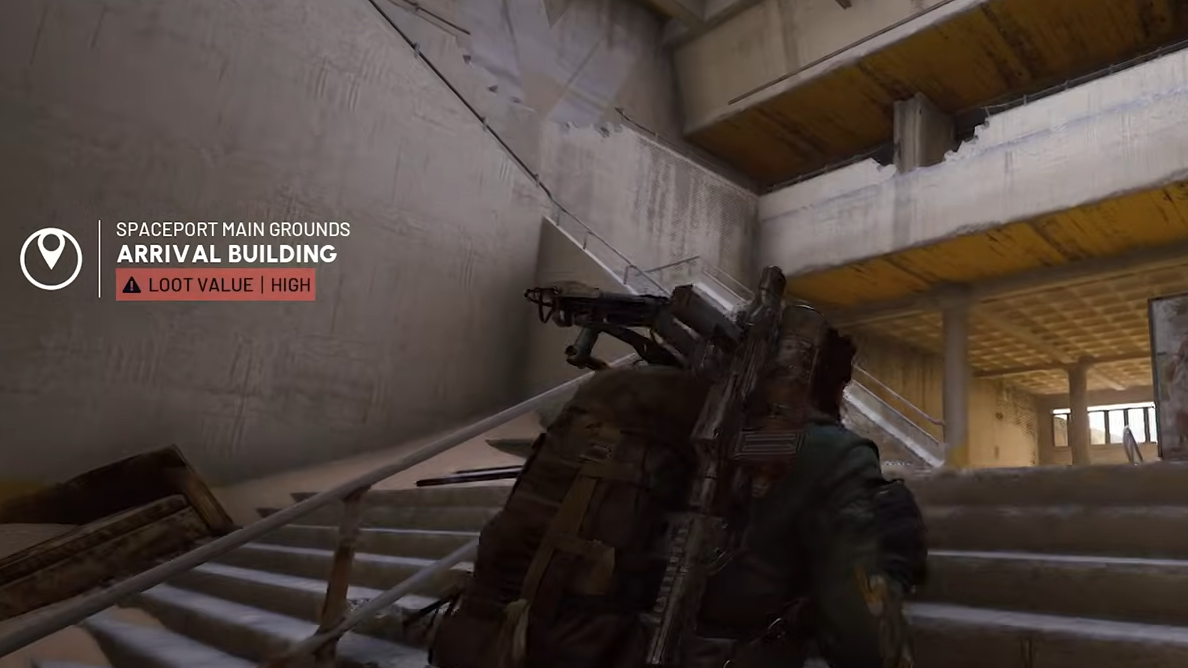
Second decryption: Arrival Building console location
The second console is deeper inside Spaceport’s Arrival Building. This structure sits on the northwest edge of the map, beyond the Launch Towers and roughly west of Fuel Control. You’ll usually cross open ground to get there, which makes you visible to both ARC units and other players.
The Arrival Building is a large multi-level terminal with a main lobby, staircases, and a grid of offices on the upper floors. Several descriptions agree that the console you need is on the top or second floor, in an office area on the west or north‑by‑northwest side of the building.
- In one layout, you pass through a doorway labeled “Passenger Registration,” then look left inside that area for a once‑barricaded door leading to a small office near a window.
- In another layout description, you circle the top floor until you find two parallel rows of machines or consoles tucked between pillars and cubicles on the west side.
From here, you can exit using any working elevator or simply play out the rest of your raid. As with the first console, there is no need to extract for the quest to record your progress once the interaction has been logged.
Enemy and loot considerations in the Arrival Building
The Arrival Building is one of Spaceport’s denser PvE zones, and it also attracts other players running the same objective. A few patterns make runs here safer and more efficient:
- Sentry concentration: Sentries spawn frequently in the Arrival Building and combine with Pop Rollers and Fireballs to punish careless movement, especially in the main lobby and open stairwells. Watch for the distinct blue searchlight from Sentries before pushing through choke points.
- Sentinel Firing Core farming: Because Sentries appear so often here, the building doubles as a strong spot to hunt Sentinel Firing Cores, which you need to upgrade your Gunsmith Workbench to level three.
- Medical and upgrade loot: The upper floors and side rooms tend to contain medical supplies such as Durable Cloth and Syringes, along with rarer station upgrade items like Cracked Bioscanners and Rusted Shut Medical Kits.
Since you do not need to bring any found gear back for the quest to count, it makes sense to run a free or disposable loadout here. That lets you play more aggressively around PvE spawns and other raiders without worrying about losing key weapons or augments.
Turning in the quest to Shani
Once both consoles in Fuel Control and the Arrival Building have been used with the Magnetic Decryptor, the active objectives for “Deciphering the Data” disappear. The only remaining step is to return to the underground hub and hand the mission back to Shani.
Finishing this quest also pushes Shani’s questline forward and helps reinforce her role as the city’s information hub, tying into how she tracks ARC behavior and keeps the Tubers and Raider Hatches running.
Once you know exactly which consoles to use in Fuel Control and the Arrival Building, “Deciphering the Data” becomes a quick Spaceport errand that slots neatly into other runs. Treat Fuel Control as a short detour on the way to the northwest, watch for Sentries and snipers around the Arrival Building, and the rest is just a matter of finding the one terminal in each room that still has enough life in it to talk to your Magnetic Decryptor.