
Persistent auto-locking or screensaver activation in Windows 11 can disrupt workflow, especially when the system reverts to a short timeout despite user adjustments. Understanding where and how Windows manages screensaver and lock screen timeout settings is key to regaining control over device behavior and preventing unwanted interruptions.
Modify Screensaver Timeout Using Windows 11 Settings
Step 1: Open the Settings app by pressing Windows + I or by selecting Settings from the Start menu.
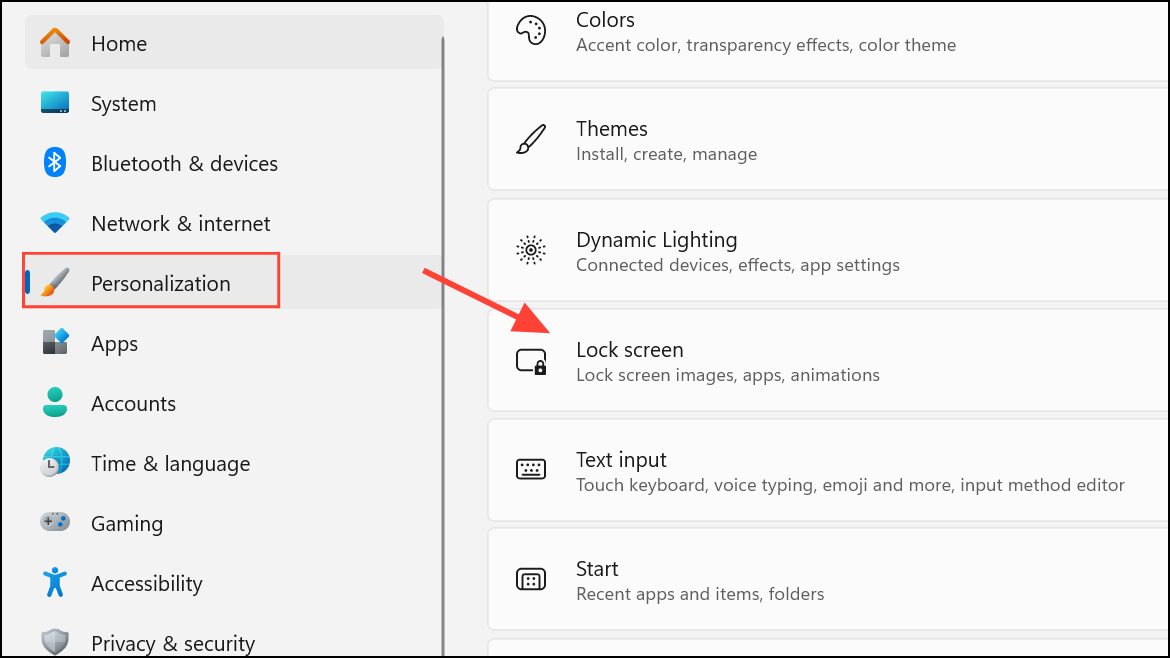
Step 2: Navigate to Personalization, then choose Lock screen.
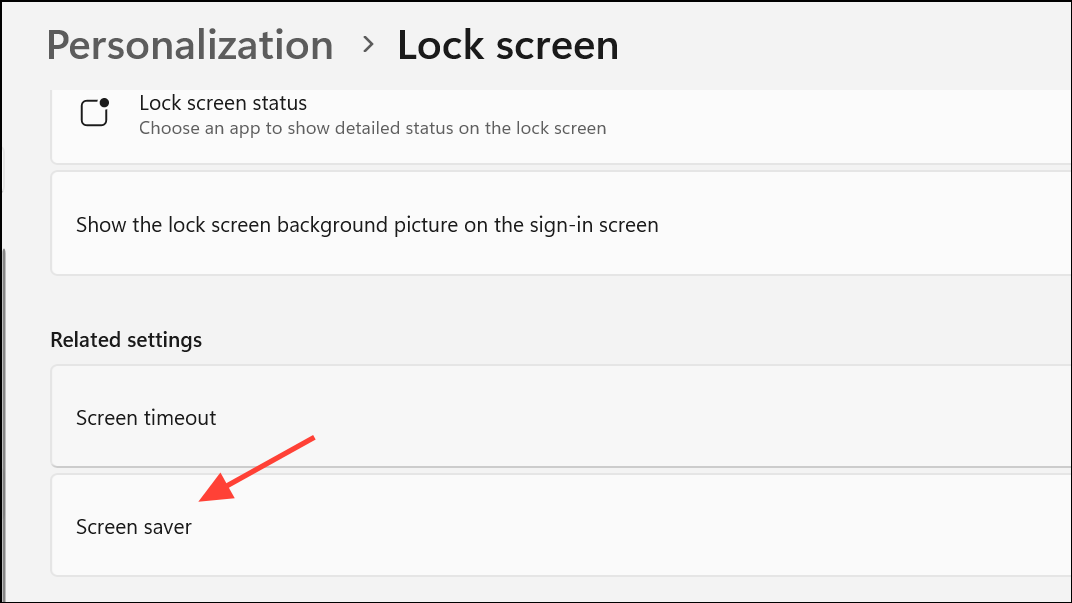
Step 3: Click Screen saver settings.
Step 4: In the new window, select a screensaver from the drop-down menu if you want one, then set your desired Wait time (in minutes) for inactivity before the screensaver activates.
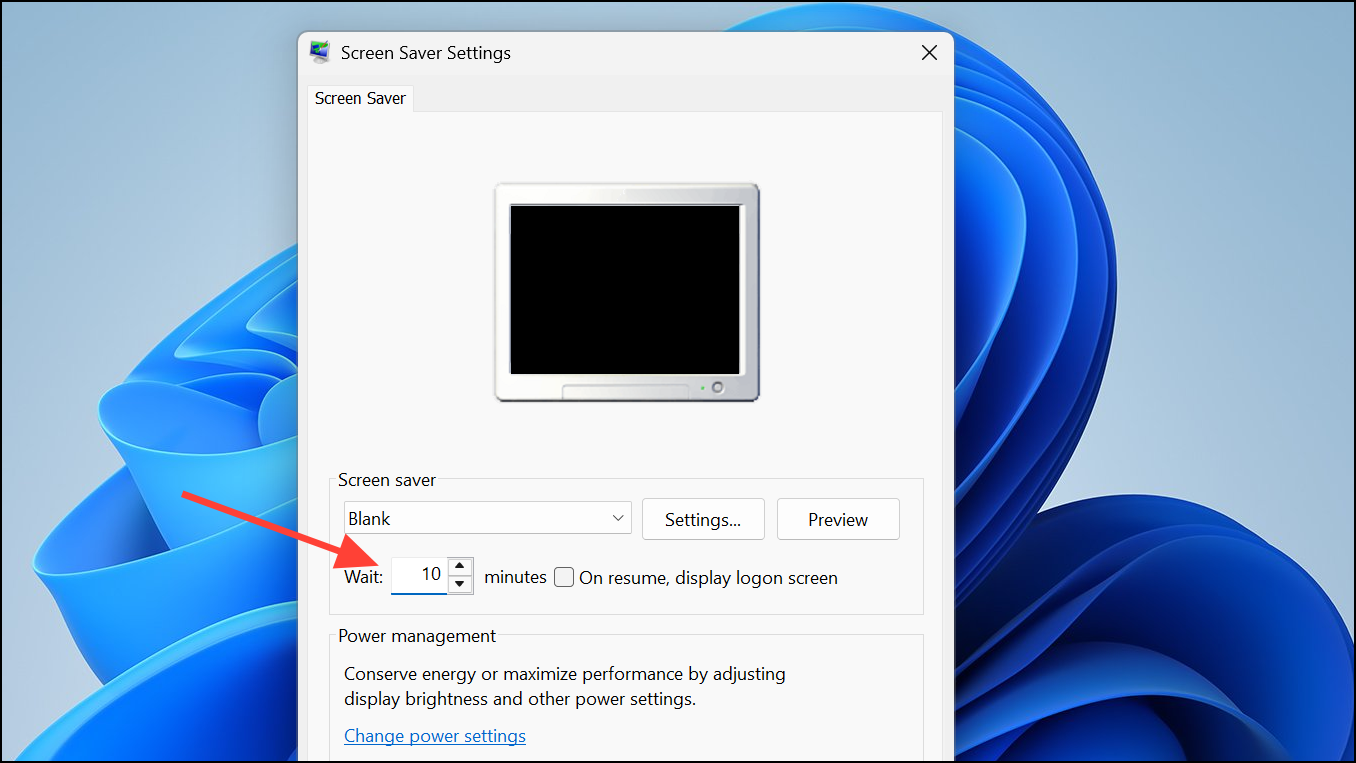
Step 5: Click Apply and then OK to save changes. Reopen the screensaver settings to confirm the new timeout is retained.
Adjust Screen and Sleep Timeouts in Power & Battery Settings
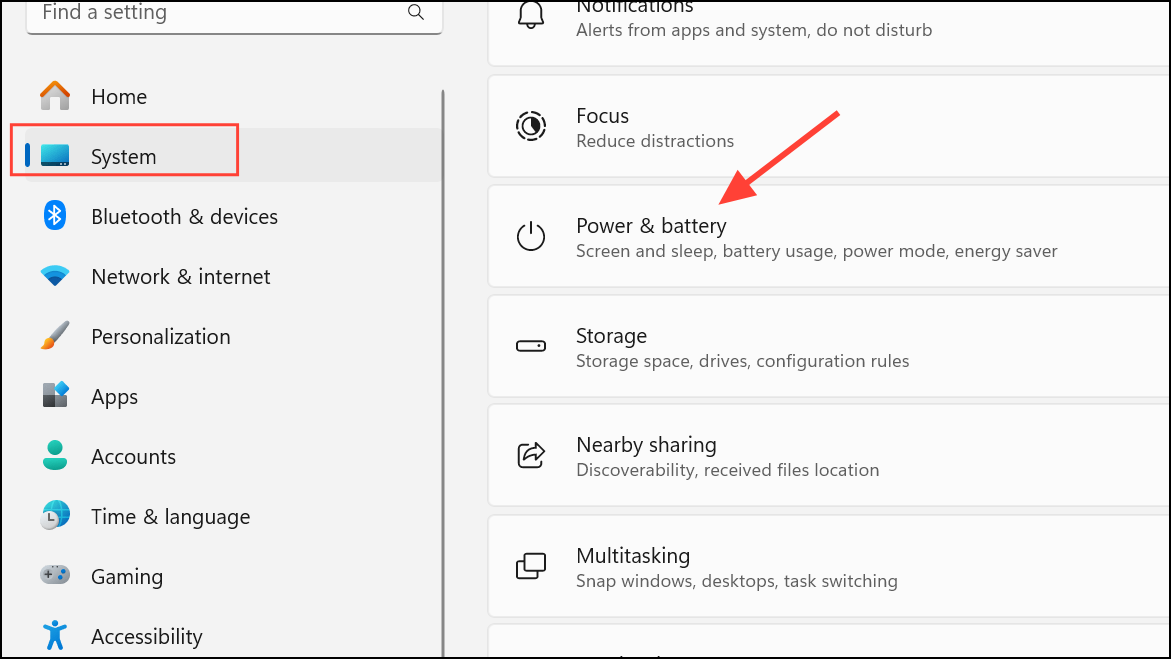
Step 1: In the Settings app, go to System > Power & battery.
Step 2: Scroll to the Screen and sleep section. Here, set the time for
On battery power, turn off my screen afterWhen plugged in, turn off my screen afterOn battery power, put my device to sleep afterWhen plugged in, put my device to sleep after
to your preferred duration.
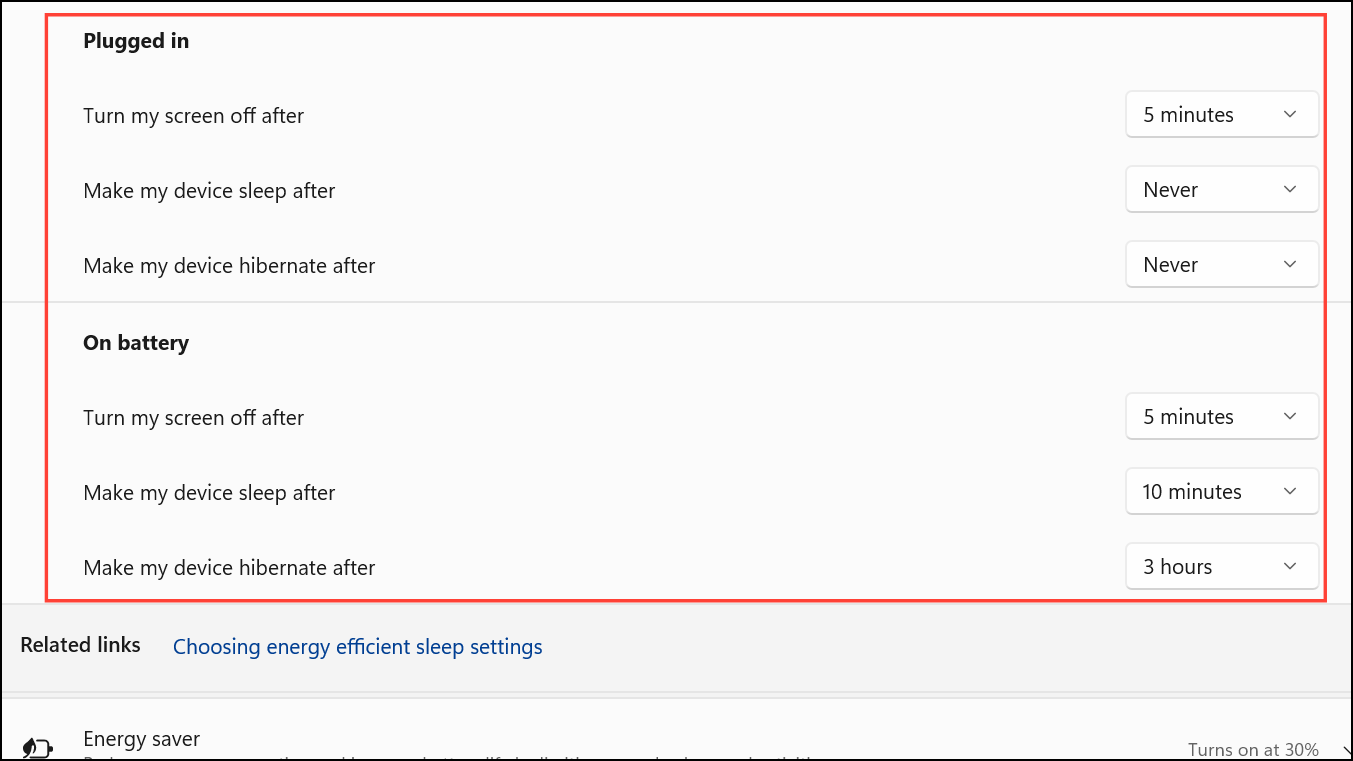
These settings control when the display turns off or when the device enters sleep mode. They can indirectly affect when the lock screen appears or when the screensaver is triggered.
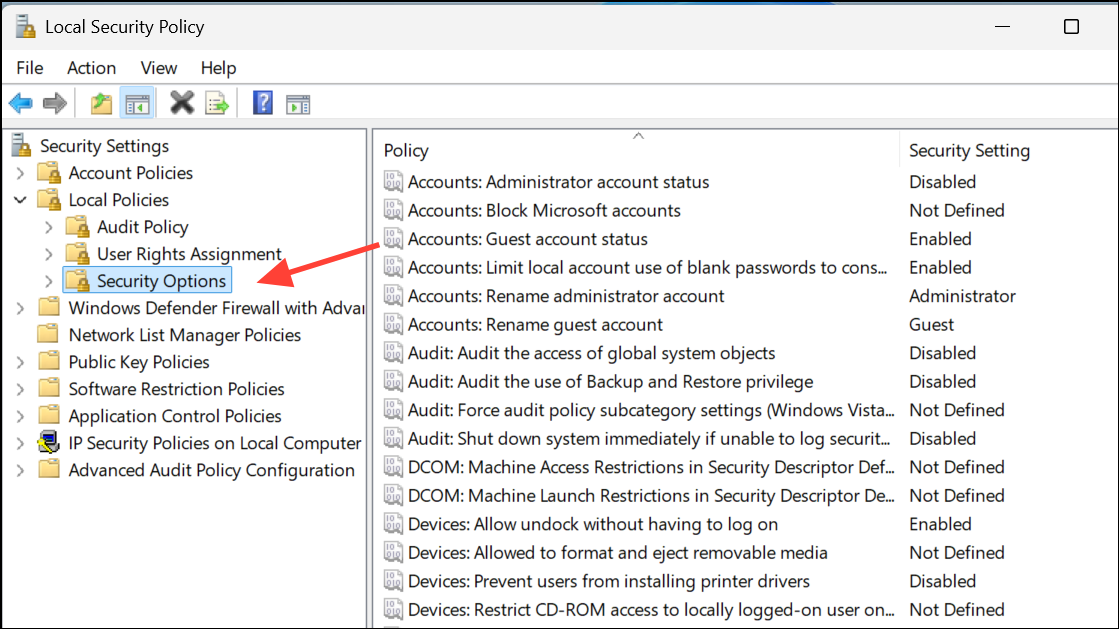
Set Screensaver Timeout via Group Policy Editor (Windows 11 Pro/Enterprise)
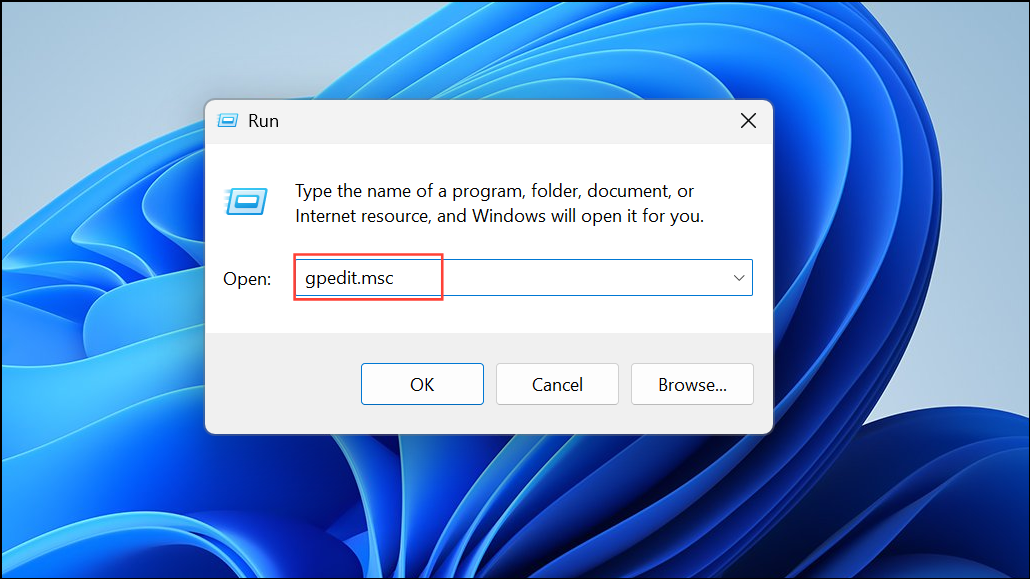
Step 1: Press Windows + R, type gpedit.msc, and press Enter to open the Group Policy Editor.
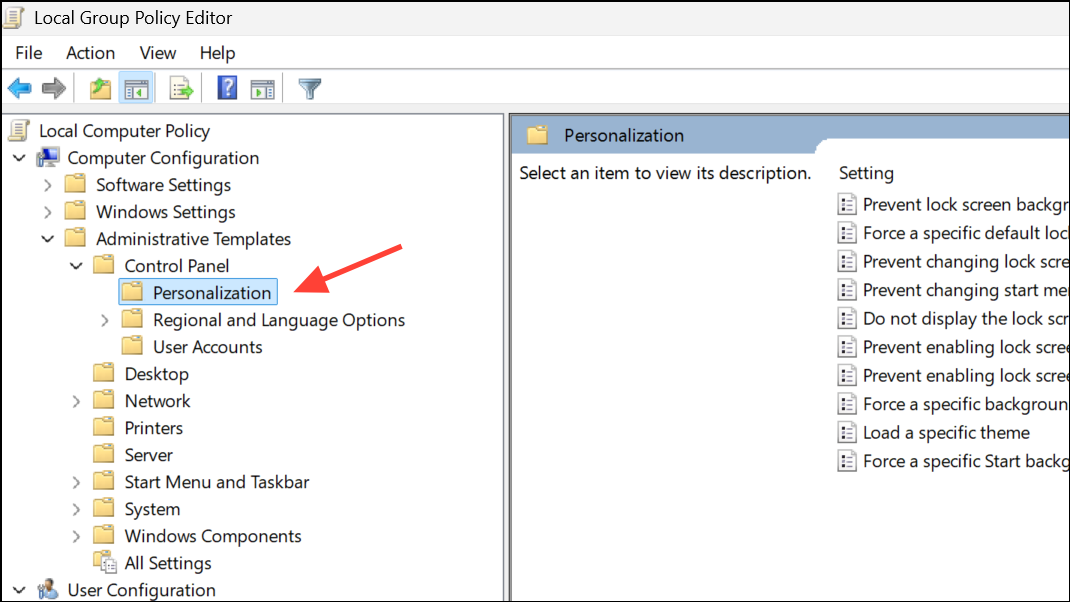
Step 2: Navigate to Computer Configuration > Administrative Templates > Control Panel > Personalization.
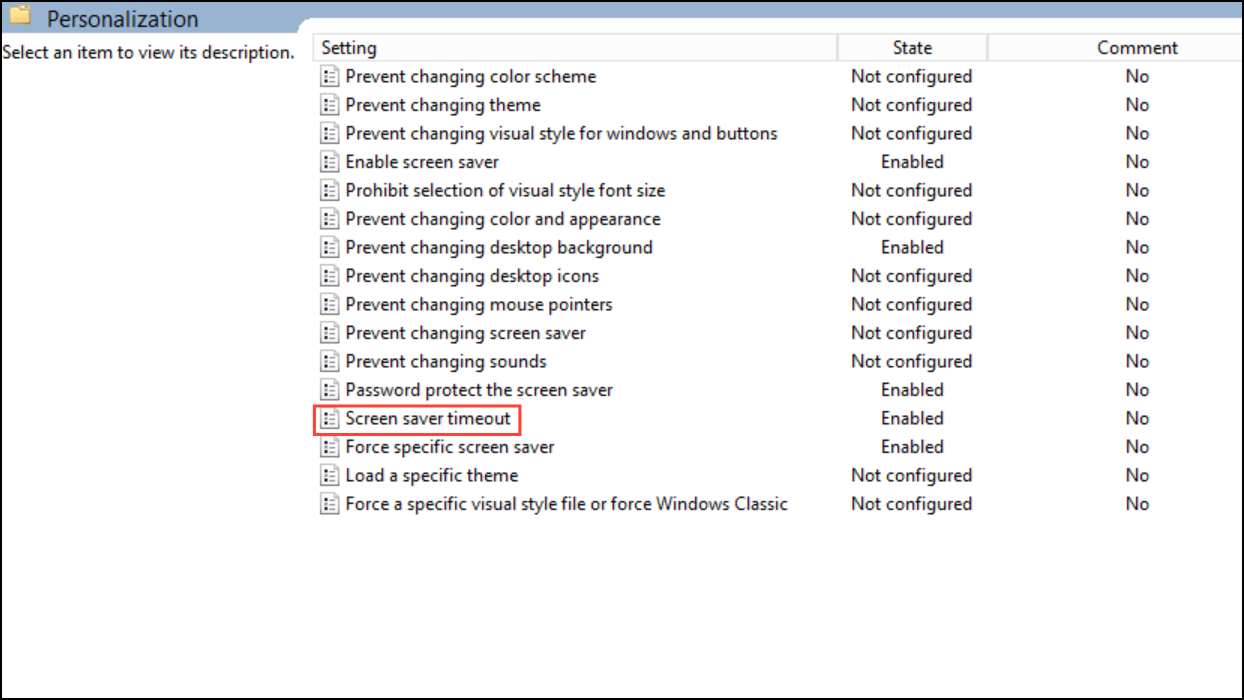
Step 3: Double-click Screen saver timeout. Set it to Enabled and specify the timeout in seconds (e.g., 900 for 15 minutes). Click OK to save.
Step 4: If you want to prevent the system from locking after a set period of inactivity, also review Interactive logon: Machine inactivity limit in Security Settings > Local Policies > Security Options via the Local Security Policy snap-in (secpol.msc). Increase this value (in seconds) to extend the maximum allowed idle time before the device locks.
Changing these policies can override user-level changes in the screensaver dialog, especially on devices previously managed by an organization or joined to a domain.
Change Screensaver Timeout Using Registry Editor
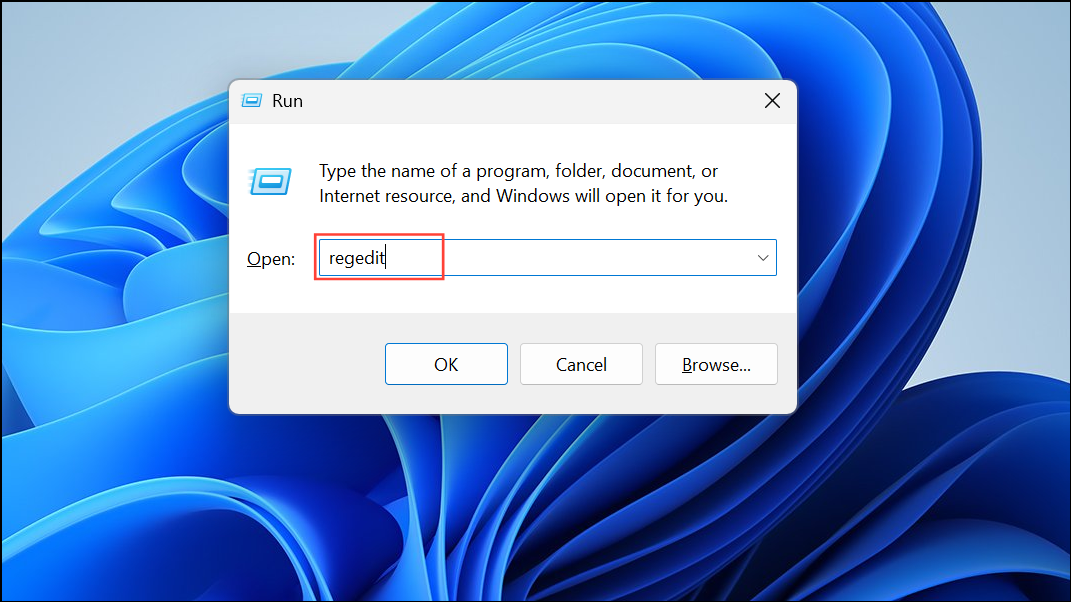
Step 1: Press Windows + R, type regedit, and press Enter to open the Registry Editor.
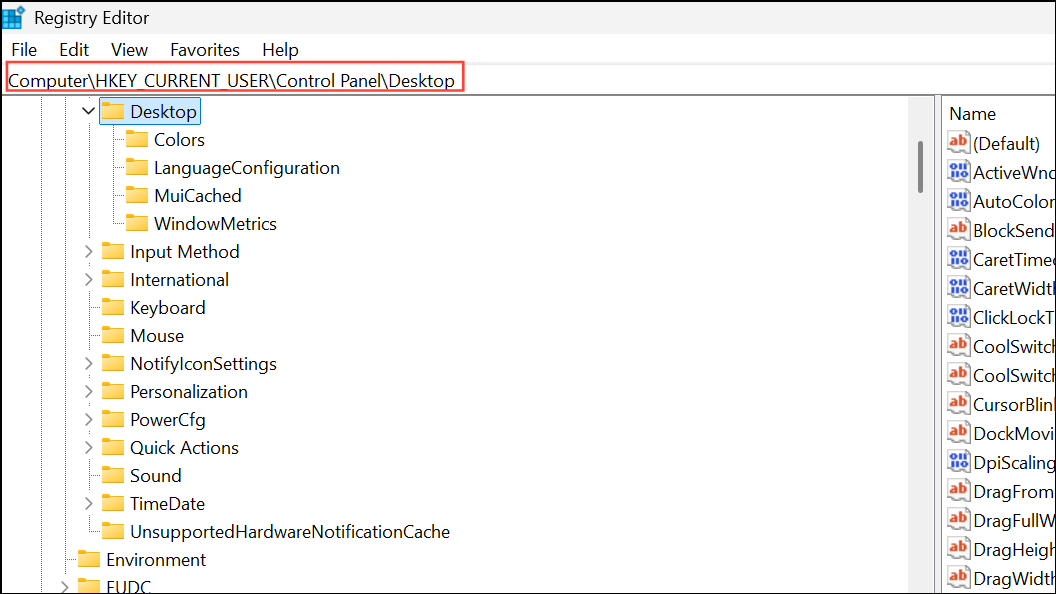
Step 2: Navigate to HKEY_CURRENT_USER\Control Panel\Desktop.
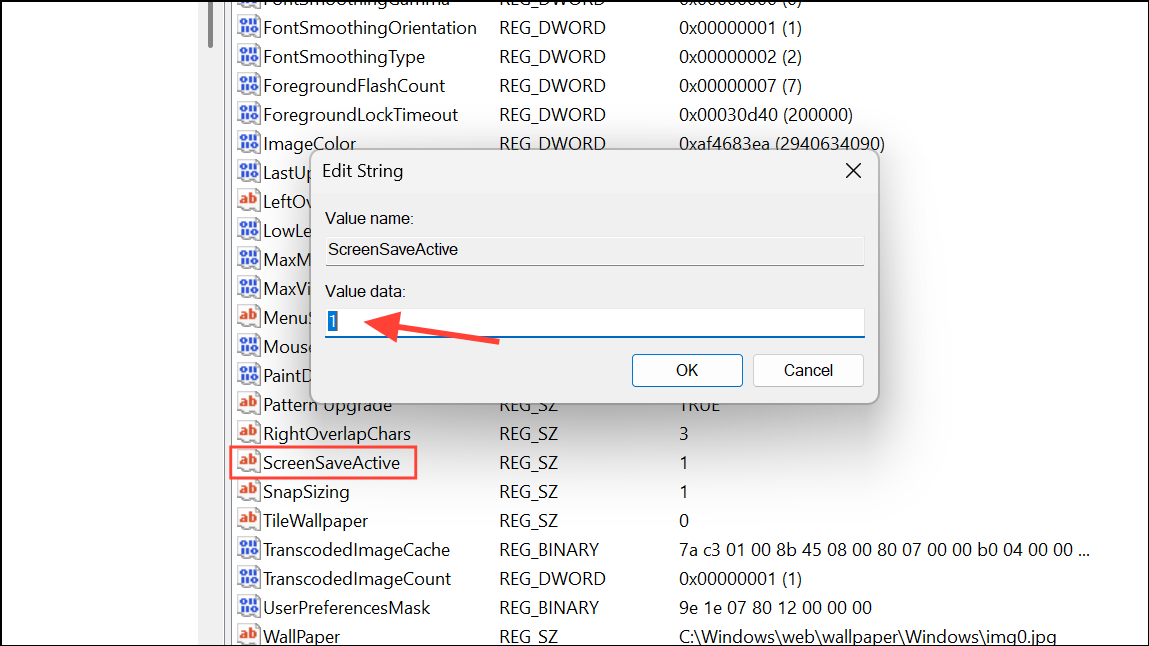
Step 3: Locate the following values and adjust as needed:
ScreenSaveActive= "1" (enables the screensaver).ScreenSaveTimeOut= "900" (sets timeout in seconds; 900 seconds = 15 minutes).ScreenSaverIsSecure= "1" (requires password on resume; optional).
[HKEY_CURRENT_USER\Control Panel\Desktop]
"ScreenSaveActive"="1"
"ScreenSaveTimeOut"="900"
"ScreenSaverIsSecure"="1"
Step 4: Close Registry Editor and sign out or restart your computer for the changes to take effect. Avoid having the Settings app open when making these changes, as it can overwrite registry edits.
If the timeout value continues to reset or is capped (commonly at 15 minutes), system-level policies may be enforcing a maximum. In such cases, review Group Policy or Local Security Policy as described above.
Fix Screensaver Timeout Issues from Previous Domain or Organizational Policies
Devices previously joined to a corporate domain or managed by IT may retain restrictive policies even after leaving the organization. These policies can limit the maximum screensaver timeout or force the device to lock quickly.
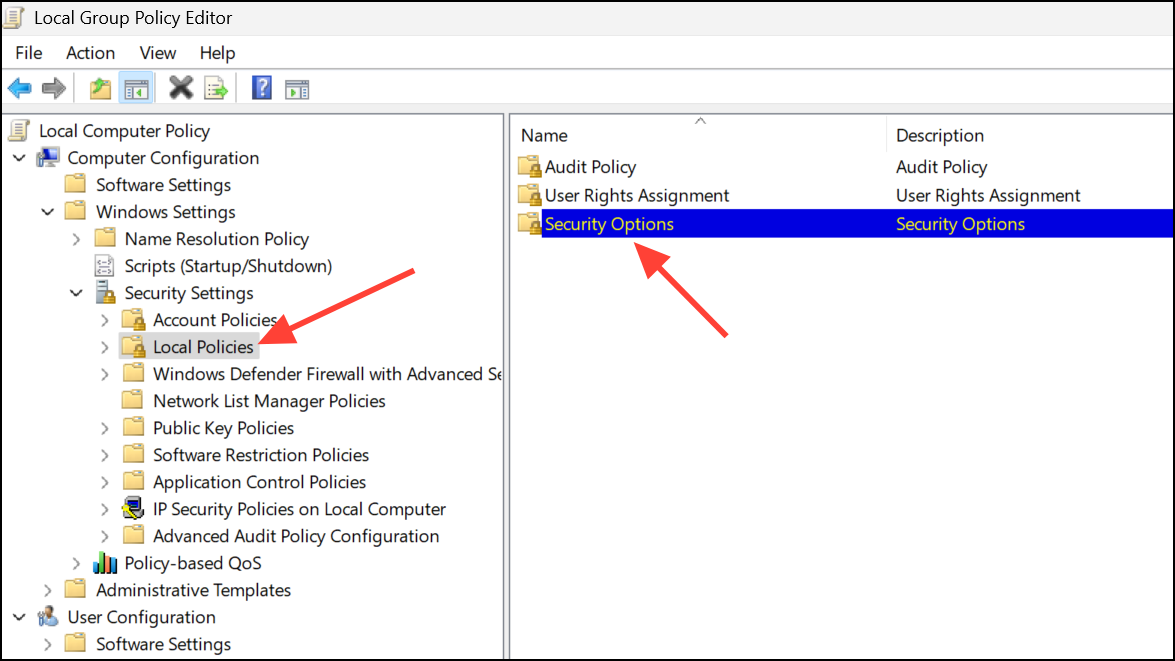
Step 1: Open the Local Security Policy snap-in by pressing Windows + R, typing secpol.msc, and pressing Enter.

Step 2: Go to Security Settings > Local Policies > Security Options.
Step 3: Find Interactive logon: Machine inactivity limit. Set this value to your preferred number of seconds (e.g., 86400 for 24 hours) to allow longer idle periods before auto-lock.
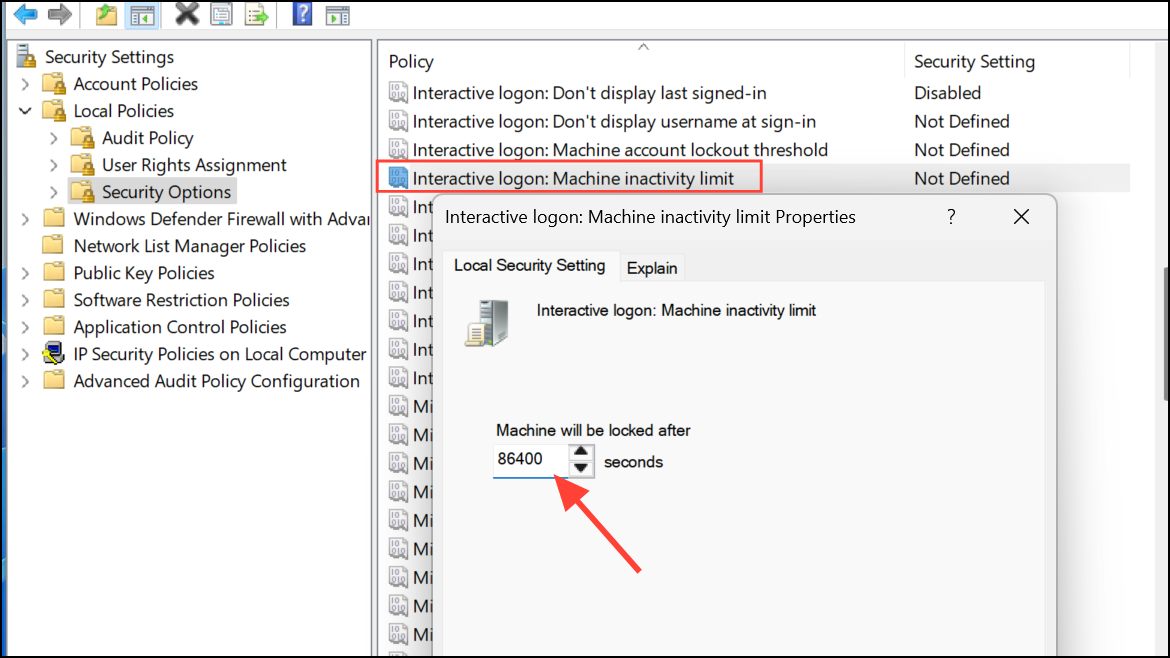
Step 4: After adjusting, restart the system. You should now be able to set longer screensaver wait times, and the changes will persist.
For persistent issues, check if any managed policies remain by running gpresult /h report.html in an elevated command prompt to generate a report of applied policies. Remove or reconfigure any lingering policies that enforce short timeouts.
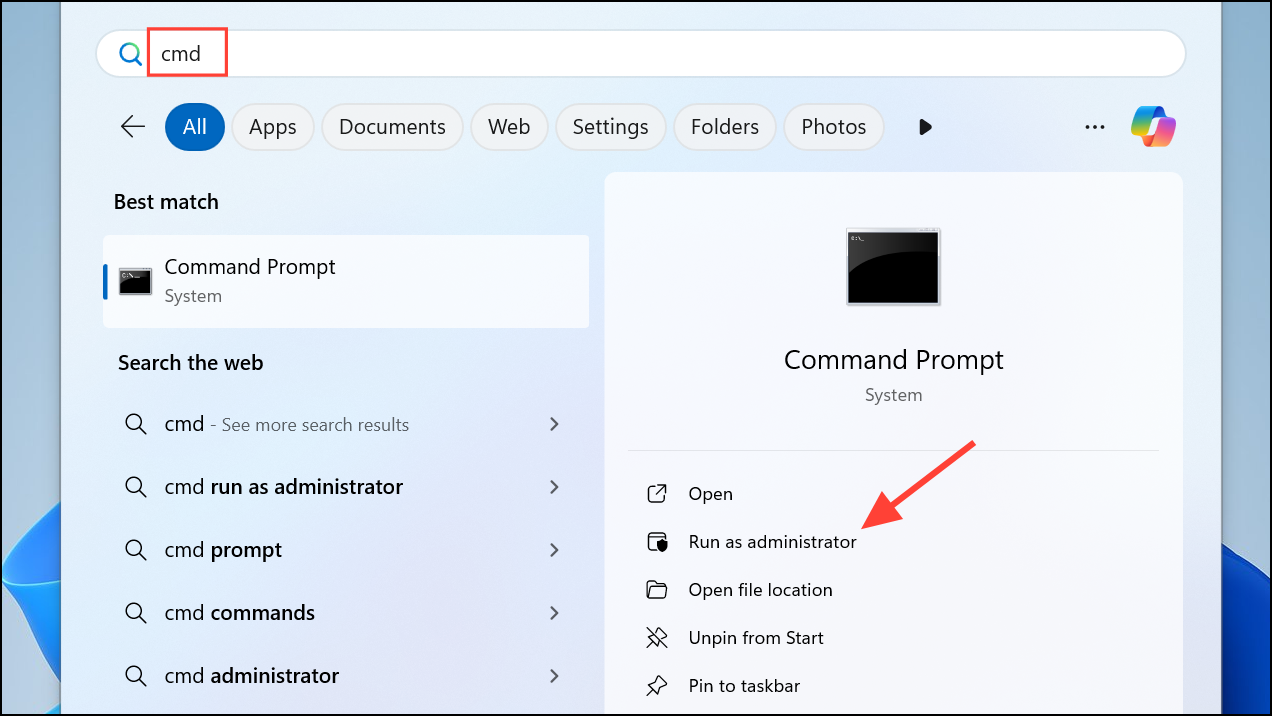
Use Command Prompt for Quick Timeout Adjustments
For users comfortable with command-line tools, the powercfg utility can change display timeout values directly.
Step 1: Launch Command Prompt as Administrator by searching cmd, right-clicking, and choosing Run as administrator.
Step 2: To set the timeout for when plugged in, enter:
powercfg /change monitor-timeout-ac 15
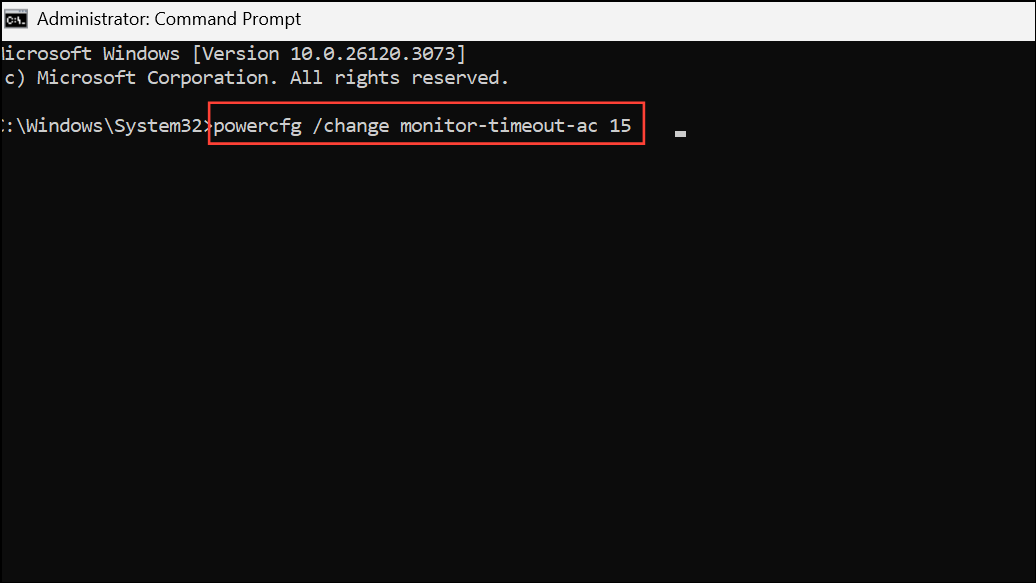
Replace 15 with your desired number of minutes.
Step 3: To set the timeout for battery mode, use:
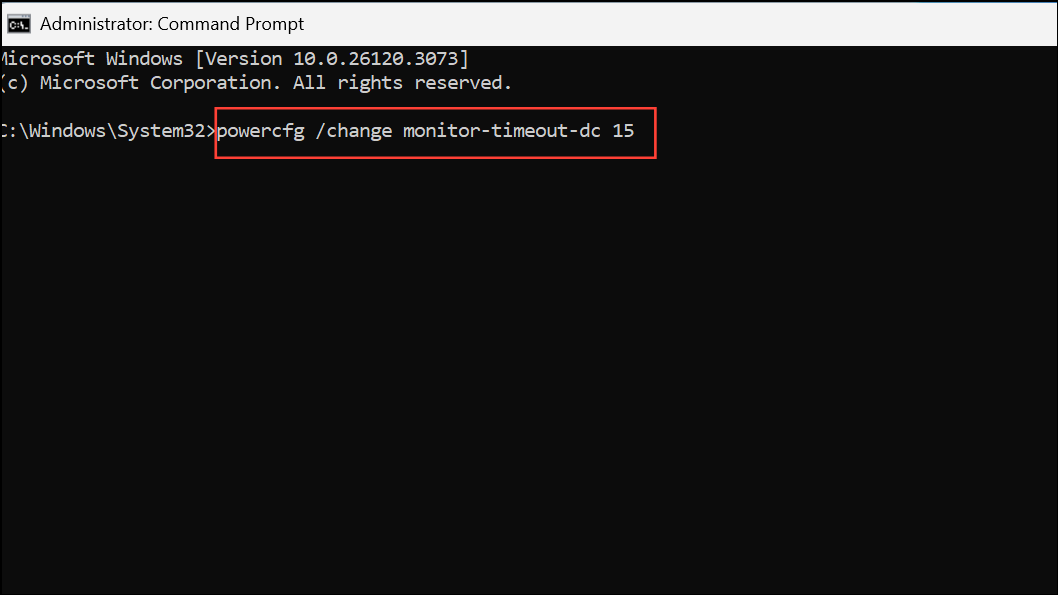
powercfg /change monitor-timeout-dc 15
Again, adjust the number as needed.
This approach updates the display timeout without navigating the graphical interface, streamlining adjustments for advanced users or scripting.
Troubleshoot Screensaver Timeout Settings Not Saving
If changes to the screensaver timeout do not persist or always revert to a default (such as 3 or 15 minutes), consider the following:
- Check for active Group Policy or Local Security Policy settings that override user preferences.
- Ensure you have selected an actual screensaver (not
None) in the screensaver settings dialog, as theWaitvalue may not be saved otherwise. - Verify that registry edits are made while the Settings app is closed.
- If on a work or school device, some settings may be locked by IT administrators. Contact your IT department for assistance if you cannot modify policies.
For devices with persistent lock or screensaver issues after leaving a domain, removing old domain policies and resetting local security policies can restore full control over timeout settings.
By following these steps, you can reliably change screensaver timeout settings in Windows 11, resolve stubborn policy restrictions, and keep your device from locking or activating the screensaver before you want it to. Regularly review these settings if you notice unexpected behavior after system updates or organizational changes.