
Knowing the precise version, build number, and edition of Windows 11 running on your device is essential for troubleshooting, verifying compatibility, and ensuring you receive the latest features and security updates. Differences between versions and builds can impact available features, system stability, and support eligibility. Here’s how to quickly and accurately check this information using several reliable methods.
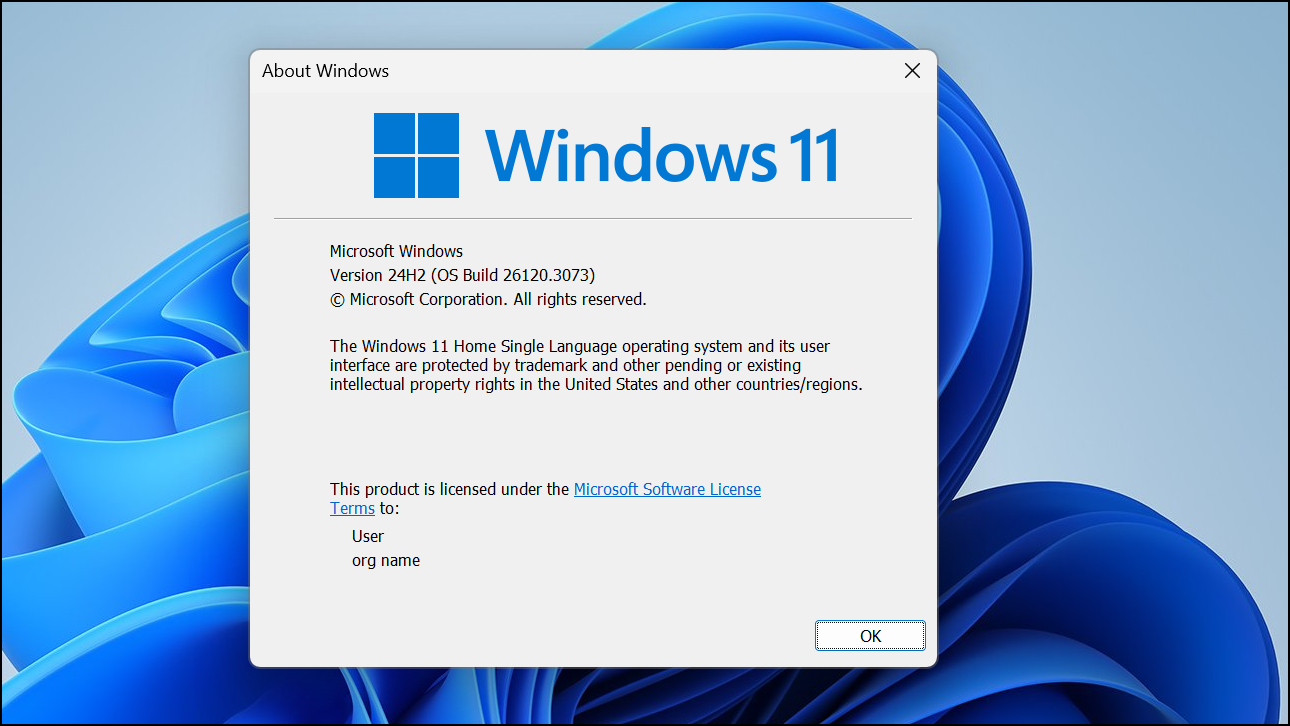
Check Version and Build Using the winver Command
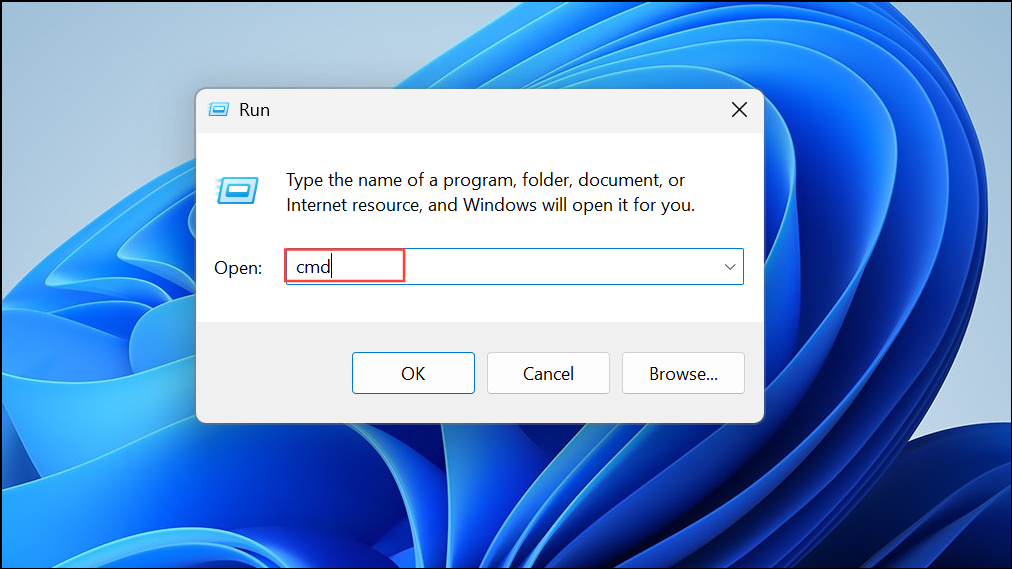
Step 1: Press Windows + R on your keyboard to open the Run dialog box. This shortcut provides direct access to various Windows tools.
Step 2: Type winver into the Run box and press Enter. This command launches the "About Windows" dialog.

Step 3: Review the pop-up window. You’ll see your Windows 11 edition (such as Home, Pro, or Enterprise), the version (for example, 23H2), and the OS build number (such as 22631.2715). This method quickly reveals if you’re on a major feature update or a cumulative update build, which is useful for support and compatibility checks.
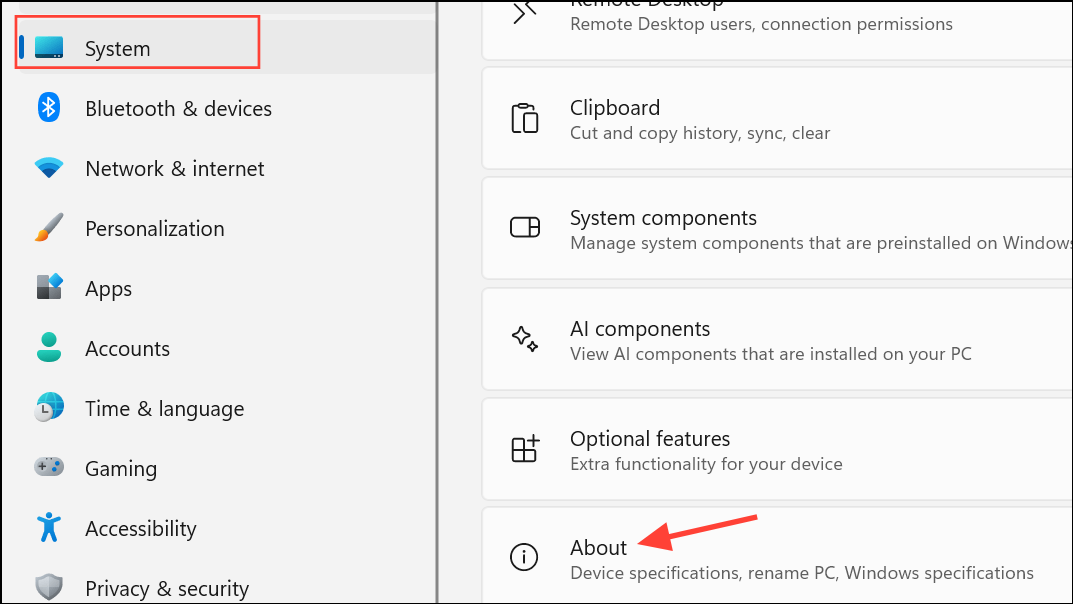
View Version and Build in Windows Settings
Step 1: Open the Settings app by pressing Windows + I or by right-clicking the Start button and selecting Settings.
Step 2: In the Settings window, click on System in the left sidebar. Then scroll down and select About.
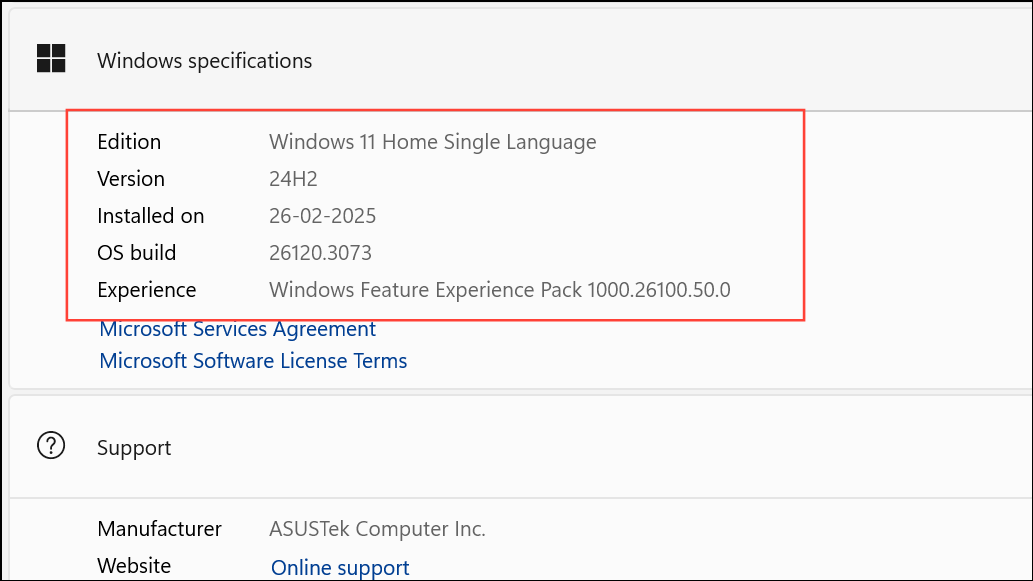
Step 3: In the About section, look for the Windows specifications area. Here you’ll find detailed information including your edition, version, OS build, and the Windows Feature Experience Pack installed. This section also confirms if you’re running a 32-bit or 64-bit version and provides the device name for reference.
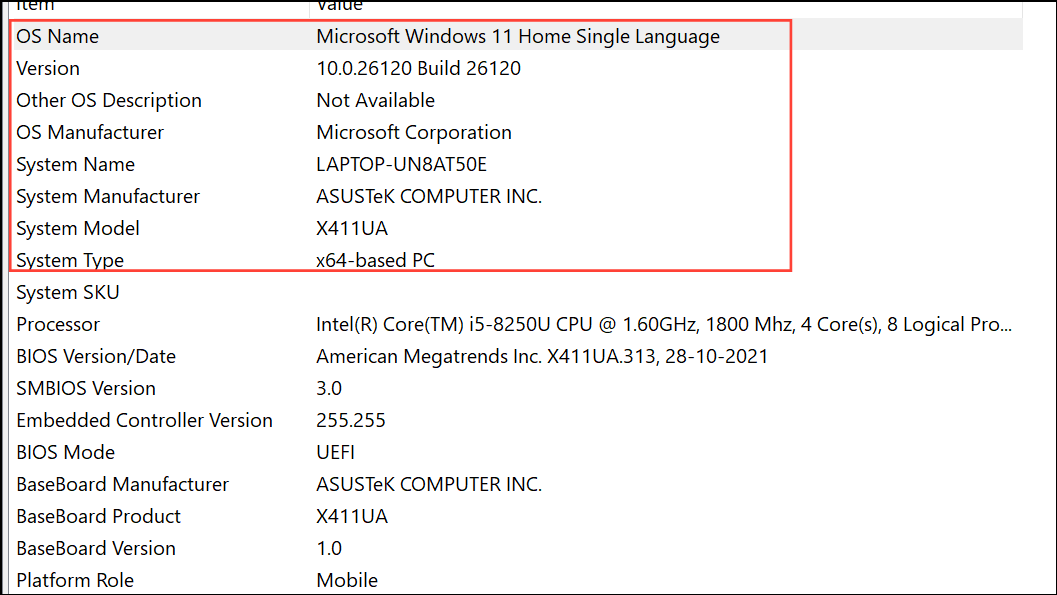
Get Version Details Using System Information
Step 1: Press Windows + R, type msinfo32, and press Enter. This opens the System Information utility.

Step 2: In the System Summary, look for OS Name, Version, and OS Build. This tool also displays hardware details, which can be helpful if you need to check system compatibility or troubleshoot specific hardware issues.
Check Version and Build from Command Prompt or PowerShell
Step 1: Open Command Prompt or PowerShell. Press Windows + R, type cmd or powershell, and press Enter.
Step 2: Enter the following command to display your OS name and version:
systeminfo | findstr /B /C:"OS Name" /B /C:"OS Version"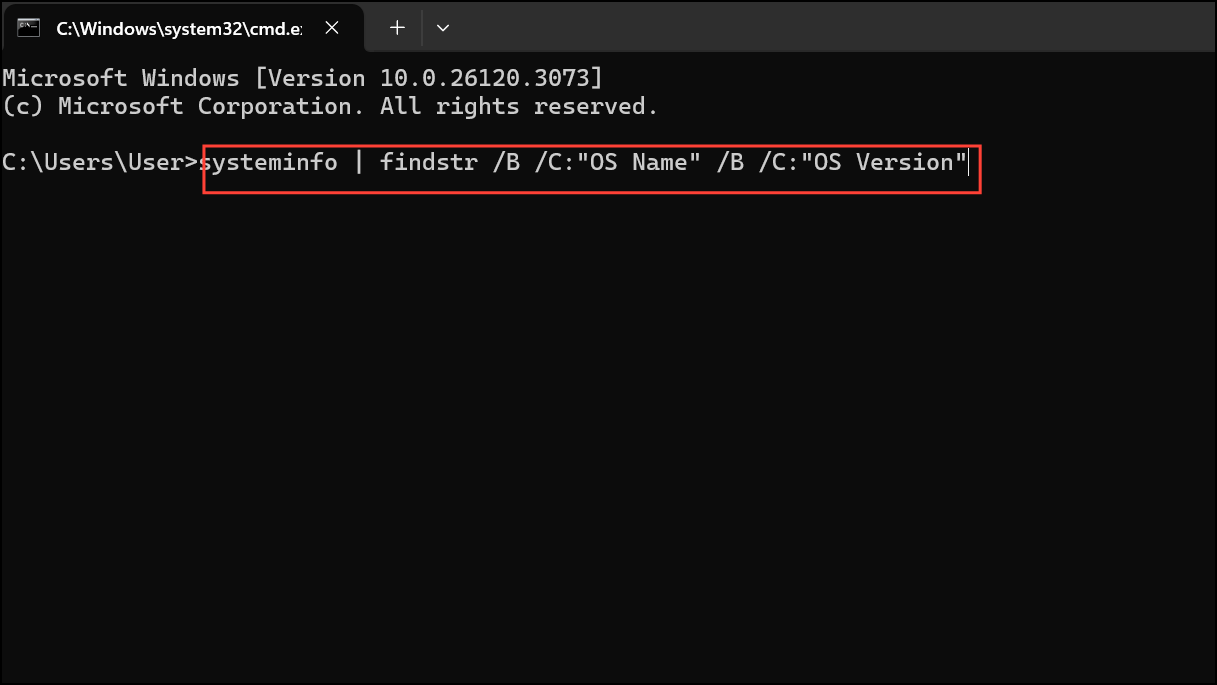
This command filters the output to show only the relevant version and build details. For a more concise output, you can also use:
wmic os get BuildNumber,Caption,version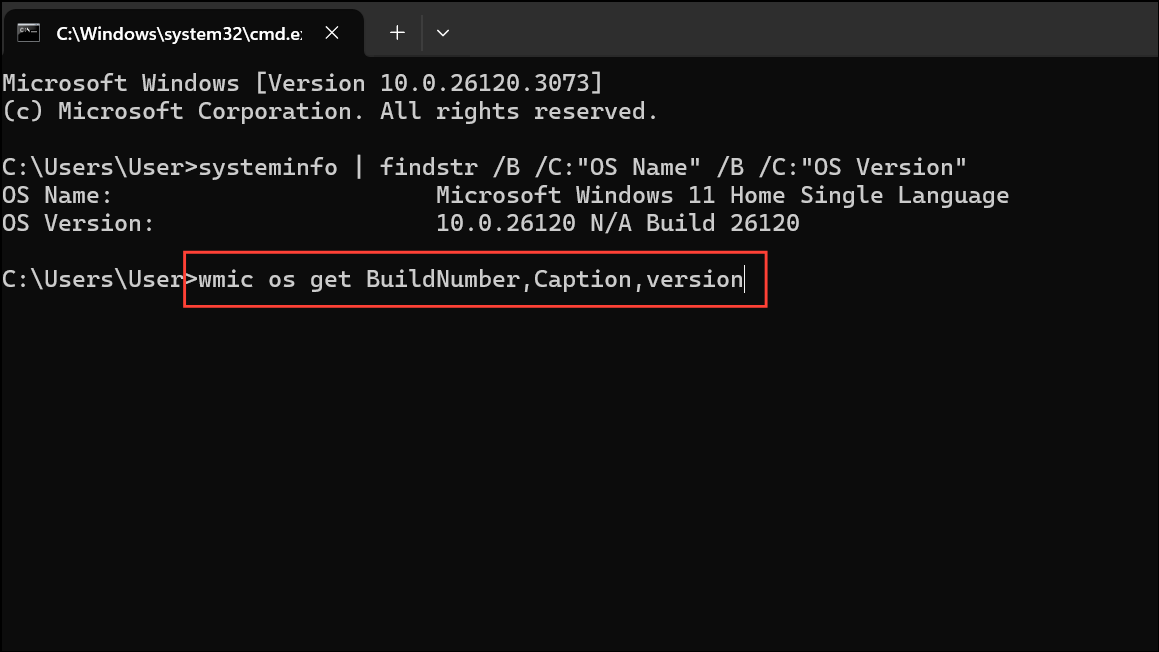
These commands are particularly useful for scripting, remote administration, or when working on systems without a graphical interface.
Identify Version and Build from an Installation ISO or USB
When preparing to install or troubleshoot Windows 11 using installation media, knowing the version and build on the ISO or USB ensures you’re using the correct release. This is especially important for system administrators or users managing multiple devices.
Step 1: Mount the Windows 11 ISO or insert the USB drive.
Step 2: Navigate to the sources folder and locate the install.wim or install.esd file.
Step 3: Open Command Prompt and use the following command (replace D:\sources\install.wim with your actual path):
dism /Get-WimInfo /WimFile:D:\sources\install.wimThis command lists all available images in the WIM file, showing the edition, version, and build number. On Linux systems, similar details can be extracted using wiminfo from the wimtools package.
Alternative: Check the properties of setup.exe in the ISO. Right-click, choose Properties, and view the Details tab. The product version field often aligns with the build number (e.g., 22000 for Windows 11 21H2, 22621 for 22H2).
Distinguishing Stable and Insider Builds
Windows 11 stable releases use version numbers like 23H2 or 24H2. Insider Preview builds typically display “Insider Preview” in the version information or have build numbers significantly higher than the latest public release (for example, builds in the 26xxx range). Use the winver command or the Settings app to confirm your channel. If your system lists a feature update like 23H2 or 24H2 and does not mention “Insider Preview,” you’re on a stable build.
Additional Tips for Version Management
- To update to the latest Windows 11 build, go to Settings > Windows Update and select Check for updates.
- For feature upgrades (e.g., moving from 22H2 to 23H2), updates may be optional at first and require manual installation.
- If you need to confirm device compatibility or troubleshoot missing features, always check both the edition (Home, Pro, Enterprise) and version/build.
Checking your Windows 11 version and build number is quick and reliable using these built-in tools and commands. Keeping track of this information streamlines troubleshooting, ensures compatibility, and helps you stay current with Microsoft’s updates.