Media Player in Windows 11 automatically displays a list of recently played songs and videos on its Home screen. This feature streamlines access to frequently used content, but it can also clutter the interface or reveal activity you would rather keep private—especially on shared devices or in professional environments. Removing these files from Media Player, or clearing the recent media list, improves privacy and keeps your library tidy.
Deleting the MediaPlayer.db-wal File and Blocking History Recording
Step 1: Open File Explorer by pressing Windows key + E. In the address bar, enter %localappdata%\Packages\Microsoft.ZuneMusic_8wekyb3d8bbwe\LocalState and press Enter. This location stores the Media Player’s database files, including your recent media history.
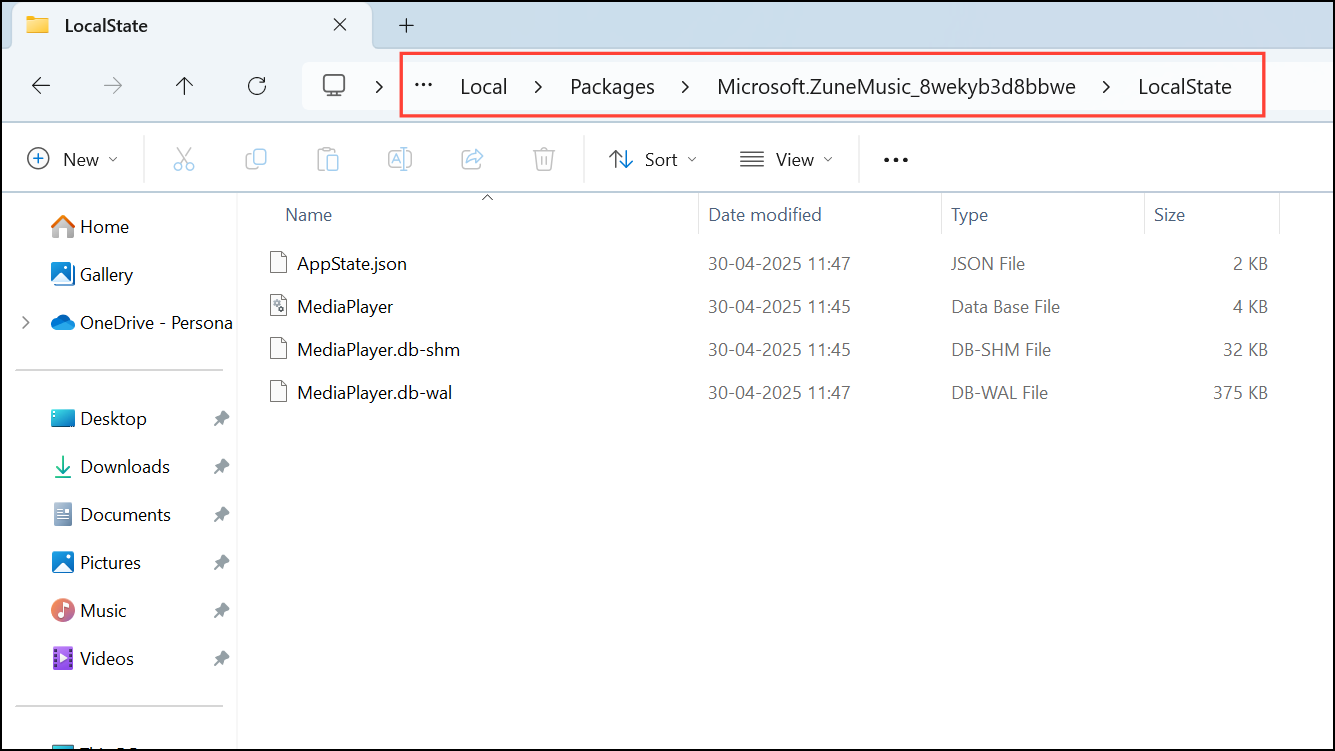
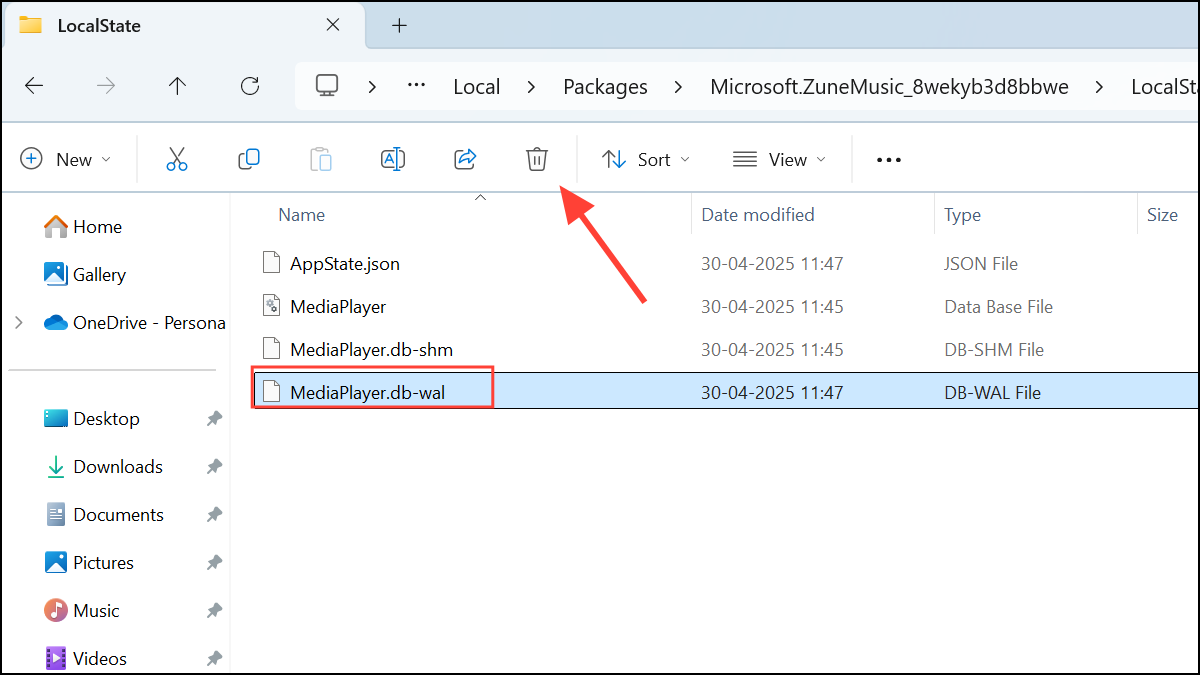
Step 2: Locate the MediaPlayer.db-wal file and delete it. This action removes the current record of your recent activity in Media Player.
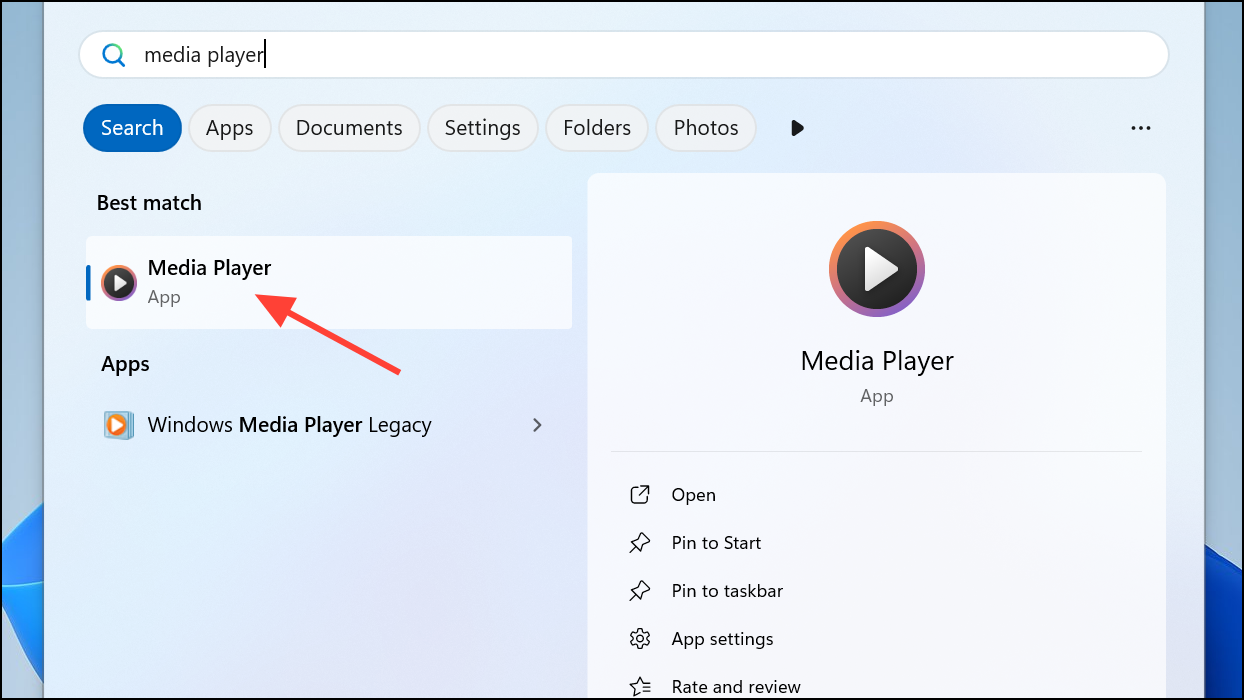
Step 3: Open Media Player and play any media file. The application will generate a new MediaPlayer.db-wal file to resume tracking recent items.
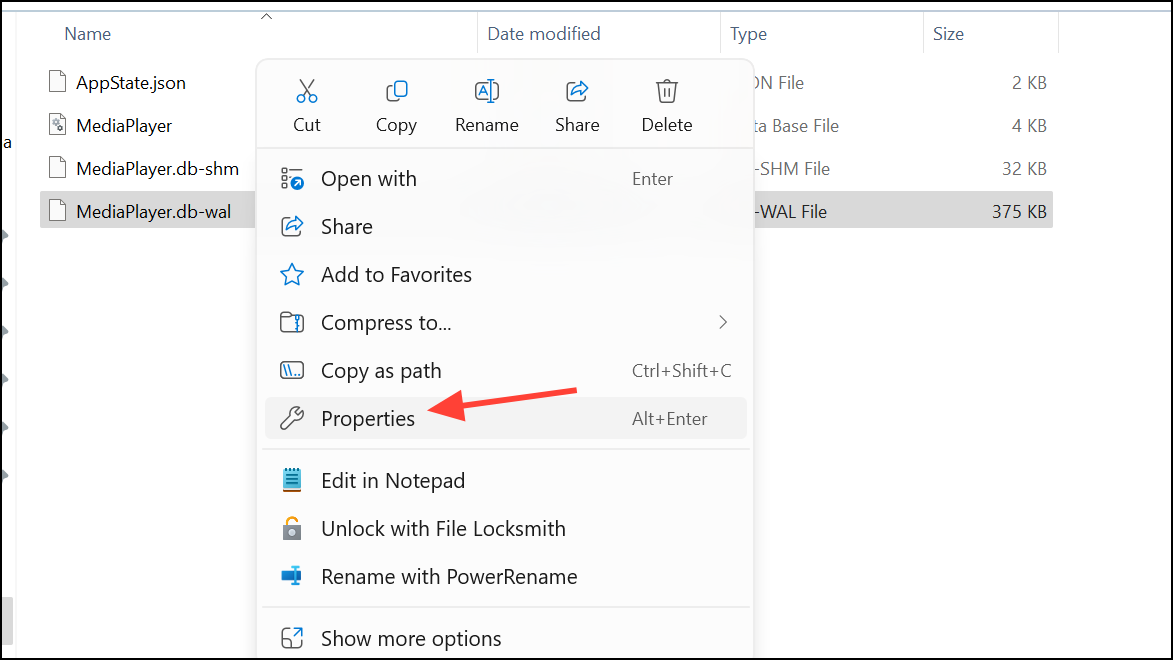
Step 4: Return to the same folder in File Explorer. Right-click the newly created MediaPlayer.db-wal file, select Properties.
Step 5: Check the Read-only box. Click Apply and OK. Setting the file to read-only prevents Media Player from updating your recent media history in the future, effectively blocking the app from recording your activity.
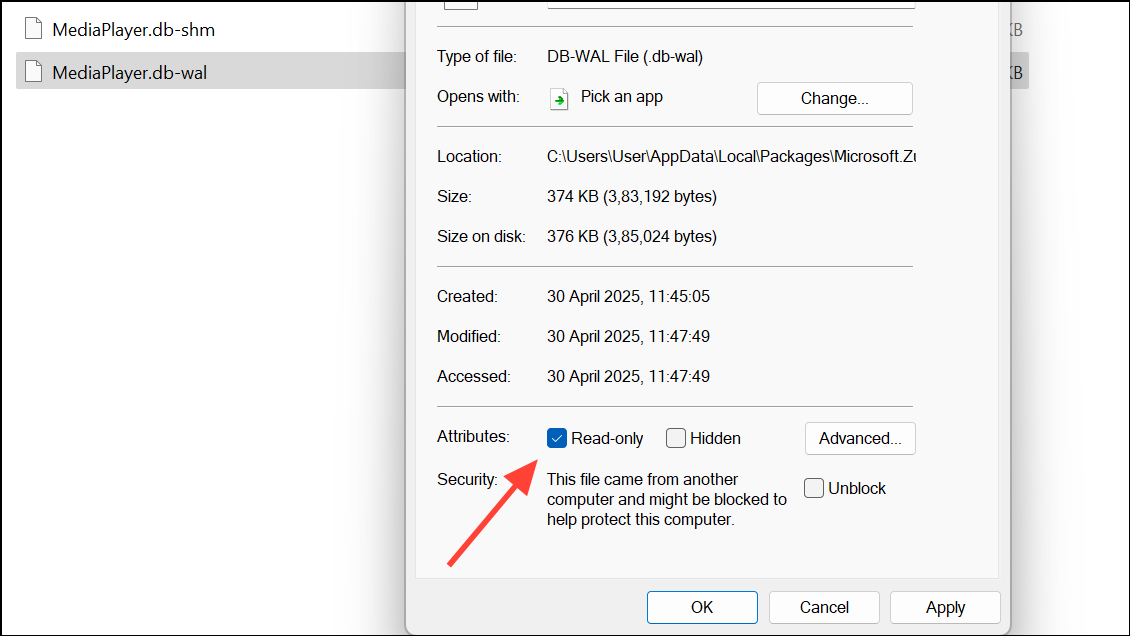
This method is highly effective for users who want to permanently stop Media Player from tracking or displaying recent files. However, note that Media Player may still show the thumbnail of the last played video in some interface elements, as this is cached elsewhere.
Removing Items Directly from Recent Media in Media Player
Step 1: Launch the Media Player app from the Start menu.

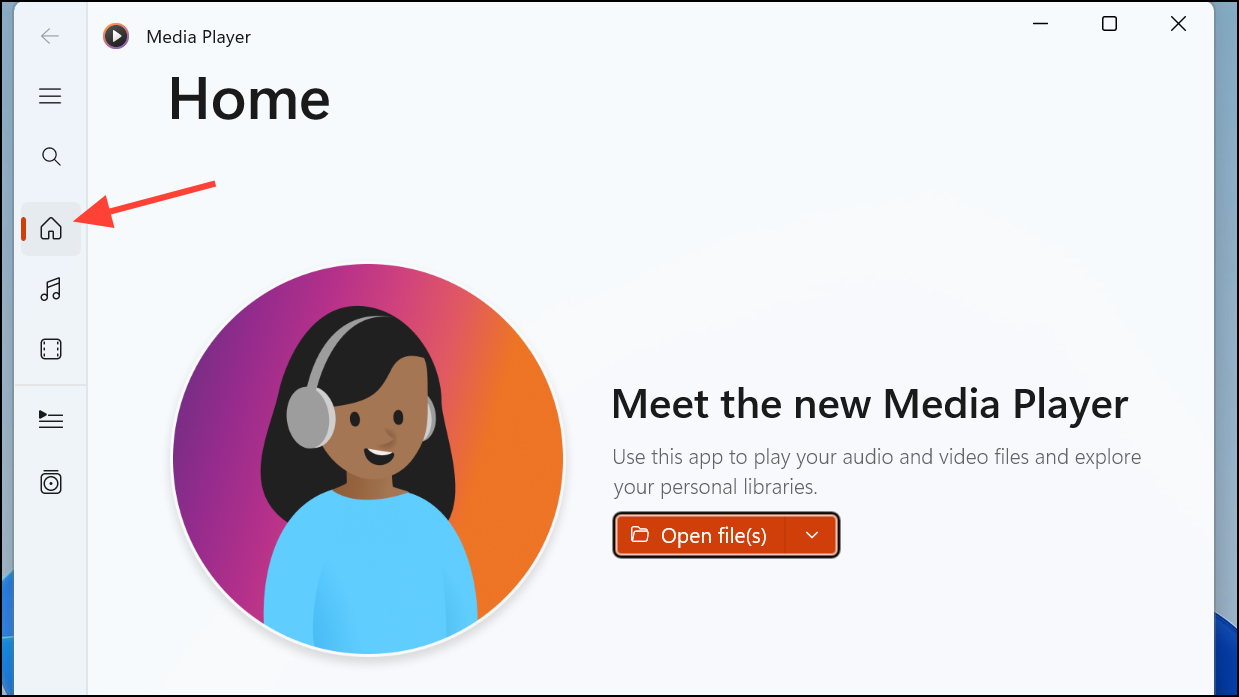
Step 2: Click on Home in the left sidebar. This panel displays your recent media files as thumbnails.
Step 3: Hover your mouse over the thumbnail of the item you want to remove. A checkbox will appear in the upper corner of the thumbnail. Select the checkbox for each media item you wish to clear from the list.
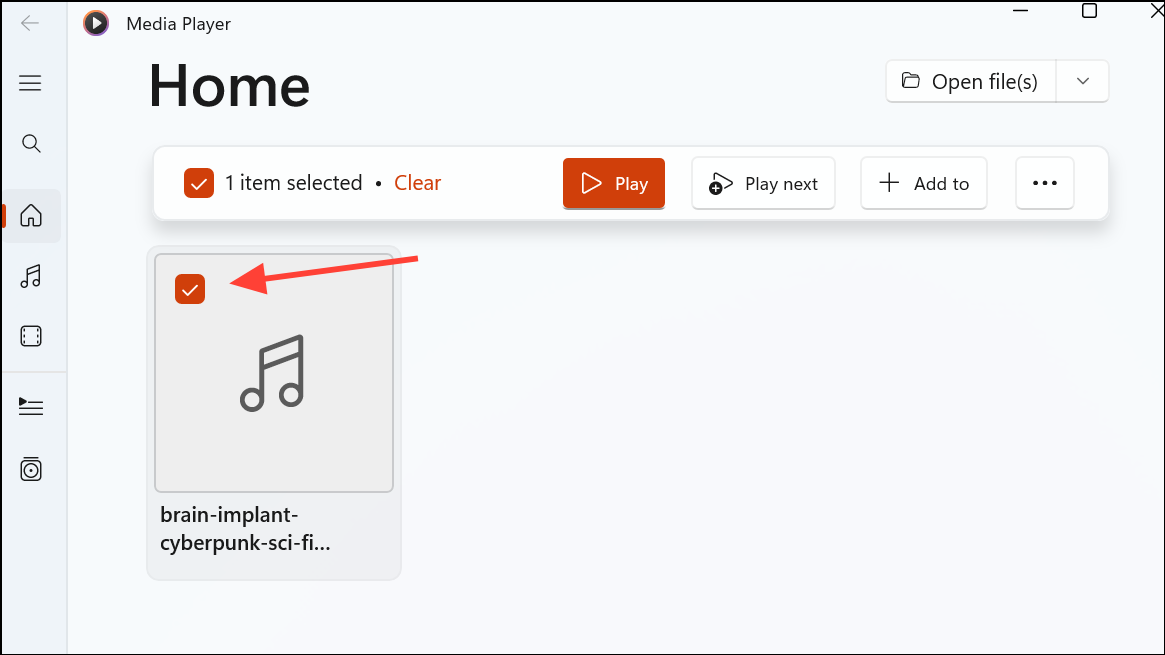
Step 4: After selecting the desired items, click the three dots at the top right and select Remove from the dropdown menu. Alternatively, you can right-click a single item and choose Remove from the context menu. This removes the selected files from the recent media list in Media Player, but does not delete the actual files from your computer.
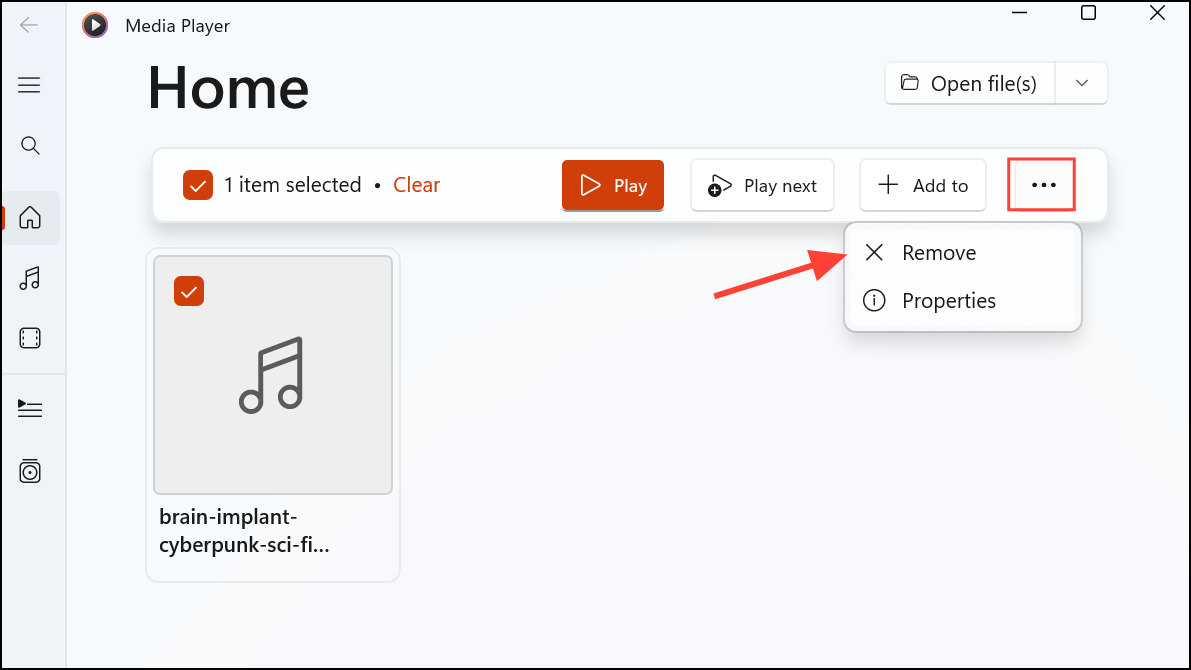
This approach is ideal if you want to selectively remove certain items from your recent history while keeping others accessible.
Clearing the Transcoded Files Cache Folder
Step 1: Open File Explorer and navigate to C:\Users\yourusername\AppData\Local\Microsoft\Media Player\Transcoded Files Cache, replacing yourusername with your actual Windows username. This folder contains cached files that may be referenced in Media Player’s recent history.
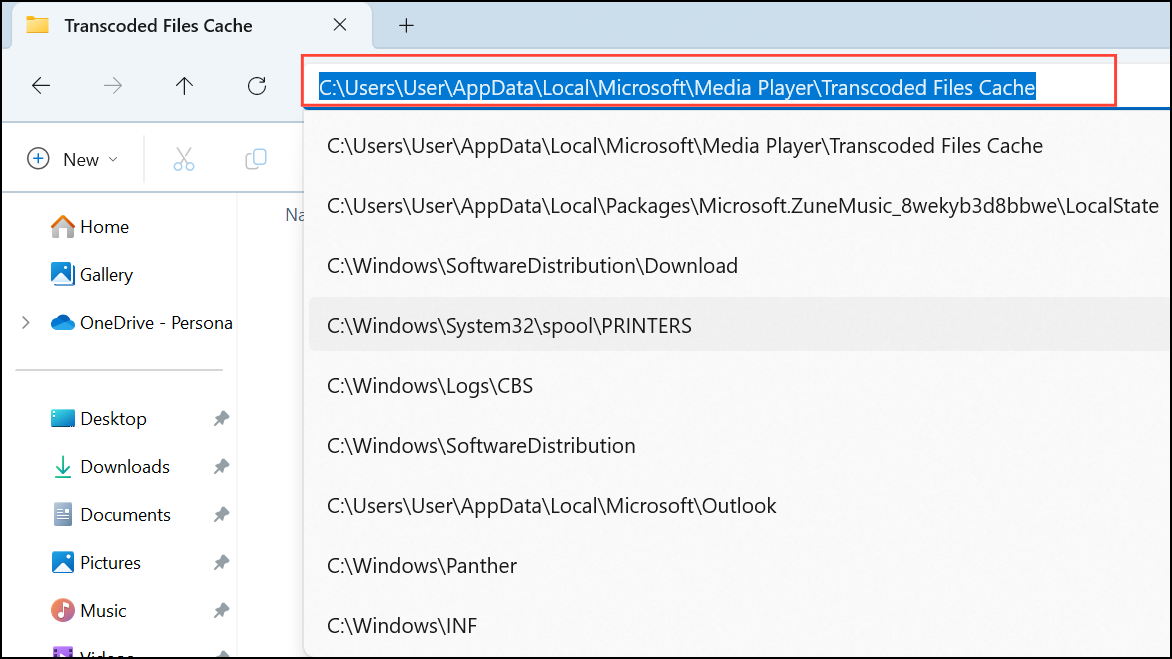
Step 2: Select all files in the Transcoded Files Cache folder and delete them. This action clears cached references to recently played media, which can help further remove traces of your activity from the app.
Regularly clearing this folder can be useful if you frequently play sensitive or temporary files and want to avoid leaving a trail in Media Player’s cache.
Resetting the Media Player App
Step 1: Press Windows key + I to open Windows Settings. Select Apps from the left menu, then click Installed apps or Apps & features.
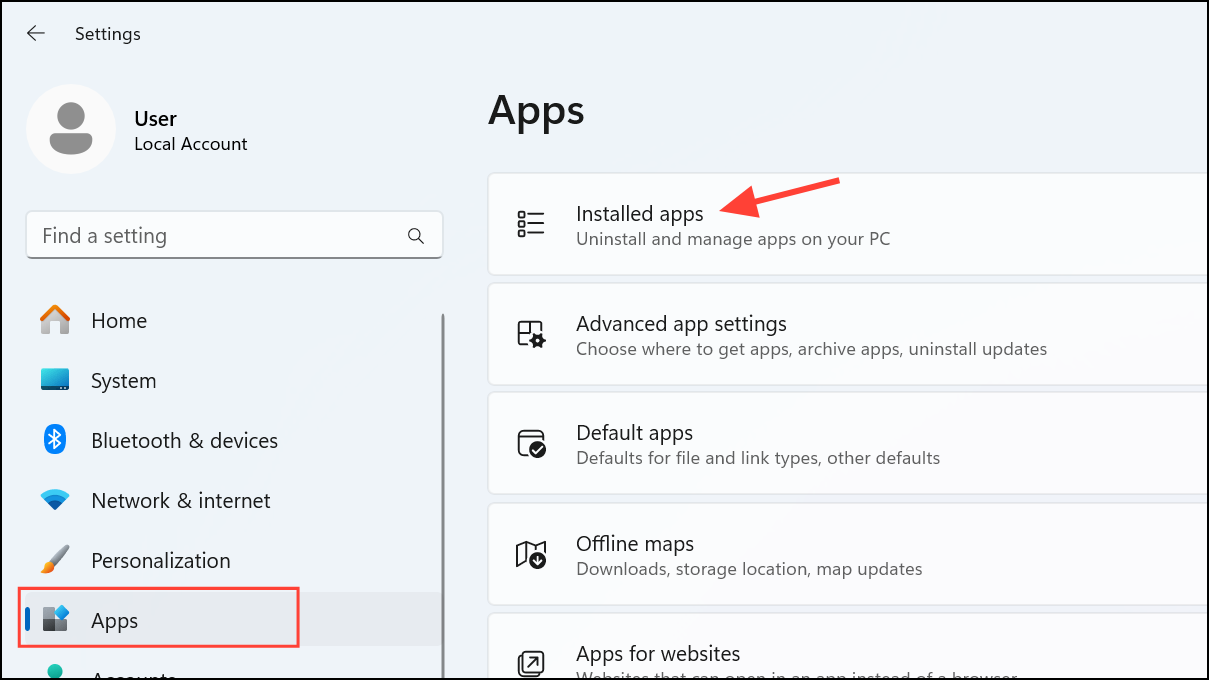
Step 2: Scroll through the list or use the search bar to find Media Player. Click the three-dot menu next to it and select Advanced options (or App settings in some builds).
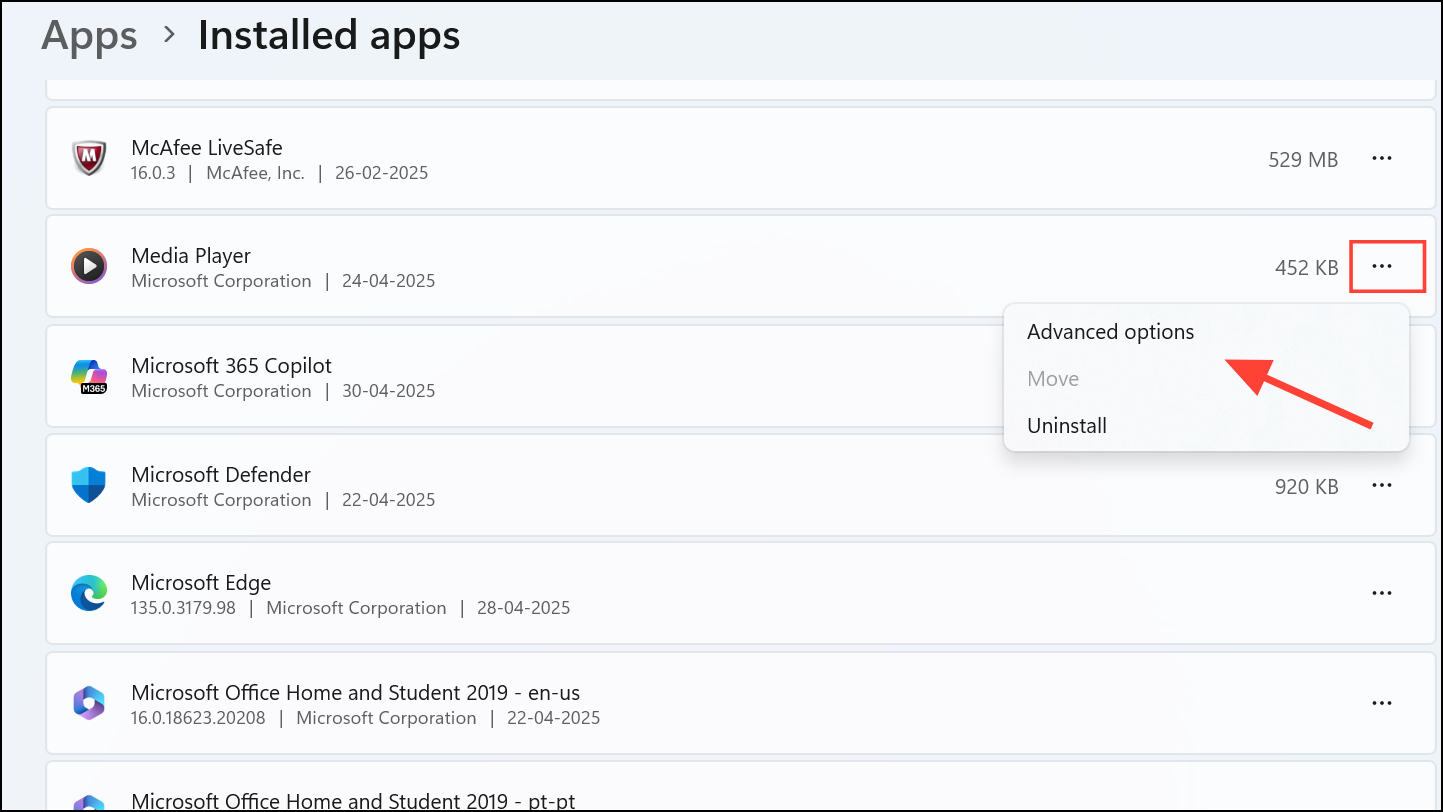
Step 3: Scroll down to the Reset section. Click the Reset button. Confirm your choice when prompted. This process deletes all app data, including recent media history, personalized settings, and playlists, returning Media Player to its default state.
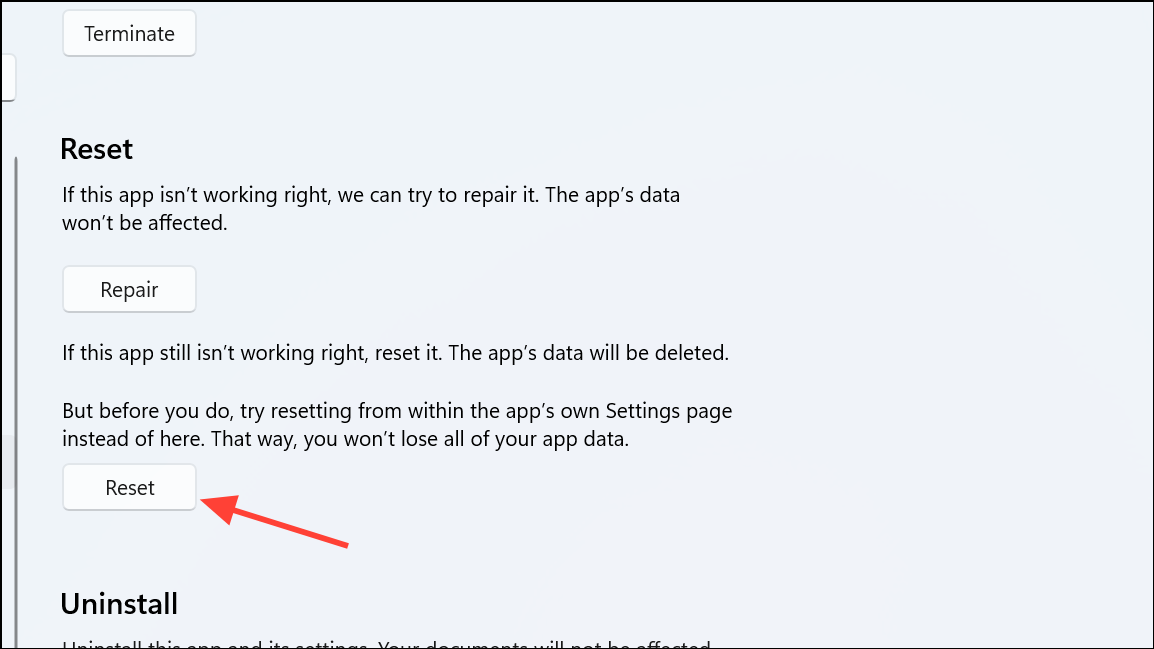
Resetting the app is a comprehensive solution if you want to wipe all traces of your usage and start fresh, but be aware that you will lose any customizations or playlists you have set up.
Additional Options and Privacy Tips
For advanced users, modifying the security permissions of the MediaPlayer.db-wal file to deny write access for all accounts can prevent Media Player from ever saving recent history. However, this approach requires careful handling of file permissions and may cause unexpected behavior in the app.
- Disable recent media tracking in Media Player’s settings if the option is available.
- Clear recent file lists in File Explorer’s Quick Access to further reduce traces of played files.
- Set up separate Windows user accounts for different people to keep media histories private.
- Periodically clear or reset the app if you frequently handle sensitive files.
By using these methods, you can control what Media Player remembers and displays, improving privacy and keeping your media browsing experience uncluttered.
Removing files from Media Player in Windows 11 is straightforward with the right method, whether you want to clear a few items or block history tracking entirely. Regular maintenance ensures your media library stays private and organized.

