Windows has had hibernation support since Windows 95. The feature helps users turn off their PCs while keeping opened files and apps in the same state. Hibernation is a must have feature for laptops running on battery as it can save work in an event of unexpected shut down of the system.
However, if you’re on a PC and Windows 10 hibernation is troubling you, you may want to disable hibernation on your PC.
There are two ways to disable hibernation on a Windows 10 PC. You can use the Command Prompt window or you can hack into the Registry Editor to disable hibernation on your system.
Use CMD to Disable Hibernation in Windows 10
Note: To disable hibernation from the command line, you must be signed into the PC with an administrative account.
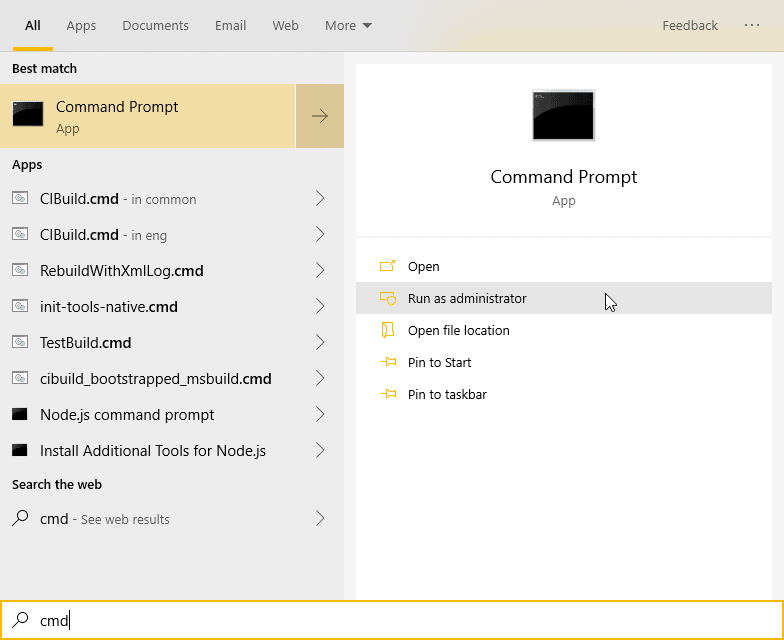
Open Start menu, type CMD, then click Run as administrator on the right panel.

Once the Command Prompt window is open, type/paste the following command into CMD and hit Enter on your keyboard.
powercfg –h off
That’s it. Hibernation is now disabled on your Windows 10 PC. If you ever wish to turn it back on, issue the powercfg -h on command in CMD.
Use Registry Editor to Disable Hibernation in Windows 10
The CMD method to disable hibernation in Windows 10 is the easiest way to do it. However, if you weren’t able to turn off hibernation using CMD, you can hack into the Registry values of your system to disable hibernation.
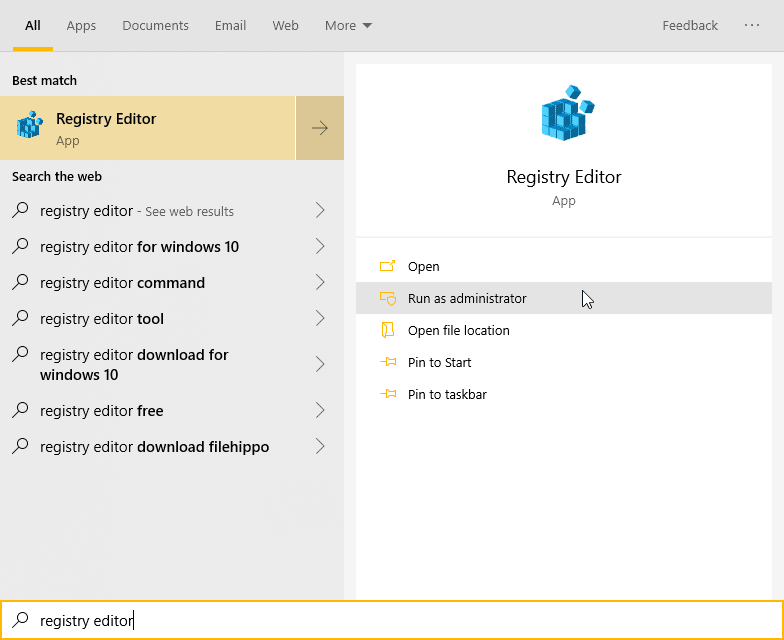
Open Start menu, type Registry Editor, then click Run as administrator on the right panel.

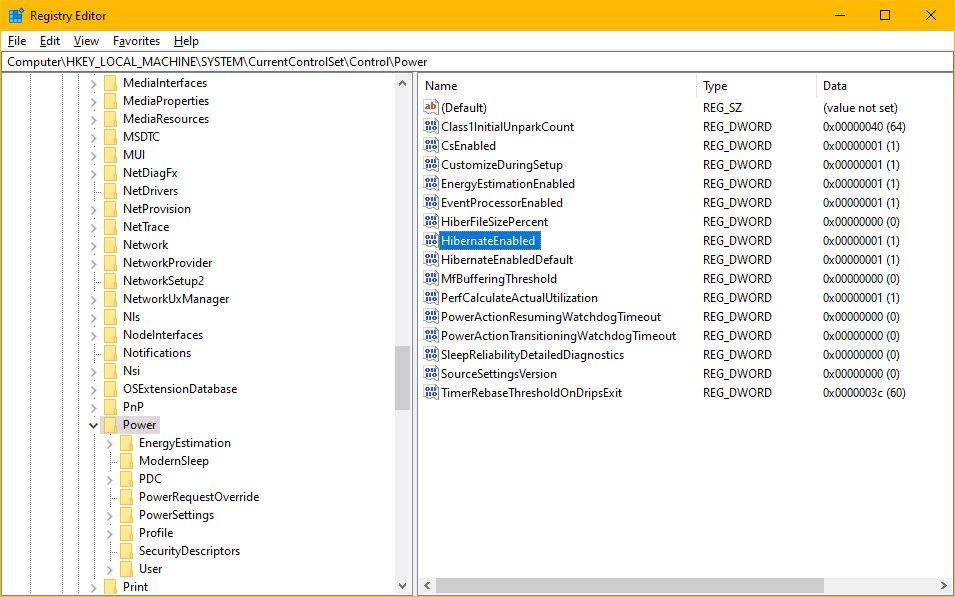
In the Registry Editor window, go to the ComputerHKEY_LOCAL_MACHINESYSTEMCurrentControlSetControlPower address. You can copy/paste the address directly in the Registry Editor window address bar.

Once you’ve navigated to the Power Options registry values, find the HibernateEnabled value and double-click to open it.

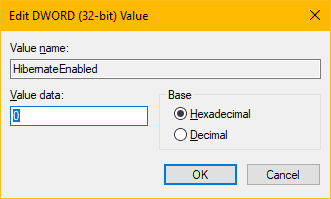
Change the value to 0 in Value data and click the OK button to disable hibernation on your PC.

If need be, restart your PC to apply the changes made in the Registry Editor.

