
Windows 11 requires Trusted Platform Module (TPM) version 2.0 and Secure Boot to be enabled on your system to ensure hardware-based security and system integrity. Activating these features involves accessing your computer’s BIOS or UEFI settings and adjusting specific configurations. This process strengthens your system’s defense against unauthorized access and malware by securing the boot process and protecting cryptographic keys.
Checking TPM 2.0 and Secure Boot Status
Before enabling TPM 2.0 or Secure Boot, verify whether your system supports and currently has these features enabled.
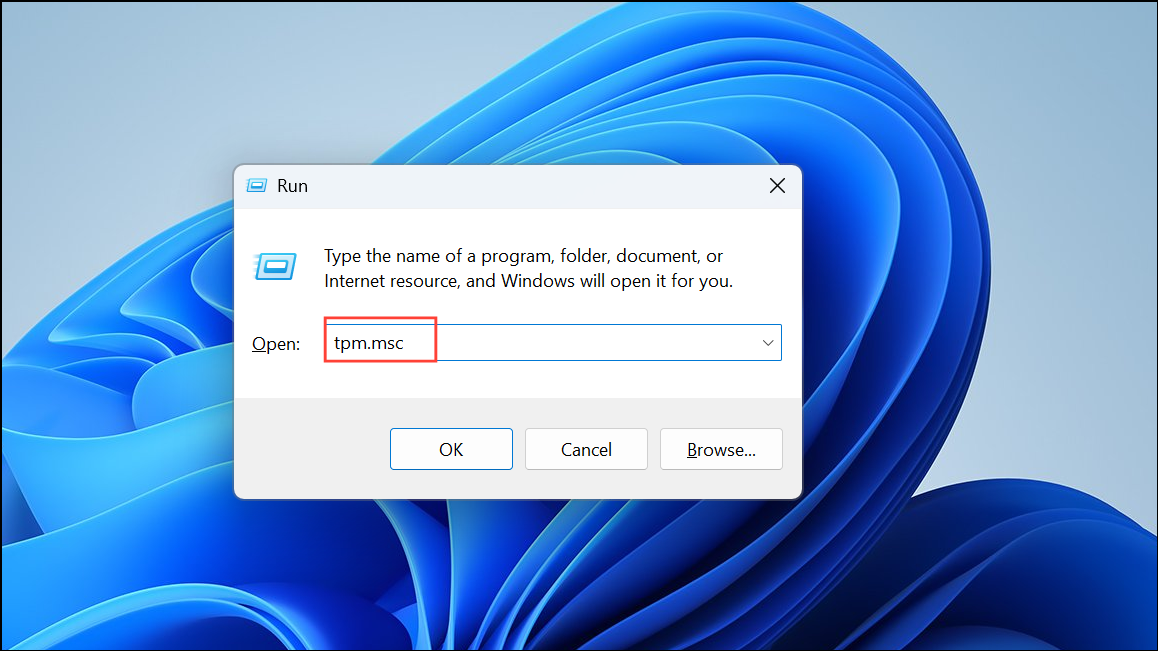
Check TPM 2.0 Status: Open the Run dialog by pressing Windows + R. Type tpm.msc and press Enter to launch the TPM Management Console. If TPM is present, the console will display its status and the specification version under “TPM Manufacturer Information.” Look for version 2.0 to meet Windows 11 requirements. If TPM is not found, it might be disabled in BIOS or your system may lack the module.
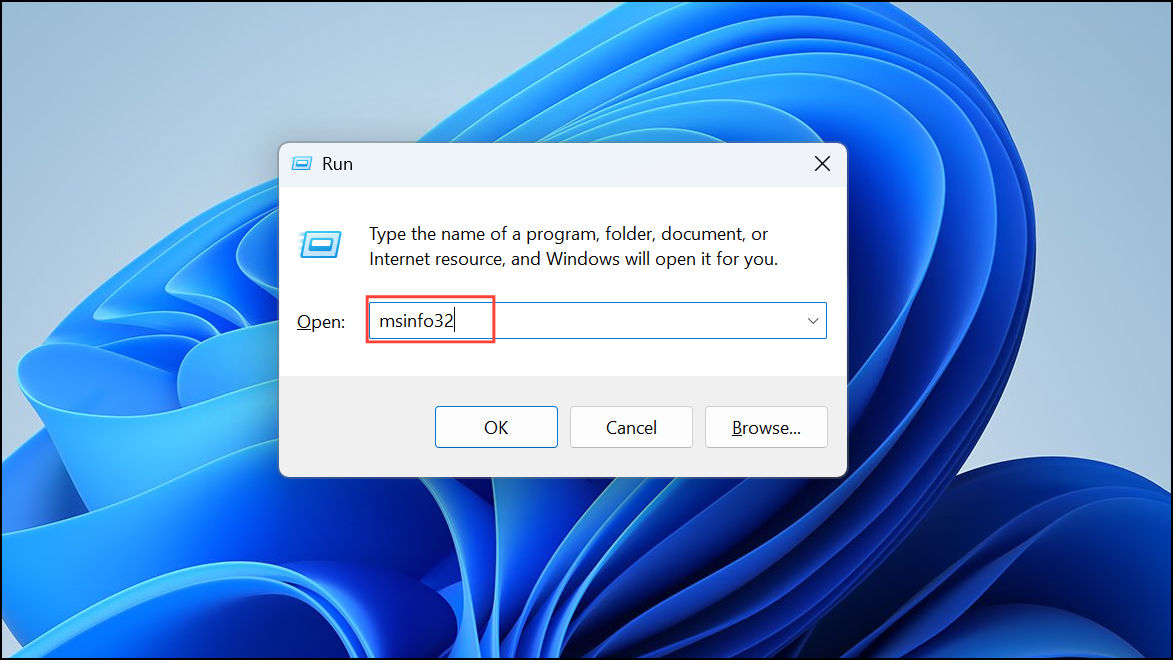
Check Secure Boot Status: Open the Run dialog (Windows + R) and enter msinfo32 to open System Information. On the right pane, locate “Secure Boot State.” It will indicate “On” if Secure Boot is enabled or “Off” if disabled.
Enabling TPM 2.0 in BIOS/UEFI
Enabling TPM 2.0 typically requires modifying firmware settings. The exact steps vary by manufacturer and motherboard model, but the general process is as follows.
Step 1: Save all your work and restart your computer.
Step 2: During the boot-up process, press the key to enter BIOS/UEFI setup. Common keys include Delete, F2, F10, or Esc. The correct key is often displayed briefly on the screen during startup.
Step 3: In the BIOS/UEFI interface, navigate to the section labeled Security, Advanced, or Trusted Computing. The location and naming depend on your system’s firmware.
Step 4: Locate the TPM setting. It may appear under names such as “TPM Device,” “TPM State,” “Security Device Support,” or platform-specific terms like “Intel PTT” (Platform Trust Technology) for Intel CPUs or “AMD fTPM” for AMD CPUs.
Step 5: Change the TPM setting from Disabled or Off to Enabled or On. If there are multiple TPM-related options, ensure the device is both enabled and activated.
Step 6: Save your changes and exit BIOS/UEFI. This is usually done by pressing F10 and confirming the save. Your computer will restart.
Step 7: After rebooting, repeat the TPM status check (tpm.msc) to confirm TPM 2.0 is now enabled and ready.
Enabling Secure Boot in BIOS/UEFI
Secure Boot complements TPM 2.0 by validating the integrity of the boot process. Enabling it ensures only trusted software loads during startup.
Step 1: Restart your computer and enter the BIOS/UEFI setup using the appropriate key as described previously.
Step 2: Navigate to the Boot, Security, or Authentication tab, depending on your BIOS layout.
Step 3: Find the “Secure Boot” option. If it is disabled or greyed out, first locate and disable “CSM” (Compatibility Support Module) or “Legacy Boot” to allow UEFI mode, which is required for Secure Boot.
Step 4: Set “Secure Boot” to Enabled.
Step 5: Save the changes and exit BIOS/UEFI, typically by pressing F10 and confirming.
Step 6: Once the system restarts, verify Secure Boot is enabled by reopening the System Information tool (msinfo32) and checking the “Secure Boot State.”
Troubleshooting Common Issues
If TPM 2.0 or Secure Boot does not appear available or cannot be enabled, consider the following:
- Ensure your BIOS/UEFI firmware is updated to the latest version provided by your motherboard or system manufacturer. Firmware updates often add or improve support for TPM and Secure Boot.
- Some systems may require physically installing a TPM module on the motherboard if only hardware TPM is supported and not firmware TPM.
- Be cautious when clearing or resetting TPM in BIOS, as this can erase stored cryptographic keys and data.
- If Secure Boot cannot be enabled, confirm that CSM or Legacy Boot is disabled and that your operating system supports Secure Boot.
- Consult your motherboard or PC manufacturer’s documentation for specific instructions related to your hardware model.
Backing up important data before modifying BIOS settings is recommended to prevent data loss in case of unexpected issues.
Enabling TPM 2.0 and Secure Boot unlocks your system’s compatibility with Windows 11 and establishes a stronger security foundation. With these features activated, your system will validate boot integrity and protect sensitive information, helping to defend against unauthorized access and malware.