
Theodora, Queen of Saramis, is built to stand at the front and refuse to move. She carries the highest HP growth in the game alongside strong Strength and a 30% chance to halve any hit she takes, which lets her soak enemy phases while still swinging a spear and throwing out ranged Blaze Arts. Her one real weakness is accuracy and doubling, so the whole build is about patching Speed and Dexterity early and then leaning into her role as a tanky frontline healer.
Quick answer: Train her through Soldier, detour into Archer for the Crescendo ability, then settle into Guardian, promote to Sentinel, and finish as her divine class, The Trident.
Theodora’s growth rates and role
Her stat spread decides everything about the build. She wants to tank physical hits and heal, not out-speed enemies. Strength is her main offensive stat, which means she is a poor fit for pure black magic even though she can cast basic offensive spells. The numbers below exclude class bonuses.
| Stat | Growth | Stat | Growth |
|---|---|---|---|
| HP | 70% | Dex | 40% |
| Str | 50% | Def | 40% |
| Mag | 30% | Res | 30% |
| Spd | 40% | Lck | 30% |
| Cha | 50% |
That HP growth is the highest of any unit, which is why she survives where others fold. The trade-off is the 40% Speed and 40% Dexterity, enough to cause missed attacks and lost doubles on Hard Mode. Her preferred skills are Authority, White Magic, and Spear, so training along those lines levels her proficiencies fastest. Black Magic is a non-ideal skill and ranks up slowly.
Class progression from beginner to divine
Treat this as a training sequence rather than a rigid climb through promotions. Keep Spear as her focus throughout, learn mastery skills that remain useful later, and remember that after certification, switching among unlocked classes before a map costs nothing. The recommended endgame path is Guardian, followed by Sentinel and finally The Trident.
| Tier | Class | Why |
|---|---|---|
| Beginner | Soldier | Starts her Spear and Heavy Armor base |
| Specialty | Archer | Grants Crescendo to fix low hit rate |
| Advanced | Guardian | Spear mastery plus white magic healing |
| Master | Sentinel | Doubles white magic uses, adds Resolute Stance |
| Divine | The Trident | Triples white magic stock, grants Def+10 |
Specialty tier: patch her accuracy and speed
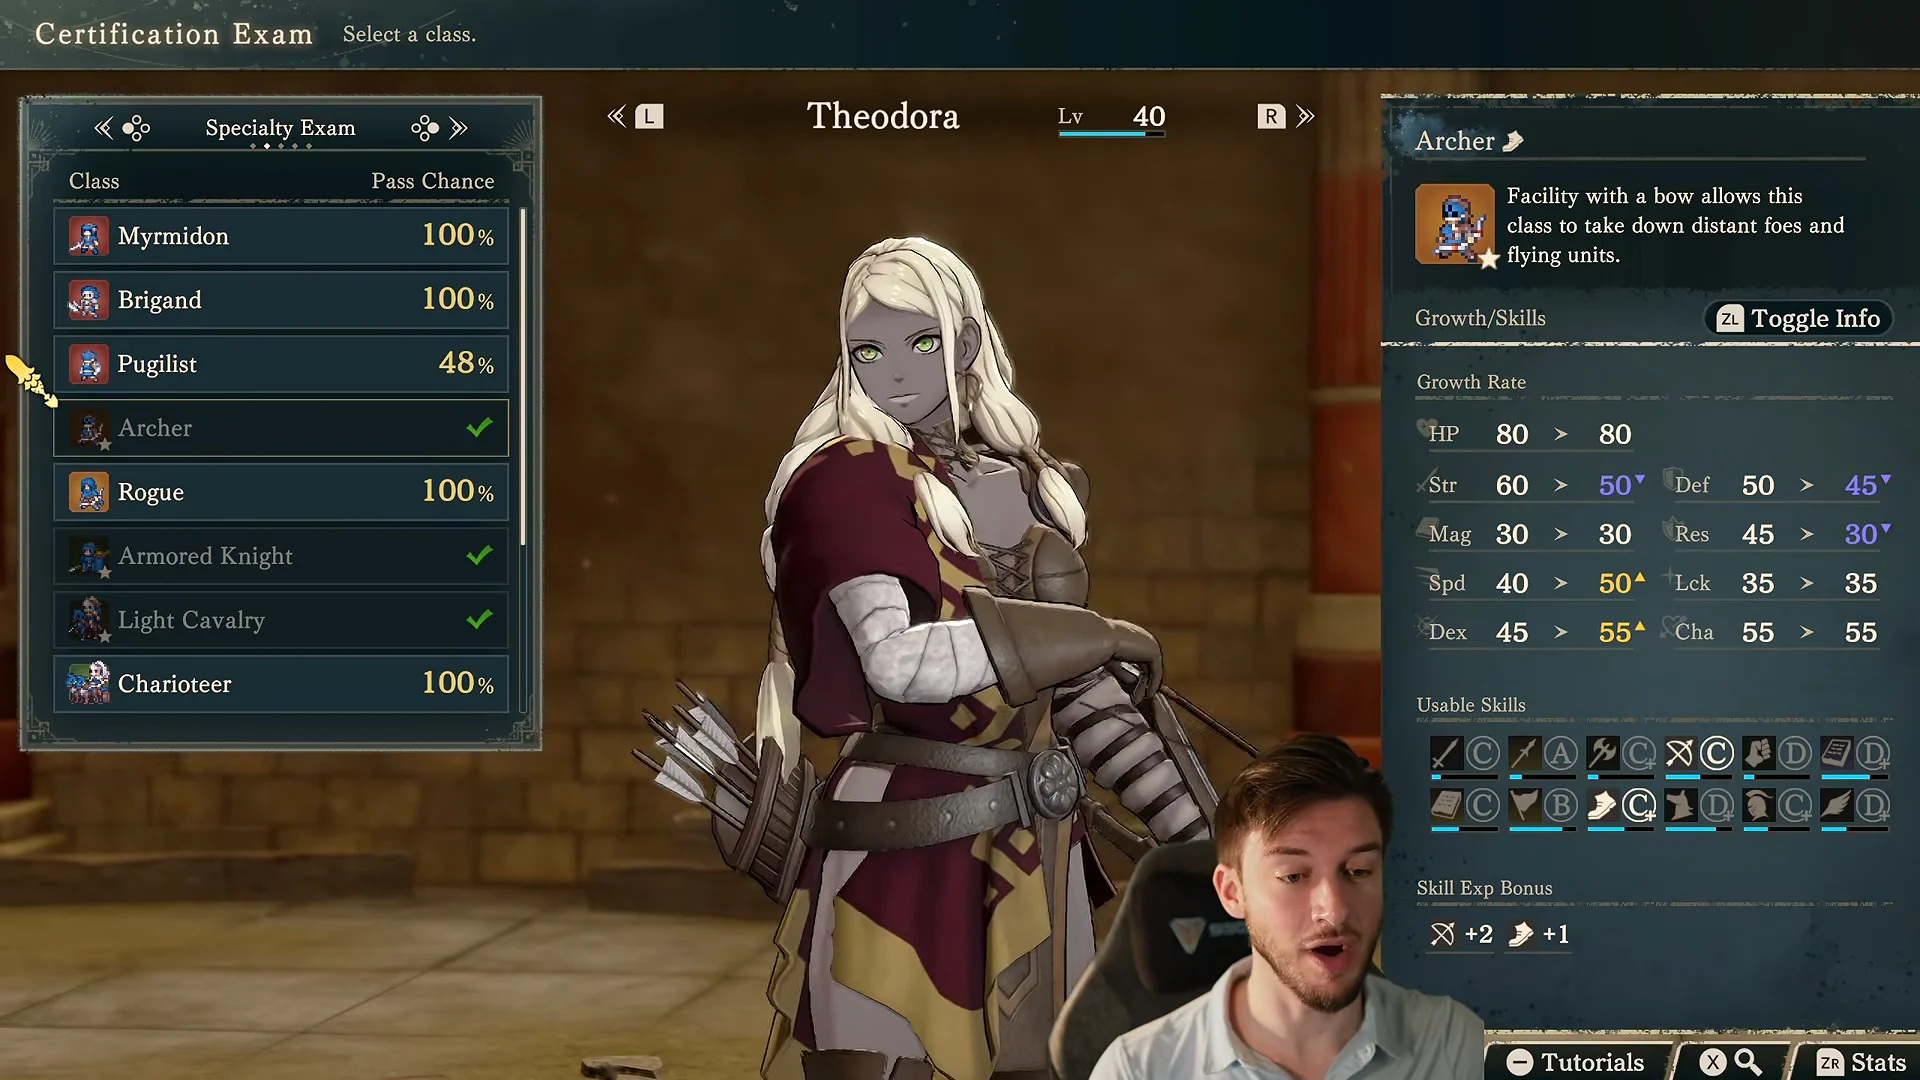
Route her through Archer to earn Crescendo, which grants Hit+3 after each kill up to a maximum of +30 for the rest of the map. That permanently offsets the accuracy penalties on her heavy combat arts without diluting her defensive growth. Leveling her through Archer at the Inn using inn experience is the quick way to reach it.
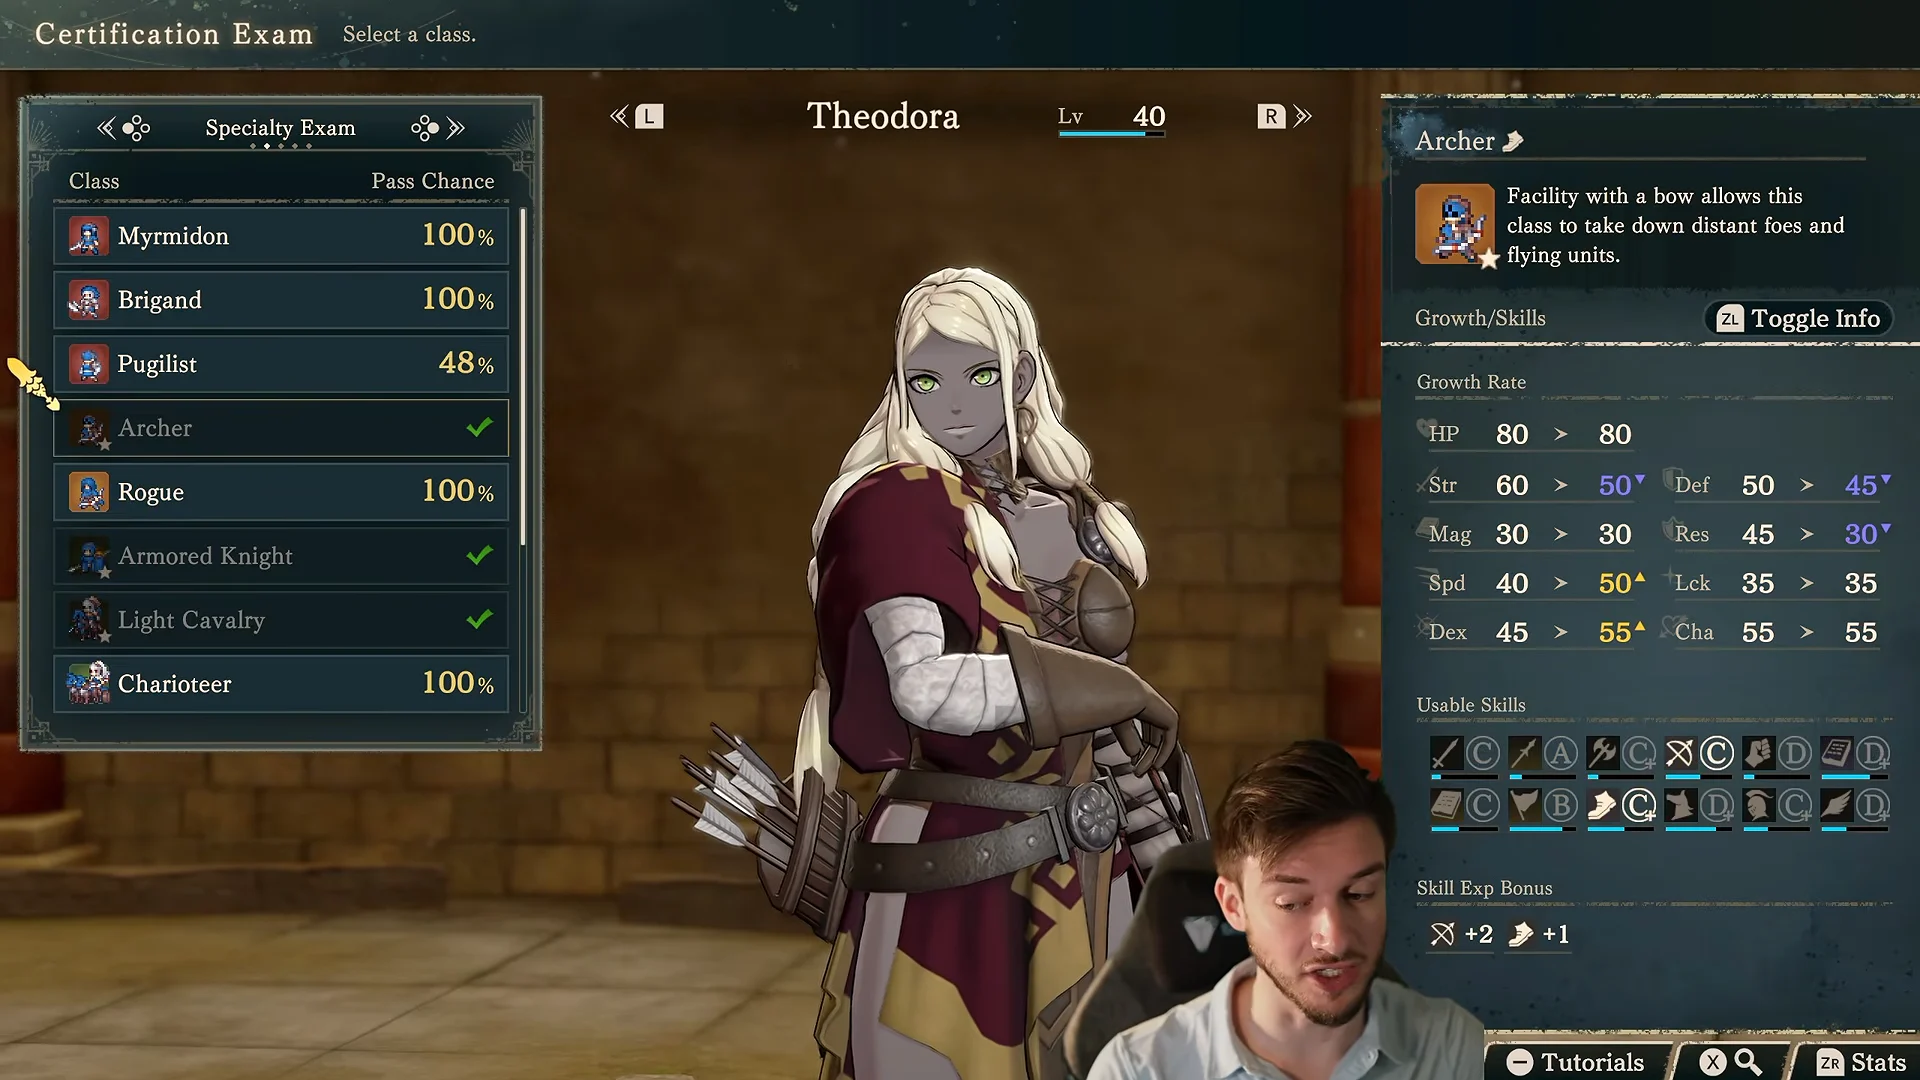
If you would rather fix doubling than hit rate, Myrmidon is the alternative. It carries a higher Speed growth while keeping spear capability, which helps her double more often on harder maps. Armored Knight is also worth a dip to develop her main weapon and pick up Great Counter, and Light Cavalry opens a mounted branch if you want the option to reclass for sprawling maps later.
Advanced tier: Guardian for healing and defense
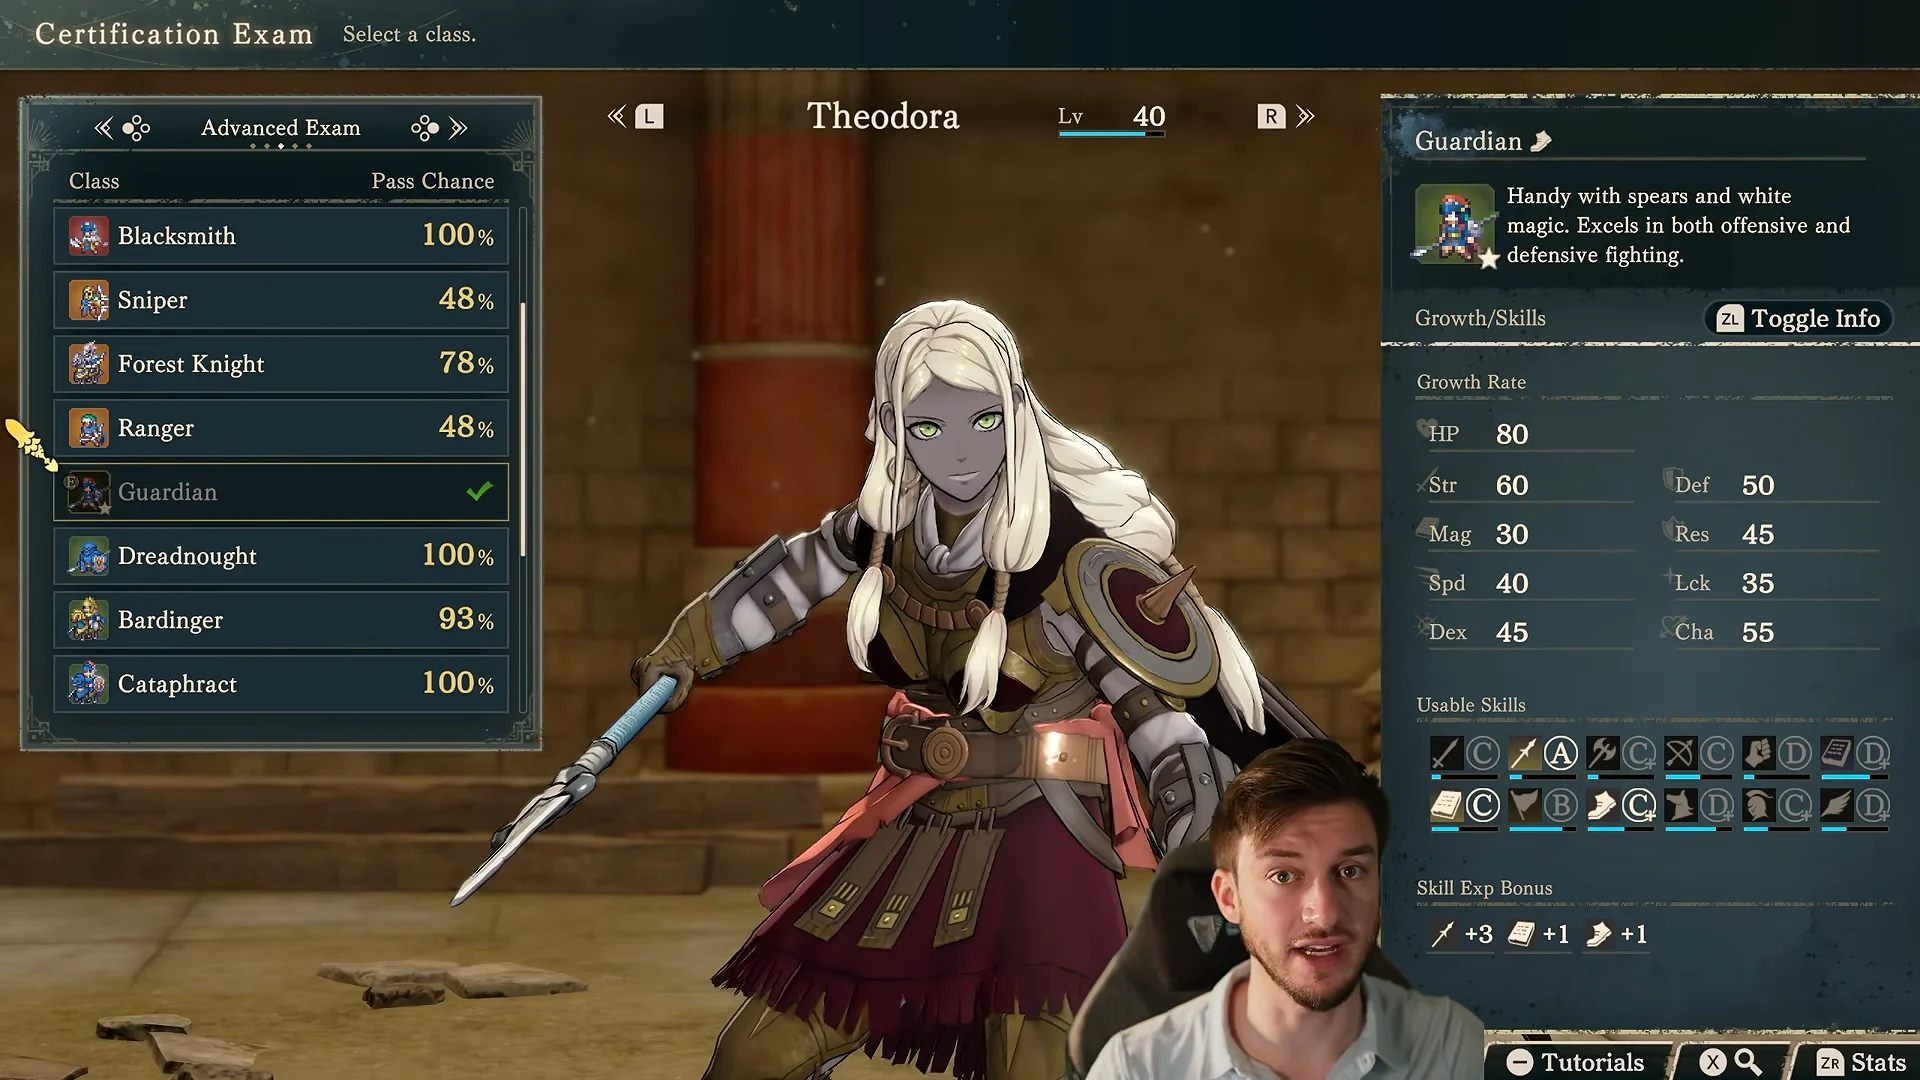
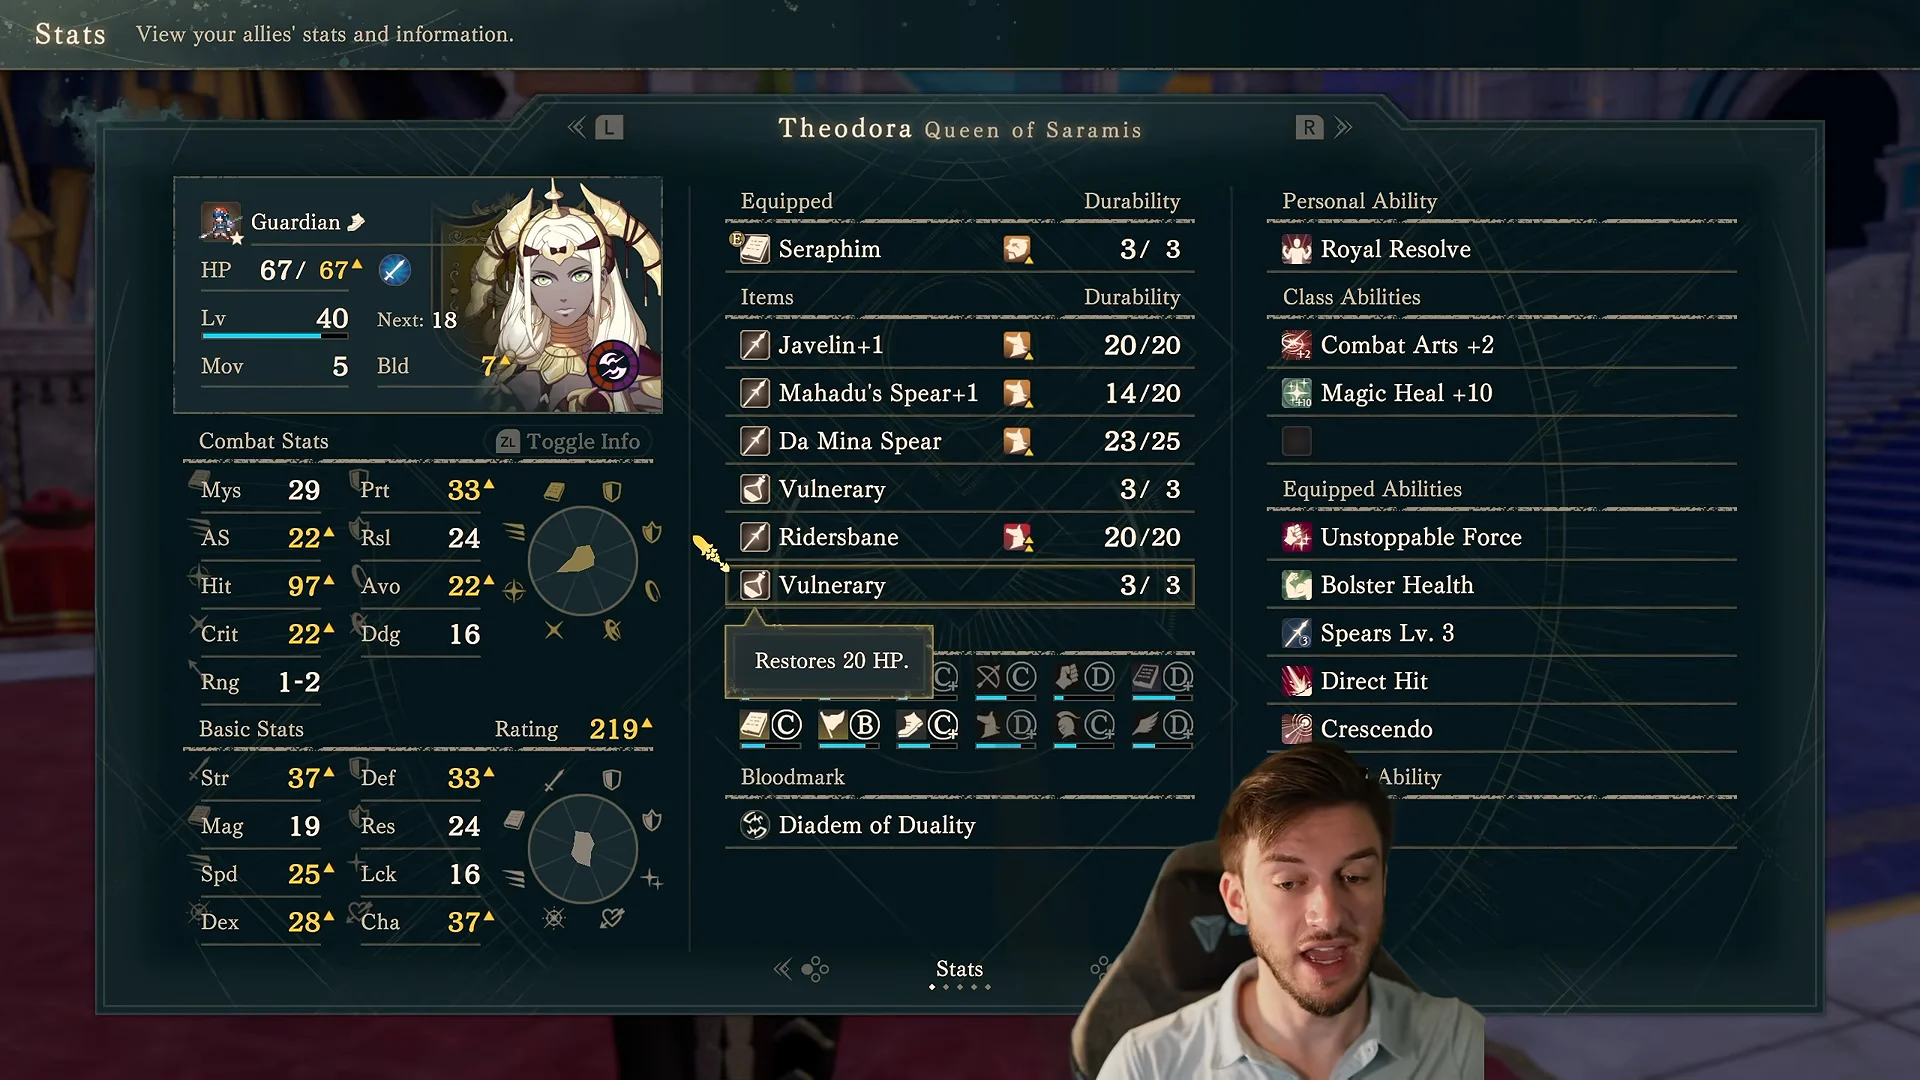
Guardian is her established advanced class, combining B-rank Spear mastery with access to white magic. It grants Combat Arts +2, Magic Heal +10, and Brace, a mastery ability that gives her Prt+3 after a kill until her next phase. This makes her a frontline bulwark who can heal as well. For a dedicated Part 1 tank, choose Dreadnought instead; Cataphract is also available on her route as an armored cavalry choice.
Master tier: Sentinel
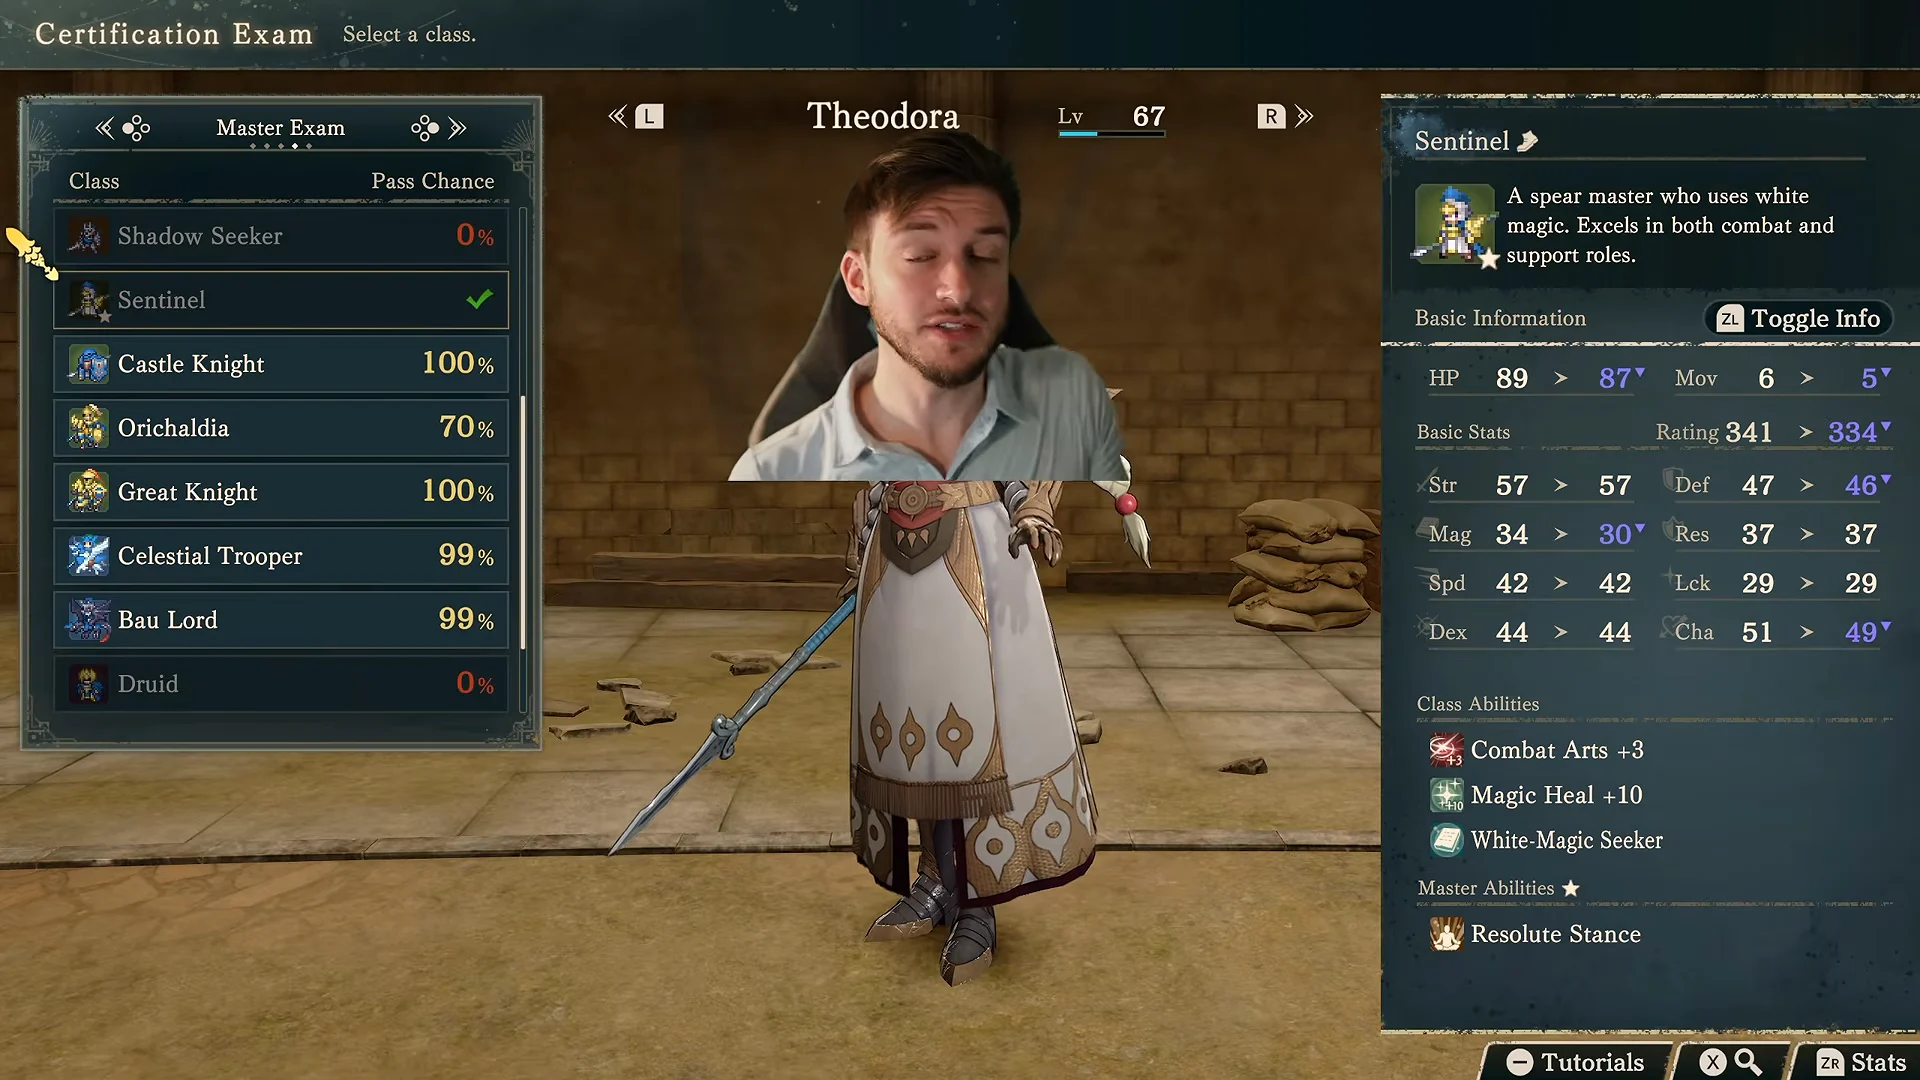
Sentinel is the master-tier pick. It upgrades her to Combat Arts +3, keeps Magic Heal +10, and adds White-Magic Seeker to double her white magic uses. Its mastery ability, Resolute Stance, grants Shld+5 during combat while she is at full HP. Two classes are worth dipping into purely for their mastery abilities before you certify: Castle Knight for Intercept, which cuts 5 flat damage from every hit, and Orichaldia for Fierce Spear, which stops enemies from making follow-up attacks against her.
Divine tier: The Trident
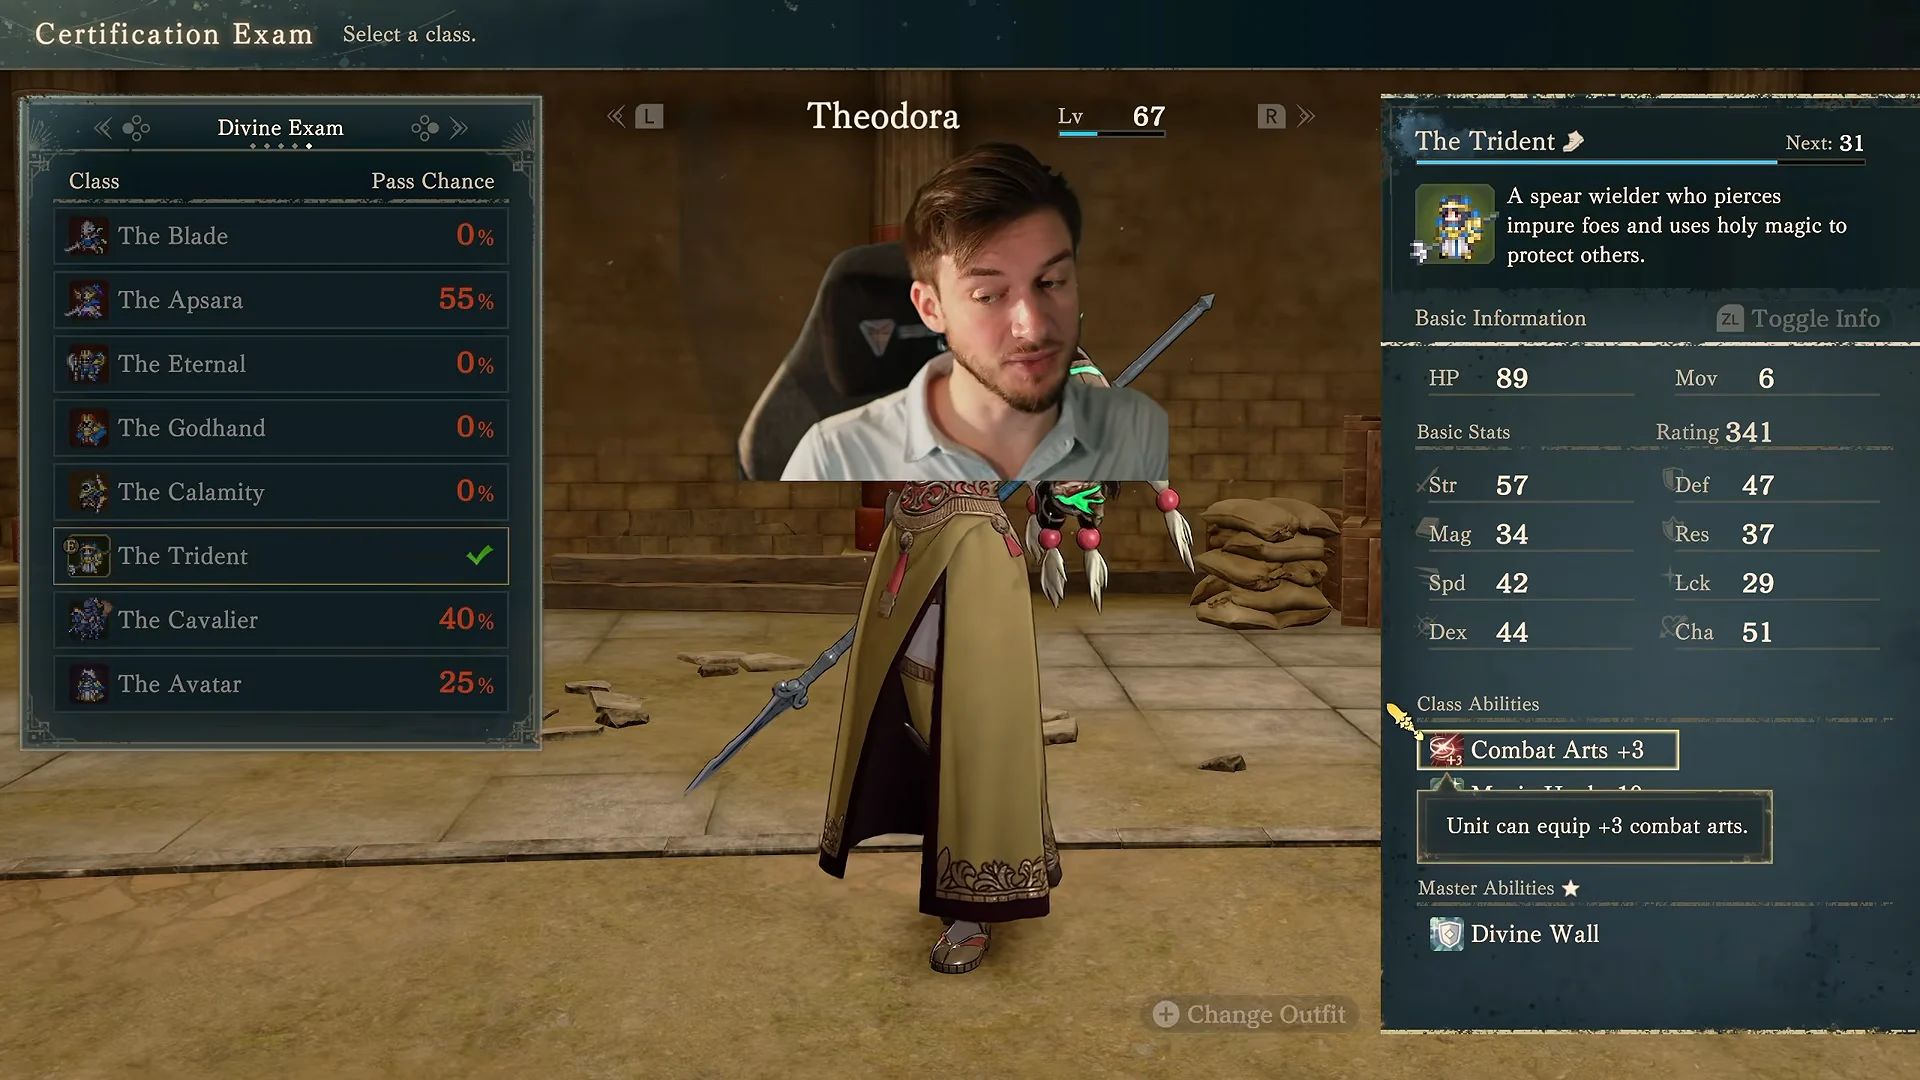
The Trident is Theodora’s unique final promotion, featuring S-rank Spear. It retains Combat Arts +3 and Magic Heal +10, and adds White-Magic Zenith to triple her white magic uses. Its mastery skill, Divine Wall, provides a flat Def+10. With three times the healing stock and extra Defense, she can stay on the front line healing without often running out.
Personal ability, Blaze Arts, and white magic
Her personal ability, Royal Resolve, gives a 30% chance to take half damage when attacked. Combined with Guardian-line Defense and her HP pool, it is the core of her survivability, and it stacks with Intercept and Divine Wall as you add them. Her bloodmark, the Diadem of Duality, grants Atk+3 on attack at a 25% trigger.
Her Blaze Arts can hit foes well beyond melee range. Earthen Throw covers 1-5 range for a low Blaze cost, while Earthen Hurl, learned at Level 20, reaches 1-7. Level 35 unlocks Dazzling Comet, a piercing attack that always hits an entire line and is usable once per map. Underworld Calm resets the Blaze Gauge to zero when you need to manage it. Direct Hit is learned at Level 5 and gives Blaze Arts a 30% chance to deal +10 damage.
Buy training manuals from vendors to raise her Faith proficiency quickly. Across three towns, you can get up to 10 White Magic manuals per chapter. Physic, a long-range healing spell, unlocks at rank B; Aura is learned at rank S.
Endgame build: abilities, arts, and gear
A finished Theodora as The Trident around Level 67 reaches roughly 89 HP, 60 Strength (adjusted), 42 Speed, and 47 Defense, with a combat rating near 354. Crescendo carries her Hit well past 130, so accuracy is no longer a concern once her stacks build.
Equip these abilities and combat arts:
- Abilities: Crescendo, Direct Hit, Resolute Stance, Infantry Move, Spearfaire.
- Combat Arts: Tempest Spear+, Armored Blow+, Protective Storm, Brilliant Strike+.
- Spearfaire adds Hit/Avo+10 and Atk+5 while a spear is equipped.
- Infantry Move cuts terrain movement cost by 1, so rough ground slows her less.
For weapons, keep a spread for coverage and effective hits: Mahadu’s Spear+4, Da Mina Spear+3, Pilum+3, Halberd+3, and Ridersbane+3 against cavalry, plus a Concoction for emergencies. Her spell slots hold Fire, Thunder, Seraphim, Heal, and Physic. During Part 1, a lighter loadout of Javelin+1, Mahadu’s Spear+1, and Da Mina Spear works fine, backed by a Killing Edge and a couple of Vulneraries.
Mahadu’s Right Arm, her personal arm, gives Str+6 and raises her physical output well beyond that of a typical tank. Spears such as Mahadu’s Spear and Da Mina Spear lose durability quickly, but smithing stones are plentiful; repair them freely instead of saving your stones.
The support team around Theodora
Theodora anchors her army as a wall, so the roster exists to feed her kills, cover her flanks, and clear threats before they reach the line. Five units form the core.
| Unit | Class | Role |
|---|---|---|
| Bonaventure | Ovate | Magic damage and Hit aura |
| Tobias | Brigand | Axe physical bruiser |
| Lysander | Bardinger | Mobile debuffer |
| Lilian | Archer | Single-target sniper |
| Sofia | Bishop | Dedicated healer |
Bonaventure is the main offensive caster and a buffer. Give him wind and ice spells like Cutting Gale, Wind, Blizzard, and Ice Blade alongside Steady Shot and Additional Intel+, which has a 30% chance to grant adjacent allies Hit+20 in combat. His personal Sage Advice gives nearby allies Dex+3, so keeping him close to the front sharpens the whole group’s accuracy.
Tobias fills the axe damage role. His All-Out Attack has a 30% chance to multiply combat art damage by 1.3, and his personal Power Arts adds further attack, helping him finish bulky enemies. Add Absolute Defense and Regroup to improve his staying power.
Lysander is built to harass foes from horseback. Distraction cuts an enemy’s Hit by 3, while each kill with Accelerate+ adds Spd+2, up to a +10 maximum, shaping him into a fast finisher. Knightly Senses and Racing Attack also help him maneuver into position to eliminate isolated targets.
Lilian can attack fliers and mages from range. For her skills, take Steady Shot and Upper Hand, along with Read the Winds; round out the setup with Crescendo and Curved Shot. Her personal skill, Safety First, adds Hit+10 whenever an enemy cannot counter, making chip damage and finishing blows reliable.
Sofia serves as the dedicated healer. Distant Healing+ extends heal spell range by 2, while her personal Healing Knowledge restores another 10 HP, allowing her to use Physic from safety. Blizzard provides occasional chip damage when no one needs healing.
For bench slots, rotate in Noctula (Pugilist) for close-range Strength pressure with Qiankun Circles, Alexandra (Wing Soldier) to hunt enemy mages with Soar and Protecting Wings, and Dante (Shaman) for Thunder magic. Seteth, Dadao, and Ninae also serve as serviceable fillers for larger deployments.
Battalions, gambits, and blessings
Battalions are assigned to units only on Theodora’s route. Each grants bonus stats and a Gambit with limited uses per battle. Mage Instructors offer Scattering Ice, an X-shaped AoE, and Adept Archers have Disturbing Volley to immobilize dangerous foes. Priest Trainees can heal a group with Splash Recover, while Alecto Morningstars provide extra burst through All-Out Offensive. Units on mounts are unable to equip Battalions.
For blessings, Kalla’s Blessing grants Avo+50, Spd+5, and Mov+2 for one turn at a cost of 20 Divine Sand, useful for repositioning or dodging a turn of aggression. Jurah’s Blessing neutralizes a foe’s effective damage and blocks follow-ups and criticals for just 7 Divine Sand, a cheap safety net when Theodora holds a choke.
How to play the team
The composition plays around Theodora absorbing aggro while support buffs and cleans up behind her. Positioning is what makes it work.
The build is working as intended if Theodora gets through the enemy phase while her Crescendo Hit stacks rise and her Blaze Arts connect reliably. A smooth skirmish—for instance, a six-turn run through Axion Gorge near Dagsion—will usually see Theodora earn stage MVP.