
A lot of people have been using Cisco Webex to hold video conferences and connect virtually these past few months. Webex has been the app of choice for many users due to the features and security it offers.
But whether you are using Webex to attend office meetings, online classes for school, or just to connect with friends and family, the whole appeal of these apps is that you can have a face to face connection. We crave connection, and although we can’t have a connection in the physical world right now, video is the closest thing. And if something goes wrong with this dimension – well, there isn’t much point left, is there?
But fret not. There are a lot of fixes you can try if your video ever stops working on Webex. Lets sally forth and see what to do.
Ensure that Webex Has Access to the Camera
Whether you are using the desktop app or the Webex web app to join meetings from the browser, Webex needs access to the camera to display your video. No access, no video – simple as that.
Go to the Windows settings from either the Start menu or by using the ‘Windows logo key + i’ keyboard shortcut. Then, go to the ‘Privacy’ option and click on it.

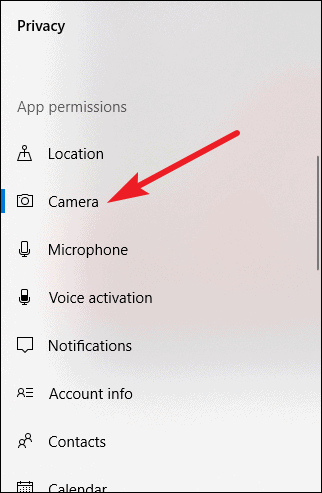
Click on ‘Camera’ under App permissions from the navigation menu on the left to open camera settings.
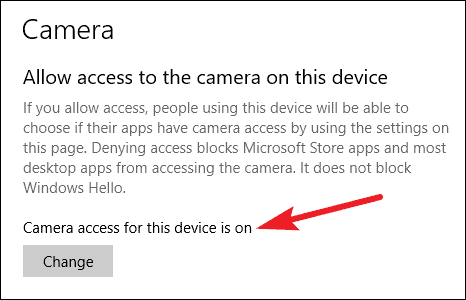
First of all, make sure that under the ‘Allow access to the camera on this device’ section, it says that the ‘Camera access for the device is on’. If it’s off, you’ve found your culprit. Windows will block all access to the camera until this option is on. Click on the ‘Change’ button to turn it on.
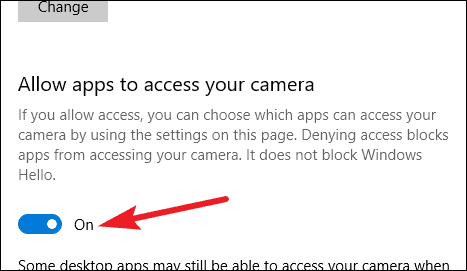
Then, go to the ‘Allow apps to access your camera’ and make sure that the toggle for this setting is on.
Also, scroll down and make sure that the toggle for ‘Allow Desktop apps to access your camera’ is also on.
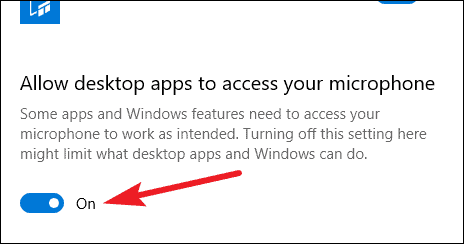
Even if the camera access is on, these parts are just as crucial as any native Windows or Desktop apps need this permission to access your camera.
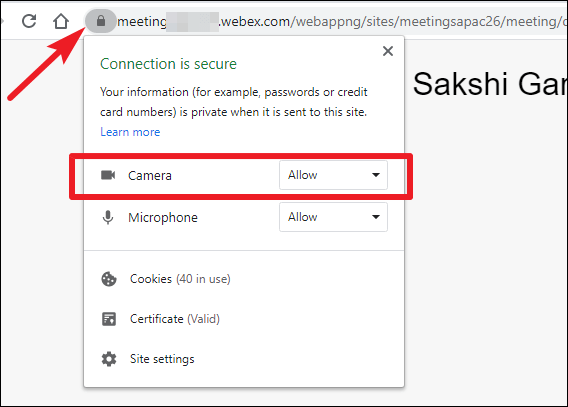
Additionally, if you’re using the Webex web app on the browser, you also need to make sure that the Webex site has permission to access the camera. And there’s a chance you might’ve blocked this permission. After joining the meeting on the browser, click on the ‘Lock’ icon on the left side of the address bar. Then, select ‘Allow’ from the drop-down menu next to the ‘Camera’ option.
Establish that No Other App is Accessing the Camera
This one’s really simple: Two apps cannot access a single resource simultaneously. So, if another app is already using your camera, Webex won’t be able to. If your camera isn’t working in a Webex meeting, make sure that no other app that could be accessing your camera is running in the background.
If your webcam has a light that turns on when it’s in use, you can enlist its help to find out whether the camera is in use. Quit the Webex meeting so that the light won’t be on because of Webex accessing the camera. If the light is still on after you’ve quit the meeting, then some other app is using the camera. Hunt for it and close it and then return to your Webex meeting.
Check Your Anti-Virus Software
Remotely spying on you using your webcam has become one of the sad realities of our time. But it’s a good thing that the Anti-Virus Software have risen to the occasion, and most of them come equipped with Privacy Protection services to protect you. When enabled, it blocks access to the webcam. So you need to make sure that your anti-virus software is not the one causing all the drama.

As every anti-virus software has different interface and controls, a generic how-to guide is not possible for disabling webcam protection.
Restart your PC and Re-install Webex
Before you go any further, you should try the oldest trick in the book: restarting your PC. Restart and check whether the camera started working.
If it doesn’t, uninstall Webex and install it again to get rid of any corrupted files that could be causing the ruckus. These might seem like such simple solutions but most of the time, they work. If you’ve already tried this, skip this and go ahead. It’s time to get the big guns out.
Run the ‘Hardware and Devices’ Troubleshooter
So, you’ve tried the above fixes and ensured that nothing is blocking the access to the camera. So maybe something’s wrong with the camera itself. Running the ‘Hardware and Devices’ Troubleshooter will help you determine if that’s the case.
Open the Command Prompt on your computer and then run the following command exactly as it is:
msdt.exe -id DeviceDiagnosticAs soon as you press the Enter key after typing or pasting the above command, the window for troubleshooting Hardware and Devices will open.
Follow the instructions on the screen to complete the troubleshooting process. If there is indeed a problem with the camera, it’ll come to light, and the Troubleshooter will also show you some tips on how to fix it.
Re-register the Camera Device
If the problem still hasn’t gone away, don’t worry. There are yet some tricks up our sleeves that can help you. Re-registering your camera will basically do what restarting does for your PC. The good old restart trick – classic! But it works most of the time, so what’s the harm in trying. Right?
Right-click on the Start menu button and select ‘Windows PowerShell (Admin)’ from the menu that will open.
A User Account Control prompt will appear, asking whether ‘you want to allow this app [Windows PowerShell] to make changes to your device?’ Click on ‘Yes’ to proceed.
The console for Windows PowerShell will open. Copy/ paste the following command carefully, so there are no changes and press the ‘Enter’ key to run it.
Get-AppxPackage -allusers Microsoft.WindowsCamera | Foreach {Add-AppxPackage -DisableDevelopmentMode -Register "$($_.InstallLocation)\AppXManifest.xml"}
Quit the PowerShell app and check whether the camera started working or not.
Update the Camera Drivers
Drivers are essential parts of the machinery needed to ensure that everything works like clockwork, and yet most of us have never paid any heed to them. That’s because Windows usually takes care of that stuff for us, and automatically updates the drivers. But the possibility that an important update to the drivers might’ve gotten overlooked is not that far-fetched. It can happen, and it could be the problem in your case.
Right-click on the Start menu button, and open ‘Device Manager’ from the menu.
The Device Manager will open, and you’ll find a list of all the devices on your system. Find ‘Cameras’ on the list and click on the arrow next to it to expand the camera device(s) available.
Then, right-click on the camera you use and select ‘Update Driver’ from the context menu.
A window will open. Select the ‘Search automatically for updated driver software’ option. If a newer update for the driver is available that Windows update somehow missed, the Device Manager would download and install it.
Reset the Camera Hardware
This last trick is more of a Hail Mary pass when nothing else works. If this doesn’t get your camera working again either, you’ll need to pay a visit to the repair shop. Open the Device Manager once again, and go to the camera device and right-click on it. Then, select ‘Uninstall Device’ from the menu. A confirmation message will appear on your screen, click on ‘OK’.
Now, go to the ‘Action’ option on the Menu Bar on the top of the Device Manager and click on it. Then, select ‘Scan for Hardware changes’ from the menu.
Wait for the scan to complete and restart your PC. This process will reset your Camera Hardware. Go to Webex and check whether this solved the problem.
If any of the above fixes didn’t help you, the problem could be something that lies beyond the realm of your scope and needs professional attention. In other words, it might be time to pay the repairing store a visit.


