
Windows 11 update processes can halt abruptly with error code 0x80070070 when the system drive runs low on available space. This error blocks installation of updates and new features, leaving your device unable to complete critical system changes. Addressing storage limitations directly not only allows the update to proceed but also improves overall system responsiveness and reliability.
Expand the System Partition to Create Sufficient Space
Expanding the system partition is the most direct way to resolve space-related update errors. This method increases the available storage for Windows updates and essential files, often resolving the error without requiring major file deletions.
Step 1: Download and install a reputable disk partition tool such as EaseUS Partition Master or AOMEI Partition Assistant. These tools provide a graphical interface for adjusting partition sizes without data loss.
Step 2: Launch the partition manager and locate your system drive (typically the C: drive). Review the available unallocated space or identify another partition (such as D:) with free space that can be reallocated.
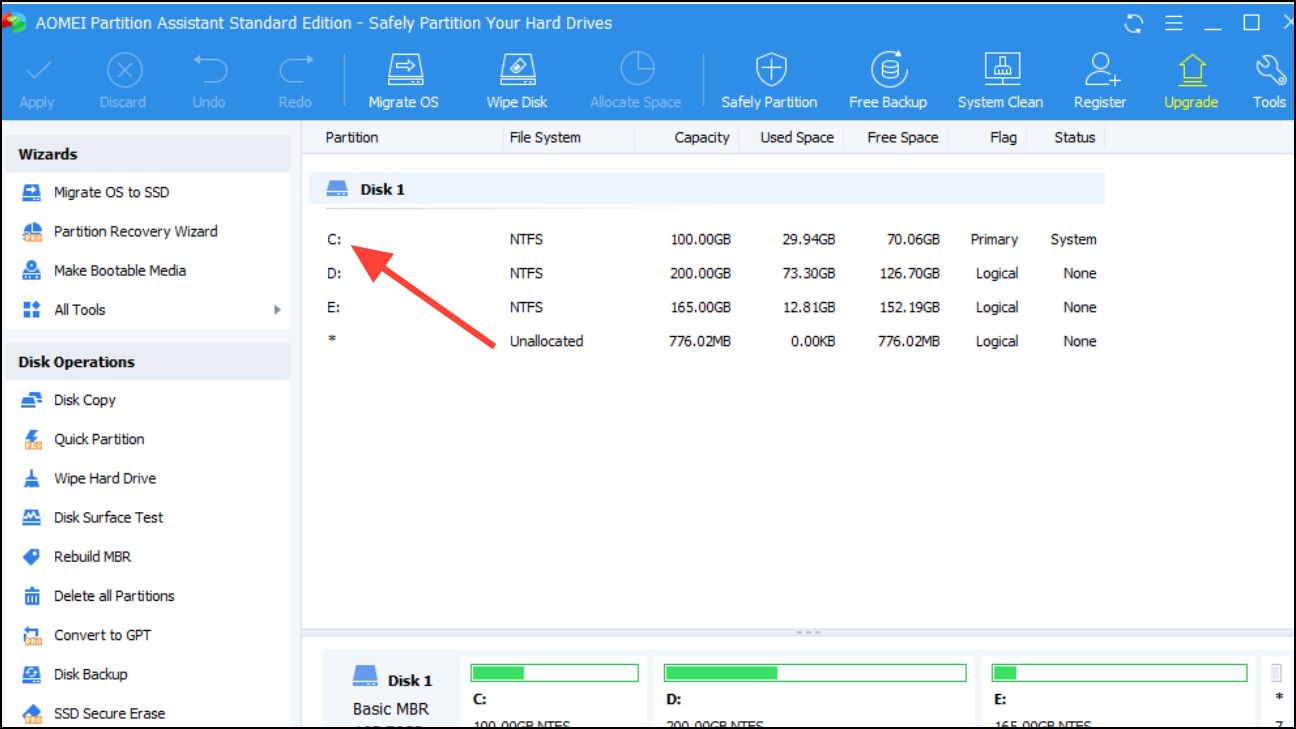
Step 3: Select the option to resize or extend the system partition. If using EaseUS Partition Master, right-click the C: drive and choose "Resize/Move". Drag the partition boundary to include unallocated space or follow prompts to allocate free space from another partition.

Step 4: Preview the changes and confirm. Click "Execute Task" or "Apply" to start the resizing process. The system may require a restart to complete the operation safely.
Expanding the system partition typically resolves the 0x80070070 error by providing enough room for updates and future system files, reducing the likelihood of recurrent storage issues.
Free Up Disk Space Using Built-In Windows Tools
When expanding the partition is not feasible, systematically clearing out unnecessary files can quickly release storage and allow updates to proceed.
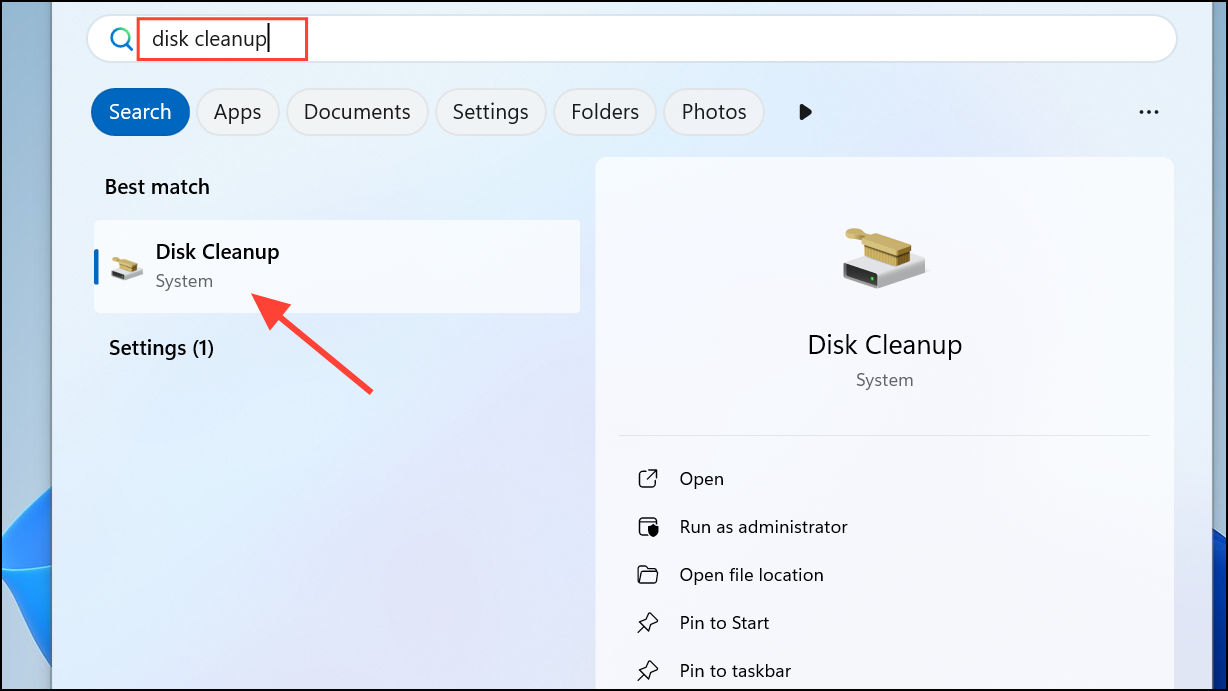
Step 1: Open the Disk Cleanup tool by typing "Disk Cleanup" in the Start menu and selecting the application.
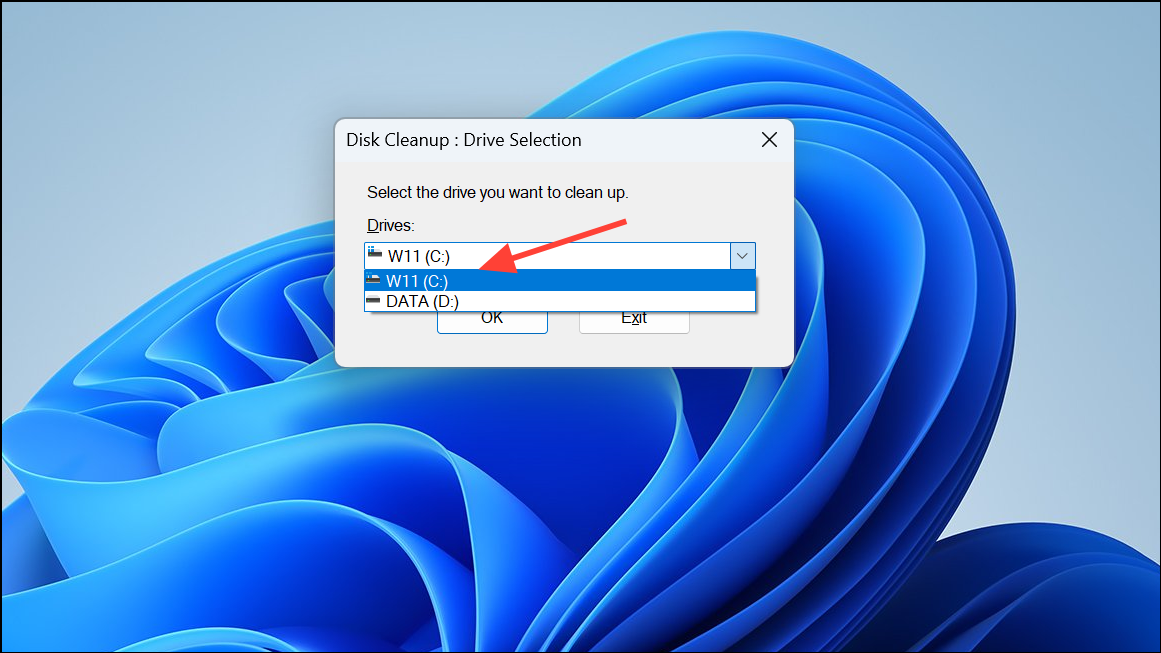
Step 2: Choose your system drive (usually C:) and let the tool calculate reclaimable space. Review the list of file categories, including temporary files, system cache, Windows Update files, and items in the Recycle Bin.
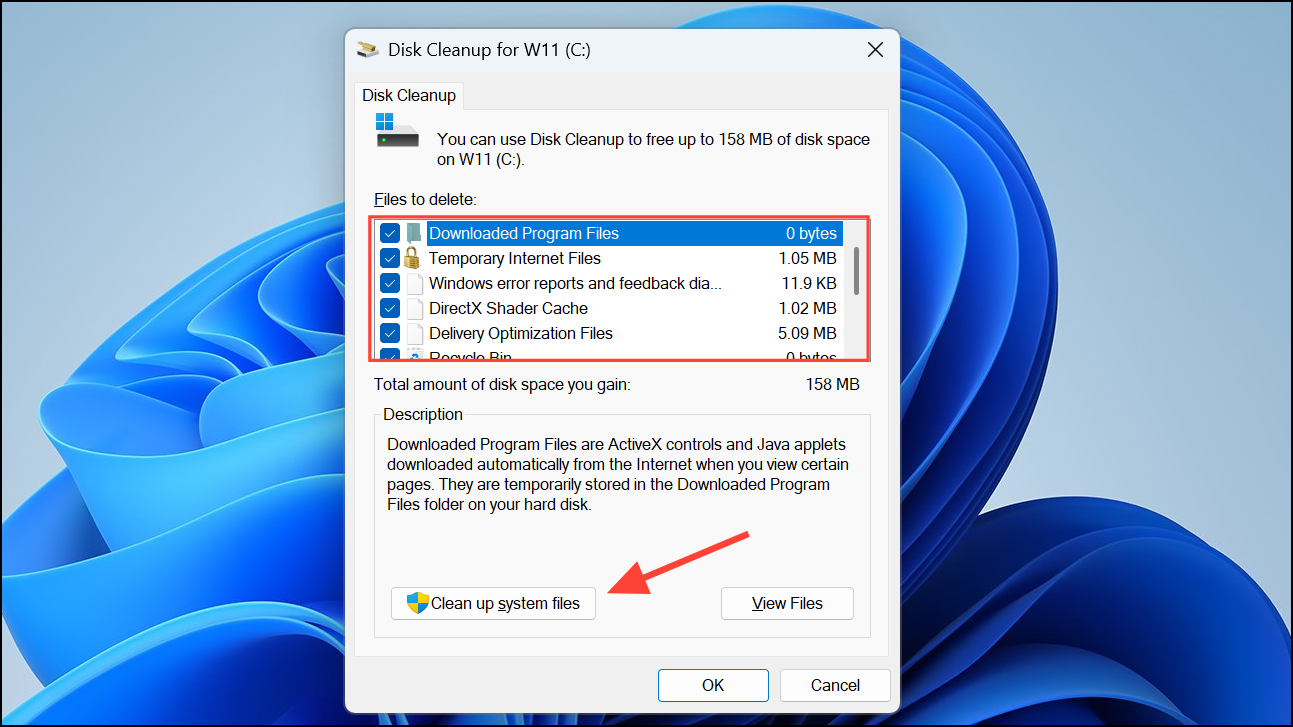
Step 3: Check the boxes for file types you no longer need. For most users, it is safe to delete temporary files, downloaded program files, and items in the Recycle Bin. If available, select "Clean up system files" to remove even more space-consuming items, such as previous Windows installations.
Step 4: Click "OK" and confirm deletion. Wait for the cleanup process to finish before attempting the update again.
Disk Cleanup provides a safe, built-in method to reclaim storage and is effective for quickly addressing minor space shortages.
Remove or Relocate Large Files and Applications
Large personal files and unused applications often occupy significant storage on the system drive. Moving or deleting these items can immediately free up space required for Windows updates.
Step 1: Open "Settings" with Windows + I and navigate to "System" > "Storage". Use the storage breakdown to identify large file categories and installed applications.

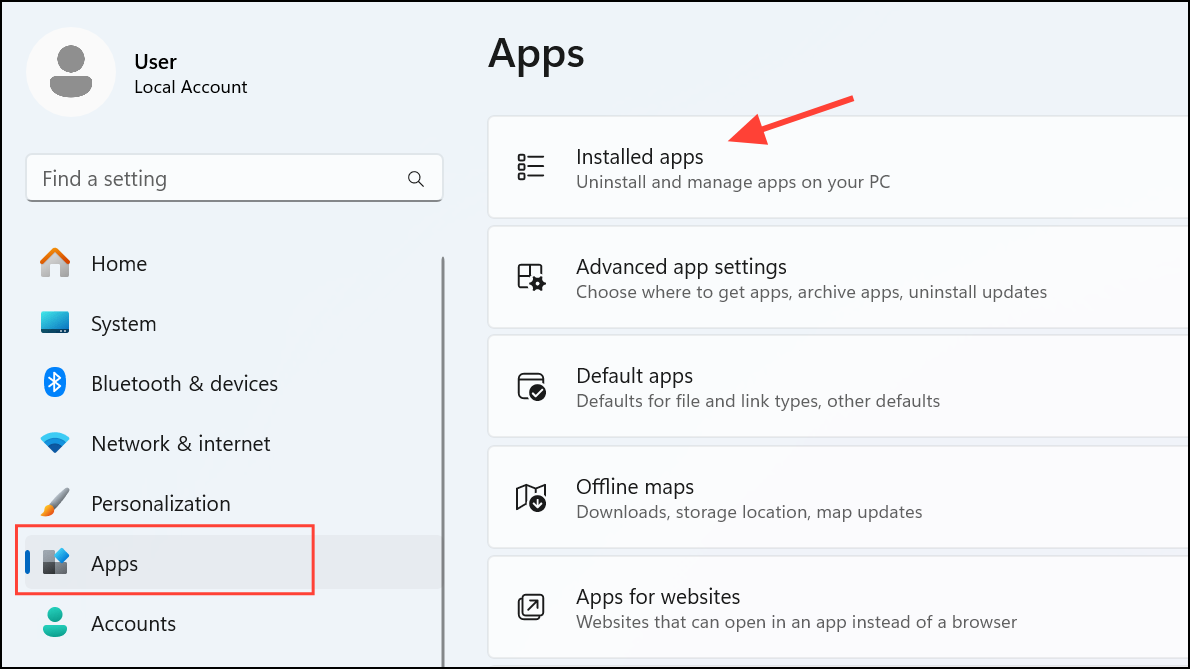
Step 2: For applications, go to "Apps" > "Installed apps". Sort by size and uninstall programs you no longer use by clicking the three-dot menu and selecting "Uninstall".
Step 3: Use File Explorer to locate large files, such as videos, installers, or disk images. Move these files to another internal drive, an external USB drive, or upload them to cloud storage (e.g., OneDrive, Google Drive). To move files, right-click the file, select "Cut", navigate to the new location, and then select "Paste".
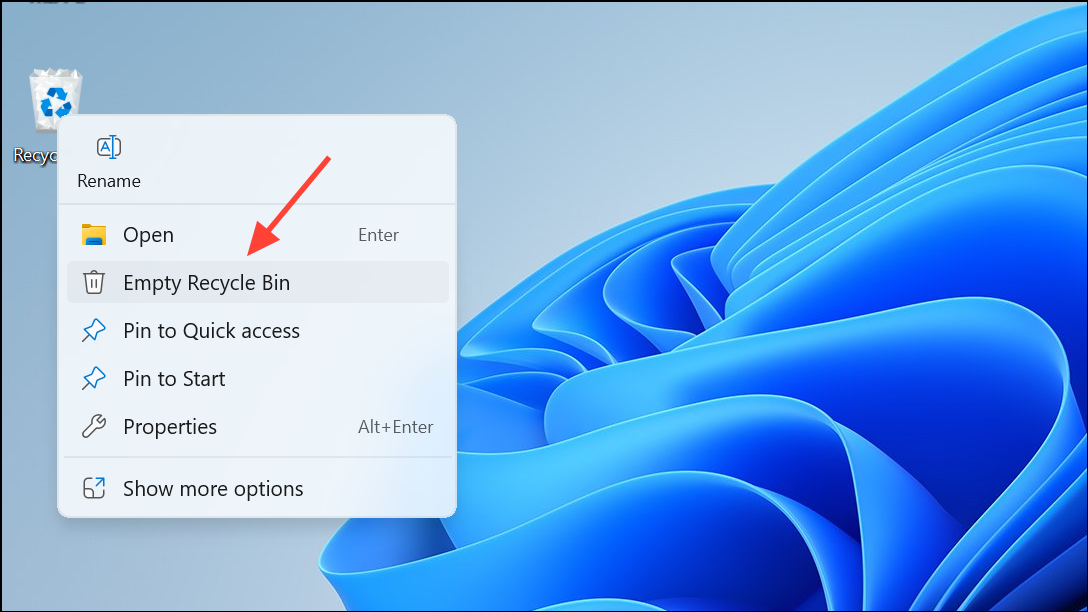
Step 4: Once files are moved, empty the Recycle Bin by right-clicking its icon and selecting "Empty Recycle Bin" to permanently remove deleted items and reclaim the space.
This process is especially effective for users with large media libraries or old software installers cluttering the primary drive.
Clear Temporary and System Files Manually
Temporary files and cached data accumulate over time, occupying valuable disk space. Manually deleting these files ensures that hidden storage is reclaimed.
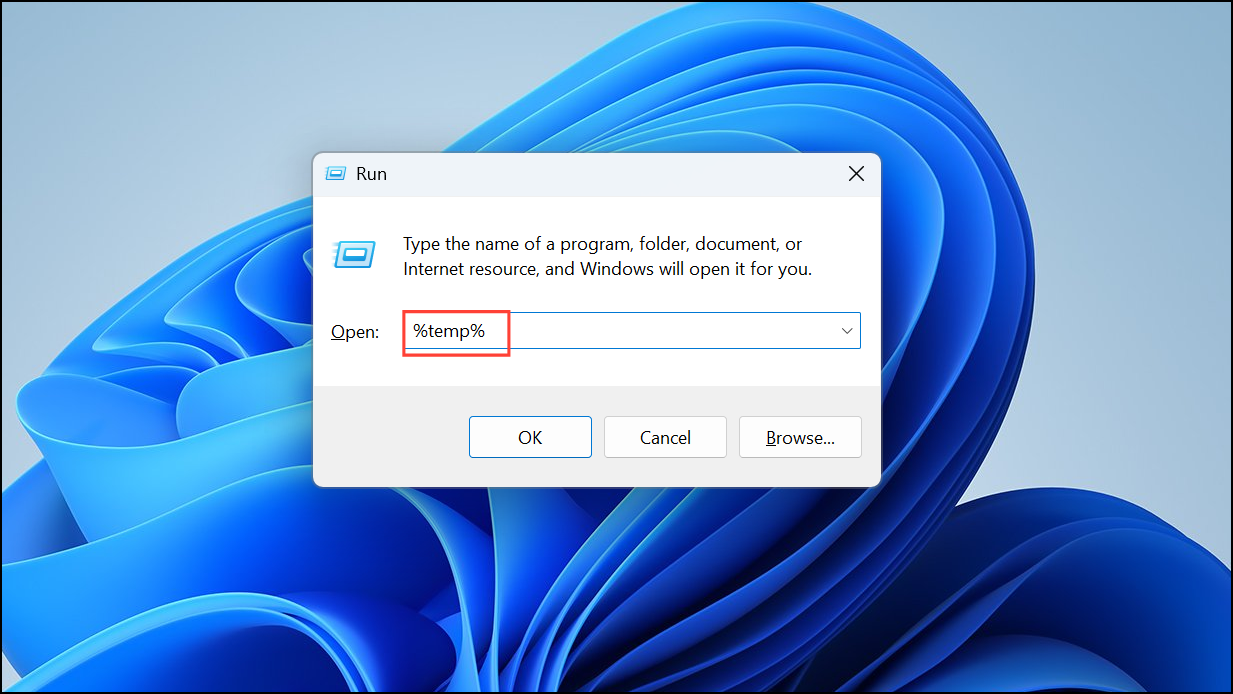
Step 1: Open the Run dialog with Windows + R and enter %temp%. This opens the temporary files folder.
Step 2: Select all files in the folder by pressing Ctrl + A, then delete them using Shift + Delete to permanently remove these files. Some files may be in use and cannot be deleted; skip these when prompted.

Step 3: Repeat the process with the C:\Windows\Temp directory for system-level temporary files.
Regularly clearing temporary files prevents gradual storage loss and supports smoother system operation.
Optimize Storage Settings and Automate Maintenance
Windows 11 includes features to automate storage management and minimize future space issues.
Step 1: Open "Settings" and go to "System" > "Storage". Locate the "Storage Sense" option and toggle it on.
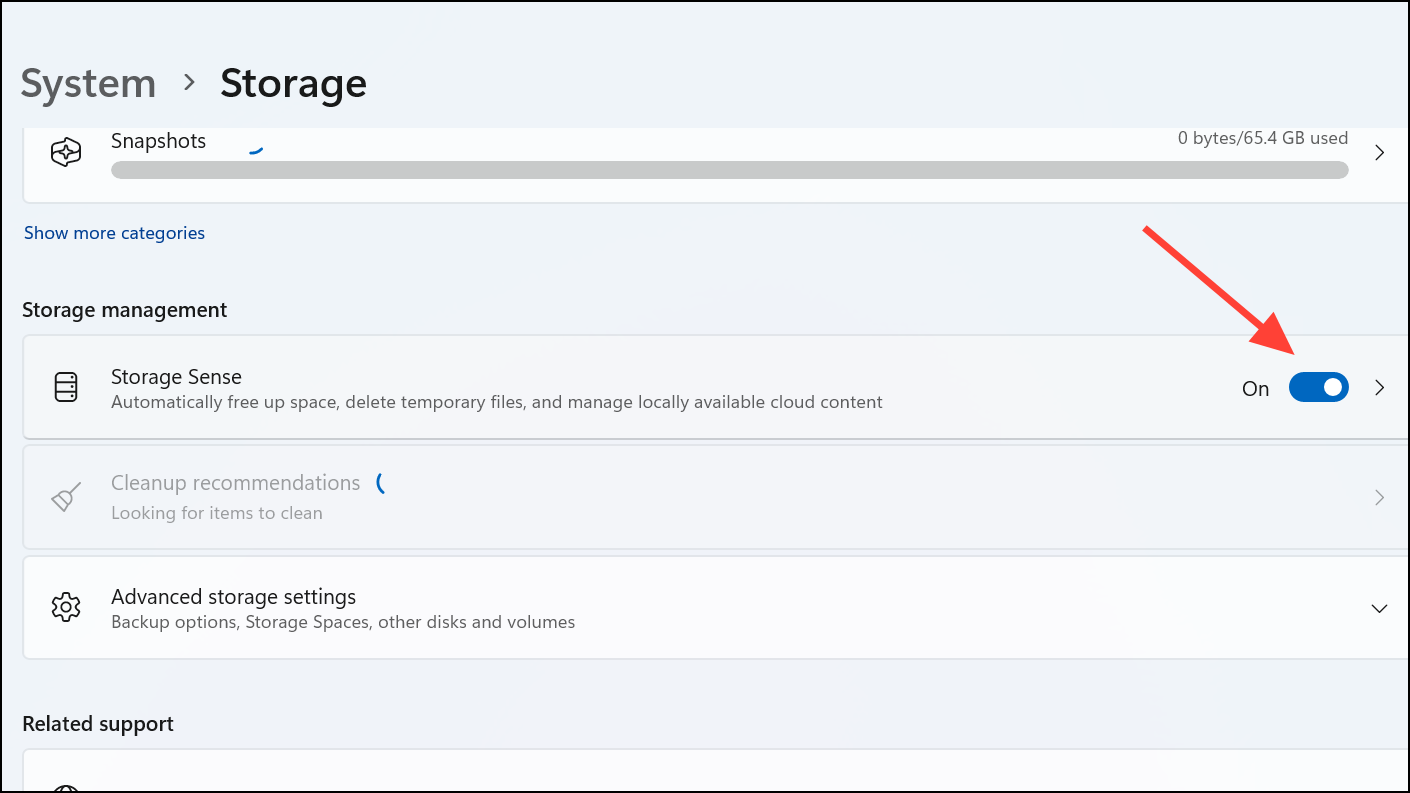
Step 2: Click on "Storage Sense" to configure how often it runs and what types of files it should delete automatically, such as temporary files and items in the Recycle Bin.

Automating storage maintenance with Storage Sense minimizes manual intervention and helps maintain enough free space for future updates.
Address Corrupted or Misconfigured System Partitions
In rare cases, the 0x80070070 error may result from partition corruption or improper configuration, not just low space. Running system checks and repair utilities can resolve these hidden issues.
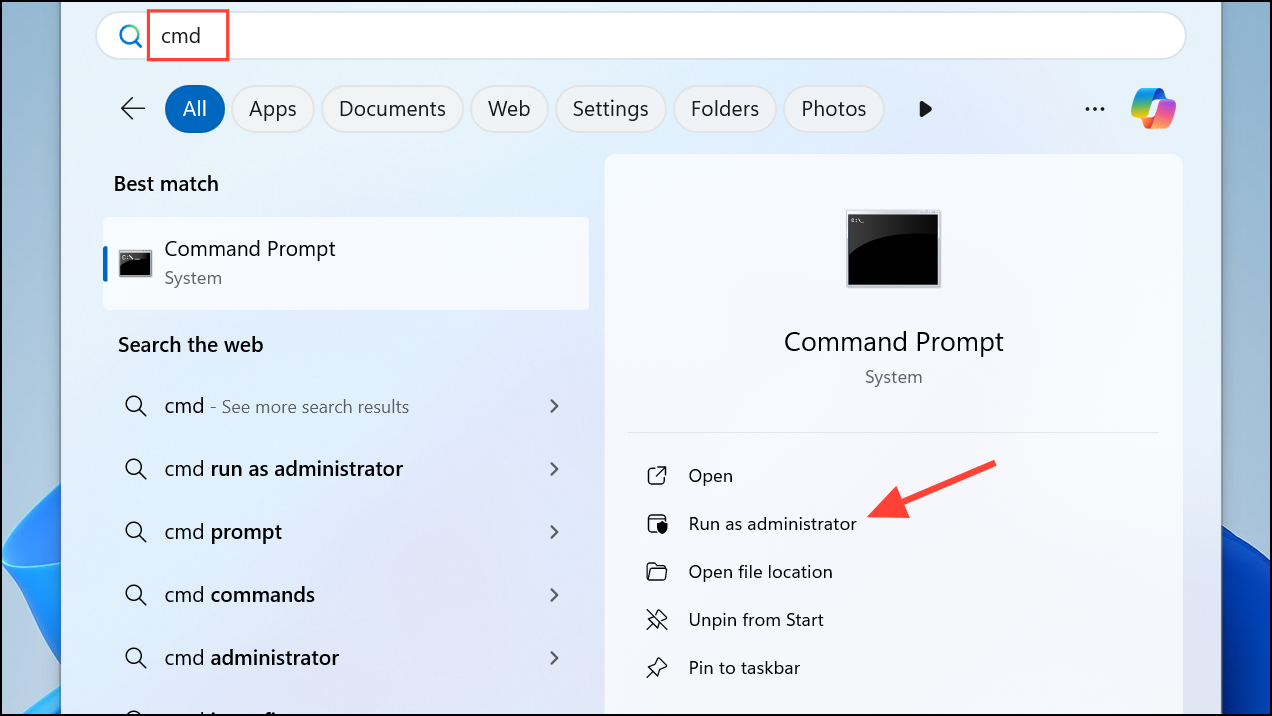
Step 1: Open Command Prompt as administrator by searching for "cmd", right-clicking, and selecting "Run as administrator".
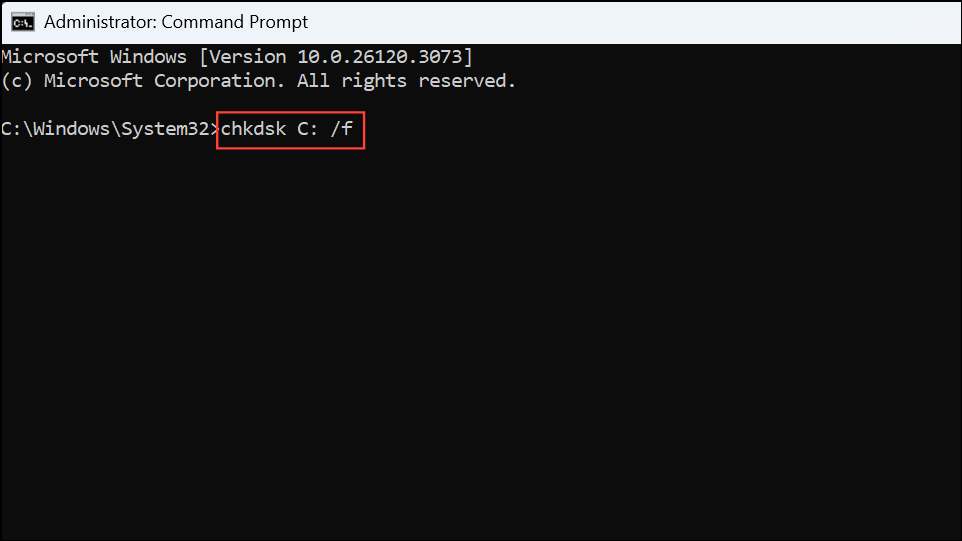
Step 2: Run the disk check utility by entering:
chkdsk C: /fThis command scans the C: drive for errors and repairs them. You may be prompted to schedule the check for the next system restart; confirm if needed and reboot.
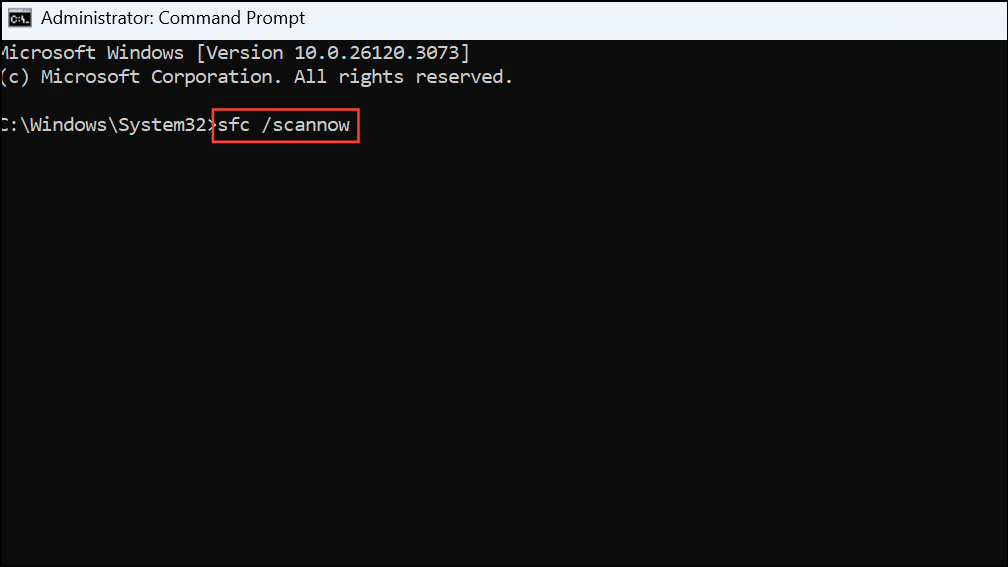
Step 3: For additional system file integrity verification, run:
sfc /scannowThis scans and repairs corrupt system files that could interfere with update processes.
Resolving error 0x80070070 on Windows 11 is straightforward when you address storage limitations directly, whether by expanding partitions, clearing out unneeded files, or automating maintenance. Keeping your system drive free of clutter not only prevents future update errors but also improves speed and reliability for daily tasks.