
Microphone input levels that constantly reset to 0 or 100 in Windows 11 can disrupt calls, recordings, and gaming sessions. This problem often stems from software conflicts, device drivers, or background applications taking control of your microphone settings. Addressing the root cause restores consistent audio levels and reliable microphone performance.
Stop Applications from Controlling Microphone Volume
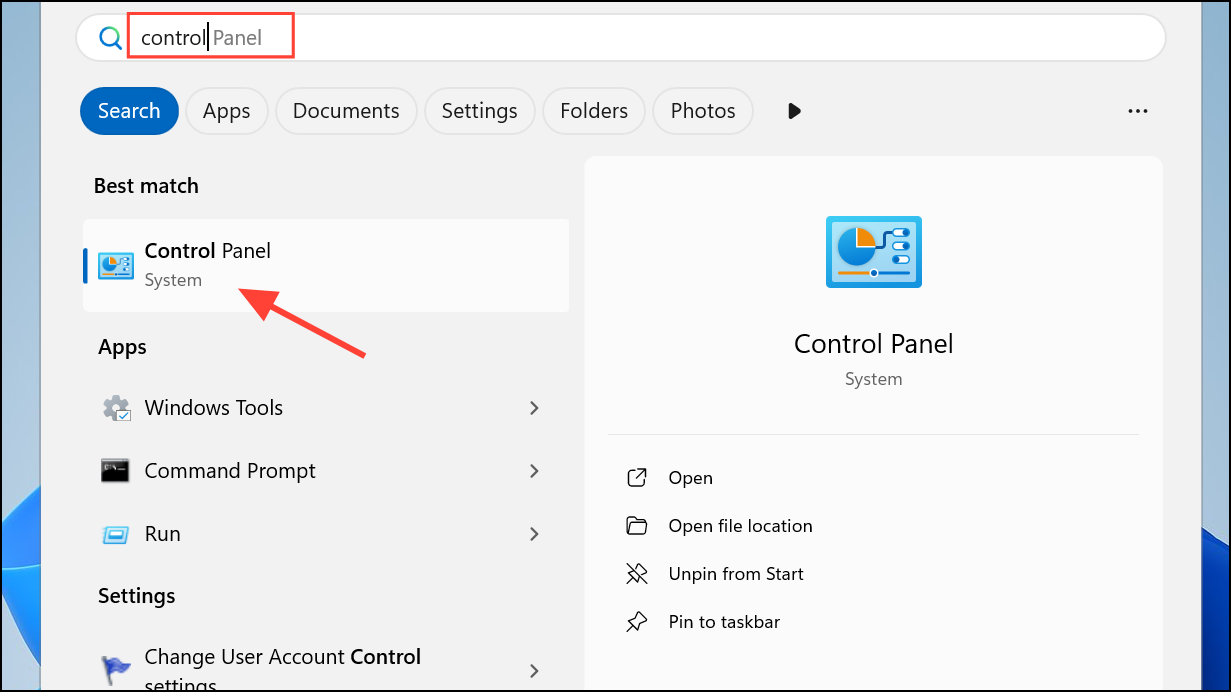
Step 1: Open the Control Panel by pressing Windows key, typing control, and selecting the Control Panel from the results.
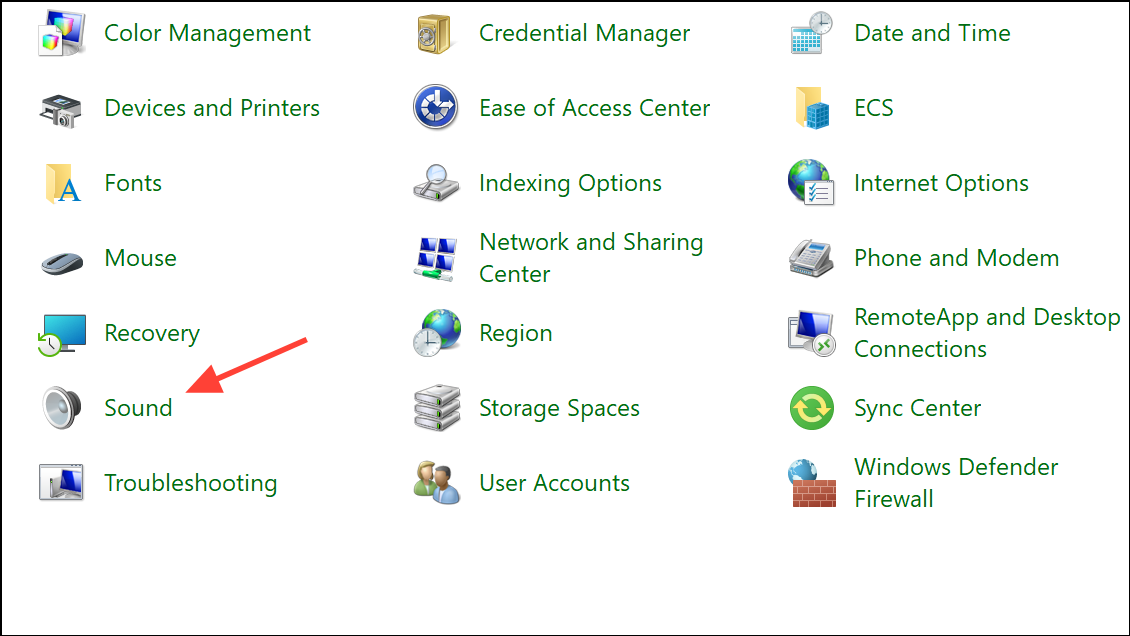
Step 2: Click on Sound (switch to Large icons view if you don’t see it).
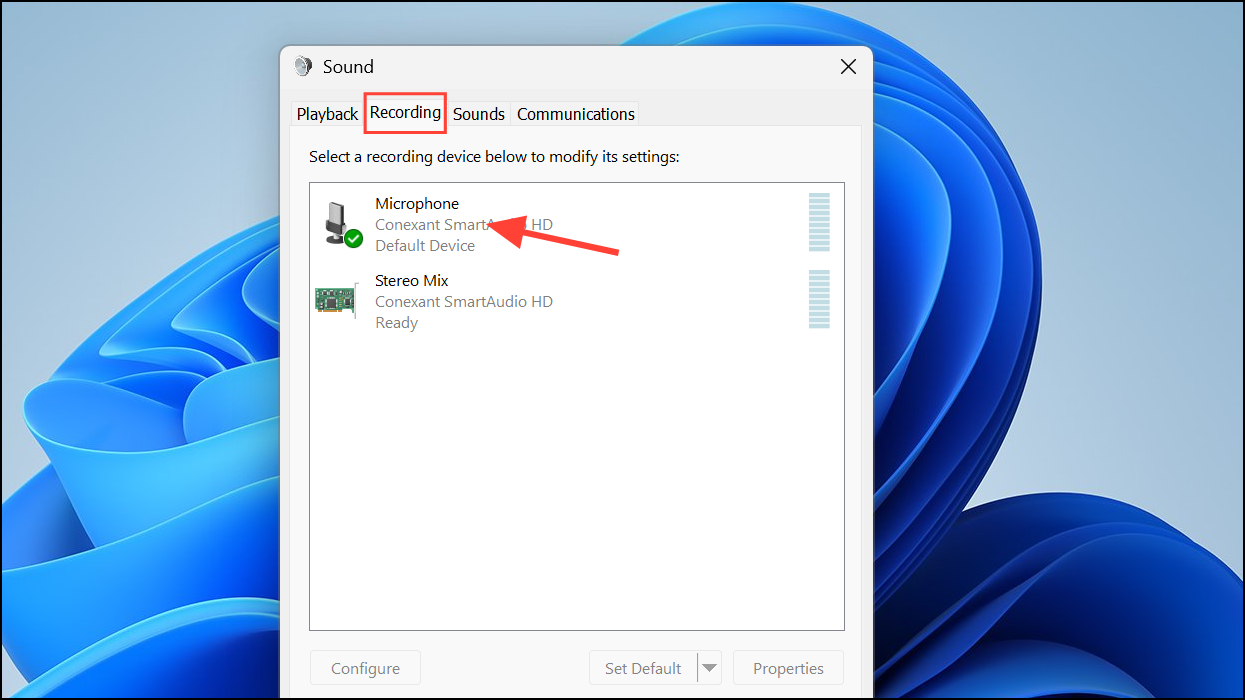
Step 3: Go to the Recording tab, then double-click your microphone device to open its properties.
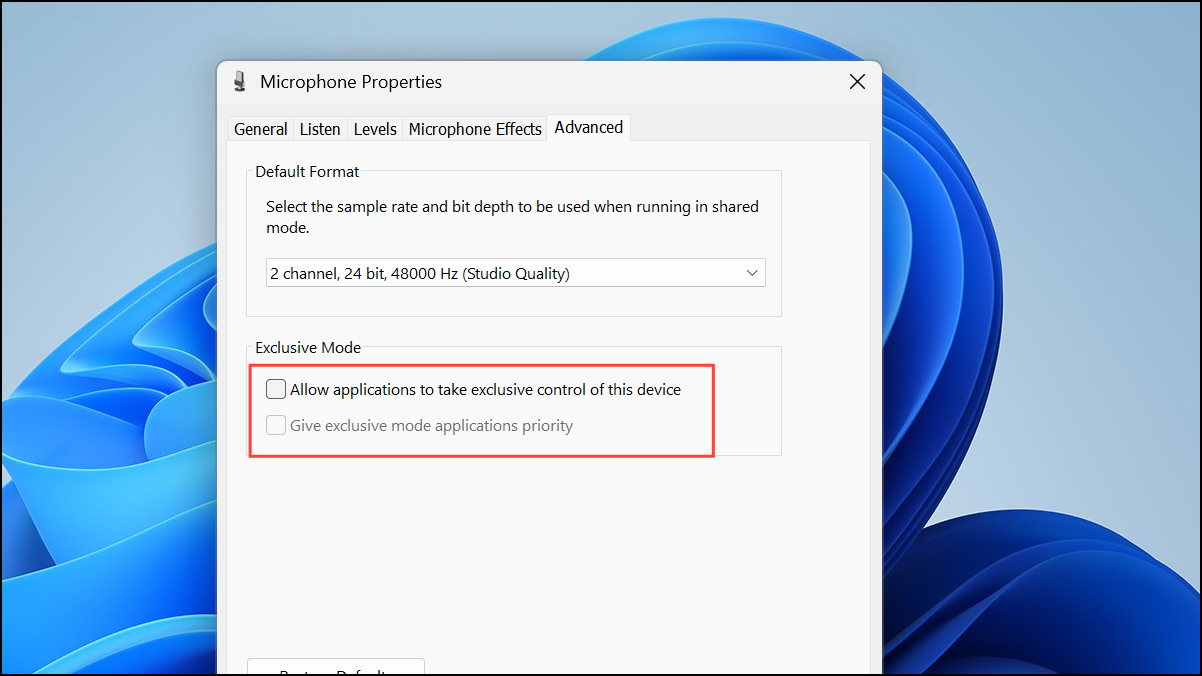
Step 4: In the Advanced tab, uncheck Allow applications to take exclusive control of this device and Give exclusive mode applications priority. Click Apply and OK to save changes. This prevents software from automatically adjusting your mic volume.
Disable Automatic Gain Control in Communication Apps and Browsers
Step 1: For communication software like Discord, Zoom, Skype, or Microsoft Teams, open the app’s settings and locate audio or voice settings. Turn off any option labeled Automatically adjust microphone settings or Automatic Gain Control.
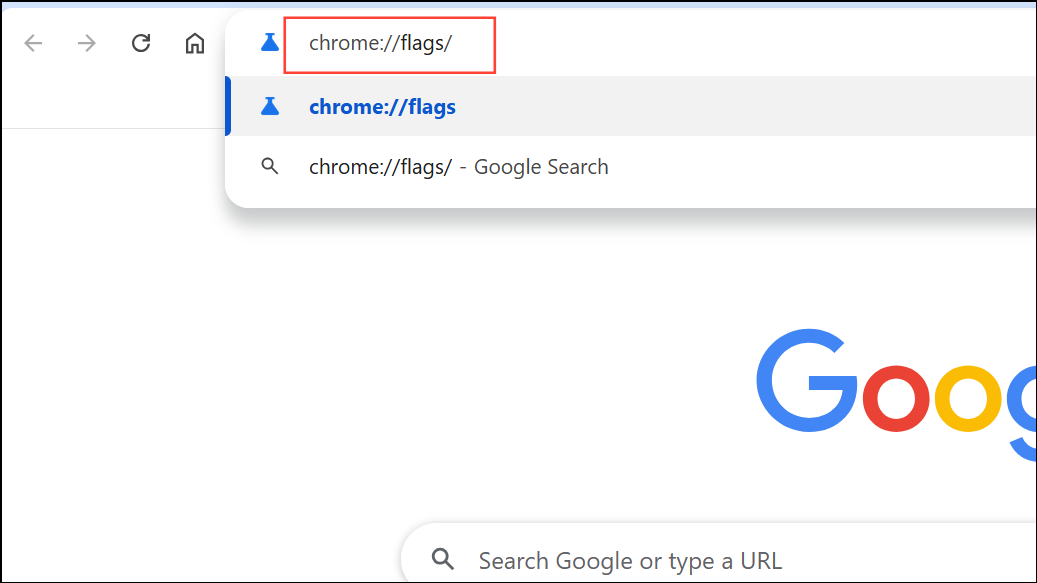
Step 2: If you use Chrome or other Chromium-based browsers for web calls, type chrome://flags/ in the address bar.
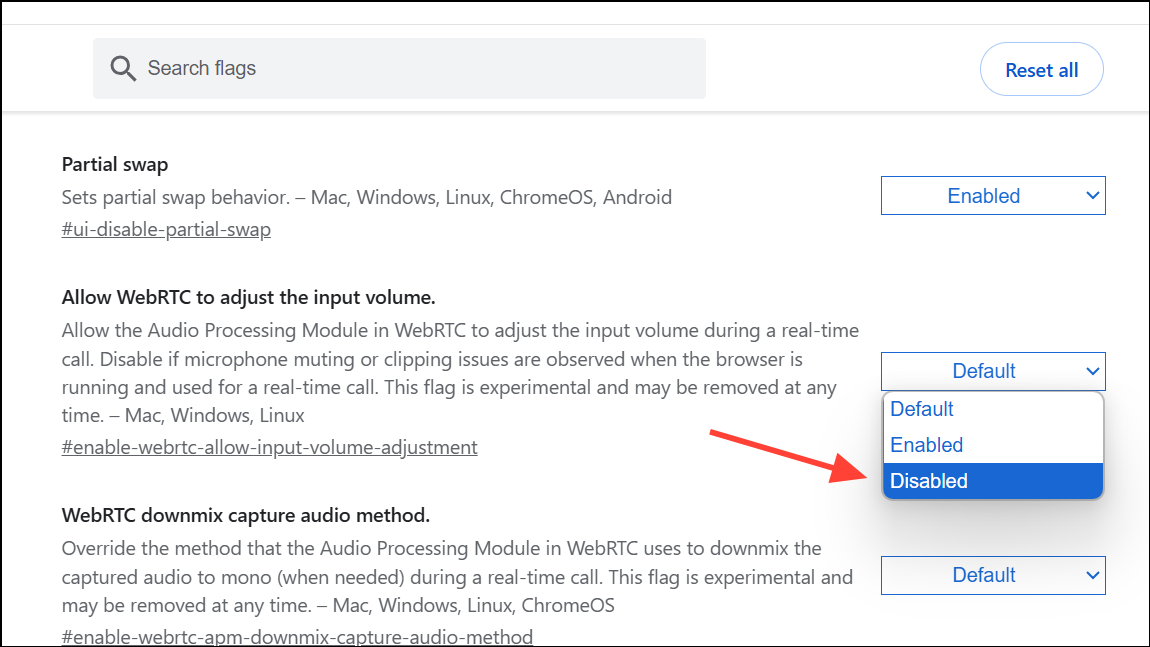
Step 3: Search for Allow WebRTC to adjust the input volume and set it to Disabled. Restart the browser to apply changes.
Step 4: For persistent issues in Chrome, consider installing an extension such as Disable Automatic Gain Control, which blocks web applications from changing your microphone input level.
Uninstall or Disable Audio Control Software
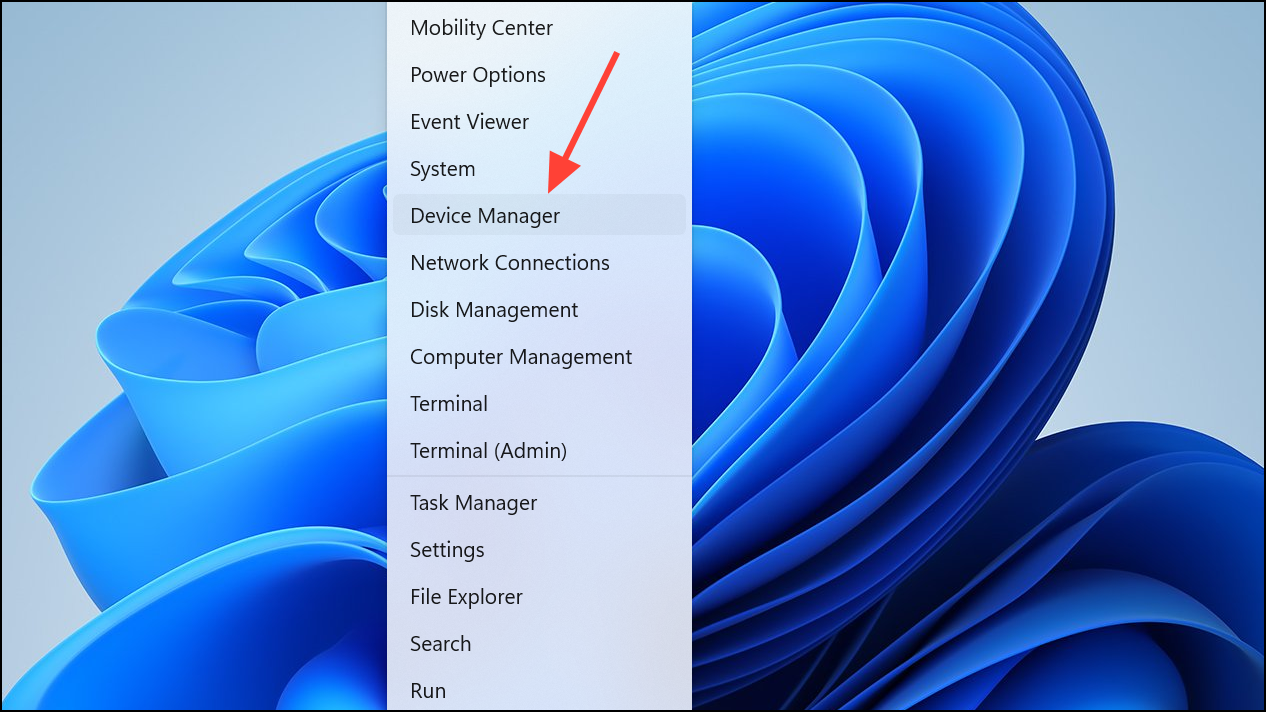
Step 1: Some pre-installed audio utilities (like Realtek Audio Console, Dell/Alienware audio services, or Intel Smart Sound Technology) can interfere with microphone settings. Open Device Manager by pressing Windows key + X and selecting Device Manager.
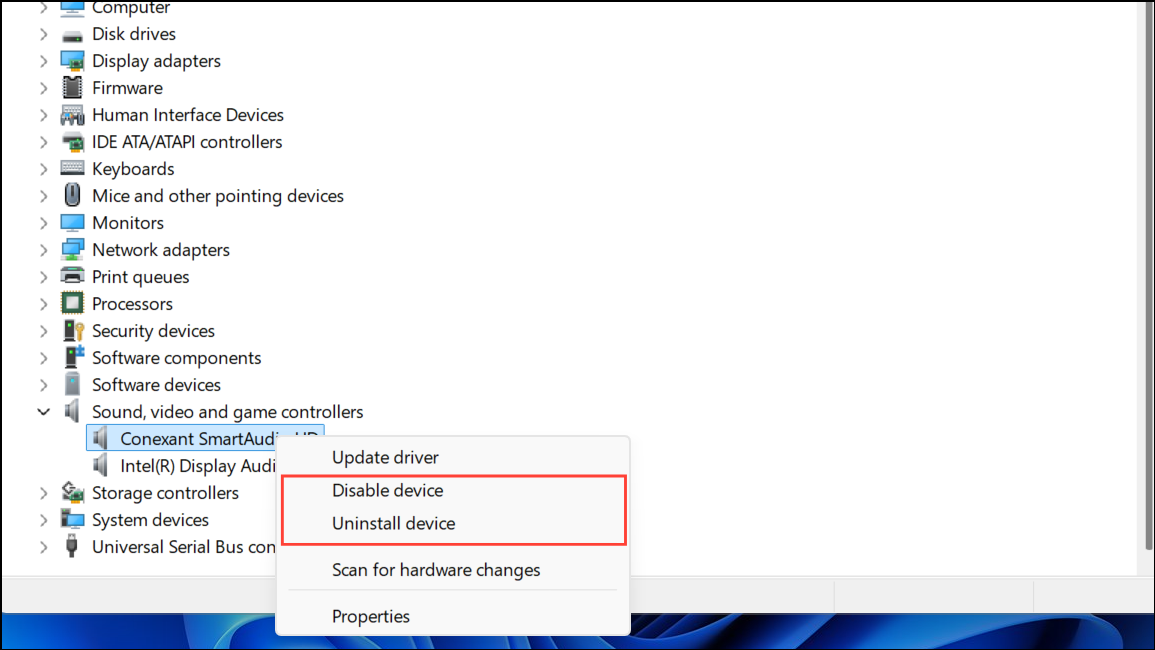
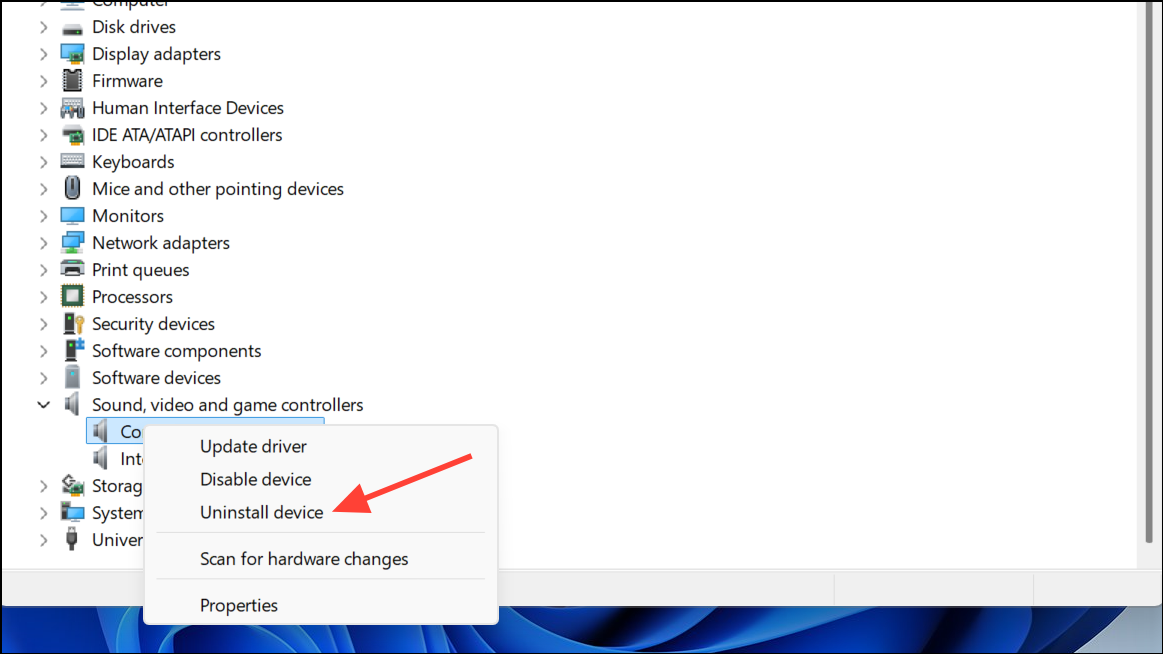
Step 2: Expand Sound, video and game controllers and Audio inputs and outputs. If you see software-specific devices (such as Intel Smart Sound Technology for USB Audio), right-click and choose Disable device or Uninstall device. Confirm the action and restart your PC.
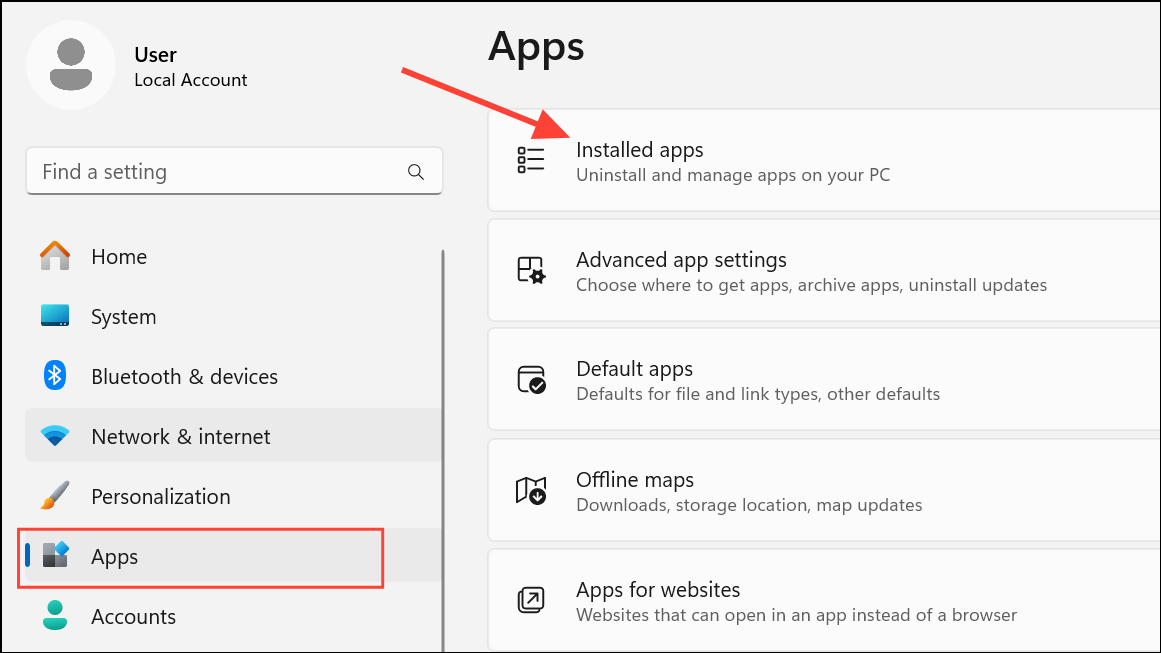
Step 3: To remove dedicated audio control applications, open Settings > Apps > Installed apps, find utilities like Realtek Audio Console, and uninstall them.
Disabling these utilities forces Windows to use its generic drivers, which often resolves volume resetting issues caused by manufacturer software.
Update, Roll Back, or Reinstall Audio Drivers
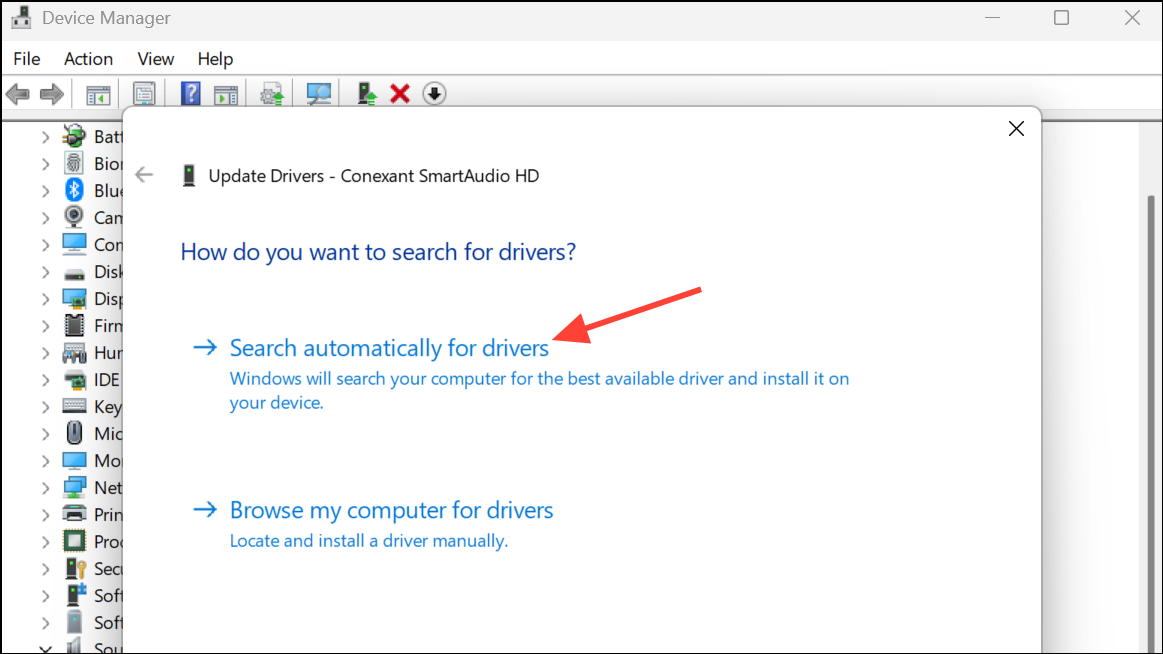
Step 1: In Device Manager, right-click your microphone device under Audio inputs and outputs and select Update driver. Choose Search automatically for drivers to let Windows find the latest version.
Step 2: If updating doesn’t help or the issue started after a recent update, right-click the device, select Properties > Driver tab, and click Roll Back Driver if available. This reverts to the previous driver version, which may restore normal microphone behavior.

Step 3: If neither updating nor rolling back works, select Uninstall device, then restart your PC. Windows will reinstall the default driver automatically.
For some systems, manually installing the latest driver from your device manufacturer’s website may offer better results.
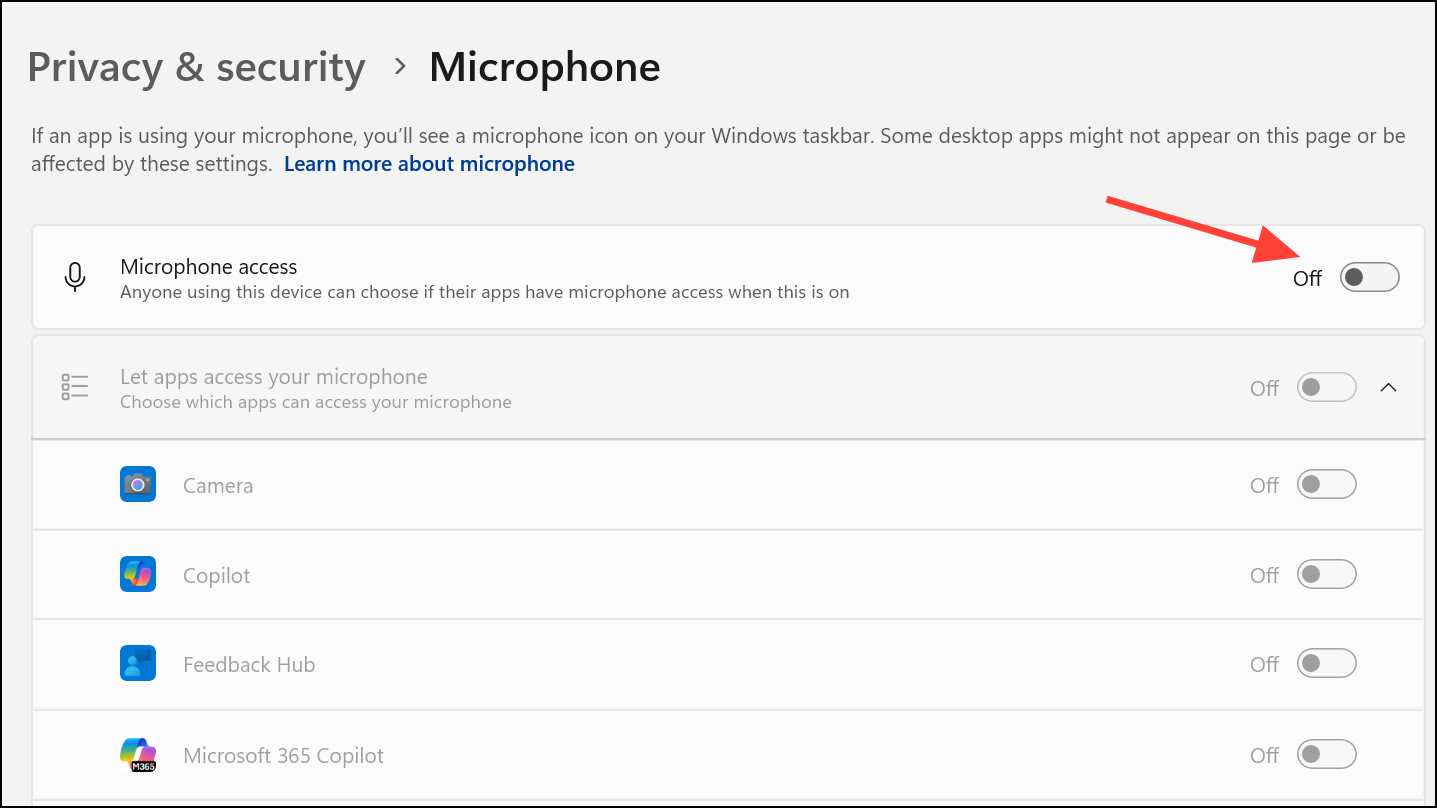
Check Microphone Privacy and Permissions
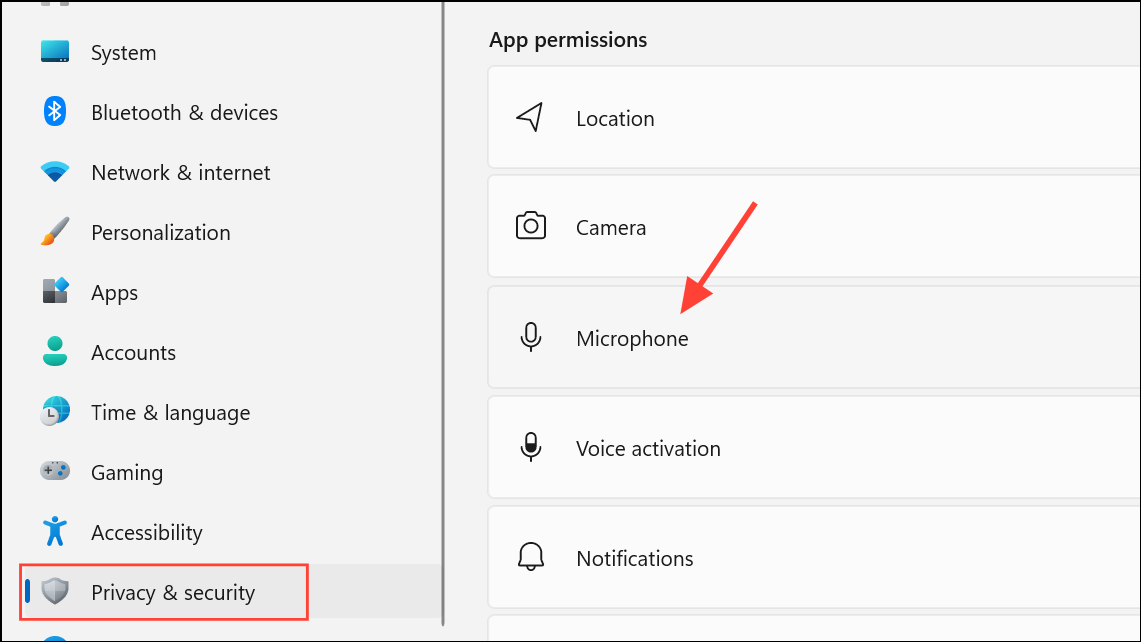
Step 1: Go to Settings > Privacy & security > Microphone. Ensure Microphone access is enabled for your device.
Step 2: Temporarily disable access for all apps, then enable one application at a time to identify if a specific app is causing the volume reset. This helps isolate problematic software.
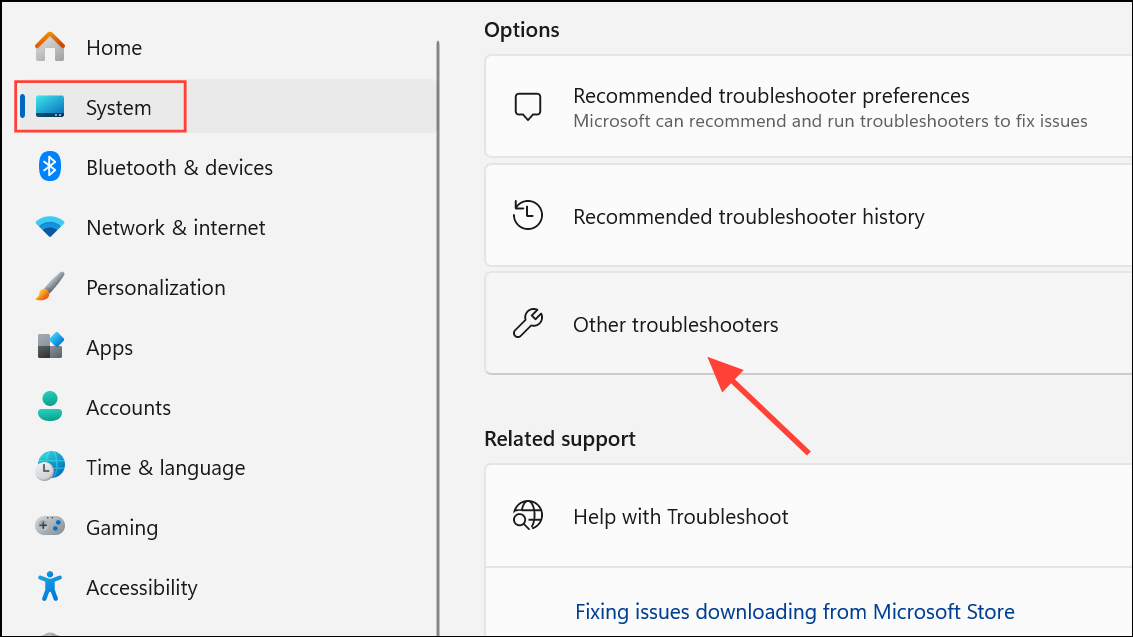
Run Windows Troubleshooters and System File Checks
Step 1: Open Settings > System > Troubleshoot > Other troubleshooters. Run the Recording Audio troubleshooter and follow the prompts to detect and resolve microphone issues.
Step 2: For persistent problems, run a system file check. Open Command Prompt as administrator and enter:
sfc /scannow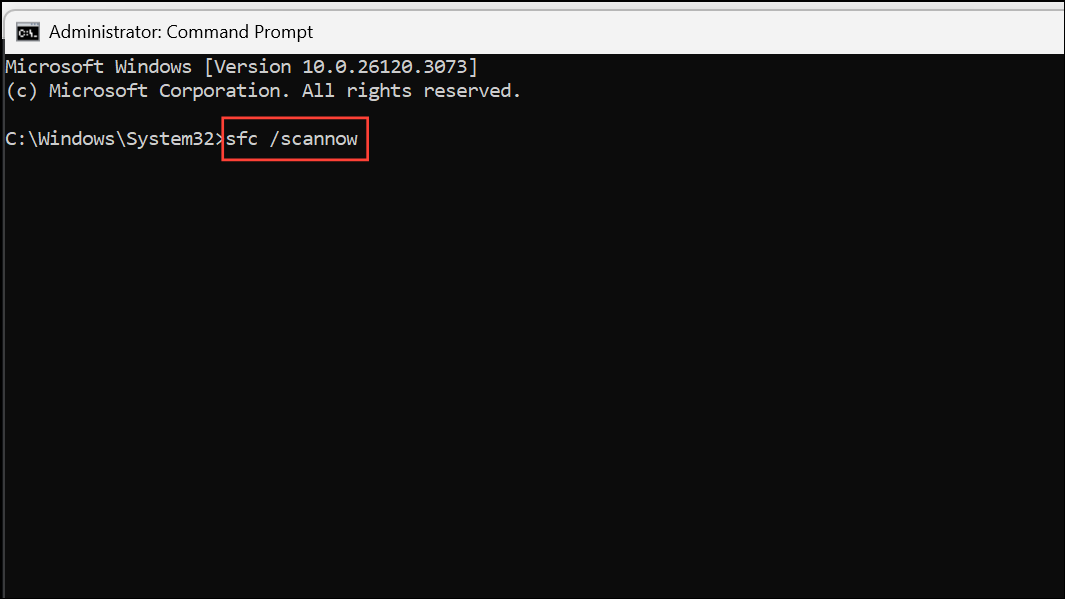
This command scans and repairs corrupted system files that could interfere with audio devices.
Use a Script to Lock Microphone Volume (Advanced)
If all else fails and the microphone volume still resets, you can use a batch script with a tool like NirCmd to force the microphone level to a fixed value at startup.
Step 1: Download and install NirCmd from the official website or via a package manager like Scoop.
Step 2: Create a batch file (e.g., 100_mic_vol.bat) with the following content, replacing 65535 with your desired volume value:
nircmd.exe setsysvolume 65535 "Microphone"Step 3: Place the batch file in your Windows startup folder to run automatically when you log in. This script will reset your microphone volume to the specified level each time the system starts or when the script is run manually.
This approach is a workaround and should only be used if other solutions do not resolve the issue, as it forcibly overrides any volume adjustments made by applications or Windows.
Resolving microphone volume resetting in Windows 11 usually requires stopping software from controlling your mic, updating or rolling back drivers, and disabling conflicting utilities. Consistently applying these steps restores stable input levels for calls, meetings, and recordings.