Microsoft Teams wasn’t ready for the mass consumption when the COVID-19 spread forced everyone to work from home. It still isn’t. But these challenging times have gotten Teams into the spotlight as there’s quite literally nothing like it when it comes to managing and operating remote teams.
Unfortunately, the sudden increase in user base also resulted in enormous pressure on the underlying infrastructure of the software. And if that wasn’t enough, the Teams desktop app is kind of a drag too when it comes to things as basic as video calling.
Many users have reported issues like camera not working in Teams and microphone issues where the software wouldn’t detect the Mic at all. Thankfully, these problems are fixable on the user level in many ways. Read on to find some of the most helpful tips to fix microphone issues in Teams below.
Plug-in Microphone Before the Call
Many people make the mistake of connecting the microphone after joining a meeting. It is the most common microphone problem Teams users face. Teams application would not recognize your microphone device if you connect it after you’ve joined a meeting. This is something Microsoft may fix in upcoming updates to the app. But in the meantime, try connecting your microphone before you join a meeting or call in Microsoft Teams. It should work fine.
If this tip doesn’t help, then your issue might be a different story and the other troubleshooting tips mentioned below will be of more help.
Configure the Right Audio Device
Sometimes, the default settings on Teams may not work in your favor. The algorithm of Teams might get confused in selecting the right audio device when you have two or three installed. You just have to choose the right one which works better.
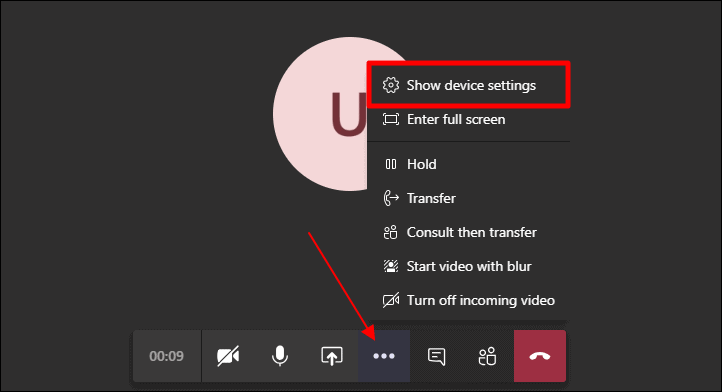
Place a call on Teams, it might be an audio call or a video call. Then, in the controls bar at the bottom of the call screen, click on the ‘More Actions’ (three dots) button and select ‘Show device settings’ from the available options in the menu that shows.
The ‘Device settings’ panel will open on the right side of the screen. Click on the drop-down menu under ‘Microphone’ setting and select the right microphone device from the available devices on your computer.
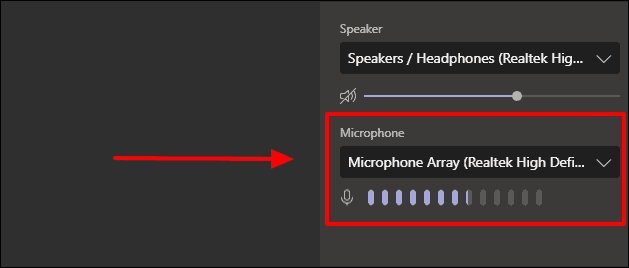
When you select the right device, the dots beside the microphone icon blink as seen in the above image. This way you can tell that you’ve selected the right device as teams is able to access the microphone.
Note: This fix works only when you have two or three audio devices installed on your computer.
Make Sure Your Microphone is not Faulty
This is a tricky problem with a basic solution. We connect headphones with microphones to our PCs. Sometimes, it may be a faulty one which you may not be aware of. You must make sure it is working fine by connecting and using it with other devices like your mobile phone.
Restart Microsoft Teams
Restarting a piece of software is often the most basic and working solution to a weird problem. If your microphone is working fine in other applications on your PC, then simply restarting Microsoft Teams will do the trick.
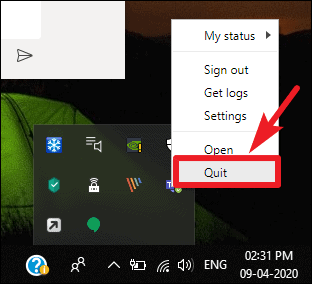
First, close the Teams window and ‘Quit’ it from the Taskbar tray as well to completely exit it.
Then, launch the Microsoft Teams app again on your computer and see if the microphone issue has been resolved.
Make Sure Microphone is Enabled in Windows Settings
If none of the above-mentioned methods works, it might be worth it to check if your Microphone device is disabled in settings on your computer.
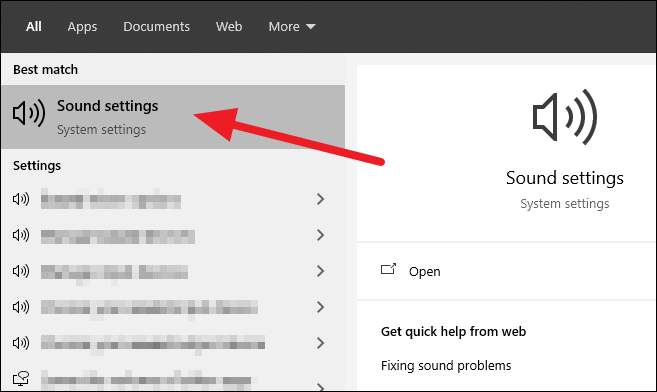
Open the Start menu and search for ‘Sound settings’, and then click to open the settings screen.
On the sound settings screen, click on the ‘Manage Sound Devices’ link to see a list of all sound devices on your computer.

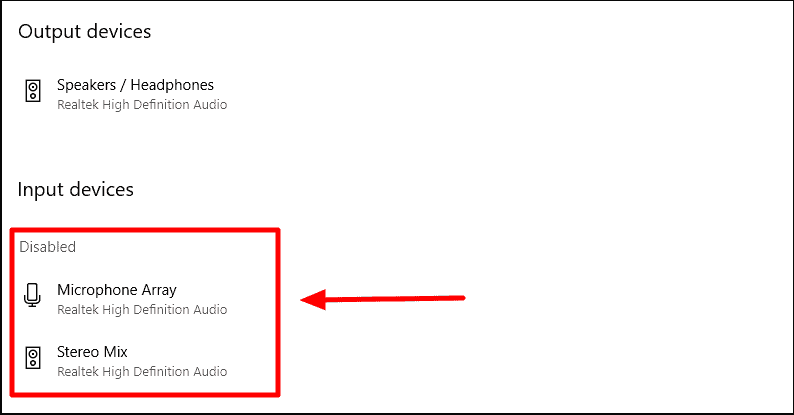
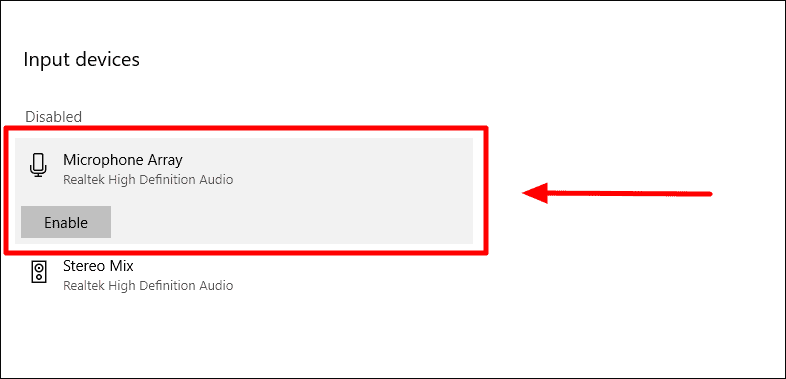
In this list, you should see the Microphone device under ‘Input devices’ section. If it’s not there, then it’s probably disabled and listed under the ‘Disabled’ section on the screen.
To enable your Microphone device, click on it and select the ‘Enable’ button from the expanded options to enable the device.
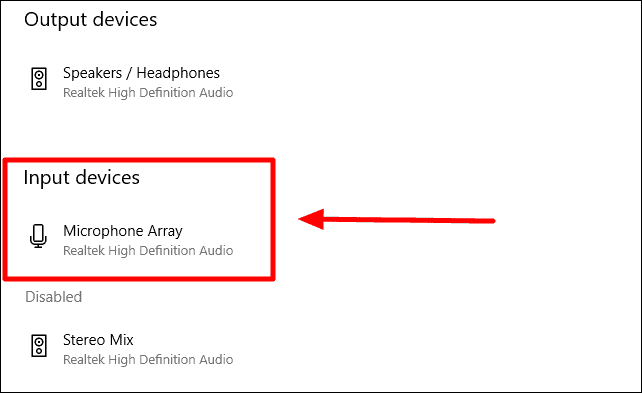
If it’s successfully enabled, it’ll will move out of the ‘Disabled’ section and into the Input devices (enabled) list.
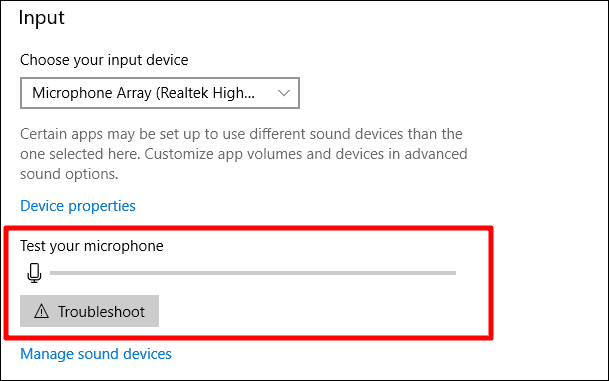
Test your microphone. Go back to the ‘Sound settings’ screen and under the ‘Input devices’ section you should see some variations in the meter below ‘Test your microphone’ label. If not, click the ‘Troubleshoot’ button to further fix any other issues.
Resolve any Driver Related Issue by Re-installing Audio Driver
Audio drivers of a system are responsible for the correct functioning of the speaker and microphone or any other accessory of sound. We need to make sure the drivers are properly installed and are not corrupted. And for that, we’ll uninstall and re-install the audio driver on your system.
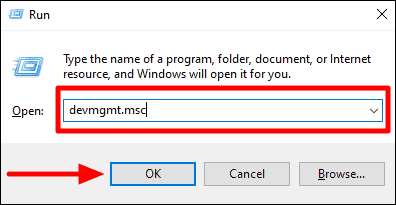
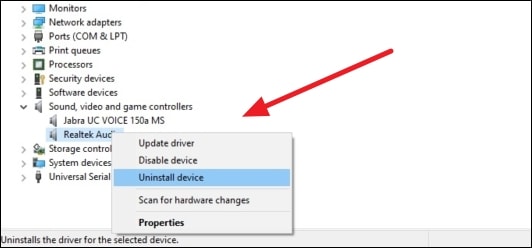
Open the ‘Run’ command box by pressing Windows key + R keyboard shortcut. Then, type devmgmt.msc in the ‘Run’ window and press Enter (or click OK) to open Device Manager on your PC. You need to be a system administrator to access it.
Find ‘Sound, video, and game controllers’ in the drivers’ list. Then, find your audio driver (Realtek Audio Driver is default driver on most systems). Right-click on it and uninstall it by clicking on the ‘Uninstall device’.
Then, search for the audio driver compatible with your laptop or PC on the internet. Download and install it. Or, run Windows Update and let Windows automatically download the correct drivers for you.
If the audio driver was any issue behind microphone not working in Teams, it should be fixed after installing the correct driver.
Re-install Microsoft Teams
If any of the fixes mentioned above do not work, then maybe the problem is with the Teams app on your system. You can verify that by using the Microsoft Teams Web app teams.microsoft.com in Chrome or Edge momentarily and try making or attending a meeting from there.
If the microphone works in the Teams web app, then the problem is definitely with the Teams app on your PC and you uninstall and reinstall it.
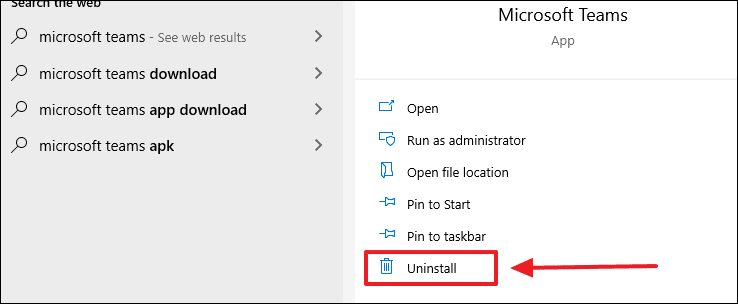
Open, the Start menu and search for ‘Microsoft Teams’. Then, select the ‘Uninstall’ link for Microsoft Teams app from the panel on the right in Start menu.
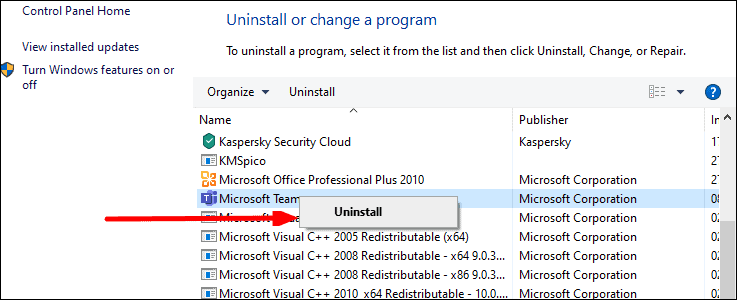
It will open the ‘Programs and Features’ window. Find Microsoft Teams in the list of all programs installed on your PC, right-click on it and select ‘Uninstall’.
After successfully uninstalling Microsoft Teams, download and install it again from the official website.
Working from home is already challenging, and your Mic not working in Microsoft Teams is the last thing you should be dealing with in these uncertain times. We hope the possible fixes mentioned above help you resolve the problem.