
Windows Update errors like Some update files are missing or have problems. We'll try to download the update again later. frequently interrupt critical system updates, causing failed installations and leaving your device vulnerable or behind on features. This issue often appears with error codes such as 0x80073712 or 0x8007000d, and can result from corrupted update files, faulty system components, network interruptions, or interference from security software. Addressing the problem quickly restores your system’s ability to receive updates and maintain security.
Repair Windows Using the Built-In Reinstallation Option
When standard troubleshooting does not resolve the missing update files error, a repair installation—also known as an in-place upgrade—offers a reliable fix. This method reinstalls Windows 11 over your current setup, repairing system files and update components without deleting your personal files or installed apps.
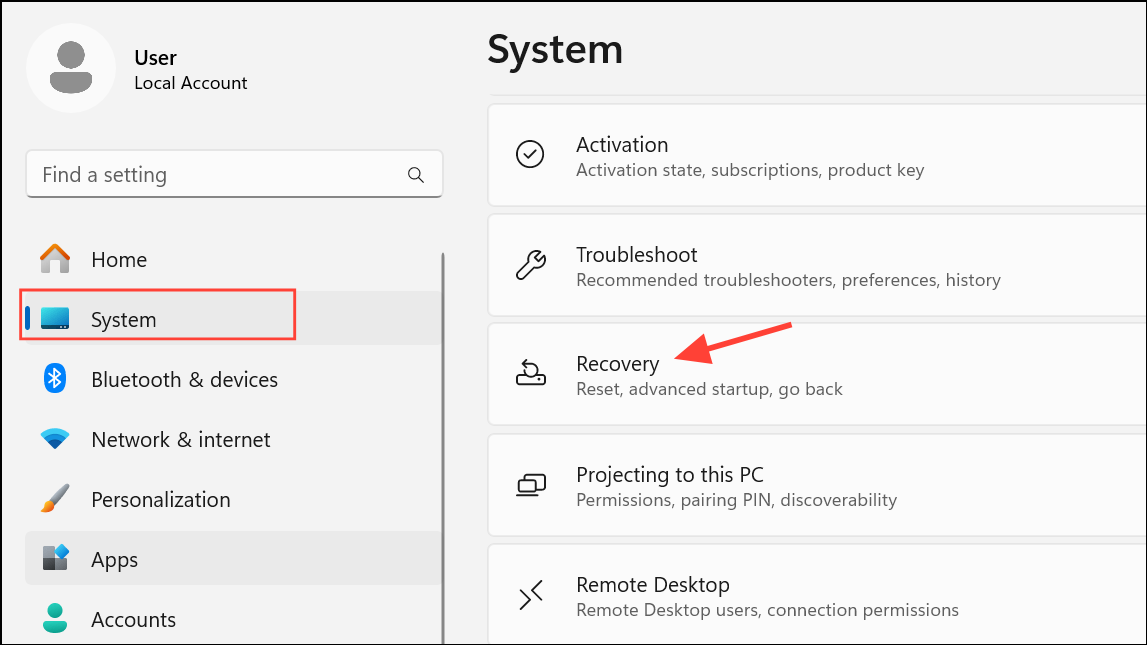
Step 1: Open Settings from the Start menu, then select System and choose Recovery.
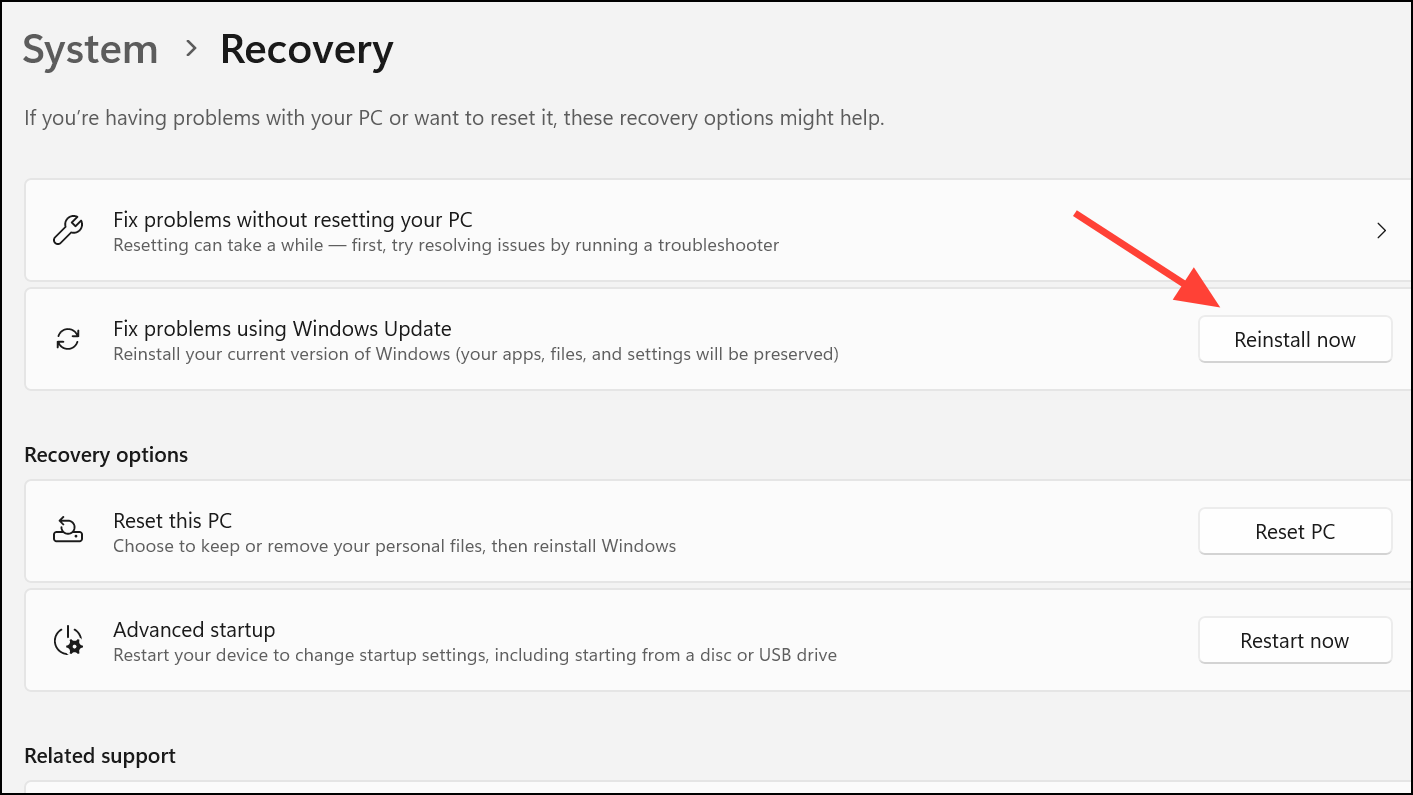
Step 2: Under Fix problems using Windows Update, click Reinstall now. Follow the on-screen instructions to complete the repair installation. This process keeps your files, apps, and settings intact while restoring the update infrastructure.
This approach resolves deeper corruption in the Windows component store, which is often the root cause of persistent update errors.
Run the Windows Update Troubleshooter
Microsoft includes a dedicated troubleshooter to automatically detect and fix update-related issues. This tool is effective for resolving common problems with update files and services.
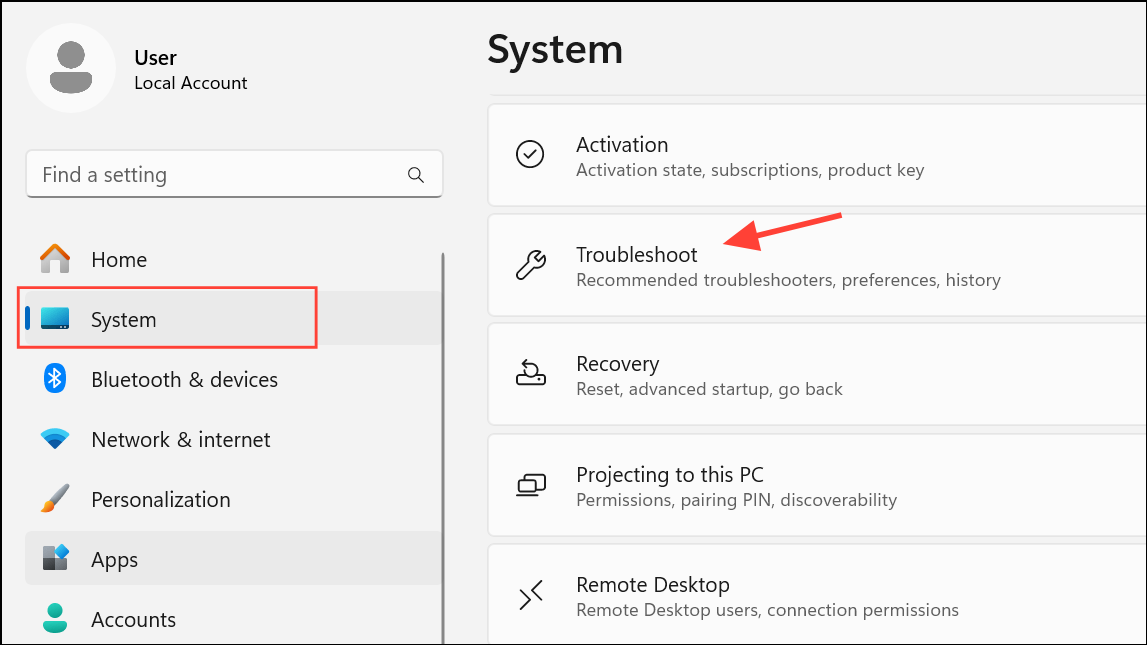
Step 1: Press Win + I to open the Settings app. Select System, then click Troubleshoot.
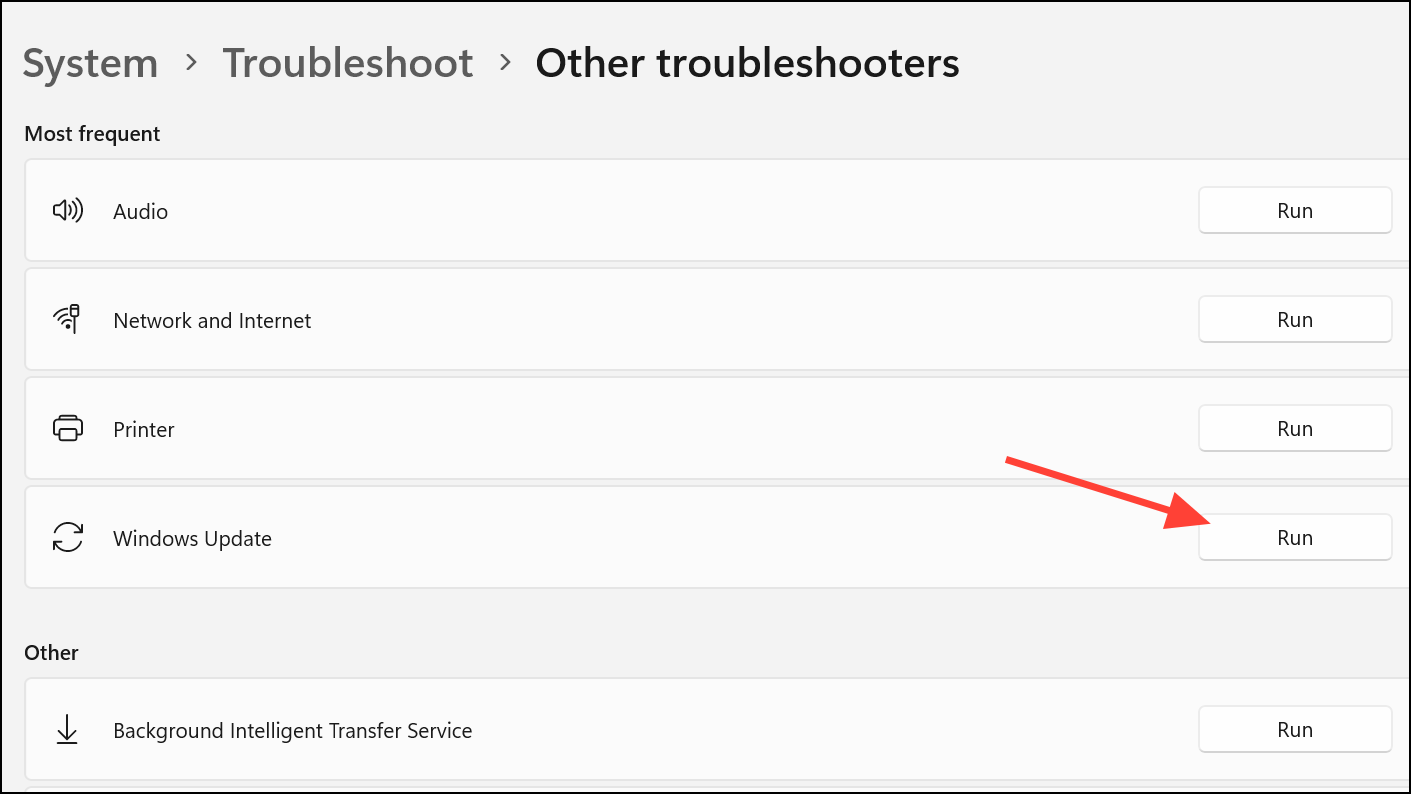
Step 2: Click Other troubleshooters, locate Windows Update, and click Run next to it.
Step 3: Allow the troubleshooter to scan and automatically apply fixes. Once complete, restart your computer and attempt the update again.
This tool repairs misconfigurations and resets update services, often resolving issues without further intervention.
Reset Windows Update Components Manually
Corrupted update cache or malfunctioning services can block updates. Manually resetting these components clears out problematic files and restarts necessary services, allowing updates to proceed.
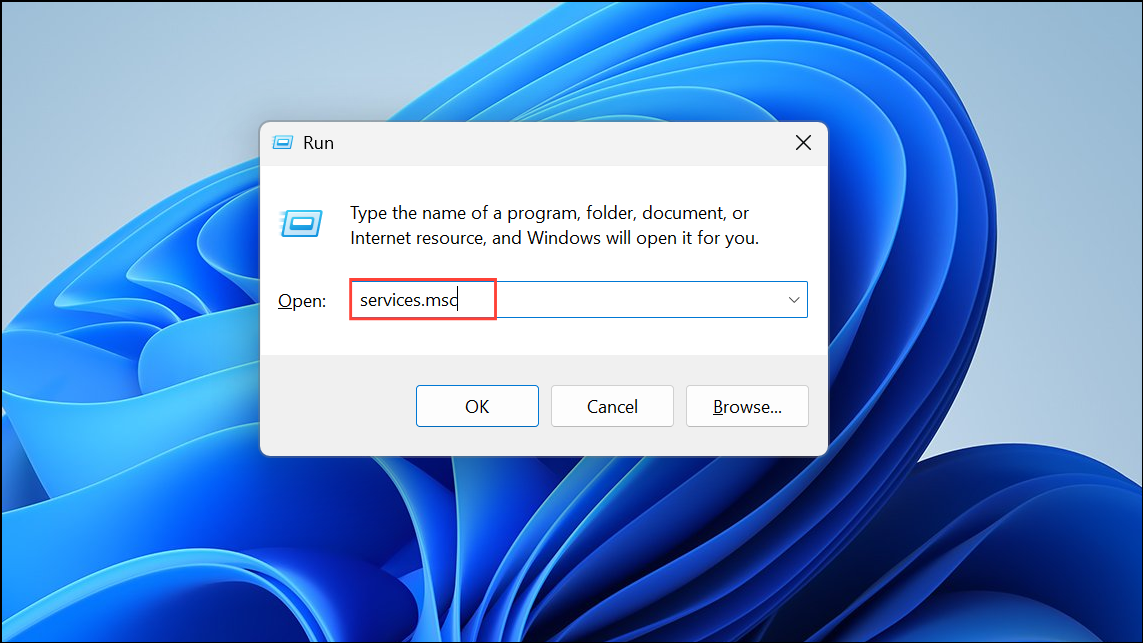
Step 1: Open the Run dialog with Win + R, type services.msc, and press Enter.
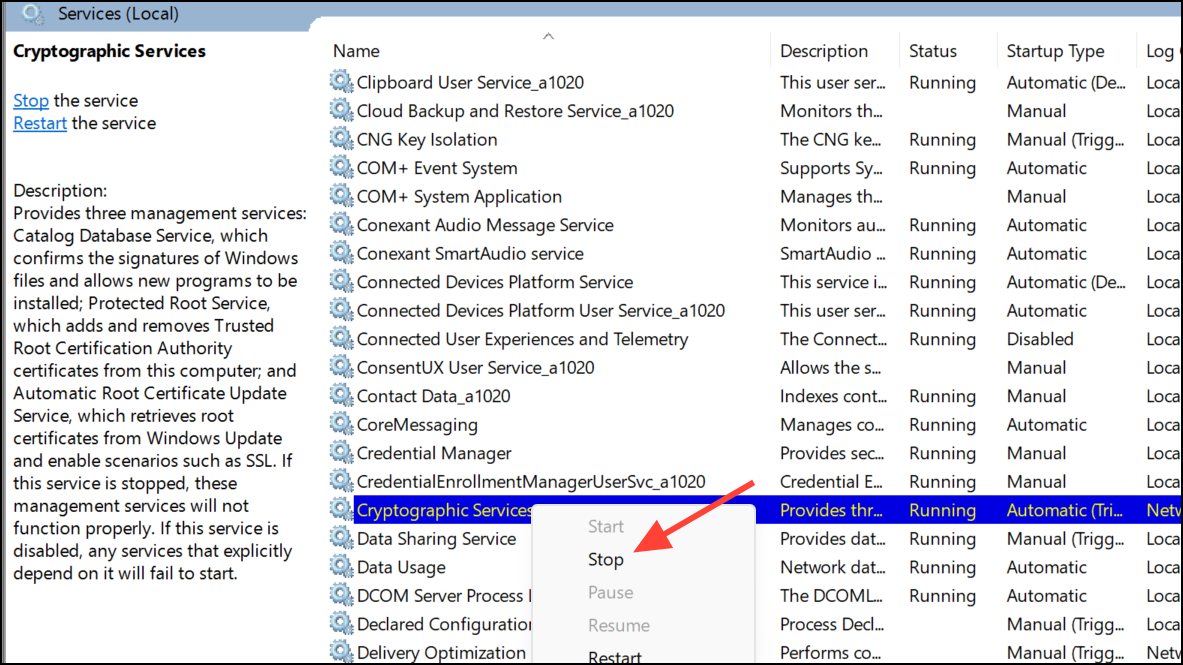
Step 2: In the Services window, locate and stop the following services by right-clicking each and selecting Stop:
- Windows Update
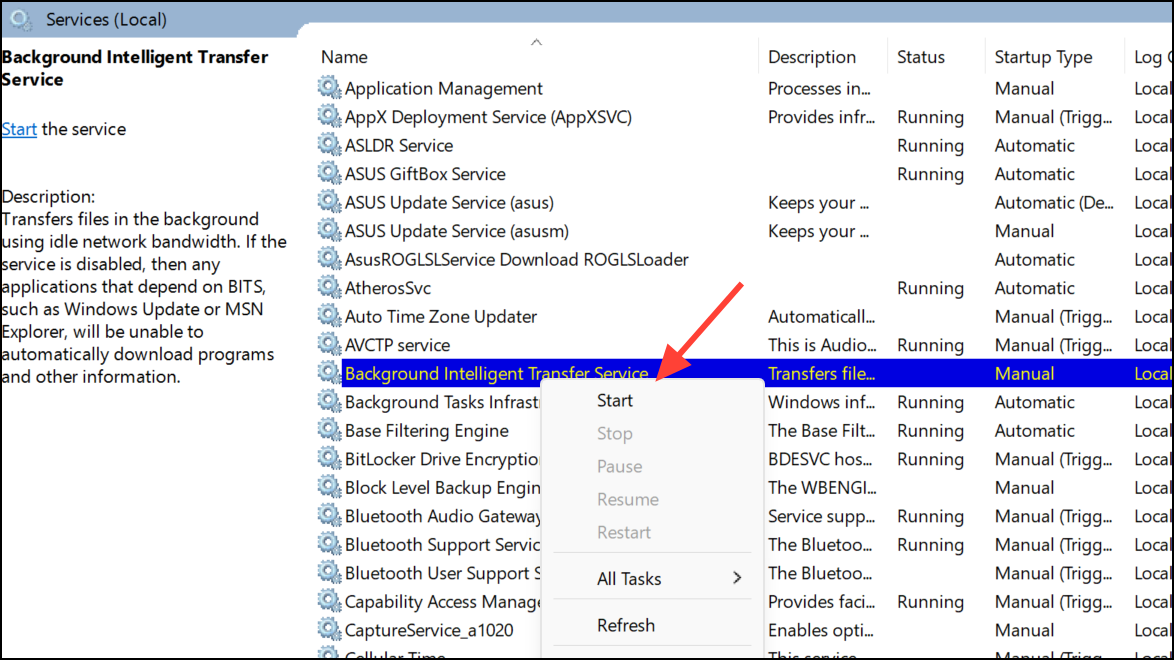
- Background Intelligent Transfer Service (BITS)
- Cryptographic Services
- Windows Installer
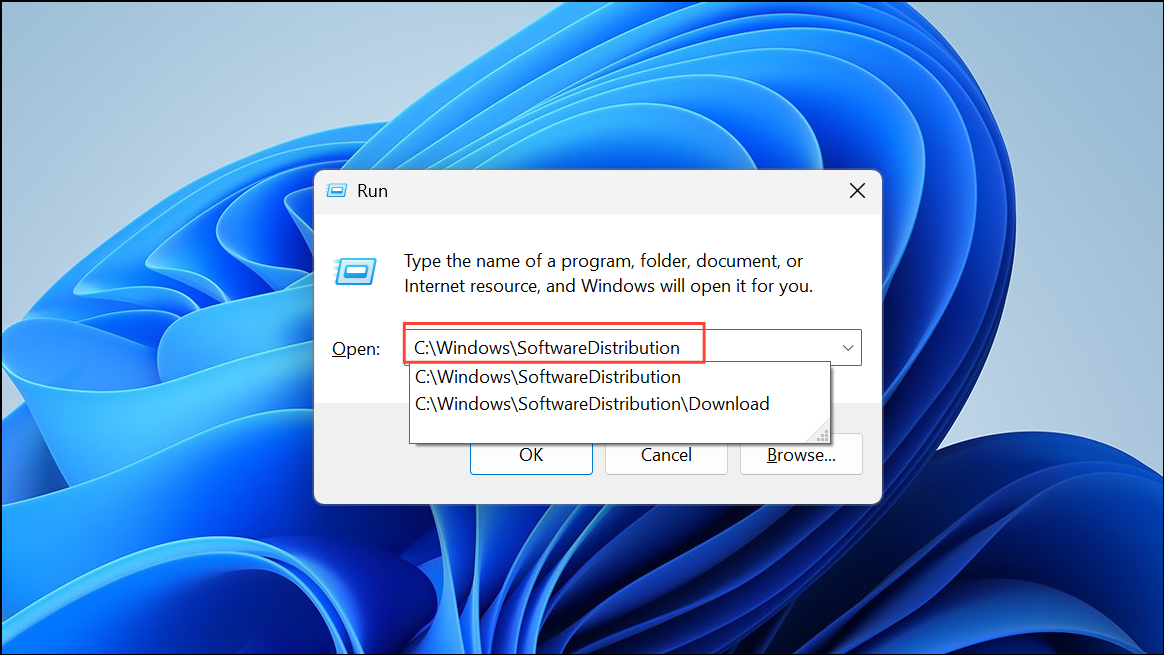
Step 3: Open the Run dialog again and enter C:\Windows\SoftwareDistribution. In the folder, select all files with Ctrl + A and delete them. These files will be rebuilt automatically by Windows Update.
Step 4: Return to the Services window and restart all the services you stopped earlier by right-clicking each and selecting Start.
Step 5: Retry the update installation in Settings.
This process removes corrupted update data and ensures all update services are running with default settings.
Repair System Files with SFC and DISM
Faulty or missing system files can block updates or cause update files to become corrupted. The System File Checker (SFC) and Deployment Image Servicing and Management (DISM) tools scan for and repair these files.
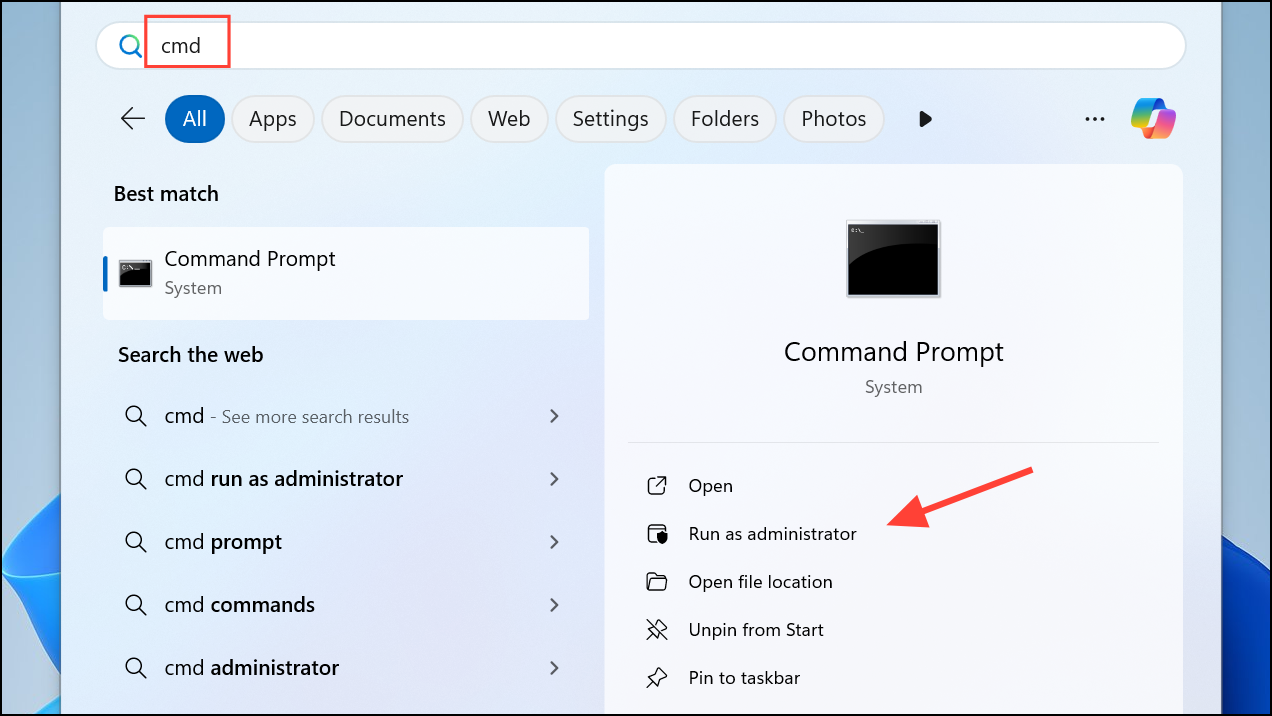
Step 1: Open the Start menu, type cmd, right-click Command Prompt, and select Run as administrator.
Step 2: Run the following DISM command to check and repair the Windows image:
DISM /Online /Cleanup-Image /RestoreHealth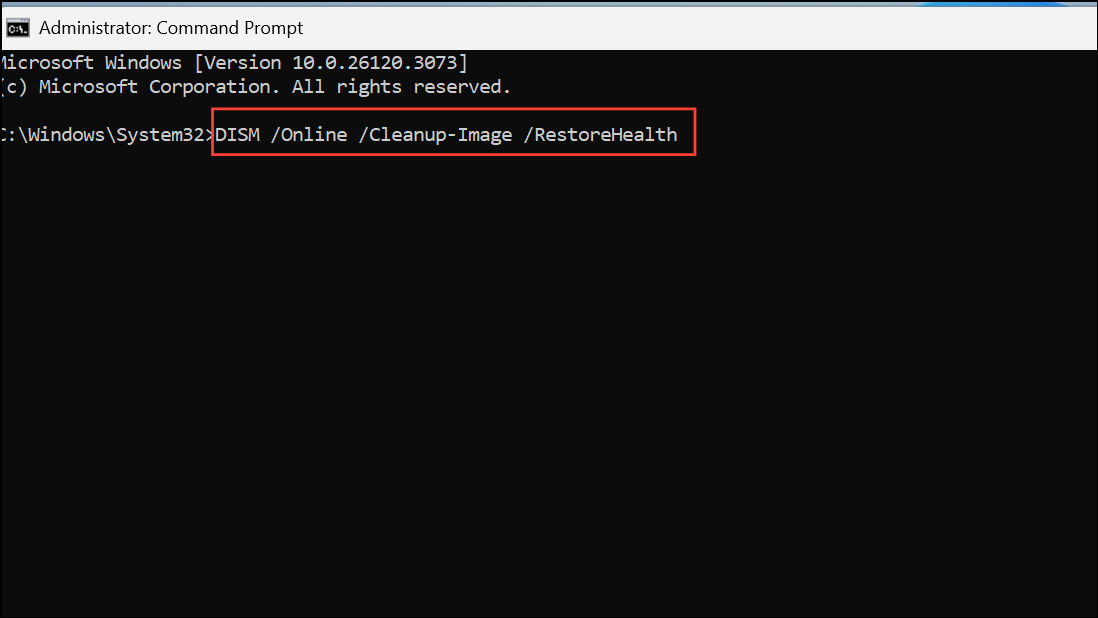
Step 3: After DISM completes, run the SFC scan:
sfc /scannow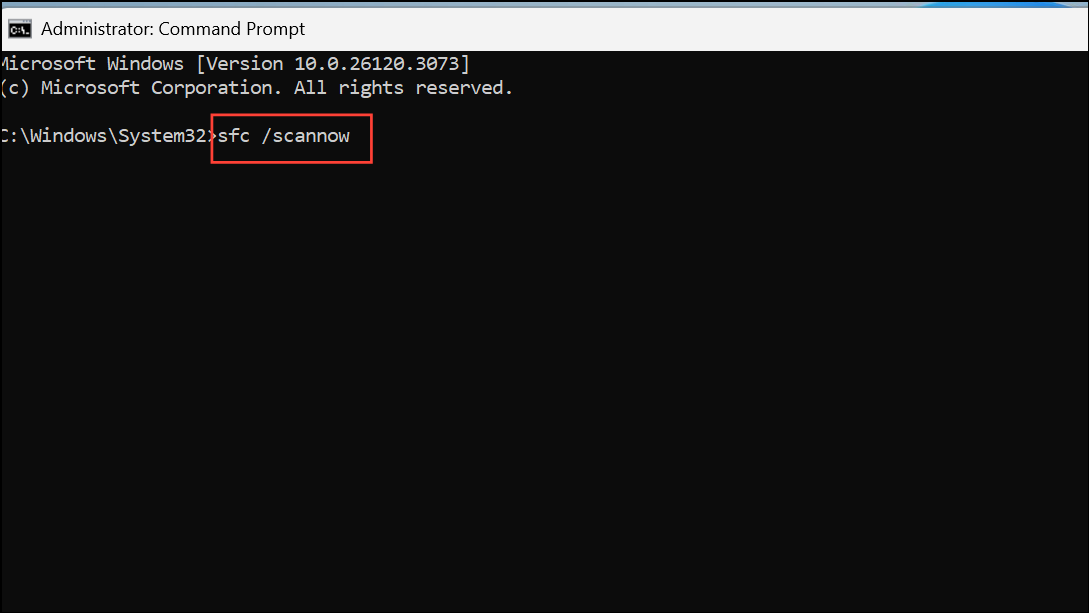
Step 4: Wait for both tools to finish. If they find and repair issues, restart your computer and check for updates again.
This sequence repairs corrupted system files and restores the integrity of the Windows update process.
Temporarily Disable Antivirus or Security Software
Third-party antivirus programs or aggressive firewall settings can block Windows Update downloads or interfere with system files. Temporarily turning off these security tools may allow updates to install successfully.
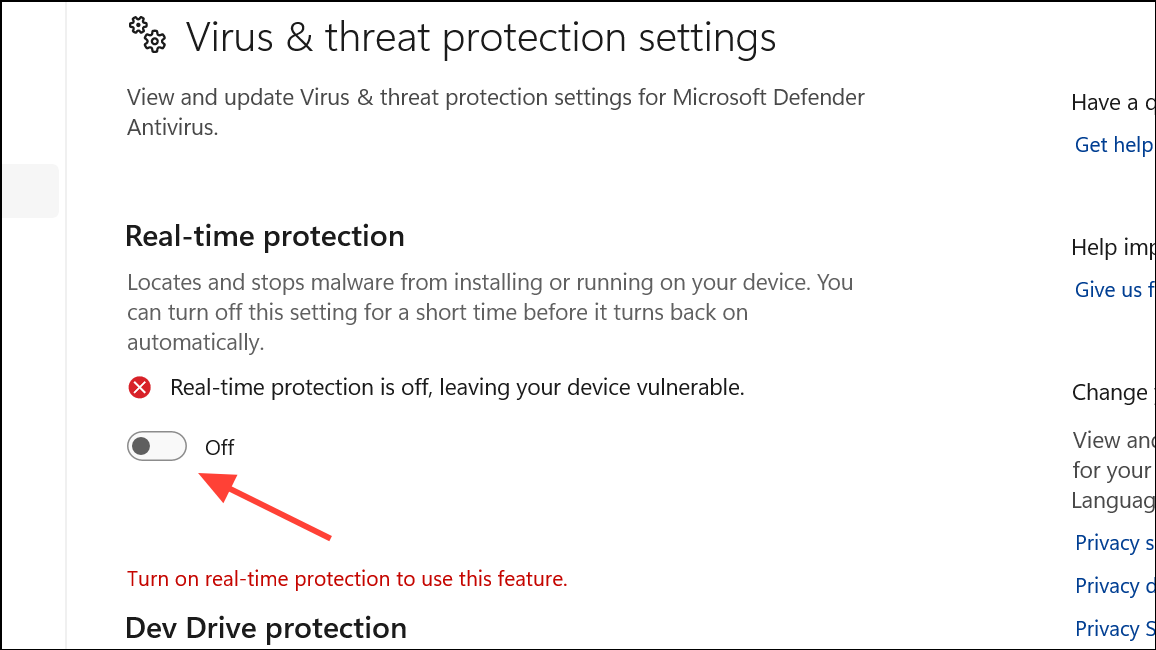
Step 1: Disable your third-party antivirus software by right-clicking its icon in the system tray and selecting the disable or exit option. If you use Windows Defender, open Windows Security from Settings, navigate to Virus & threat protection, and turn off real-time protection.
Step 2: Attempt to run Windows Update again while the antivirus is disabled. Monitor your system for any security prompts and re-enable your protection as soon as the update completes.
Disabling security software is a temporary troubleshooting step and should not be left off after updates finish installing.
Perform an In-Place Upgrade Using the Media Creation Tool
When all other fixes fail, using the Windows Media Creation Tool to upgrade your system can repair deeply embedded update issues. This process reinstalls Windows 11 while keeping your files and apps.
Step 1: Download the Media Creation Tool from the official Microsoft website.
Step 2: Launch the tool and select Upgrade this PC now. Follow the prompts, choosing the option to keep your files and applications.
Step 3: Allow the process to finish. Your device will reboot several times. Once complete, check Windows Update for any remaining updates.
This method addresses persistent update failures by reinstalling core system components.
Resolving the missing update files error in Windows 11 restores your device’s ability to stay current and secure. If problems persist after these steps, contacting Microsoft Support or considering a full system reset may be necessary.