
Ubuntu Server virtual machines in Hyper-V may display the network is unreachable error when their network configuration does not allow access to external or local networks. This issue prevents updates, software installations, and communication with other devices. Correcting the network setup in Hyper-V and verifying Ubuntu’s network configuration restores full connectivity.
Configure Hyper-V Virtual Switch for Ubuntu Server
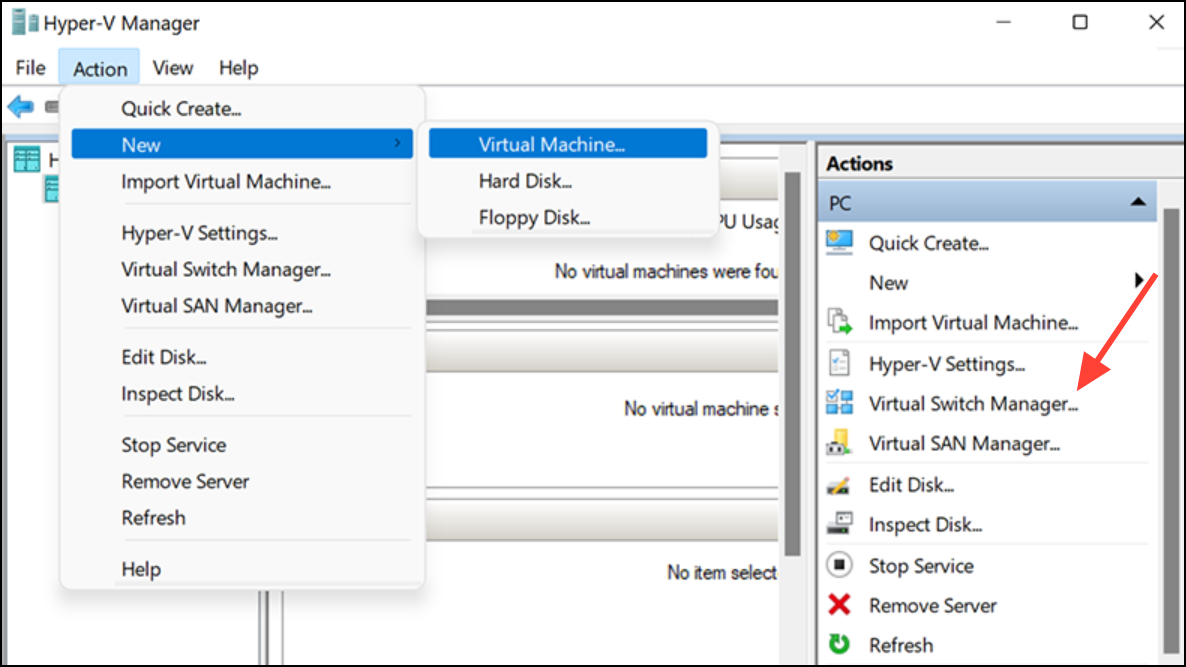
Step 1: Open Hyper-V Manager on your Windows 11 system and select the host machine from the left panel. Click on "Virtual Switch Manager" in the Actions pane. This tool lets you create and manage network switches for your virtual machines.
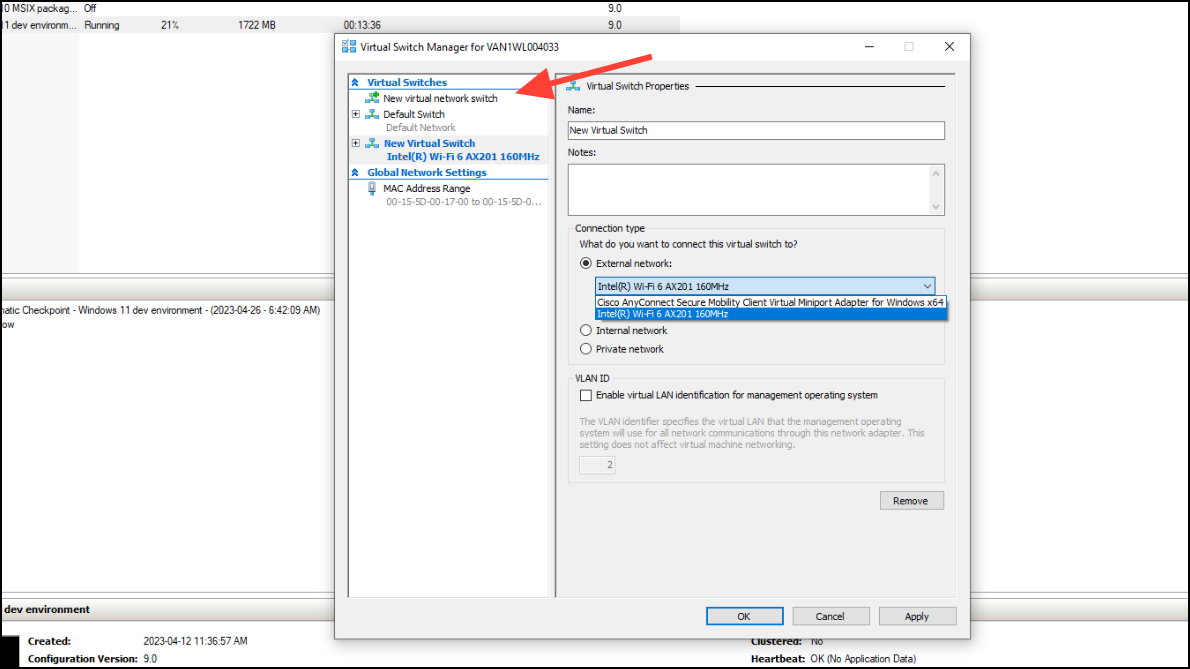
Step 2: Choose "New virtual network switch," then select "External" if you want your Ubuntu Server VM to access your physical network and the internet. Click "Create Virtual Switch." Assign a name and select the physical network adapter your computer uses for internet access. Save the changes.
Step 3: Shut down the Ubuntu Server VM if it’s running. Open the settings for the VM in Hyper-V Manager. Under "Network Adapter," select the virtual switch you just created. Apply the changes and start the VM.
Set Up Network Configuration Inside Ubuntu Server
Step 1: After booting your Ubuntu Server VM, log in and check the network interface status with:
ip aThis command lists all network interfaces and their current status. Look for an interface like eth0 or ens33.
Step 2: Determine if the interface has an IP address assigned. If not, you may need to configure DHCP or set a static IP. Edit the netplan configuration file, typically found at /etc/netplan/01-netcfg.yaml or a similar location. For DHCP, the configuration should look like:
network:
  version: 2
  ethernets:
    eth0:
      dhcp4: true
Replace eth0 with your network interface name if different.
Step 3: Apply the new configuration with:
sudo netplan applyThis command activates the updated network settings. Test connectivity by pinging an external address, such as:
ping 8.8.8.8If the ping succeeds, your network is functioning.
Check Firewall and Routing Settings
Step 1: Examine any firewall rules in Ubuntu that might block traffic. Use:
sudo ufw statusIf the firewall is active, ensure it allows outgoing connections or temporarily disable it for testing with sudo ufw disable.
Step 2: Verify the default gateway is set. Run:
ip routeThe output should include a line starting with default via followed by an IP address. If missing, add a default route with:
sudo ip route add default via [gateway_ip]Replace [gateway_ip] with your network’s gateway address.
Alternative: Use NAT or Internal Network for Isolated Environments
If you do not need your VM to access the broader network, configure a NAT or Internal virtual switch in Hyper-V. This setup restricts the VM to communicate only with the host or other VMs, which is useful for testing or isolated workloads. In Hyper-V Manager, create a new "Internal" or "Private" switch, assign it to your Ubuntu VM, and configure the VM’s network interface accordingly.
Restoring network access in Ubuntu Server VMs on Hyper-V requires correct virtual switch setup and in-guest network configuration. After making these adjustments, your server should regain full connectivity for updates and remote access.