
The Process1 Initialization Failed blue screen error on Windows 11 interrupts normal startup, forcing the system into a crash loop before user credentials appear. This stop code, often labeled as PROCESS1_INITIALIZATION_FAILED or 0x0000006B, points to critical failures during the Windows boot sequence. Most commonly, this is triggered by corrupted or missing system files, disk errors, or issues with the Bootcat.cache file, but can also result from hardware failures or incomplete updates. Immediate action restores system access and prevents data loss.
Use Startup Repair to Restore Boot Functionality
Windows 11 includes a built-in Startup Repair tool that automatically diagnoses and resolves many boot-related errors, including those causing the Process1 Initialization Failed BSOD. This method directly addresses the most common causes by repairing essential boot files and configurations.
Step 1: Initiate the Windows Recovery Environment (WinRE) by powering on your PC, then holding the power button to force shutdown as soon as the Windows logo appears. Repeat this forced shutdown and restart process two to three times. On the next boot, Windows will detect repeated failed startups and launch Automatic Repair mode.
Step 2: When the Automatic Repair screen appears, select Advanced options. Navigate to Troubleshoot > Advanced options > Startup Repair.
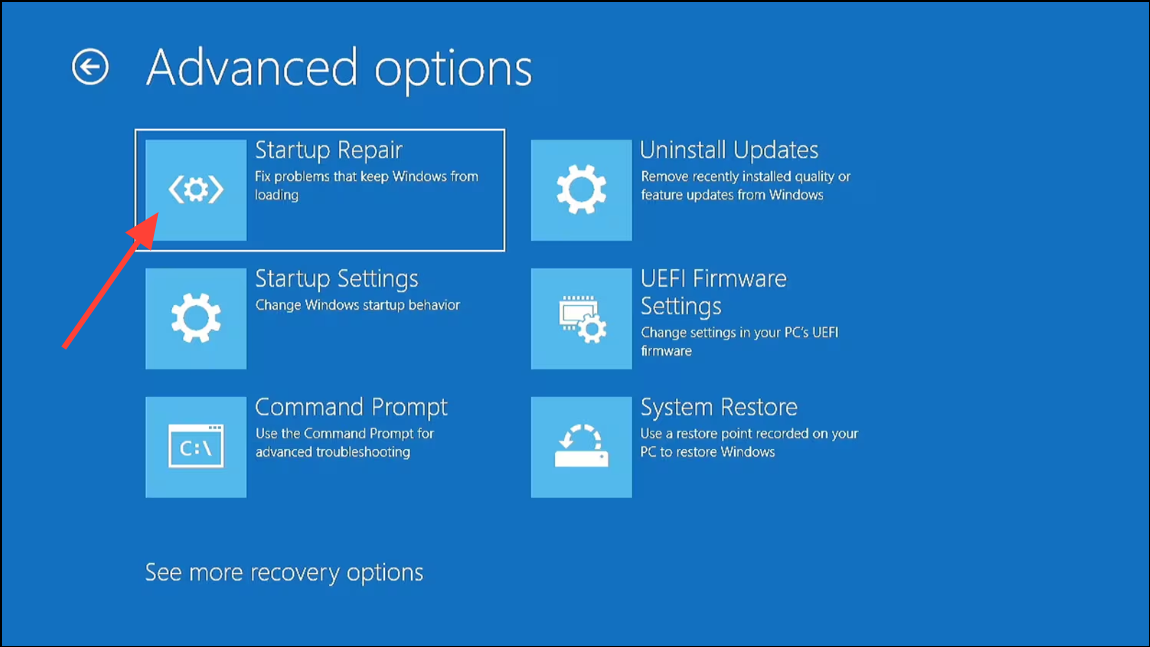
Step 3: Choose your user account and enter your password if prompted. Allow Startup Repair to scan and attempt repairs. This process may take several minutes. If repairs are successful, Windows will restart and attempt to boot normally.
Remove or Replace the Bootcat.cache File
The Bootcat.cache file, located in %SystemRoot%\System32\CodeIntegrity, is essential for Windows startup. Corruption or size changes in this file frequently cause the Process1 Initialization Failed error. Removing this file forces Windows to regenerate it on the next boot, often resolving the issue.
Step 1: Boot into the Windows Recovery Environment using the forced restart method described above.
Step 2: In WinRE, go to Troubleshoot > Advanced options > Command Prompt.

Step 3: Enter your administrative credentials if prompted. Once the Command Prompt opens, type the following command to delete the Bootcat.cache file:
del C:\Windows\System32\CodeIntegrity\bootcat.cache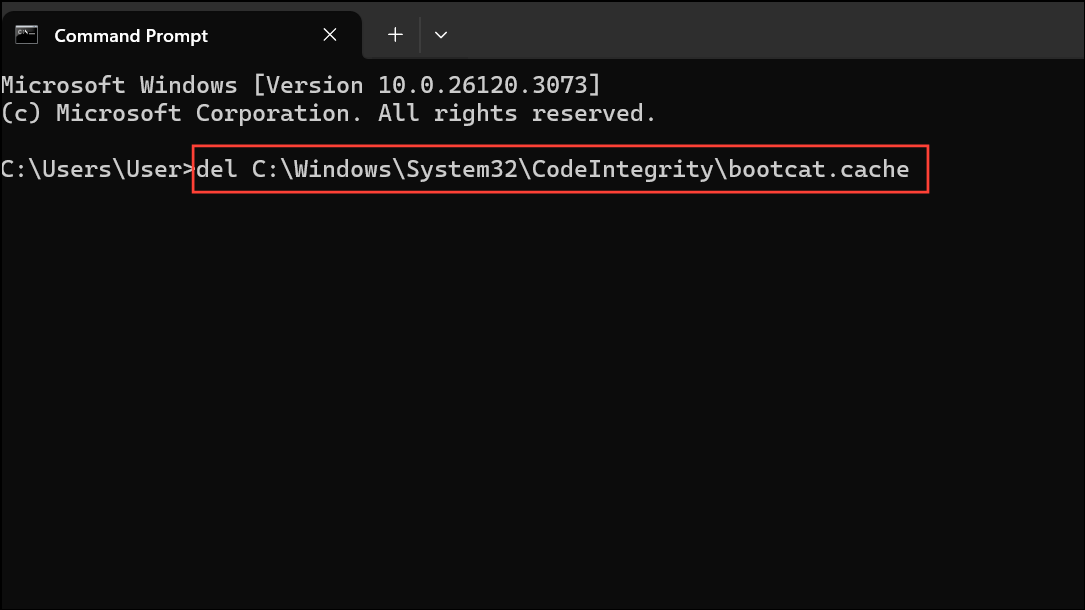
Step 4: Close Command Prompt and select Continue to restart Windows. On reboot, Windows will recreate the Bootcat.cache file. If the error persists, consider copying this file from a working Windows 11 system with the same version, or proceed to additional recovery steps.
Check Disk for Errors and Repair File System
Physical or logical errors on the system drive can prevent Windows from initializing critical processes. Running a disk check with repair options identifies and fixes bad sectors or corrupted file system entries.
Step 1: Access the Windows Recovery Environment and open Command Prompt as described earlier.
Step 2: Run the following command to scan and repair the system drive (replace C: with your Windows installation drive if different):
chkdsk C: /f /r
This command checks for file system errors (/f) and locates bad sectors (/r), attempting to recover readable information. Allow the scan to finish without interruption. After completion, restart your computer to see if normal boot is restored.
Repair System Files Using SFC and DISM
Corrupted or missing system files can disrupt the boot process. The System File Checker (SFC) and Deployment Imaging Service and Management Tool (DISM) utilities scan for and repair damaged Windows files.
Step 1: Open Command Prompt from the Windows Recovery Environment.
Step 2: To check and repair critical system files, enter:
sfc /scannow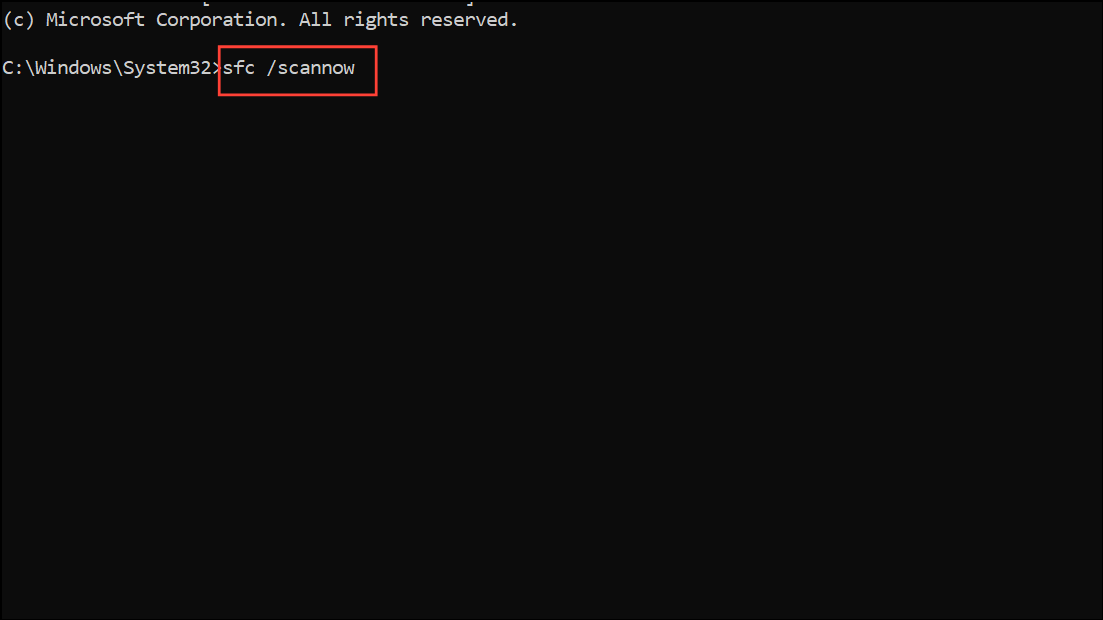
Step 3: After SFC completes, run DISM to restore the system image:
DISM /Online /Cleanup-Image /RestoreHealth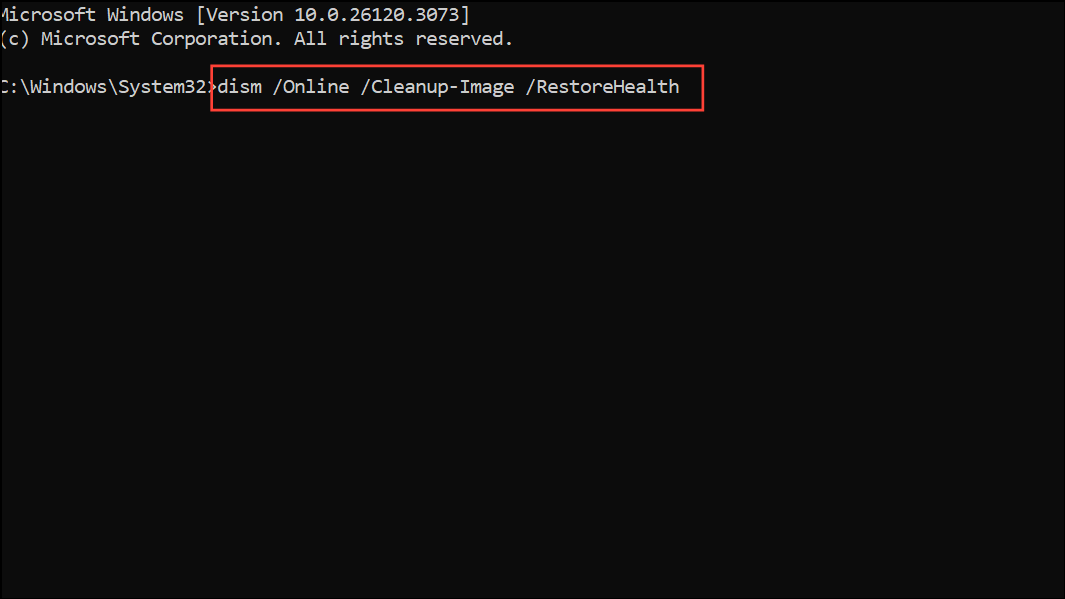
If DISM returns an error, specify a repair source with:
DISM /Online /Cleanup-Image /RestoreHealth /Source:C:\RepairSource\Windows /LimitAccess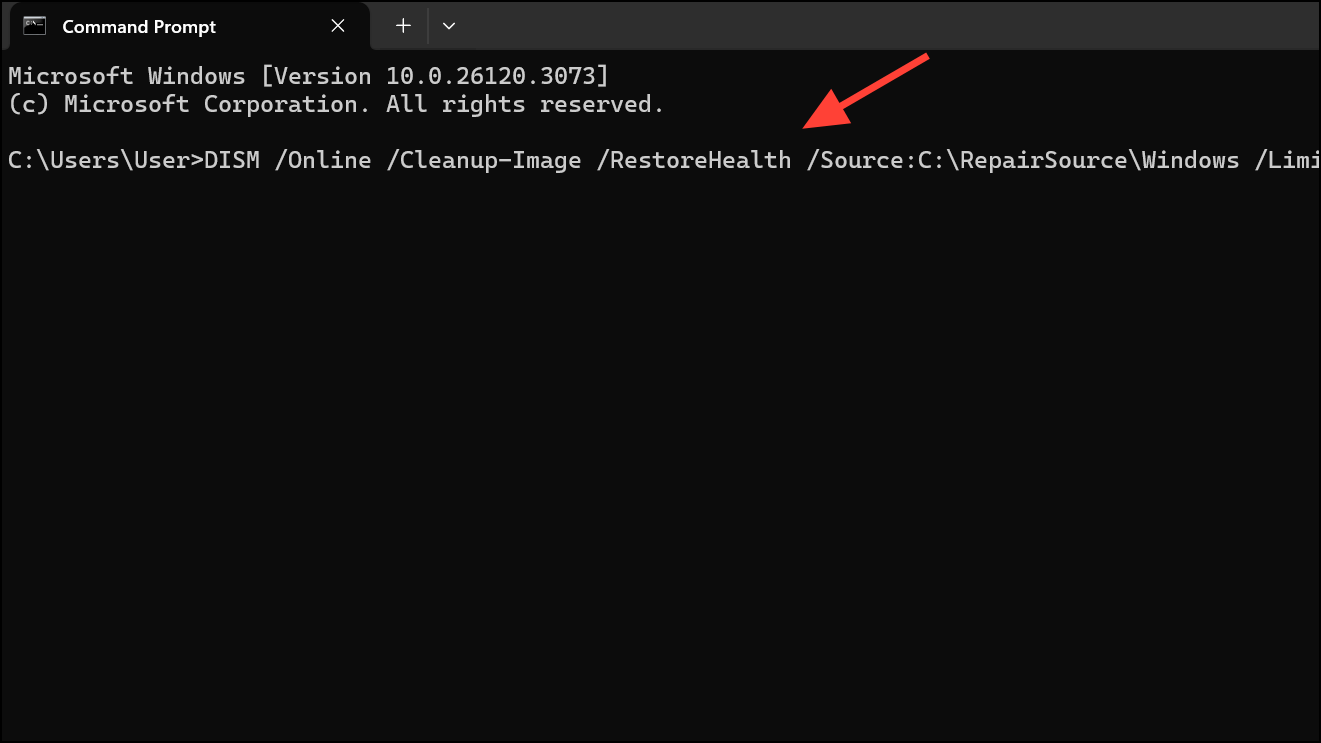
Allow both scans to finish, then restart your PC. This process replaces corrupted files with correct versions, restoring boot stability.
Restore Windows Using System Restore
If the error began after recent software changes, updates, or driver installations, restoring Windows to a previous working state can resolve the problem without affecting personal files.
Step 1: In the Windows Recovery Environment, select Troubleshoot > Advanced options > System Restore.
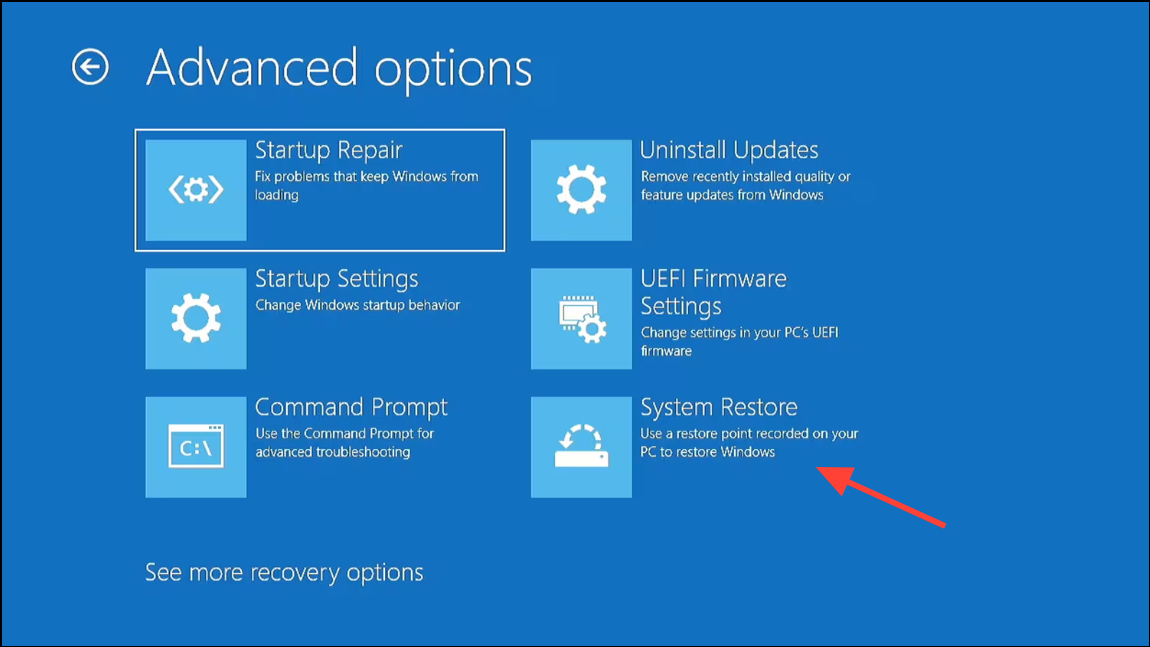
Step 2: Follow the prompts to select a restore point created before the error occurred. Confirm your choice and allow Windows to revert system settings and files to their previous state. The system will restart automatically after restoration.
Check and Repair Boot Configuration Data (BCD)
Corruption in the Boot Configuration Data can prevent Windows from initializing core processes. Rebuilding the BCD restores essential boot entries.
Step 1: Open Command Prompt from the Windows Recovery Environment.
Step 2: Enter the following commands one at a time, pressing Enter after each:
bootrec /fixmbr
bootrec /fixboot
bootrec /scanos
bootrec /rebuildbcd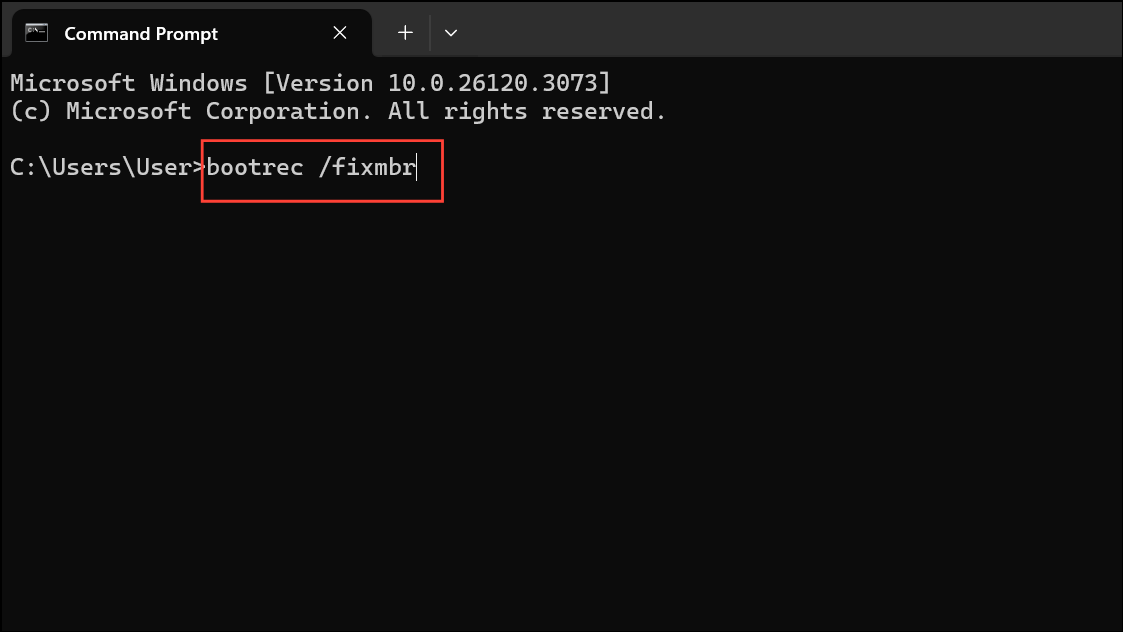
After completing these commands, close Command Prompt and restart your PC. This process reconstructs the boot records, resolving issues that block system initialization.
Perform a Fresh Windows 11 Installation
If all other methods fail, a clean installation of Windows 11 removes persistent errors caused by deep system corruption or hardware faults. This process erases all data on the system drive, so back up important files if possible.
Step 1: Use another computer to download the official Windows 11 Media Creation Tool from Microsoft’s website. Create a bootable USB drive following the tool’s instructions.
Step 2: Insert the USB into your affected PC and boot from it (usually by pressing F12, Esc, or Del during startup to access the boot menu).
Step 3: Choose Install Now, select Custom installation, delete the previous Windows partitions, and proceed with a fresh install. Follow on-screen prompts to complete setup.
Additional Recovery Steps and Maintenance Tips
- Disconnect external devices (USB drives, printers, etc.) before troubleshooting. Faulty peripherals can sometimes trigger BSOD errors.
- Check Device Manager for device conflicts or outdated drivers once Windows boots successfully.
- Run Windows Memory Diagnostic from WinRE to test for RAM issues if errors persist after software repairs.
- Regularly update Windows and drivers to prevent future system file corruption.
- Maintain at least 10–15% free space on your system drive to allow Windows to create necessary files and operate efficiently.
Restoring normal startup after the Process1 Initialization Failed blue screen on Windows 11 requires targeted repairs to system files, boot records, and hardware. Following these steps streamlines recovery and gets your PC back to a usable state quickly.