
The "Failed to connect to a Windows service" error can prevent you from using essential features, including Windows Update, the Microsoft Store, and even basic internet connectivity. This issue often stems from corrupted system files, misconfigured network settings, or problems with critical Windows services. The following methods address these root causes, starting with the most common and effective solutions.
Reset Network Configuration
Problems with your computer's network settings are a primary cause of this error. Resetting the network configuration can resolve conflicts and clear corrupted data that prevents services from connecting to the internet.
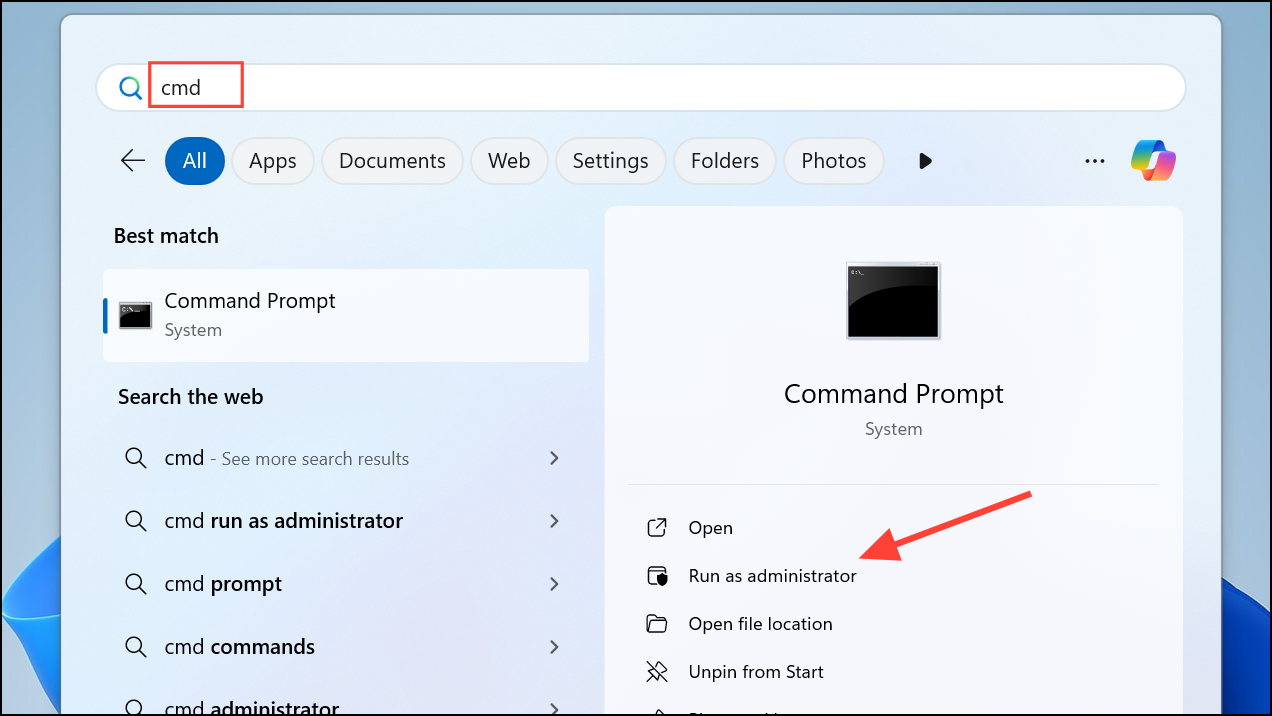
Step 1: Open the Start Menu, type CMD, right-click the result, and select Run as administrator to open an elevated command-line window.
Step 2: Type the following command and press Enter. This command resets the Winsock catalog, which defines how Windows network applications access network services. A corrupted catalog can block all network access.
netsh winsock reset
Step 3: Next, reset the TCP/IP stack by entering the command below and pressing Enter. This restores the protocol to its default settings, fixing issues related to IP addressing and connectivity.
netsh int ip reset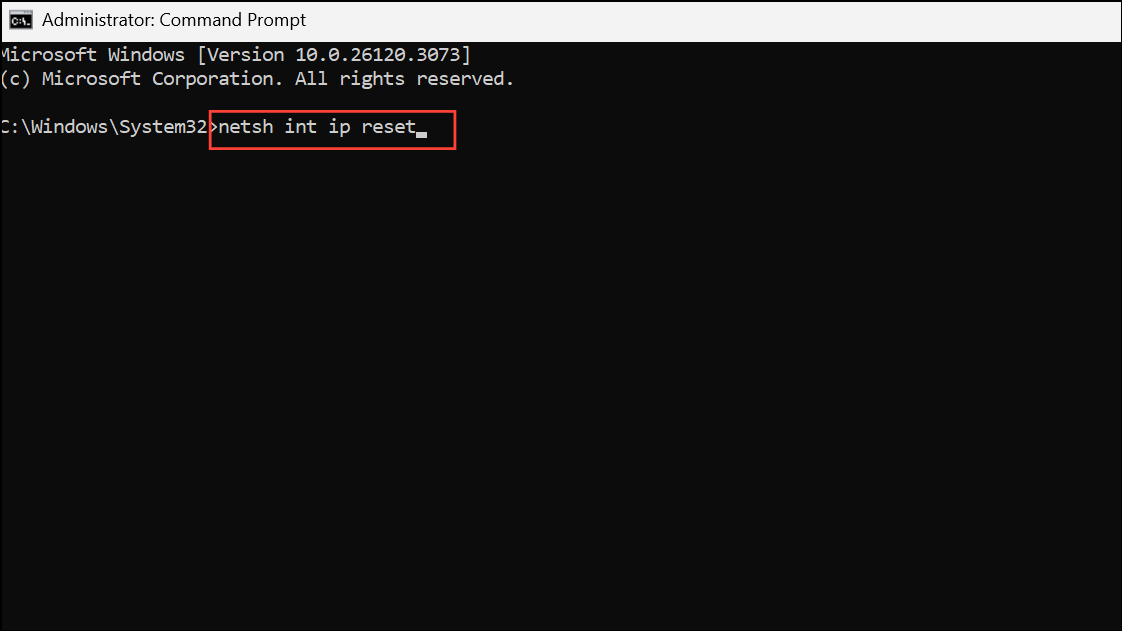
Step 4: Clear the DNS resolver cache to remove outdated or incorrect DNS information. Type the following command and press Enter.
ipconfig /flushdns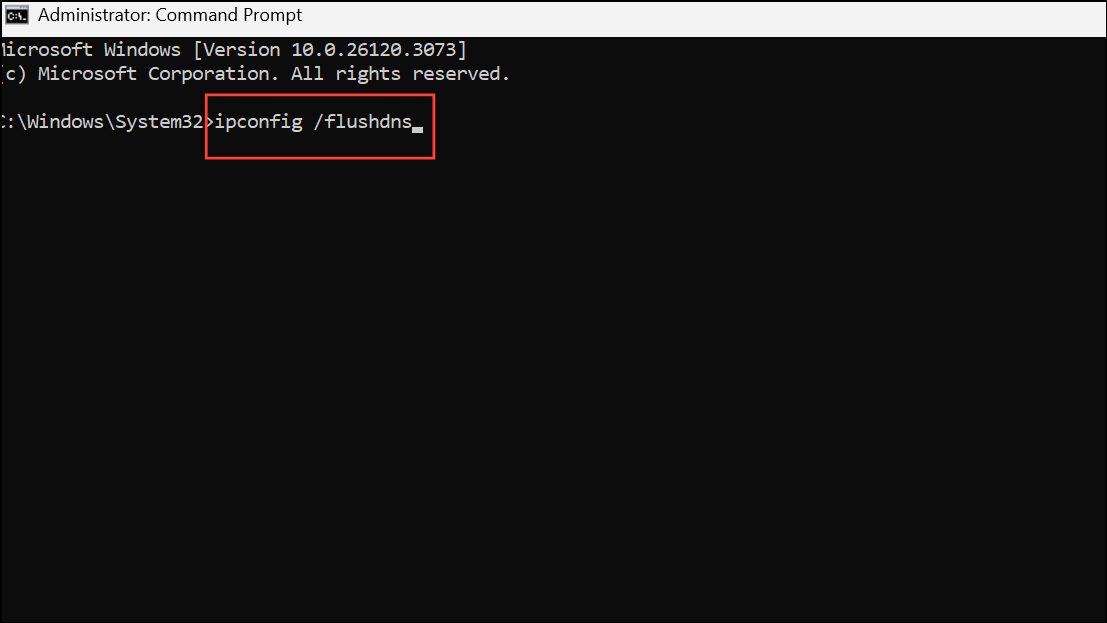
Step 5: Release your current IP address and request a new one from your router. Enter these two commands one after the other, pressing Enter after each one.
ipconfig /release
ipconfig /renew
Step 6: Close the Command Prompt and restart your computer. After rebooting, check if the "Failed to connect to a Windows service" error is resolved.
Repair System Files and Disk Errors
Corrupted system files or errors on your hard drive can interfere with Windows services, causing them to fail. Using built-in Windows utilities like Check Disk, System File Checker (SFC), and Deployment Image Servicing and Management (DISM) can find and repair these underlying issues.
Step 1: Open Command Prompt with administrative privileges, as shown in the previous method.
Step 2: Run the Check Disk utility to scan your system drive for file system errors and bad sectors. Type the following command and press Enter. You will likely be prompted to schedule the scan for the next restart; type Y and press Enter.
chkdsk c: /f /r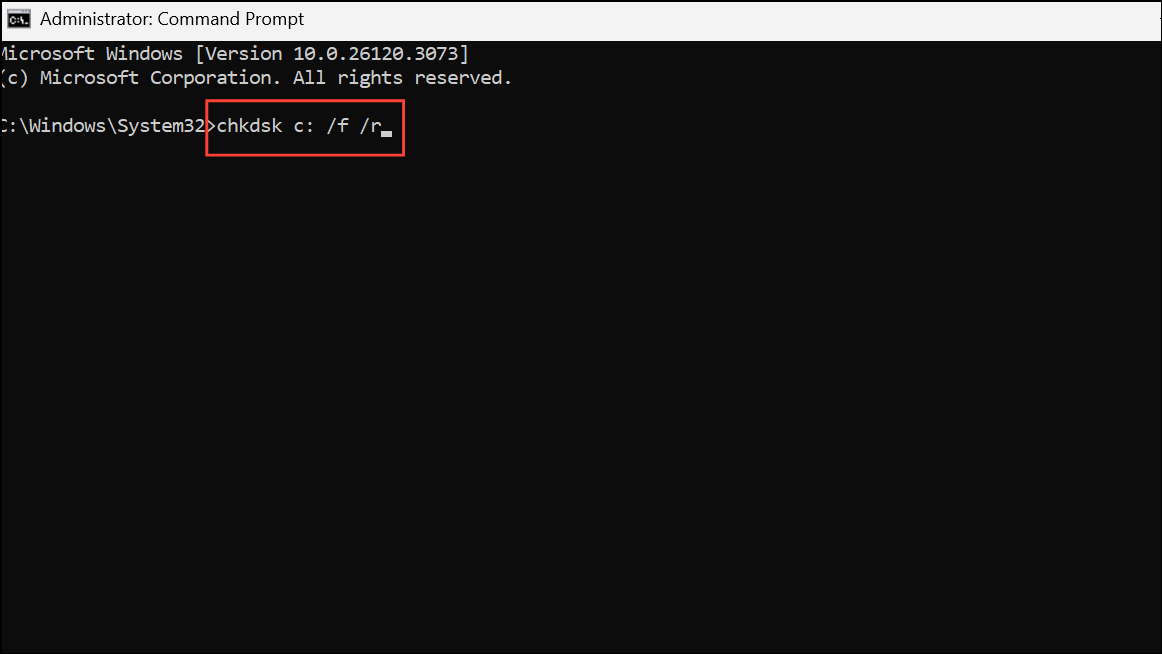
Step 3: Restart your computer. The Check Disk scan will run before Windows loads. This process can take a significant amount of time, so let it complete without interruption.
Step 4: Once your computer has rebooted, open an elevated Command Prompt again. Run the System File Checker to find and replace any corrupted or missing Windows system files. Type the command below and press Enter.
sfc /scannow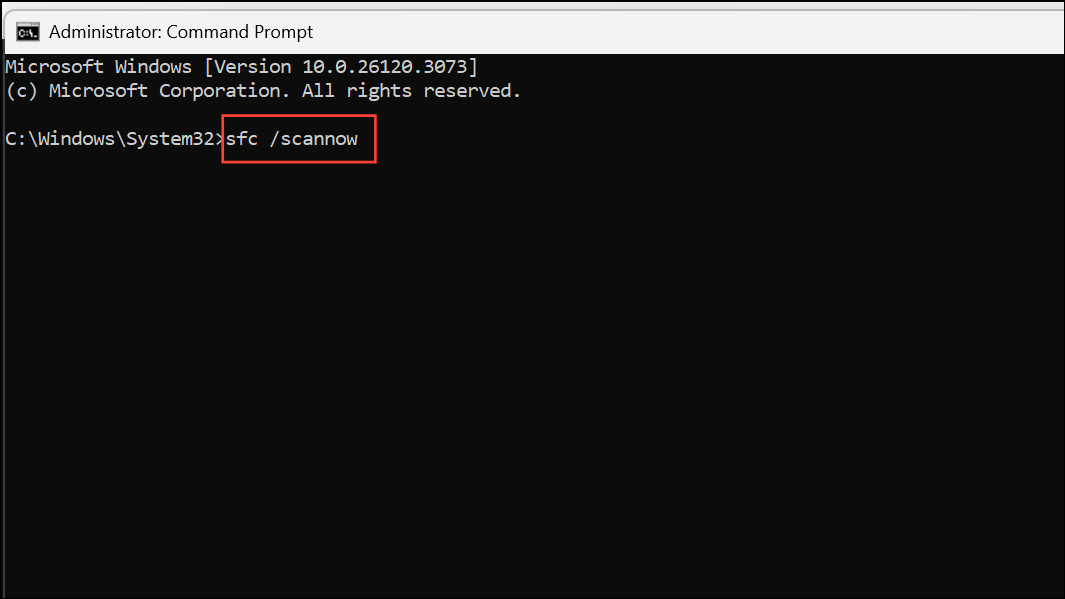
Step 5: After the SFC scan is complete, run the DISM tool to repair the core Windows component store, which SFC uses as a source for its repairs. Enter the following command.
DISM /Online /Cleanup-Image /RestoreHealth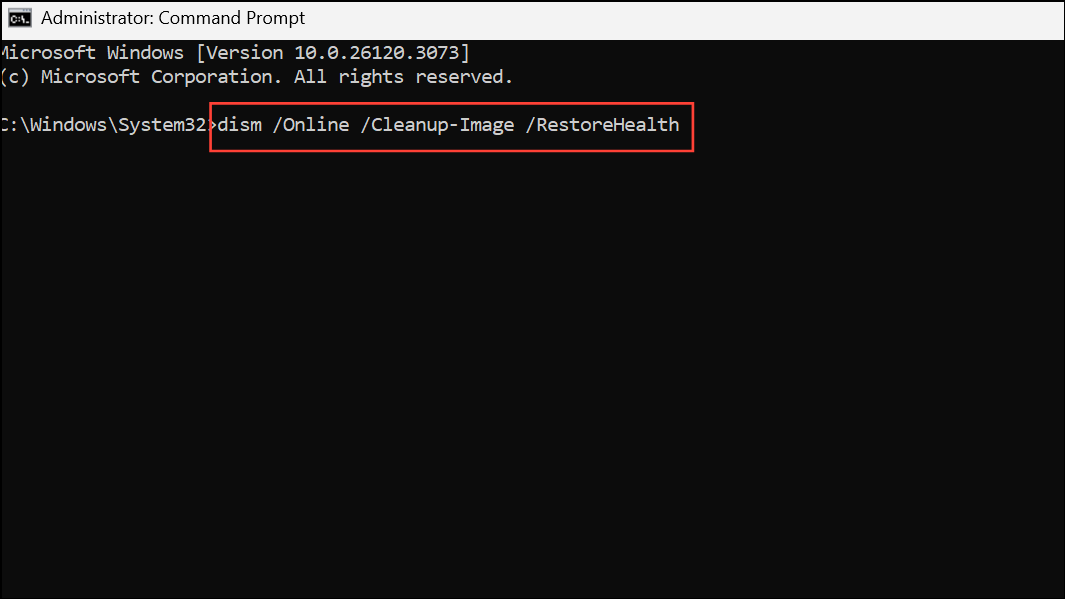
Step 6: Once the DISM scan finishes, restart your computer one more time to apply all the changes and check if the error persists.
Check and Restart Key Windows Services
Sometimes, the error is caused by a specific service that has stopped working correctly. Restarting these services and ensuring they are configured to start automatically can resolve the problem.
System Event Notification Service
This service monitors system events and notifies subscribers. If it fails, other services that depend on it may also fail.
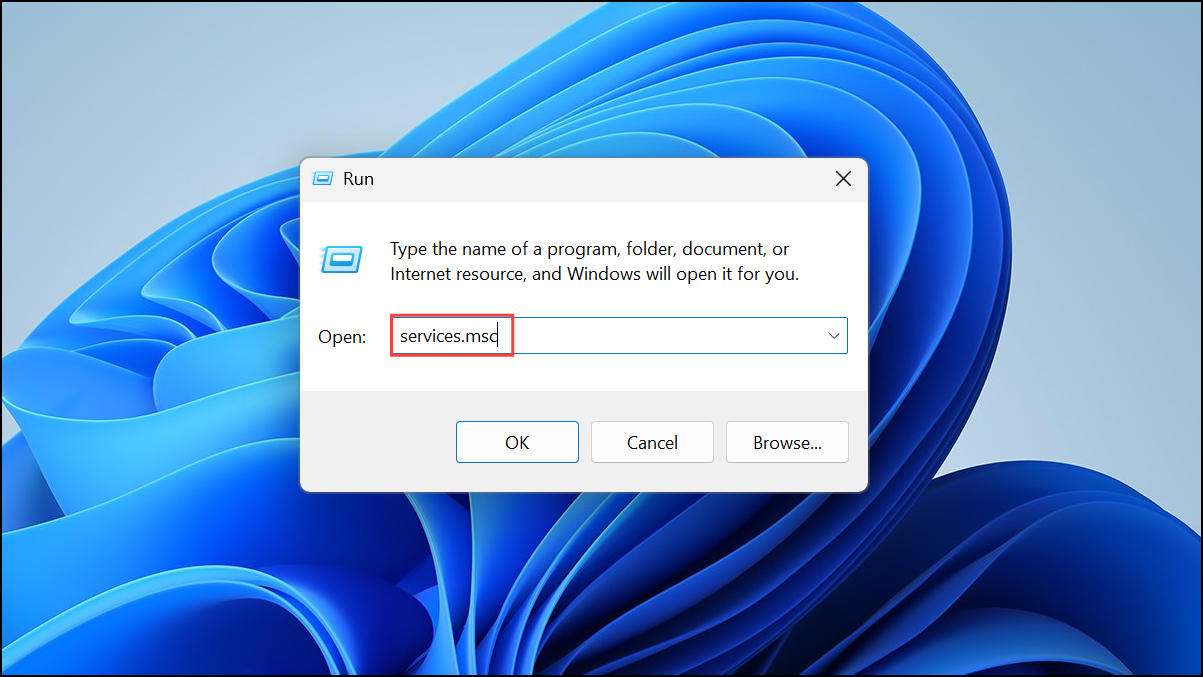
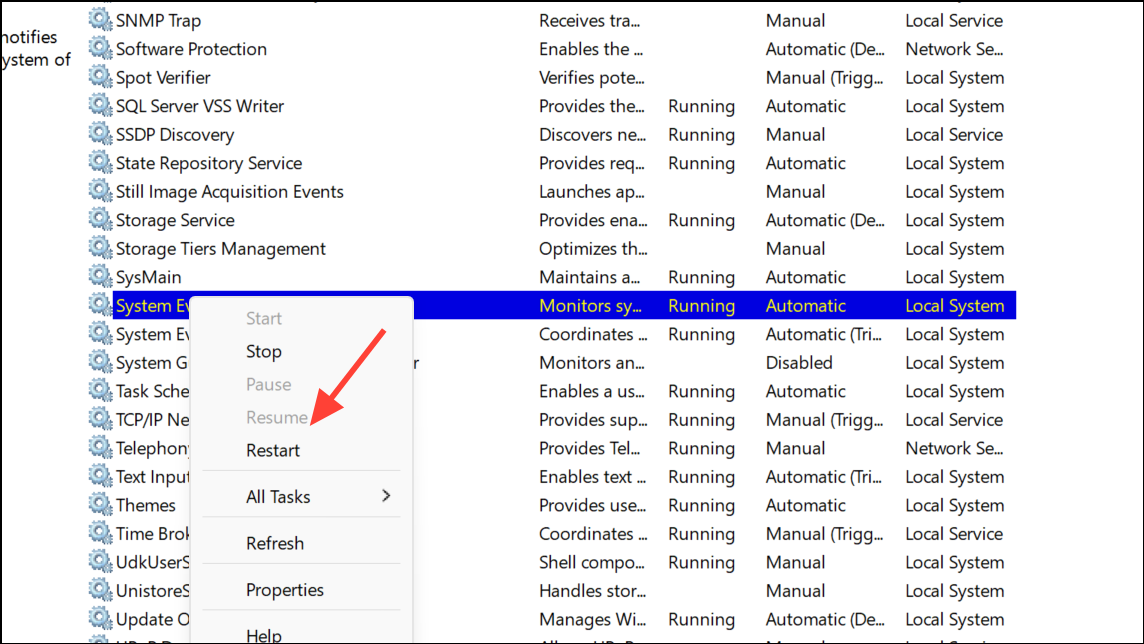
Step 1: Press Windows key + R to open the Run dialog box. Type services.msc and press Enter to open the Services window.
Step 2: Scroll down the list and locate the System Event Notification Service.
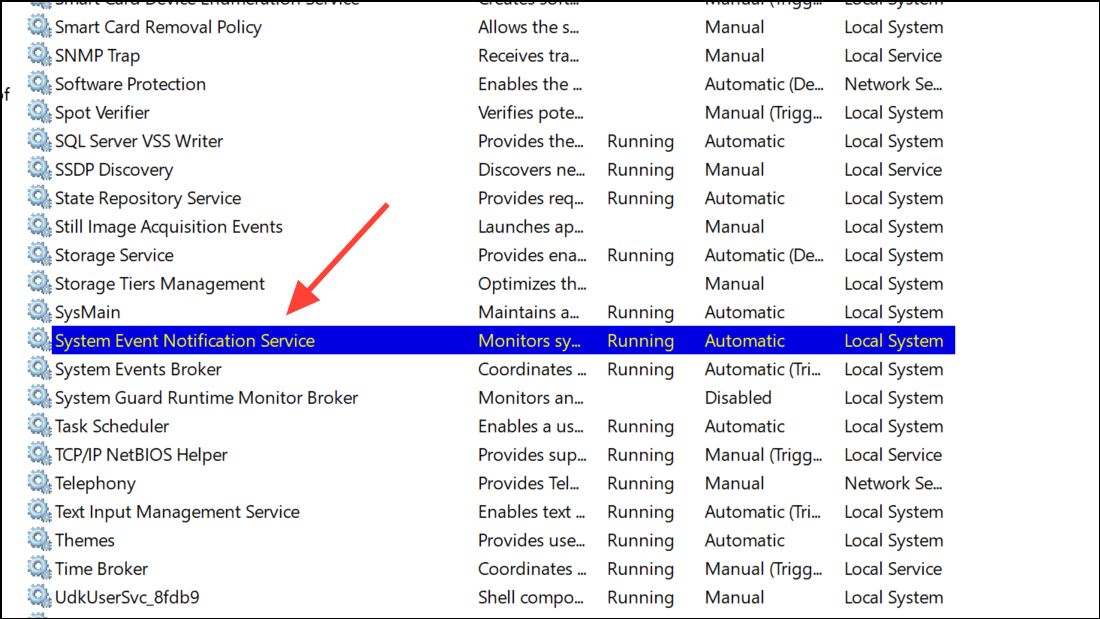
Step 3: Right-click on the service and select Restart. If Restart is grayed out, choose Start instead.
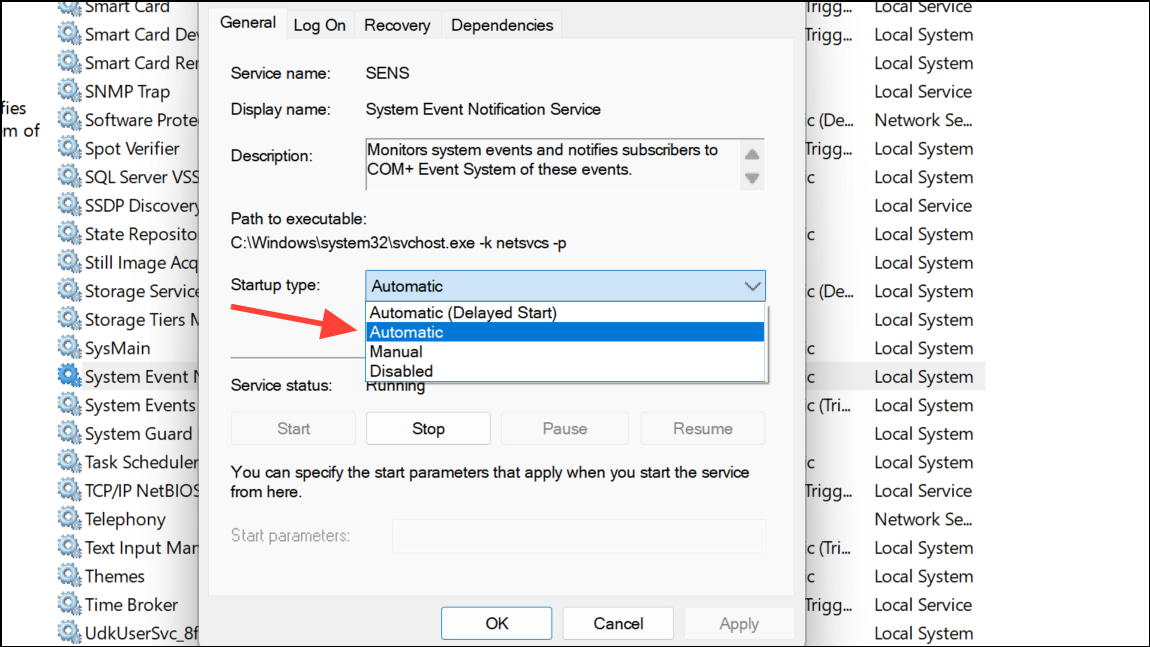
Step 4: Right-click the service again and select Properties. In the Properties window, set the Startup type to Automatic. Click Apply and then OK to save the changes.
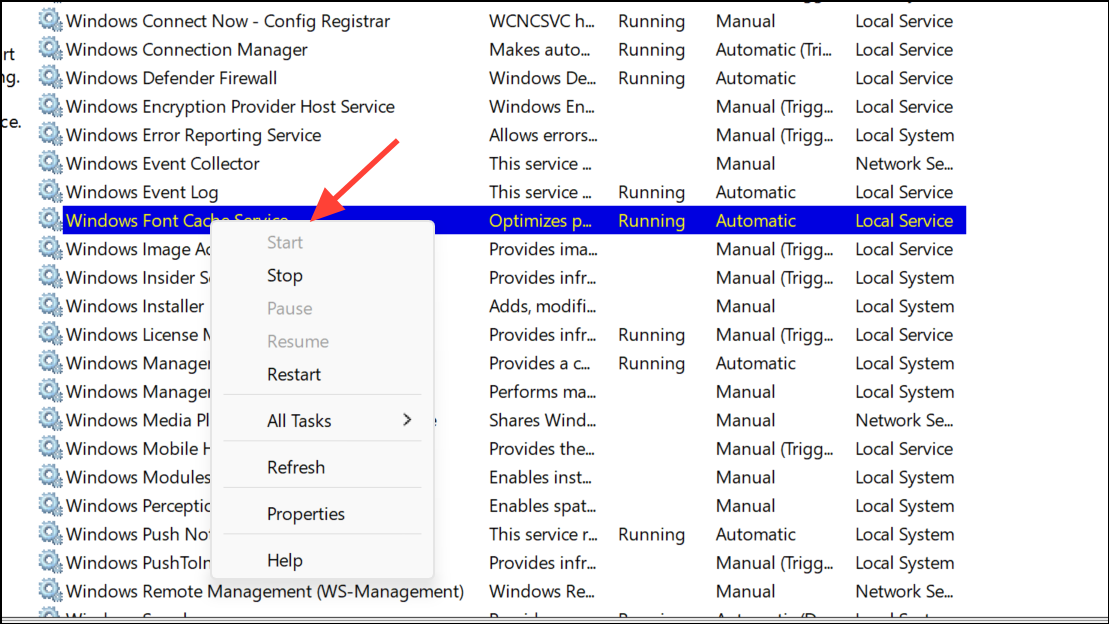
Windows Font Cache Service
A corrupted font cache can unexpectedly lead to service connection errors. Clearing this cache can fix the issue.
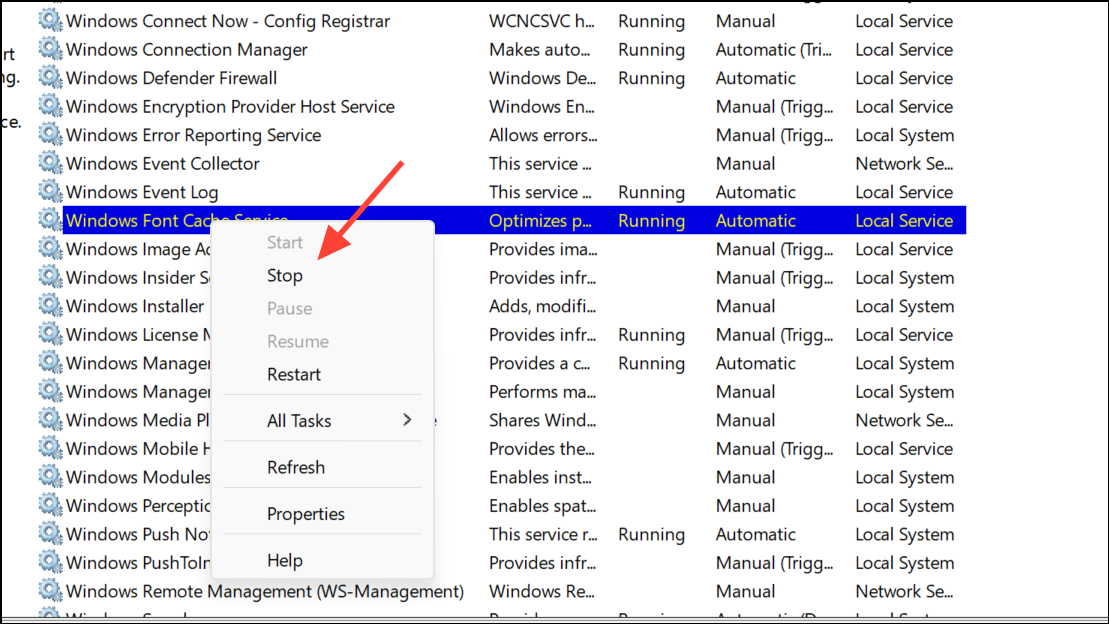
Step 1: In the Services window, find the Windows Font Cache Service.

Step 2: Right-click the service and select Stop.
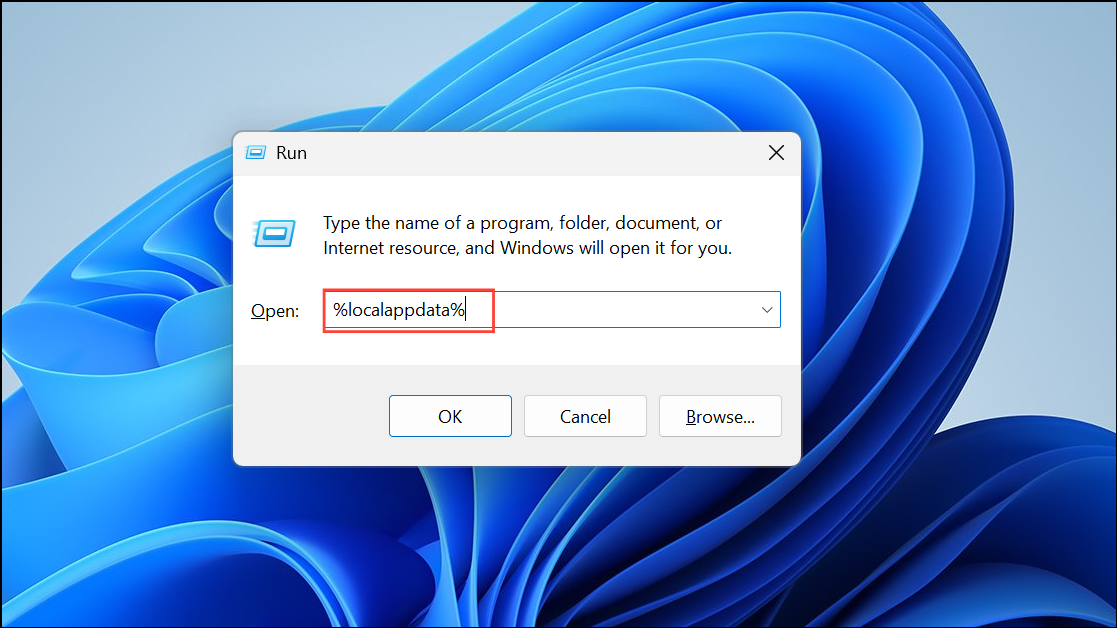
Step 3: Press Windows key + R, type %localappdata%, and press Enter. This will open your local AppData folder in File Explorer.
Step 4: Locate and delete all files that start with FontCache and have a .dat extension. This removes the old, potentially corrupt cache.
Step 5: Return to the Services window, right-click the Windows Font Cache Service, and select Start.
Reset Windows Update Components Manually
If the error is primarily affecting Windows Update, its core components may be corrupted. Manually resetting them forces Windows to create fresh folders and re-register files, which often fixes stubborn update and connectivity issues.
Step 1: Launch Command Prompt as an administrator.
Step 2: Stop the four key services related to Windows Update by entering these commands one at a time. This ensures the files and folders they use are not locked.
net stop wuauserv
net stop cryptSvc
net stop bits
net stop msiserver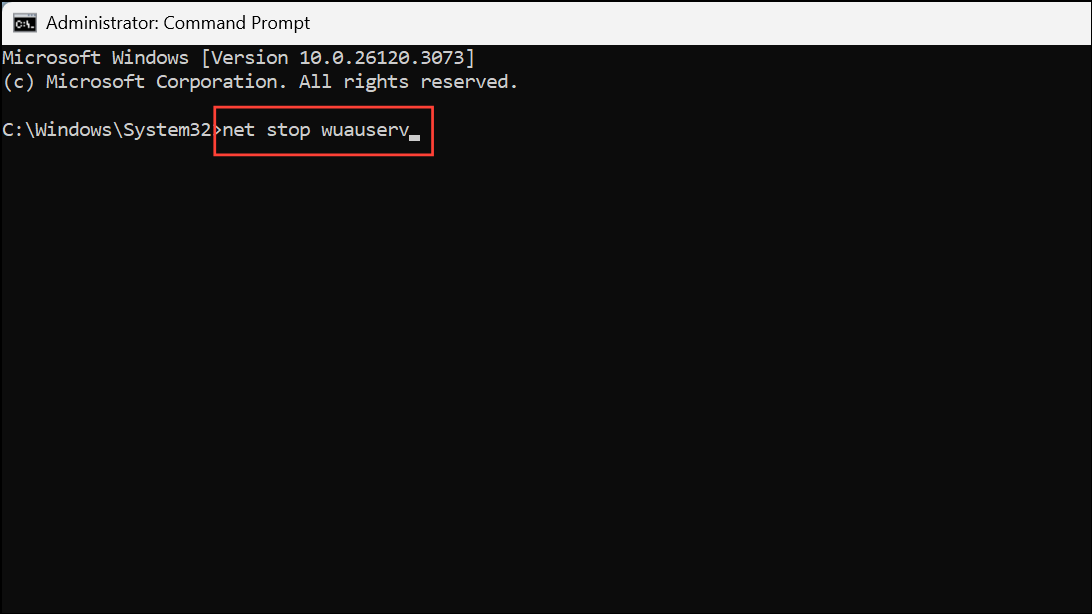
Step 3: Rename the primary folders that store update files. This will back up the old folders and force Windows to create new ones. Enter the following two commands.
ren C:\Windows\SoftwareDistribution SoftwareDistribution.old
ren C:\Windows\System32\catroot2 catroot2.old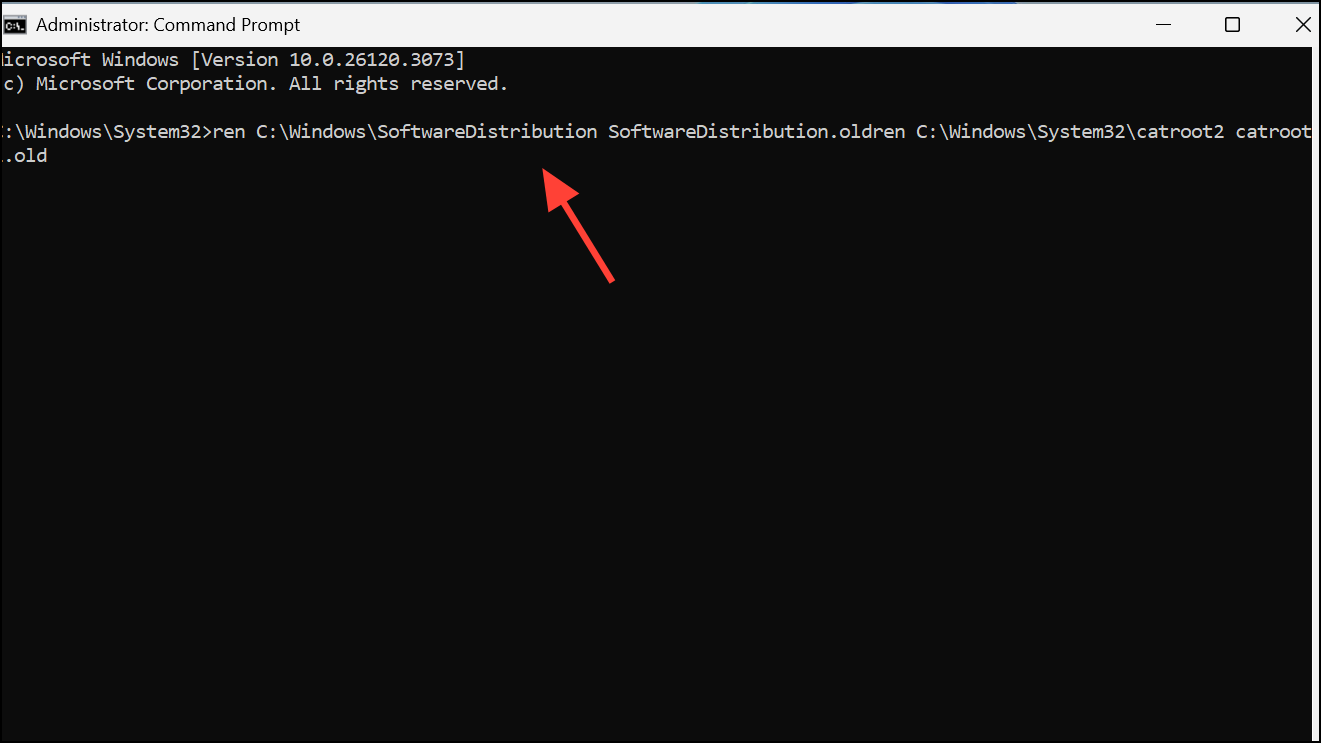
Step 4: Restart the services you stopped earlier by entering these commands one by one.
net start wuauserv
net start cryptSvc
net start bits
net start msiserver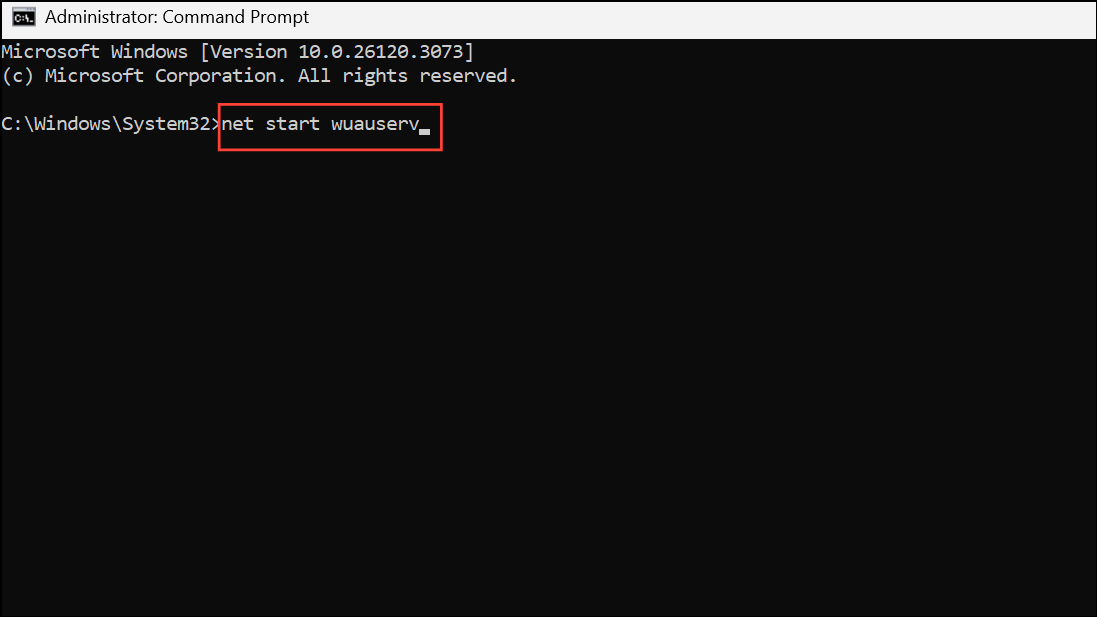
Step 5: Close Command Prompt and reboot your PC. Windows will automatically recreate the necessary update components.
Perform a Clean Boot
If the problem continues, a third-party application or background service might be causing a conflict. A clean boot starts Windows with a minimal set of drivers and startup programs, which helps you identify the source of the problem.
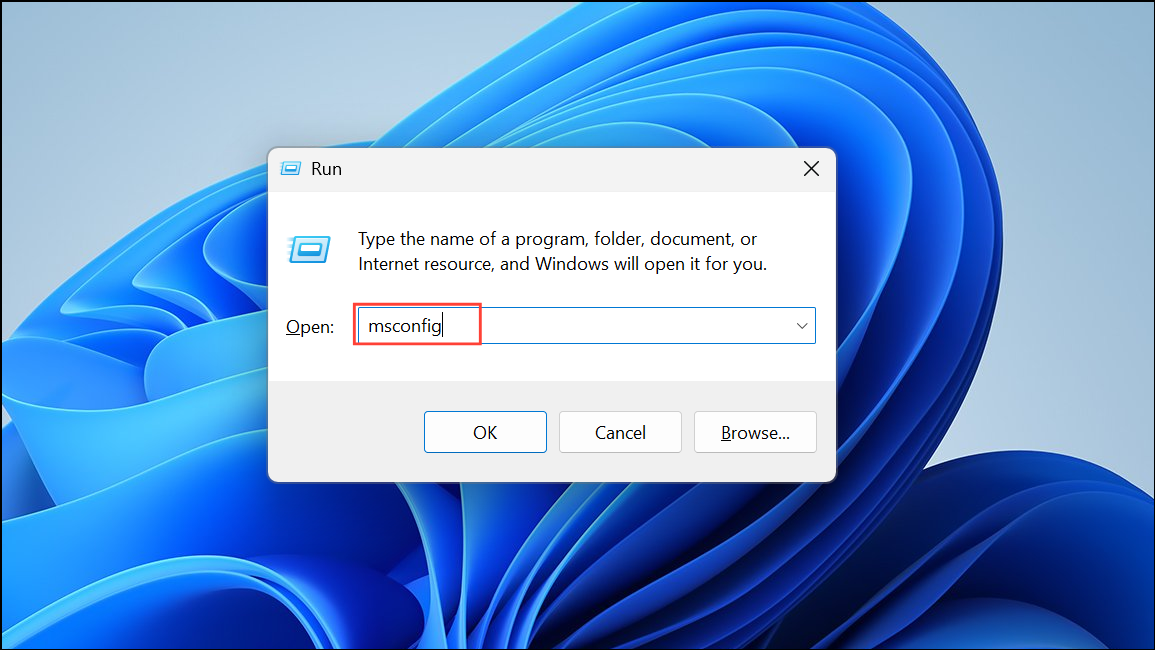
Step 1: Press Windows key + R, type msconfig, and press Enter to open the System Configuration window.
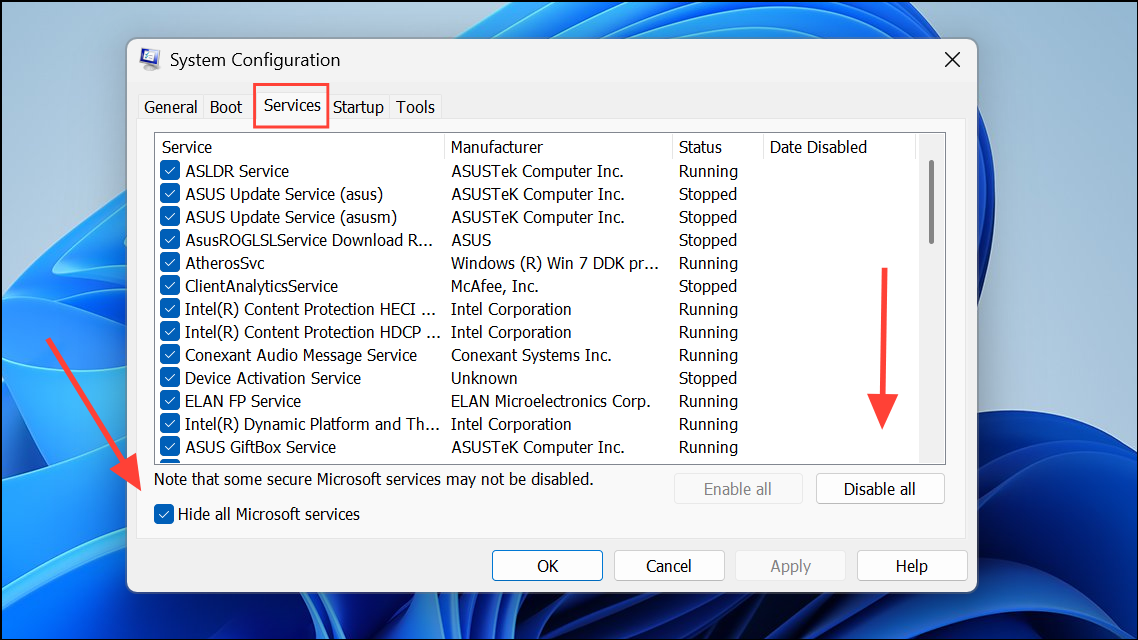
Step 2: Navigate to the Services tab. Check the box for Hide all Microsoft services, and then click the Disable all button. This prevents all non-essential, third-party services from running at startup.
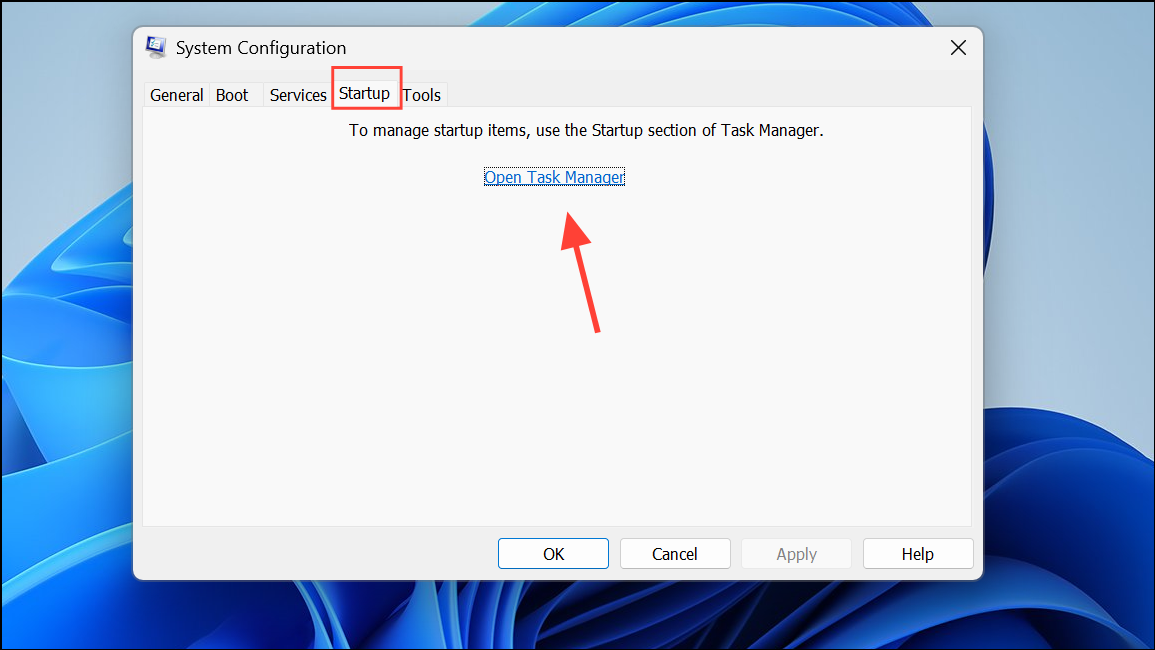
Step 3: Switch to the Startup tab and click Open Task Manager. In Task Manager, go through each enabled startup item, right-click it, and select Disable.
Step 4: Close Task Manager and click OK in the System Configuration window. Restart your computer. When it reboots, it will be in a clean boot state.
Step 5: Check if the error is gone. If it is, a disabled service or startup item was the culprit. To find it, re-enable the services and startup items in small groups through msconfig and Task Manager, rebooting after each change, until the error reappears. Once you identify the problematic software, you can uninstall or update it. Remember to return your system to a normal startup by re-enabling everything once you are finished troubleshooting.
With these troubleshooting steps, you should be able to resolve the service connection error and get your Windows 11 system running smoothly again.