Hearth and Hamlet gives you a campfire, a tent, and a handful of people, and then asks you to be patient. It’s an incremental city builder from Phorust Studios, published by Runic Forge and Gamersky Games, and it rewards a good opening far more than it rewards constant clicking. Get the first few decisions right and the settlement more or less grows itself while you’re doing something else.
Quick answer: Split your starting workers between food and wood, build hunting camps before fishing, lay down roads early for the passive +1 gathering bonus, and push into the research tree as soon as you can afford it.
Early game priority order in Hearth and Hamlet
Everything in the opening hours funnels through two resources. Food drives population, population gives you more workers, and wood pays for the buildings that make both of those numbers bigger. Nothing else is worth chasing until those two are stable.
| Priority | What it does for you |
|---|---|
| Food production (hunting first) | Population growth and incoming refugees both scale with your food surplus |
| Wood production | Pays for every early structure and upgrade |
| Roads and paths | Passive +1 to gathering efficiency, plus reduced movement penalties |
| Research structures | Permanently unlocks buildings, policies, magic, and better production |
| Guards and defences | Needed before you take on combat, especially on higher difficulties |
Build hunting camps before fishing spots
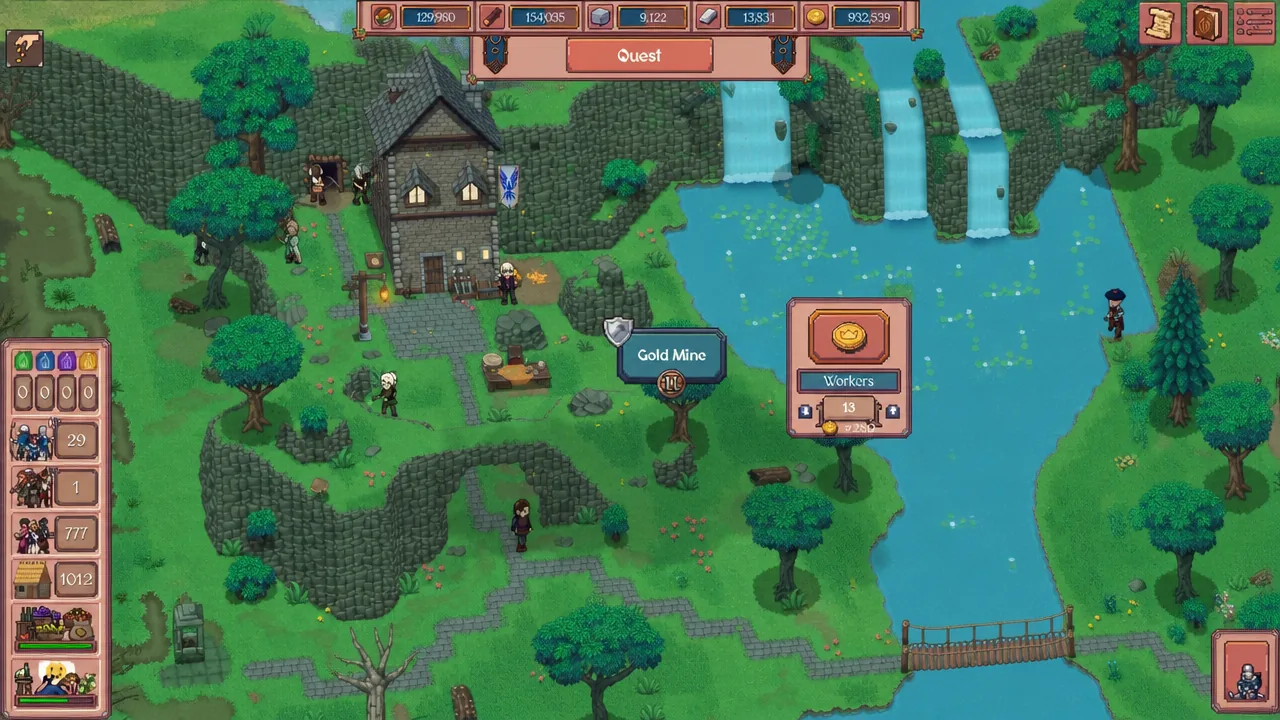
Both hunting camps and fishing locations feed your settlement, but they don’t perform the same way at the start. Hunting gives the stronger initial food boost, so it’s the more efficient investment while building costs are still low. Fishing eventually overtakes it, but only once mid-game upgrades from the church or guilds come online.
Optimise both before fixed building costs climb. Food surplus is the throttle on your whole settlement, since population growth and the arrival of new refugees are tied directly to how much spare food you’re sitting on. Expanding aggressively while your food line is flat just stalls everything.
How to assign workers when a resource runs dry
Start with a roughly even split across food and wood. That keeps the settlement stable and stops you from starving people while chasing a lumber target.
The split shouldn’t be permanent, though. Sooner or later you’ll be halfway through a construction project and one resource will run short. When that happens, throw the entire active workforce at the shortage until the project completes, then move everyone back to the balanced spread. Leaving a deficit sitting there because you’re attached to a “correct” worker distribution is the most common way to waste time in the opening hours.
Lay roads early and build your production around them
Basic paths and roads are cheap and they pay you back forever. Each one gives a passive +1 to resource gathering efficiency and cuts the movement speed penalties inside the settlement, which quietly speeds up every worker you own.
The bigger reason to build them first is layout. Placing your production buildings around an existing road network means you collect the passive bonus from day one, and it spares you a painful reorganisation later when the town is dense and moving things is far more expensive. Plan the skeleton now, fill it in later.
Get into the research tree as fast as possible
Research is what turns a survival camp into an actual production engine. Early research structures like the Fishing Hut scale your output in a way that manual worker shuffling never will, and every unlock feeds the next one. That compounding is the entire point of the game’s progression.
Past the first tier, the tree opens up permanently: more advanced buildings, new settlement policies, churches, defensive fortifications, alchemy, and academies of magic. Delaying research to hoard resources is a false economy, because the perks are permanent and the sooner they’re active, the longer they compound.
Follow the on-screen arrows and the Quest Log
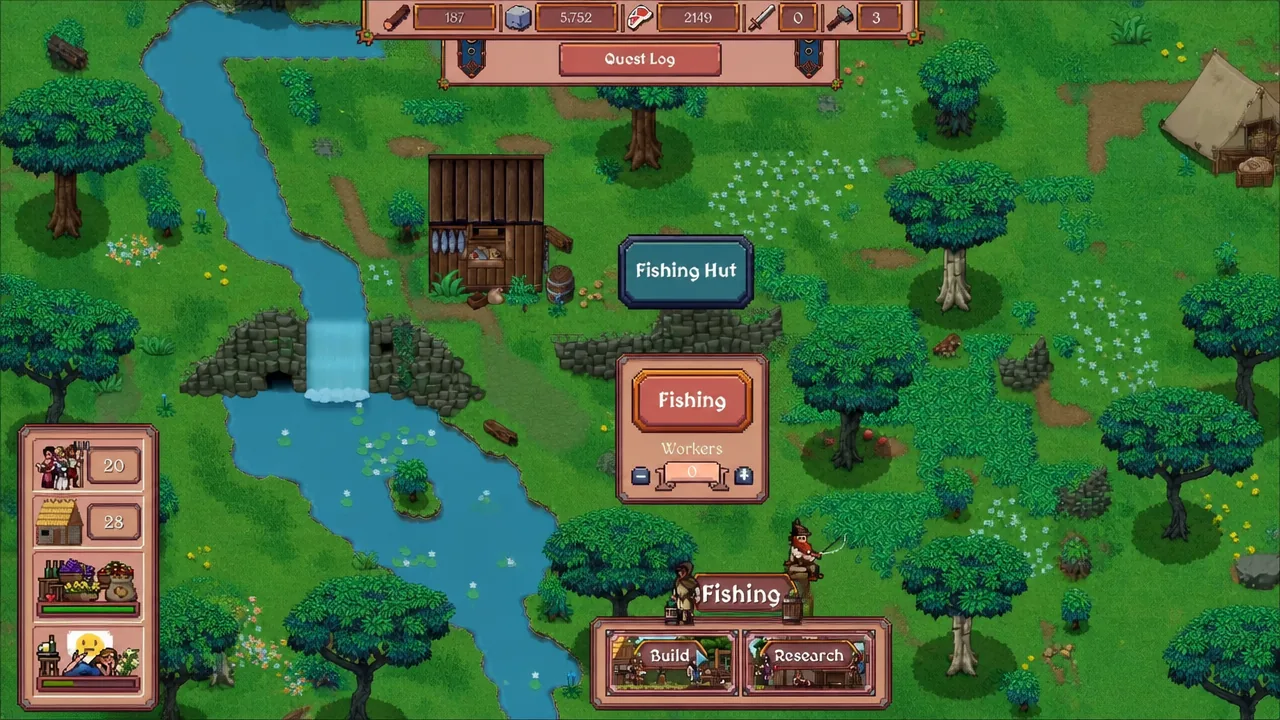
The blue and green directional arrows that appear in the early game aren’t decoration. They point at the next structure, resource node, or point of interest that unlocks progression, effectively acting as a live tutorial map.
Work through them in the order they appear rather than wandering off to build something you like the look of. It cuts out most of the guesswork about what the settlement can and can’t do yet, and it keeps the pace moving. The Quest Log panel does the same job in menu form, listing the objectives currently open to you.
Gold isn’t an early resource. It comes mostly from the gold mine across the river and from taxation, so don’t plan your opening around gold-gated upgrades you can see but can’t afford yet.
Idle safely and hold off on combat
This is an idler at heart. Once workers are assigned and the roads are down, it’s completely fine to let the game tick along in the background and come back when the stockpiles have filled. That’s the intended rhythm, not a shortcut.
What you shouldn’t do is pick a fight early. The settlement expects you to maintain guards, and the upkeep cost of that militia rises as you grow. On the higher difficulties, avoid triggering combat encounters until your defences are recruited and you’ve got a resource buffer to absorb the hit. On normal difficulty the whole run comes in around 16 hours, and there are two harder tiers above it where patience and planning matter considerably more.
You’ll know the opening is working when food is climbing without you touching it, refugees start arriving on their own, and new research options appear faster than you can buy them. That’s the signal to stop micromanaging and start planning the next tier of the town. Hearth and Hamlet is available on Windows and Linux through its Steam store page, and there’s a demo if you’d rather test the loop before committing.