
The "Access Denied" error in Windows 11 blocks users from opening, modifying, or deleting files and folders, even with administrator rights. This issue commonly appears after moving drives from another PC, restoring backups, or when system permissions become misconfigured. These restrictions can prevent file transfers, software installations, and even basic file management, disrupting productivity and causing data migration headaches.
Take Ownership of the Folder or Drive
Ownership conflicts often prevent users from accessing folders that originated on a different Windows installation or user account. Taking ownership assigns full control to your current account, resolving most access issues.
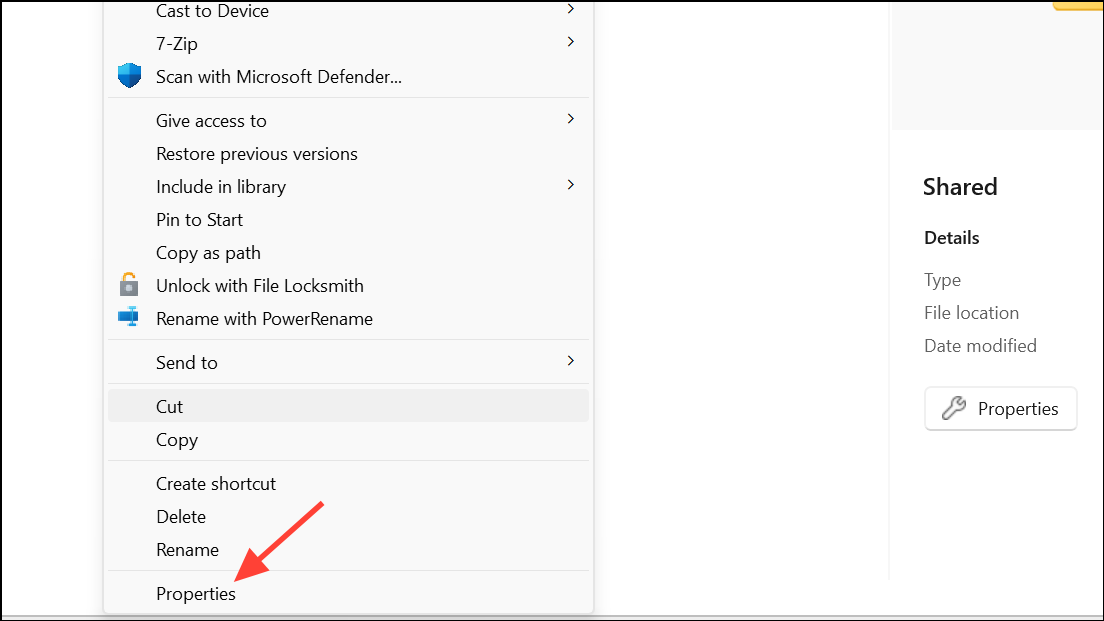
Step 1: Open File Explorer and navigate to the restricted folder or drive. Right-click the item and select Properties.
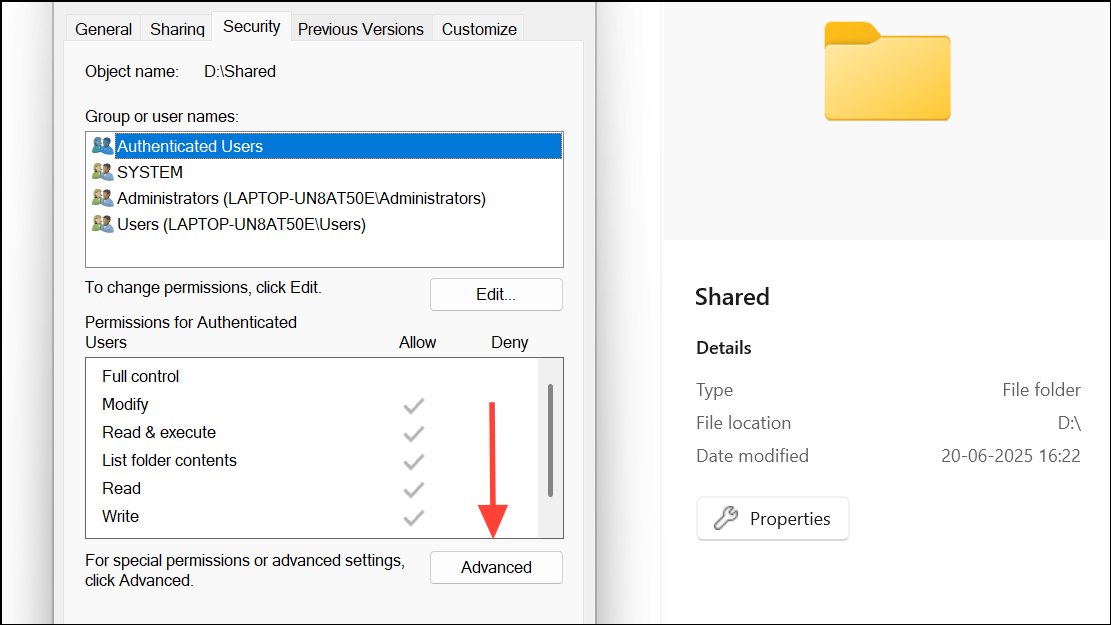
Step 2: In the Properties window, go to the Security tab. Click the Advanced button to open Advanced Security Settings.
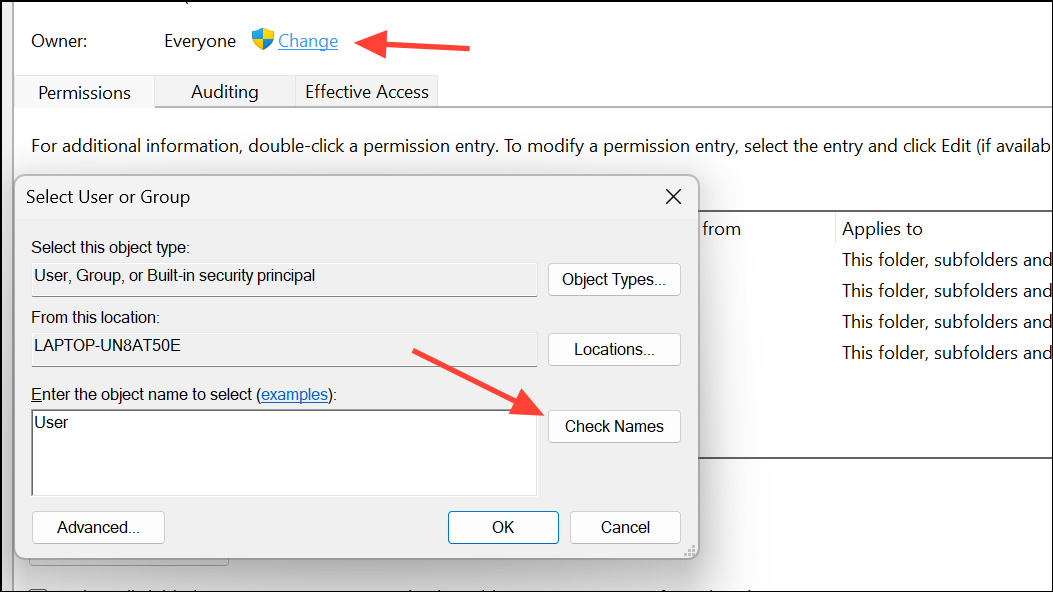
Step 3: At the top of the window, find the Owner field and click Change. In the dialog, type your username, then click Check Names to validate. Click OK.
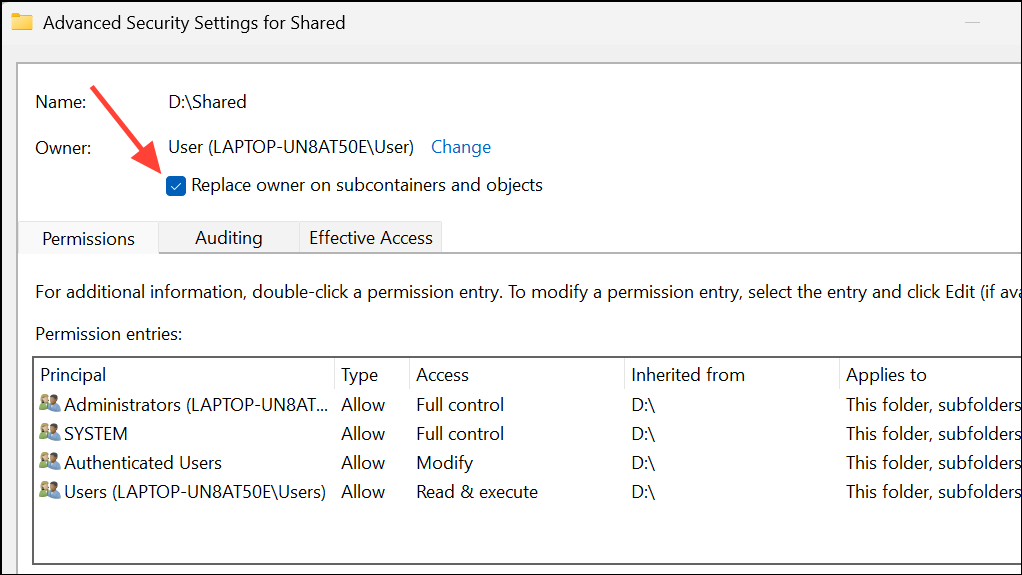
Step 4: Check the box labeled Replace owner on subcontainers and objects to apply ownership recursively. Click Apply and OK.
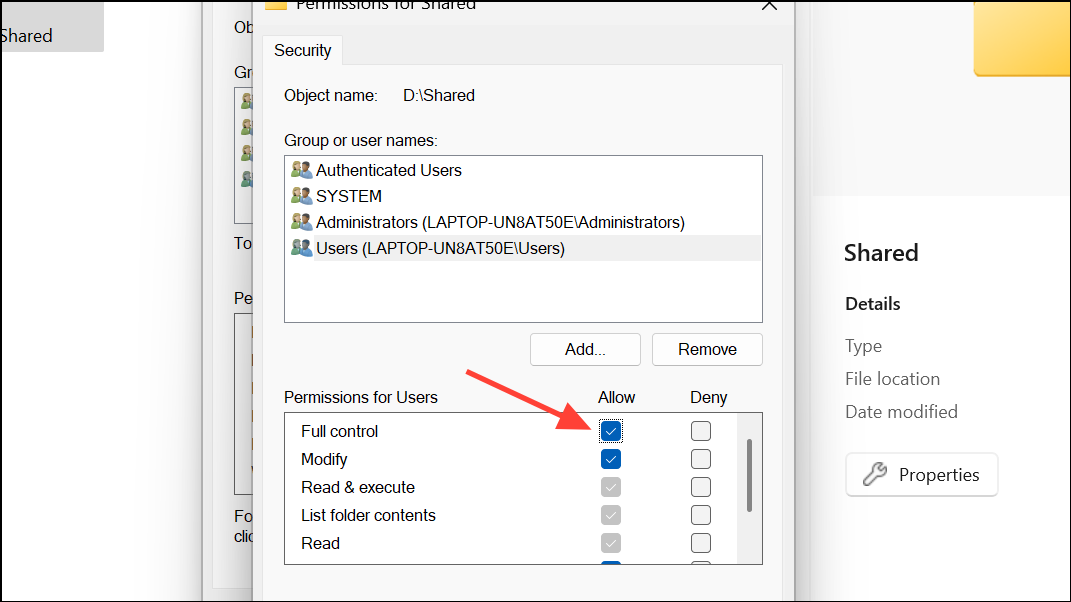
Step 5: Back in the Security tab, click Edit, select your user account, and check Full control under the Allow column. Click OK to save changes.
Taking ownership and granting full control should resolve most access issues. If you do not see your username listed, add it manually and assign the appropriate permissions.
Use Command Prompt to Force Ownership and Permissions
When graphical tools fail or the Security tab is missing, command-line tools provide a direct way to reset permissions and ownership. This method is especially effective for external drives or folders with stubborn restrictions.
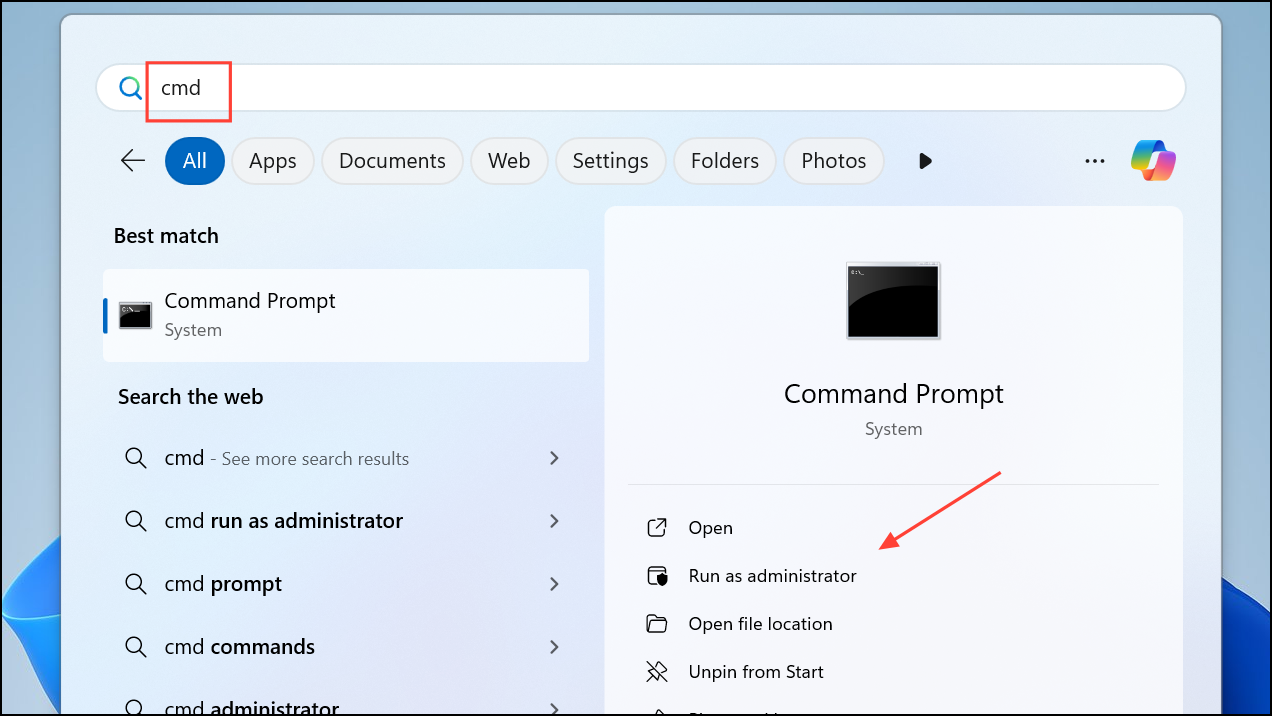
Step 1: Press Win + S, type cmd, right-click Command Prompt, and choose Run as administrator.
Step 2: To take ownership, enter the following command (replace path_to_folder with your actual folder path):
takeown /f "path_to_folder" /r /d y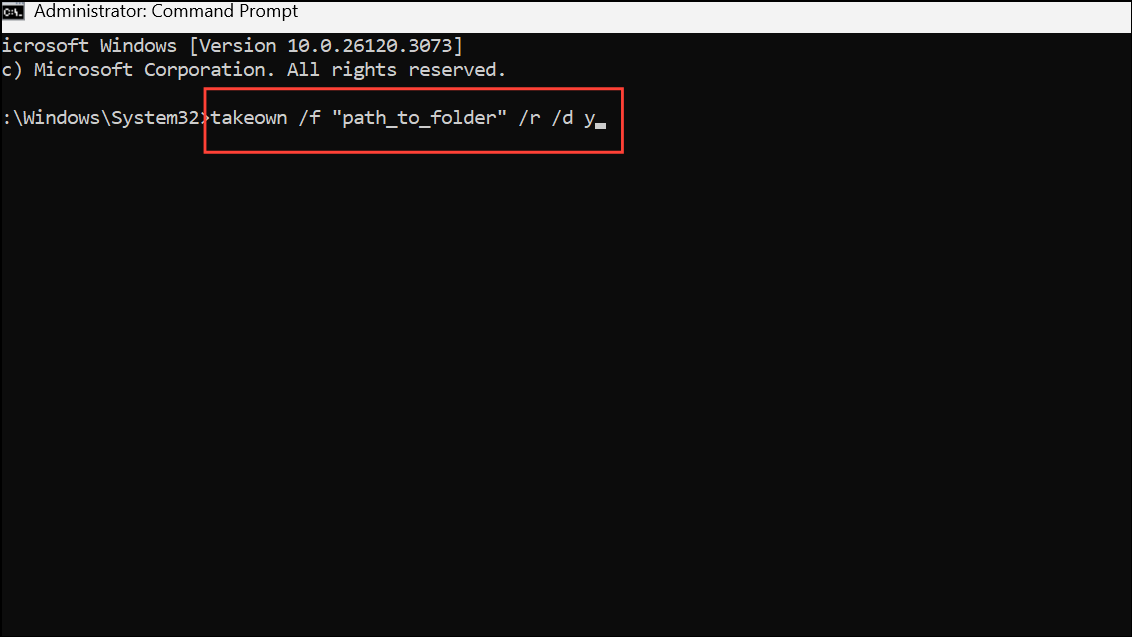
Step 3: Grant administrator full control with:
icacls "path_to_folder" /grant administrators:F /t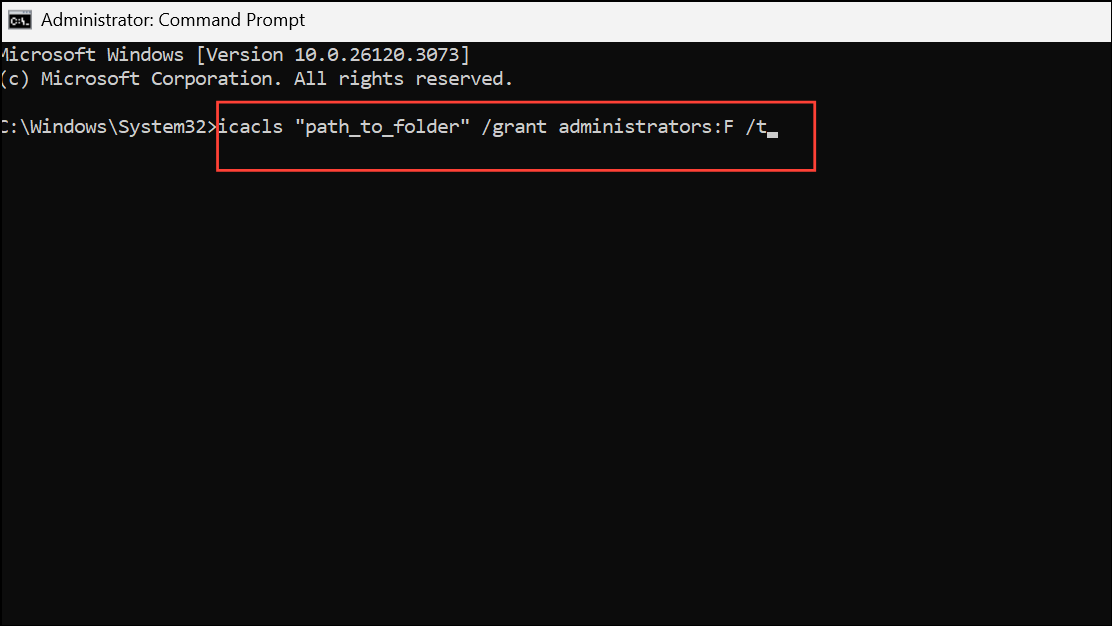
These commands recursively assign ownership and full permissions to the administrators group. After running them, restart your computer and try accessing the folder again.
Enable the Hidden Administrator Account
Windows 11 includes a hidden built-in Administrator account with unrestricted privileges. Temporarily activating this account can bypass stubborn permission barriers, especially when other methods fail.
Step 1: Open Command Prompt as administrator (see previous method).
Step 2: Enable the Administrator account with:
net user administrator /active:yes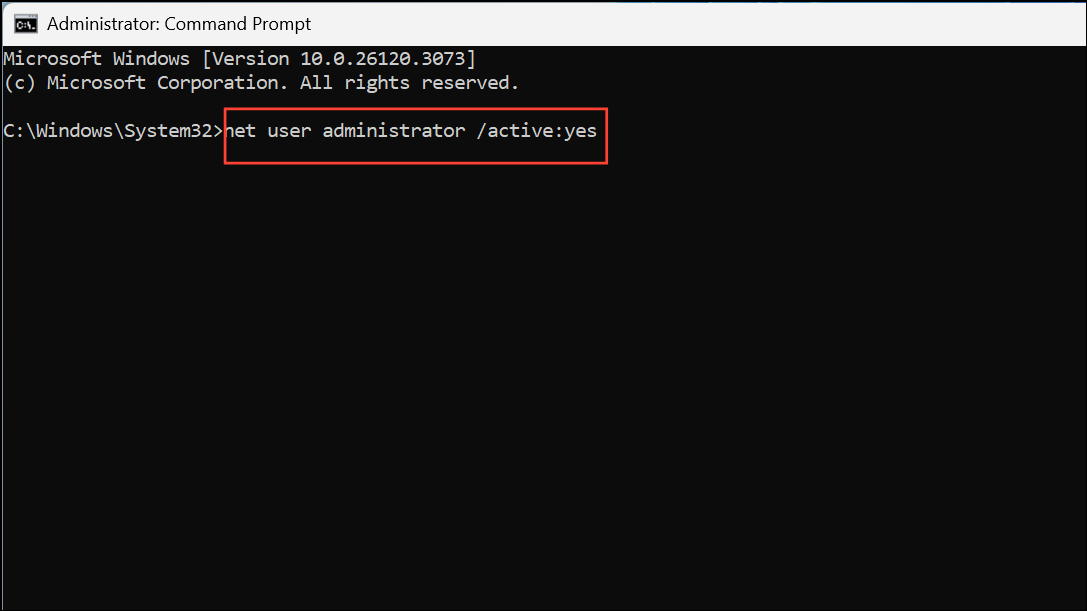
Step 3: Sign out of your current account. On the login screen, select the new Administrator account and log in.
Step 4: Access the restricted folder or drive. You should now have full access.
Step 5: After resolving the issue, disable the Administrator account for security with:
net user administrator /active:no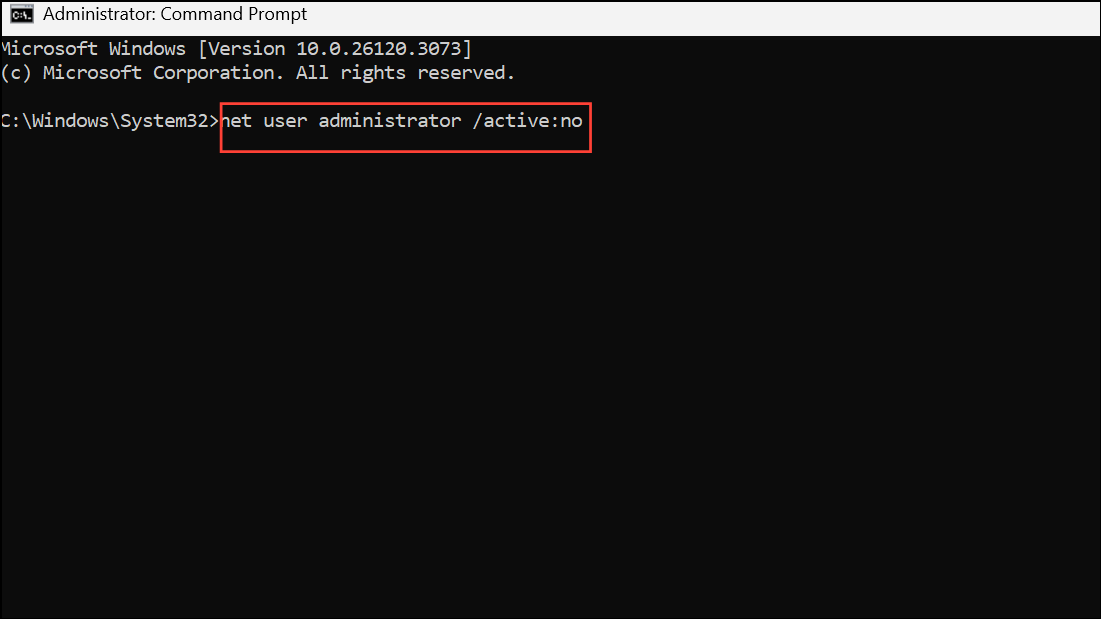
Leaving the built-in Administrator account enabled increases risk from malware or accidental changes. Always disable it when not in use.
Check and Adjust File System Permissions
Incorrect or missing file permissions can cause "Access Denied" errors even if you are the owner. Adjusting permissions ensures your account or group has the necessary rights.
Step 1: Right-click the restricted folder or drive, choose Properties, and go to the Security tab.
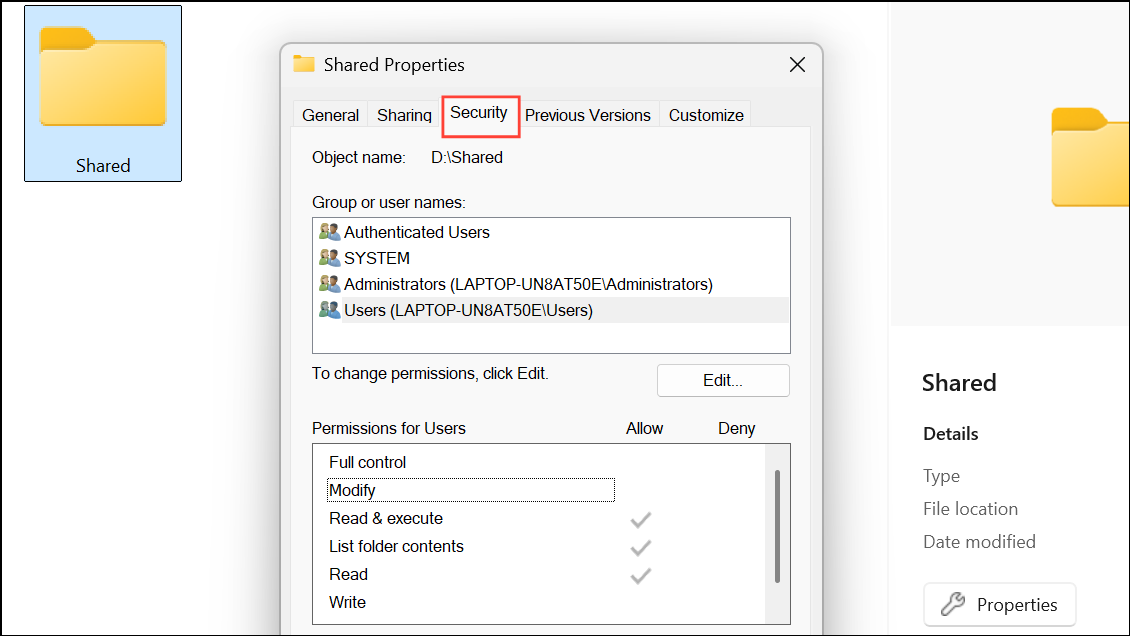
Step 2: Click Edit to modify permissions. Select your user account or the Administrators group, then check Full control in the Allow column.

Step 3: If your account is missing, click Add, enter your username, and assign full control.
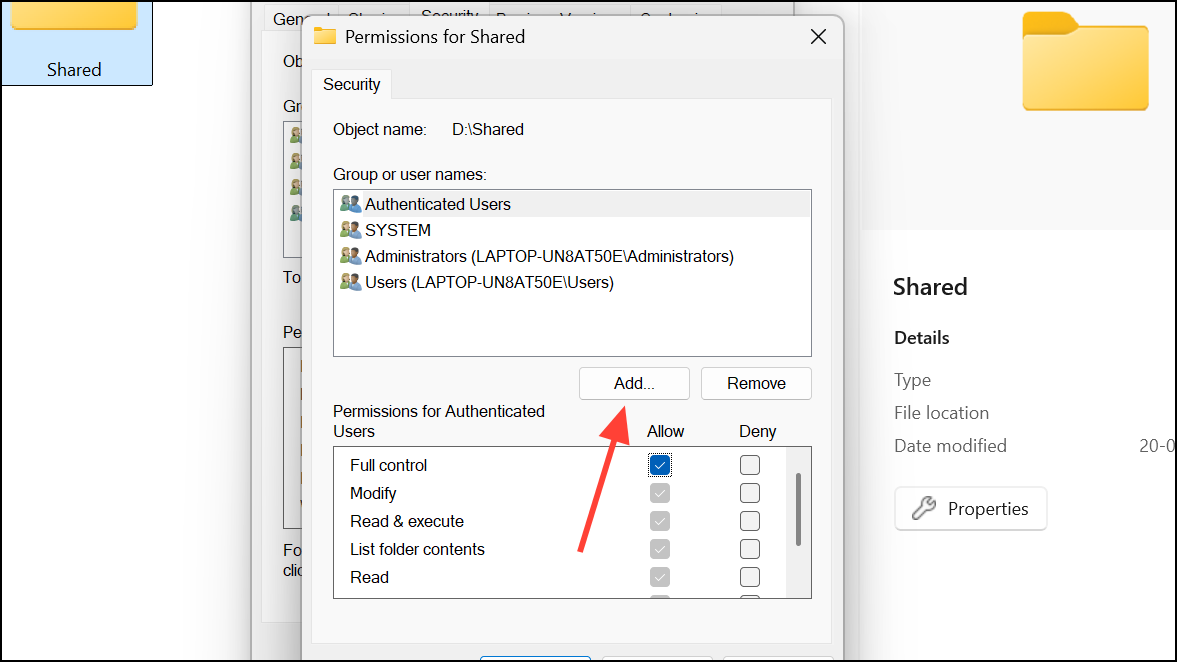
Step 4: Click Apply and OK to save changes.
For system folders like WindowsApps or Program Files, stricter access controls are enforced by Windows. Manual changes can break applications or system updates, so proceed only if necessary and back up your system first.
Temporarily Disable Third-Party Security Software
Some antivirus or security tools interfere with file system operations, mistakenly blocking legitimate access. Disabling these tools temporarily can help identify if they are the cause.
Step 1: Open your antivirus or security software from the system tray or Start menu.
Step 2: Locate the setting to disable protection temporarily. This is often found in the main dashboard or under settings.
Step 3: Turn off real-time protection and attempt to access the restricted folder. If access is restored, add an exception for the folder or consider using Windows Defender instead.
Create a New User Account
Corrupted user profiles can trigger persistent access errors. Creating a new account can resolve these issues by providing a fresh set of permissions and user settings.
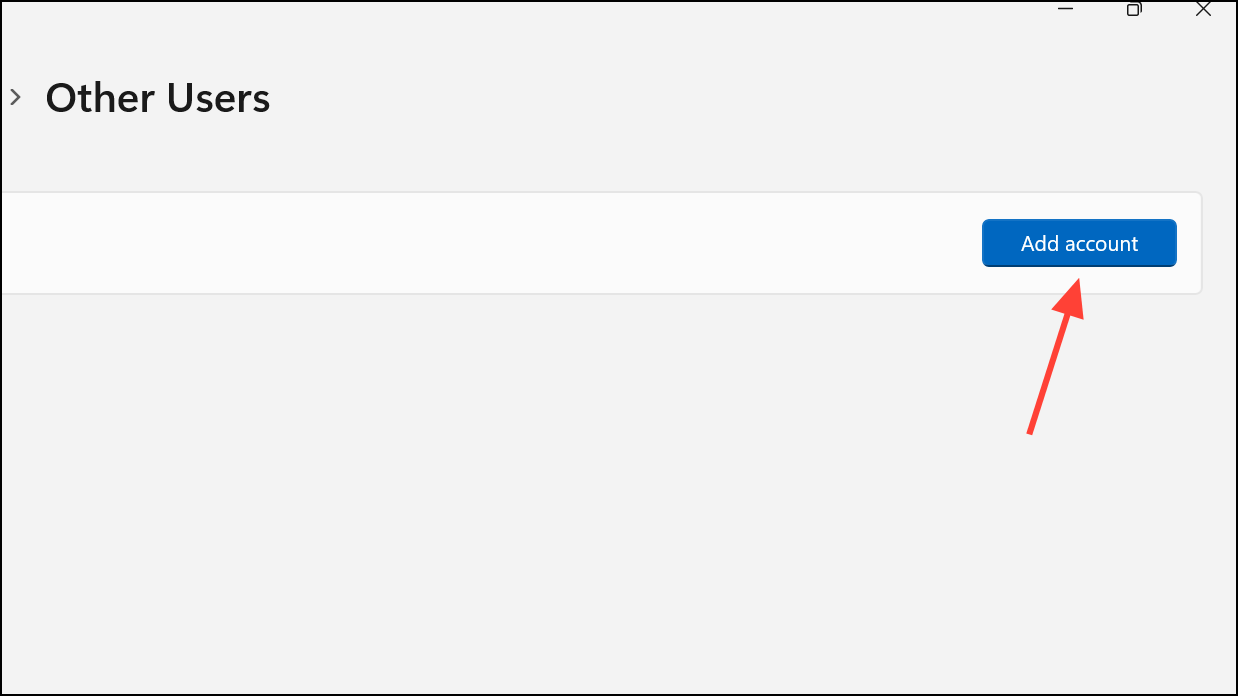
Step 1: Press Win + I to open Settings. Navigate to Accounts > Other users > Add account.
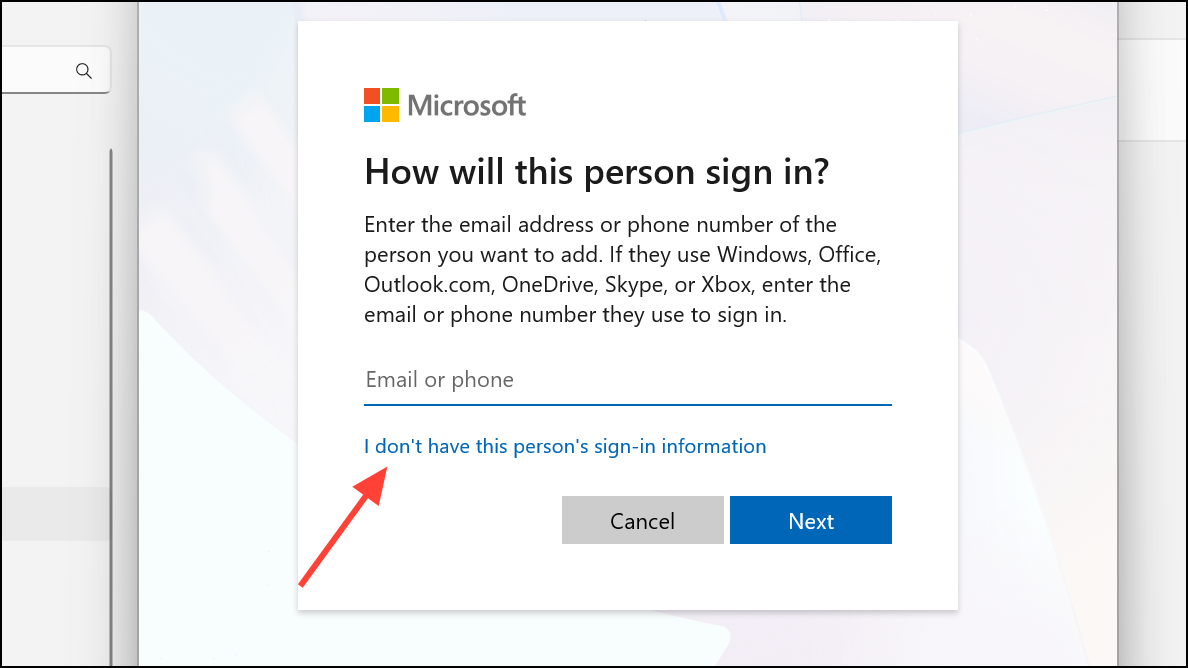
Step 2: Follow the prompts to create a new local or Microsoft account. Opt for I don't have this person's sign-in information > Add a user without a Microsoft account if you want a local account.
Step 3: Log out of your current profile and log into the new account. Test access to the restricted folder. If successful, transfer your files and settings to the new account.
Additional Tips and Cautions
- When working with system or application folders (such as
WindowsApps), changes may only be possible using tools that run asTrustedInstaller. Utilities like PowerRun or AdvancedRun can help, but improper use can cause system instability. - Always back up important data before making ownership or permission changes, especially on external or migrated drives.
- If the Security tab is missing, the drive may be formatted with a file system that does not support NTFS permissions (e.g., FAT32 or exFAT). Convert the drive to NTFS if advanced permissions are needed.
- For persistent issues after Windows updates or system restores, running
sfc /scannowandDISM /Online /Cleanup-Image /RestoreHealthin Command Prompt can repair system file corruption that may be affecting permissions.
Regaining access to denied or restricted folders in Windows 11 often comes down to taking ownership, resetting permissions, or using the built-in Administrator account. With careful attention to these steps, you can restore control over your files and avoid future permission headaches.