Adding page numbers in Microsoft Word is essential for organizing lengthy documents like reports, books, or academic papers. Whether you're working on a new project or editing an existing document, inserting page numbers helps readers navigate your content effortlessly.
Adding page numbers in Word
Step 1: Open your Word document where you want to insert page numbers. If starting from scratch, create a new document.
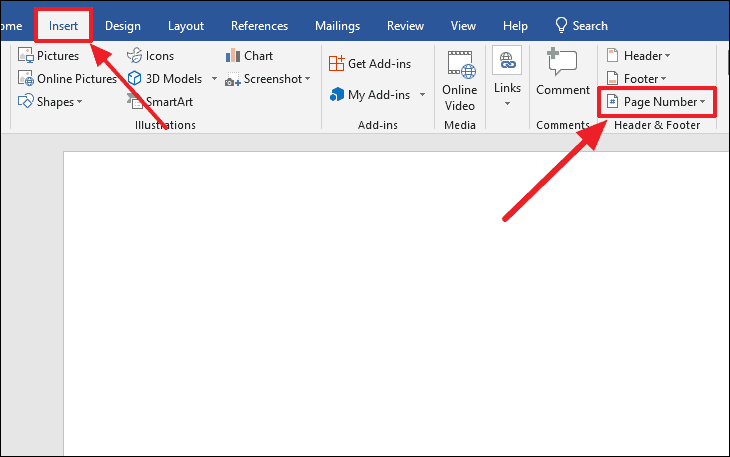
Step 2: Click on the Insert tab located in the top toolbar of the Word interface.
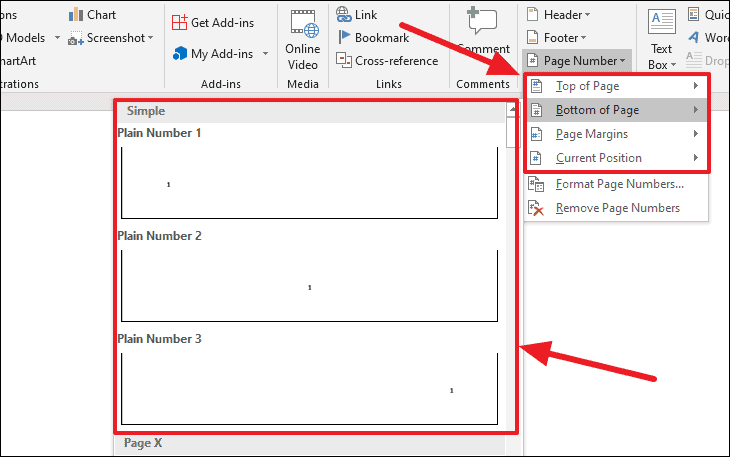
Step 3: In the Insert tab, find and click on the Page Number option. This will open a dropdown menu with various page numbering options.

Step 4: Choose the desired location and style for your page numbers from the dropdown menu. Word provides options for top of the page (Header), bottom of the page (Footer), page margins, or current position. Select the one that best suits your document's requirements.

Step 5: After selecting your preferred style, the page numbers will automatically appear in your document at the chosen location.
If your document has a cover page or if you prefer the first page without a page number, you can adjust this setting. Navigate to the Design tab under Header & Footer Tools, and check the box for Different First Page to exclude the number from the first page.
You can also modify the numbering format by selecting Format Page Numbers from the Page Number dropdown menu. This allows you to change the numbering style (such as Roman numerals or letters) or set a specific starting number for your pages.
By following these steps, you can easily insert and customize page numbers in your Microsoft Word documents, enhancing their professionalism and readability.

