When working with extensive datasets in Excel, manually dragging the fill handle to populate cells can be inefficient and time-consuming. Fortunately, Excel offers alternative methods to autofill data without the need to drag the fill handle.
Autofill Formulas Without Dragging Using the Name Box
To quickly apply a formula to a large number of cells without dragging, you can utilize the Name Box feature.
Step 1: Enter the desired formula in the first cell of your target column. For example, input the formula into cell C2.
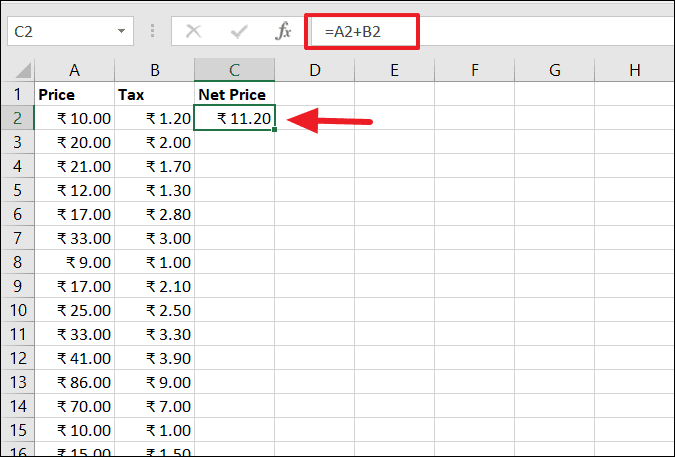
Step 2: Copy the formula by selecting the cell and pressing Ctrl + C.
Step 3: Click on the Name Box, located to the left of the formula bar above column A. In the Name Box, type the range where you want to paste the formula (e.g., C2:C800) and press Enter. This action selects the entire specified range.
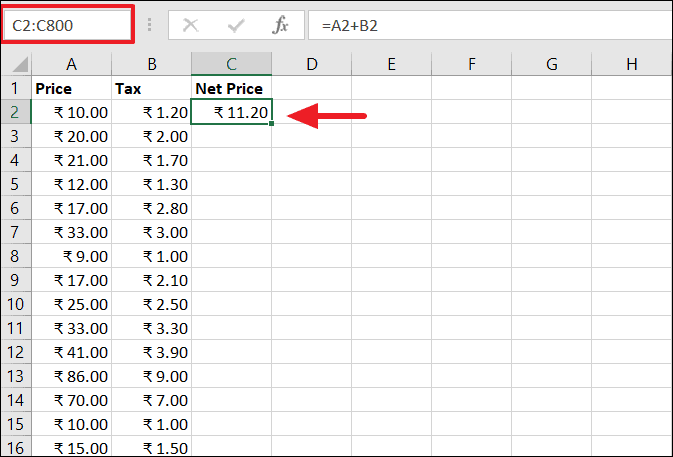
Step 4: Paste the formula into the selected cells by pressing Ctrl + V. Alternatively, you can fill down by pressing Ctrl + D or fill right with Ctrl + R, depending on your data orientation.
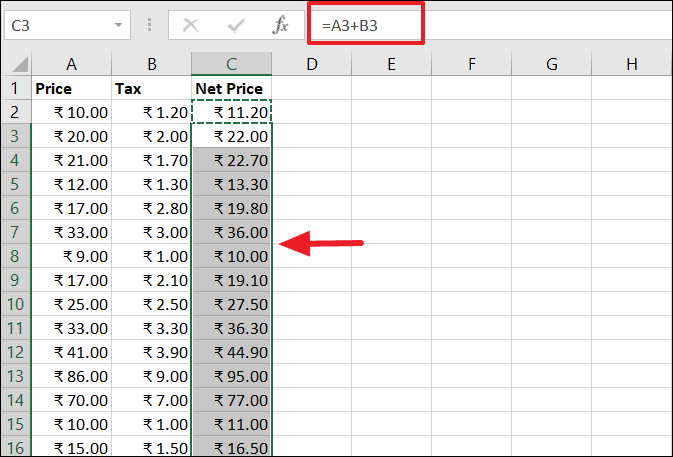
The formula is now applied to all selected cells without the need to drag the fill handle.
Autofill Cells Without Dragging Using the Series Dialog
The Series dialog provides a flexible way to autofill numbers or dates across a range of cells without manual dragging.
Autofill Numbers Using the Series Dialog
Step 1: Input the starting number in the initial cell of your desired range. For example, type 1 into cell A1.
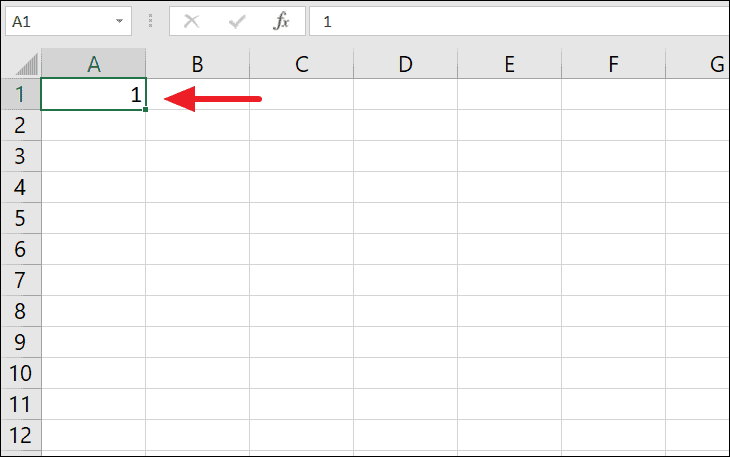
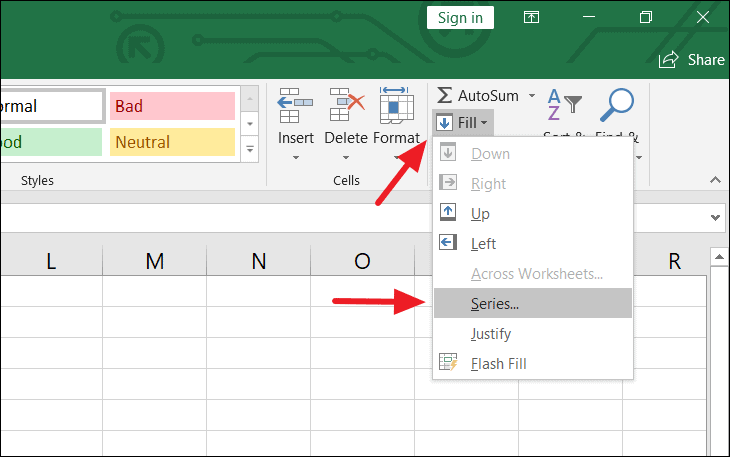
Step 2: Navigate to the Home tab. In the Editing group, click on the Fill option and select Series from the dropdown menu.
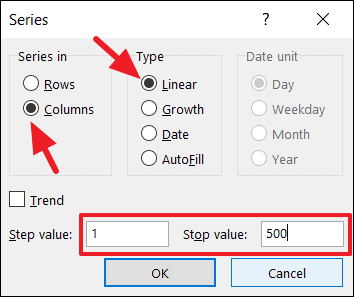
Step 3: In the Series dialog box, select Columns or Rows under Series in, depending on the orientation of your data. Choose Linear as the Type. Enter the Step value (the increment between numbers, e.g., 1) and the Stop value (the ending number of your series, e.g., 500).
Step 4: Click OK to generate the series. Cells from A1 to A500 will be populated with numbers sequentially from 1 to 500.
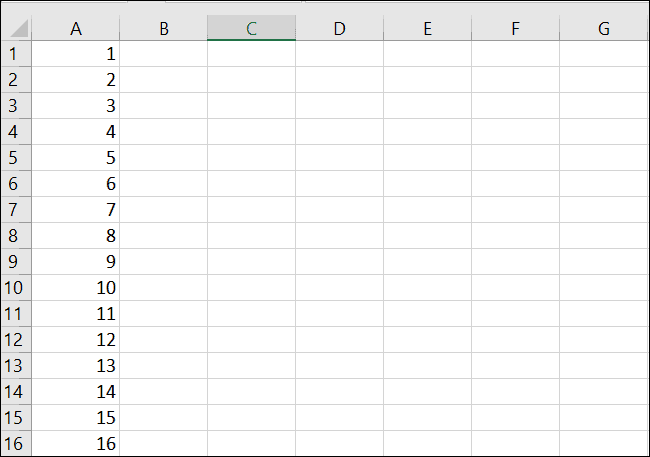
You can create different numerical patterns by adjusting the Step value. For instance, to fill odd numbers starting from 1, set the Step value to 2. To fill even numbers starting from 2, input 2 in both the starting cell and the Step value.
Autofill Dates Using the Series Dialog
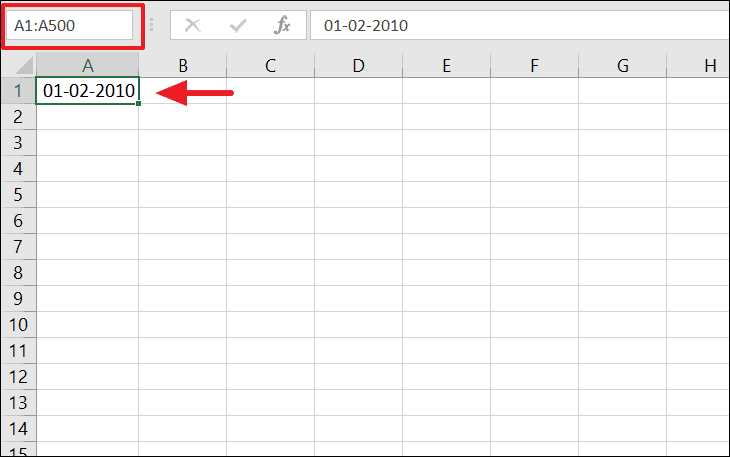
Step 1: Enter the initial date into the first cell of your range, such as 01-02-2010 in cell A1.
Step 2: Select the range where you want the dates to be filled. To quickly select a large range, click on the Name Box, type the range (e.g., A1:A500), and press Enter.
Step 3: Go to the Home tab, click on Fill, and select Series.
Step 4: In the Series dialog box, choose Date under Type and select the appropriate Date unit (e.g., Day, Weekday, Month, or Year). Enter the Step value based on how you want the dates to increment. Click OK to autofill the dates.
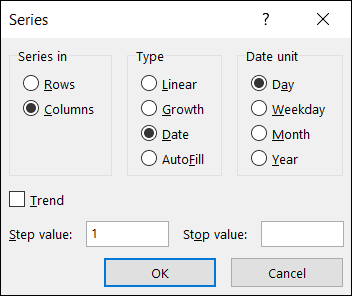
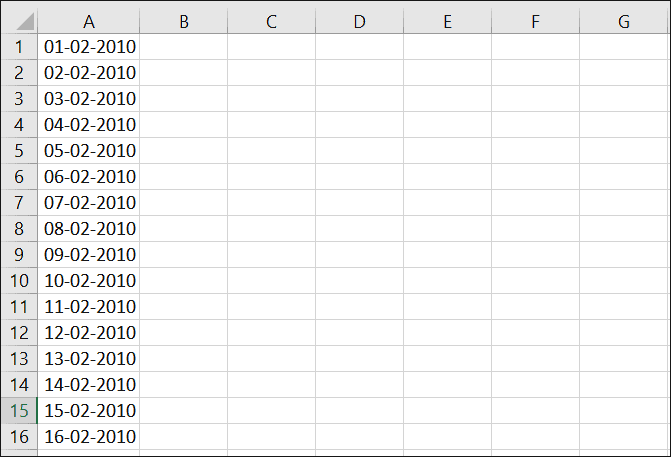
The selected cells will now display a sequential series of dates according to your specifications.
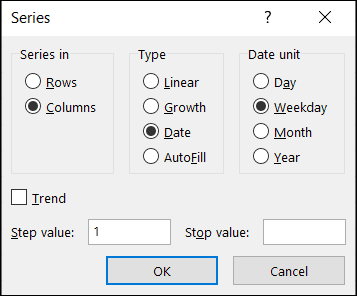
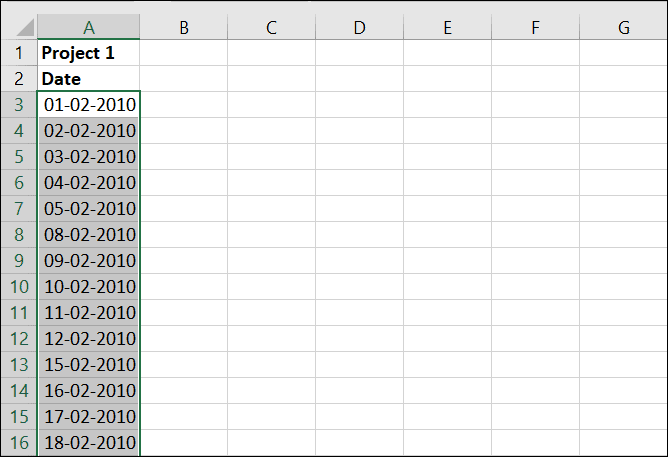
To exclude weekends and fill only weekdays, select Weekday under Date unit in the Series dialog. This will populate the series with dates that fall on weekdays, skipping Saturdays and Sundays.
The result will be a list of dates representing only the working days.
By using these techniques, you can efficiently autofill large ranges in Excel without the tedium of manually dragging the fill handle.


