Planet Earth currently hosts a human population of nearly 8 billion. Different communities in this massive species speak different languages. Not everyone speaks the second most popular language – English, though we all know it exists. Although we can turn our world upside-down and adhere to an anglicizing ourselves, it’s not a comforting process. It’s blissful to speak, read, think, teach, organize, and learn in our own languages.
Google Chrome, one of the most used web browsers in the world, understands this beauty in diversity. Hence, it offers the option to use Chrome in a variety of languages. The platform supports nearly 200 languages as of 2021 – including individual languages and multiple versions of the same language. Chrome celebrates the beauty of difference and here’s how you can make the most of it.
Set Your Preferred Language and Enable Auto Translation of Web Pages
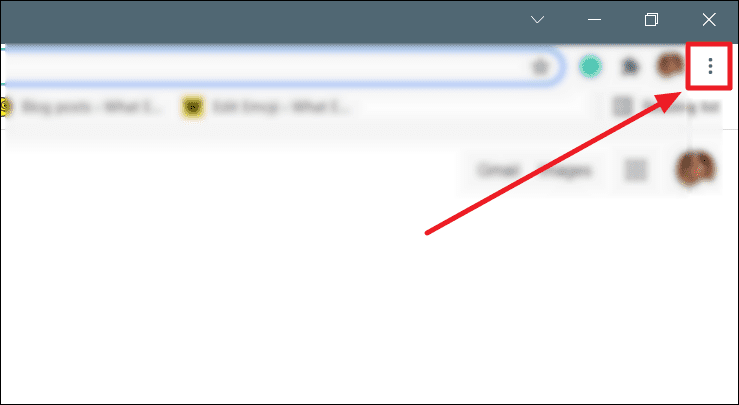
First, launch Google Chrome on your Windows 11 PC. Then, click the ‘Menu’ button, shown with three vertical dots, on the top right corner of the window.
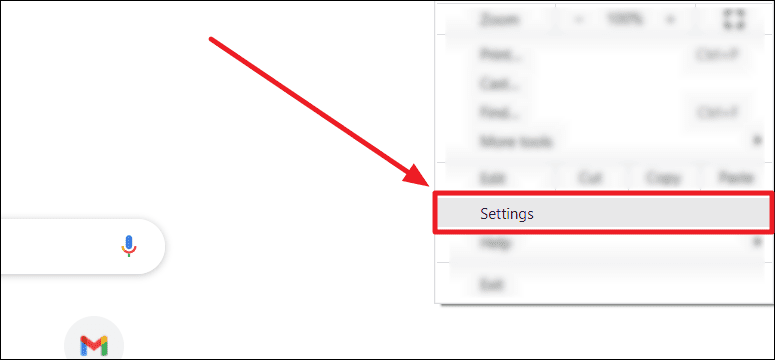
Select ‘Settings’ from the drop-down menu.
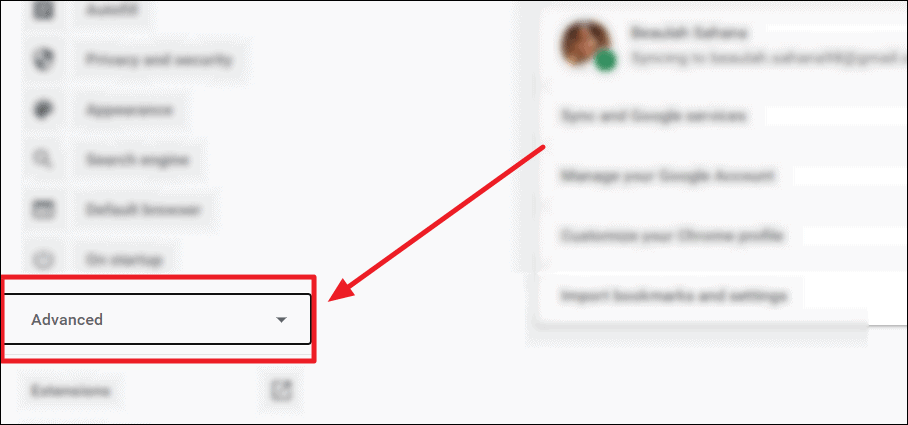
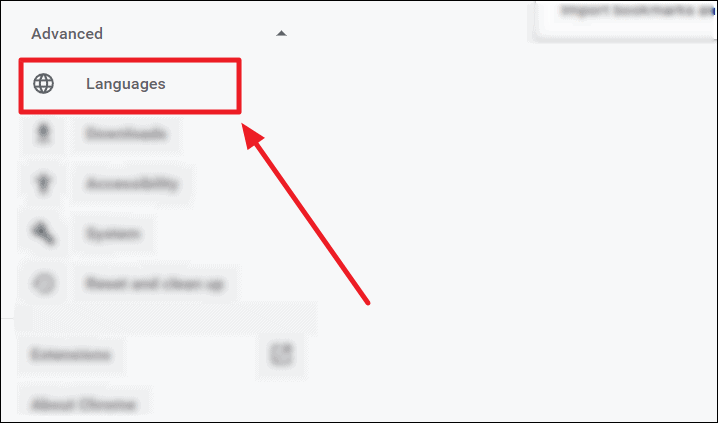
Now, click ‘Advanced Settings’ from the left margin of the Settings window.
Select ‘Languages’ from the ‘Advanced Settings’ context menu.
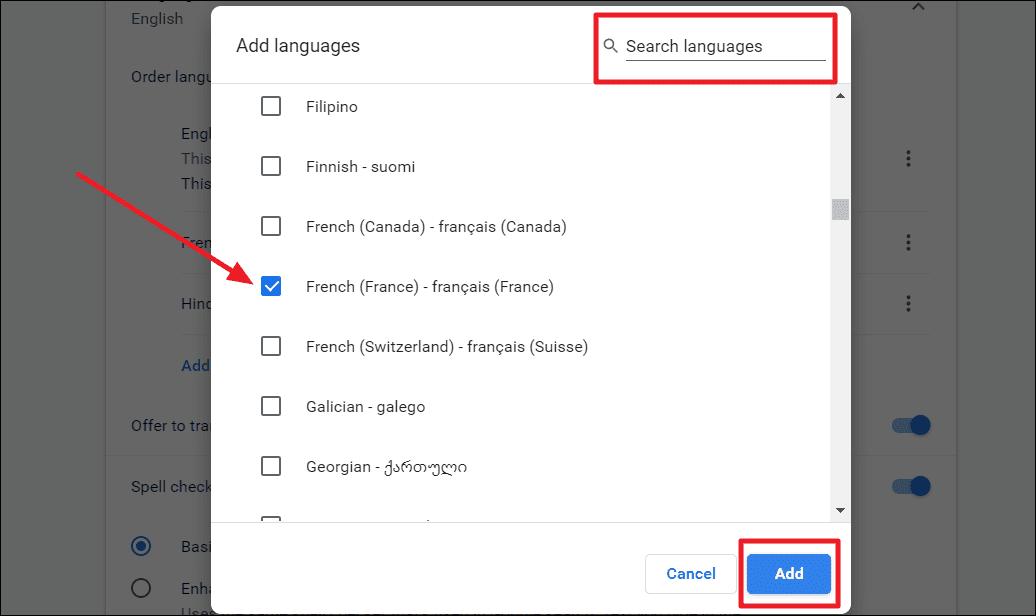
Click the downward-facing arrowhead adjacent to ‘Language’ below the ‘Languages’ section. Then click the ‘Add languages’ button below the list of default languages.

You will now see an ‘Add languages’ box. Scroll to find the language(s) you want to add or just type the name of the language in the ‘Search languages’ field and click the tickbox in front of the desired language(s). You can add multiple languages at once. Once done, hit the ‘Add’ button.
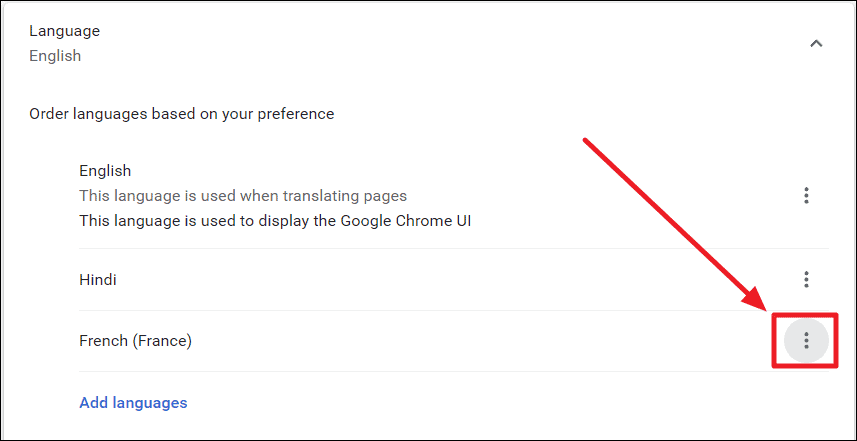
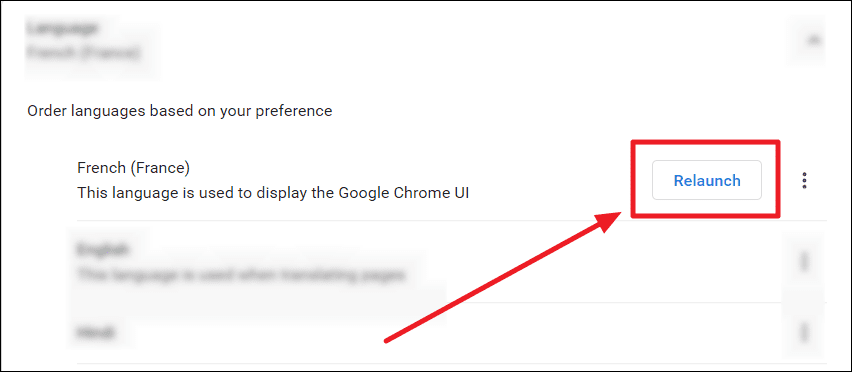
The newly added language(s) will be at the bottom of the default language(s). Click the ‘More actions’ button (three vertical dots) next to the language you wish to use Google Chrome in.
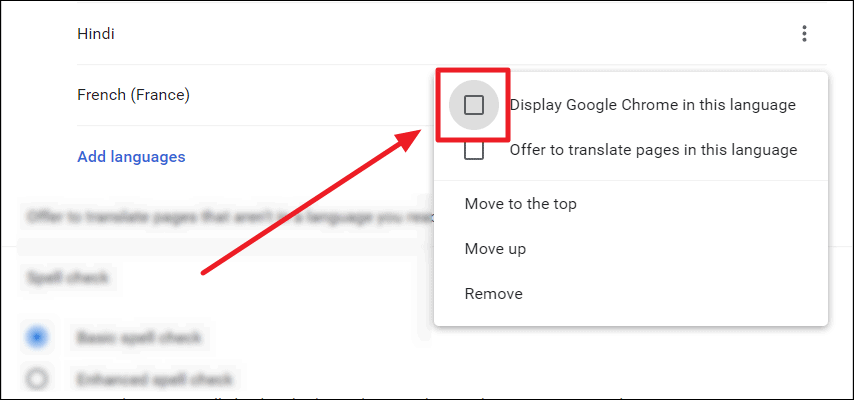
Click the tickbox of the first option in the context menu – Display Google Chrome in this language. This will send the language to the top of the list of languages with a ‘Relaunch’ button.
If you wish to have a translation option henceforth for the language you are currently opting for, tick the next option as well – Offer to translate pages in this language. This is for the times you come across web pages that aren’t in your chosen language.
In case you missed choosing the translation option, worry not. Simply click the toggle next to the ‘Offer to translate pages that aren’t in a language you read’ option right below the list of languages, to turn it blue.

Now, to set the chosen language as your Chrome language, click the ‘Relaunch’ button next to it.
Google Chrome will now restart on its own and display the browser in your language.
Translate Individual Languages
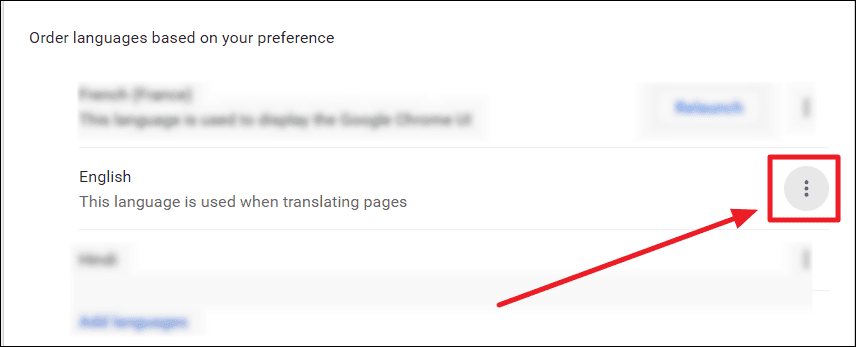
You can opt for translation of language(s) apart from the preferred language. To do so, simply click the ellipsis icon (three vertical dots) next to the language you want a translation for, in the ‘Other languages’ section.
Then, click the tickbox in front of the ‘Offer to translate pages in this language’ option to select it and therefore enable translation for that particular language.
Google will now ask to translate pages that aren’t in the language of your choice.
Reordering Your Languages
If you wish to arrange your list of languages in an order that reflects your preference, click the ellipsis icon (three vertical dots) next to the language you want to move. Now select the appropriate choice – either to move upwards or down.
The language that tops the list can only be moved down, while any language below the top can be shot up to the first place with the ‘Move to the top’ option.
Removing Languages on Google Chrome
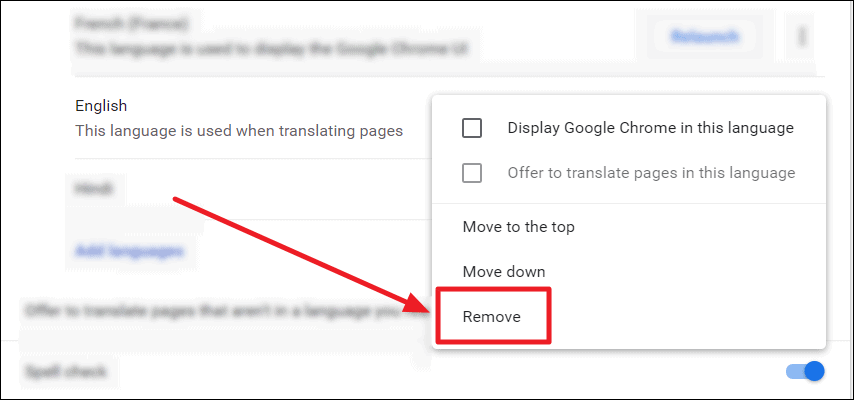
In case you find yourself not needing a language you added, you can always remove it. To remove a language from your list of Chrome languages, click the ‘More actions’ icon shown with three vertical dots next to the targetted language.
Now, click the ‘Remove’ option at the end of the context menu.
The language will now be out of your list of Chrome languages.
Using Spellcheck on Google Chrome
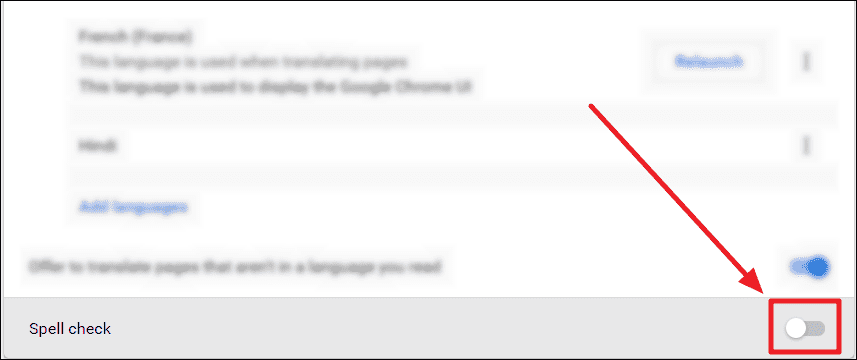
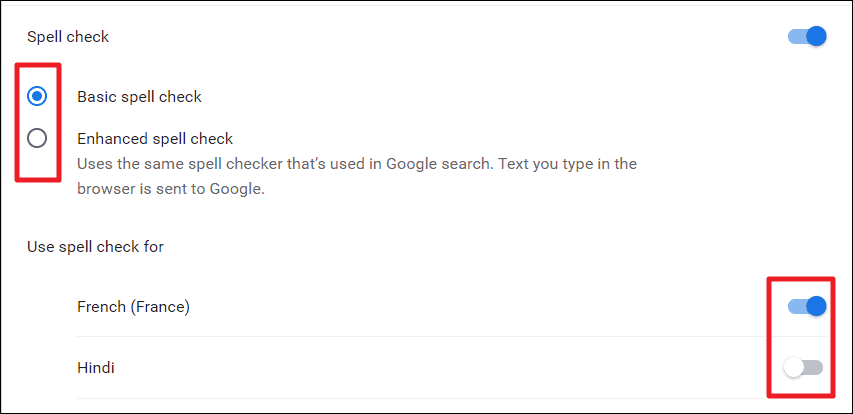
Spellcheck is the tool that does just as the name suggests – it checks your spellings in the chosen language(s). Any spelling errors will instantly be pointed out by the Spellcheck tool. If you wish to enable spellcheck for your newly chosen language, first click the Spellcheck toggle to enable it, and thus its options.
Choose the level of spellcheck you want – Basic or Enhanced, by clicking the radio button in front of the respective choice. Then click the toggle next to the language you want the spellcheck for.
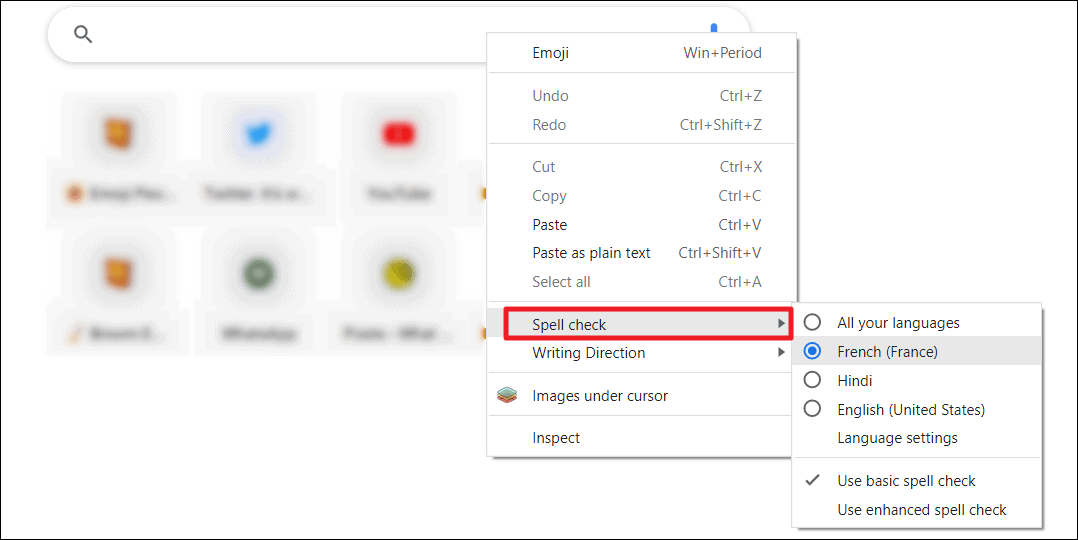
A quicker alternative. You can also change the spellcheck language and preferences on the Google Chrome homepage. Right-click or double-finger tap on the Google search bar and hover your cursor over ‘Spell check’.
Now, choose the language you want to spellcheck by clicking the radio button in front of it. If you want to spellcheck all your languages, tick the ‘All your languages’ option. You can also change the level of spellcheck (basic and enhanced) in this context menu.
Changing Preferred Language on Your Google Account
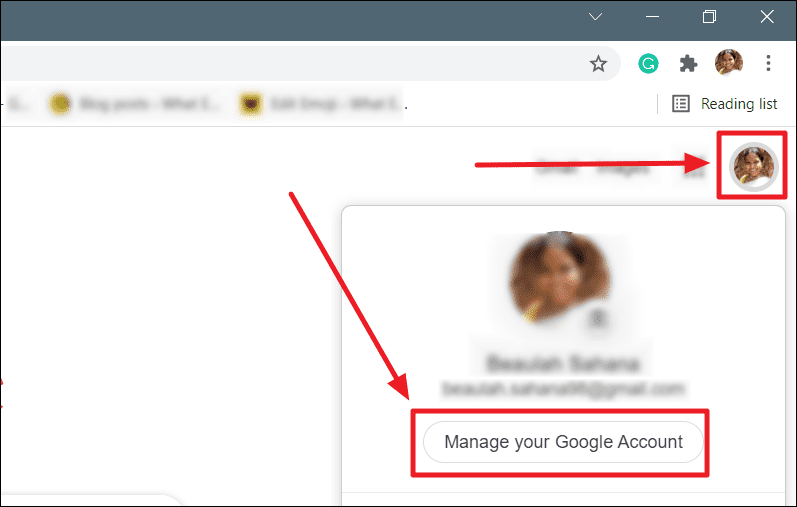
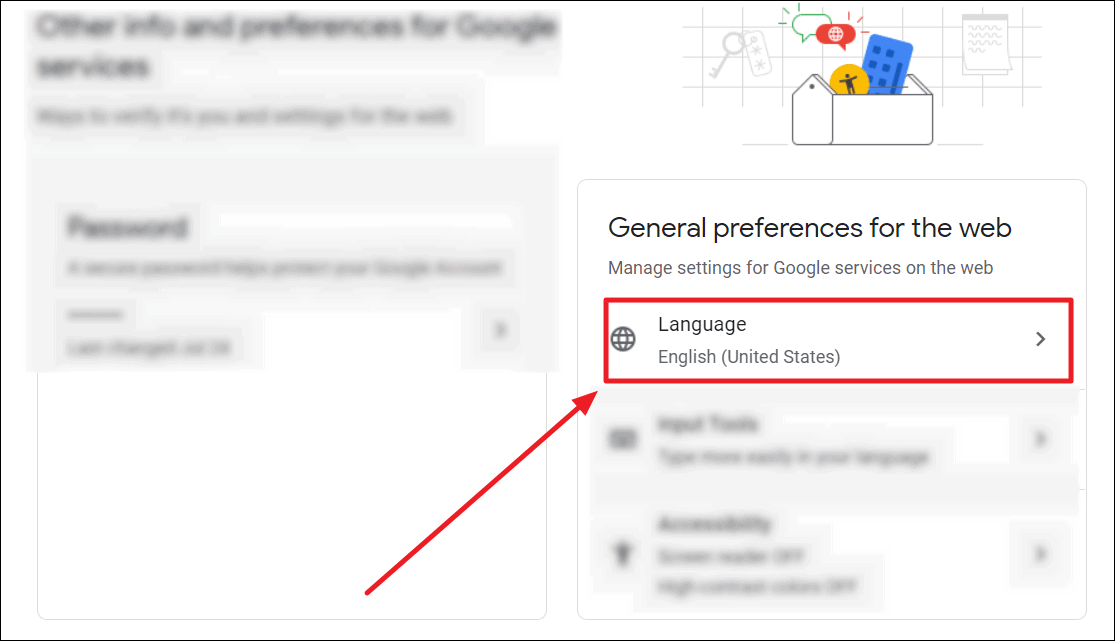
Launch the Chrome web browser on your PC and click your Google Account profile picture to the top right corner of the browser screen. Then, click the ‘Manage your Google Account’ button below your Google profile credentials.
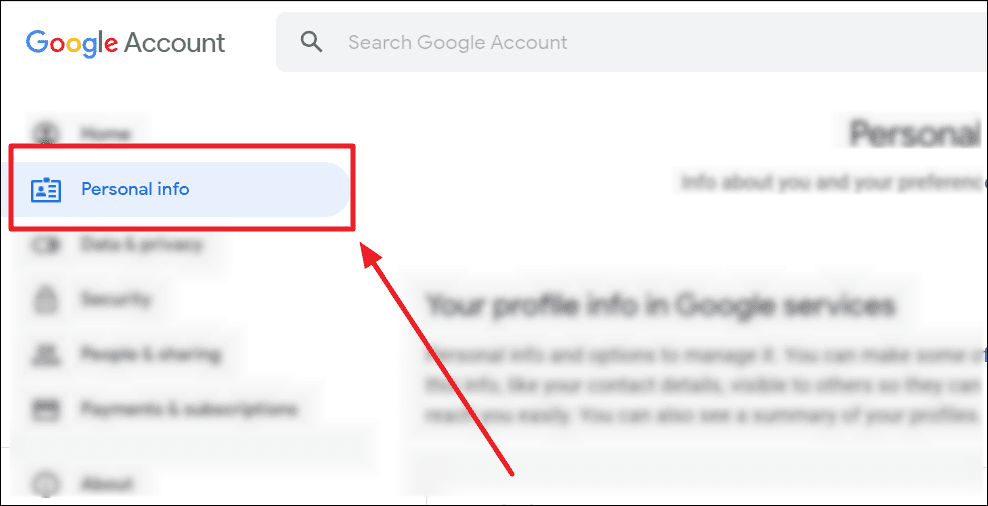
You will now be redirected to the web page of your Google Account. Here, select ‘Personal info’ from the left list of options.
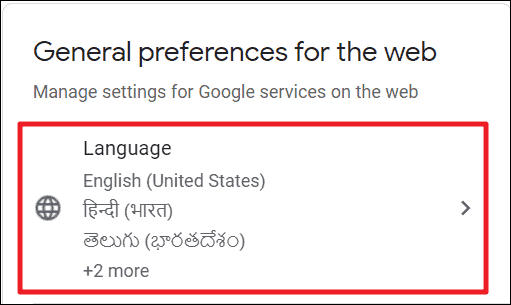
Scroll through the ‘Personal info’ window to find the ‘General preferences for the web’ section to the right. Under this section, select the first option – ‘Language’.
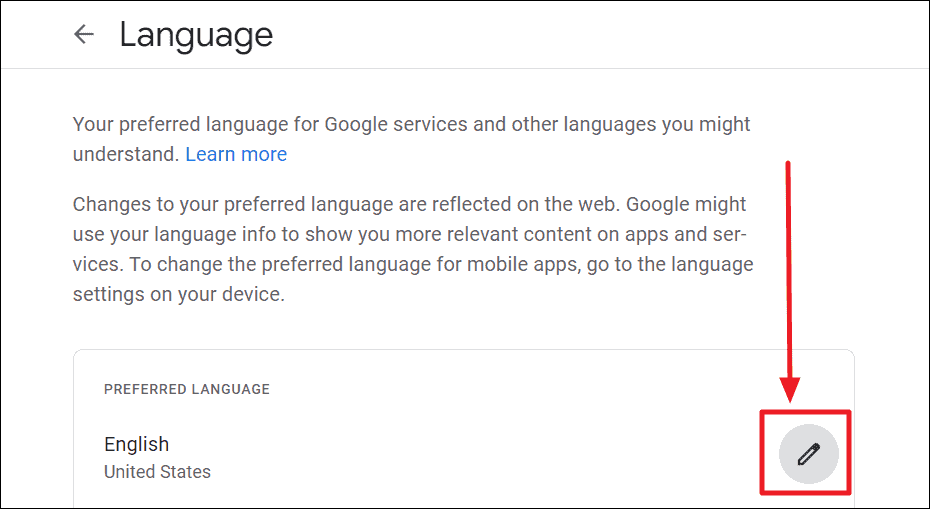
Click the pencil icon next to your preferred language below the ‘Preferred language’ title on the Language window.
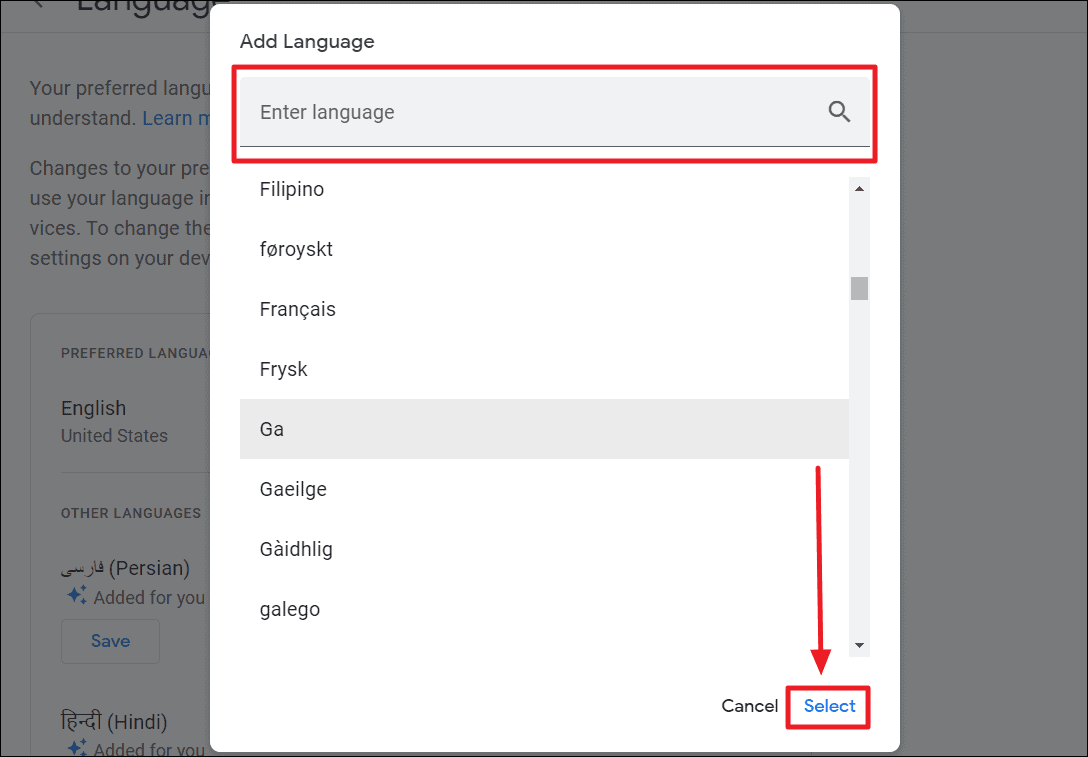
Choose your language either by scrolling through the list or by typing the name of the language in the ‘Enter language’ box. If you choose a language with a minimum of 1 variation you will redirect to the list of variations. Click the appropriate language and/or variation from either list and hit ‘Select’.
If you don’t find a language on the list, in your browser’s default language, it may be because the language is in its original script. Scroll to the bottom to find it.
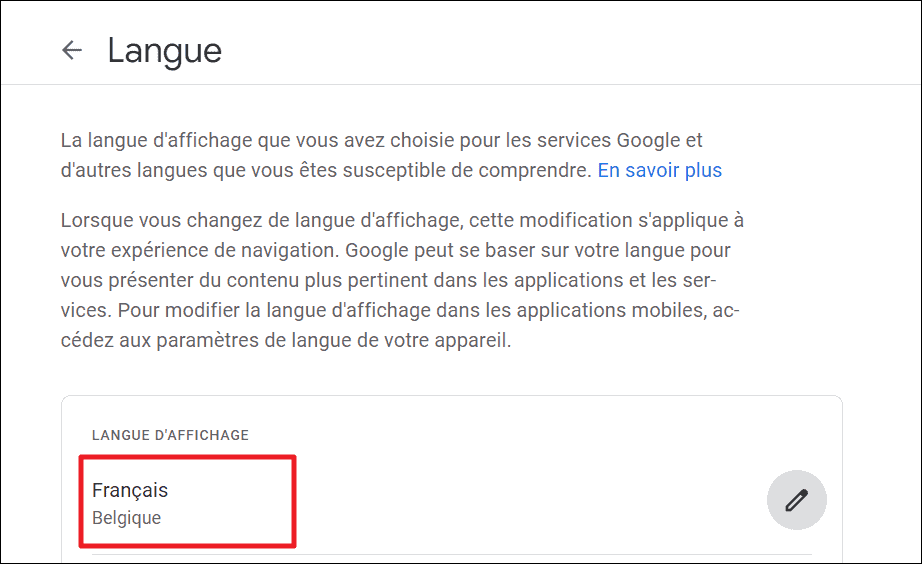
Your Chrome preferred language will immediately change to the newly chosen language. Everything on your Chrome page will now be in the new preferred language.
Adding Other Languages to Your Google Account
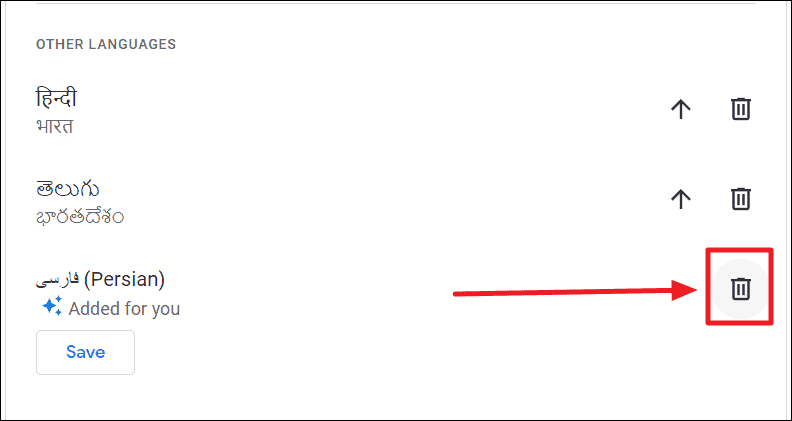
Google automatically adds language suggestions based on your browser activity. It’s a default setting. To include these suggestions in your main list of ‘Other languages’, click the ‘Save’ button below the language suggestion.
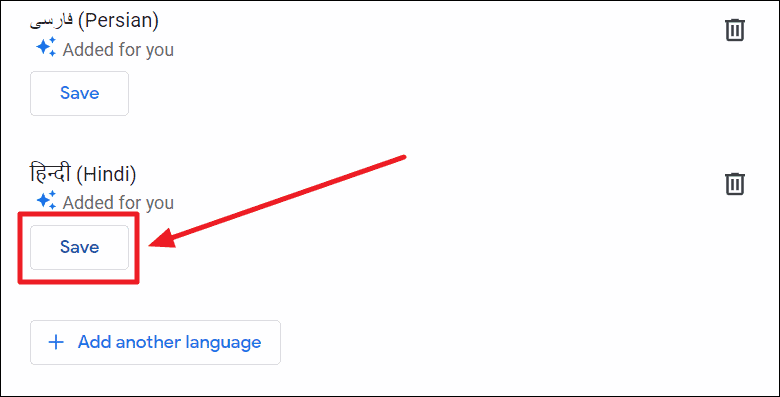
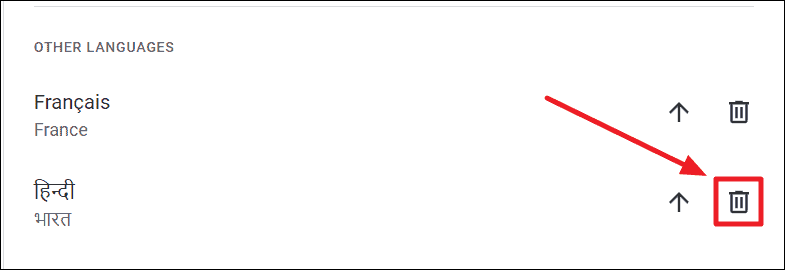
When you save a language suggestion, it will appear below the previous list of ‘Other languages’. To remove any language on this list, hit the ‘Trashcan’ icon or the delete icon adjacent to the language.
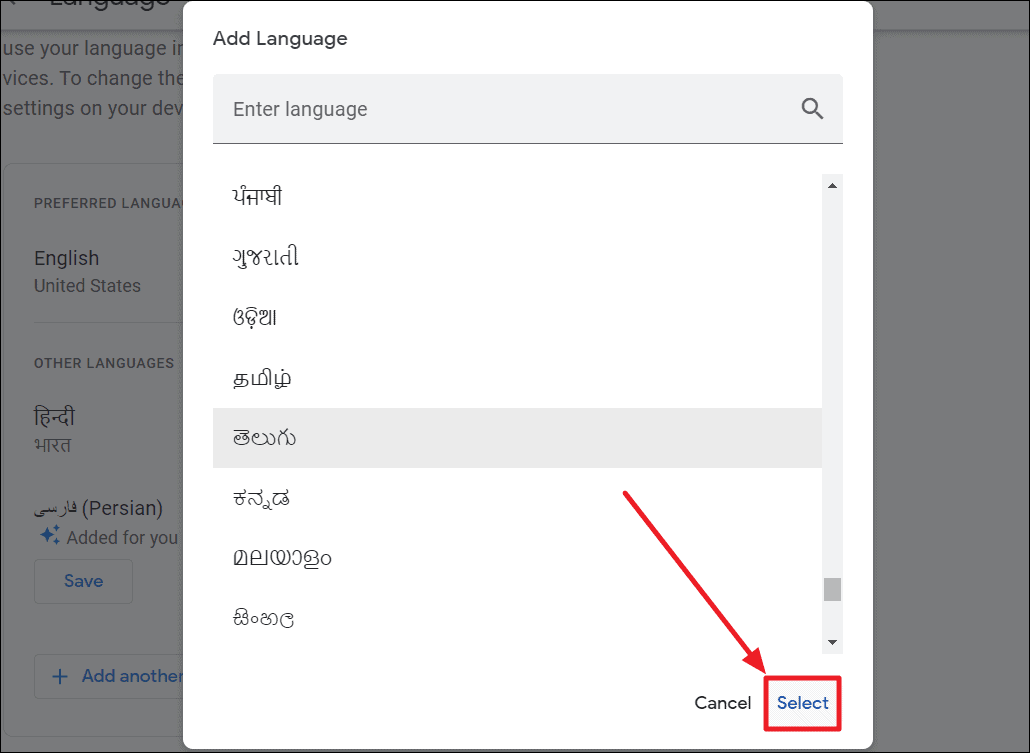
Next, scroll through the ‘Add a language’ box or type in the name of the language in the search field. Click the language, and then hit ‘Select’ to add it.
An alternative way to change the preferred language. When you add ‘Other languages’, you will notice an upward arrow next to each language. This button will push the language upwards on the list, and the language at the top of the ‘Other languages’ section will be pushed as the preferred language using this button.
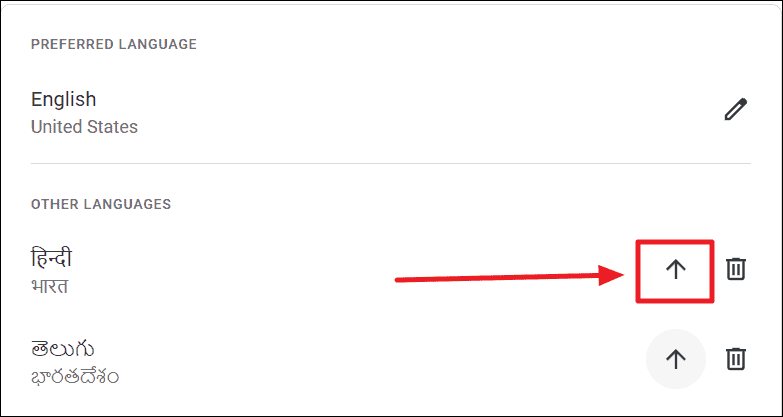
The previous preferred language will now take the top position in the ‘Other languages’ section.
Adding more languages will show the top three languages (other and preferred) below the ‘General preferences for the web’ section on your Google account web page.
Deleting Google’s Language Suggestions
If you want to remove any of Google’s language suggestions, click the trashcan/delete icon next to the particular suggestion(s).
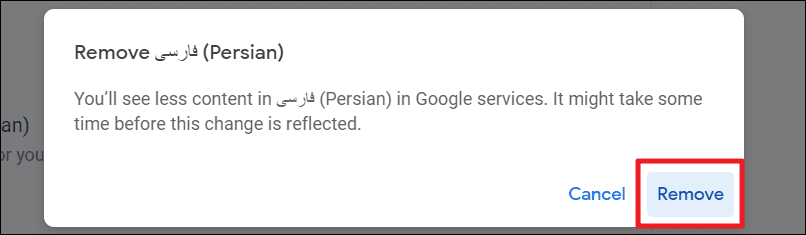
Deleting a Google suggestion will also reduce Google services content in that particular language. You will get a confirmation message regarding this decision as well. If you’re sure, click the ‘Remove’ option.
The changes will reflect in a while.
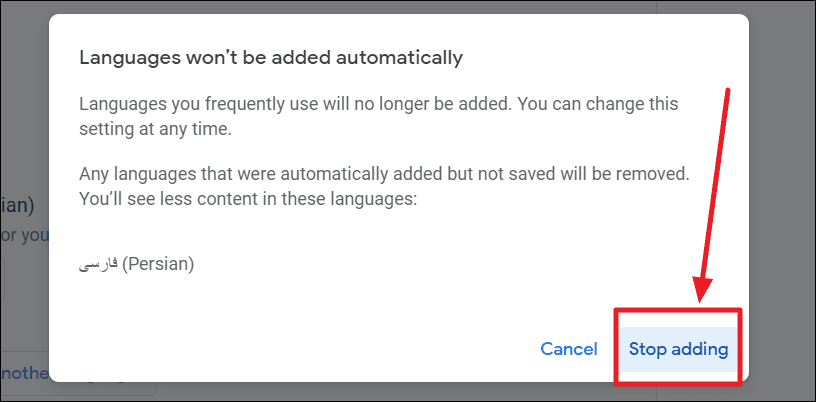
If you want to completely do away with Google’s language suggestions, simply click the toggle next to ‘Automatically add languages: On’, at the bottom of the page, to turn off the setting.
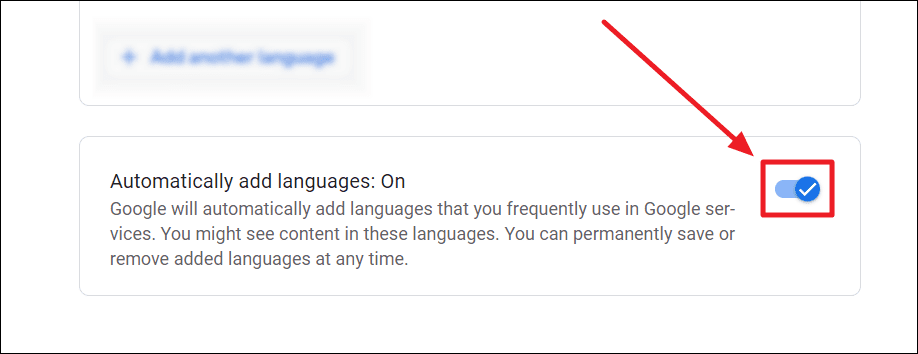
You will get a box confirming your choice to stop Google from adding languages automatically. Read the message, and click the ‘Stop adding’ option.
This will remove the previous suggestions as well. To enable the setting again, simply click the same toggle and your previous suggestions will reappear.