Microsoft Teams is one of the leading communication and collaboration apps for both personal and professional use. However, users often complain about various issues they encounter when using the app such as the app running slow, unable to share or access files, unable to chat with people, app crashing, blank pages being loaded, among other issues.
Besides, if you are using the Teams app frequently, the app’s cache can take up quite a lot of storage space on your device which may slow down your device. The basic troubleshooting method to solve these issues and others with the Microsoft Teams app is to clear the cache.
App Cache is temporarily stored files that the app uses when you open it, it can include images, icons, thumbnails, search history, message history, and other user preferences. There is no direct option within the Teams desktop apps to clear cache using the GUI, but you can still do it from the AppData folder within the user’s profile folder.
Clearing Microsoft Teams Cache on Windows 10 and Older Versions
Follow these steps to clear the cache for Microsoft Teams in Windows 10.
First, you need to close all instances of Microsoft Team apps from your computer. Simply pressing the ‘X’ button in the Teams app windows doesn’t completely close the app, it will be still running in the background.
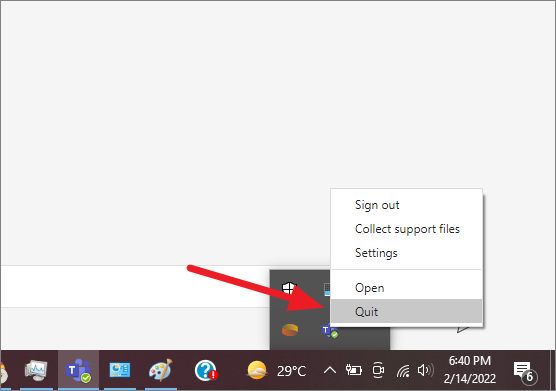
To fully close the Microsoft Teams app, right-click on the Microsoft Teams icon on the taskbar or click the upward arrow on the taskbar corner (system tray) and then right-click on the Teams icon, and select the ‘Quit’ option.
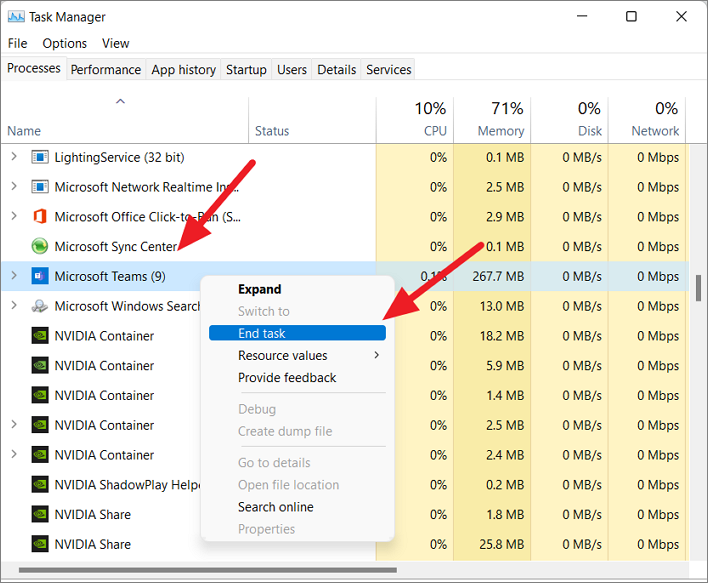
Then, make sure all process of the Microsoft Teams app is terminated. To do that, press Ctrl+Shift+Esc to open the Task Manager. In the Task Manager, scroll down to find any Microsoft Teams process, right-click on it and select ‘End Task’.
After closing the Teams app, open the Run dialog box using the Windows+R key combination. Then, type or copy/paste the below address in the run dialogue box and press Enter or click ‘OK’.
%appdata%\Microsoft\Teams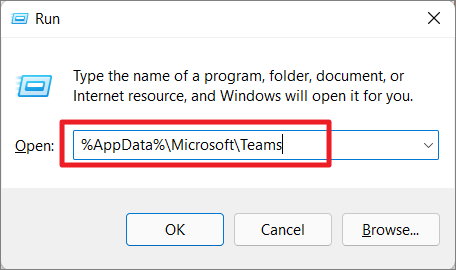
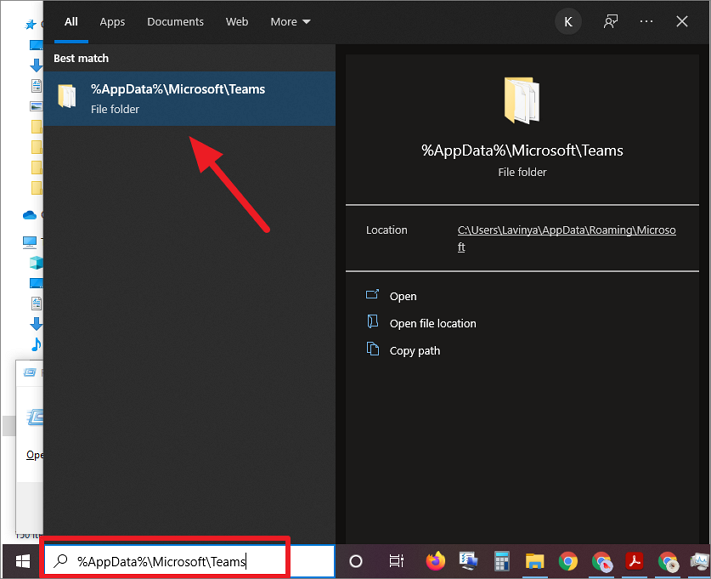
Alternatively, type the above address in the search box or click the Start menu and type the address and then click the folder under Best match.
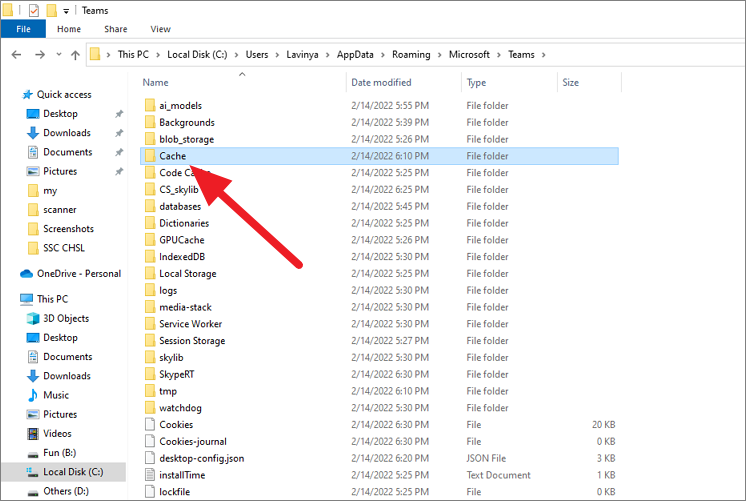
Now, locate and double-click on the ‘Cache’ folder to open it.
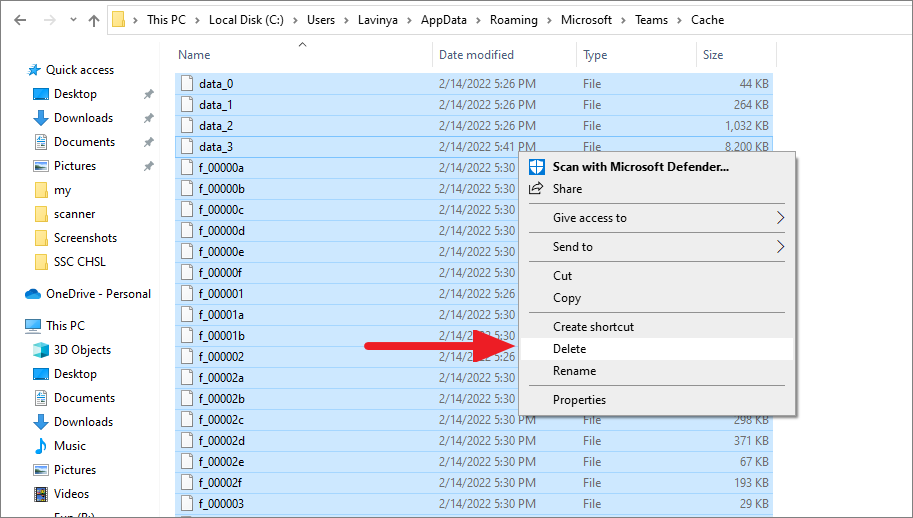
Then, select all the files inside that folder, right-click and select ‘Delete’ or press the ‘Delete’ key.
Next, go back to the Teams folder, then open each of the following folders and delete all the folders and files inside them:
- blob_storage: Contains audio, video, documents, and image files.
- Cache: Websites and other data.
- Code cache: Java Virtual Machine’s (JVM) bytecode
- databases: Structured database information
- GPUCache: Cache related to computer graphics card for processing.
- IndexedDb: Data fron the user’s browser.
- Local Storage: Digital data.
- tmp: Temporary files.
These cache folders are the ones that usually cause issues with your Microsoft Teams app, so cleaning them would be sufficient.
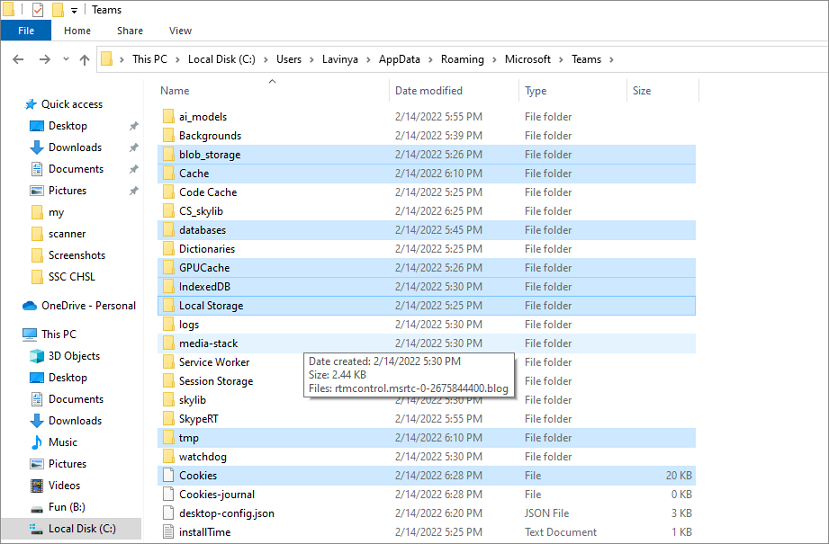
However, if you want you can select all the folders and files inside the Teams folder and delete them. This might reset all the user preferences and settings in the Microsoft Teams app.
Using Command Prompt
You can also Command Prompt to clean out all cache data of the Microsoft Teams app. Here’s how you can do that:
Search for ‘Command Prompt’ or ‘cmd’ in the Windows search, and click on the ‘Run as administrator’ option.
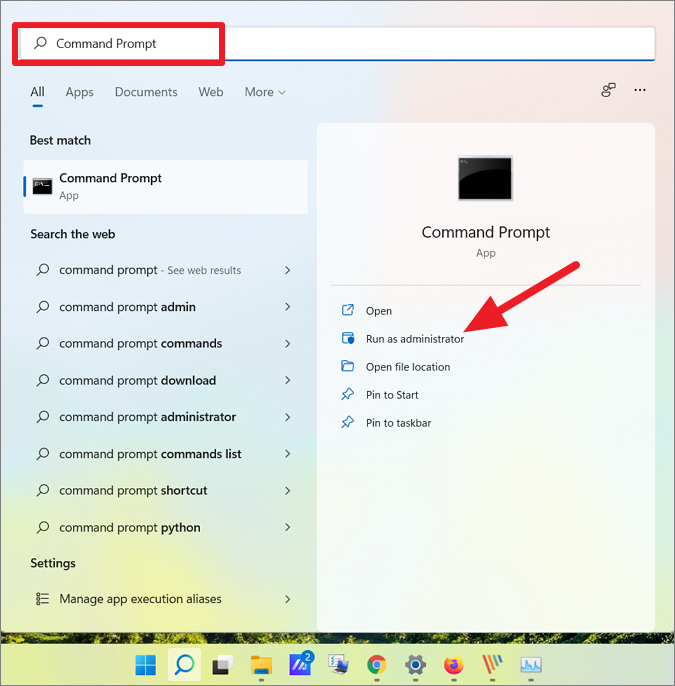
In the Command Prompt terminal, type the below command and press Enter.
rmdir /q /s %appdata%\Microsoft\Teams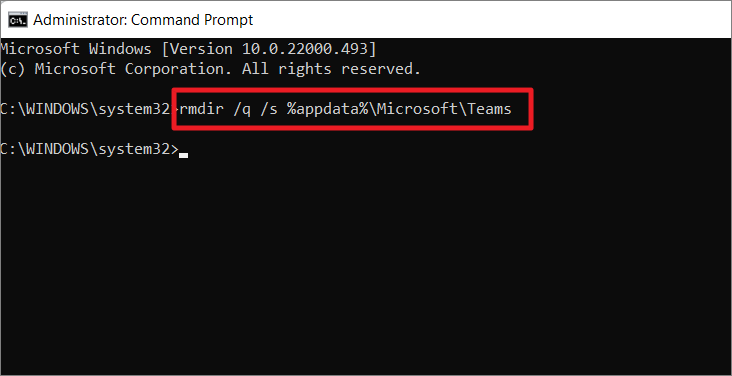
This will clear all the cache files of the Microsoft Teams app.
Once you deleted the cache files, restart your computer and reopen the Teams app. Whatever issue you are facing, it will probably be fixed by now.
Clearing Cache for All Users of Microsoft Teams
If you wish to delete the cache of Microsoft Teams for all users accounts on the computer at one go, follow these instructions:
Open Windows Powershell with administrative privileges. Then, type the following script and press Enter.
gci “C:\Users\*\AppData\Roaming\Microsoft\Teams\*” -dir | ? name in (‘application cache’,’blob storage’,’databases’,’GPUcache’,’IndexedDB’,’Local Storage’,’tmp’) | %{rm $_.FullName -R -Fo -W}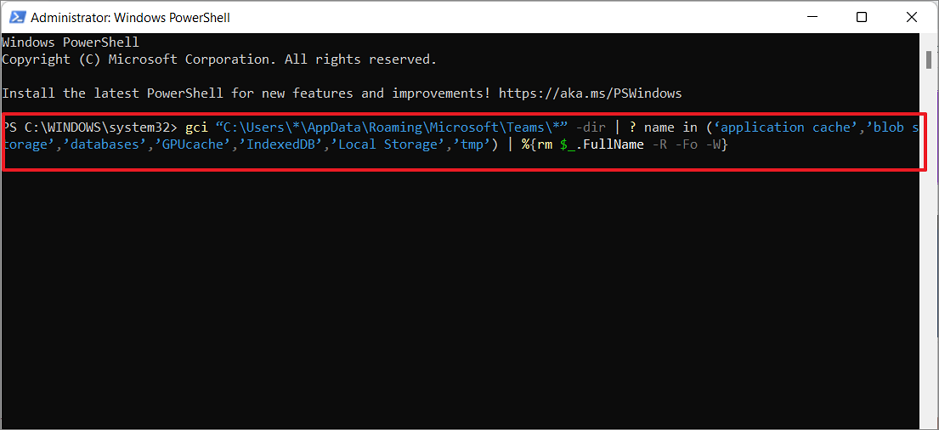
This will remove all the user cache data for all the users on the computer.
Clearing Microsoft Teams Cache on Windows 11
Windows 11 Microsoft Teams cache files are not stored in the usual location, it’s because Teams is a part of the built-in apps of Windows 11, so their data is stored separately in a different location.
Method 1:
To access Teams cache data in Windows 11, open the Run command (Win+R)and then type or copy/paste the below address and press Enter:
C:\Users\user_name\AppData\Local\Packages\MicrosoftTeams_8wekyb3d8bbweWhere type your computer User name for user_name like this:
C:\Users\rajst\AppData\Local\Packages\MicrosoftTeams_8wekyb3d8bbwe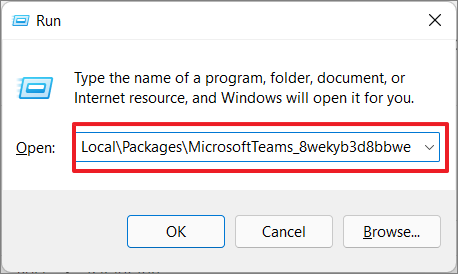
Or you can also open the Start menu, type the above address in the search field and open the best-matched result.
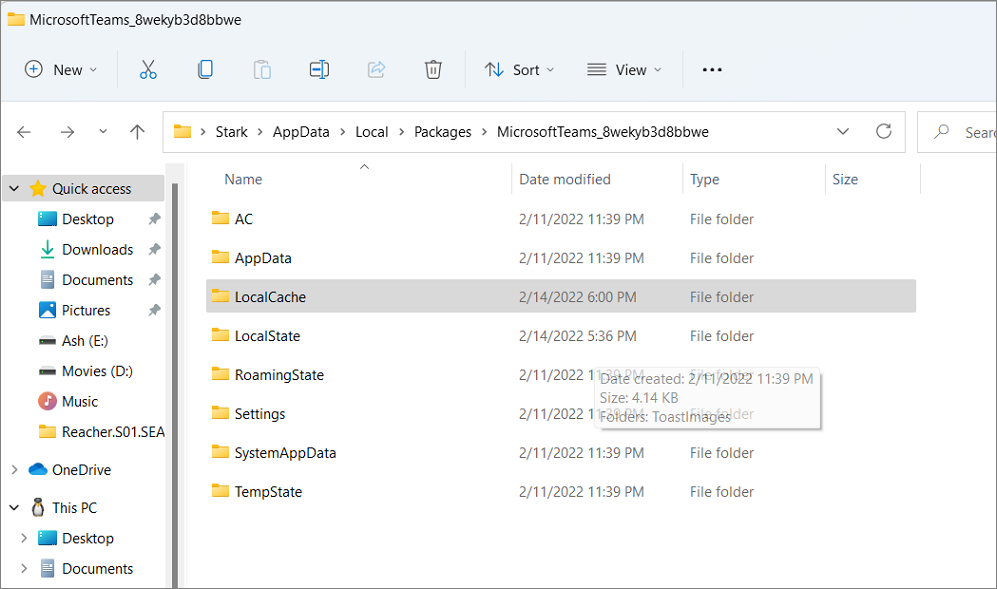
This will open up the folder name ‘MicrosoftTeams_8wekyb3d8bbwe’. Now, double-click on the ‘LocalCache’ folder to open it.
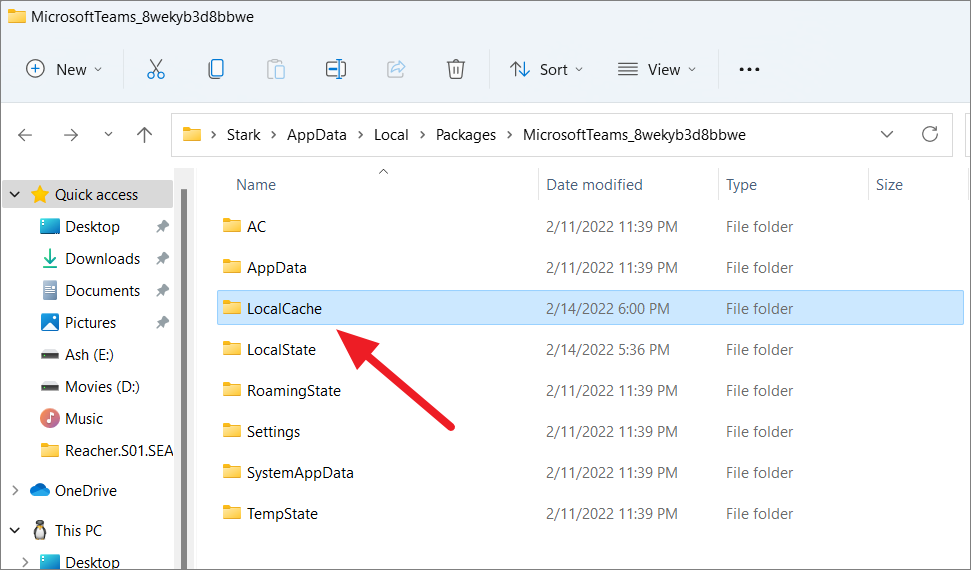
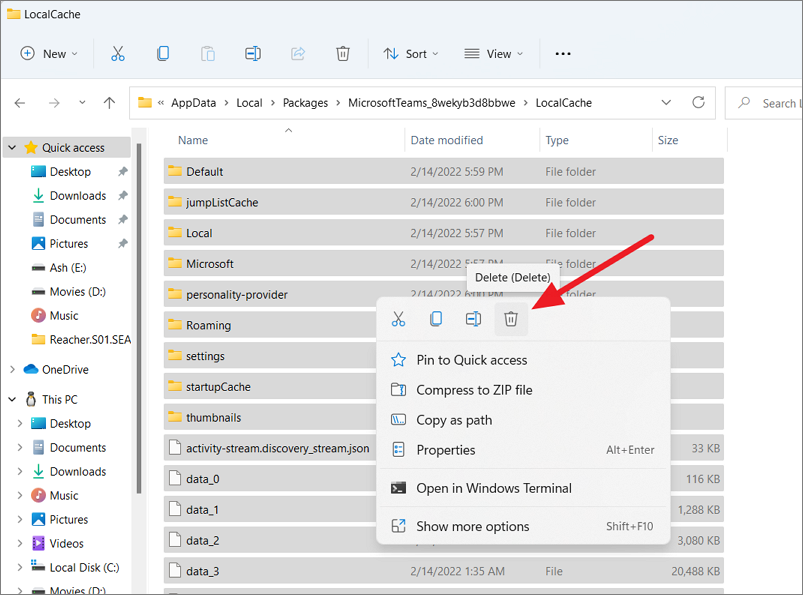
Now, select all the files and folders inside and click the ‘Delete’ icon in the context menu or press the ‘Delete’ key (or Shift+Delete).
Method 2:
Alternatively, if you wish to manually navigate to the Teams cache folder, follow these steps:
All caches and temporary files are usually stored in the AppData folder under the user profile. But the AppData folder is hidden by default, so you must make that folder visible to find any temporary files in Windows.
To show hidden files and folders in Windows 11, open File Explorer, and click the View menu button at the top ribbon. From the drop-down menu, hover over the ‘Show’ option and then click ‘Hidden items’ (tick) from the expanded menu.
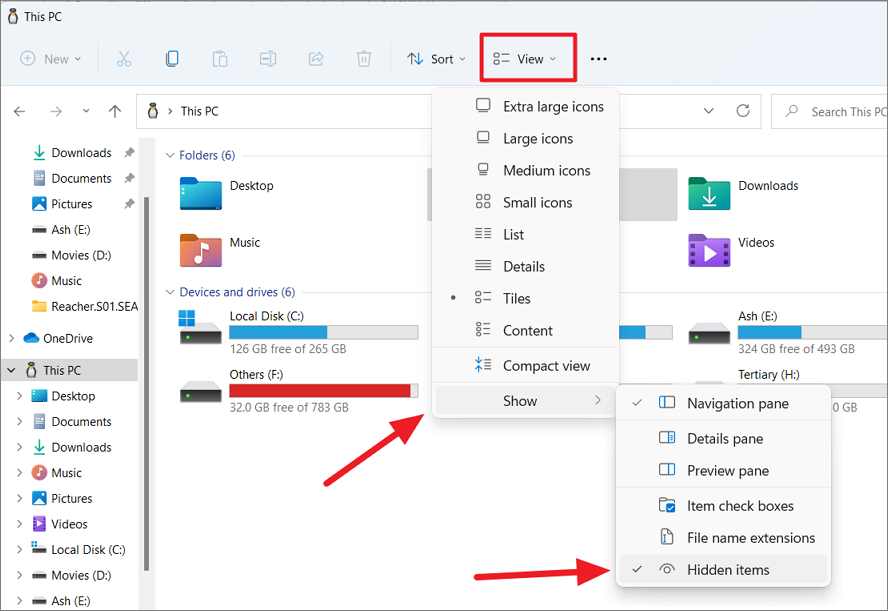
This will make all the hidden files visible again.
Now, type the same or copy/paste the below address in the address field and press Enter:
C:\Users\rajst\AppData\Local\Packages\MicrosoftTeams_8wekyb3d8bbweHere, make sure to replace rajst with the user name of the computer.
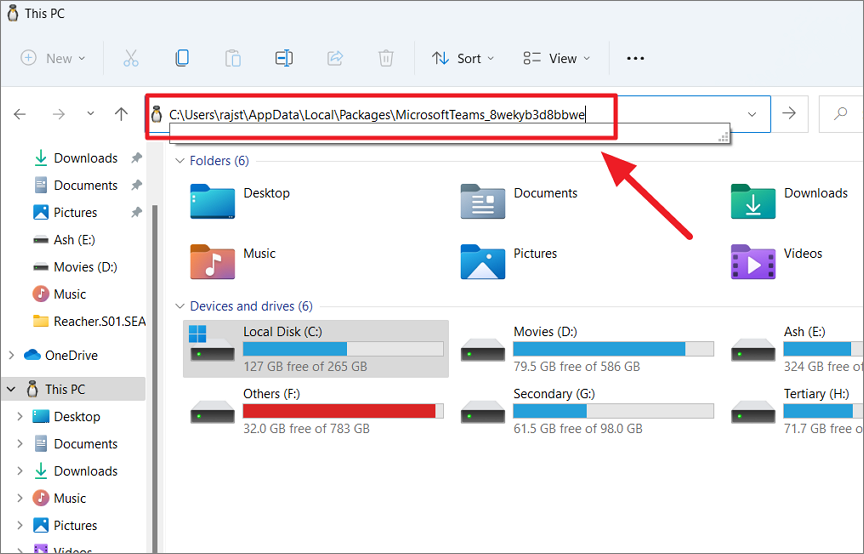
You can also manually navigate to the ‘MicrosoftTeams_8wekyb3d8bbwe’ folder using the above address through File Explorer. Then, open the ‘LocalCache’ folder and delete its contents.
Cleaning Microsoft Teams Cache on Mac
If you want to remove Teams cache files on an iOS (MAC) computer, you can do that by following a similar method.
First, open the ‘Go to Folder’ feature (Shift+G) and type or paste the following, and press the Return key:
~/Library/Application Support/Microsoft/TeamsNow, select all the folder contents, right-click and select ‘Move to Bin’.
Cleaning Microsoft Teams Cache on Mobile
You can often run out of storage space on your mobile phone. So clearing out Microsoft Teams cache data on mobile devices can free up precious storage space and keep the app running smoothly. Here’s how you can clear Teams app cache on mobile:
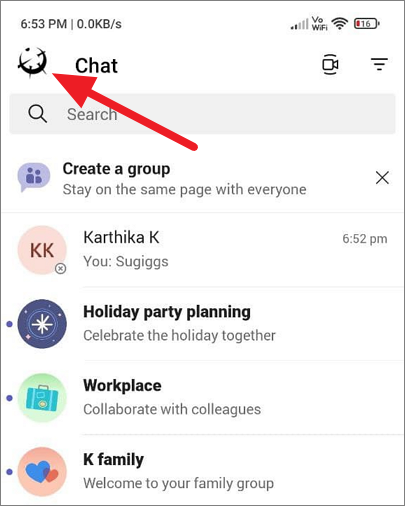
Open the Microsoft Teams app on your mobile phone and click the profile picture at the top left corner.
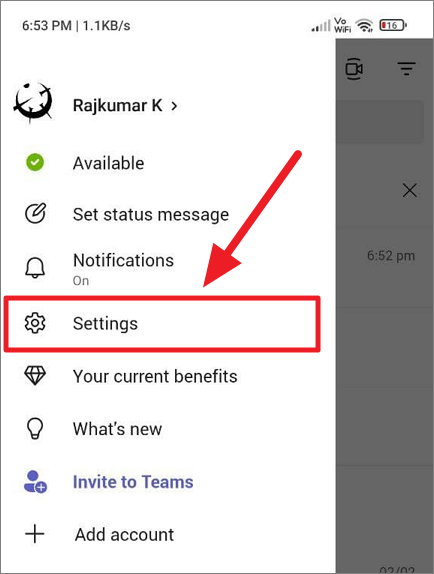
Next, tap the ‘Settings’ option on the left.
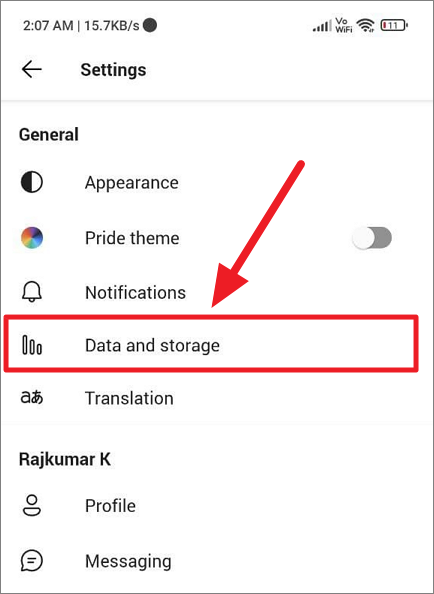
Then, tap/select the ‘Data and storage’ option under the General section.
To remove only the temporary files of the app, select the ‘Clear temporary files’ option.
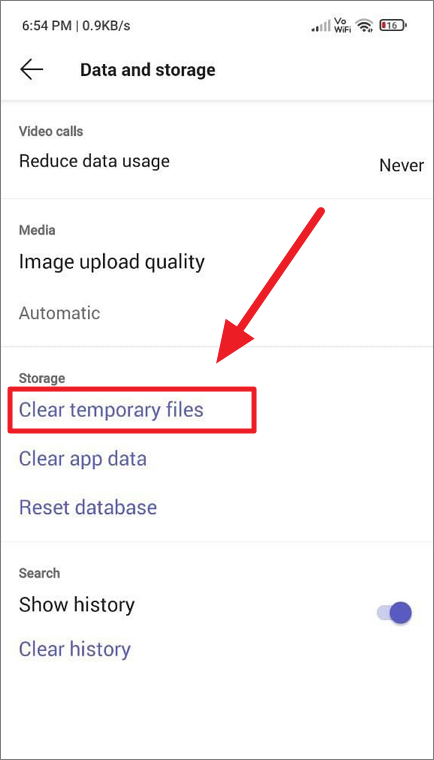
To clear everything, including temporary files, media files, documents, history, chat records, and others, tap/select the ‘Clear app data’ option.
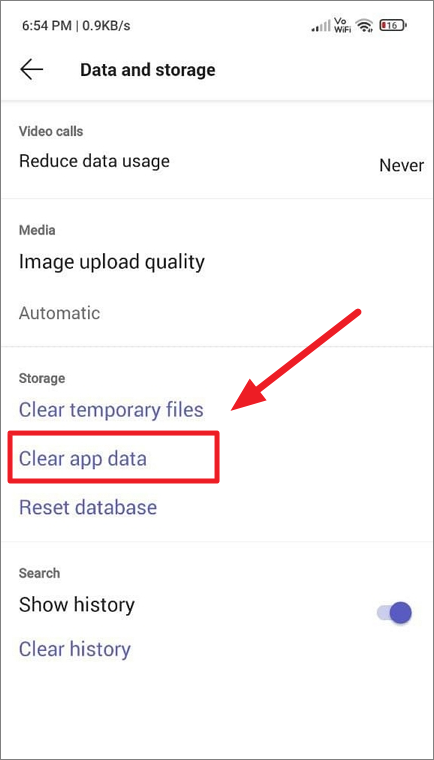
To clear the app’s chat history, tap the ‘Clear history’ option.
That’s it.

