Update your Camera driver either from the Settings, Device Manager, or initiate a force reinstall by uninstalling the driver from your PC.
Update your Camera driver either from the Settings, Device Manager, or initiate a force reinstall by uninstalling the driver from your PC.
by Parth Sawhney
Device drivers are crucial software components that enable your computer’s operating system to communicate effectively with hardware devices like cameras. Keeping these drivers updated ensures optimal performance and compatibility.
Update Camera Driver via Settings App
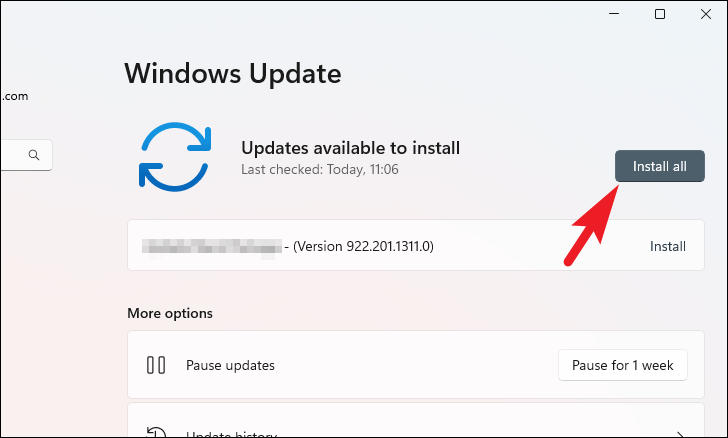
One of the simplest ways to update your camera driver is through the Settings app, where Windows provides optional driver updates.
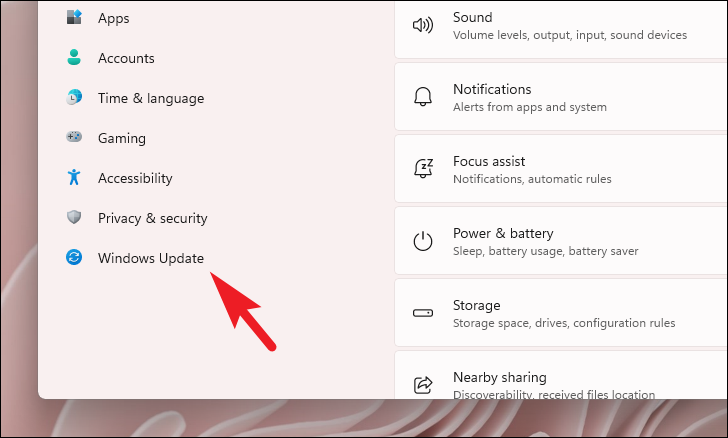
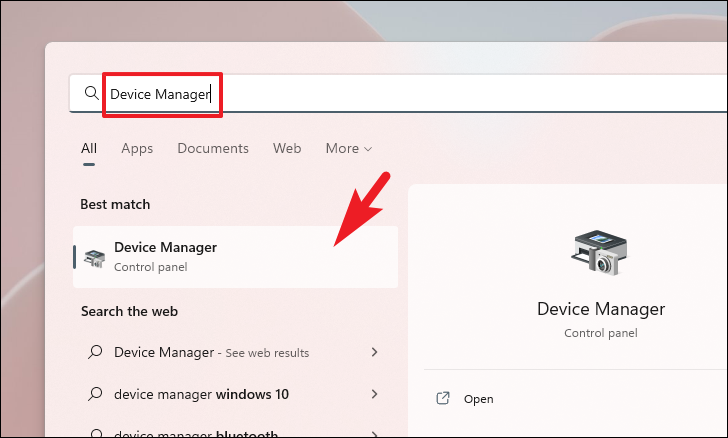
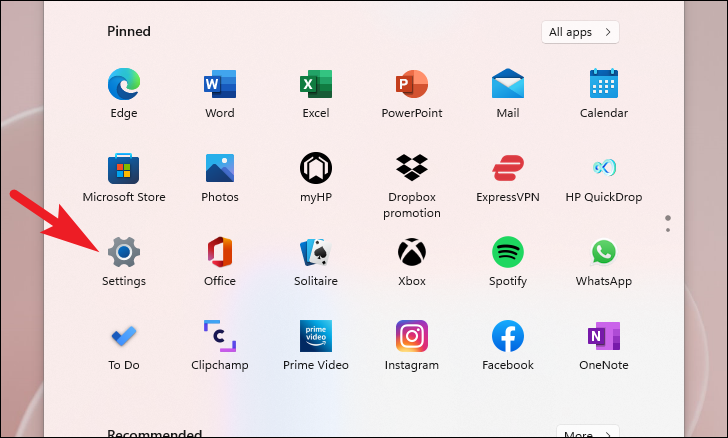
Open the Settings app by clicking on the Start Menu and selecting the Settings tile from the ‘Pinned apps’ section or by typing Settings in the search bar.
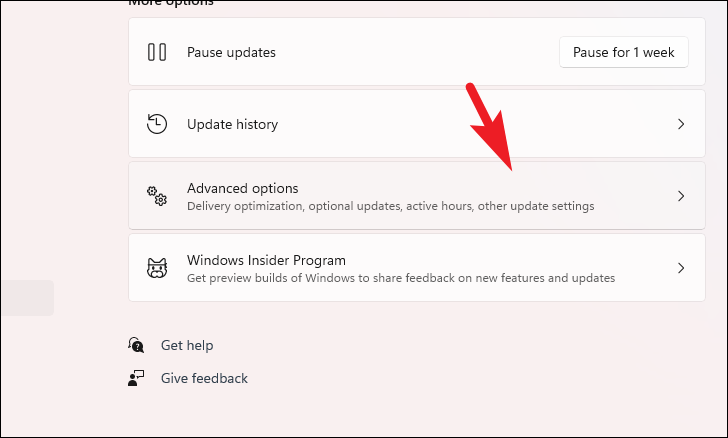
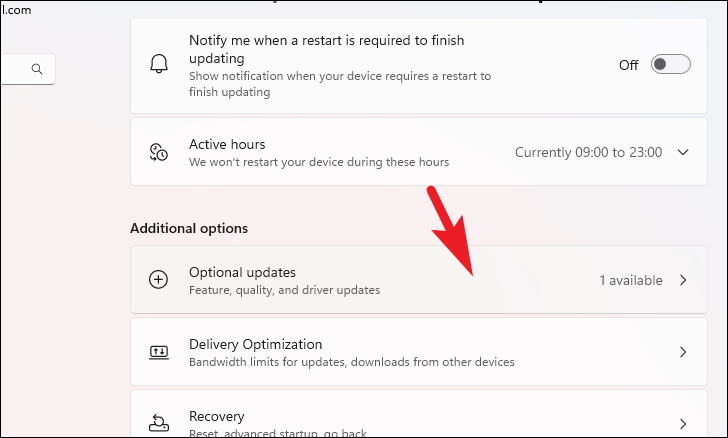
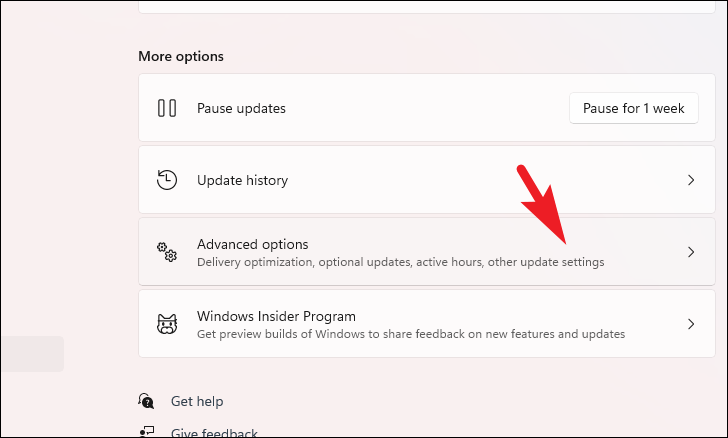
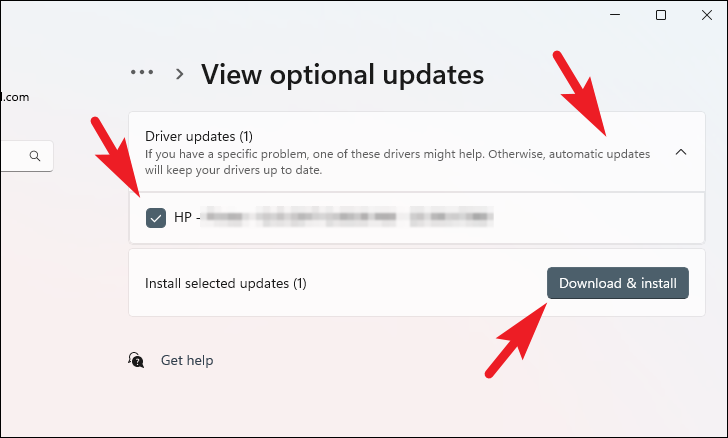
Expand the ‘Driver updates’ section. If a camera driver update is available, check the box next to it and click on ‘Download & install’ to update the driver.
Once the installation is complete, your camera driver will be updated. If no update is listed, you can try the next method.
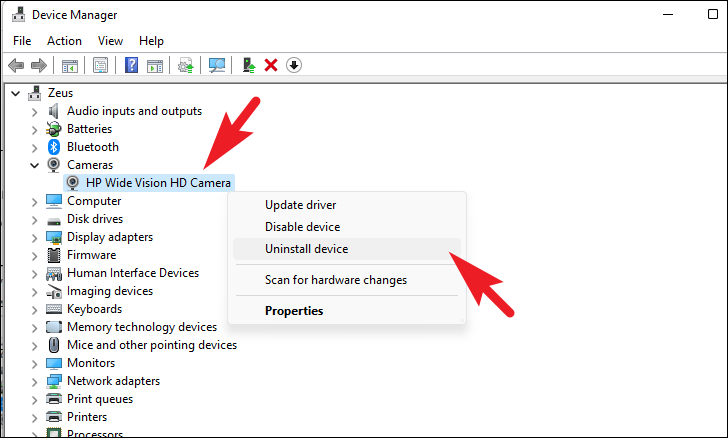
Update Camera Driver via Device Manager
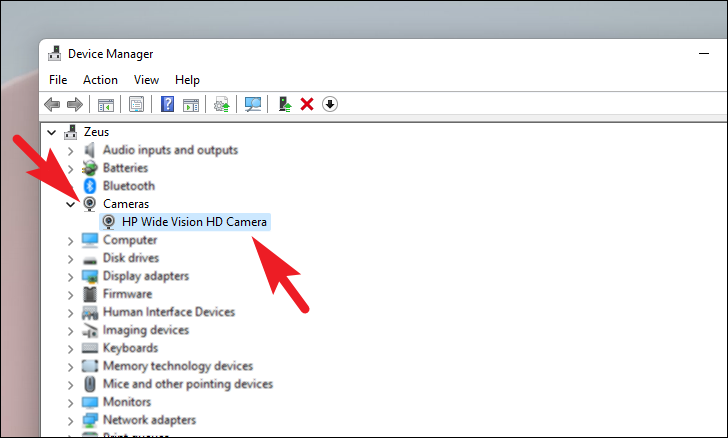
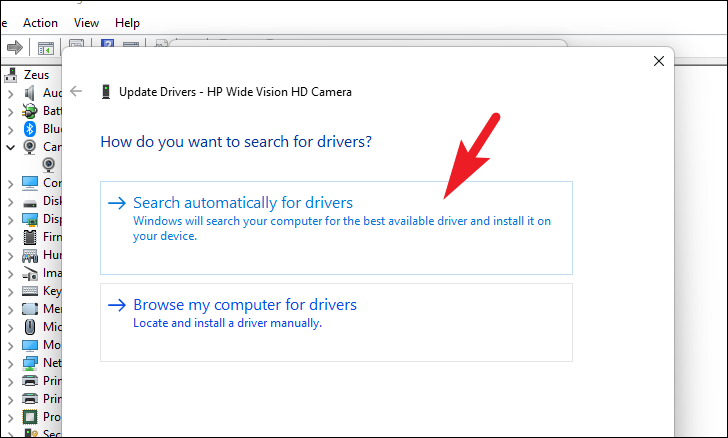
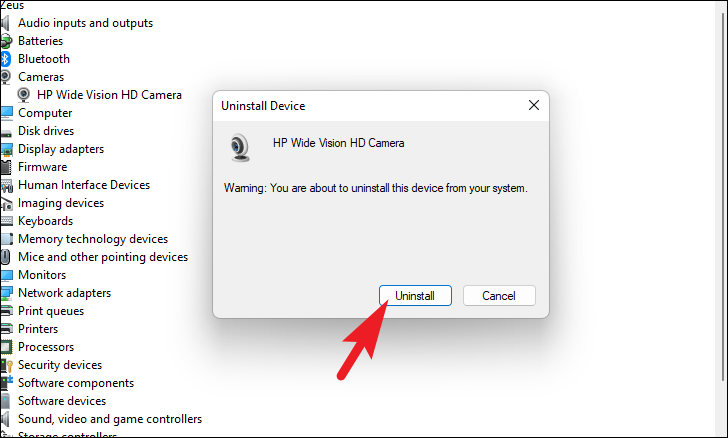
If the Settings app doesn’t offer an update, you can manually update the driver using Device Manager.
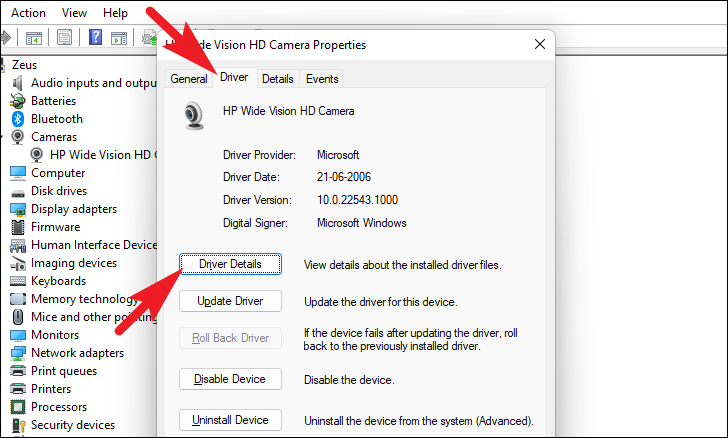
In the Device Manager window, locate the ‘Camera’ category and double-click to expand it. Then, double-click on your camera device to open its properties.
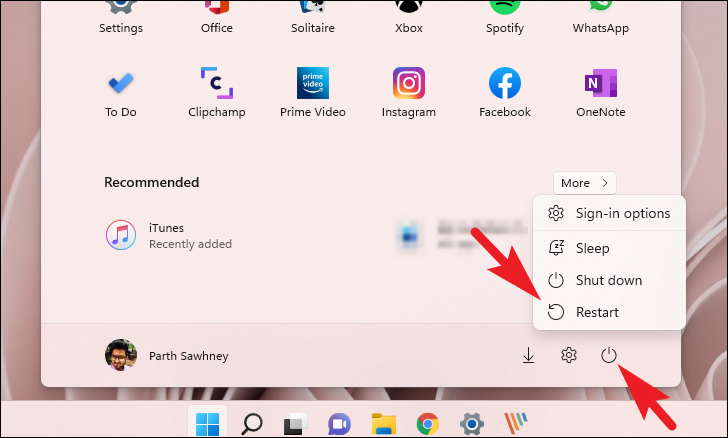
Restart your computer to allow Windows to detect and reinstall the camera driver automatically. Click on the Start Menu, select the power icon, and choose ‘Restart’.
Expand the ‘Driver updates’ section, select the camera driver update by checking the box next to it, and click on ‘Download & install’.
By following these steps, you should have successfully updated or reinstalled your camera driver, ensuring your camera functions correctly on Windows 11.