If you're working on a document with someone else, tasks like editing, reviewing, and making changes can be a bit challenging. That's where Microsoft Word's collaboration tools come in handy. These tools are designed to make it easy to track the changes made to a document as well as approve or reject them.
All you need to start using these collaboration tools is one of the newer versions of Microsoft Word, preferably Microsoft 365, an internet connection, and a Microsoft Account. You should also have OneDrive enabled on your PC.
Step 1: Save your document to OneDrive
- Launch Microsoft Word from the Start menu or open the online version in your web browser.
- Create a new document or open one you want to share with someone else.
- Go to the 'File' menu and then click on 'Save' and then select OneDrive.
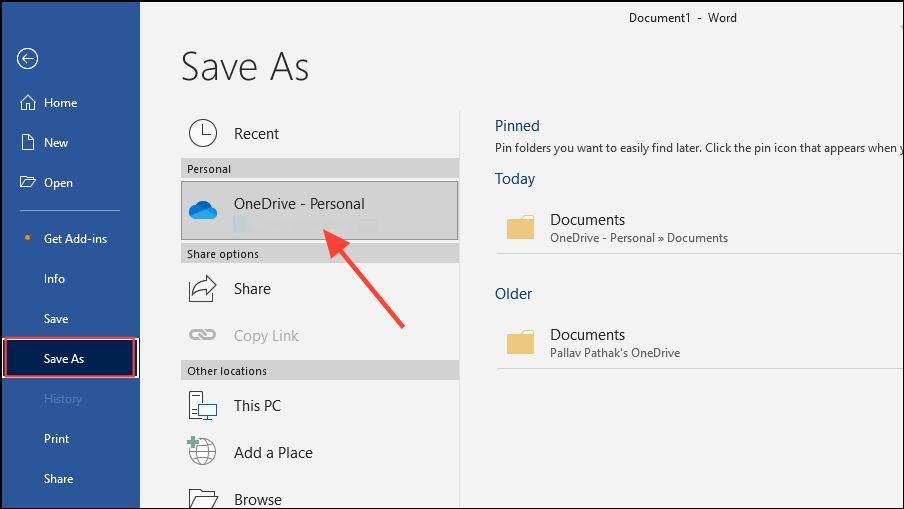
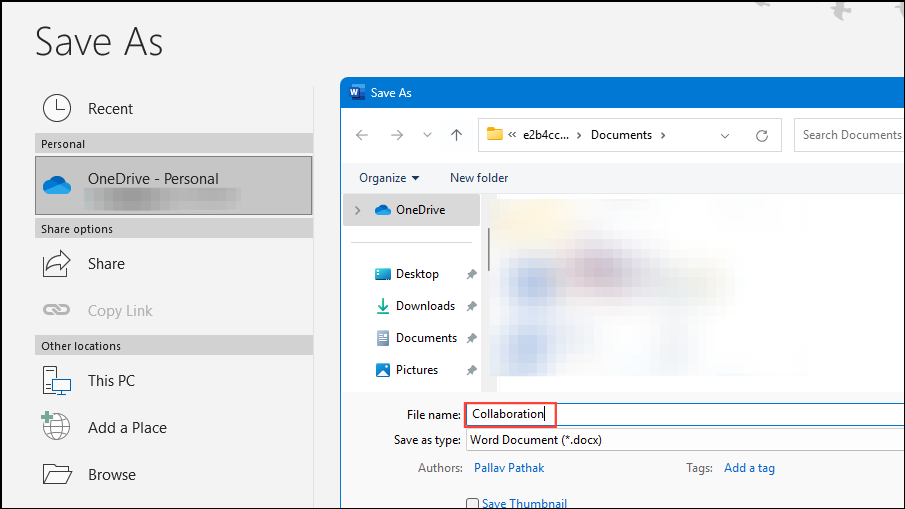
- Click on the OneDrive folder in which you want to save the document. Give your document a name and save it. Alternatively, you can upload it to OneDrive after saving it on your PC.
Step 2: Invite collaborators
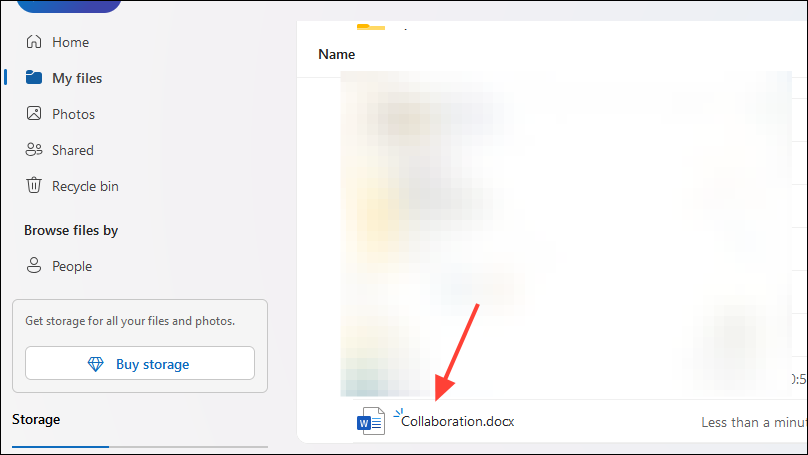
Once you've saved or uploaded your Word document to OneDrive, you can access it from there.
- Open the Word document in OneDrive by double-clicking on it.
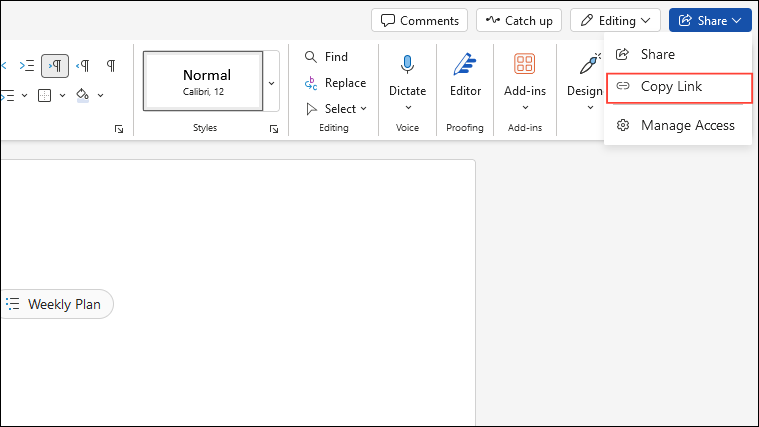
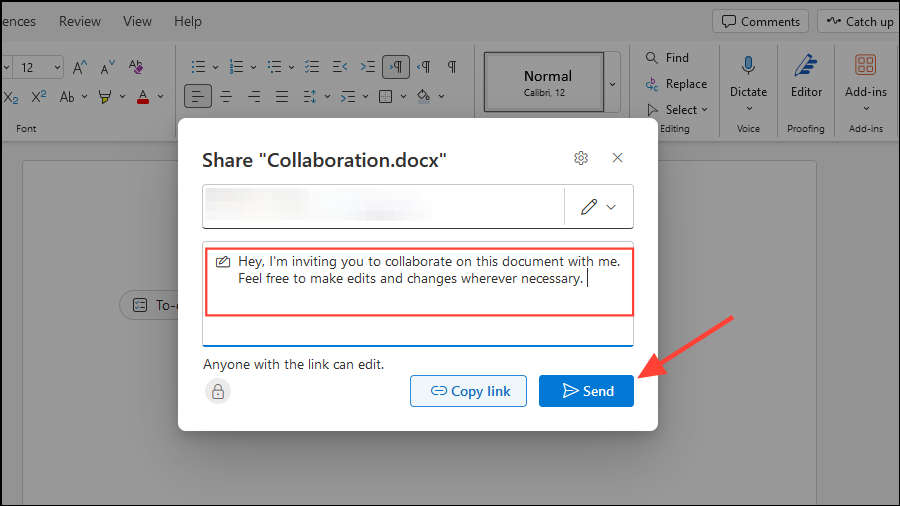
- After opening the document, click the 'Share' button on the right. You can now choose the person you want to share the file with by clicking the 'Share' option and entering the person's name or email address.
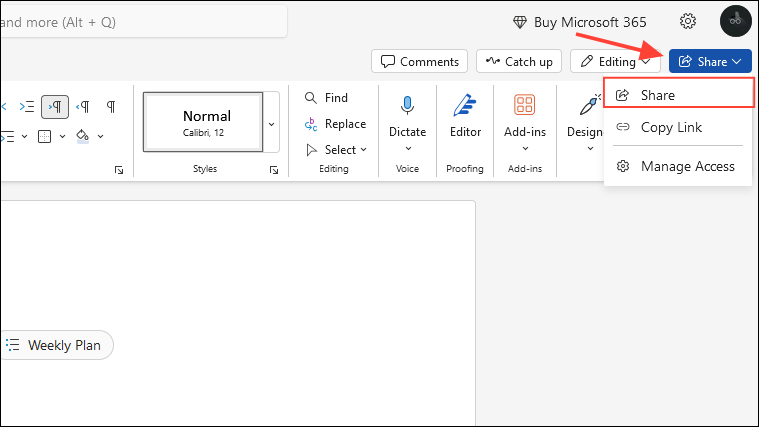
- Alternatively, you can use the 'Copy Link' option and share the copied link with the person you want to collaborate on the document.
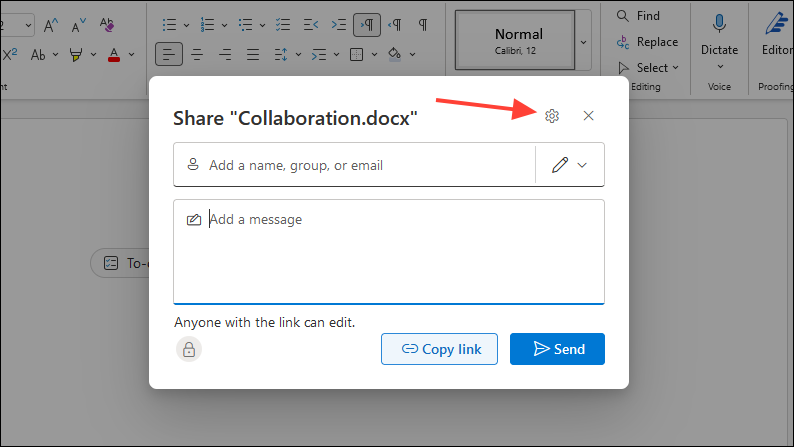
- When you use the 'Share' option, you can choose how much control collaborators have over the document. Click on the gear icon at the top right of the dialog box that appears when you click on the 'Share' option.
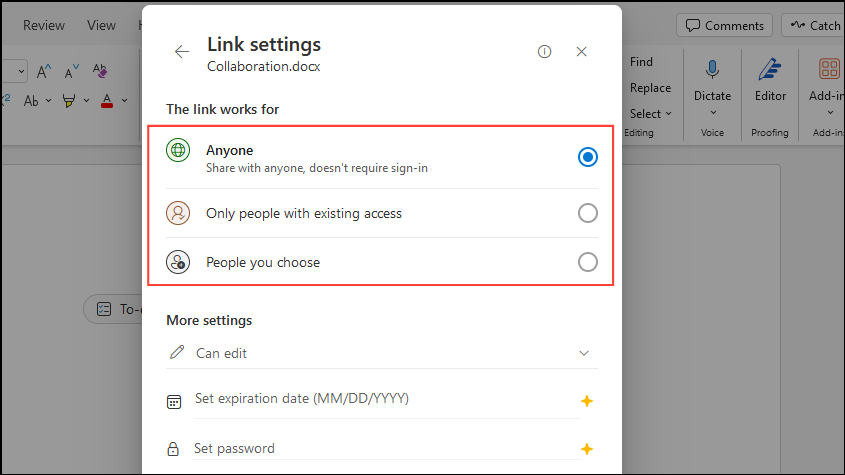
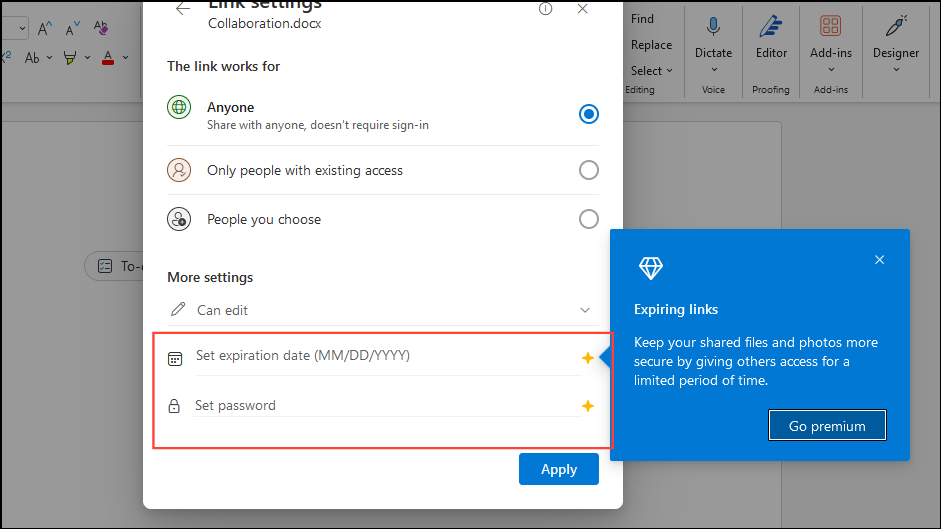
- Now, you can control how to share the document with collaborators. You can allow anyone to access the document without signing in, allow people who already have access to collaborate, or select specific people as collaborators.
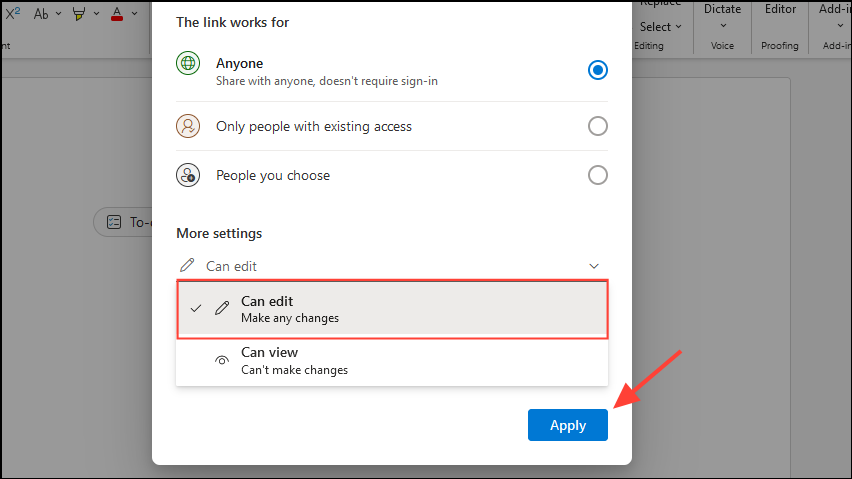
- In the 'More settings' section, you can choose whether people you are sharing the document with can edit it or just view it. For effective collaboration, set it to 'Can edit' before clicking the 'Apply' button.
- If you have a premium Microsoft 365 subscription, you can also set an expiration date and a password to protect your shared document.
- Once you're done changing these settings as per your preference, type in the name or email address of the person you want to invite to the document as a collaborator. Then enter a message for them in the box provided before clicking on the 'Send' button.
Things to know
- Once you set up your Word document for collaboration, all collaborators can work on the document at the same time. Everyone will be able to see the changes made by others in real time and color-coded cursors will make it easy to identify the different collaborators.
- Collaborators can add comments in the Word document by highlighting a section of text, going to the 'Review' tab, and selecting 'New comment' from the right-click context menu. Others can then reply to the comments, resulting in a conversation thread.
- A review pane will also be accessible in Word documents on which multiple collaborators are working together and will show all the comments and changes made to it.
- You can also go to the 'Review' tab and enable the 'Track Changes' option, which will make it easy to see all the changes, deletions, and insertions. Colored flags will also appear in the document with the names of collaborators, allowing you to see where each one is working.

