Use Microsoft Word’s ‘Compare’ feature to compare versions of a Word document to view their similarities and differences.
Use Microsoft Word’s ‘Compare’ feature to compare versions of a Word document to view their similarities and differences.
by Raj Kumar
🔊
Quick Summary. To compare two Word documents, navigate to the Review tab, select the Compare option, and choose your original and revised files. Adjust settings as needed, click OK, and review the changes highlighted in the new document. Save this comparison for future reference.
Working with multiple versions of a Microsoft Word document can lead to confusion when trying to identify differences and changes made. Whether you’ve collaborated with others, forgotten to enable Track Changes, or need to review edits between contract drafts, manually comparing documents is inefficient. Fortunately, Microsoft Word offers a built-in Compare feature that efficiently highlights discrepancies between documents and identifies who made specific changes. Here’s how you can use this feature to compare two Word documents and streamline your editing process.
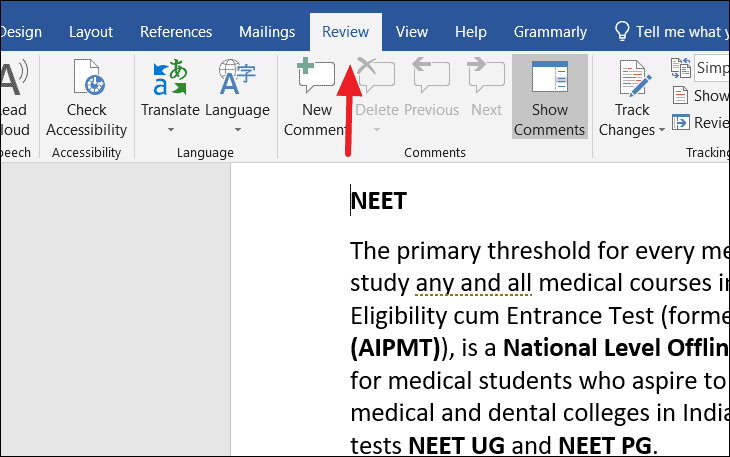
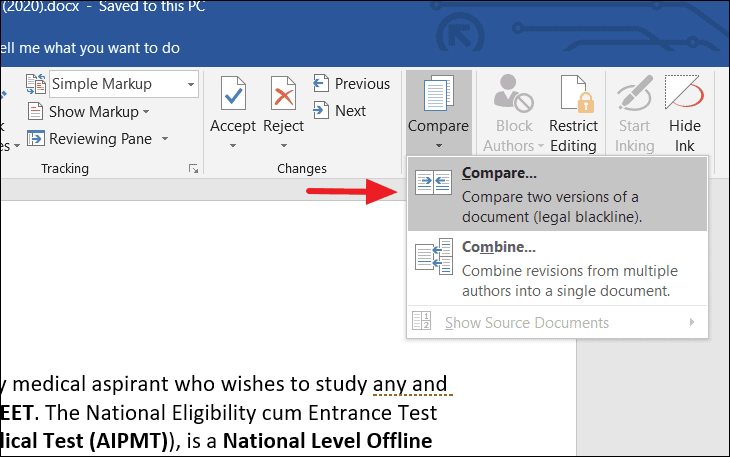
How to compare two Word documents using Microsoft Word
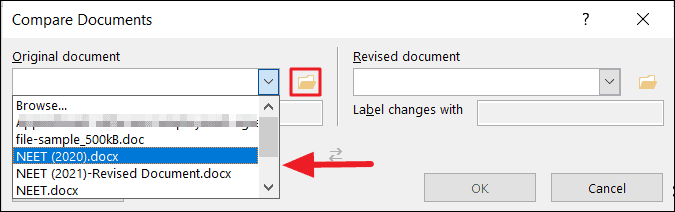
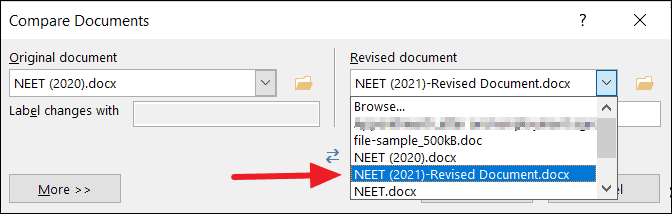
The Compare Documents dialog box will appear, featuring two fields: Original document and Revised document. Here, you’ll select the two documents you wish to compare.
Click the drop-down menu next to Original document and choose the initial version of your document from the list (e.g., NEET (2020).docx in this example).
Note: If the desired document isn’t listed, click the folder icon next to the Original document field to browse your computer and select the file manually.
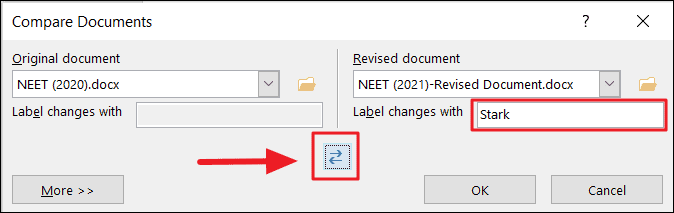
In the Label changes with field, type a name or note that will appear alongside the tracked changes. For instance, you might enter Stark to indicate who made the revisions.
Tip: If you need to swap the original and revised documents, click the double-arrow icon between the fields.
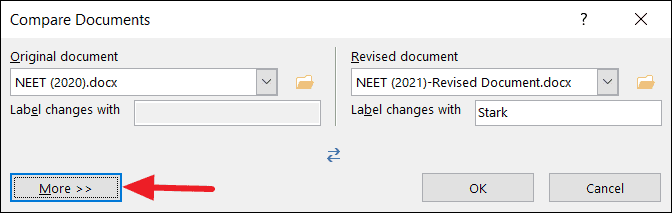
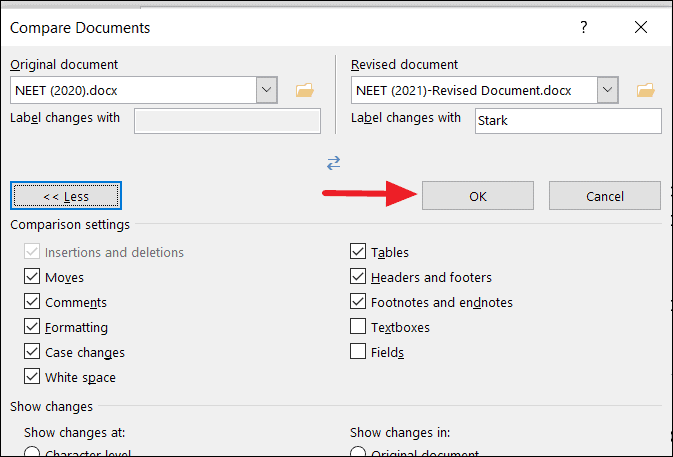
For additional comparison settings, click the More >> button at the bottom left corner. This step is optional; you may proceed by clicking OK if you prefer default settings.
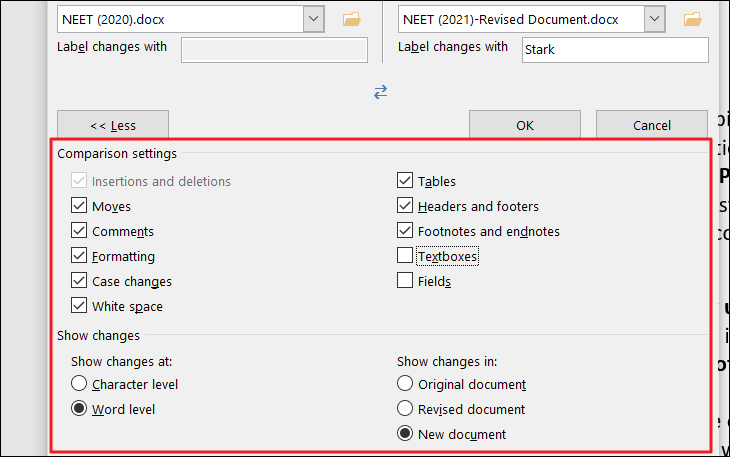
Within the Comparison settings, select the elements you want Word to compare, such as formatting, comments, case changes, or whitespace. By default, all options are checked.
Under the Show changes section, decide how changes are displayed—either character by character or word by word. Additionally, choose where to display the changes: in the original document, the revised document, or a new document. Selecting New document is recommended to keep your original files intact.
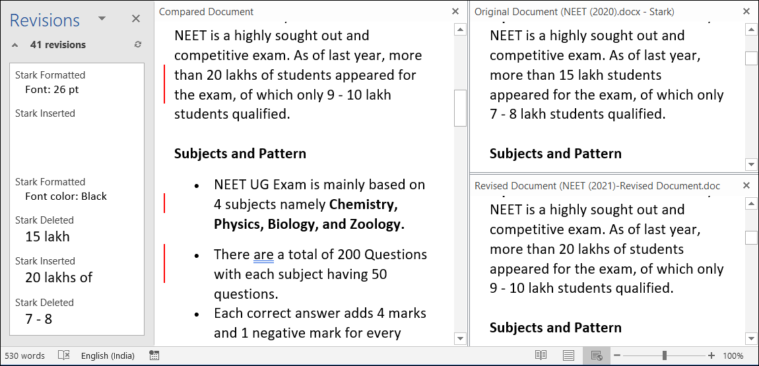
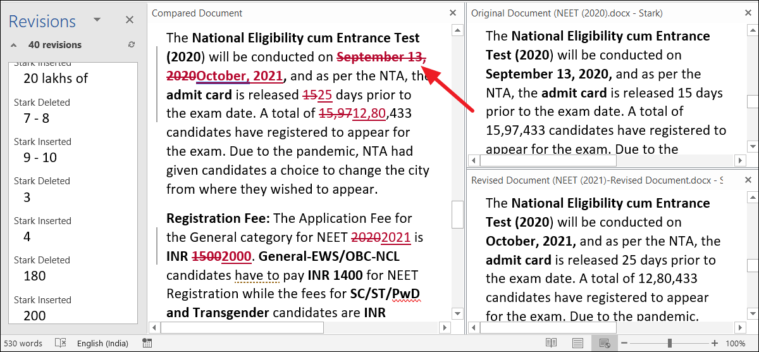
A new window will open displaying the comparison results in four panes. The central pane shows the Compared Document with all changes highlighted and red markers along the left margin. On the right, two panes display the Original and Revised documents side by side. The Revisions pane on the left lists all changes, including insertions, deletions, and formatting alterations.
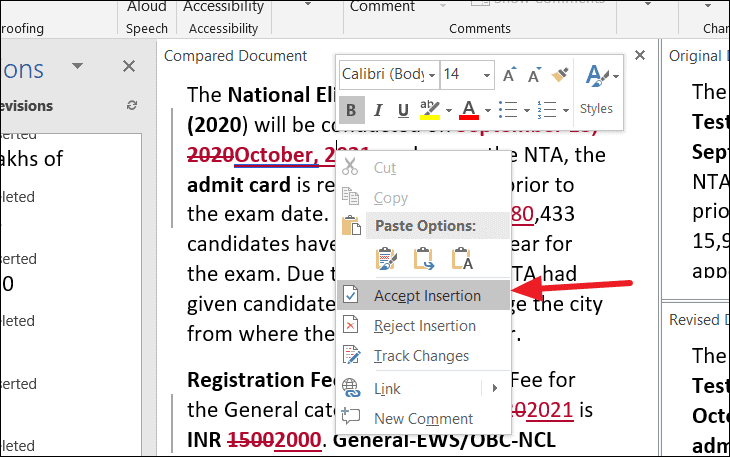
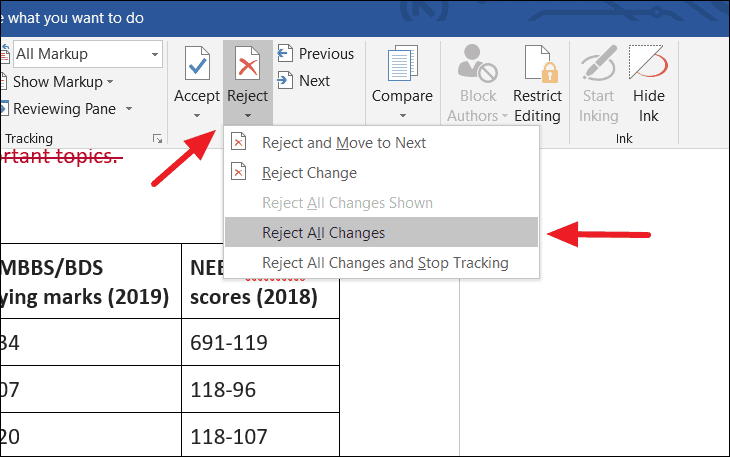
To accept or reject individual changes, right-click on the specific modification in the document. Choose Accept Insertion to keep the change or Reject Insertion to discard it.
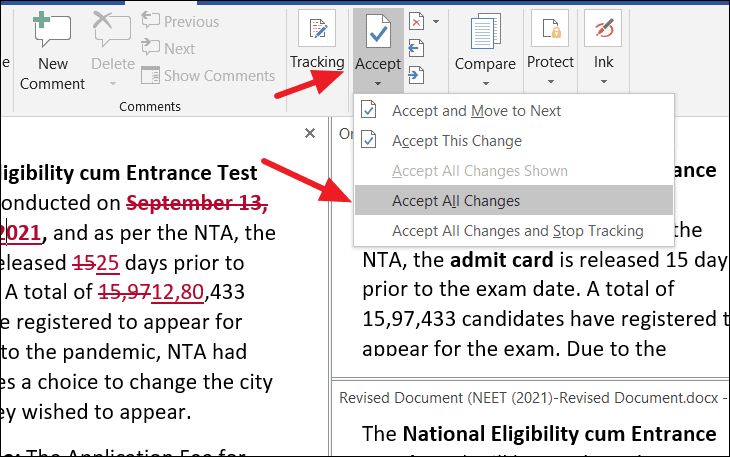
If you wish to accept all changes simultaneously, go to the Review tab, click on the Accept drop-down menu in the Changes group, and select Accept All Changes. You can also explore other options based on your needs.
After finalizing your review, save the compared document as a separate file by selecting File > Save As to ensure all changes are preserved for future reference.
By utilizing Microsoft Word’s Compare feature, you can efficiently identify differences between document versions, streamline collaboration, and maintain clear records of changes without manually sifting through each file.