
When importing data into Excel, it’s common to encounter dates formatted as text. These text dates can’t be used in calculations or data analysis until they’re converted into proper date formats recognized by Excel.
Excel offers several methods to transform text entries into usable dates. Below are the most effective techniques to accomplish this conversion.
Convert Text to Date Using the Error Checking Feature
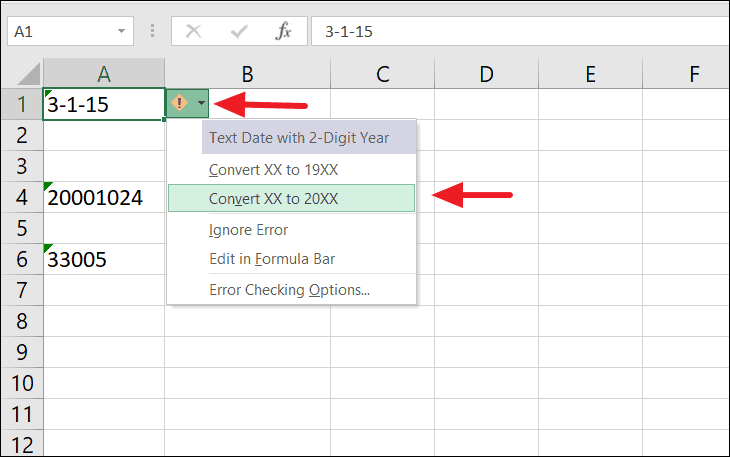
Excel’s built-in error checking can automatically detect cells that might contain dates stored as text. When Excel suspects an error, it displays a small green triangle in the upper-left corner of the cell. Selecting the cell reveals a caution icon; hovering over it shows a message explaining the potential issue.
For instance, if a date is entered with a two-digit year, Excel may interpret it as text. Clicking on the caution icon provides options to convert the text to a date format. Choose the appropriate conversion, such as changing “15” to “2015” or “1915”.
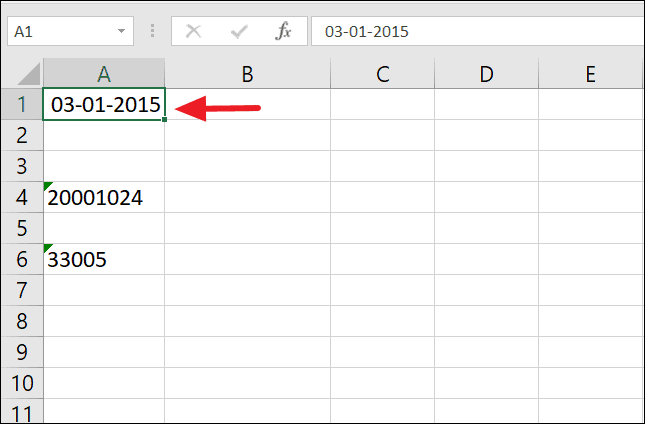
After selecting the correct option, Excel converts the text into a proper date format.
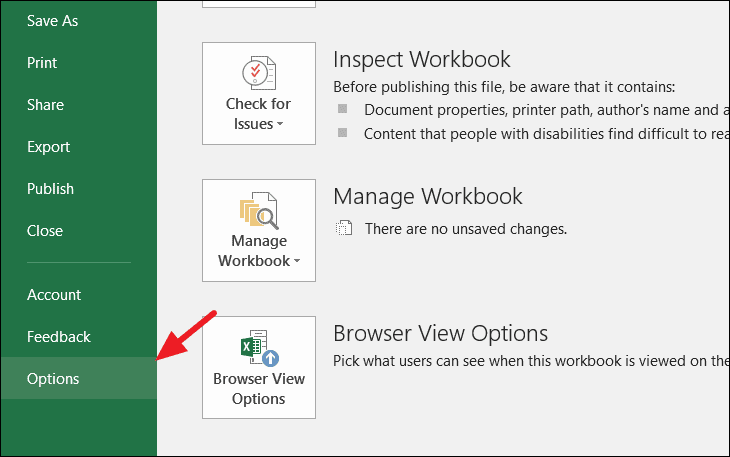
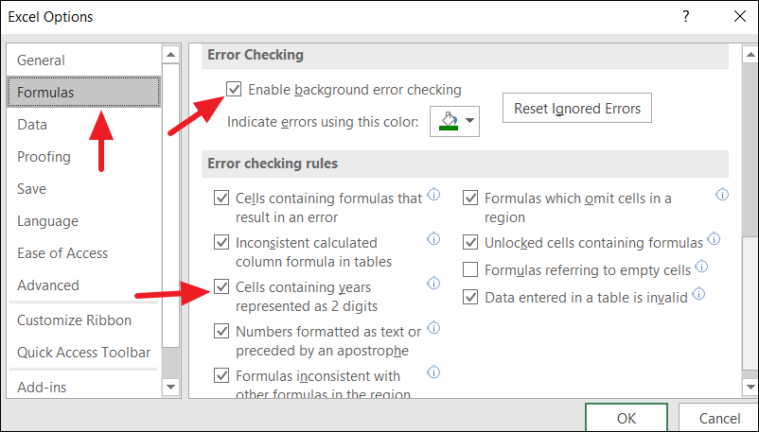
Enabling the Error Checking Option in Excel
If the error checking feature isn’t active, you can enable it in Excel’s options.
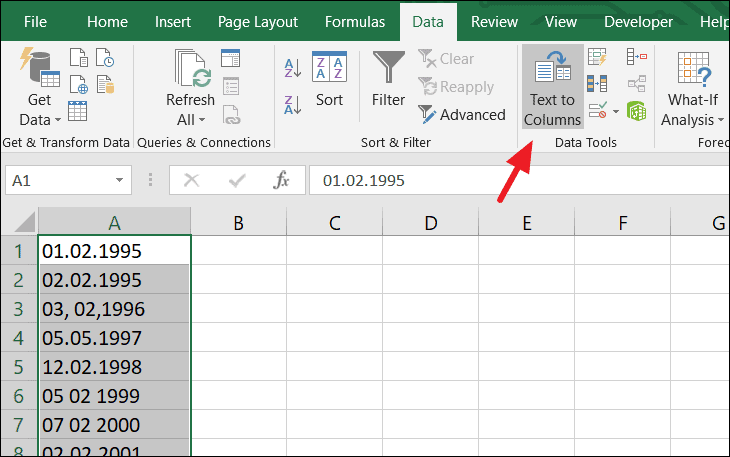
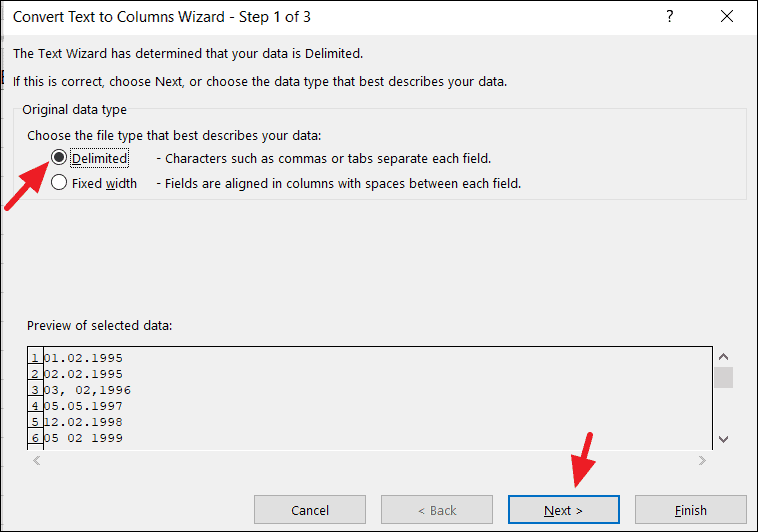
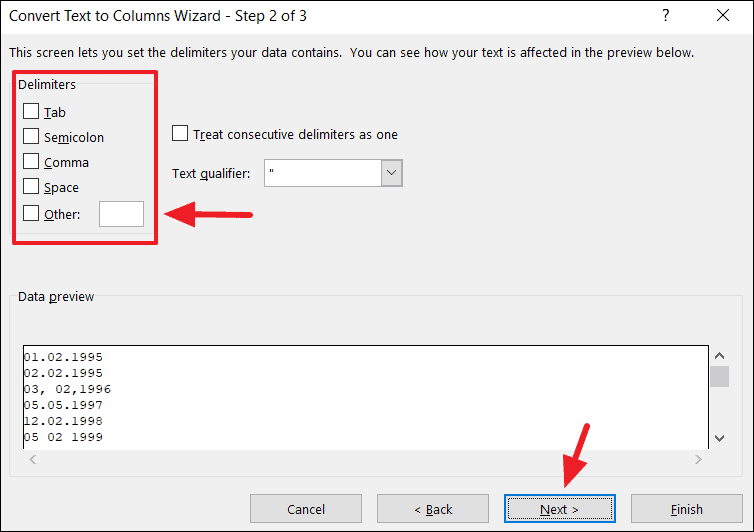
Convert Text to Date Using the Text to Columns Feature
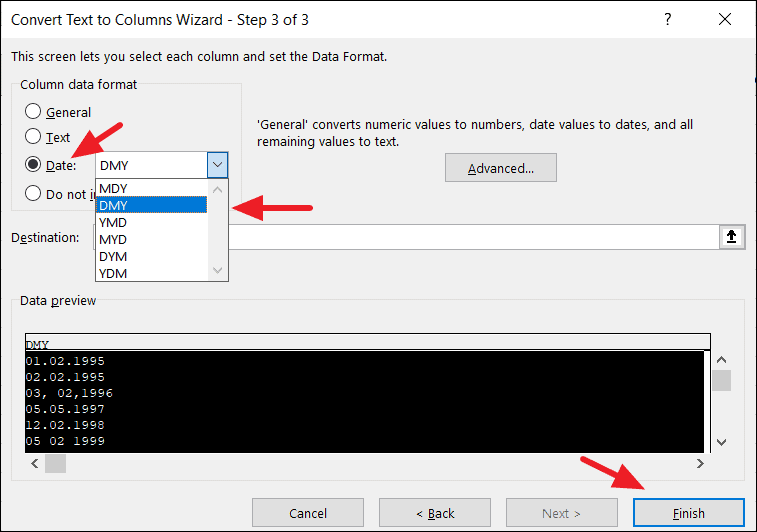
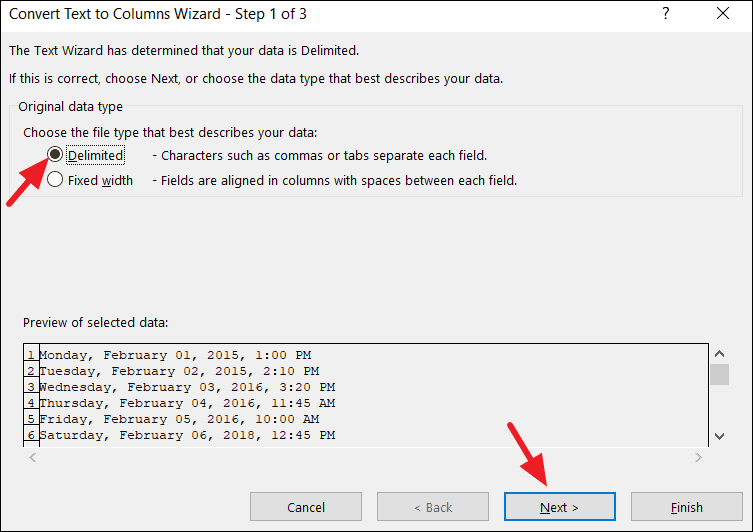
The Text to Columns tool is a versatile feature that not only splits text into multiple columns but can also convert text to dates. This method is particularly useful when dealing with dates in a consistent format.
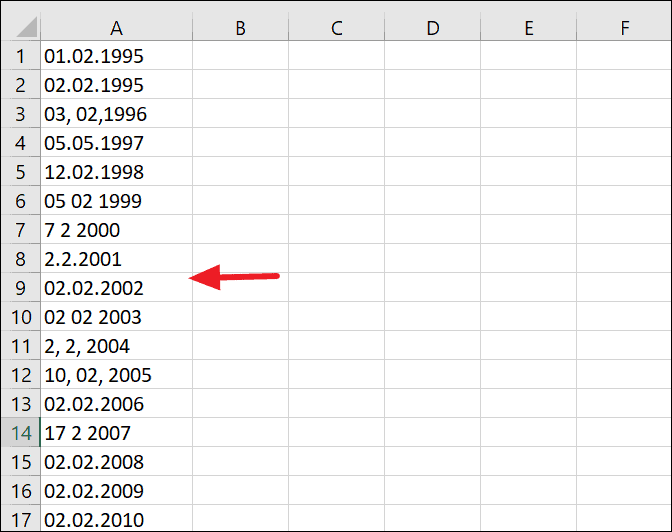
Converting Simple Text Strings to Dates
Consider a scenario where your dates are formatted as text strings like “01 02 1995”. Here’s how you can convert them:
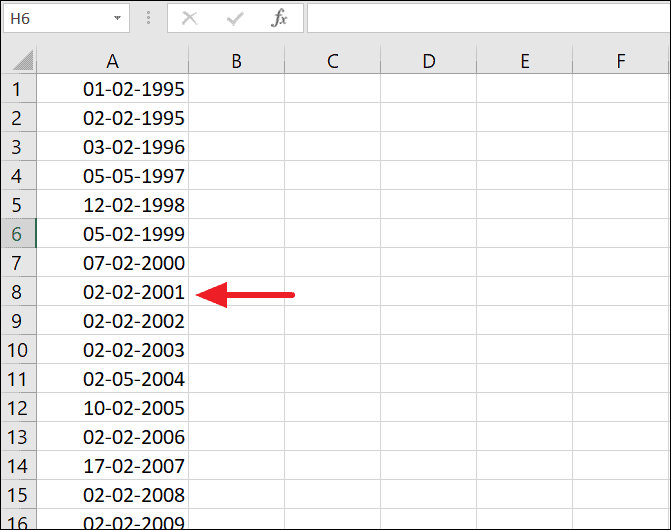
Your text dates are now converted into proper Excel date formats and should be right-aligned in the cells.
Note: Ensure that all text dates are in the same format before using this method. If formats vary (e.g., some in DMY and others in MDY), the conversion may produce incorrect results.
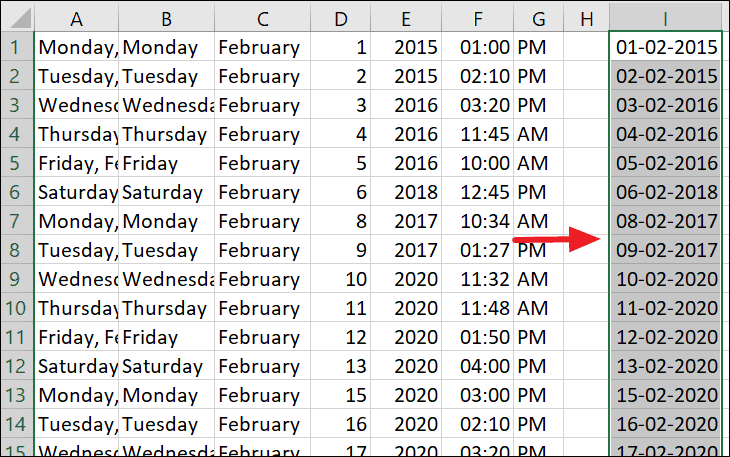
Converting Complex Text Strings to Dates
For more complicated text strings, such as “Wednesday, February 01, 2020” or “February 01, 2020, 4.10 PM”, the Text to Columns feature can help by splitting the text into separate components.
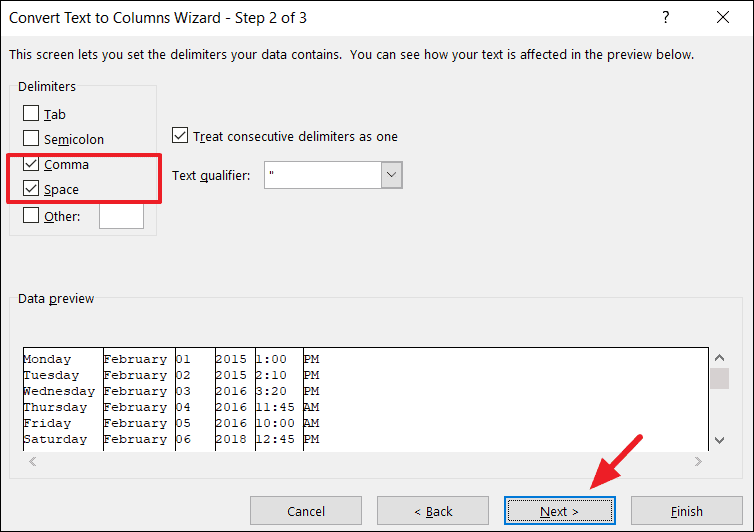
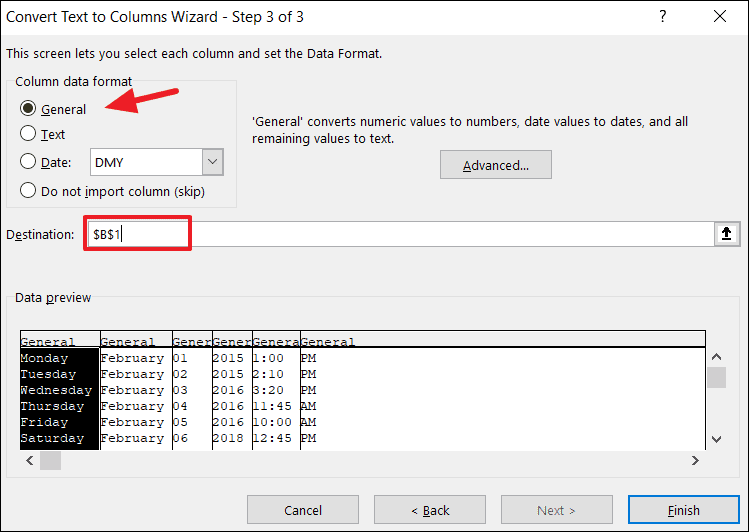
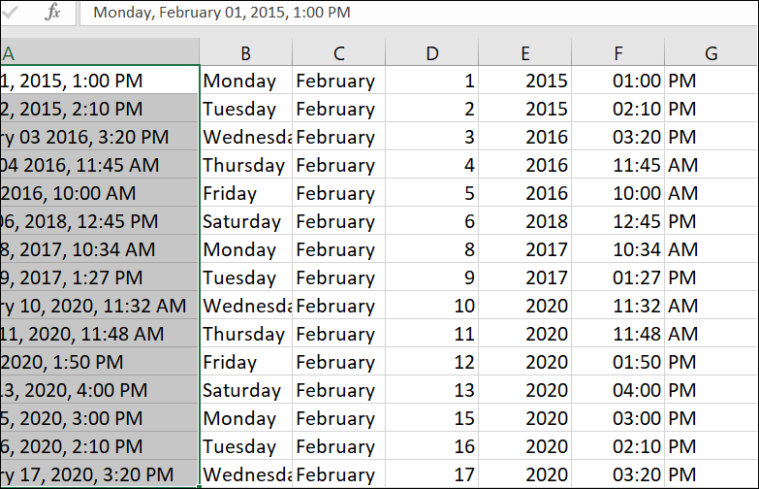
The text is now split into multiple columns containing days, months, years, and times.
To reassemble the date, use the DATE function along with the MONTH function to convert month names to numbers.
=DATE(Year, MONTH(1 & Month), Day)For example, if the year is in column E, the month name in column C, and the day in column D, the formula would be:
=DATE(E1, MONTH(1 & C1), D1)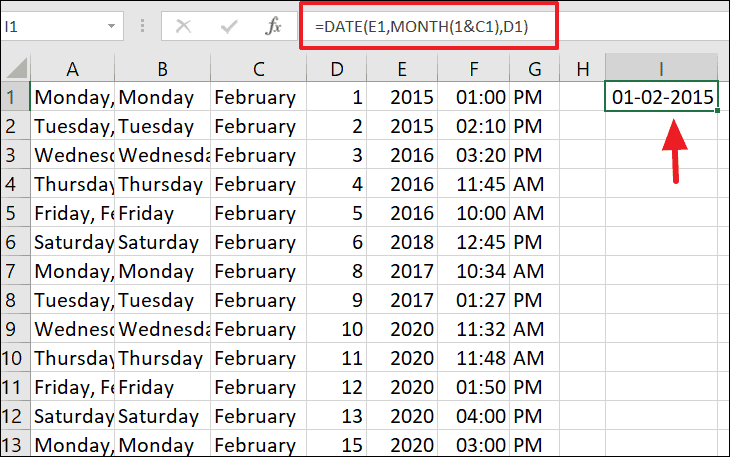
Drag the fill handle to apply the formula to the remaining cells.
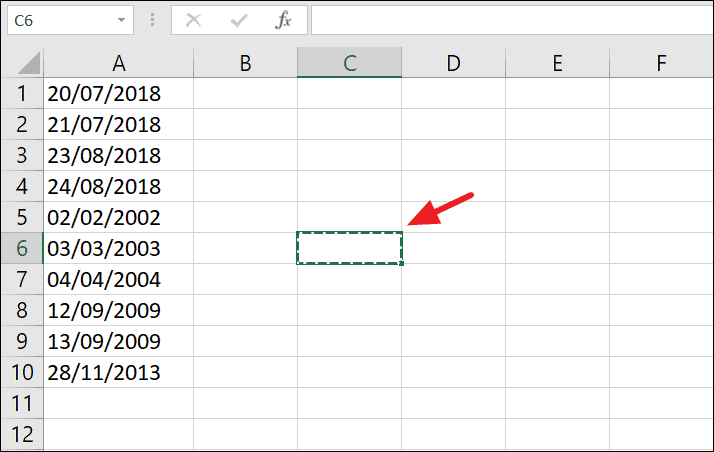
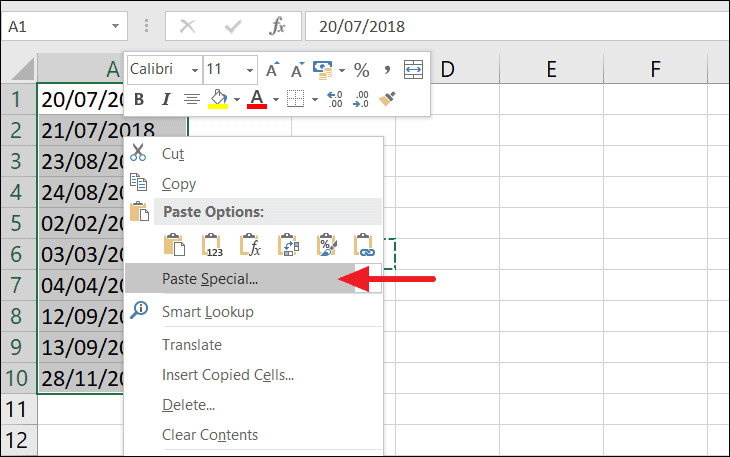
Convert Text to Date Using the Paste Special Tool
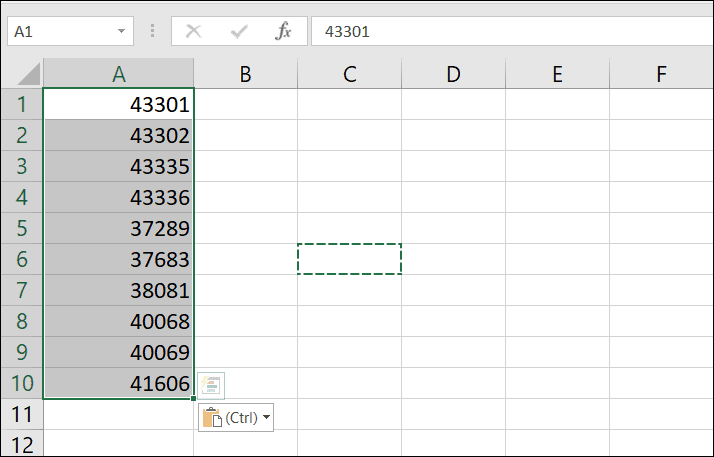
Another straightforward method involves using the Paste Special feature to add zero to your text dates, effectively converting them into date serial numbers.
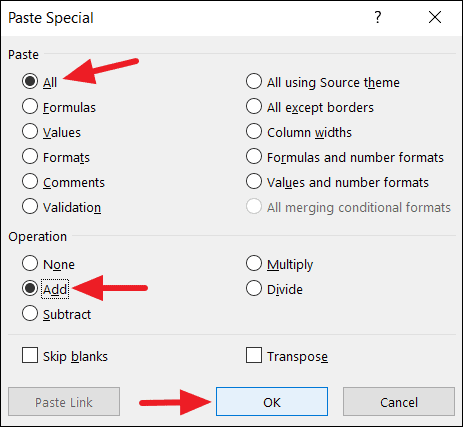
The text dates are converted to date serial numbers.
The serial numbers are now formatted as dates.
Convert Text to Date Using Find and Replace
If your text dates use delimiters that Excel doesn’t recognize (such as periods instead of slashes), you can use Find and Replace to update them.


Excel now recognizes the dates and converts them accordingly.
Convert Text to Date Using Formulas
Excel provides functions like DATEVALUE and VALUE to convert text to dates.
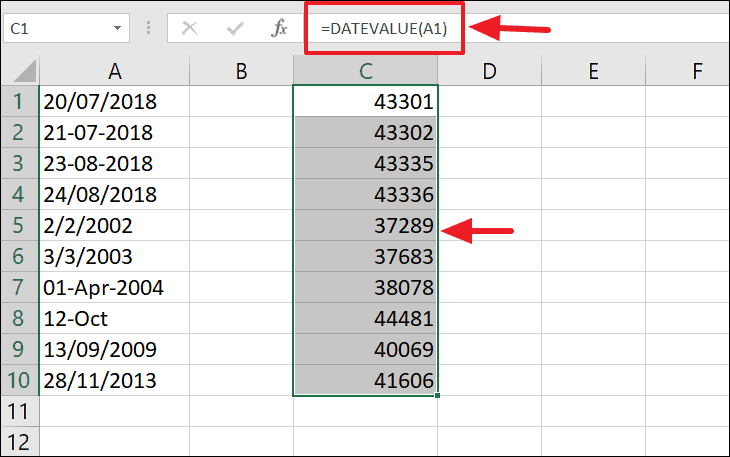
Using the DATEVALUE Function
The DATEVALUE function converts a date represented as text into a serial number that Excel recognizes as a date.
=DATEVALUE(date_text)For example, if cell A1 contains a text date, the formula would be:
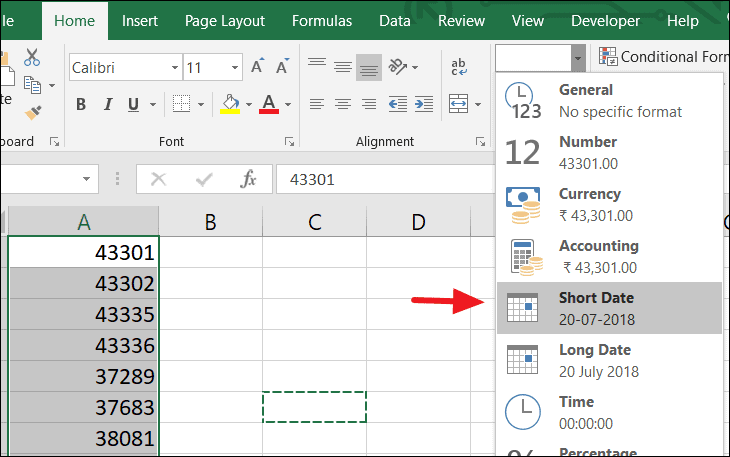
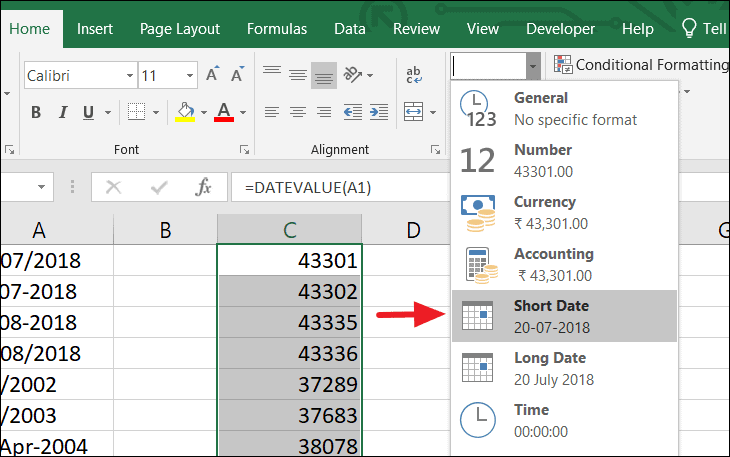
=DATEVALUE(A1)After applying the function, format the cells to display dates.
Step: Select the cells with the serial numbers, go to the Home tab, and choose Short Date from the Number Format drop-down.
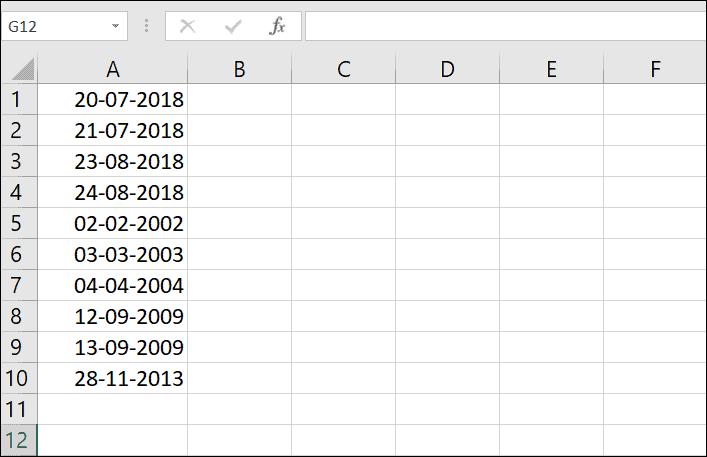
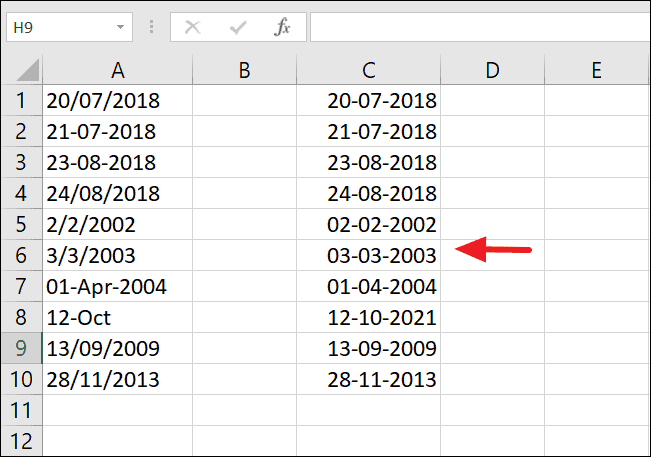
The cells now display the dates in a recognizable format.
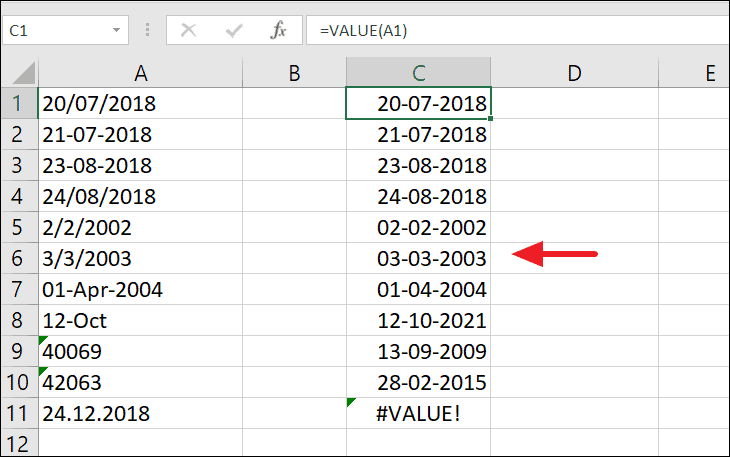
Using the VALUE Function
The VALUE function can convert text strings that resemble dates or numbers into numeric values.
=VALUE(text)For example, to convert a text date in cell A1:
=VALUE(A1)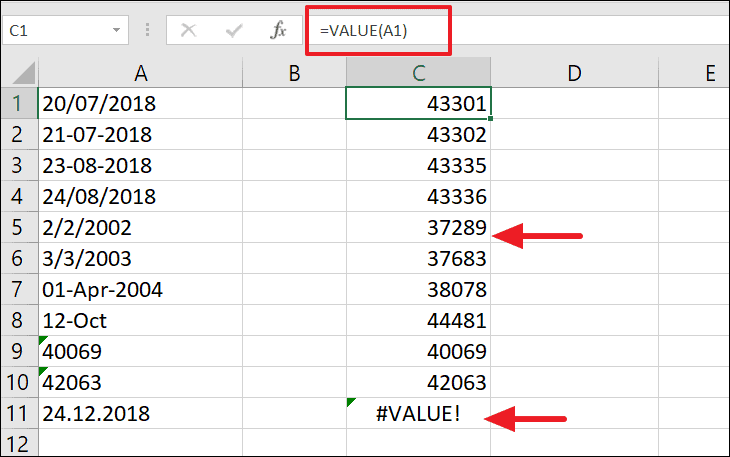
After getting the serial numbers, format the cells as dates using the Number Format options.
Converting text to dates in Excel is essential for accurate data analysis. By using these methods, you can ensure that all your date entries are correctly formatted and ready for calculations.


