
Microsoft Teams has become an indispensable tool for organizations to collaborate and communicate effectively. One way to enhance team engagement is by creating polls within Teams. Polls can help gather opinions, make decisions, or just have a bit of fun with your colleagues. While Teams doesn’t have a built-in poll feature, you can create polls using integrated apps like Polly and Microsoft Forms.
Create a Poll Using the Polly App
The Polly app is a versatile tool that allows both free and subscription-based Microsoft Teams users to create polls easily. Here’s how you can use Polly to create a poll in Teams.
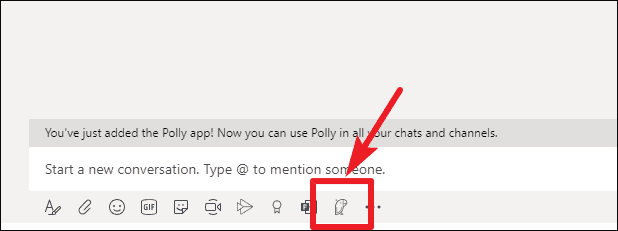
Messaging Extensions (three dots) below the message box.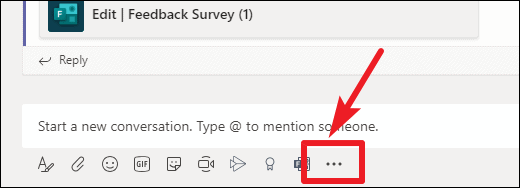
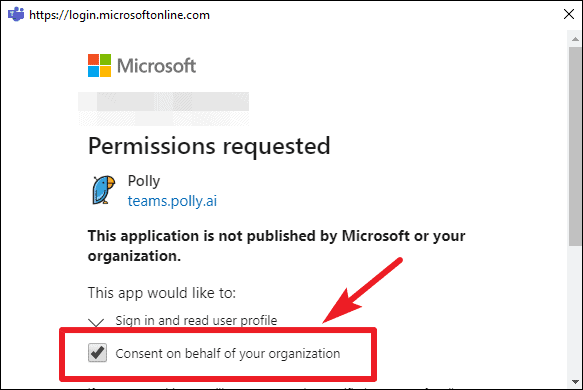
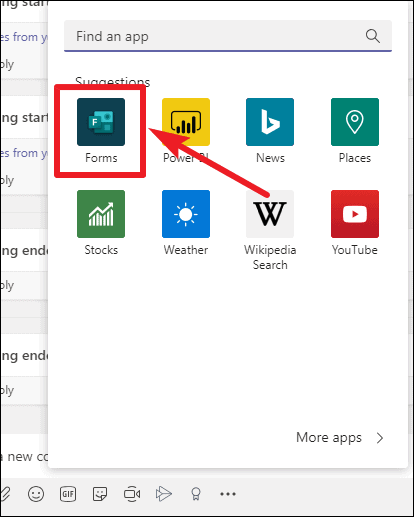
Add button to install it for your account. This will allow you to create polls using Polly within Teams.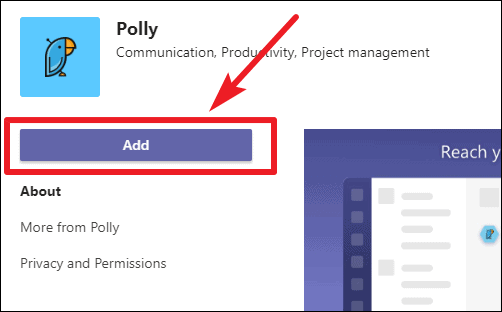
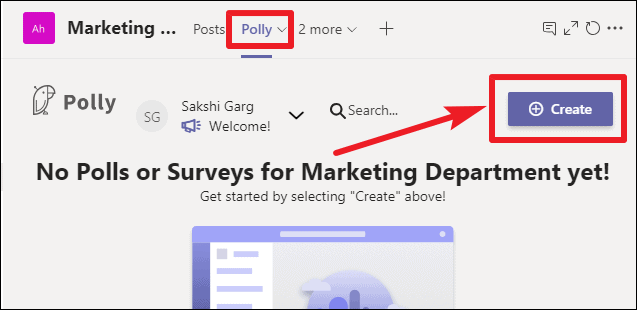
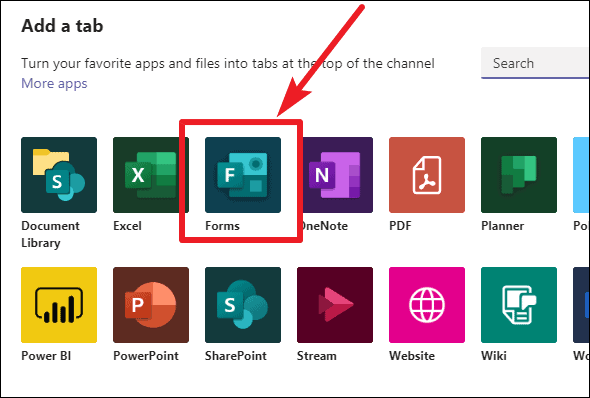
+ icon next to the existing tabs.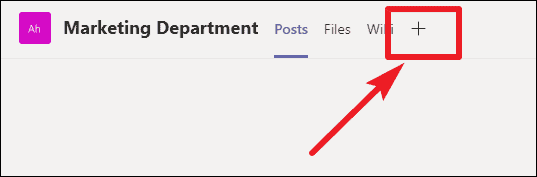
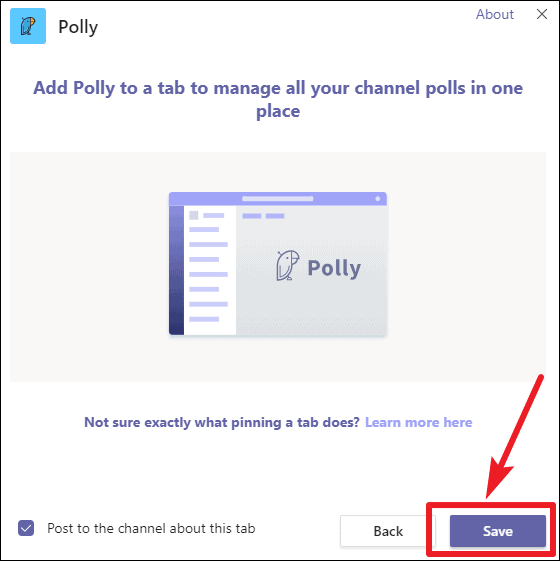
Add Choice. Adjust the settings for anonymity and result visibility according to your preferences. Click Preview when you’re ready.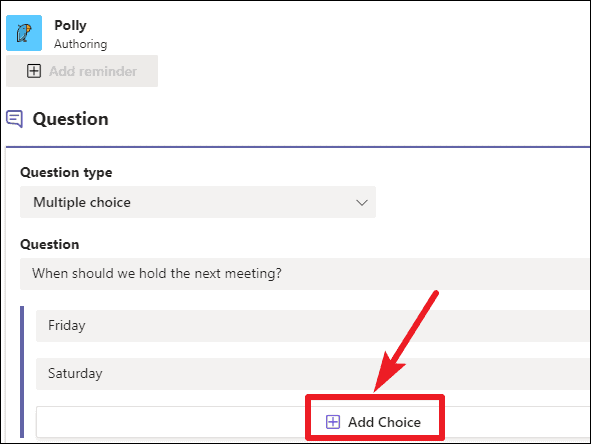
Send to post the poll to the channel. If you need to make changes, click Edit.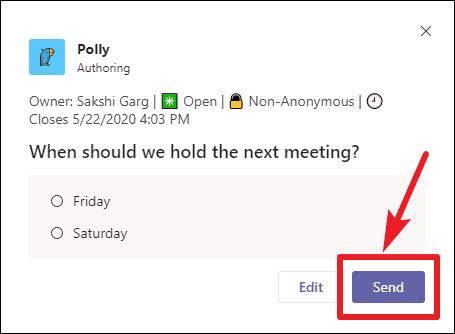
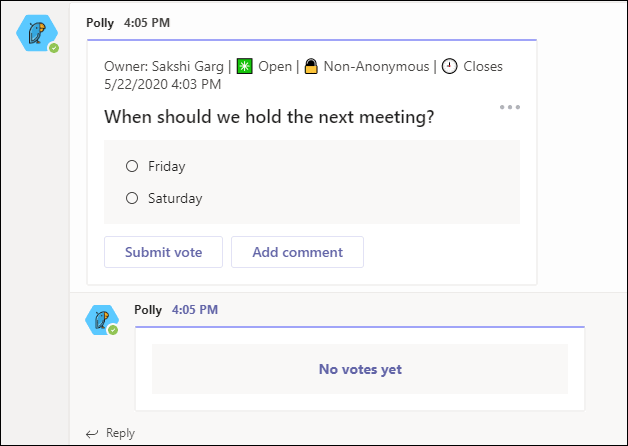
The poll will appear in the channel, and team members can vote and see the results based on the settings you chose.
Create a Poll Using Microsoft Forms
Microsoft Forms is another tool integrated with Teams that allows you to create polls. Note that Microsoft Forms is only available to Teams users with a Microsoft 365 Business subscription.
Messaging Extensions (three dots) below the message box.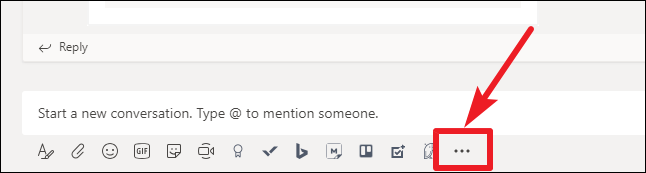
Add Option. If you want respondents to select multiple answers, toggle on Multiple Answers. Click Next when you’re done.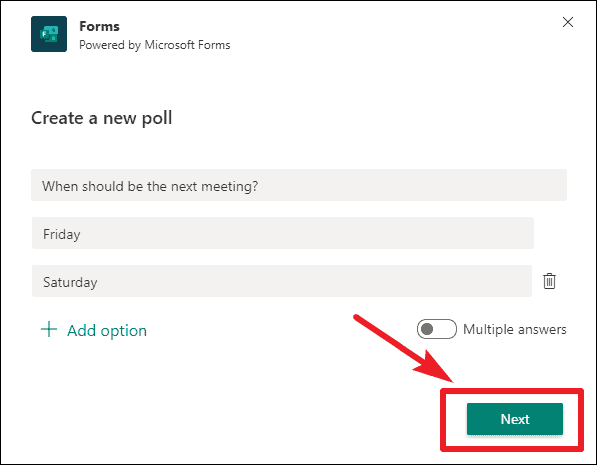
Edit. Otherwise, click Send to post the poll to the channel or chat.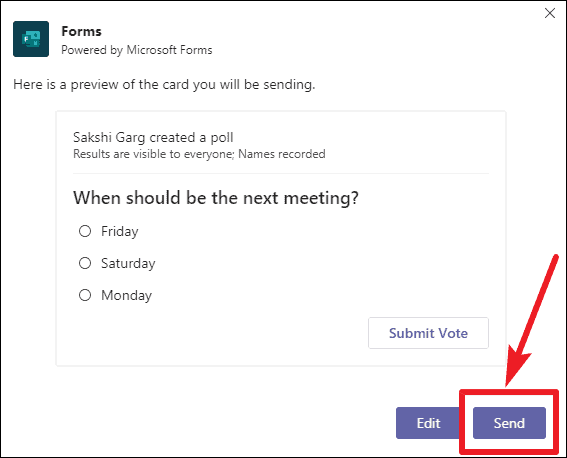
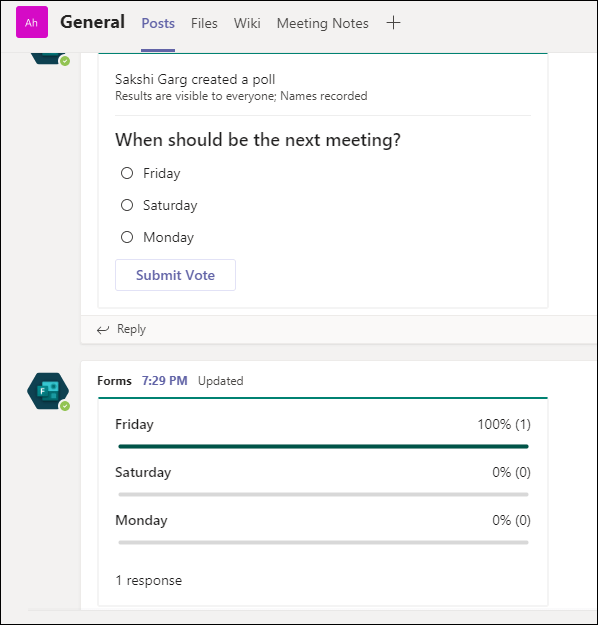
The poll will be posted, and team members can submit their responses. The results will be displayed in real-time.
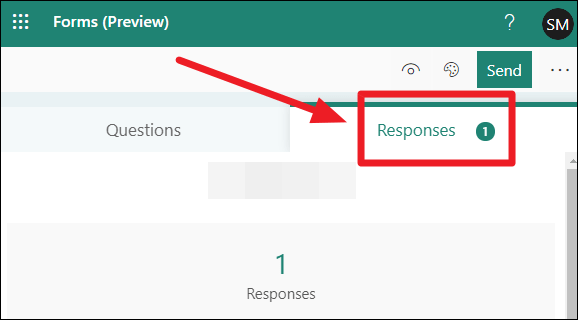
Viewing Responses by Name
Although the poll results are visible in Teams, they do not show who voted for which option. To view detailed responses, including names, follow these steps.
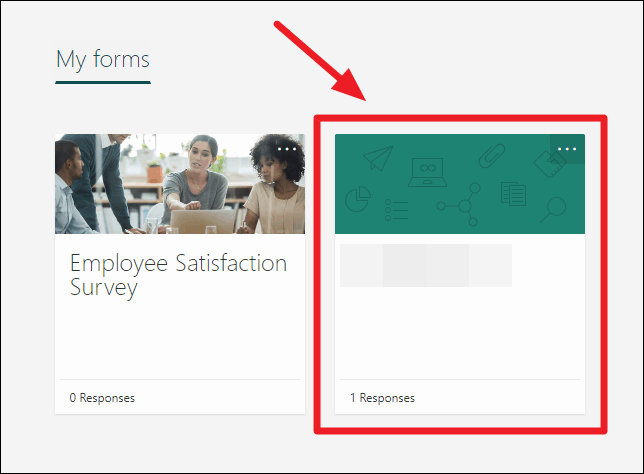
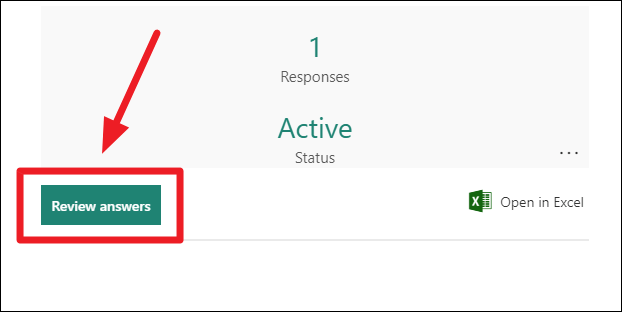
You can also export the results to Excel by clicking Open in Excel.
Create a Collaborative Poll with Microsoft Forms
If you want to create a poll collaboratively with your team, Microsoft Forms allows you to do that as well. This is useful when multiple team members need to contribute to the poll questions.
Create a shared form that your team can edit or Add an existing form to collaborate on. Enter a name for the form and click Save.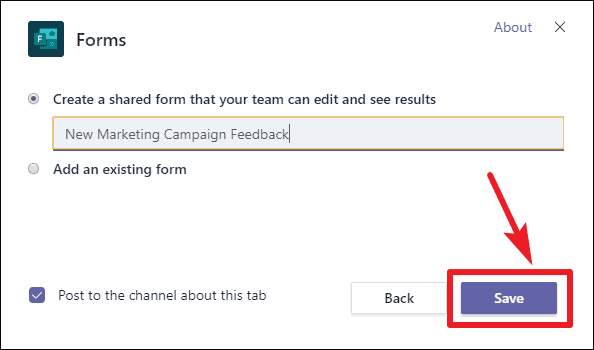
Add New under the Questions section. Changes are saved automatically.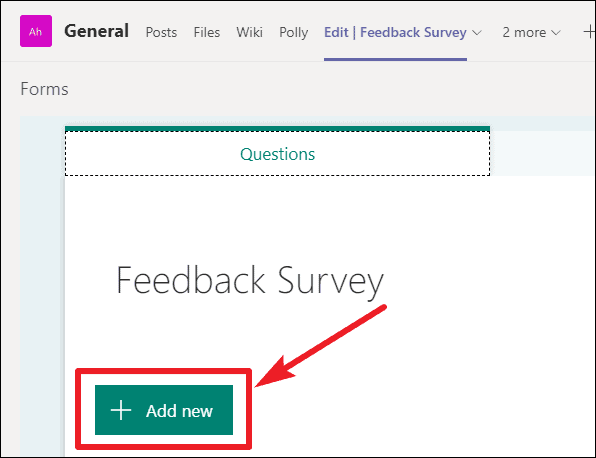
Share to collect responses. Choose whether only people in your organization can respond or anyone with the link.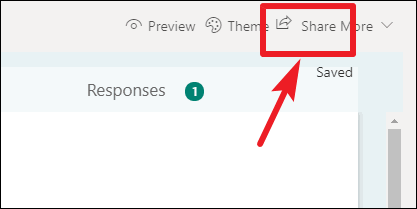
Responses tab of the form, visible to all collaborators.
Creating polls in Microsoft Teams is a great way to engage with your team, gather feedback, and make collaborative decisions. Whether you use the Polly app or Microsoft Forms, both tools offer unique features to meet your polling needs within Teams.