Discord introduces the ‘Event’ feature, a quick and easy way to host meetings, discussions, and even set reminders for work or personal occasions. There are two types of events you can create – a voice event and a non-voice event.
A non-voice event is essentially an event that takes place ‘Somewhere Else’. It can be over a text channel, at a physical location, or on an external platform. A voice event is a spoken and/or visual event. It can be a vocal discussion, a video meeting, a screen-sharing session, anything where you Go Live.
To create an event, first, launch Discord and open your server. Then, click the server’s name to the top left of the screen.
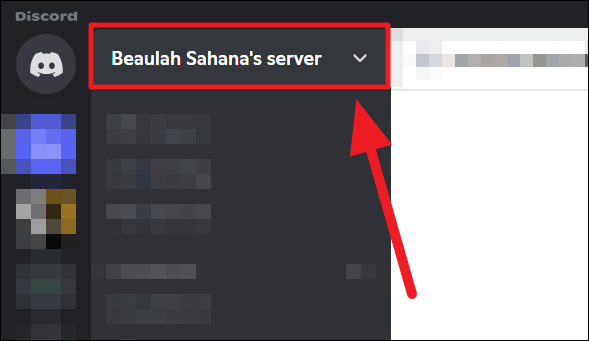
Select ‘Create an Event’ in the context menu.
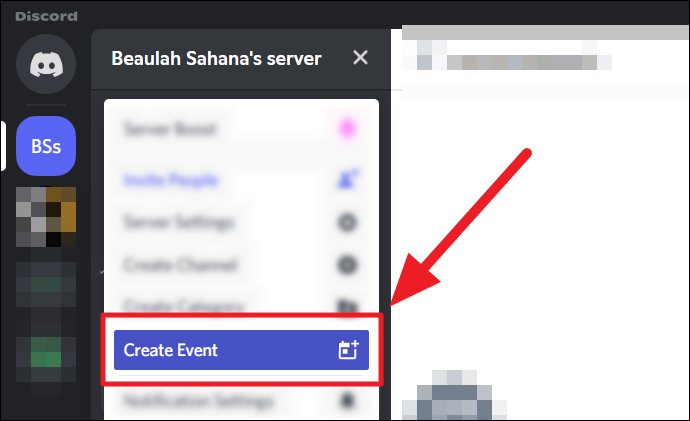
Next, you’ll see a ‘Where is your event’ box. Here, decide if the event is going to be via text, in a physical location, on an external platform, or if it’s going to be a voice/speaking event on Discord itself. The course after this decision is the same for both events.
Creating a Voice Event
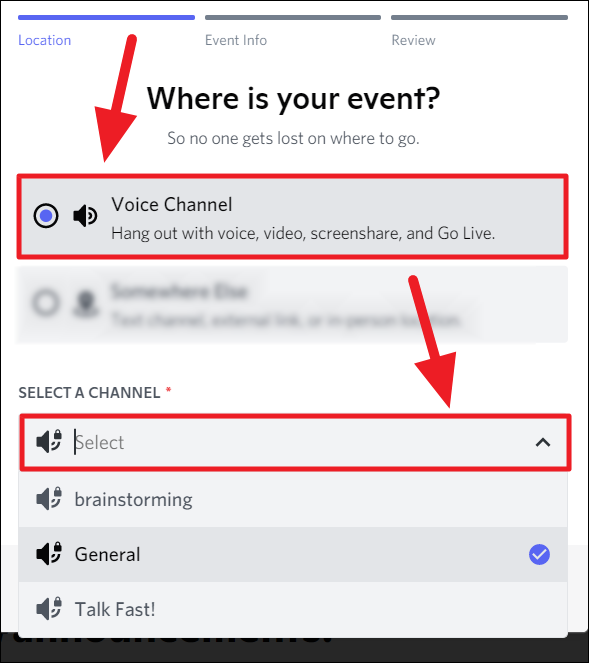
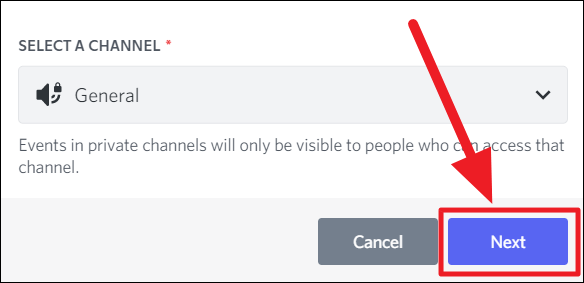
If you’re creating a voice event, click the radio button in front of ‘Voice Channel’. Then, click the ‘Select a Channel’ drop-down box and choose the voice channel that’ll host the event. It can be a general or private voice channel.
Once you’ve chosen the type of event and the hosting channel, hit the ‘Next’ button.
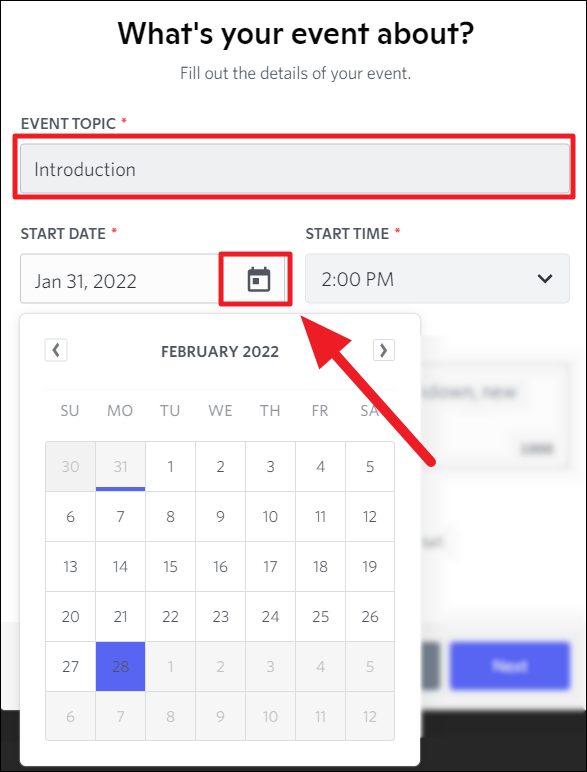
You must now add details of the event. Give the event a name in the ‘Event Topic’ text box. To choose the date of the event, click the calendar icon in the ‘Start Date’ textbox and select the event’s date.
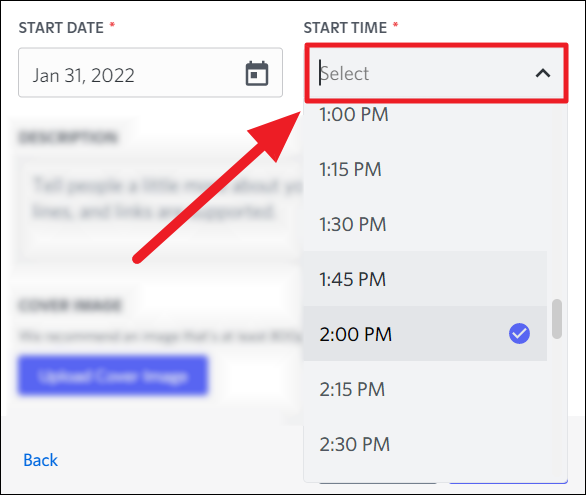
To choose the time of the event, click the ‘Start Time’ drop-down box next to the ‘Start Date’ box. Choose the time the event would start on the chosen date. Voice events only require the start date and time.
Creating an Event for ‘Somewhere Else’
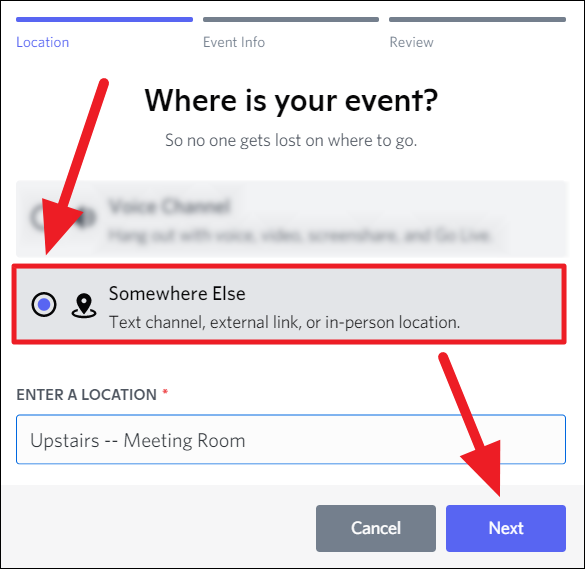
To create an event that is due to take place elsewhere (other than a voice/video call or screen-share on Discord), click the ‘Somewhere Else’ radio button. Then, type the location of the meet — a text channel on Discord, a physical location, or paste an external link here. Once done, click ‘Next’.
To make an event private (in-person or online), share the invite link in a private channel.
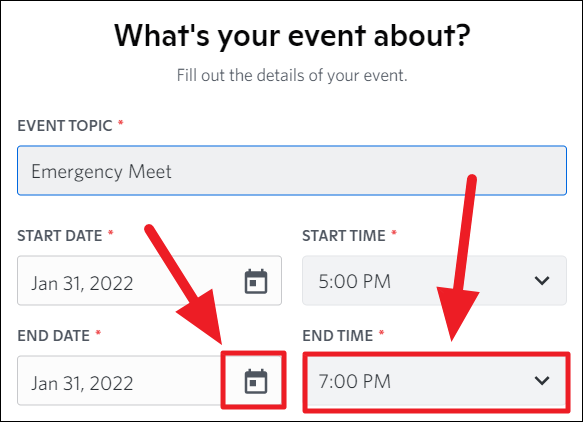
When a meeting is set to ‘somewhere else’, apart from the start date and time, you also get to set the end date and time. So, on the ‘What’s your event about’ box, enter the theme/name of the event in the ‘Event Topic’ box and choose the ‘Start Date’ and Start Time’ in the same way as explained above.
Similarly, choose the ‘End Date’ and ‘End Time’ (by clicking the ‘Calendar’ icon next to ‘End Date’ and the ‘End Time’ drop-down box).
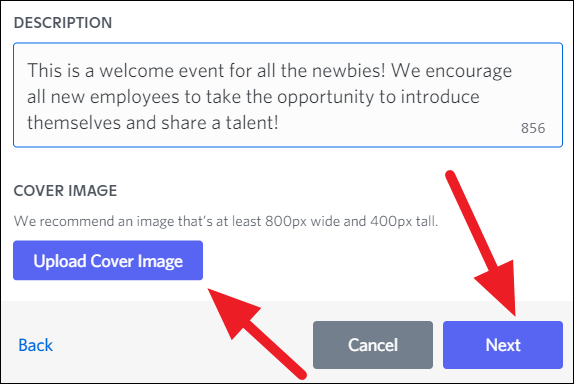
After this decision, the process is the same regardless of the type of event. Now, describe the event in the ‘Description’ box. If your event needs a cover image, hit the ‘Upload Cover Image’ button. If not, click ‘Next.
Adding a cover image to your event
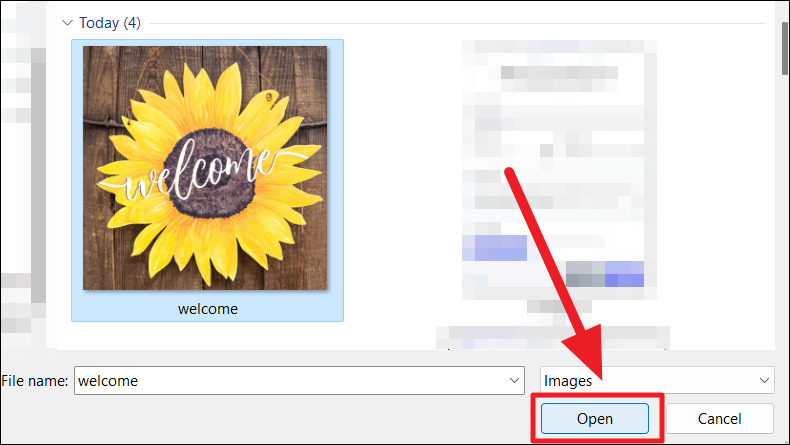
If you chose to add a cover image, the next step is to choose the image on your device. Once chosen, click ‘Open’ to add the image to your event.
You’ll now view an ‘Edit Image’ box. Here, you can zoom the picture in or out by clicking and dragging the toggle below it. The image is rectangularly cropped by default. You can change the placement of the image by moving it to fit the cropping space. Once done, click ‘Apply’.

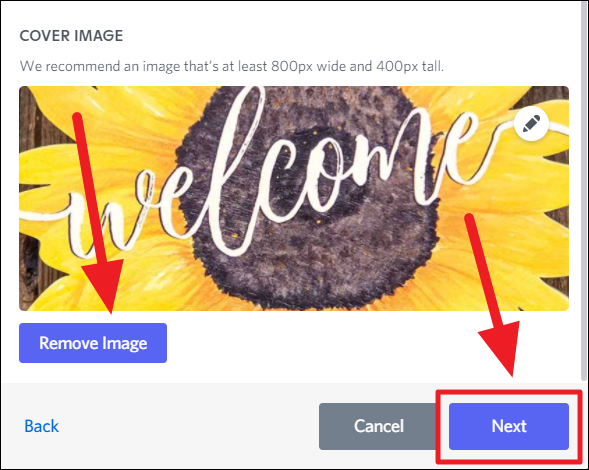
You will now see an editable view of the details of your event. Here, you can edit the text or change the image. If you don’t want an image, click the ‘Remove Image’ button. If not, hit ‘Next’.
Before you create an event, you’ll see a preview of the event. If you’re satisfied with the appearance, click ‘Create Event’. If not, click ‘Back’ and make the necessary changes.

Sharing your Discord event
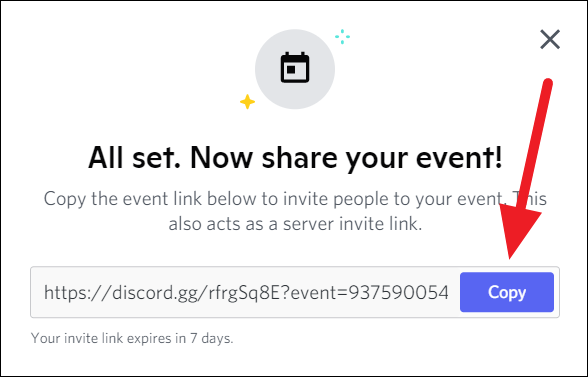
Once an event is created, you must invite members. If you created a general event, you’ll see a ‘Share your event’ box with a ‘Copy’ button after clicking ‘Create Event’. You can now paste and send the invite link to the respective members.
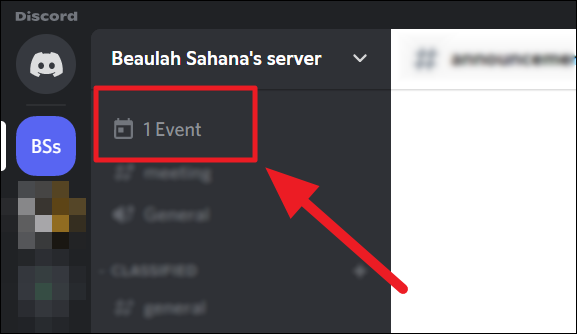
A private event would not show the ‘Share your event’ box after clicking ‘Create Channel’. To share the invite to a private event, click the ‘Event’ button below the server’s name.
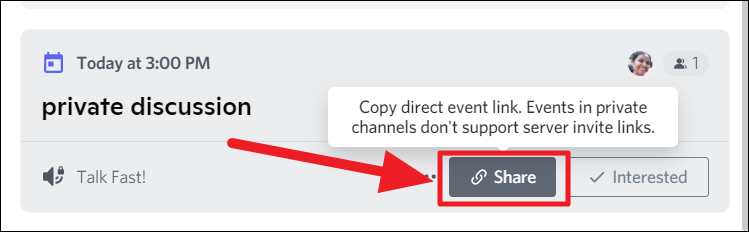
Locate the private event in the ‘Events’ list and click the ‘Share’ button in grey with a link icon to copy the event invite. Now, paste and send the link.
You can also share links to general voice events on this list in case you missed it on the ‘Share you event’ box. Click the grey ‘Share’ button on the general event’s card in the ‘Events’ list. The message you see on a general event’s share button will be different.

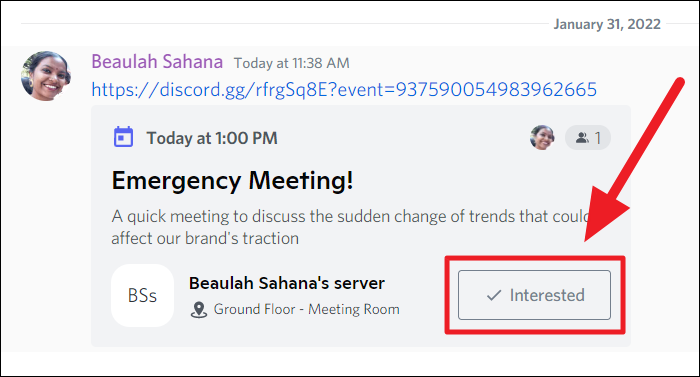
This is how a pasted event-invite link would look on a channel. Ensure recipients click the ‘Interested’ button. This will let the creator know they’ve seen the event. When receivers click the link on this invite, they’ll redirect to the event’s info and can view other participants.
Checking how many people are interested in your event
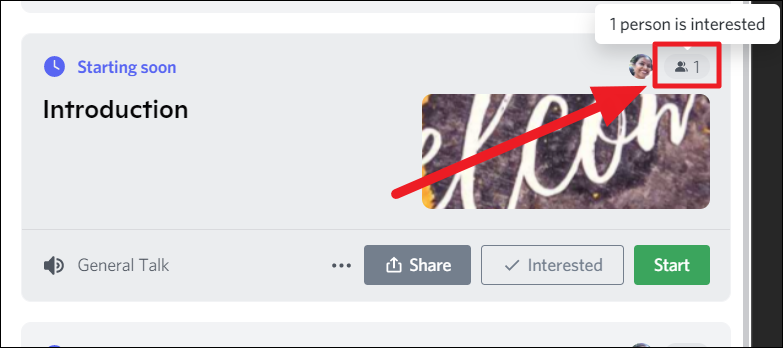
Being ‘Interested’ in any event is not only a show of interest but can also be a great way to ensure members see your invite. To see who and how many are interested in the event and have seen the event’s details, open the ‘Events’ list and then navigate to the event you want to check.
Now, you can either click the event card to view the event or click the button with the people icon and the number of people interested to the top right corner of the card.
Regardless, you’ll land on the ‘Event Info’ box. Here, click the ‘Interested’ tab next to it.
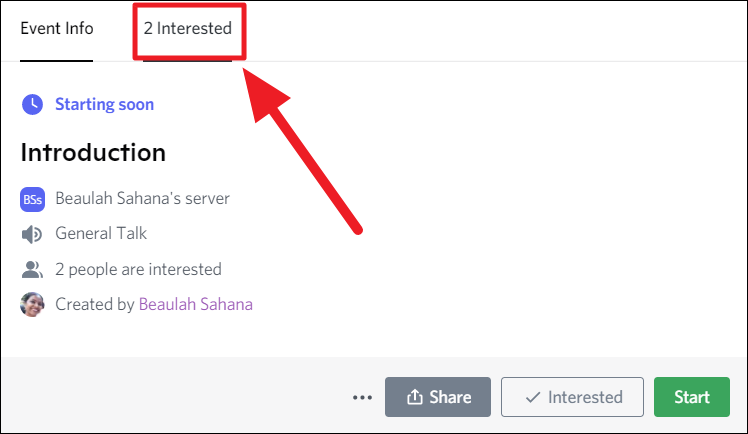
You’ll now see all the members who are interested in the event or who have seen the event, in other words.
Editing an Event on Discord
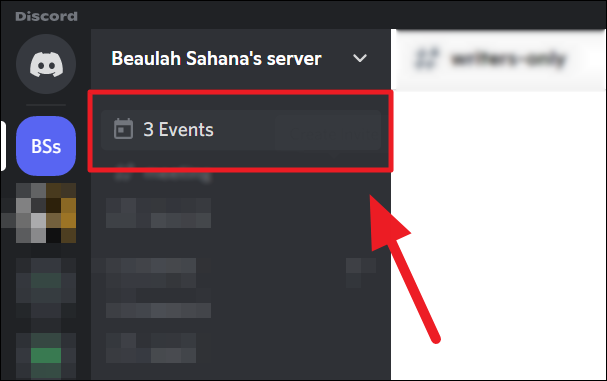
To edit an event, you must first open the event list. Click the ‘Events’ button with the number of upcoming events to the top left of the screen.
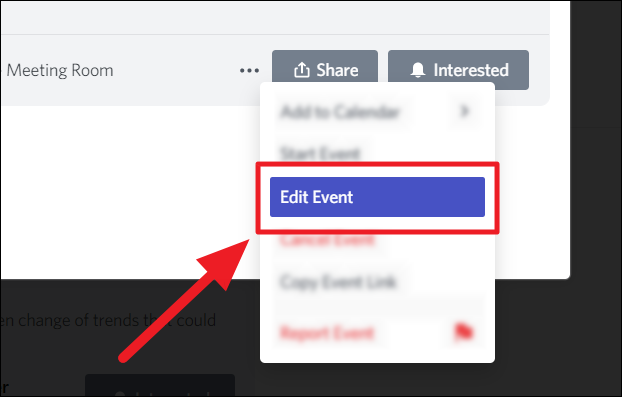
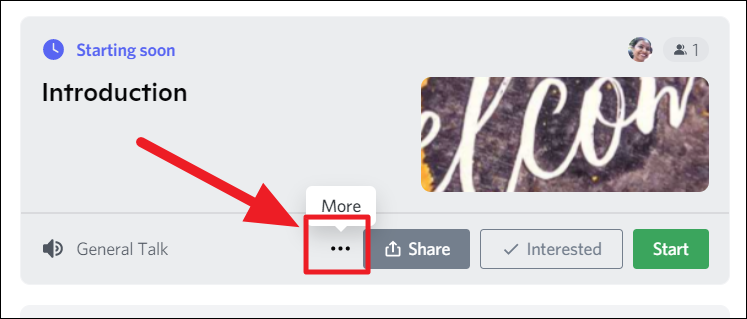
Now, click the ‘More’ button (three vertical dots) on the event card that needs editing.
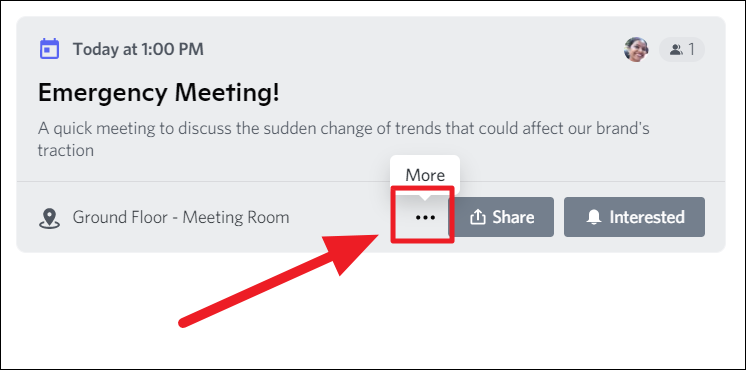
Or click the event card to open the event’s info and then click the ‘More’ button.
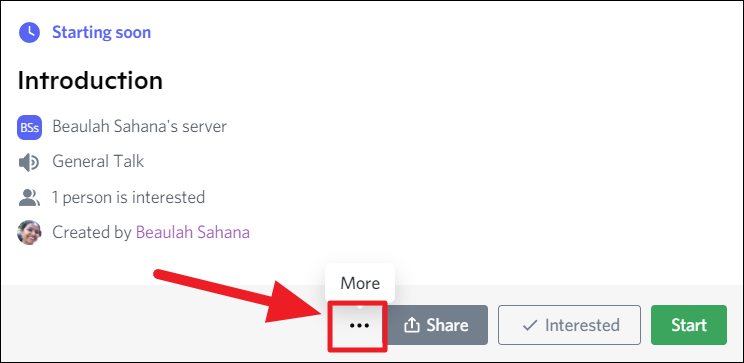
Select ‘Edit Event’ in the menu.
You’ll now redirect to the initial ‘What is your event’ box. You can make any changes in the same way you added the details at first.
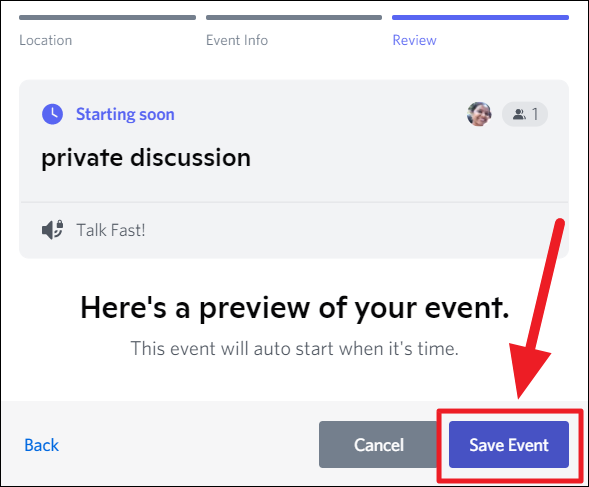
After clicking the ‘Next’ button in the respective edit boxes and reaching the final ‘Review’ box, click the ‘Save Event’ to save your changes and apply them to the event.
How to Add a Discord Event to Google Calendar
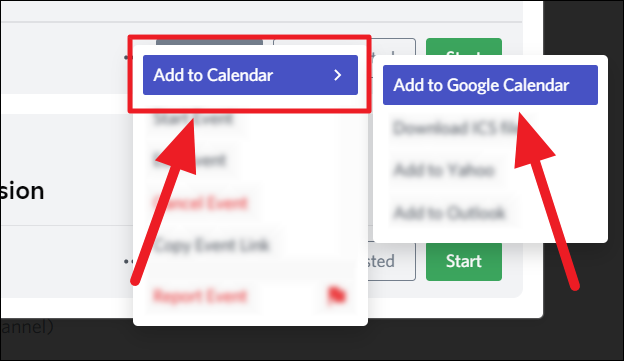
To create an event reminder on Google calendar, open the ‘Events’ list and locate the event. Now, click the event’s ‘Menu’ button either on the list or on the individual event (by clicking the event card to open it).
Now, hover the cursor over ‘Add to Calendar’ in the menu. Select ‘Add to Google Calendar’.
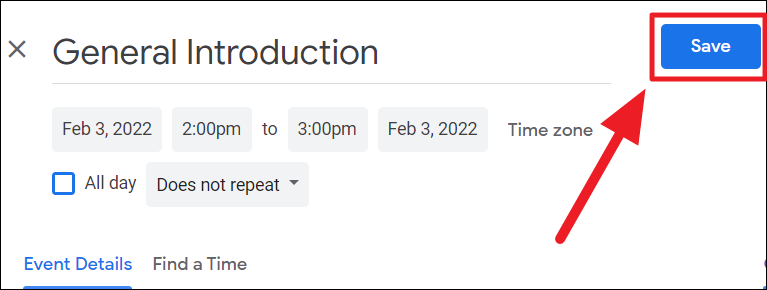
You’ll redirect to your Google Calendar. If need be, change the start/end date and time, add a reminder (or multiple reminders), change the event’s location, time zone, add guests, etc. Once done, click the ‘Save’ button to save your changes.
Starting a Discord Event Early
You can prepone any event that is scheduled for later on the same day or another day. However, you can see the ‘Start’ button only for events that are due to begin in 10-15 minutes or less.
For events that are scheduled for much later, you must take a slightly different route. Either way, you must first open the ‘Events’ list in the same manner as explained before.
For events starting soon, you can click the green ‘Start’ button on the event that needs to start now. An event needs to be ‘Starting Soon’, for this button to be visible.
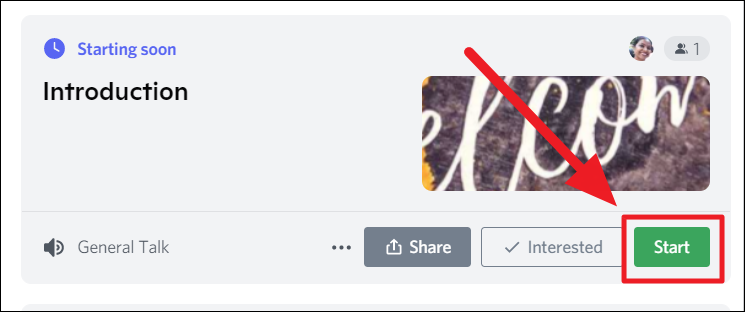
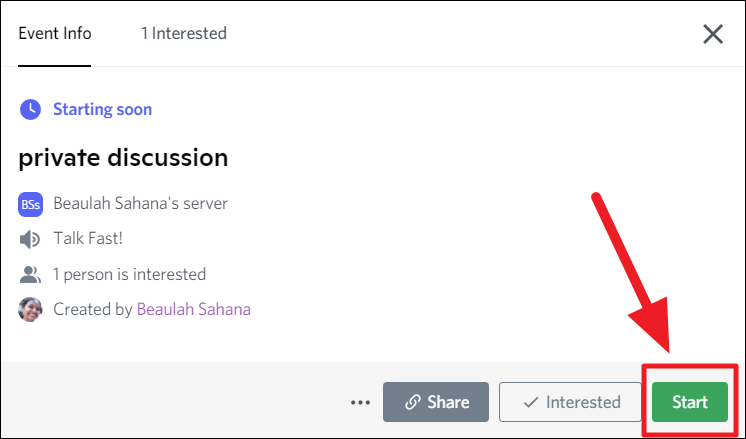
Or click to open the event card and then click the ‘Start’ button.
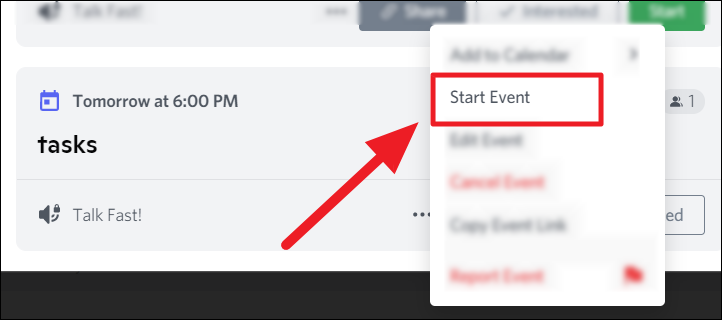
For events scheduled for later (over 15 mins), open the ‘Events’ list and locate the event. Now, click the ‘Menu’ button (three vertical dots) of the event that needs to be preponed.

You can also open the event’s card and then click the same ‘Menu’ button.
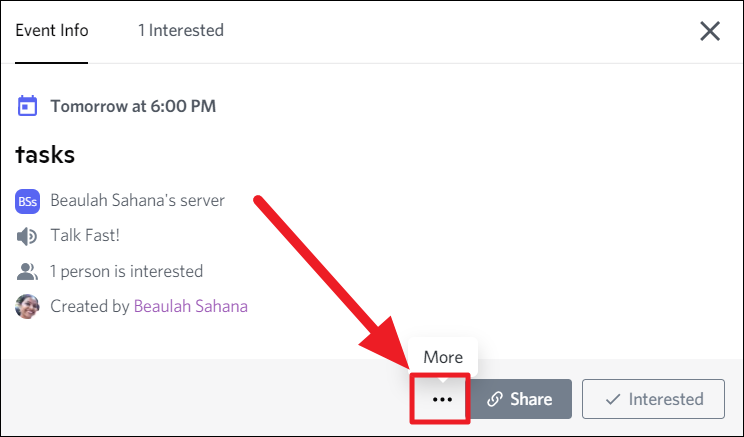
Now, select ‘Start Event’ from the menu.
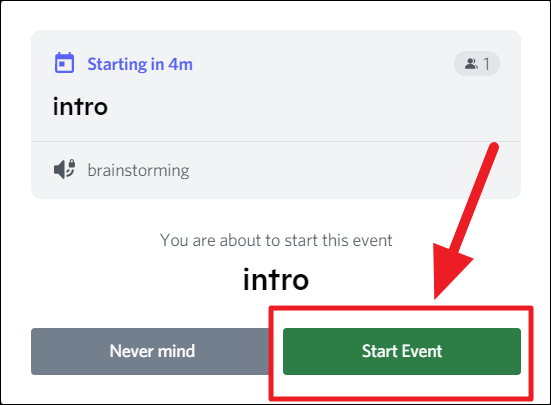
Confirm your choice by clicking the same ‘Start’ button in green on the upcoming ‘You’re about to start this event’ box. If you change your mind, click ‘Never mind’.
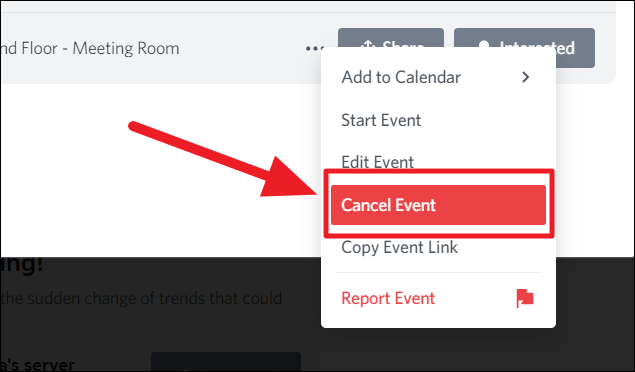
How to Cancel an Event on Discord
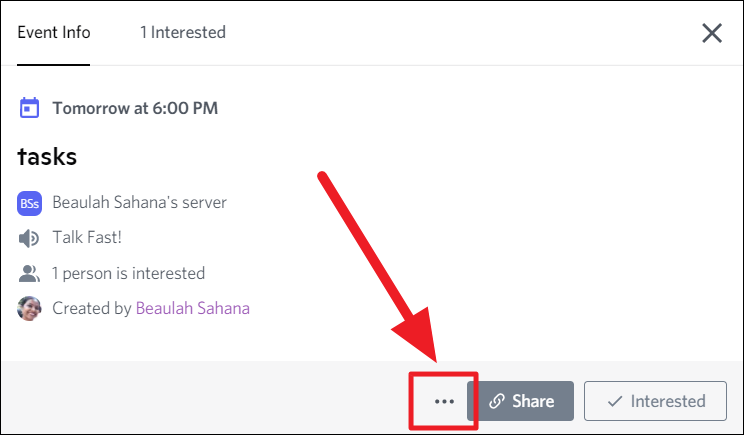
You can cancel any event that hasn’t yet started or didn’t happen in the first place. To cancel any event, open the ‘Events’ list and locate the event that needs to be canceled. Now, click the ‘More’ button (three horizontal dots) on the event’s card.
You can also open the event and then click the same ‘More’ button.
Select ‘Cancel Event’ in the menu.
Click ‘Cancel Event’ in the next prompt to finalize the decision. If not, click ‘Never mind’.
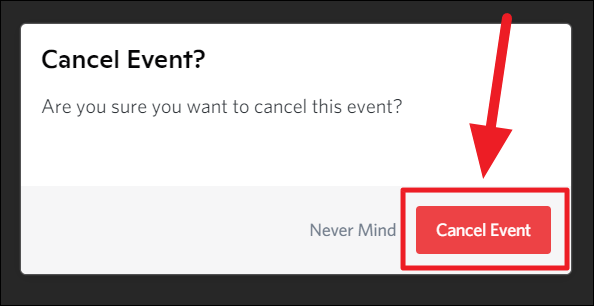
The event now stands canceled.
And this is how you can create and manage events on Discord! You can create multiple events and manage them all smoothly. The method to create events is the same on any Discord client. We hope you found our guide useful!


