
Have you ever noticed a process called “Antimalware Service Executable” or “msmpeng.exe” consuming significant CPU or disk resources in your Task Manager? This mysterious service can sometimes impact system performance, leaving users wondering about its purpose and whether it’s safe. Let’s see what this process does and how to manage it.
What is Antimalware Service Executable?
Contrary to what its resource-hungry behavior might suggest, Antimalware Service Executable is not malware. It’s actually a core component of Windows Defender, Microsoft’s built-in antivirus solution. This process runs in the background to continuously monitor your system for potential threats.
The service becomes active when:
- No third-party antivirus is installed
- Your third-party antivirus has expired or is deactivated
Its primary goal is to ensure that all Windows users have at least a basic level of protection against malicious software.
Should You Disable Antimalware Service Executable?
In most cases, it’s not recommended to disable this service. Here’s why:
- It provides essential real-time protection against malware
- Disabling it may compromise other Windows Defender functions
- Your system could be left vulnerable to threats
However, if you’re experiencing severe performance issues and have a reliable third-party antivirus installed, you might consider temporary solutions to mitigate its impact.
Effective Methods to Manage Antimalware Service Executable
Let’s explore some ways to address high resource usage, starting with the most effective and least disruptive methods.
Method 1: Adjust Windows Defender Scan Schedule
Rescheduling Windows Defender scans to off-peak hours can significantly reduce its impact on your daily work.
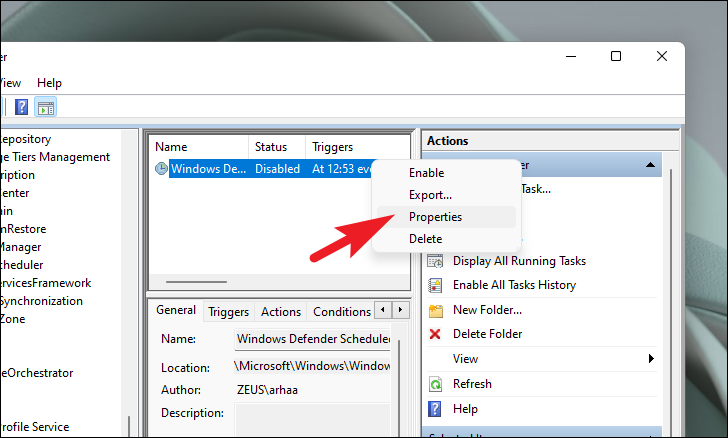
- Open the Start Menu and search for “Task Scheduler”
- Navigate to Task Scheduler Library > Microsoft > Windows > Windows Defender
- Right-click on “Windows Defender Scheduled Scan” and select “Properties”
- Go to the “Triggers” tab and click “New”
- Set up a weekly scan at a convenient time, like late at night
- Delete any other existing triggers
Method 2: Temporarily Disable Real-Time Protection
For short-term relief, you can temporarily turn off real-time protection:
- Open “Windows Security” from the Start Menu
- Go to “Virus & threat protection”
- Click “Manage settings”
- Toggle off “Real-time protection”
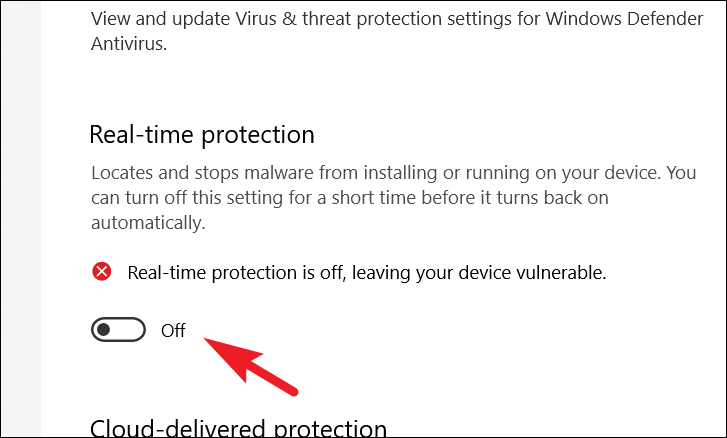
Note: This setting will automatically re-enable itself after a short period.
Method 3: Exclude Certain Files or Folders
If specific applications are causing conflicts, you can exclude them from scans:
- Open Windows Security
- Go to “Virus & threat protection”
- Under “Virus & threat protection settings”, click “Manage settings”
- Scroll down to “Exclusions” and click “Add or remove exclusions”
- Add the specific files or folders you want to exclude
Method 4: Update Windows and Windows Defender
Ensuring your system and Windows Defender are up-to-date can resolve many performance issues:
- Go to Settings > Update & Security
- Click “Check for updates”
- Install any available updates for Windows and Windows Defender
When All Else Fails: Advanced Options
These methods should only be used as a last resort, and only if you have a reliable third-party antivirus installed.
Disable Windows Defender via Registry (Not Recommended)
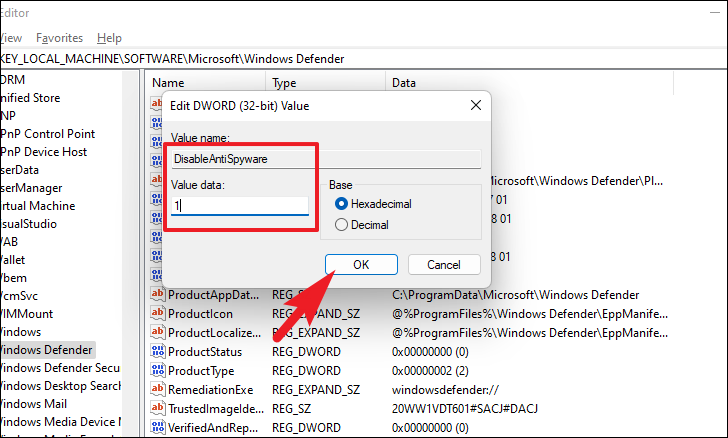
- Open Registry Editor
- Navigate to
HKEY_LOCAL_MACHINE\SOFTWARE\Microsoft\Windows Defender - Right-click, create a new DWORD value named “DisableAntiSpyware”
- Set its value to 1
- Restart your PC
Temporarily Stop Windows Defender Service
- Open Services from the Start Menu
- Find “Windows Defender Antivirus Service”
- Right-click and select “Stop”
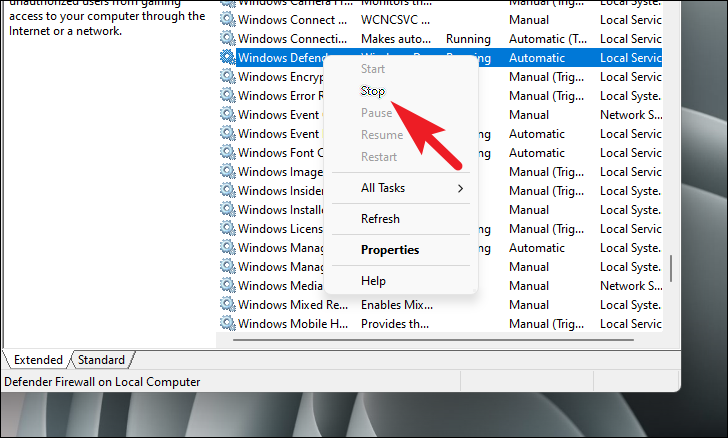
Remember, this is temporary and the service will restart automatically.
Conclusion
While Antimalware Service Executable can sometimes be resource-intensive, it plays a crucial role in keeping your system secure. Before taking drastic measures, try the less invasive methods like adjusting scan schedules or temporarily disabling real-time protection. Always prioritize your system’s security and only disable Windows Defender if you have a reliable alternative in place.
Have you tried any of these methods? Share your experiences in the comments below!


