
The StandBy feature in iOS 17 turns your iPhone into a customizable desk clock or digital photo frame. It offers three views: Widgets, Photos, and Clock. StandBy works when your iPhone is charging and in landscape mode, displaying information like weather, calendar events, and more. It’s integrated with Siri and supports live activities from compatible apps. You can also customize StandBy in the Settings app to enhance your user experience.
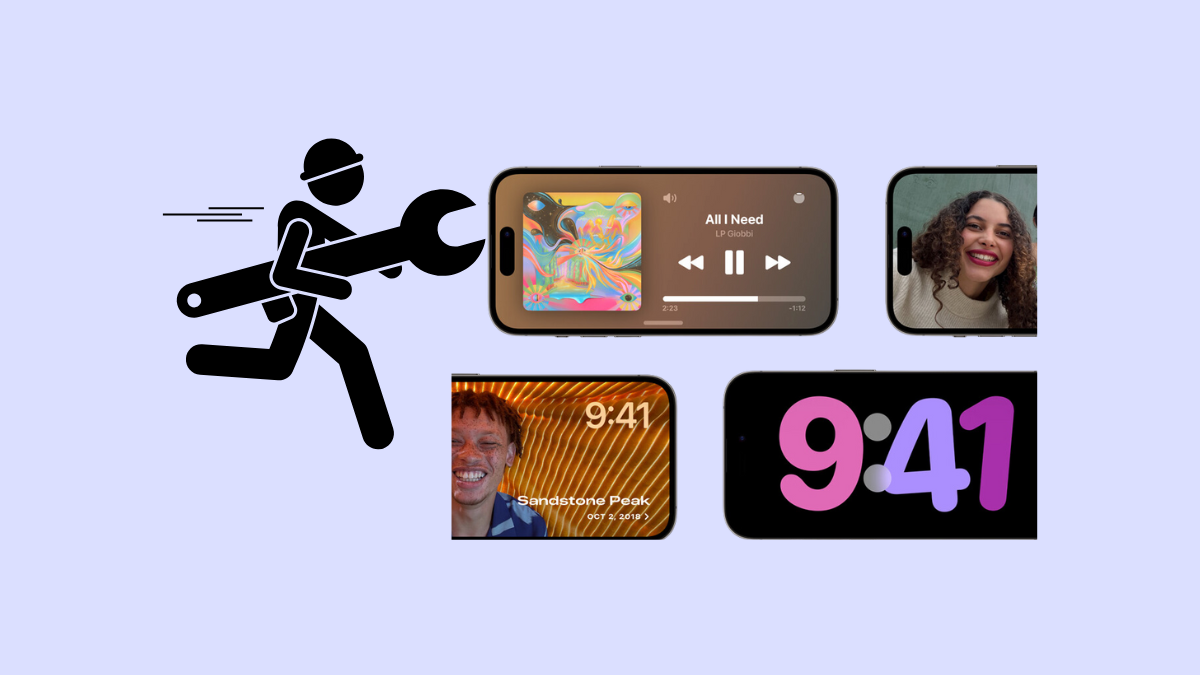
With iOS 17, Apple is introducing features we didn’t even know we needed. StandBy feature falls exactly in that category. It lets you turn your iPhone into a desk clock or a digital photo frame.
Contrary to initial impressions, StandBy is not merely a basic screen saver. It presents three unique layouts that can be populated with widgets organized into smart stacks that are compatible with Smart Rotate.
Furthermore, StandBy mode is integrated with Siri, enabling users to access the voice assistant seamlessly. Any information requested through Siri is displayed directly on the StandBy screen with aesthetically pleasing graphics. The StandBy feature also supports Live activities from compatible applications, adding to its dynamic capabilities.
What is StandBy and How Does it Work?
For the uninitiated, StandBy mode enables your iPhone to display critical information such as weather updates, time, upcoming calendar events, stock market information, and live activities from supported apps.
The StandBy screen automatically dims and changes into a red hue when low light is detected to cause the least disturbance. As mentioned previously in this guide, Siri will display the requested information without leaving the StandBy screen when summoned.
The feature is enabled by default on iOS 17. However, it only kicks in when your iPhone is charging and kept in landscape mode on a stable surface. Even if a single condition is not fulfilled, the StandBy screen will not appear on your iPhone.
The StandBy screen has three basic layouts. Before you proceed to customize them, you must learn what each layout offers and how much customization each one allows.
- Widgets. The first layout allows you to have two columns of smart stacks or widgets that can be personalized. You can toggle Smart Rotate (iOS detects user behavior and charging pattern to display the most appropriate widget.)
- Photos. The second layout displays photos from your gallery, the time, and the current date. You can not add widgets to this layout. That being said, you can choose the album you wish to display here.
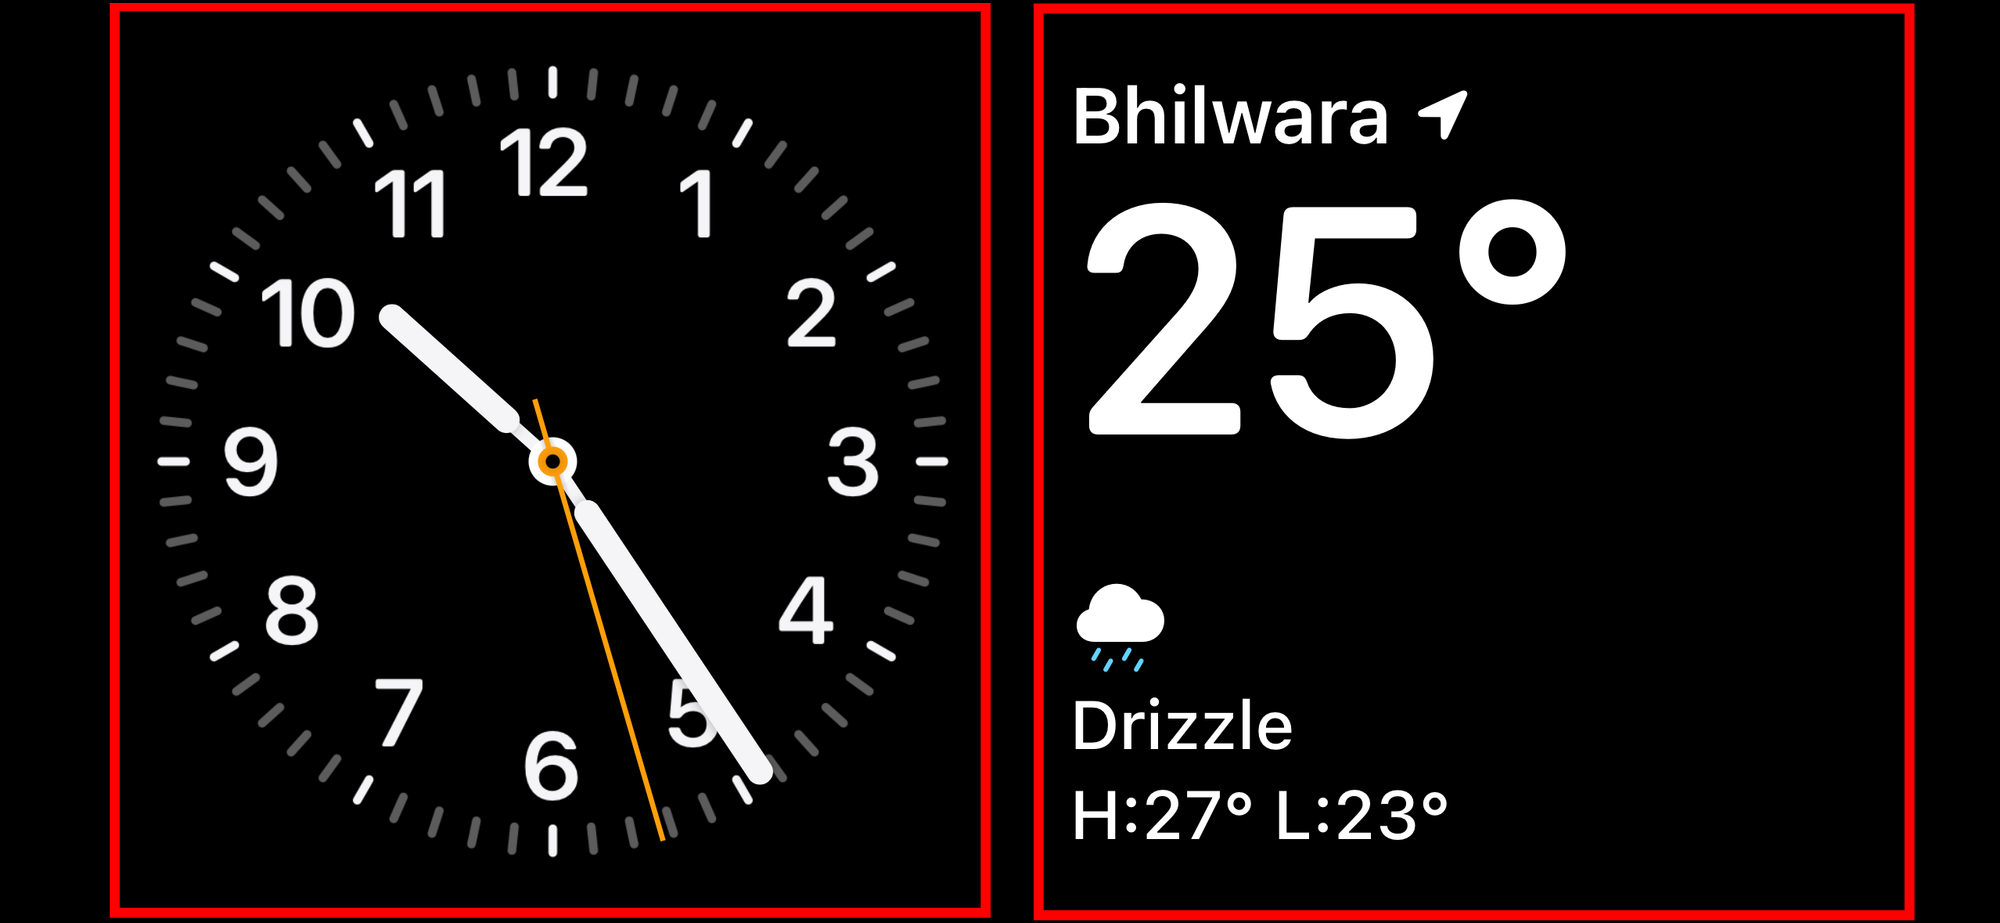
- Clock. The last layout displays a clock and the current date. There are five templates to choose from (analog, digital, world, solar, and float); no customizations are allowed on this layout.
You can customize Standby layouts from the StandBy screen itself
You cannot customize the Standby screen from the Settings app. For good or worse, it can only be customized once it is active on your iPhone.
To let the StandBy mode kick in, ensure your iPhone is placed in landscape mode (horizontal) on a stable surface and is plugged in.
Customizing the Widgets View
The initial configuration of StandBy features a dual-column layout, wherein widgets can be converted into Smart Stacks through Widget Editing. These Smart Stacks are equipped with Smart Rotate functionality, which intelligently displays the corresponding widget based on your device usage and charging habits.
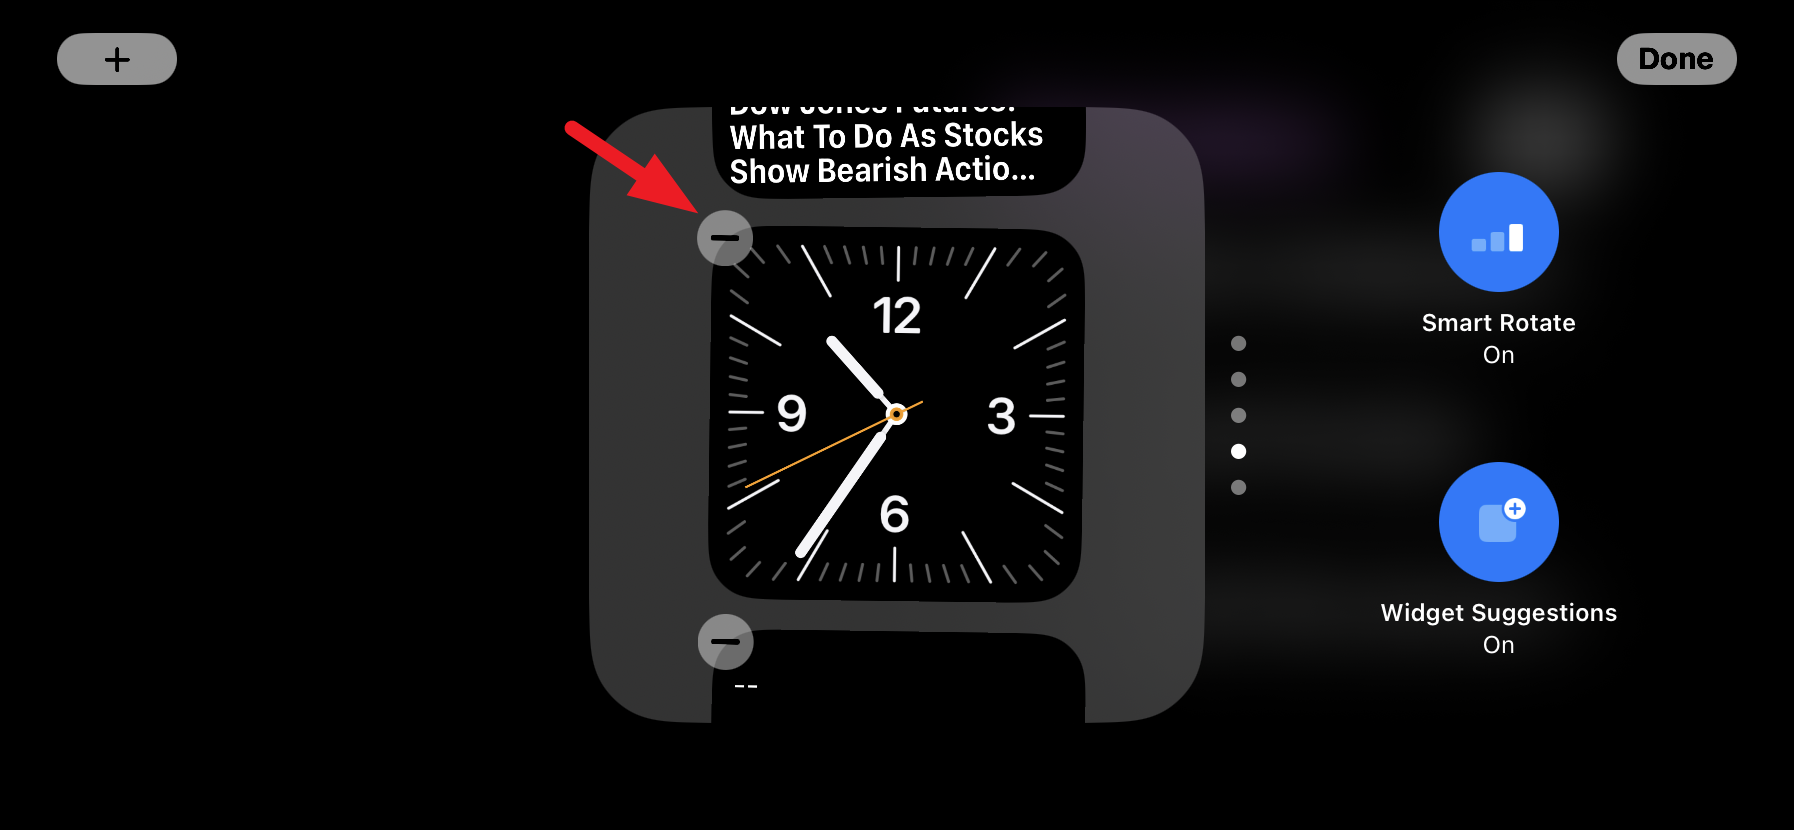
To get started with Widget Editing, tap and hold on a smart stack from the StandBy screen that you wish to customize. The left and right columns can be customized separately.
A Face ID scan or passcode will be required to be able to edit widgets in StanBy Mode.
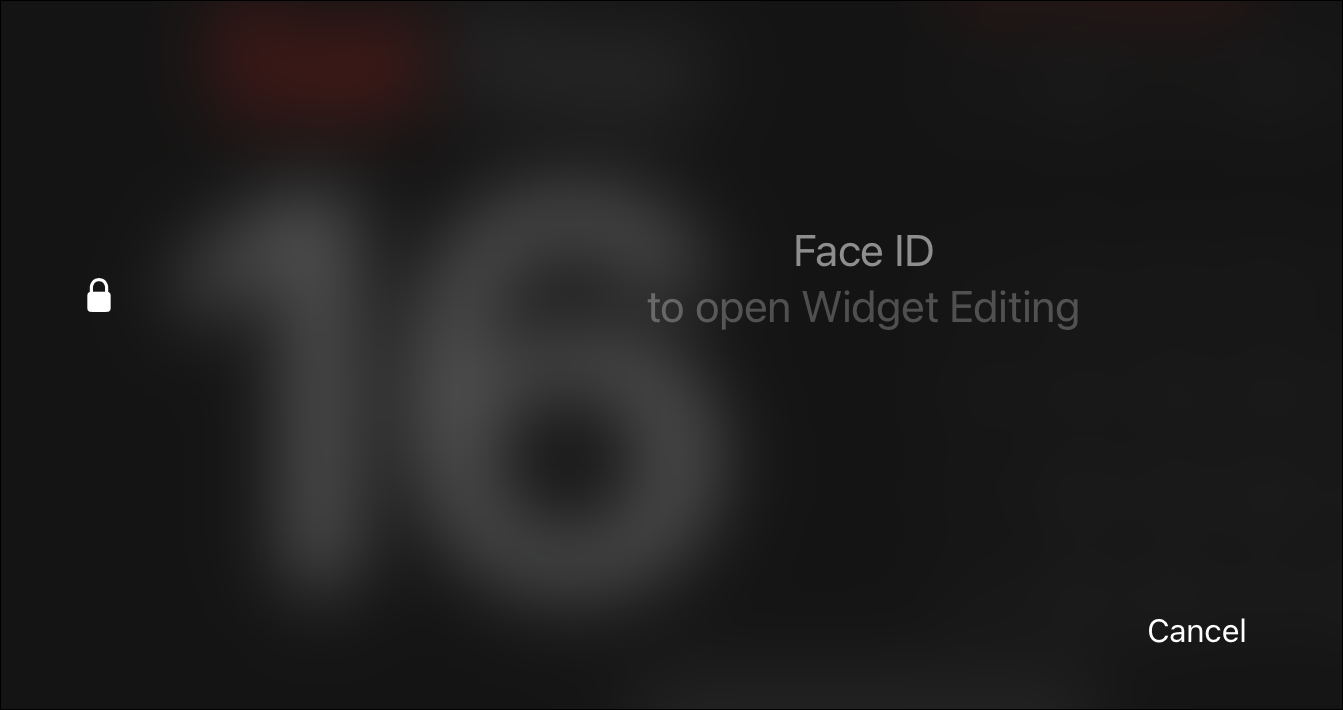
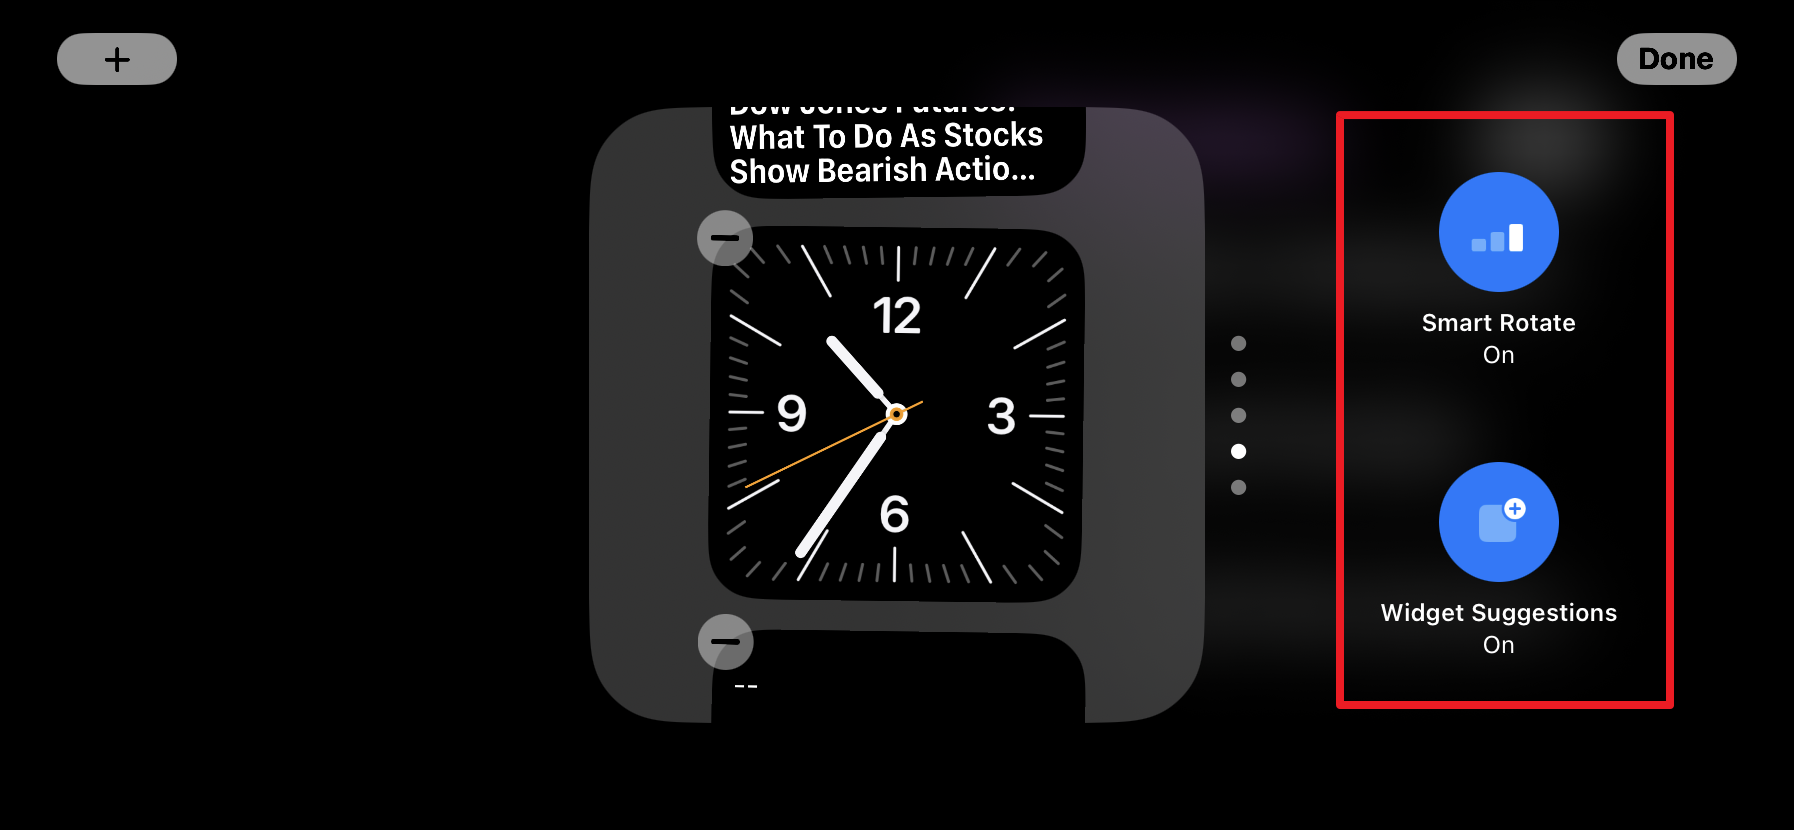
Once authenticated, the widget editing screen will show your smart stack with various editing options.
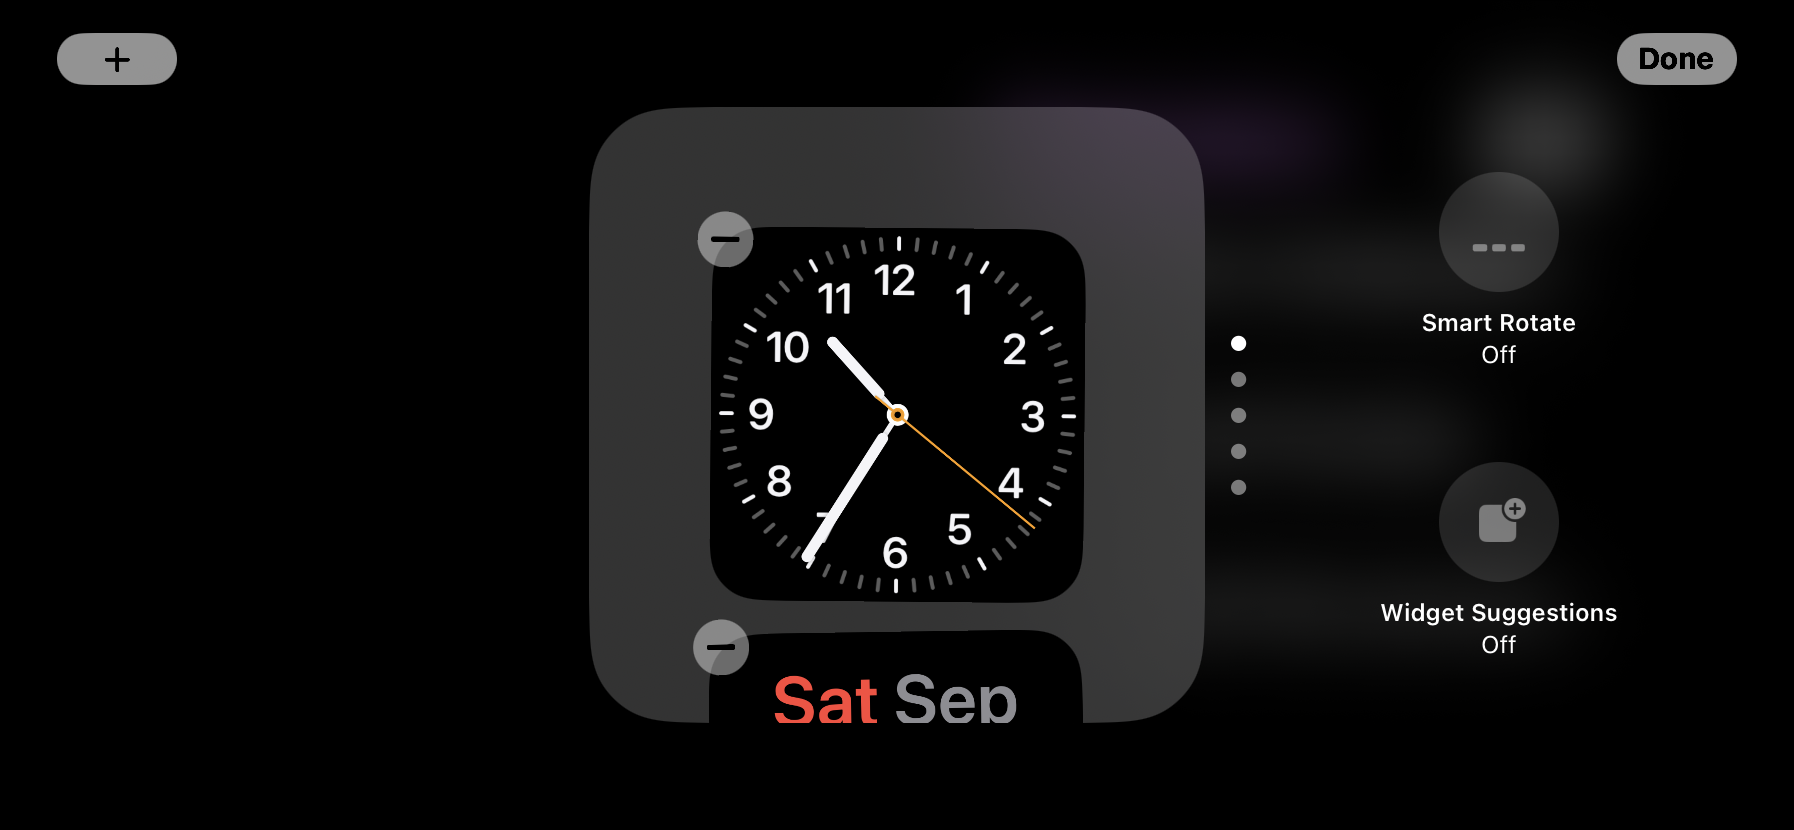
You can enable Smart Rotate to let the system automatically rotate widgets based on your usage patterns. And enable the ‘Widget Suggestions’ feature to make adding widgets effortless. Their ‘On/Off’ status is displayed exactly beneath the icon.
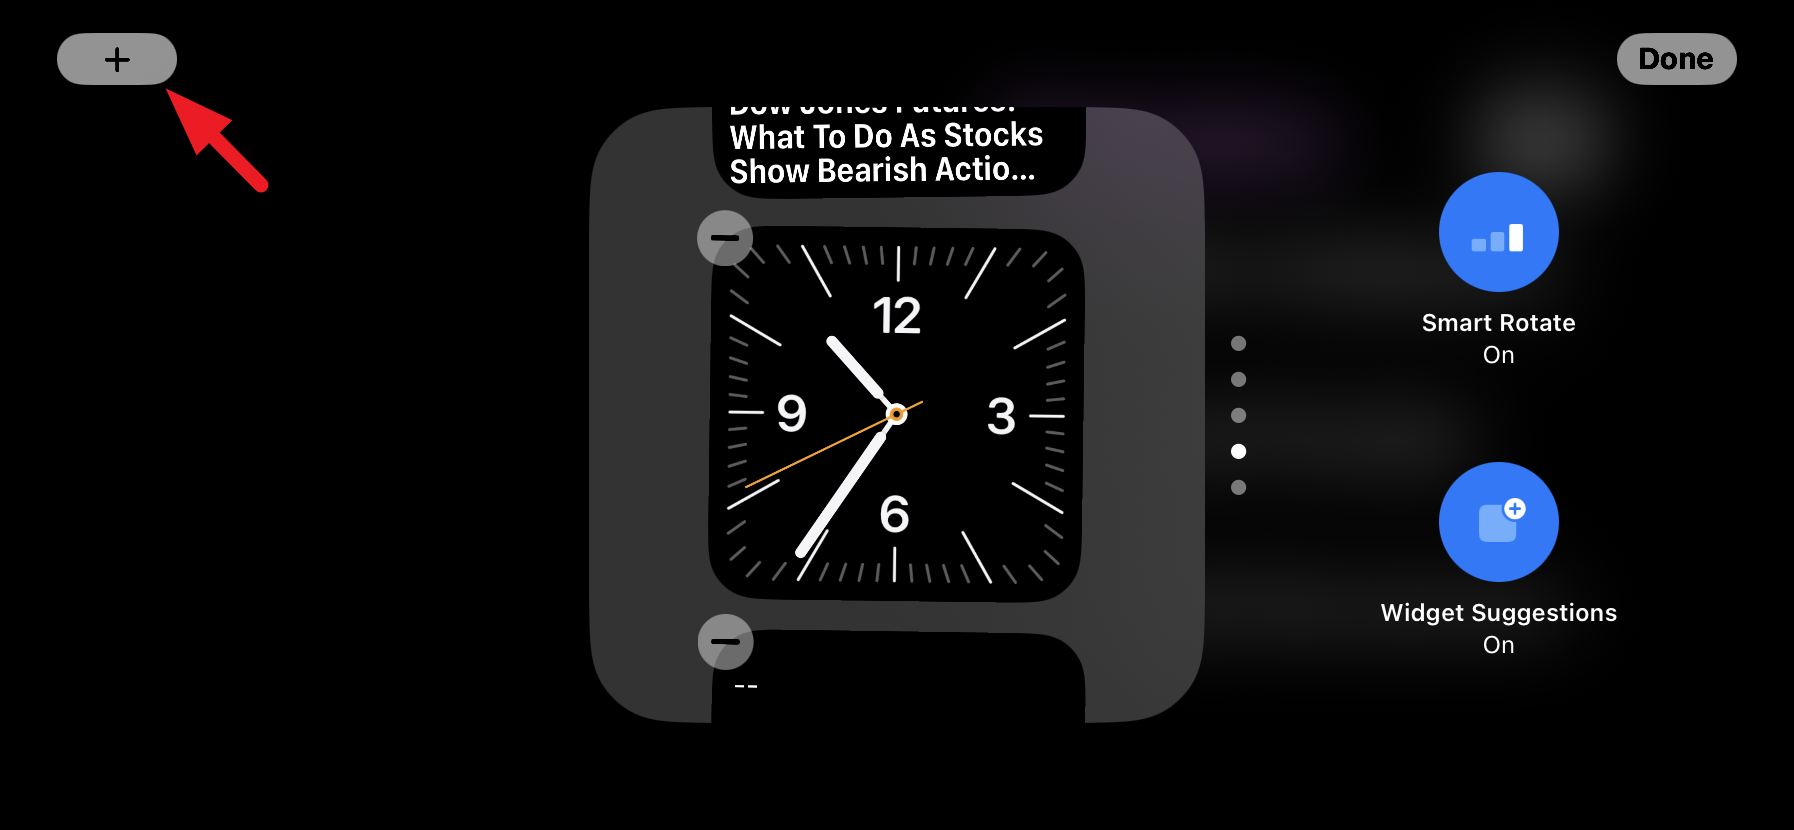
To add a widget to your Smart Stack in StandBy, tap the ‘+’ in the top left corner of the Widget Editing screen.
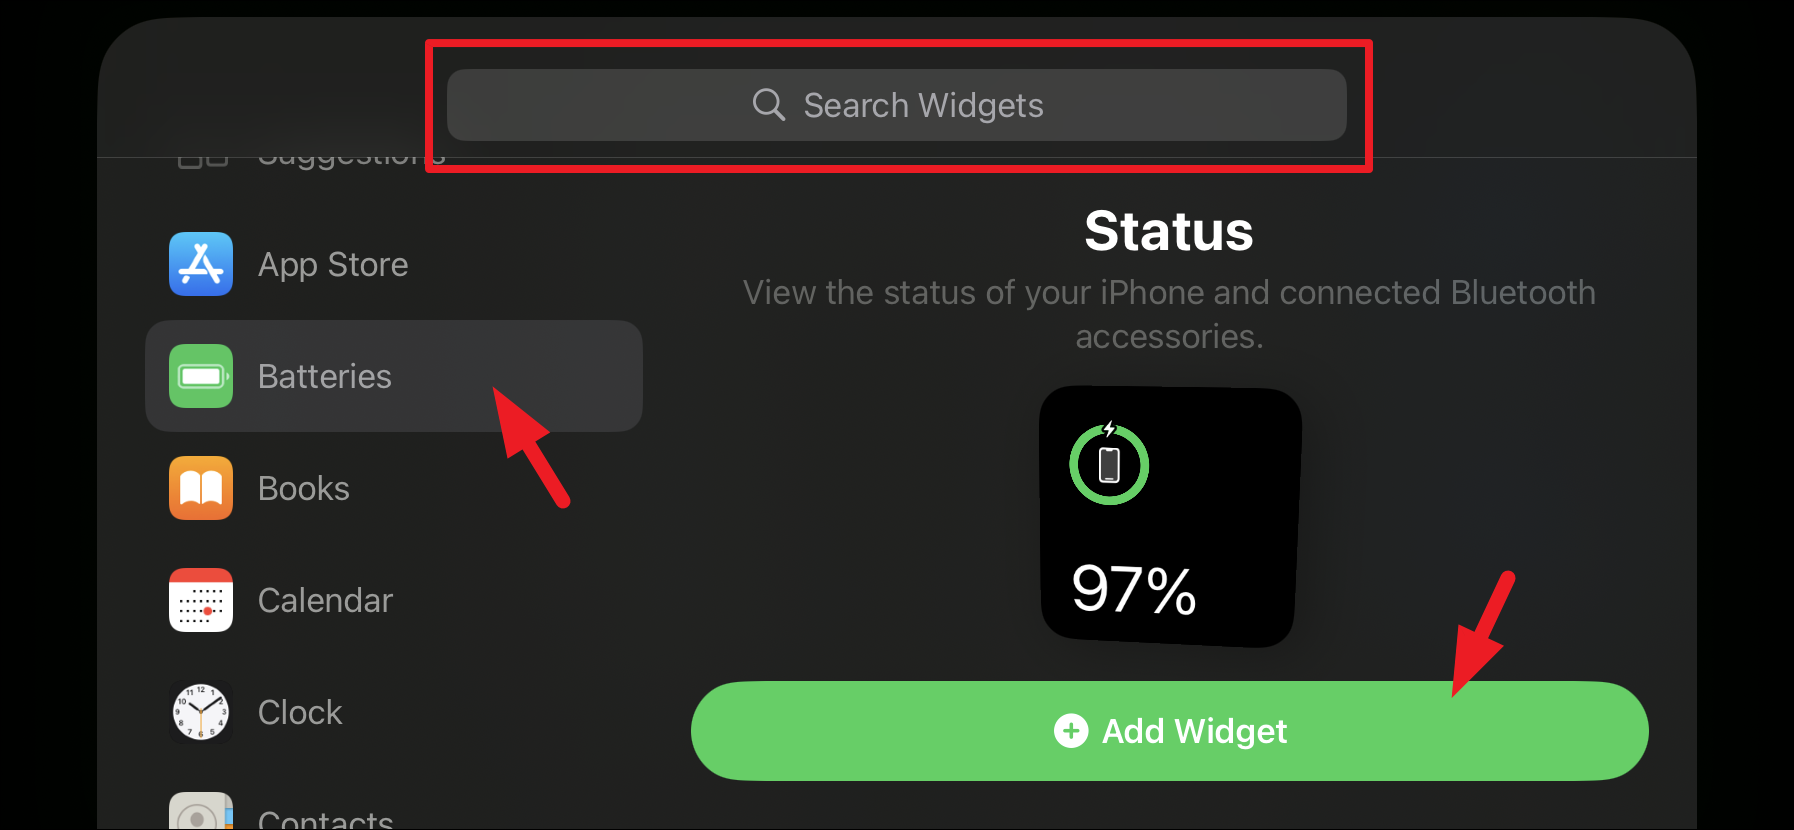
You will get a list of compatible widgets that you can add to StandBy. Simply browse through the suggested widgets and select any to add it. The ‘Suggestions’ tab will not be available if you have ‘Widget Suggestions’ turned off.
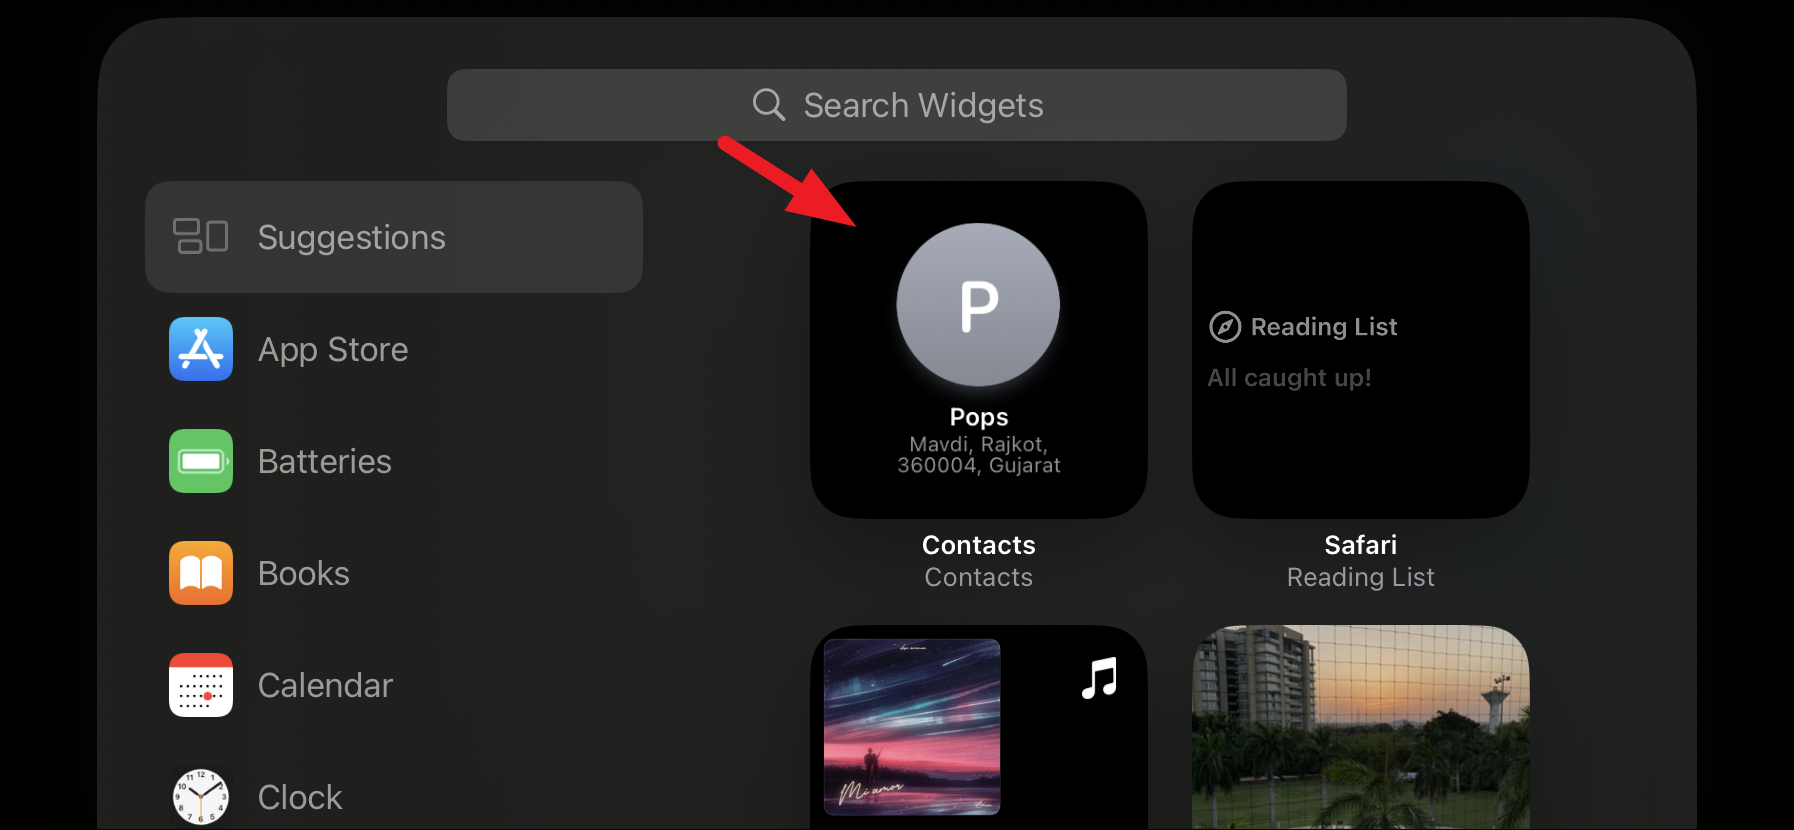
You can also find widgets using the search bar or the app list in the sidebar. Once you’ve selected a widget, tap on ‘Add Widget’ to add it to your Smart Stack in StandBy.
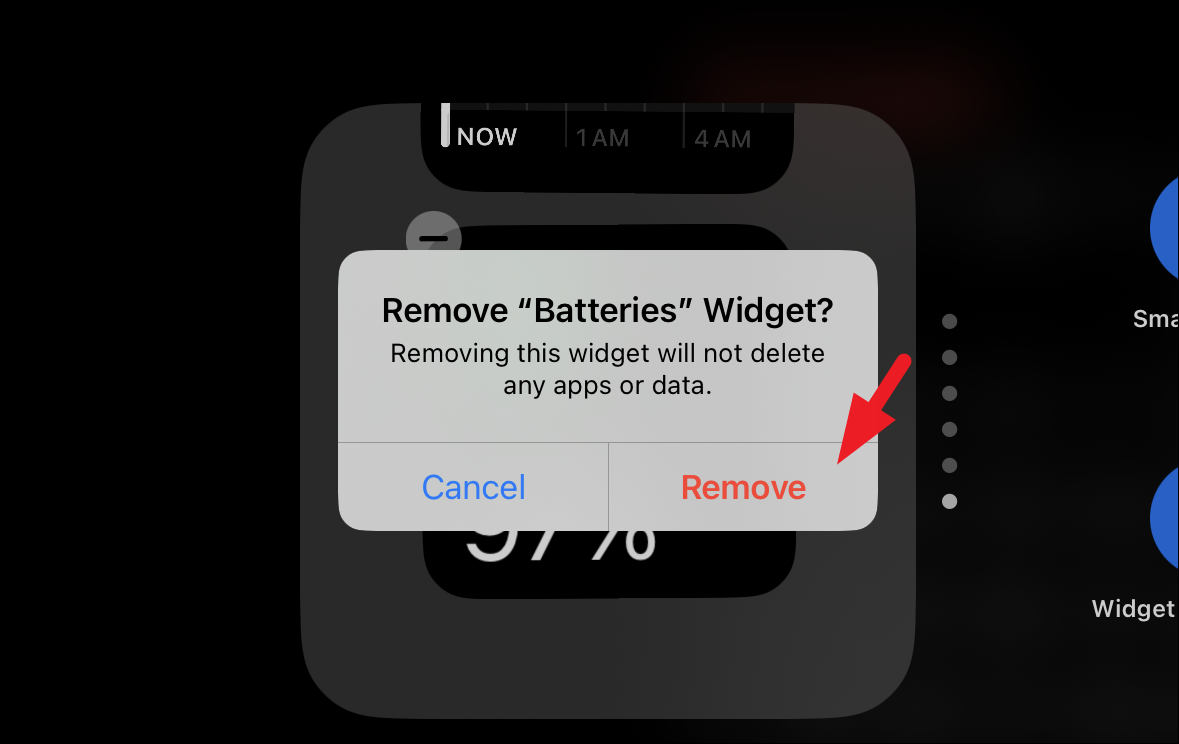
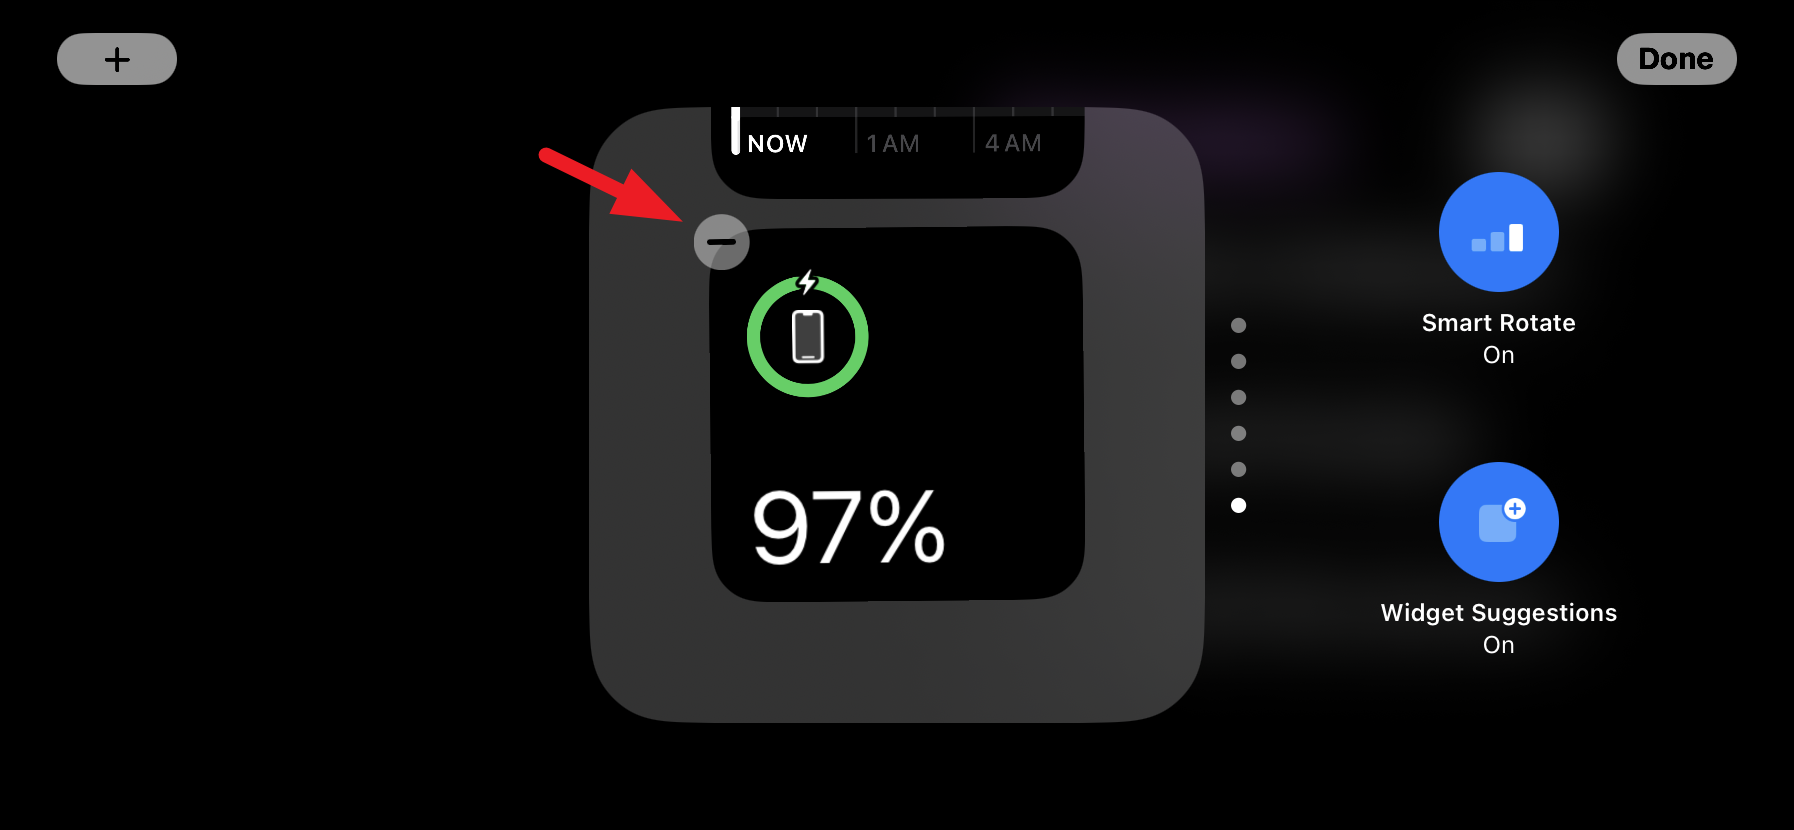
To remove a widget from the Smart Stack in StandBy, tap on the ‘–’ in the top left corner of individual widgets.
A dialogue box will appear on your screen to confirm removal. Tap ‘Remove’ to confirm.
If you want to keep a single widget instead of a stack of widgets, remove all the widgets from the Smart Stack except the one you wish to keep.
Similarly, you can customize the other smart stack column on the Widgets screen using.
Customizing the Photos Standby View
The Photos StandBy screen is the one that displays pictures from your gallery along with the current time and date. This screen doesn’t work unless you authenticate via FaceID or Passcode at the time of putting you iPhone on StandBy mode.
iOS will automatically choose photos to display on the Photos StandBy screen by default. To change it with your preferences, touch and hold your finger on the screen to enter the customization menu. You may have to authenticate via FaceID or Passcode.

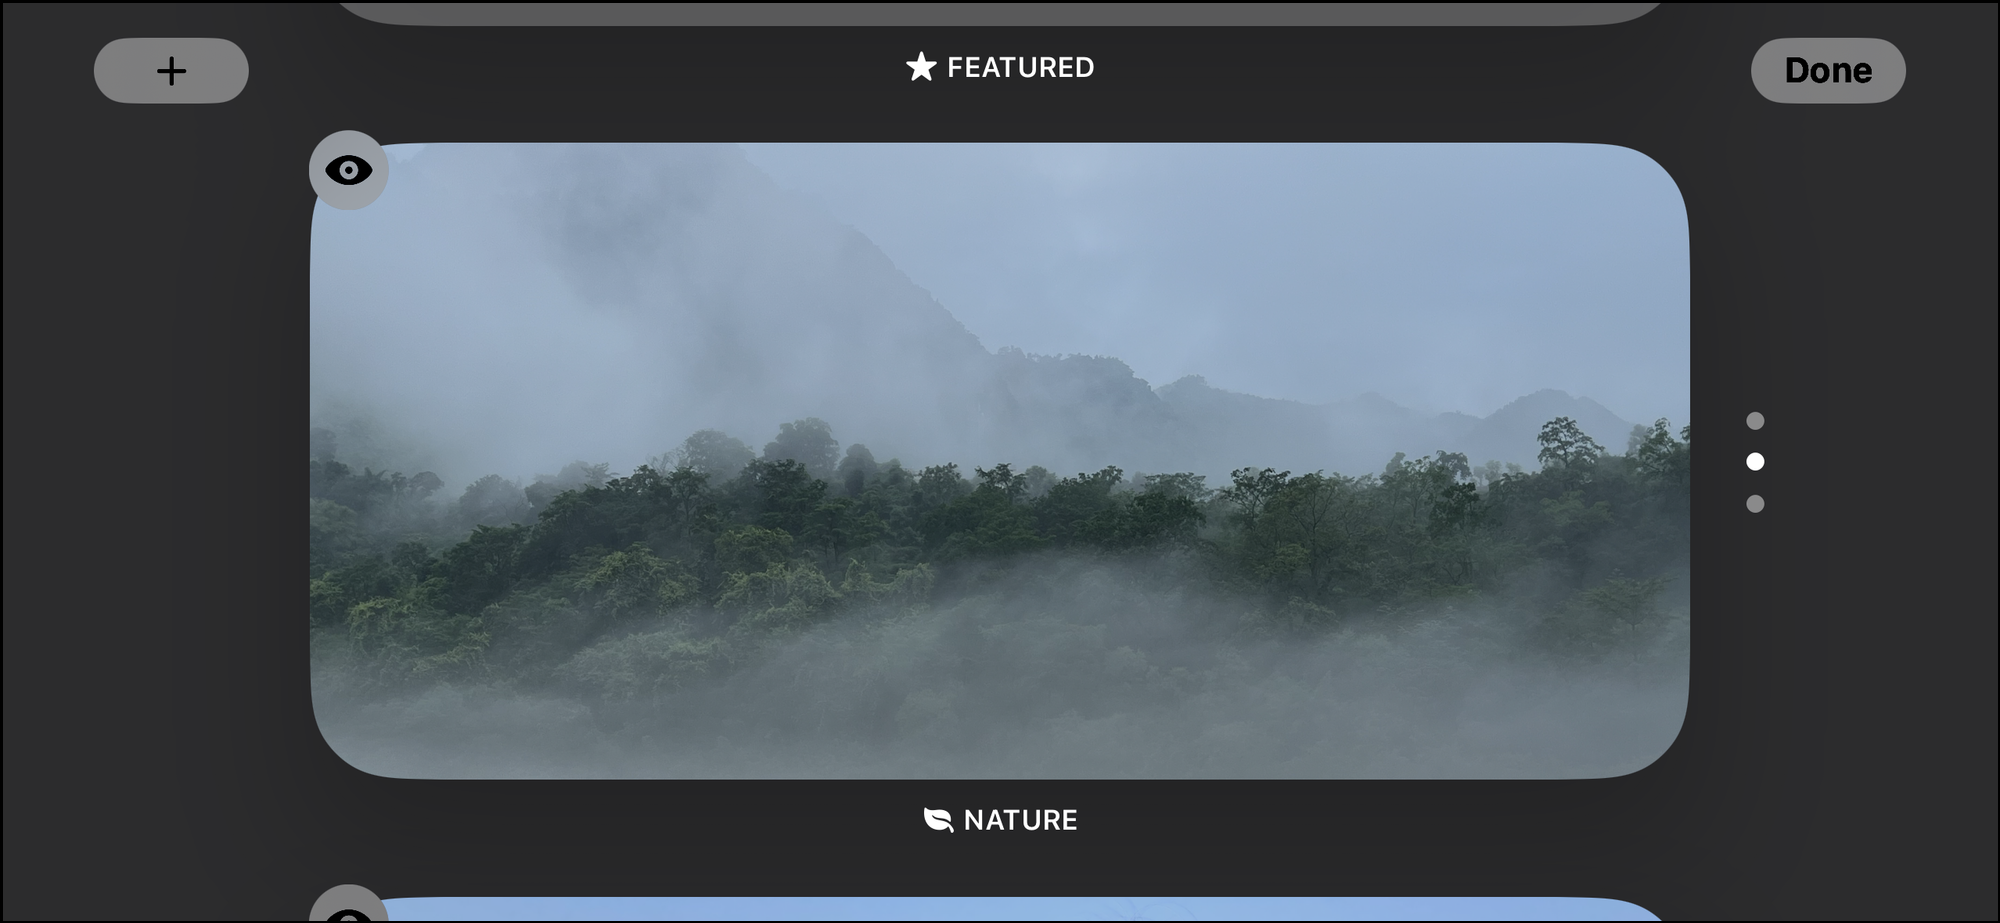
Once authenticated, you’ll see the different views available for the Photos layout. You can select between Featured, Nature, People, and Albums.
The Nature view is designed for nature enthusiasts who never miss a chance to photograph the stunning beauty of our world. This collection displays your finest nature photographs, taken over the years, and includes specific location details to help you relive those memorable moments. It’s a feature designed to bring joy and a sense of nostalgia.
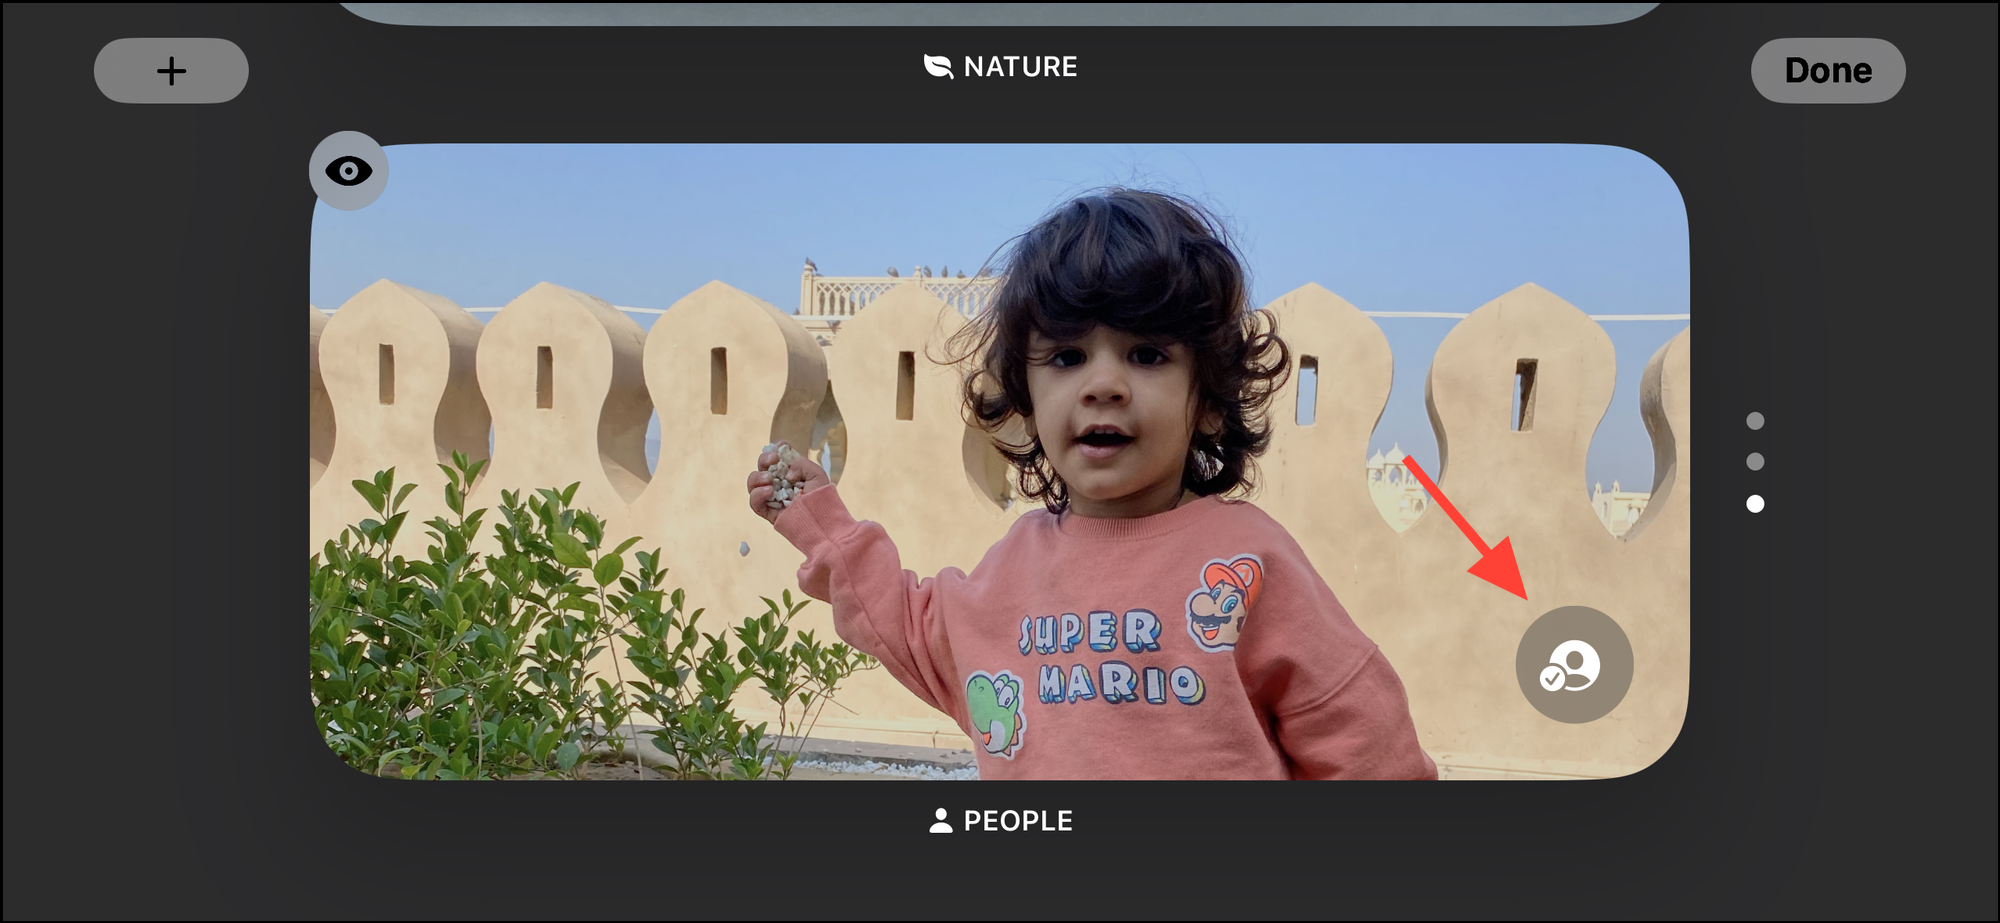
The People View displays pictures of your favorite people on the StandBy screen. You can select one or multiple people(s) by tapping on the little circular people icon at the bottom left of the view.
You can also add an Album from your library, and it’ll display as a separate view on the customization screen.
To add a Photo album on the StandBy screen, tap ‘+’ in the top left corner to proceed. This will bring an overlay window to your screen.

All albums within your gallery are readily accessible. To select an album, tap on its icon. Upon doing so, the StandBy screen will display all photos contained within the chosen album.

If you wish to highlight certain images, it is recommended to create a dedicated album in your gallery that solely contains these specific pictures. Once this album is created, select it to have your preferred images showcased on the StandBy screen.
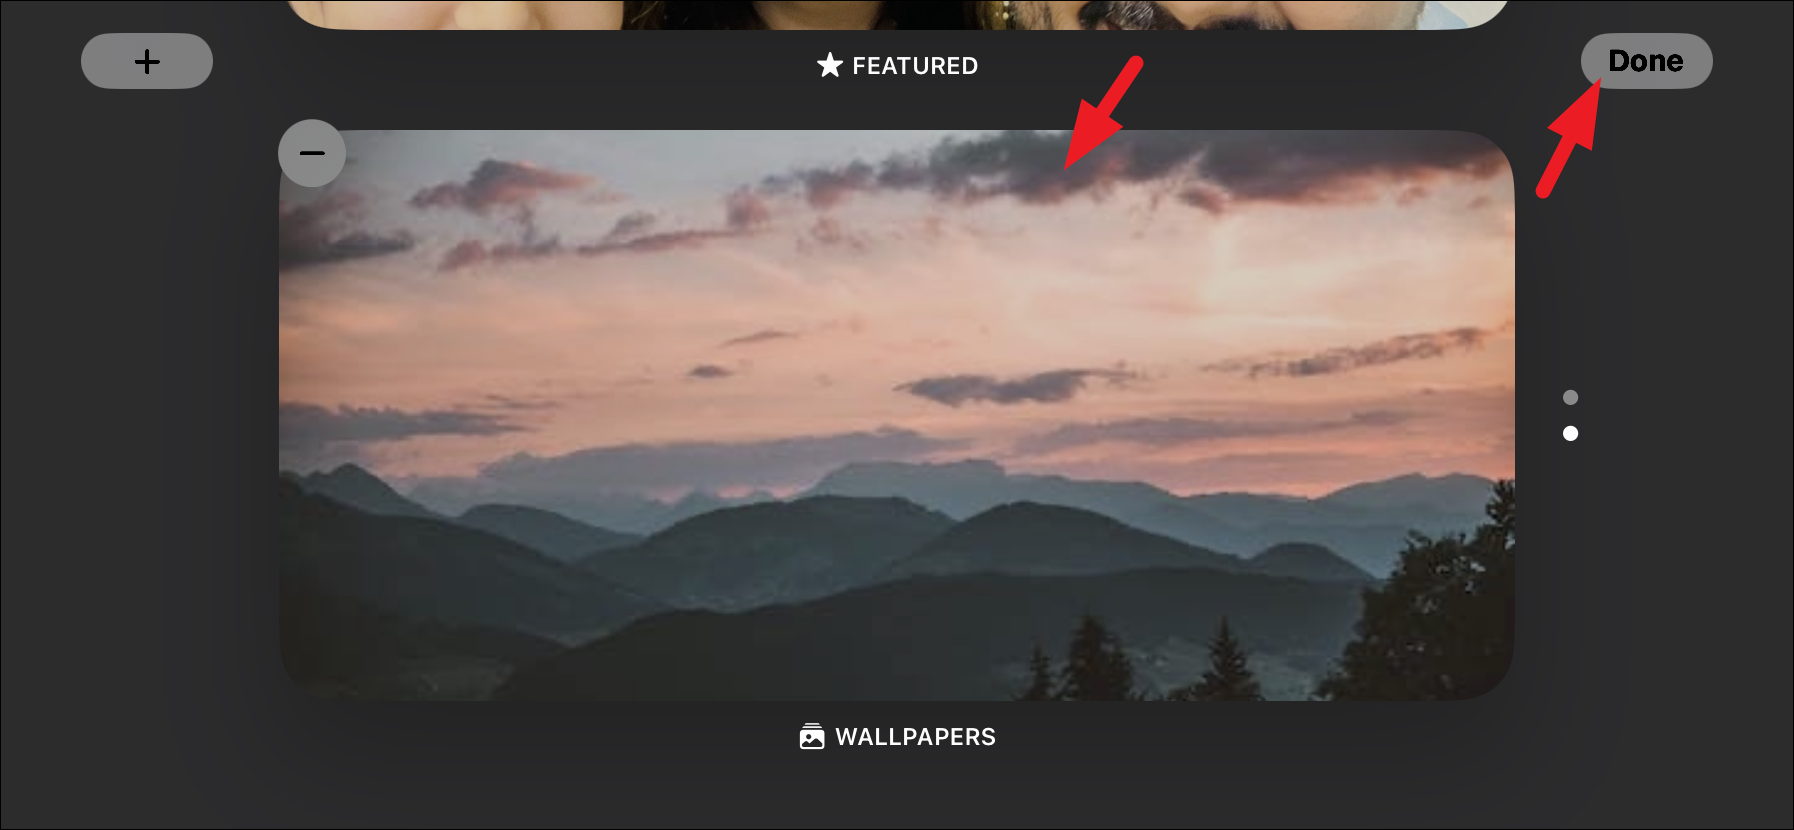
Upon completion, the album will be displayed on the selection screen. To activate it, either touch the album thumbnail or choose the ‘Done’ button.
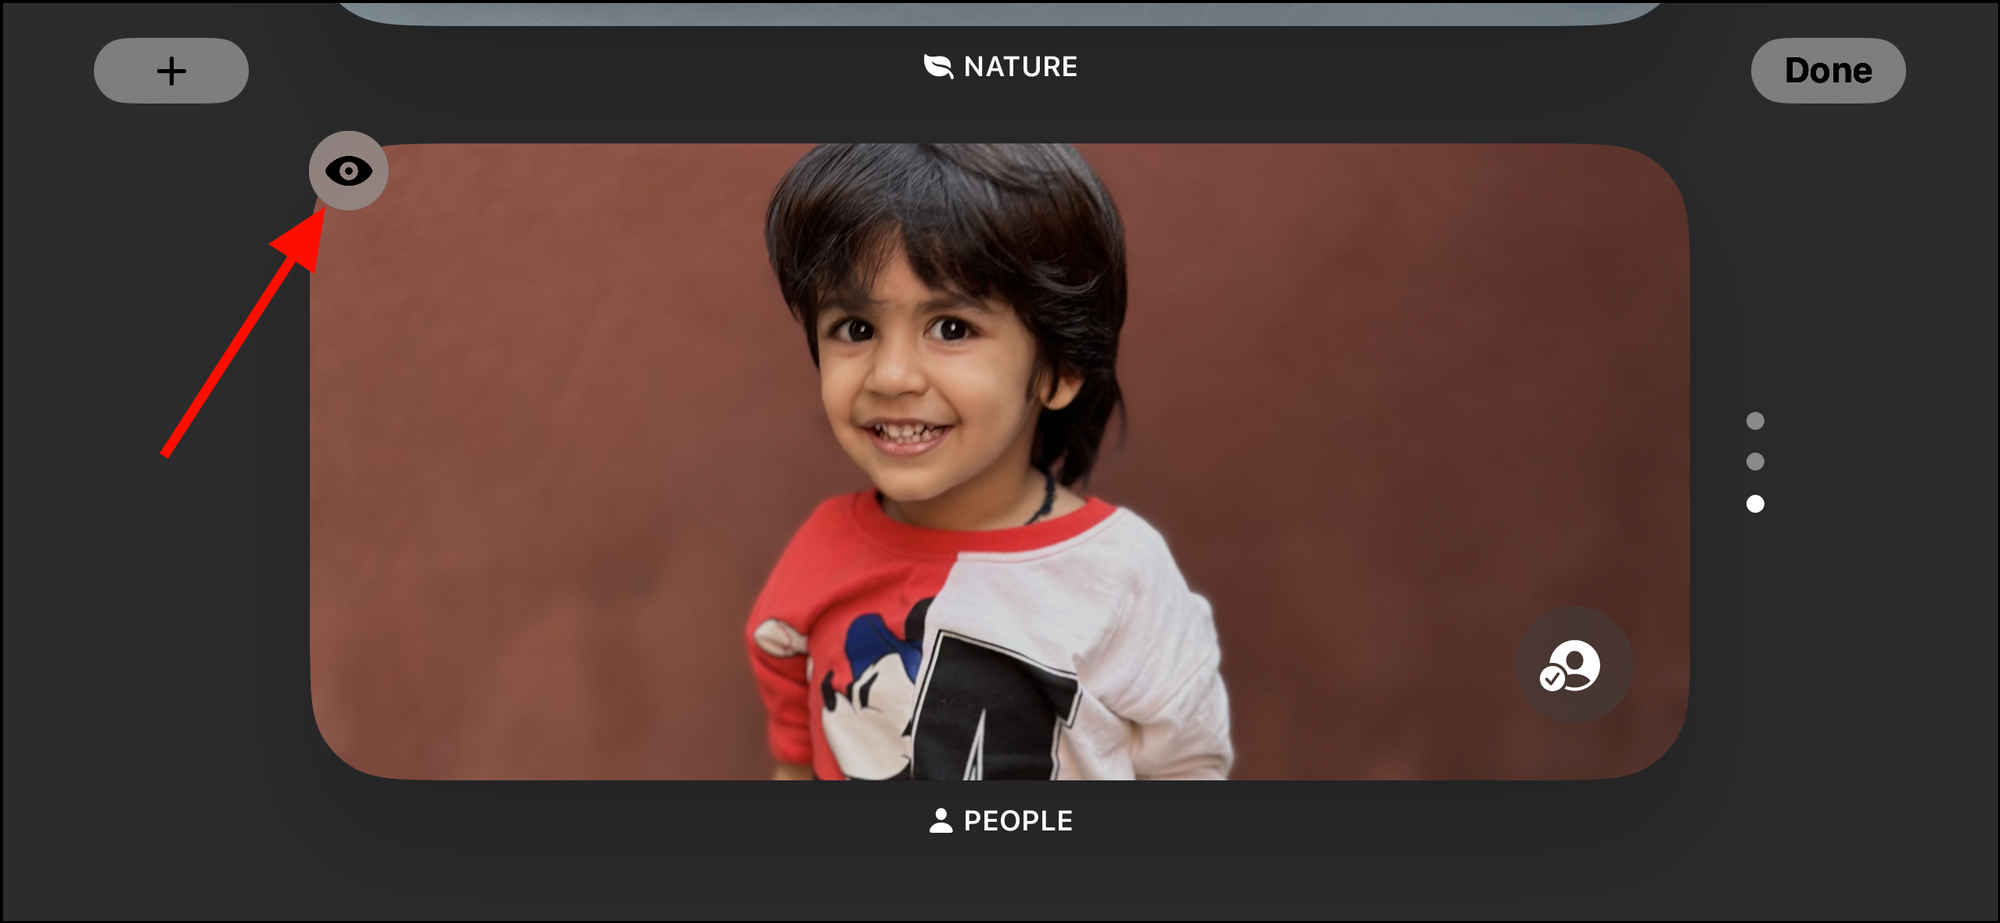
To hide any of the default photo views from showing up on StandBy, tap on the circular ‘eye’ icon at the top left of the view, and it’ll be hidden from the StandBy screen. This means this view won’t appear when scrolling between views from the main screen.
Customizing the Clock View
The clock layout, while offering limited customization options, still presents an aesthetically pleasing interface. It’s primarily designed to display the current time and date. There are five pre-established configurations available for users to select from, providing some degree of personalization.
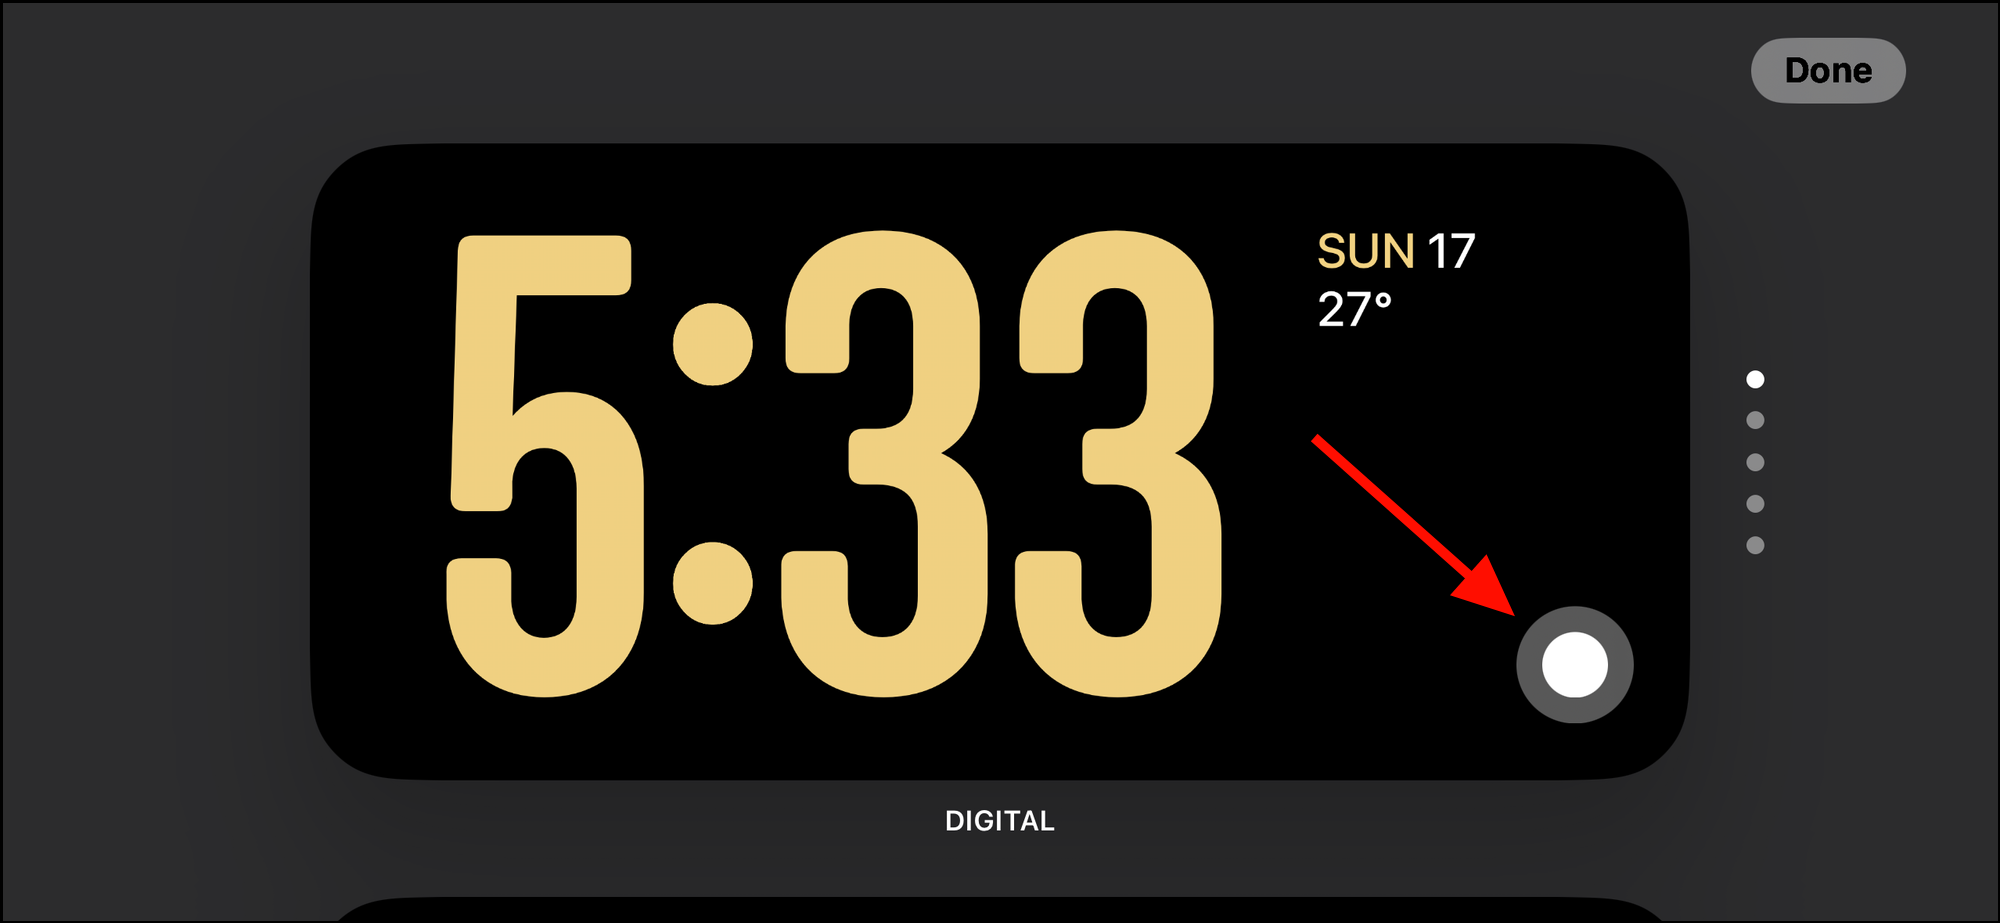
To edit the Clock layout, tap and hold on the screen while the Clock StandBy screen is active, and you’ll enter the customizations screen.

Next, select a preset that you wish to customize by swiping up/down, and tap on the circular icon at the bottom left of the in-view clock style.
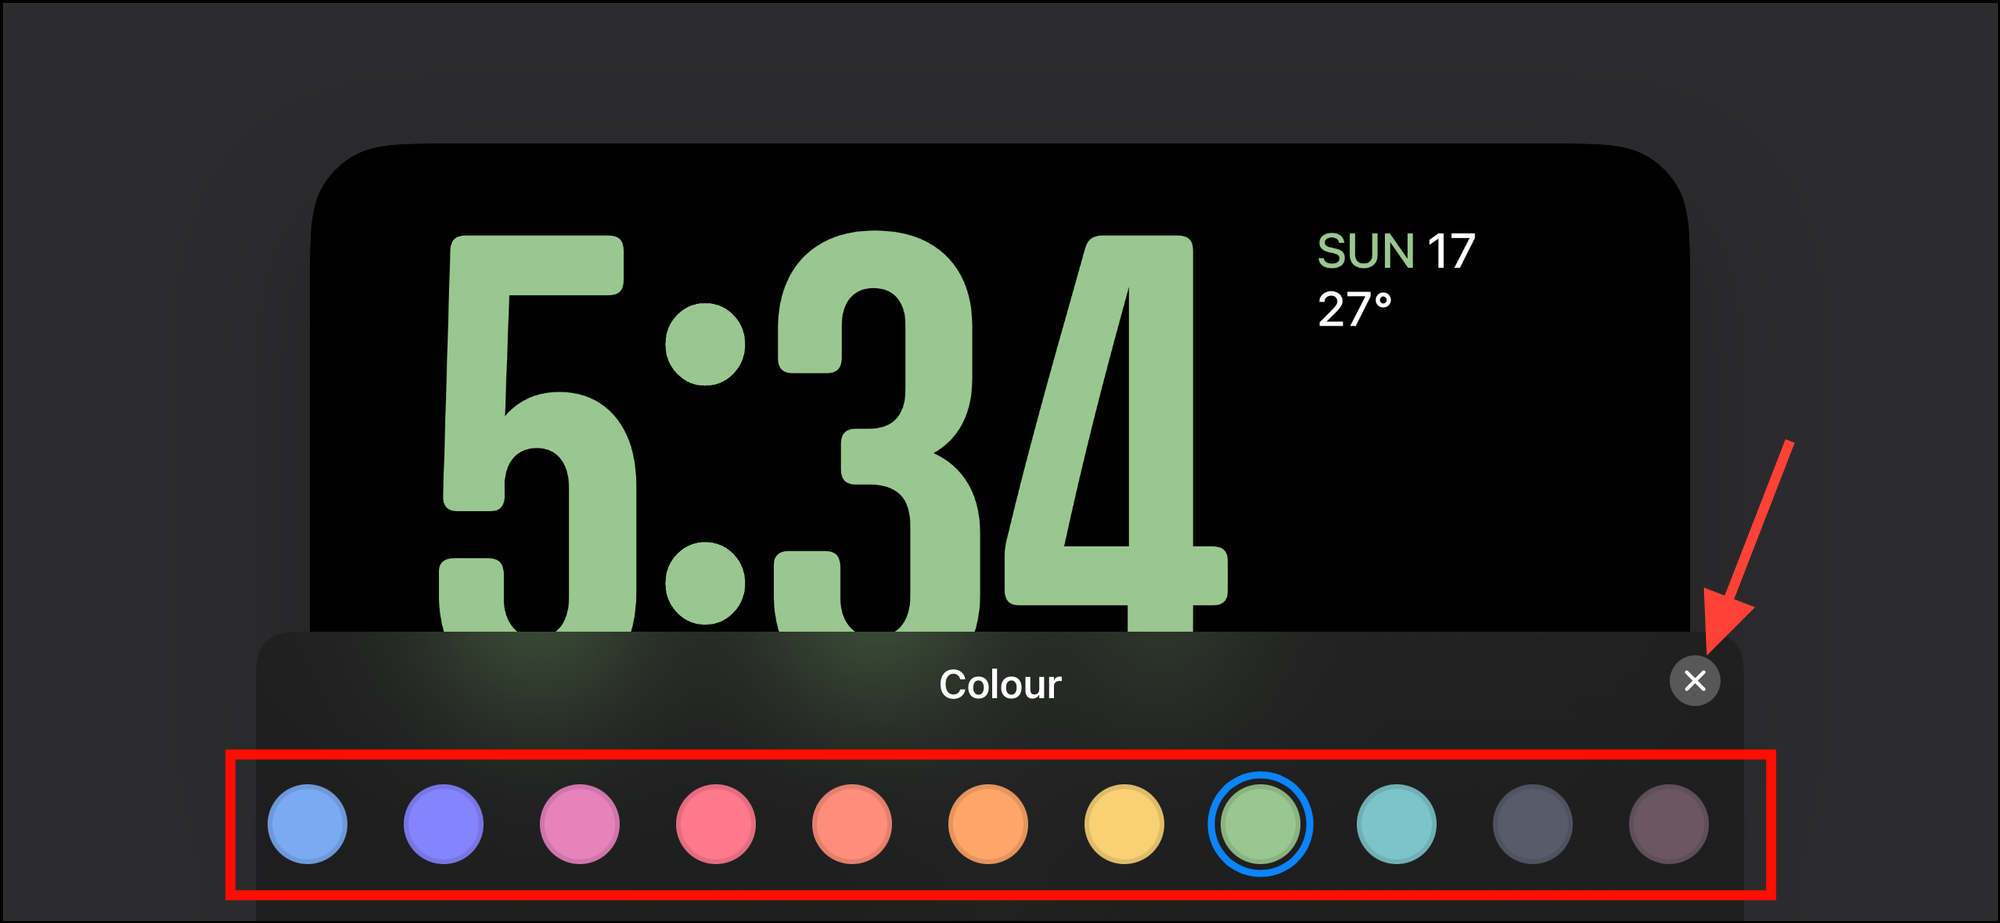
Then, select a color from the available options to your preference and close the menu by tapping the cross icon at the right corner of the color selection menu.
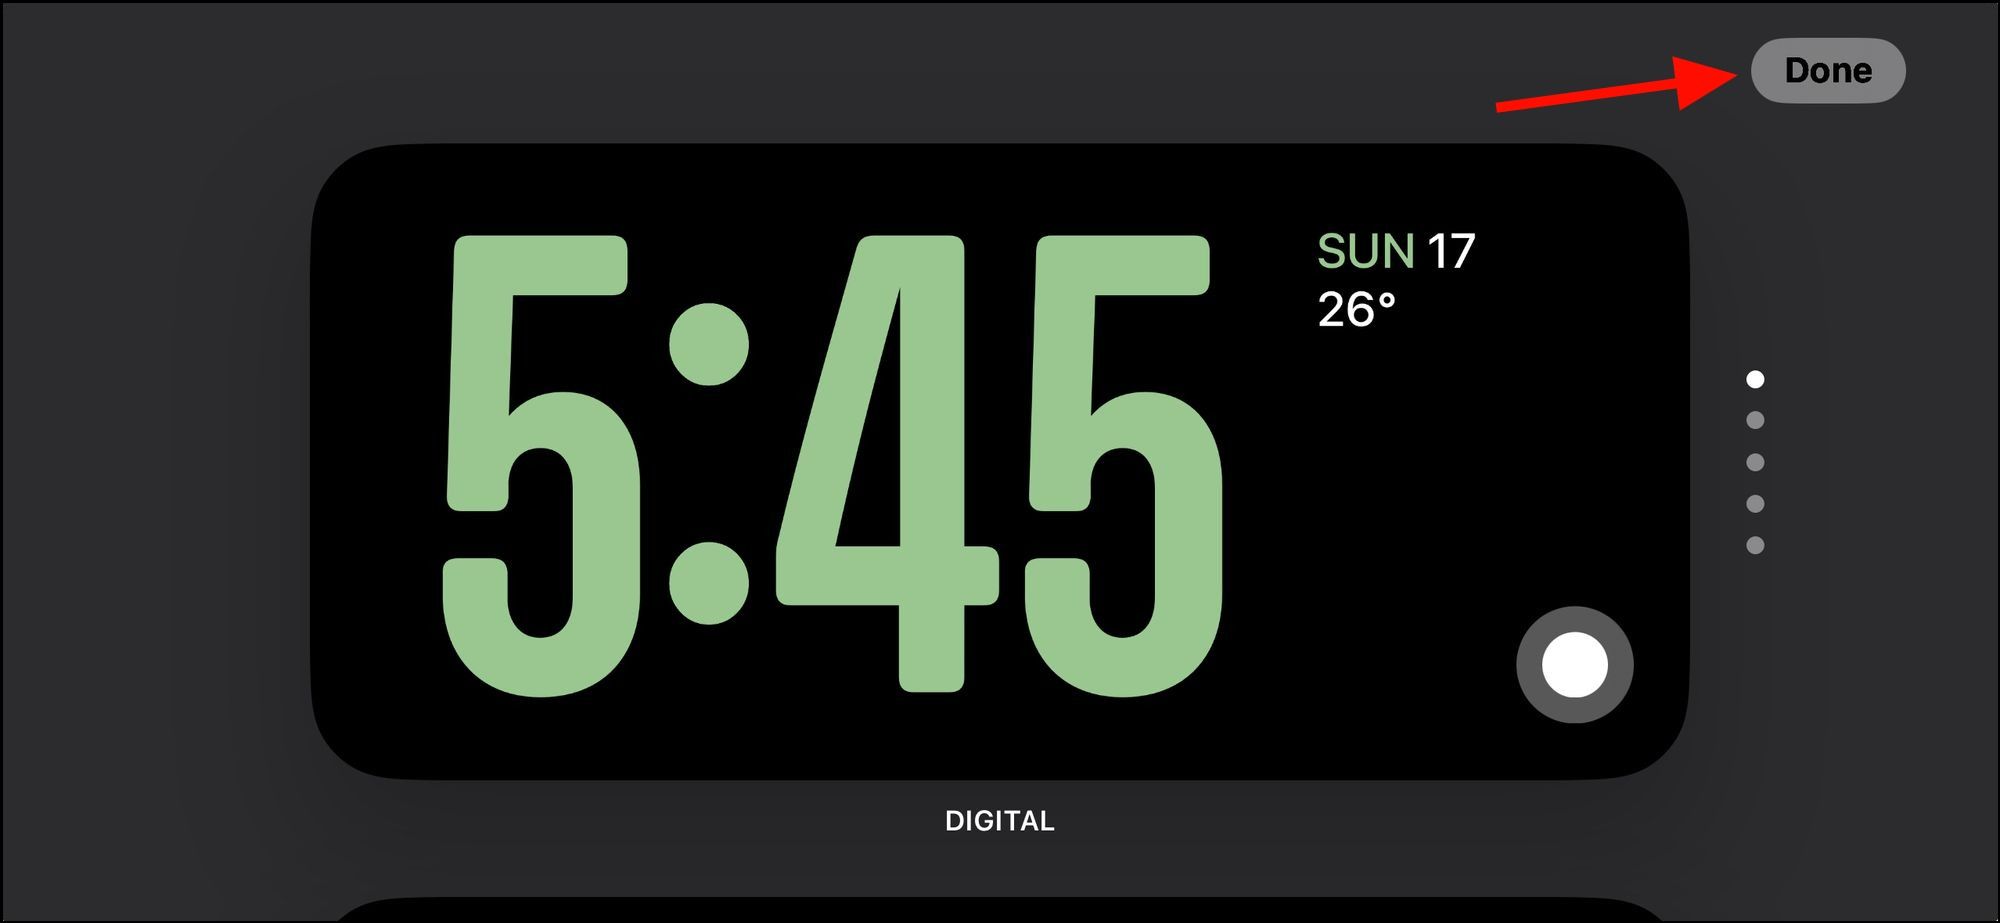
Once you have personalized the clock style and color, confirm your selection by tapping on the clock or pressing the ‘Done’ button located in the upper right corner. This will establish your chosen style and color as the default clock on the Standby screen.
Configuring StandBy Mode in Settings
The StandBy mode on your iPhone offers a customizable experience, allowing you to adjust its behavior to better suit your needs. This can be conveniently done through the Settings application.
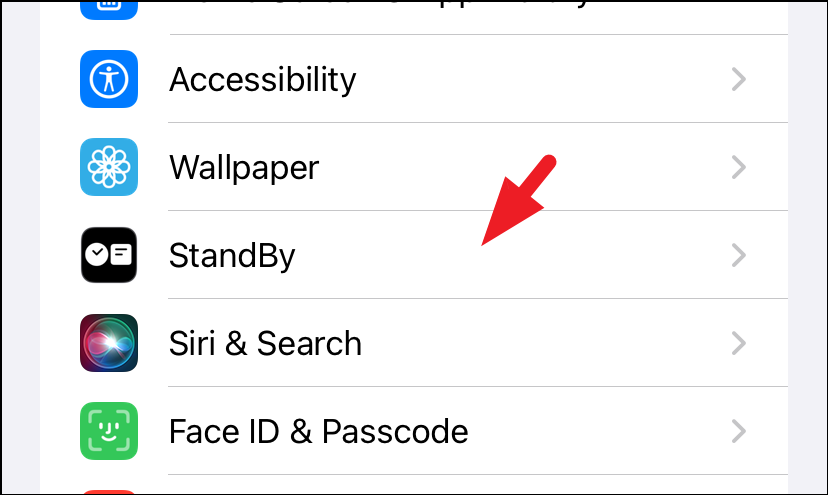
To begin, open the Settings application on your iPhone.
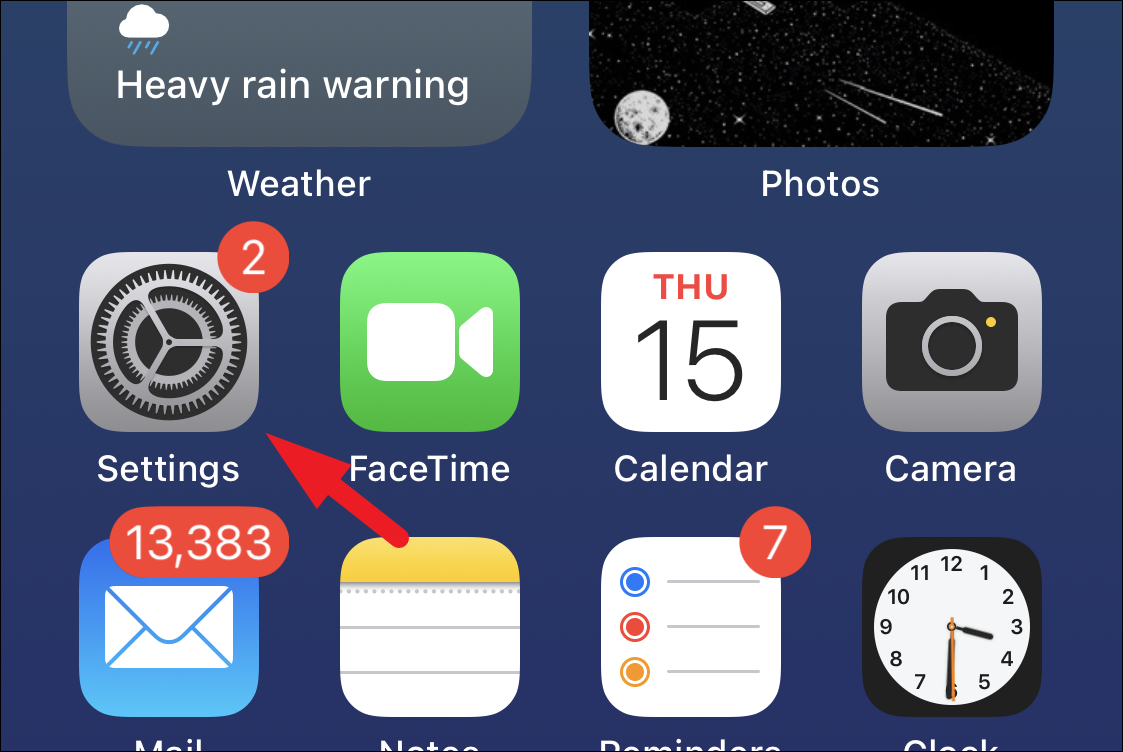
Next, find the ‘StandBy’ option and select it to continue.
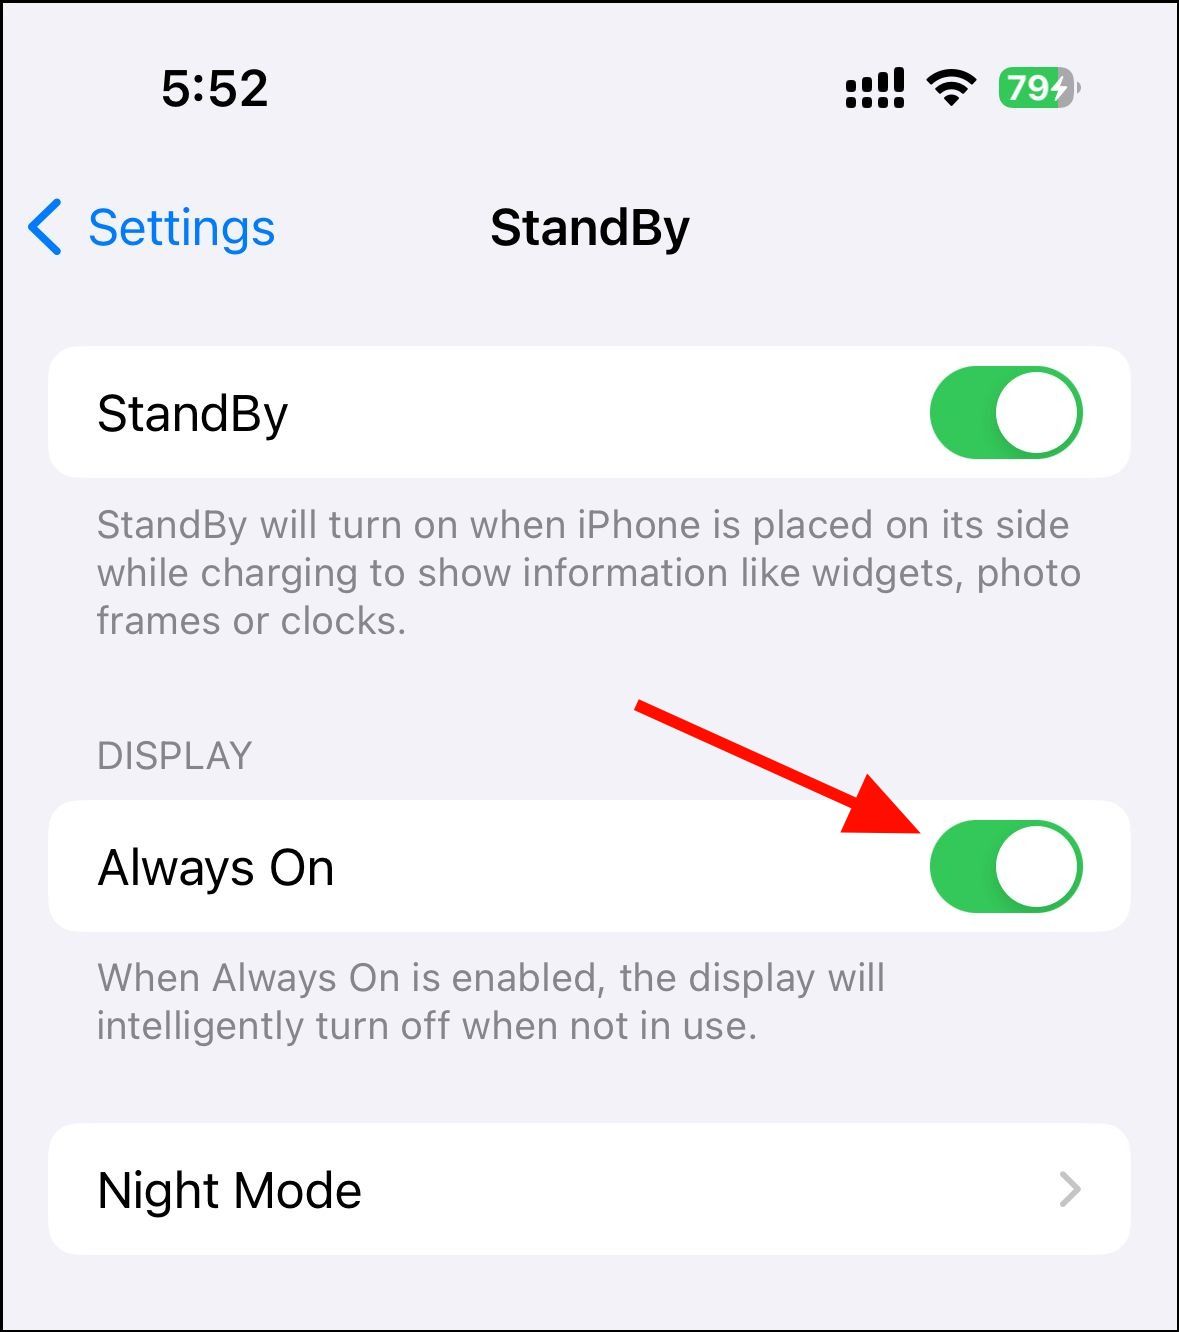
The StandBy settings provide several options to improve your user experience. If your iPhone’s display is compatible with the Always On feature, this can also be enabled for StandBy.
To enable or disable ‘Always On’ in StandBy, look for the ‘Always On’ option under the Display section and simply turn the toggle switch to the ‘On’ position to enable it or ‘Off’ to disable it.
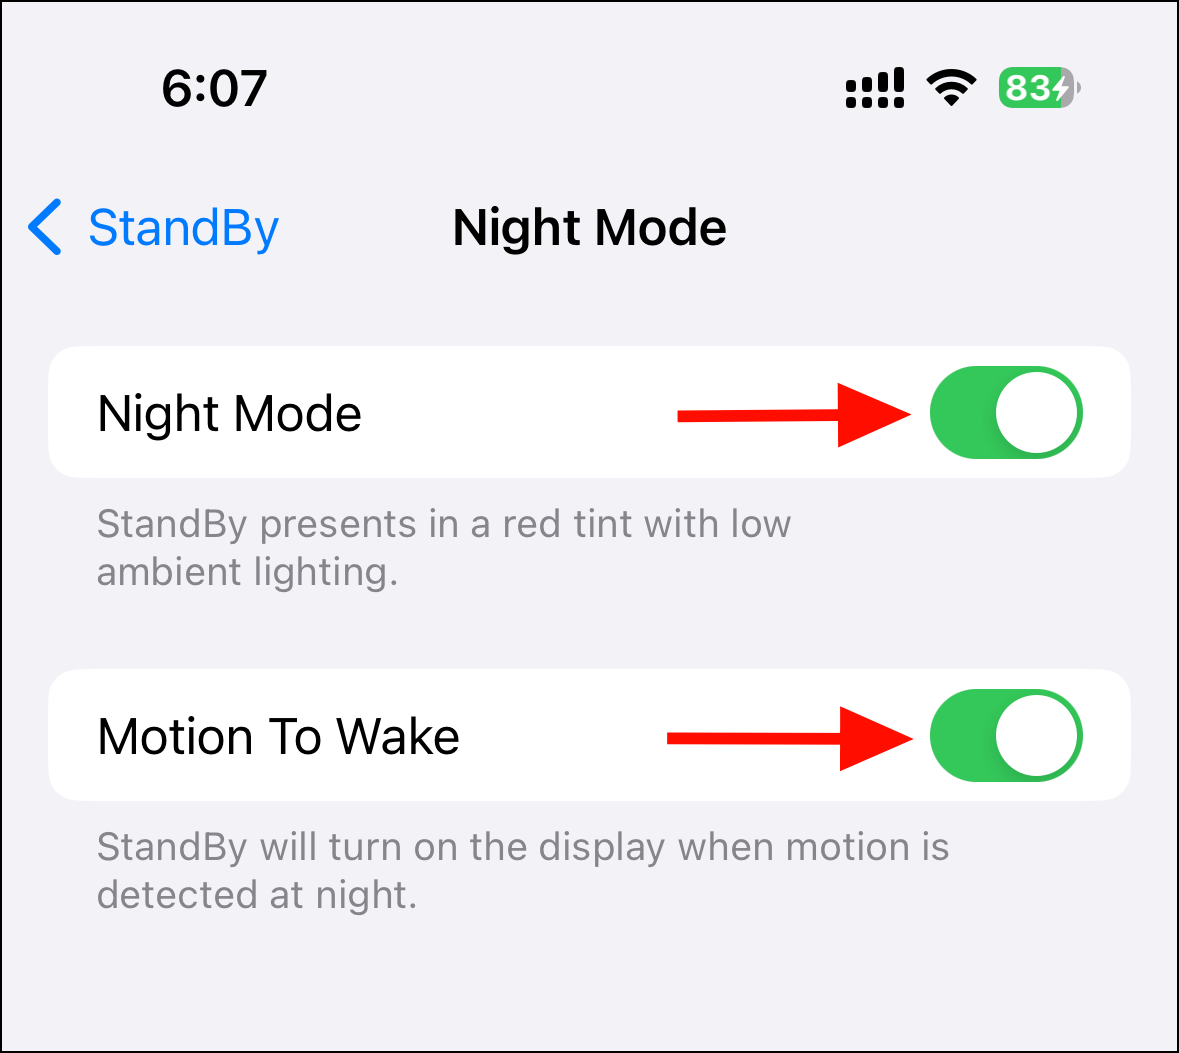
In StandBy, there is also a ‘Night Mode’ feature that offers a red tint with minimal ambient lighting. Additionally, the ‘Motion to Wake’ function activates the display when it detects movement during the night.
To utilize these features, select ‘Night Mode’ under the Display section. Then, switch on the toggle buttons adjacent to ‘Night Mode’ and ‘Motion to Wake.’ This will enable both features, enhancing your StandBy experience.
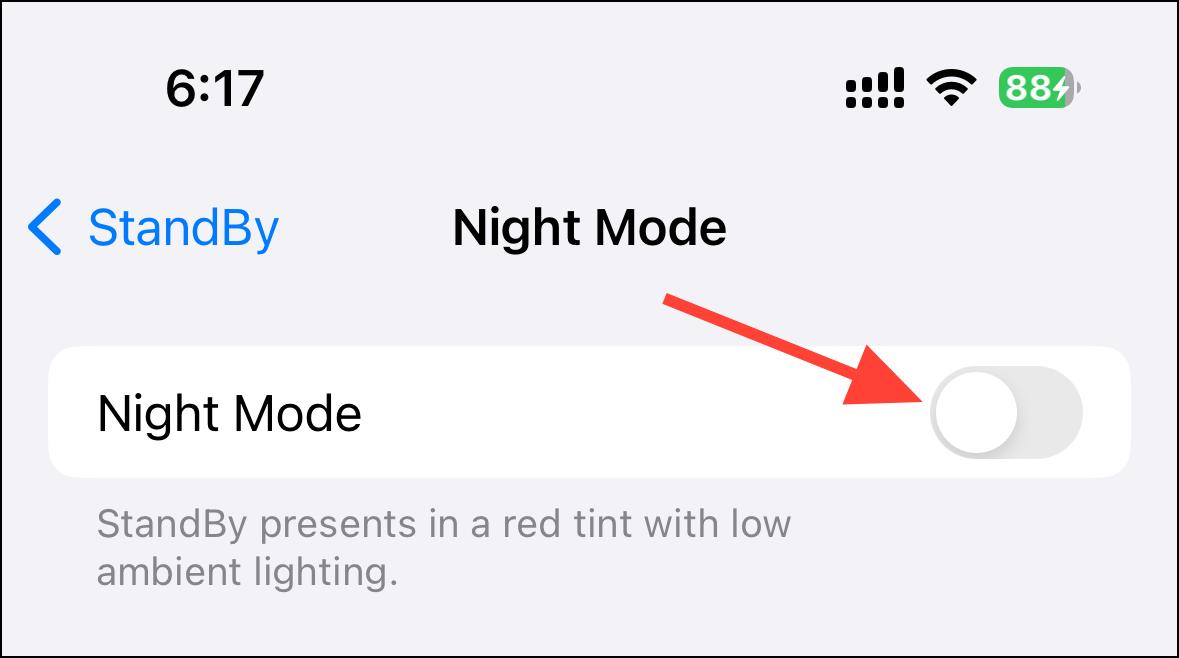
If StandBy Night Mode was already active on your iPhone and you were here about the StandBy screen turning red and want to disable it, now you know that it was the night mode that made it so.
To disable the StandBy screen from turning red, turn off the toggle for ‘Night Mode’, and you’ll have a normal StandBy display even in dark rooms.
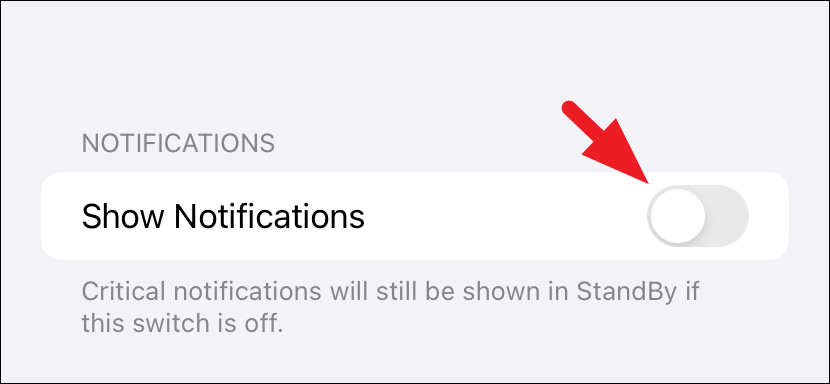
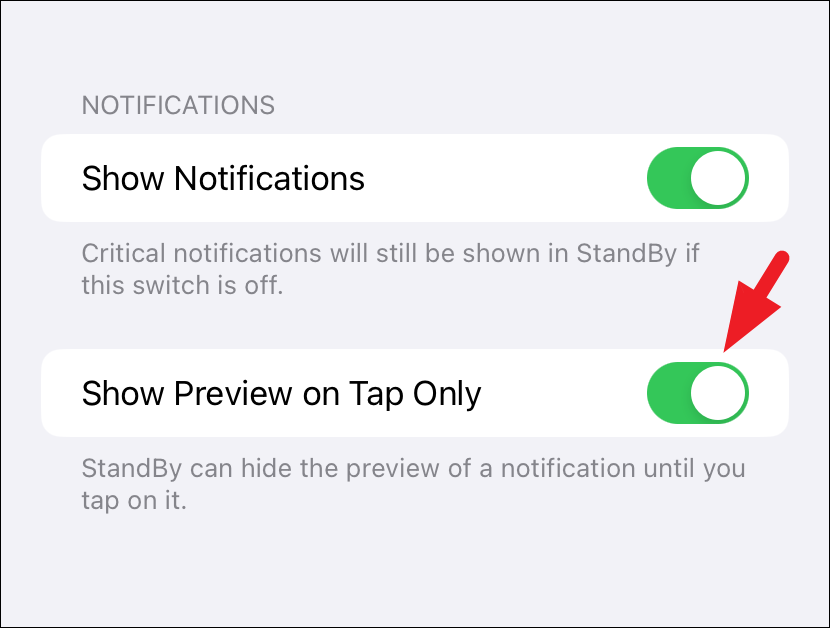
StandBy comes with notifications enabled by default. However, if you wish to disable them, you can do so by deactivating the ‘Show notifications’ toggle. It’s important to understand that, regardless of this setting, fundamental alerts encompassing health, battery status, and crucial weather updates will persist. This feature ensures that you always stay informed about vital information.
If you choose to maintain notifications on StandBy but wish to turn off the notification preview, you can activate the ‘Show Preview on Tap Only’ setting. This configuration will conceal the notification preview until you specifically tap on it, providing a balance between immediate visibility and privacy.
Conclusion
StandBy mode in iOS 17 allows you to turn your iPhone into a desk clock or digital photo frame. It displays critical information such as weather updates, calendar events, and stock market information. You can customize the layouts for widgets, photos, and the clock. StandBy mode is activated when your iPhone is charging and in landscape mode on a stable surface. You can also configure StandBy mode in the Settings app to enable features like Always On, Night Mode, and Motion to Wake.


