
Windows 11 improved upon Windows 10 in many ways but it did take a few steps back by removing certain features and functionality in the older OS. One example of this is the context menu that appears when you right-click on any object, such as a file or a folder.
The context menu has been simplified by hiding away many of the options that could earlier be accessed quickly. Now, an additional step is required to view the hidden options, which, for many users, is a worse experience than what earlier versions of Windows offered.
Fortunately, you can overcome this problem by customizing the context menu using the Registry Editor as well as third-party applications, tailoring it to suit your personal preferences and requirements.
Use the Registry Editor
Using the Registry Editor, you can customize the context menu in various ways, as explained below.
Create an app launcher shortcut
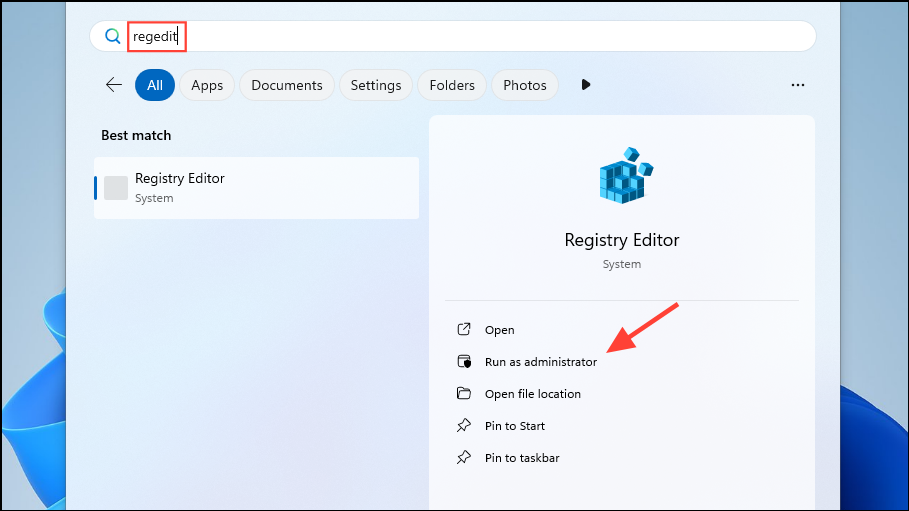
- Open the Start menu, type
regeditand click on 'Run as administrator' on the right to launch the Registry Editor.
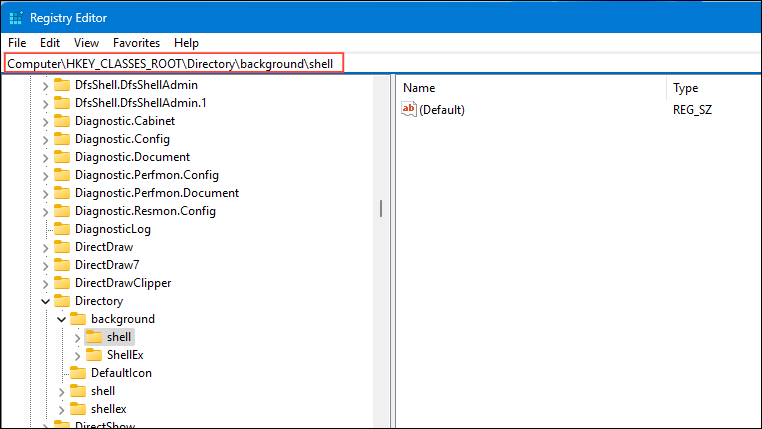
- Navigate to the following directory when the Registry Editor opens:
HKEY_CLASSES_ROOT*\Directory\Background\Shell.
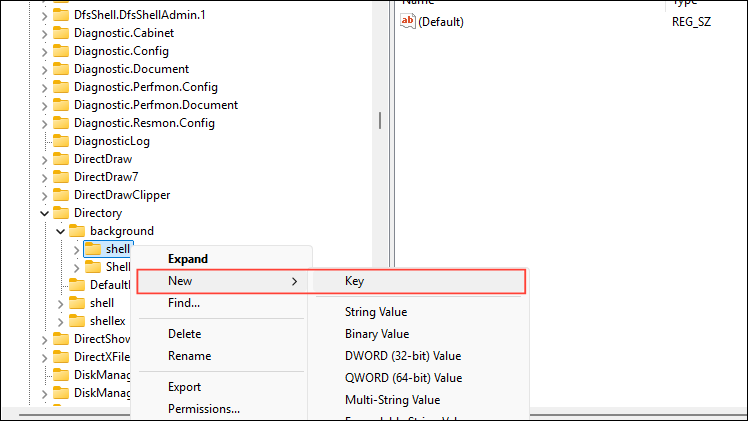
- Right-click on the 'Shell' folder and go to 'New' before selecting 'Key'.
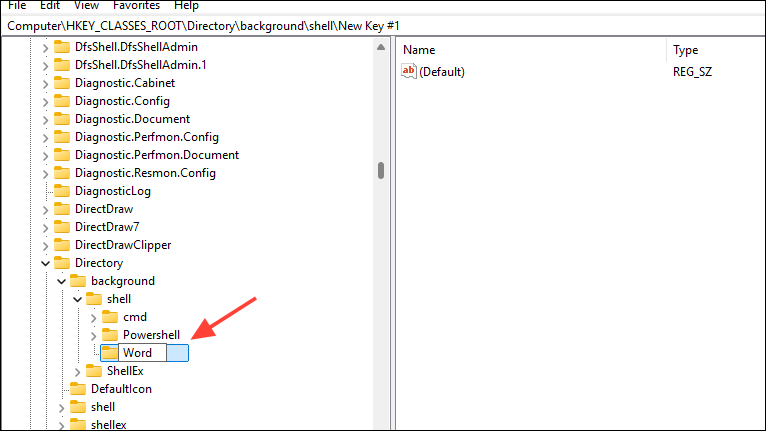
- Give the newly created a name, such as
wordif you're creating a shortcut to open Microsoft Word from the context menu.
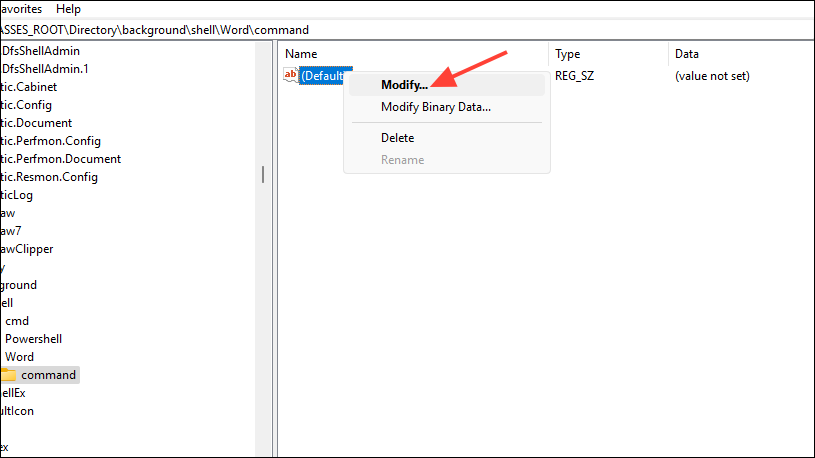
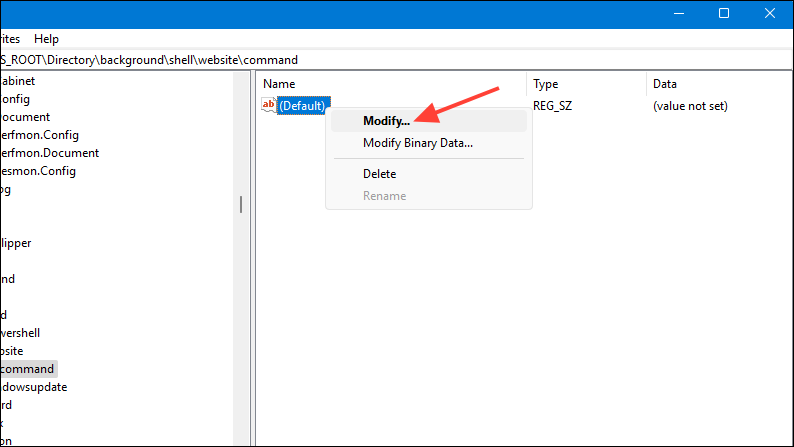
- On the right side, right-click on the 'Default' String and click on 'Modify'.
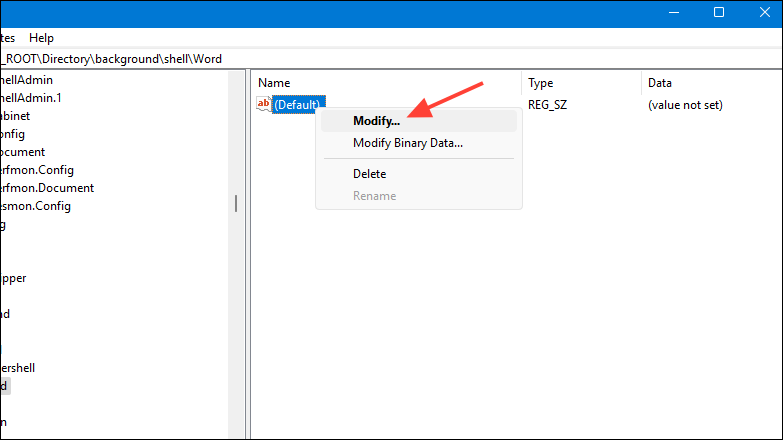
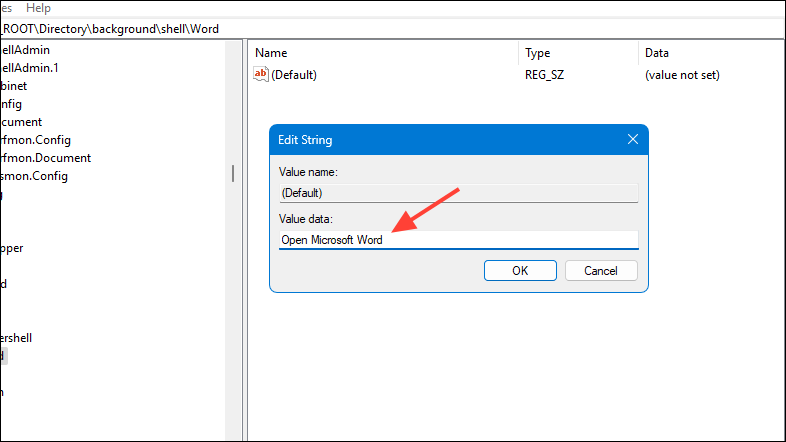
- Type in the name of the shortcut in the Value Data field, for example,
Open Microsoft Wordand click on OK.
- Then right-click on the 'Word' key you created on the left side and again go to 'New' and select 'Key'.
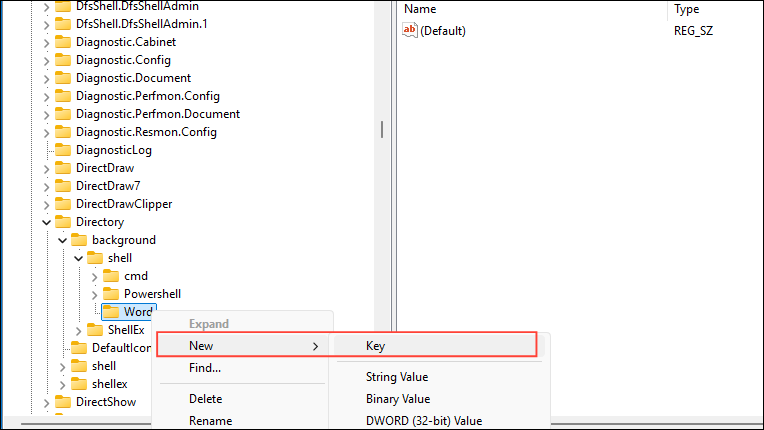
- Right-click on the newly created Key and name it
command.
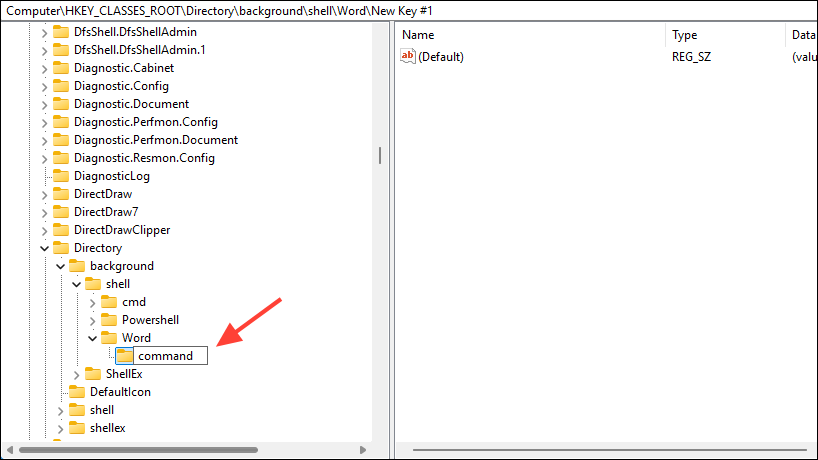
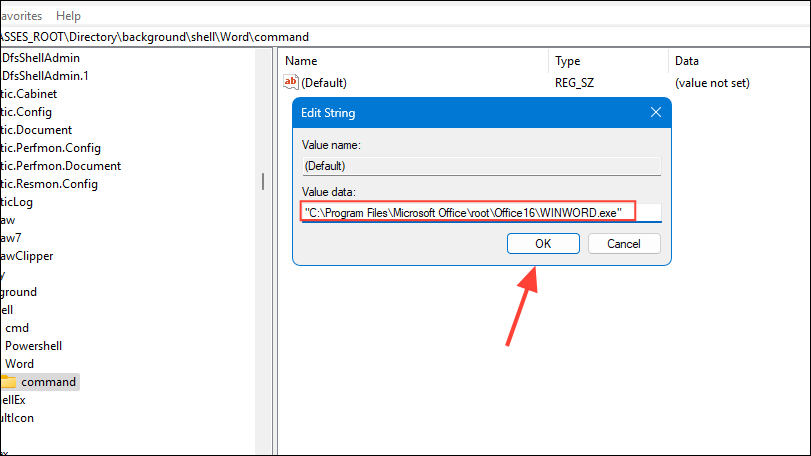
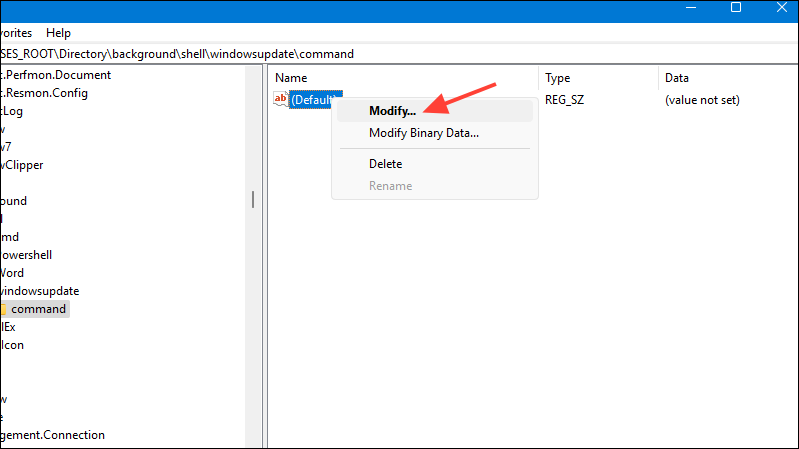
- Now, with the 'command' key selected, right-click on the 'Default' String on the right side and click on 'Modify'.
- Enter the path to the application launcher in the Value Data field and click on OK. For Microsoft Word, it is usually
"C:\Program Files\Microsoft Office\root\Office16\WINWORD.exe".
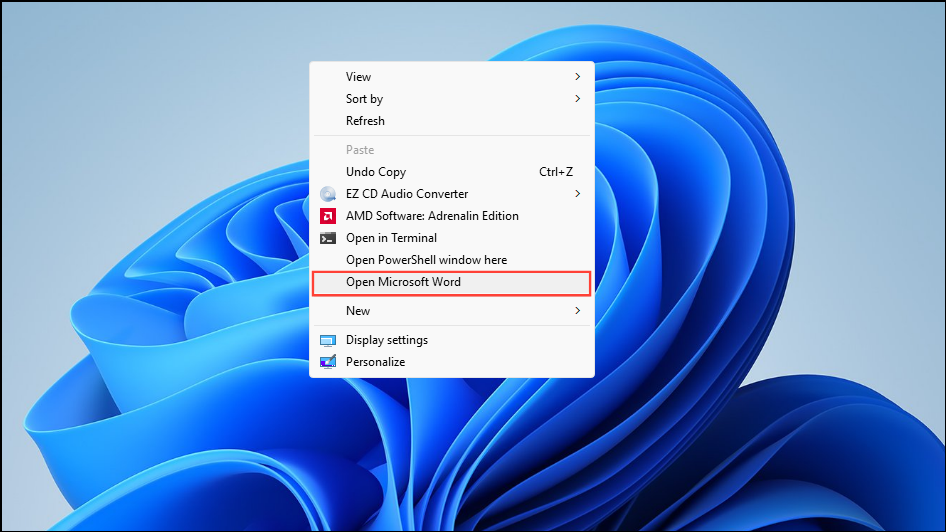
- Now, when you right-click on the desktop or inside the File Explorer, you should see the new shortcut to Microsoft Word in the context menu.
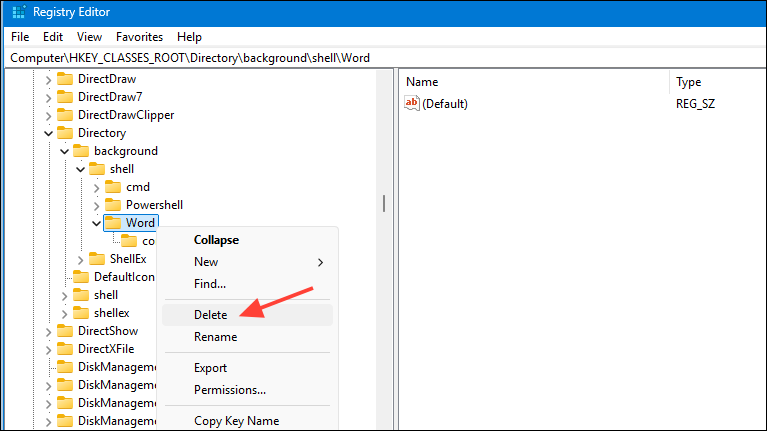
- In the same manner, you can add shortcuts for other applications, like Notepad, Paint, Calculator, File Explorer, and Clock. To remove the shortcuts you've created, simply open the Registry Editor and delete the Key, such as the 'Word' key in the above example.
Add a feature launcher shortcut
You can also add a feature launcher shortcut that lets you open Windows features, such as various pages in the Settings app, directly from the context menu.
- Open the Registry Editor and navigate to the following path:
HKEY_CLASSES_ROOT\Directory\Background\shell.
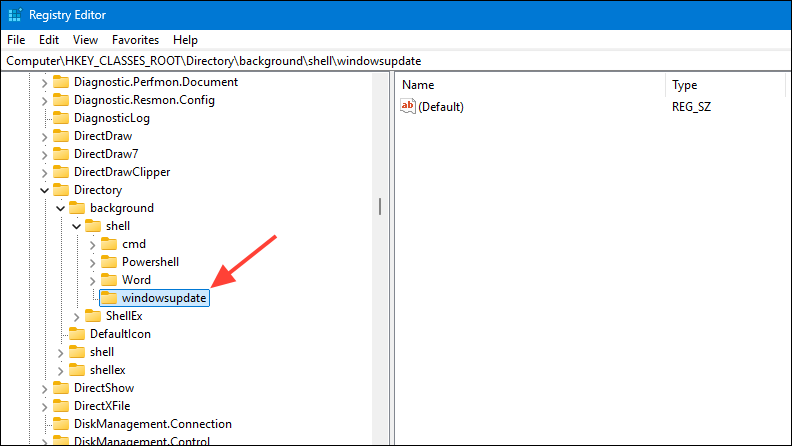
- Right-click on the 'Shell' folder and go to 'New' before selecting 'Key'.
- Give the newly created a descriptive name, such as
windowsupdateif you want to create a Windows Update launcher.
- Select the 'windowsupdate' key, right-click on the 'Default' string on the right side, and click on 'Modify'.
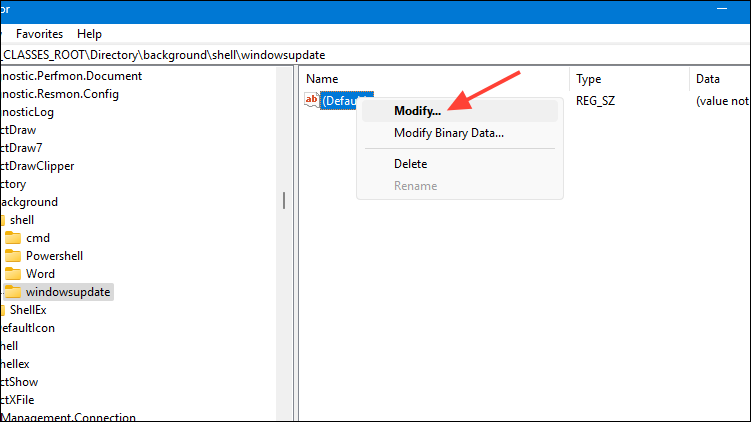
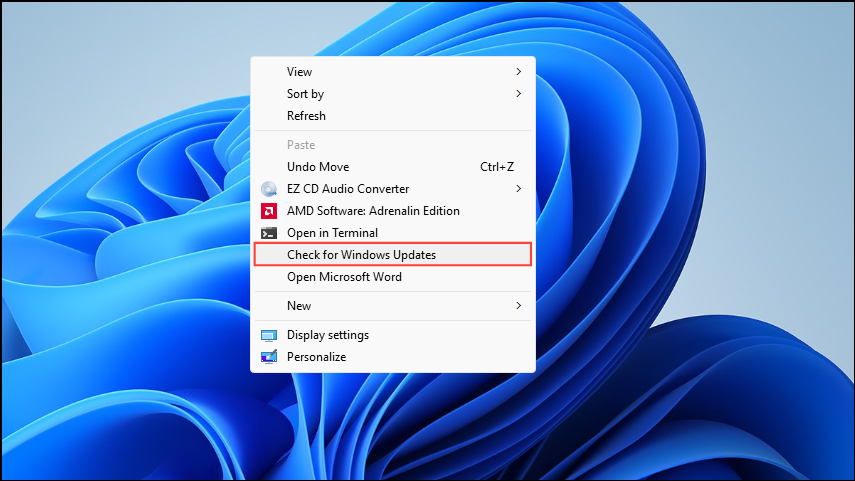
- In the Value Data field, type in the name you want for the shortcut, such as 'Check for Windows Updates' and click on OK.

- Now, right-click on the 'windowsupdate' key on the left, go to 'New' and again select 'Key'.
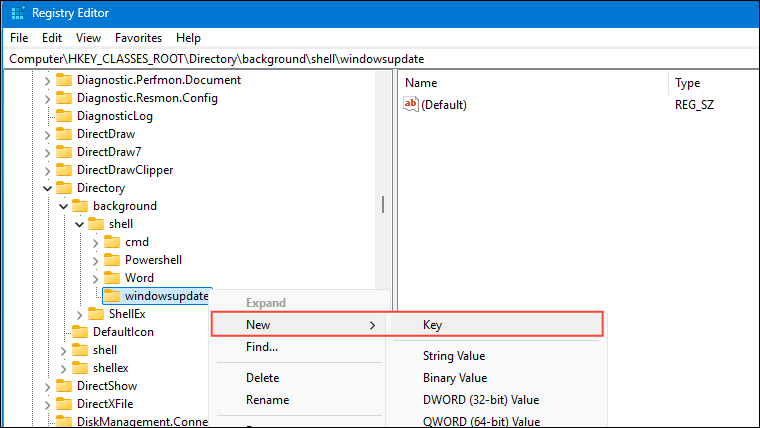
- Name the new key
commandand press Enter.
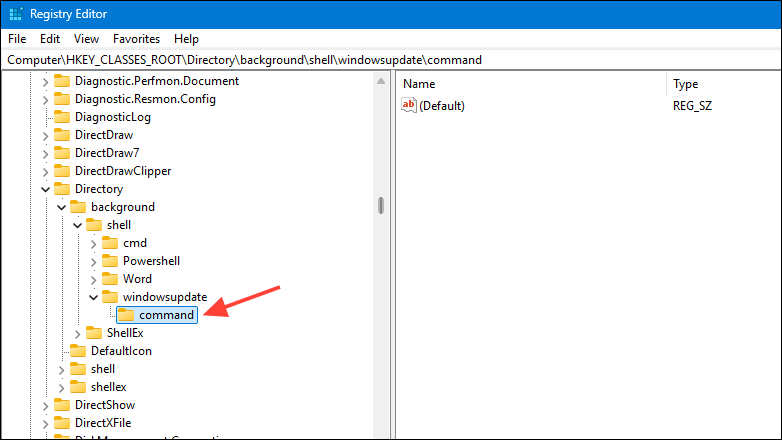
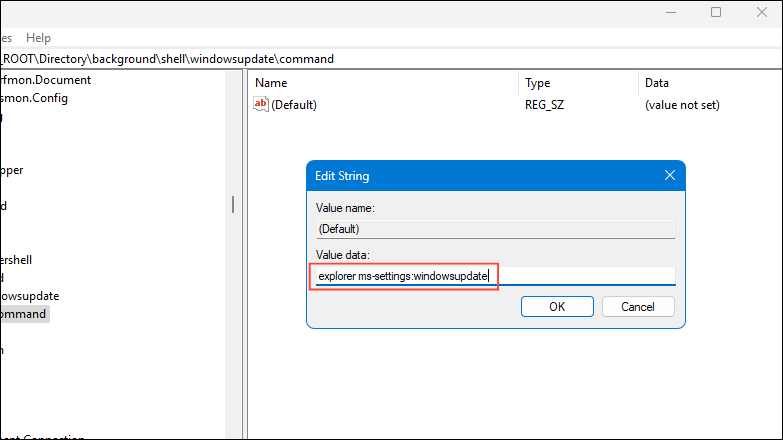
- With the 'command' key selected, right-click on the 'Default' string on the right and click on 'Modify'.
- Type in the path for the feature you want to add to the context menu and click on OK. For Windows Updates, the path will be
explorer ms-settings:windowsupdate.
- You can check whether the feature launcher shortcut is added to your context menu by right-clicking on an empty area on the desktop.
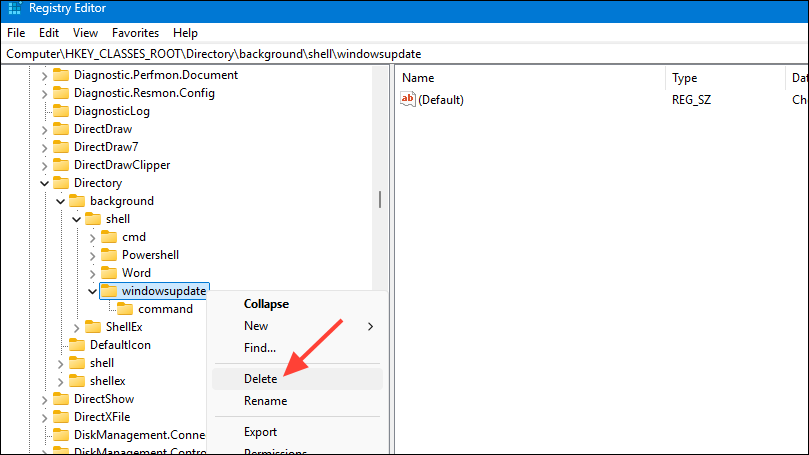
- You can add other launchers to open different controls from the Settings app, such as the Display setting, Start menu personalization setting, and more. To remove the shortcut from the context menu, just delete the first key you created in the 'Shell' folder.
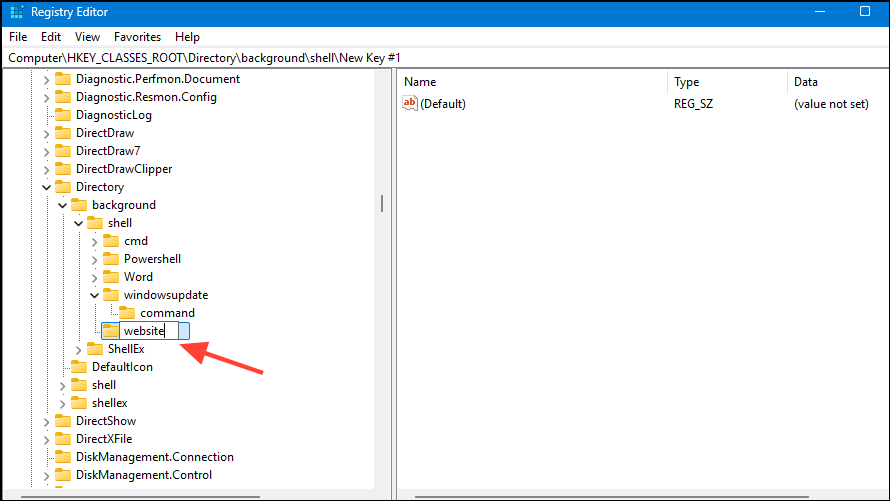
Add a shortcut to a particular website
You can add shortcuts in the same manner as explained above to open a particular website directly from the context menu.
- Open the Registry Editor and head to the following path:
HKEY_CLASSES_ROOT\Directory\Background\shell.
- Right-click on the 'Shell' folder and create a new key as before, naming it something like
website.
- Select the newly created key, right-click on the 'Default' string on the right and click on 'Modify'.
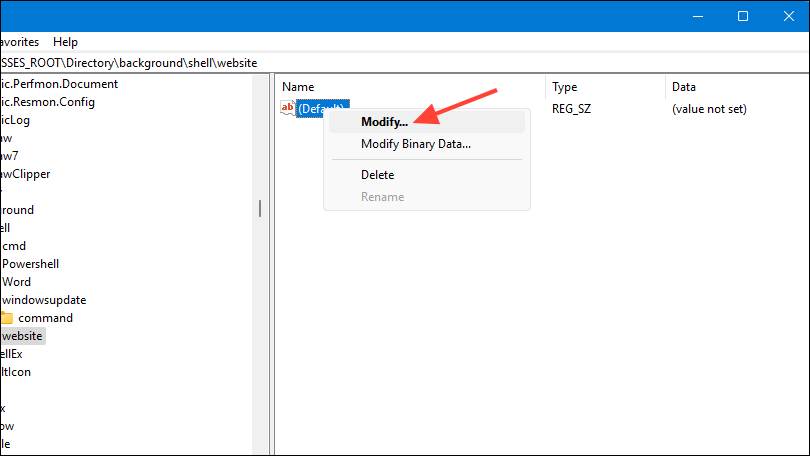
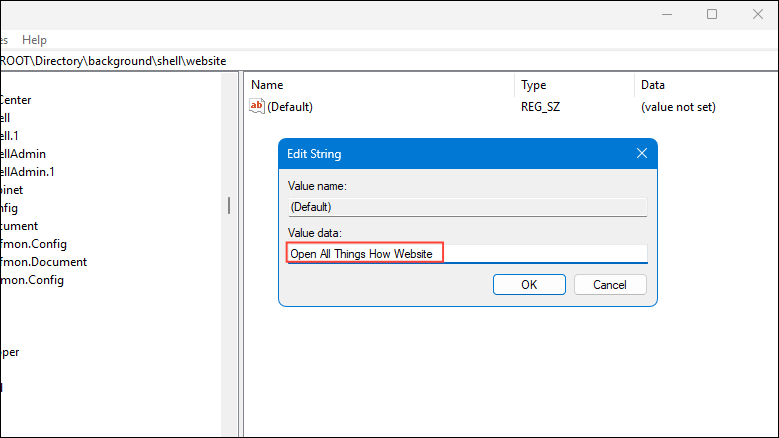
- In the Value Data field, type in the website you want the shortcut to open, such as
Open All Things How Websiteand click on OK.
- Now, right-click on the 'website' key and create another new key. Name the new key
command.
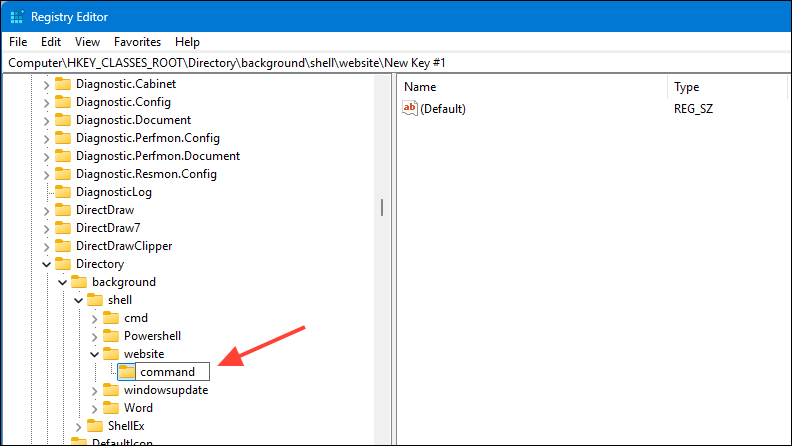
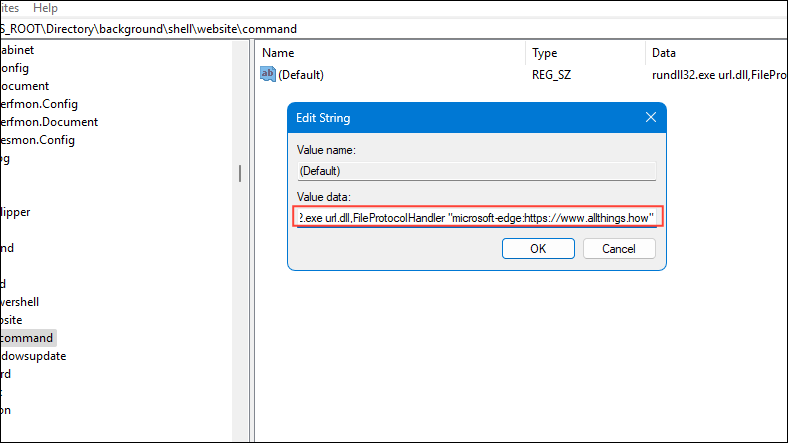
- Select the 'command' key and right-click on the 'Default' string on the right before clicking on 'Modify'.
- In the Value Data field, enter the path to launch the website, such as
rundll32.exe url.dll,FileProtocolHandler "microsoft-edge:https://www.allthings.how"and click on OK.
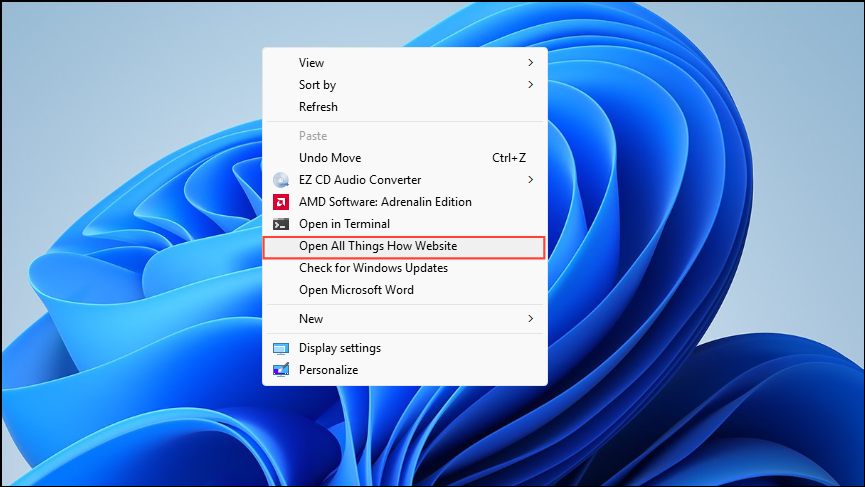
- Now, you will see the 'Open All Things How Website' option when you right-click on an empty area on the desktop. Click on it and the website should open in the Edge browser.
Restore the classic Windows 10 context menu
Since the Windows 11 context menu hides many of the options present in the older Windows versions, it can be tedious to use, since you require twice as many clicks as before to find the option you need. To change this, you can restore the classic context menu present in Windows 10.
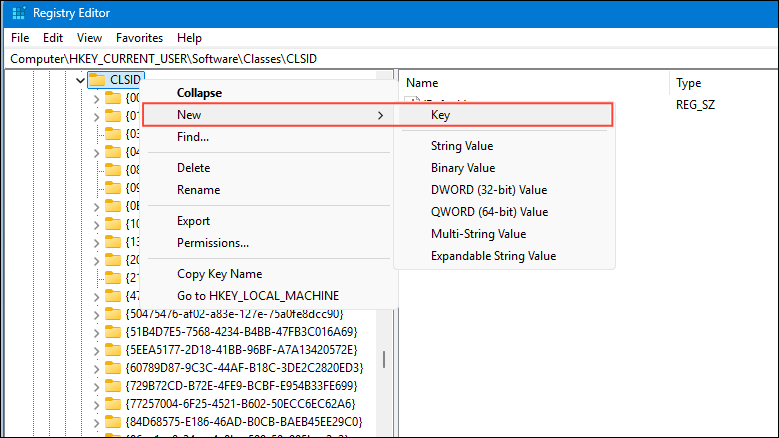
- Open the Registry Editor and head to
HKEY_CURRENT_USER\SOFTWARE\CLASSES\CLSID.
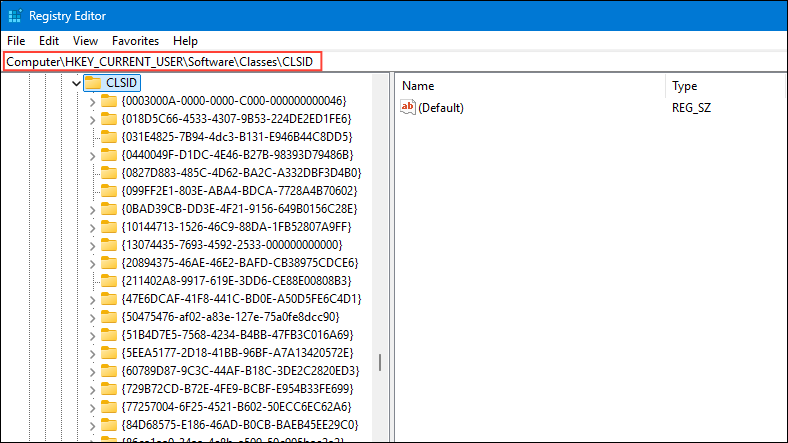
- Right-click on the CLSID folder and create a new key.
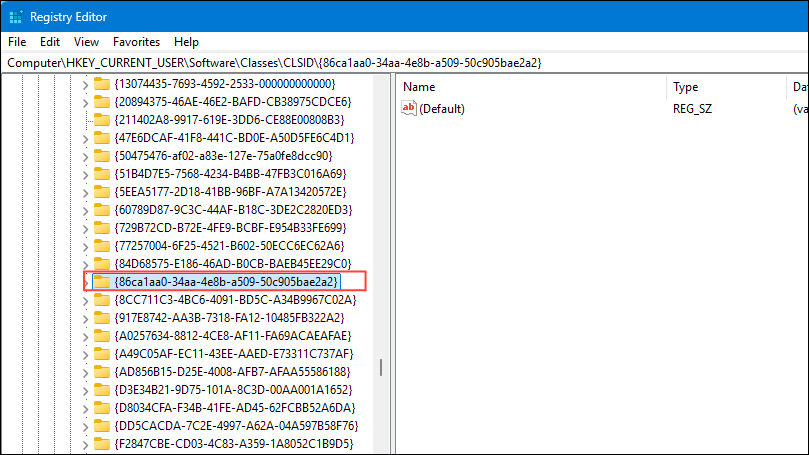
- Name the new key
{86ca1aa0-34aa-4e8b-a509-50c905bae2a2}.
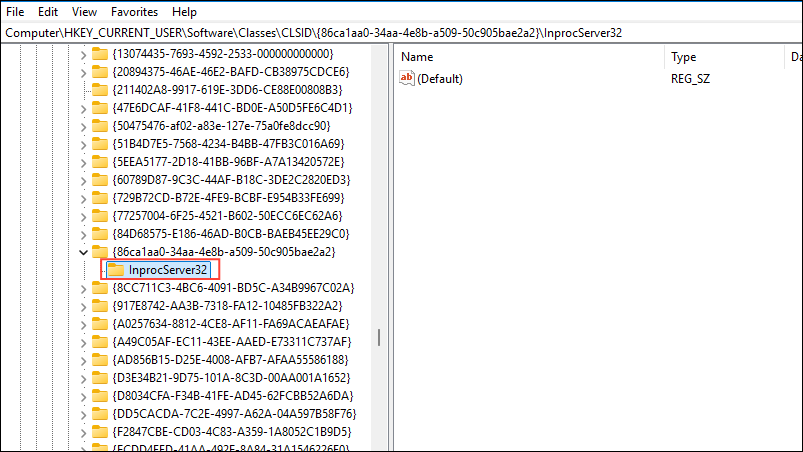
- Right-click on the newly created key and create another key, naming it
InprocServer32.
- Right-click on the 'Default' string on the right and click on 'Modify'.
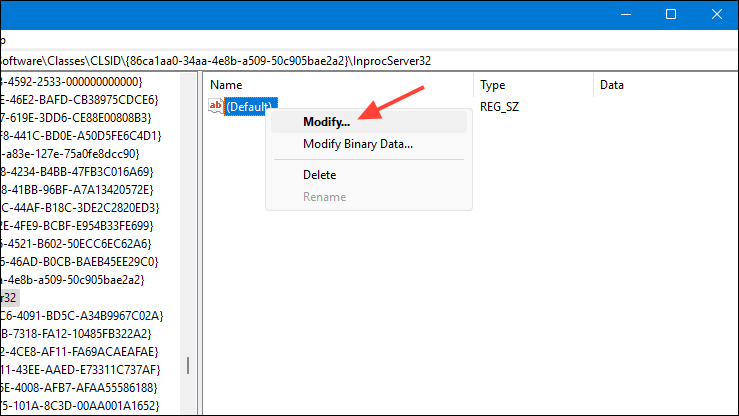
- Click on the Value Data field and press the
SpaceandBackspacekeys to clear it before clicking on OK. Then reboot your PC and you should now have access to the classic Windows 10 context menu.
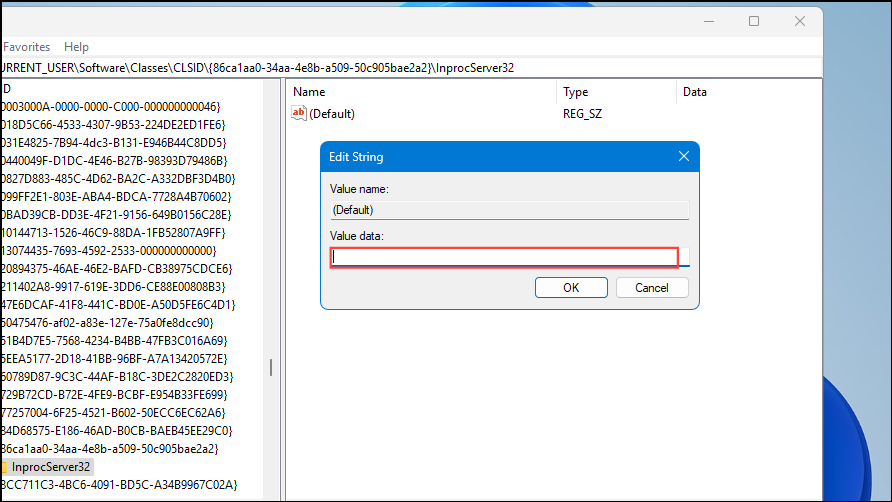
reg add "HKCU\Software\Classes\CLSID\{86ca1aa0-34aa-4e8b-a509-50c905bae2a2}\InprocServer32" /f /ve. Press Enter and restart your PC to get the classic context menu back. Add a context menu item for a specific file type
You can also add custom items to the context menu that appear when you right-click on a specific file type, such as a notepad .txt file. This lets you open that specific file using a particular program without having to change the default application for it.
- Open the Registry Editor and navigate to:
HKEY_CLASSES_ROOT\SystemFileAssociations\[EXT], with EXT being the file extension you are looking for. For example, if you want to add a custom menu item for a .txt file, you can head toHKEY_CLASSES_ROOT\SystemFileAssociations\.txt. - Create a new key called
shellhere. Then right-click on the 'shell' key and create another key calledmycommandor something else. - Right-click on the 'Default' string on the right in the 'mycommand' key and and click on 'Modify'.
- In the 'Value data' field, set the name for the shortcut, such as
Open This Txt File in Chrome. - Create another key called
commandunder themycommandkey and right-click on the 'Default' string on the right. - Enter the path to the executable in the Value Data field followed by
"%1", likeC:\Program Files\Google\Chrome\Application\chrome.exe" "%1". - Click on the 'OK' button and right-click on the file with the respective extension to check whether the item you added appears or not. If it does not, you may have to log out and then sign back in.
Add context menu items for all file types
You can also add items to the context menu that will appear whenever you click on any file, irrespective of its type.
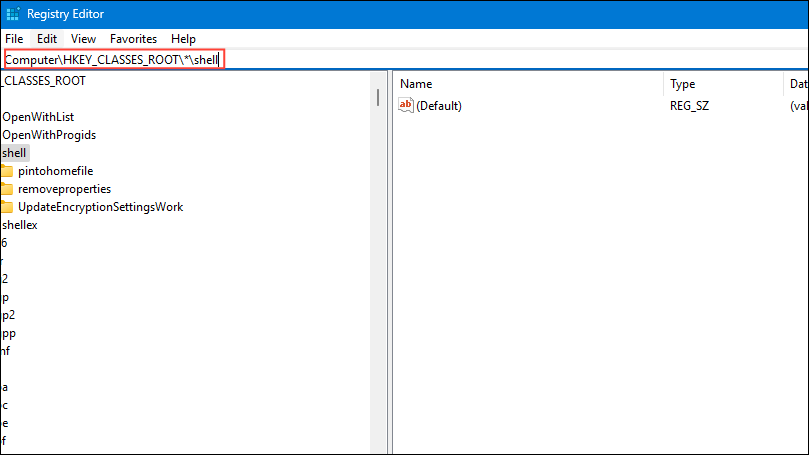
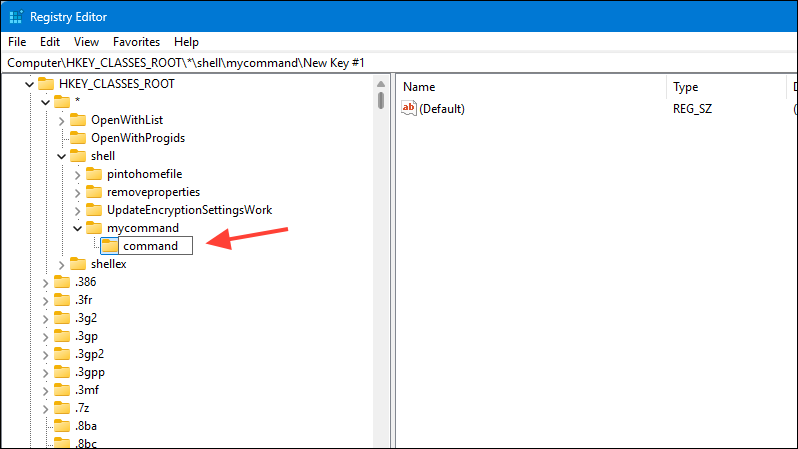
- Open the Registry Editor and navigate to:
HKEY_CLASSES_ROOT\*\shell.
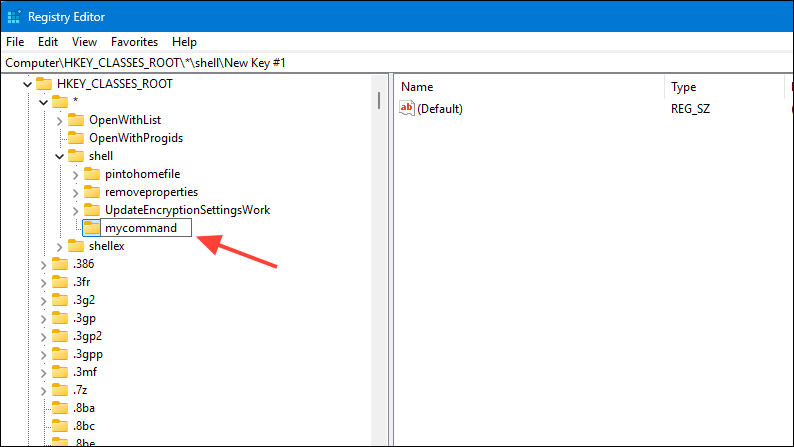
- Right-click on the 'shell' key and create a new key called
mycommandunder it.
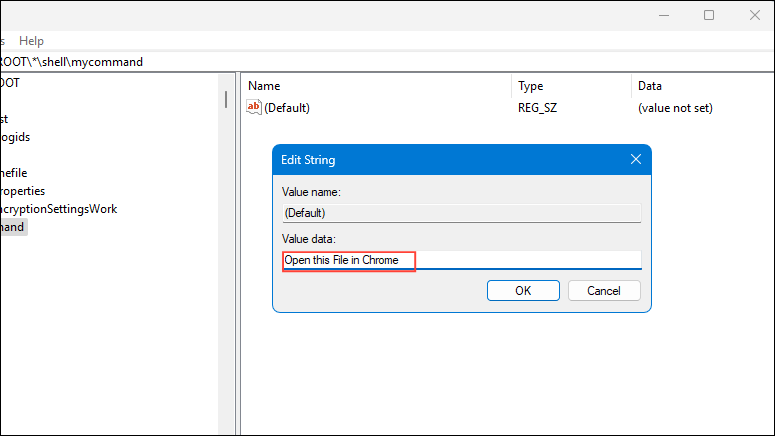
- Right-click on the 'Default' string on the right and click on 'Modify'.

- Then, in the Value Data field, type in the text you want to appear as the menu item, such as
Open this File in Chrome.
- Create another key called
commandunder 'mycommand'.
- To open a file in Chrome with the context menu, enter the following path in the Value Data field for the 'Default' string on the right:
"C:\Program Files\Google\Chrome\Application\chrome.exe"and click on OK.
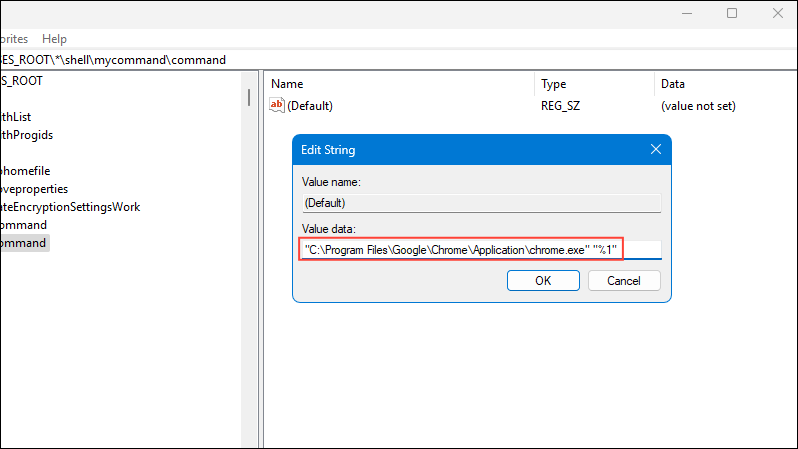
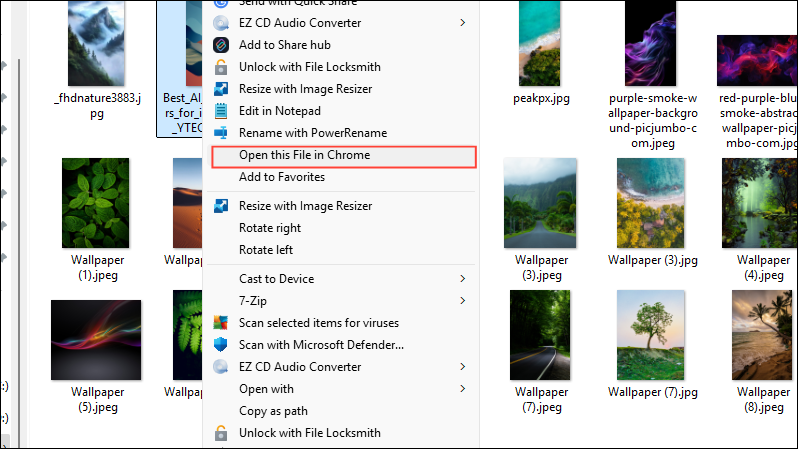
- Right-click on any file and you should see the 'Open File in Chrome' menu.
Use a third-party tool
If using the Registry Editor seems too complicated or risky to you, you can rely on third-party tools to customize the context menu.
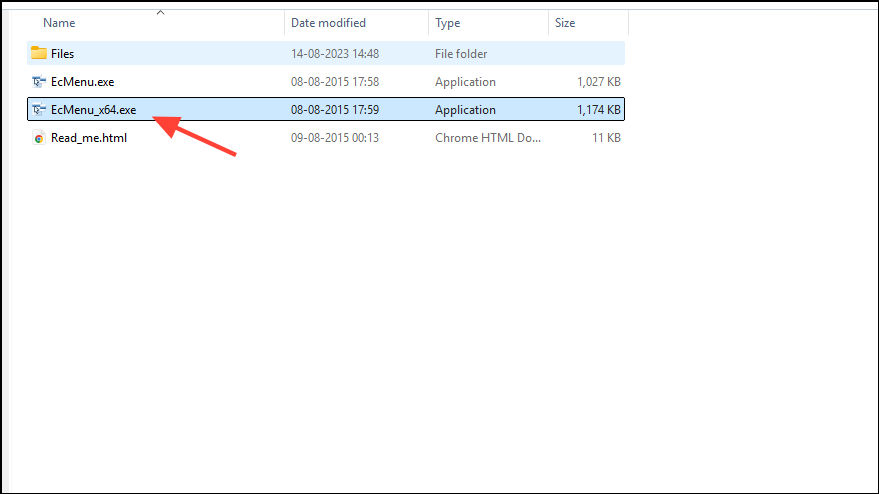
- Go to the Easy Context Menu website using your web browser and download the program.
- Once the download is complete, extract the .zip file and run the .exe or .exe 64 program inside the folder, depending on your system.
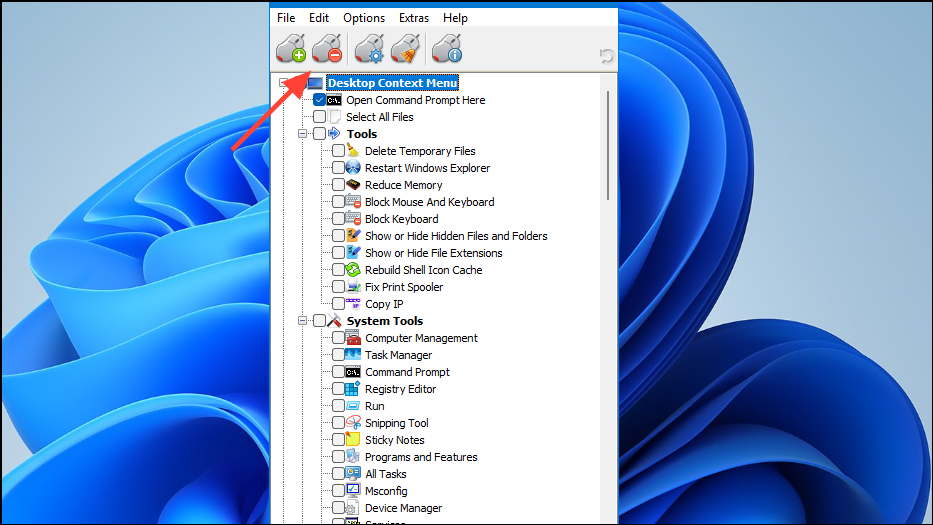
- Now, you can simply click on the checkboxes for the items you want to add to the context menu.
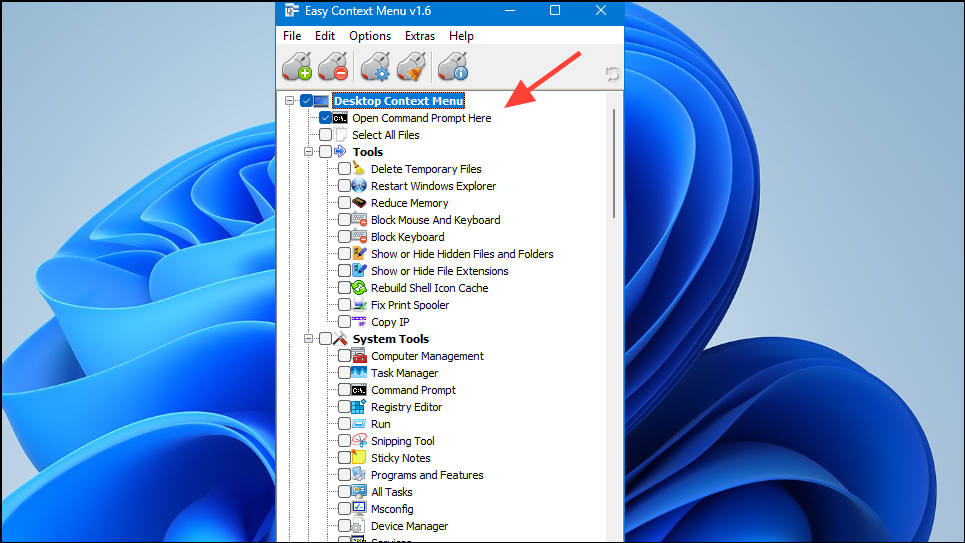
- Once you have selected all the options you want, click on the 'Apply changes' button.
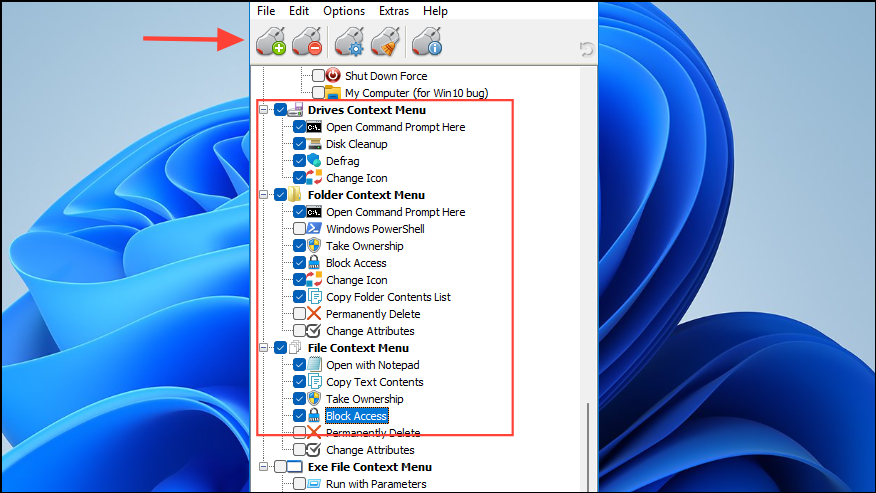
- To remove the items you've added using the Easy Context Menu, click on the 'Uninstall All' button at the top. You can also edit the items in the list using the third button at the top.
Things to know
- You can add custom icons to the shortcuts you add to the context menu for opening apps and launching websites. For this, you can use the icons in the icon library in Windows or download third-party ones from the internet.
- Make sure to back up your registry before making any changes to it. Making changes to it without having proper knowledge can cause serious problems and even make your computer unusable.
- You can find a list of the paths for various items such as applications and features you want to add to the context menu on Microsoft's website.
- Other third-party apps like Custom Context Menu and ShellExView can also help you customize the context menu.