If you are planning to give away or sell your Mac then the first thing you should do is to erase the data on it. You wouldn’t want all your data which includes your files, pictures, videos, and apps, etc to be there on the Mac when you sell it.
You might also want to erase data on the drive and reinstall macOS if your Mac has run into some software issues and is not working as expected and First Aid in disk utility is unable to fix the problem.
In this article, we will show you how to erase the hard drive on your Mac and reinstall macOS before you hand it over to someone else or fully restore the Mac to its factory state if it is having some issues.
We strongly recommend that you take a backup of your data on Mac using Time Machine so that we can restore your data after formatting it.
We would also recommend that you connect your Mac to the Internet via WiFi or Lan cable before beginning the process. This is in case if any files are missing during formatting or installation, the Mac can automatically download them from Apple servers.
Delete Data on Mac
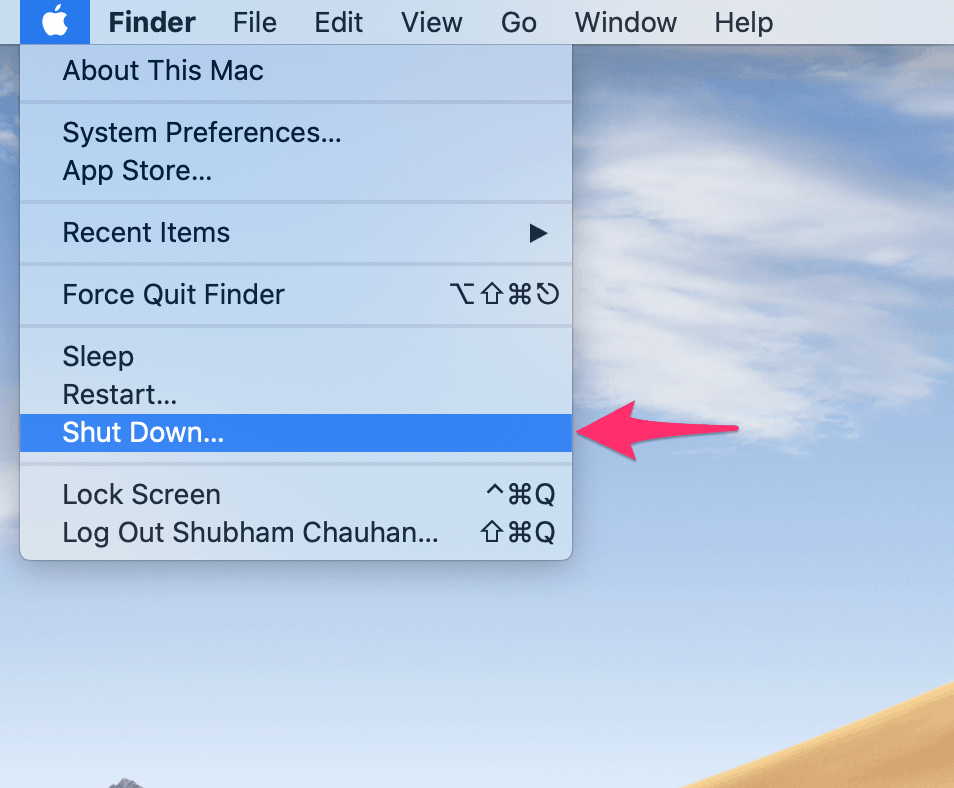
Once we have the backup ready we can proceed to erase the disk. For doing this you need to shut down your Mac by selecting ‘Shut Down’ from the Apple Menu at the top left corner of your Mac home screen.
Once the Mac has shut down, press and hold the Command + R keys and then press the Power key on your Mac to boot into the macOS Recovery menu.
You can release the keys when you see the Apple logo on the screen.

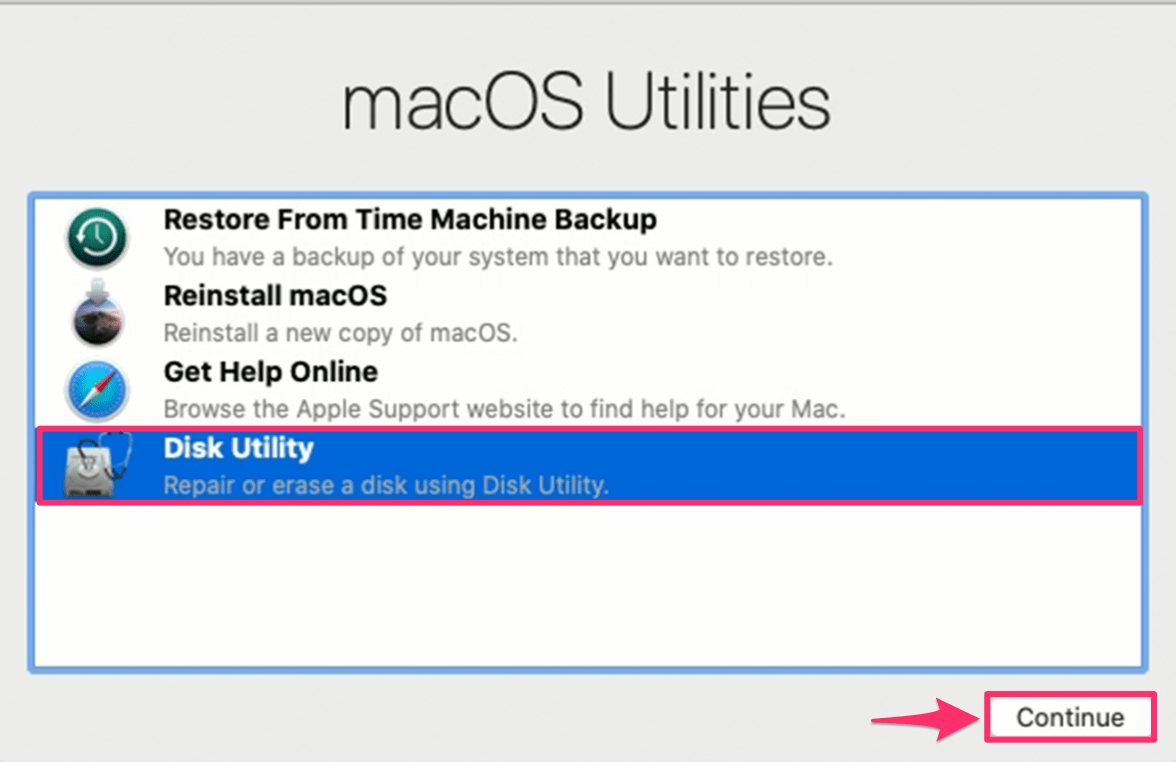
The combination of the keys will open macOS utilities in macOS recovery. It is part of the built-in recovery system of your Mac. You can use macOS Recovery and use its utilities to recover from certain software issues, reinstall macOS and also to repair or erase the disk.
Select ‘Disk Utility’ and click the ‘Continue’ button at the bottom right.
Next, you will see a window where the sidebar on the left in Disk Utility will show the name of your startup disk. This is named Macintosh HD by default unless you renamed it.
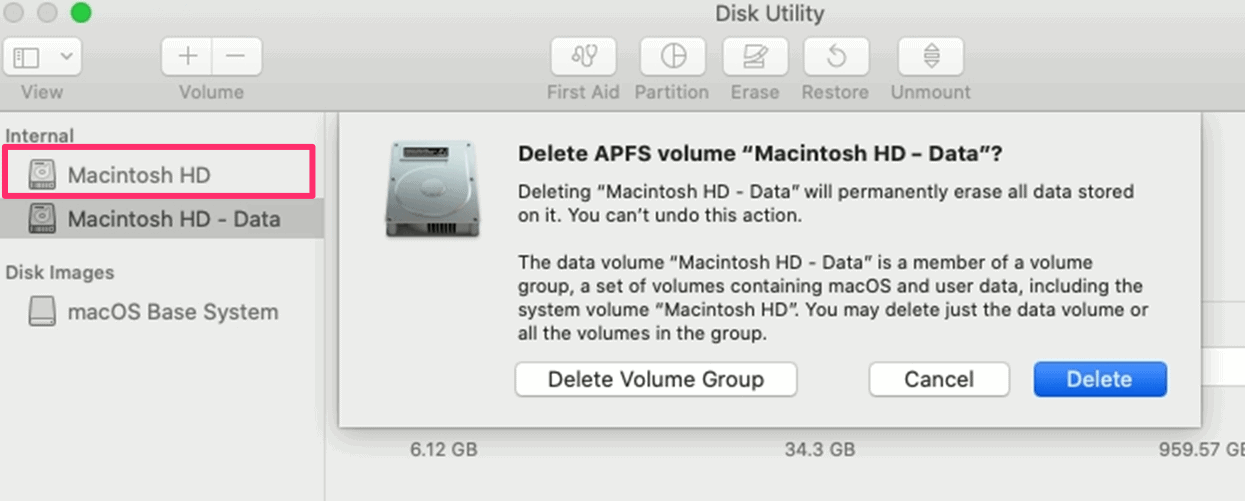
Just below this, you will see Macintosh HD – Data. This is the volume with all your data in it. You need to select this volume and click on the delete volume button (–) on the top left side.

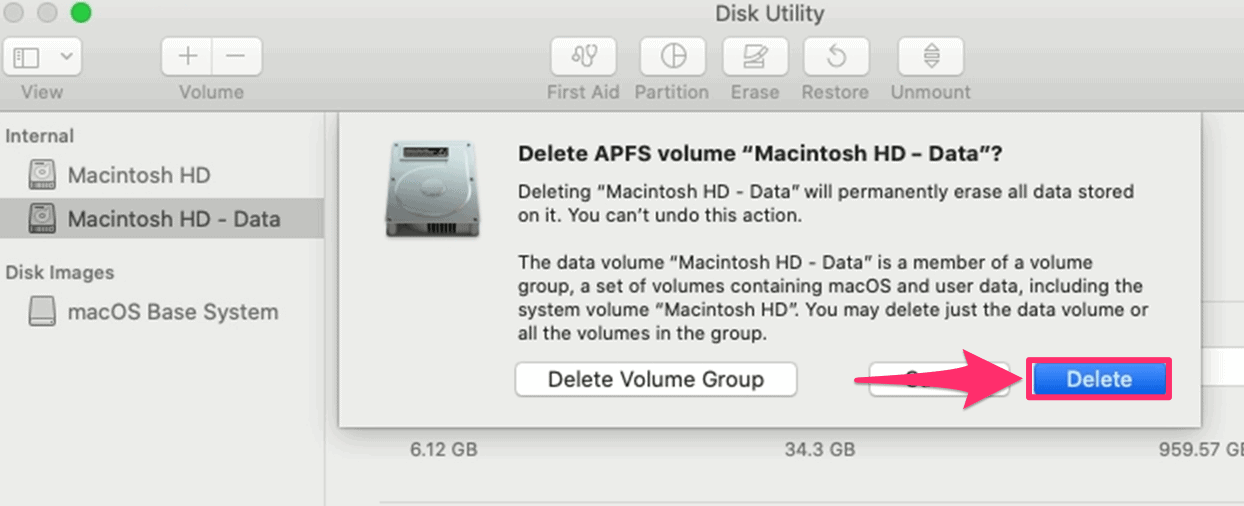
On the confirmation dialogue, click the ‘Delete’ button to proceed. Do not click Delete Volume Group. You can repeat the process if you have multiple volumes just be careful not to delete the volume named Macintosh HD as it contains system and system support files.
Erase/Format Startup Disk
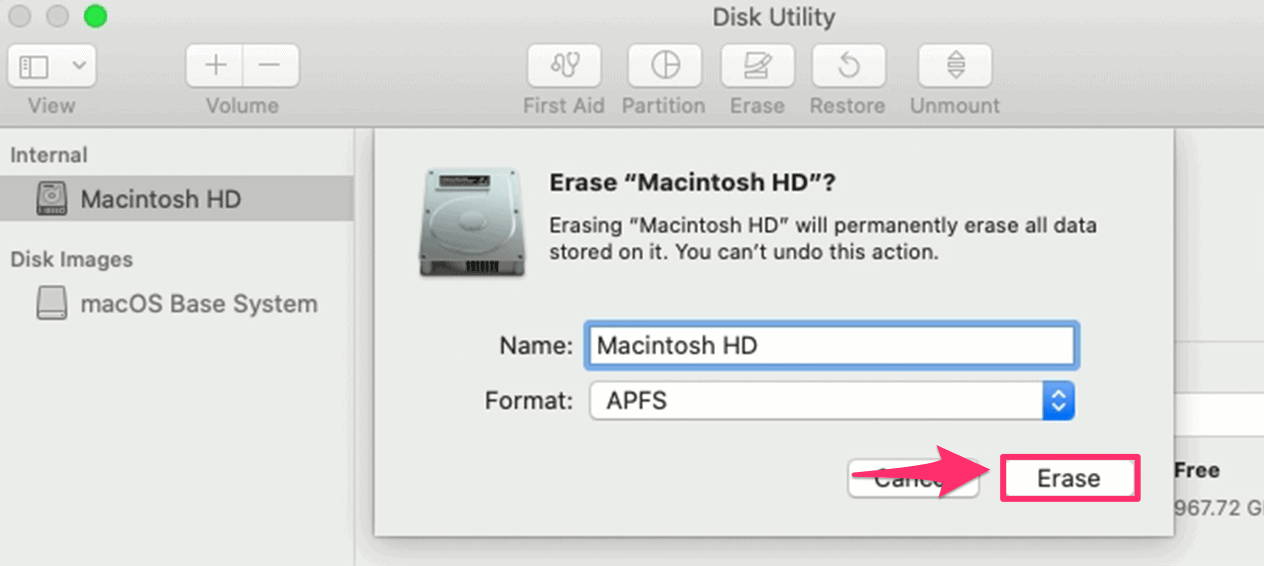
To erase the Mac Startup Disk, select ‘Macintosh HD’ from the left panel and click on the ‘Erase’ button. After you do that the utility will ask you to a name to the drive after formatting it, you can use any name, even the same ‘Macintosh HD’ name.
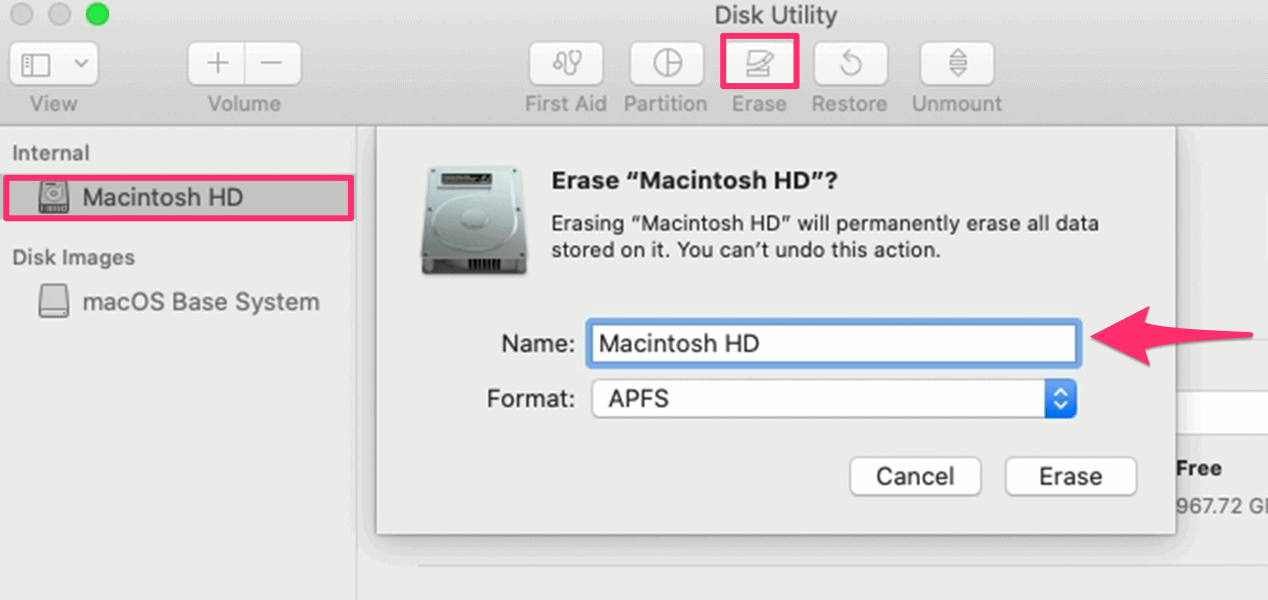
For the file system format, choose APFS (Apple File System) on newer Mac devices, or Mac OS (Journaled) on older devices.
After renaming the disk, click ‘Erase’ button to begin erasing. You might get a pop up to enter your Apple ID and Password registered with your Mac.
Reinstall macOS
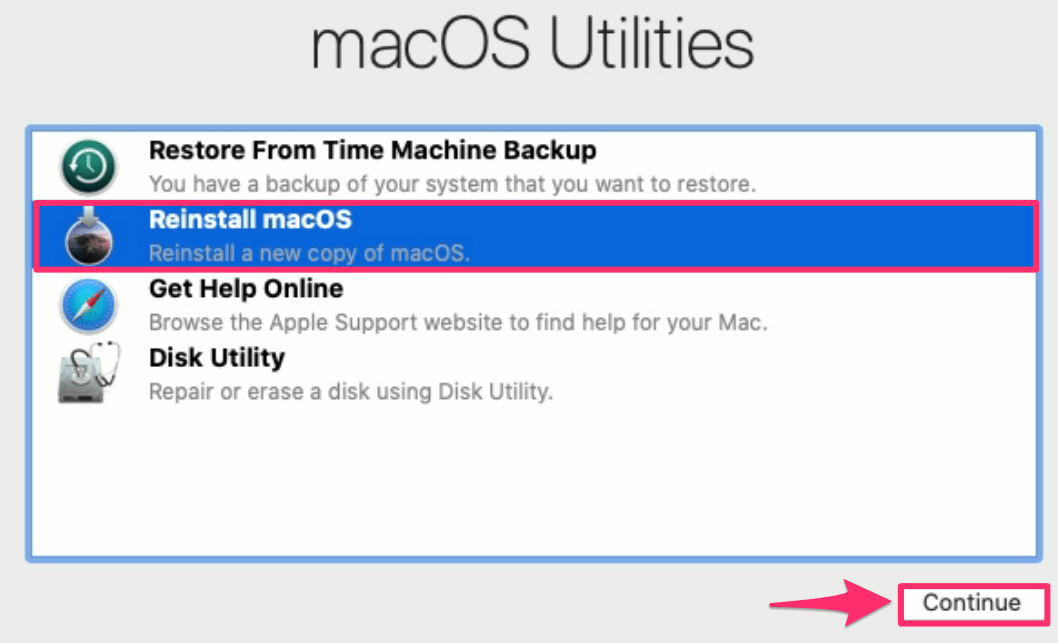
Once the drive is erased and formatted quit Disk Utilities by pressing Command + Q. This will take you back to the macOS Utilities window.
Select ‘Reinstall macOS’ option and click the ‘Continue’ button to install a fresh copy of macOS on your Mac.
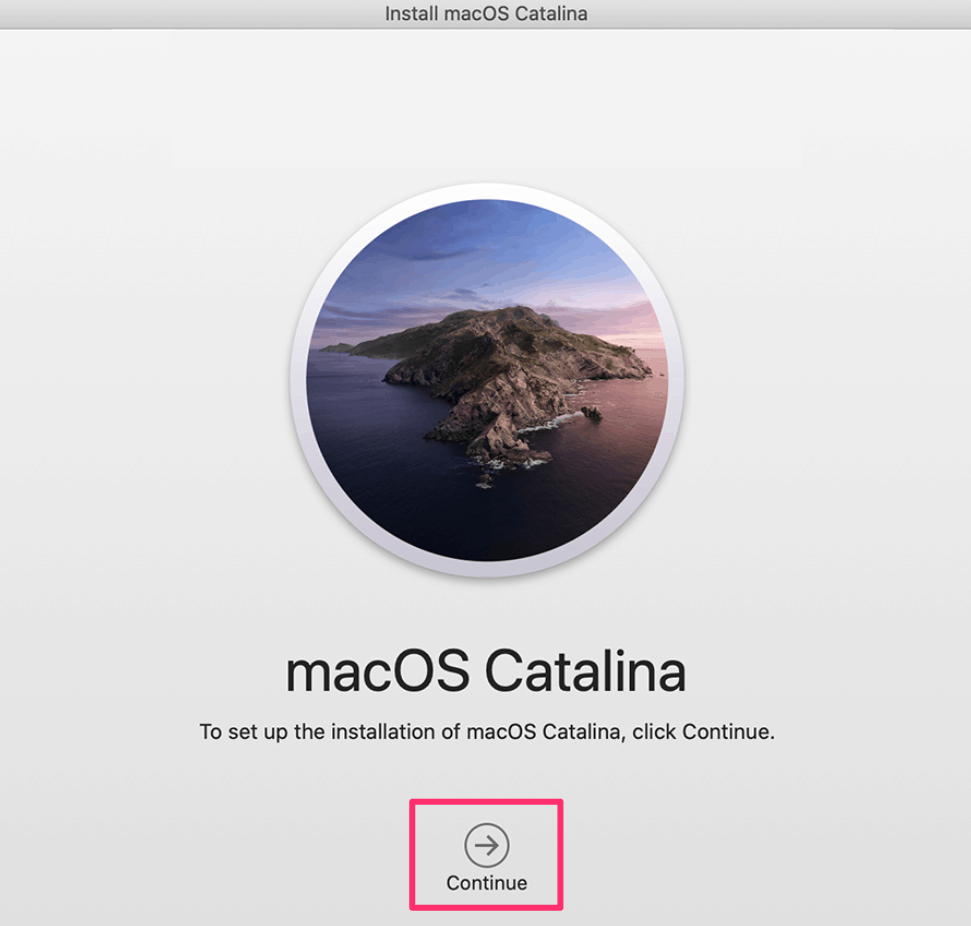
You will now be taken to the window where the latest version of macOS that is compatible with your system will be displayed. Click ‘Continue’ to begin the installation.
Please allow installation to complete without putting your Mac to sleep or closing its lid. We would also advise keeping your Mac plugged in during the entire process. Once the installation is complete your Mac will restart with setup your Mac Screen.