Blank rows in Excel spreadsheets can disrupt data continuity and interfere with functions such as sorting and filtering. Removing these empty rows enhances data integrity and ensures that Excel's features work as intended. This guide outlines several methods to efficiently delete blank rows in Excel.
Quickly Removing Blank Rows Using 'Go To Special'
Step 1: Select the range of data from which you want to remove blank rows.
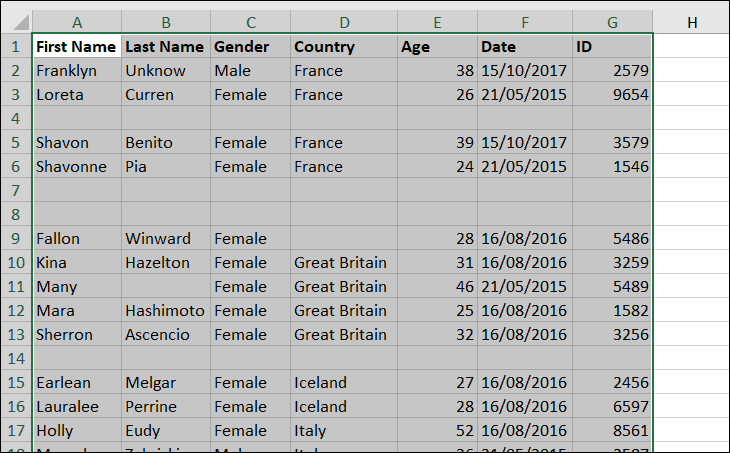
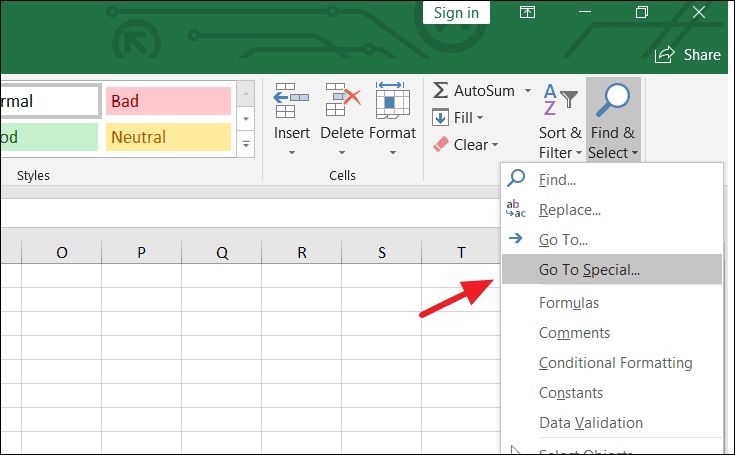
Step 2: Navigate to the Home tab, click on Find & Select, and choose Go To Special from the dropdown menu.
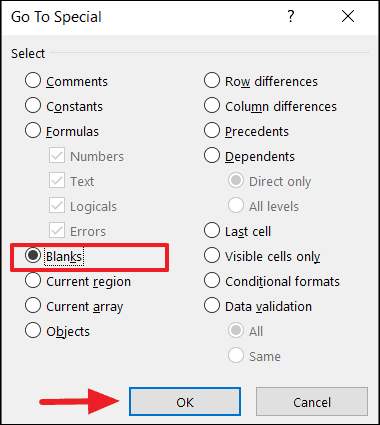
Step 3: In the Go To Special dialog box, select Blanks and click OK.
All blank cells within the selected range will now be highlighted.
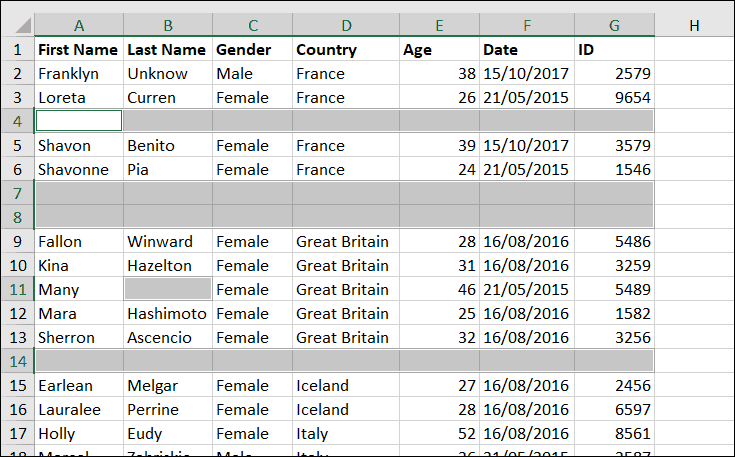
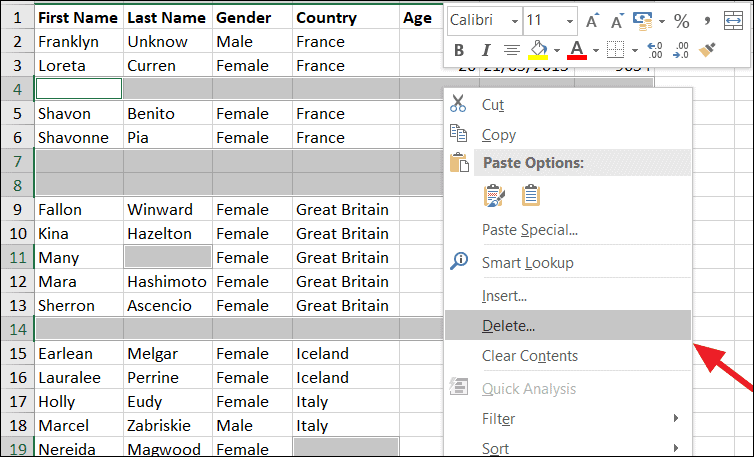
Step 4: Right-click on any of the selected blank cells and choose Delete from the context menu.
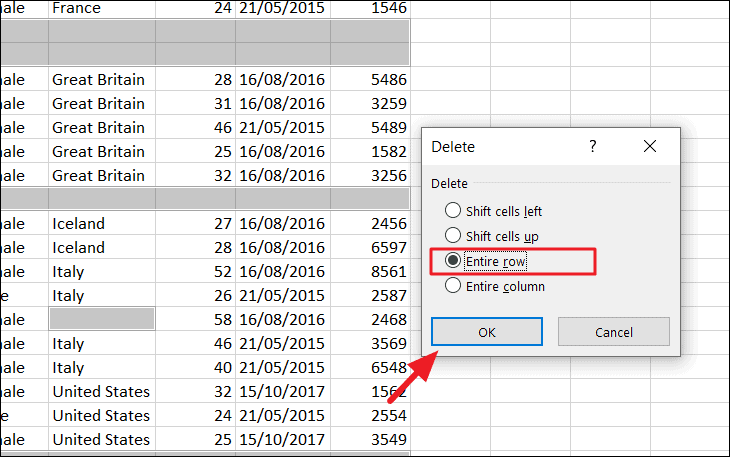
Step 5: In the Delete dialog box, select Entire Row and click OK.
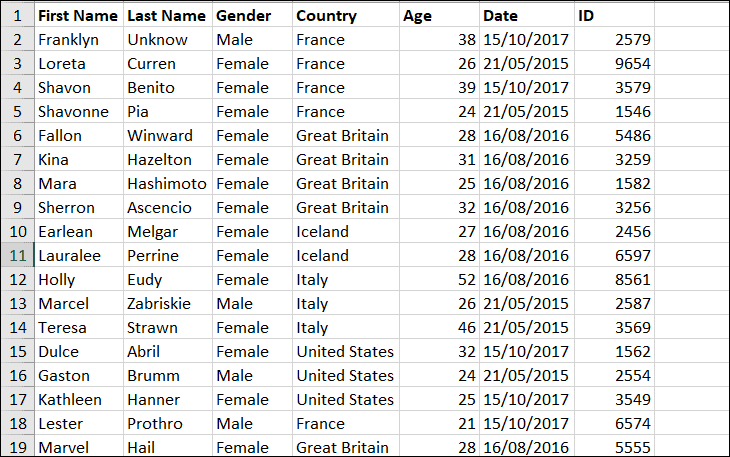
All blank rows within the selected data range will be removed.
Alternatively, you can go to Home > Delete > Delete Sheet Rows after selecting the blank cells to achieve the same result.
Removing Blank Rows Using Filter Functionality
If your dataset contains rows where some cells are empty but others contain data, you can use Excel's filtering feature to remove only completely blank rows.
Step 1: Select the entire data range you are working with.
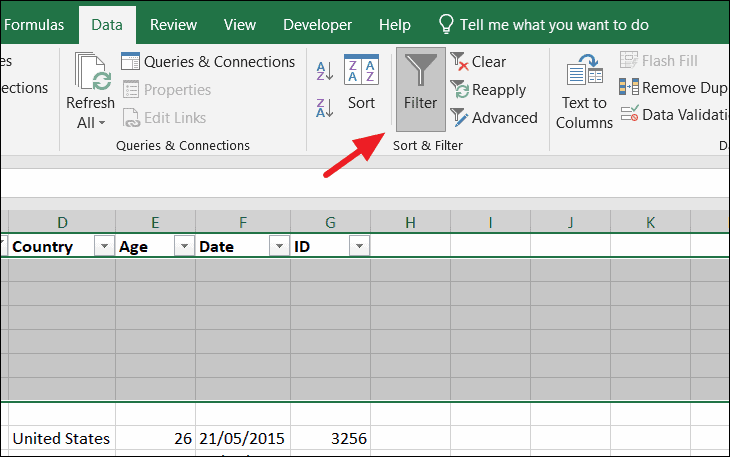
Step 2: Go to the Data tab and click on the Filter icon in the Sort & Filter group, or press Ctrl+Shift+L to apply filters.
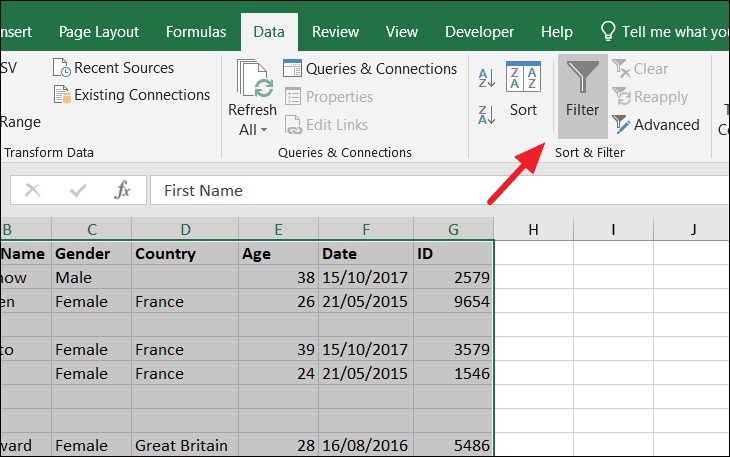
Filter arrows will appear in the header cells of each column.
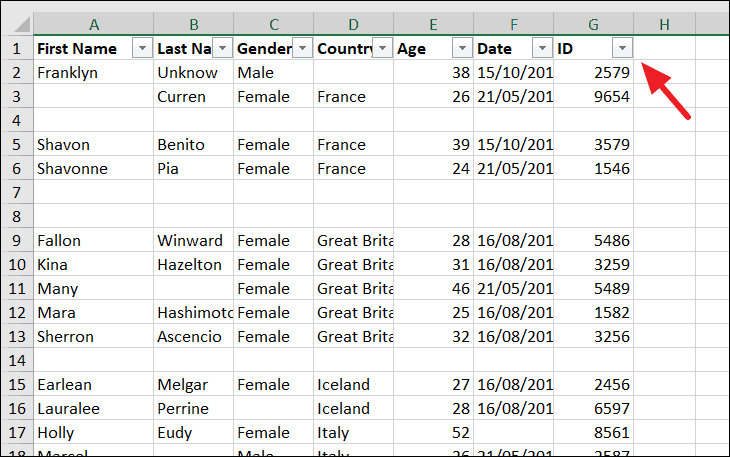
Step 3: Click the filter arrow in one of the columns and uncheck the Select All option. Then, scroll down and check the Blanks option. Click OK.
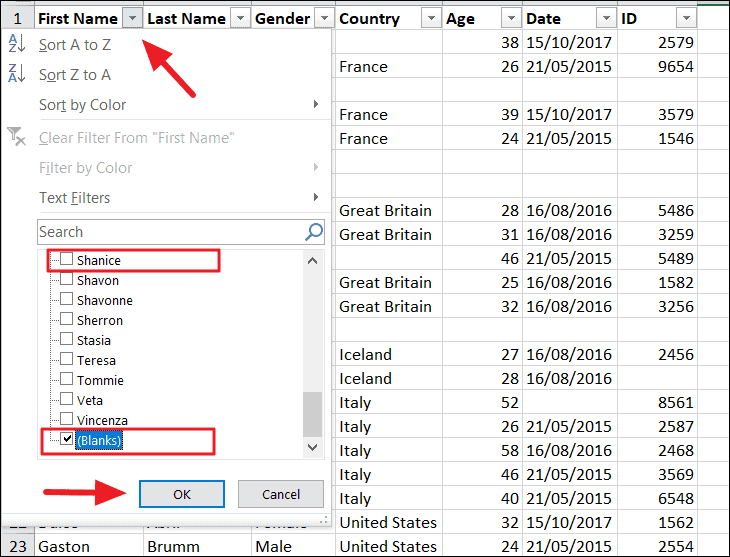
Repeat this step for each column to ensure all completely blank rows are displayed.
Step 4: The filtered rows will now show only the blank rows. Select these rows by clicking on their row numbers. The row numbers will appear in blue.
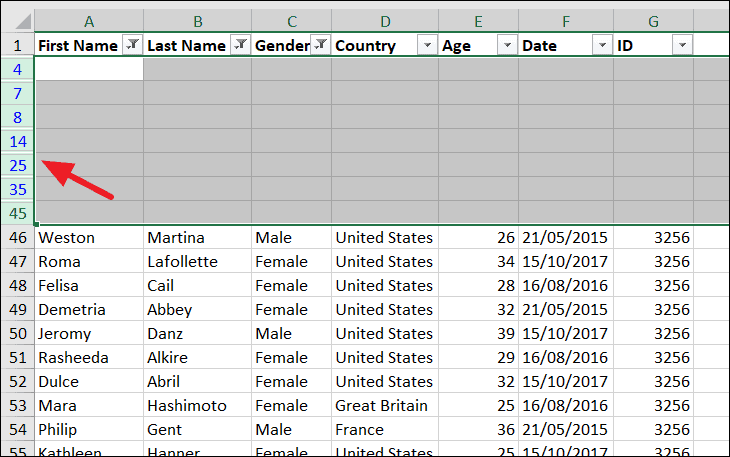
Step 5: Right-click on the selected rows and choose Delete Row from the context menu.
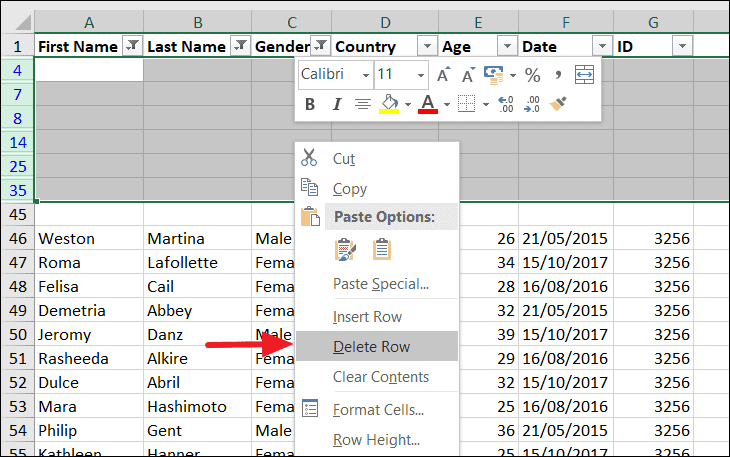
Step 6: Remove the filters by clicking on the Filter button in the Data tab again.
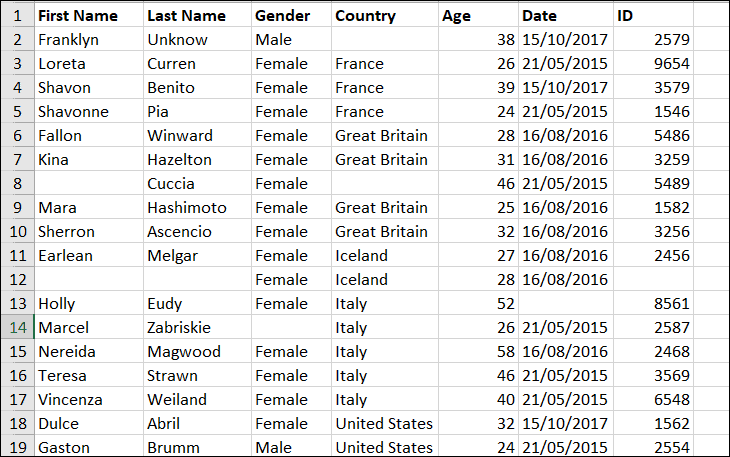
The blank rows have now been deleted, while rows with data remain intact.
Deleting Blank Rows Using the COUNTBLANK Function
The COUNTBLANK function can help identify rows with a specific number of blank cells. This is useful when you want to remove rows that are completely empty or have a certain number of empty cells.
Step 1: Add a new column to your dataset (e.g., label it as Blanks).
Step 2: In the first cell of this column, enter the COUNTBLANK formula to count the number of blank cells in that row. For example:
=COUNTBLANK(B2:G2)This formula counts the number of empty cells between columns B and G in the second row.
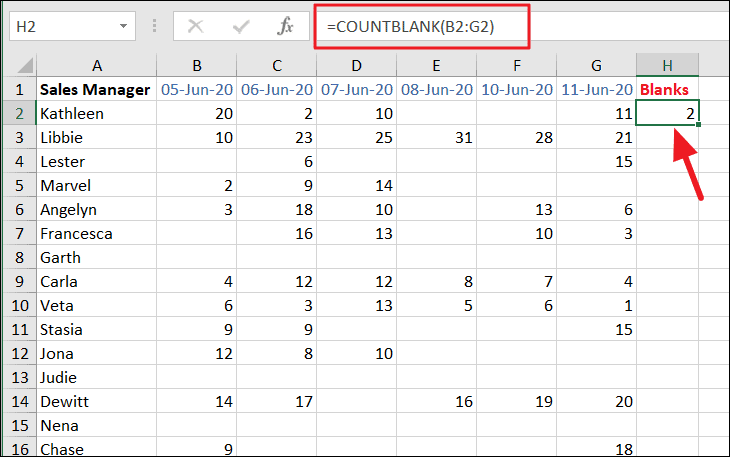
Step 3: Copy the formula down the entire column to apply it to all rows.
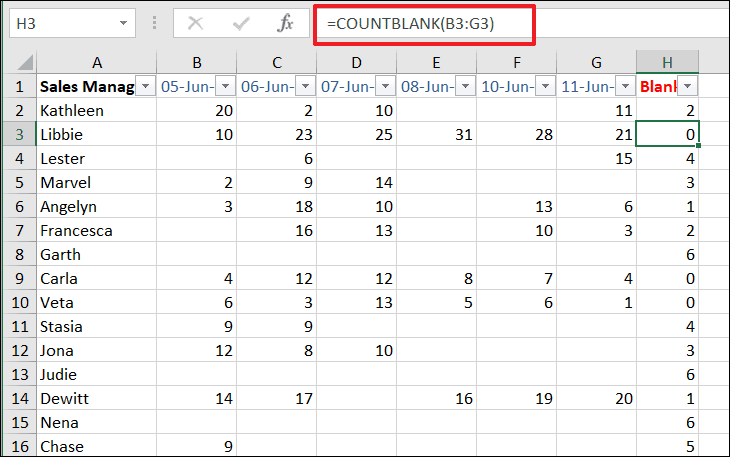
Step 4: Apply a filter to the Blanks column by selecting the dataset and clicking on Filter in the Data tab.
Step 5: Click the filter arrow on the Blanks column and select the criteria for deletion. For instance, to remove rows with four or more blank cells, uncheck numbers less than 4.
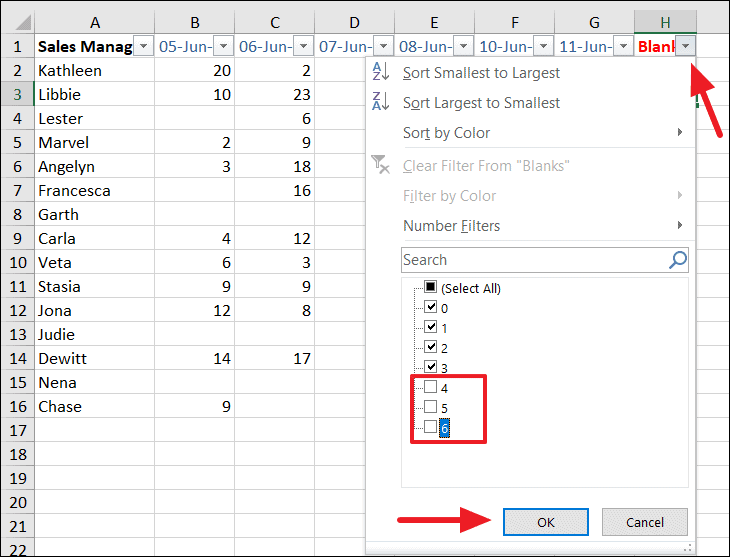
Step 6: Select the filtered rows, right-click, and choose Delete Row.
Step 7: Remove the filters to view your updated dataset.
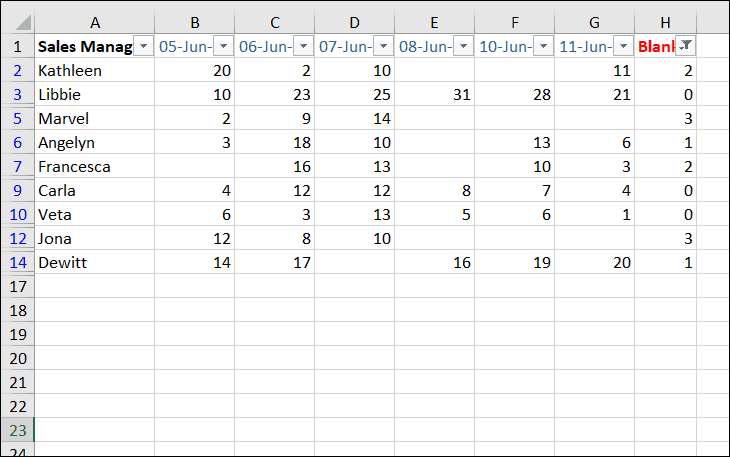
This method allows you to delete rows based on the number of blank cells they contain.
Deleting Blank Rows Using the Find Functionality
Another way to remove blank rows is by using Excel's Find feature to locate empty cells and delete the corresponding rows.
Step 1: Select the data range you want to search.
Step 2: Go to the Home tab, click on Find & Select, and choose Find. Alternatively, press Ctrl + F to open the Find and Replace dialog box.
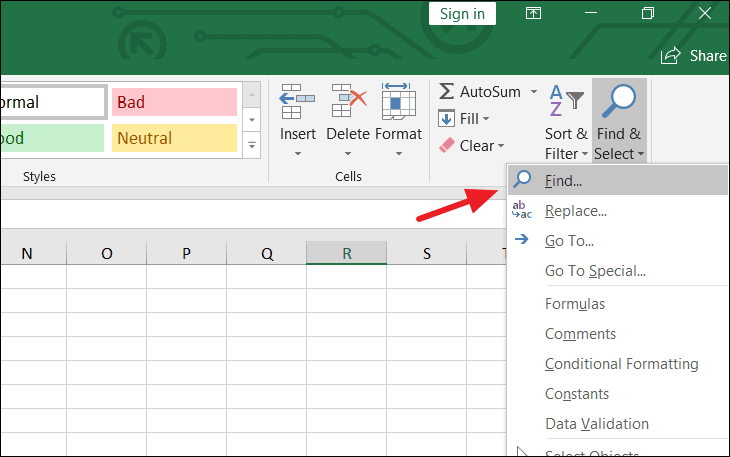
Step 3: Leave the Find what field blank. Click on the Options button to expand the dialog box.
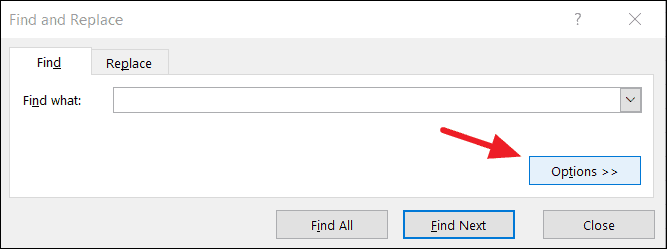
Step 4: Under Look in, select Values. Ensure that Within is set to Sheet and Search is set to By Rows. Click Find All.
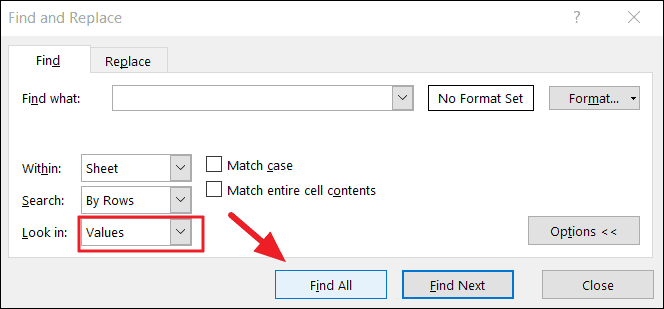
All blank cells will be listed at the bottom of the dialog box.
Step 5: Press Ctrl + A to select all found blank cells, then close the dialog box.
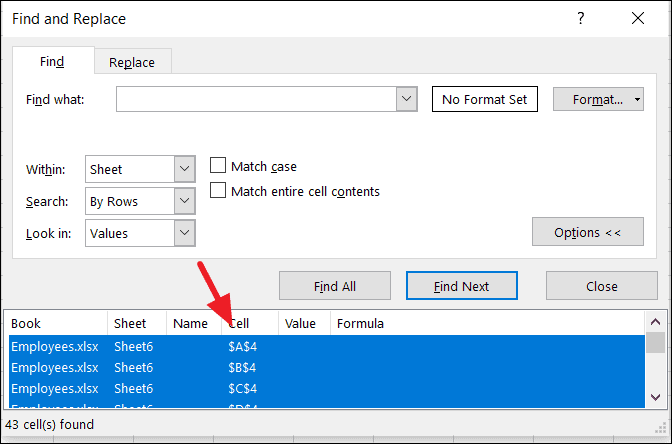
Step 6: Without clicking elsewhere, go to Home > Delete > Delete Sheet Rows to remove the rows containing the selected blank cells.
The empty rows will now be deleted from your sheet.
Manually Deleting Blank Rows
For smaller datasets with only a few blank rows, manual deletion might be the simplest approach.
Step 1: Click on the row number of the blank row you wish to delete to select the entire row. To select multiple rows, hold the Ctrl key and click on each row number.
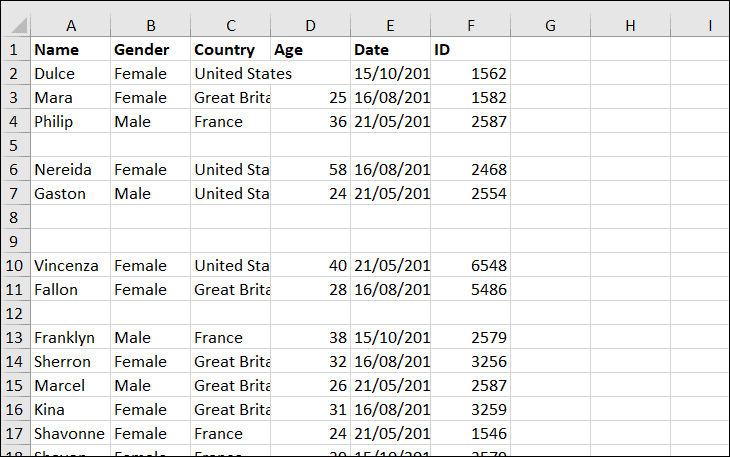
Step 2: Right-click on one of the selected rows and choose Delete from the context menu.
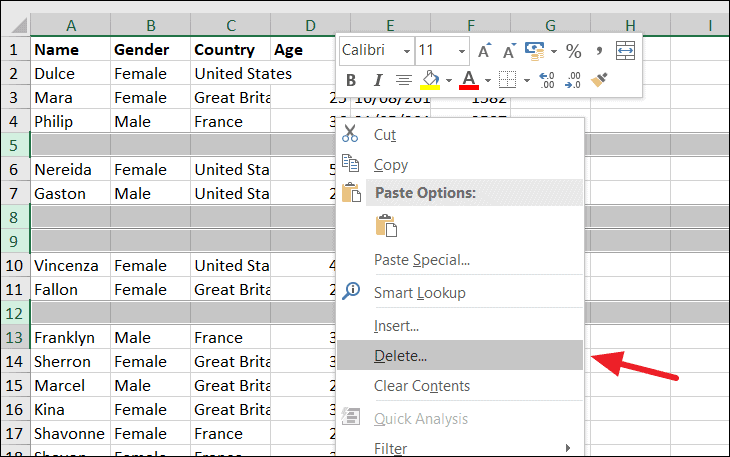
The selected blank rows will be removed from your worksheet.
Eliminating blank rows from your Excel spreadsheets can significantly improve data management and functionality. Choose the method that best suits your dataset and requirements.

