
Microsoft OneDrive is deeply integrated into Windows 11, offering seamless cloud storage and synchronization. However, you might prefer not to use it due to personal preferences, privacy concerns, or because you use alternative cloud services. This guide provides several methods to disable OneDrive on your Windows 11 PC.
Uninstall OneDrive
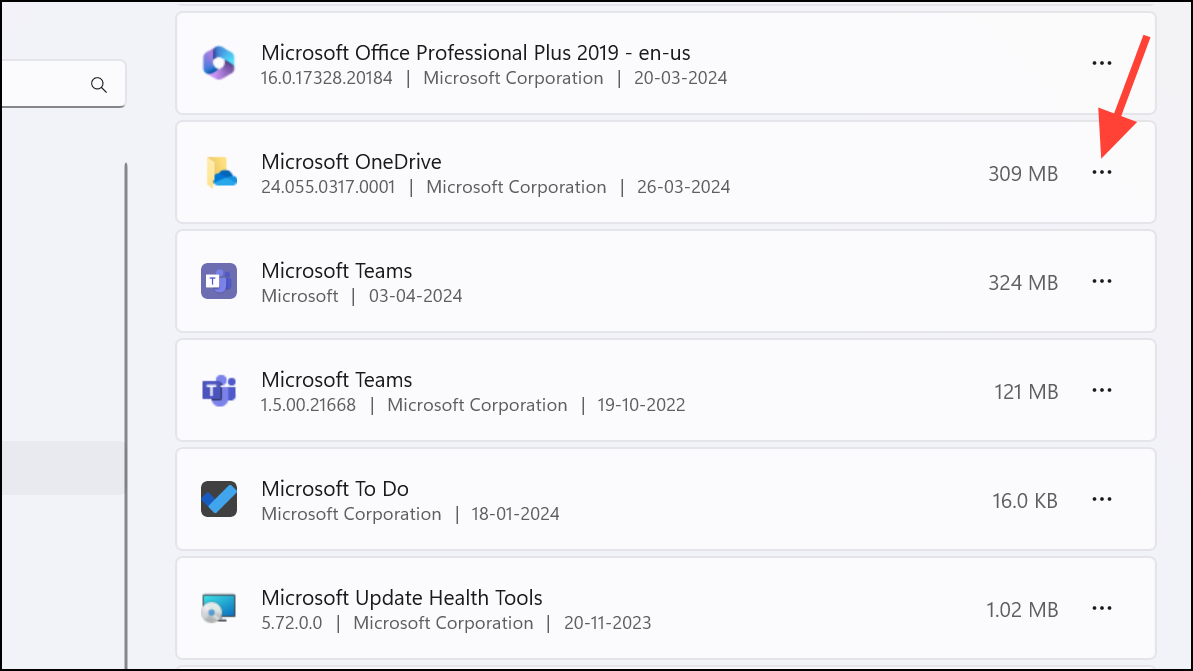
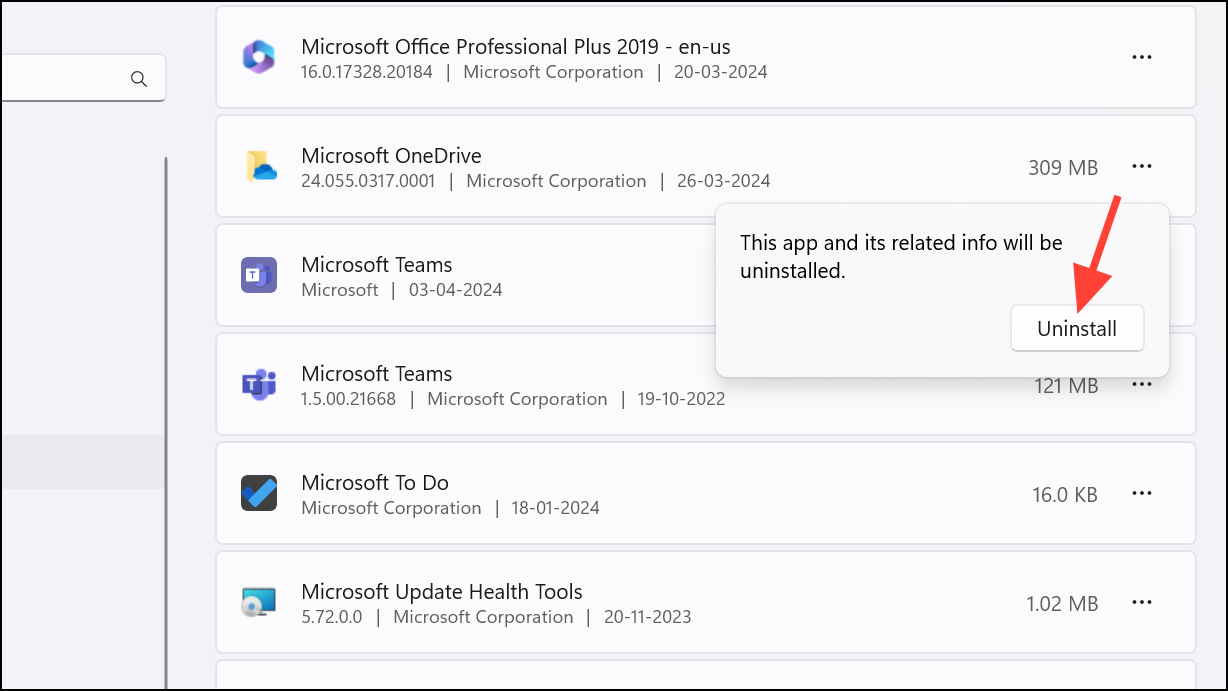
If you want to completely remove OneDrive from your system, uninstalling it via the Settings app is the most direct method.


If you decide to use OneDrive again in the future, you can reinstall it by searching for ‘OneDrive’ in the Microsoft Store and downloading it from there.
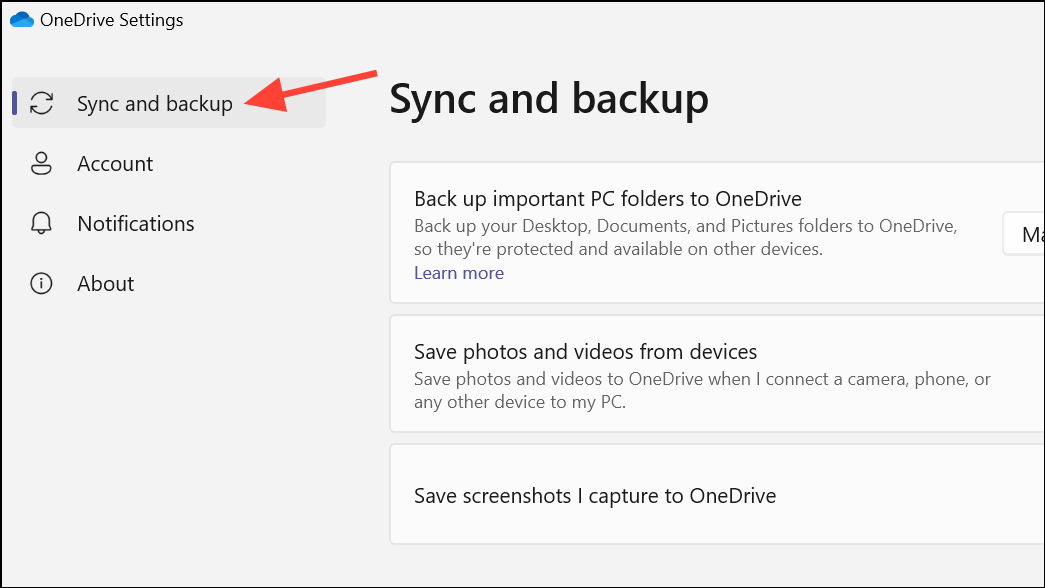
Unlink OneDrive
If you don’t want to uninstall OneDrive completely but wish to disconnect your account, you can unlink your PC. This stops file synchronization without removing the application.
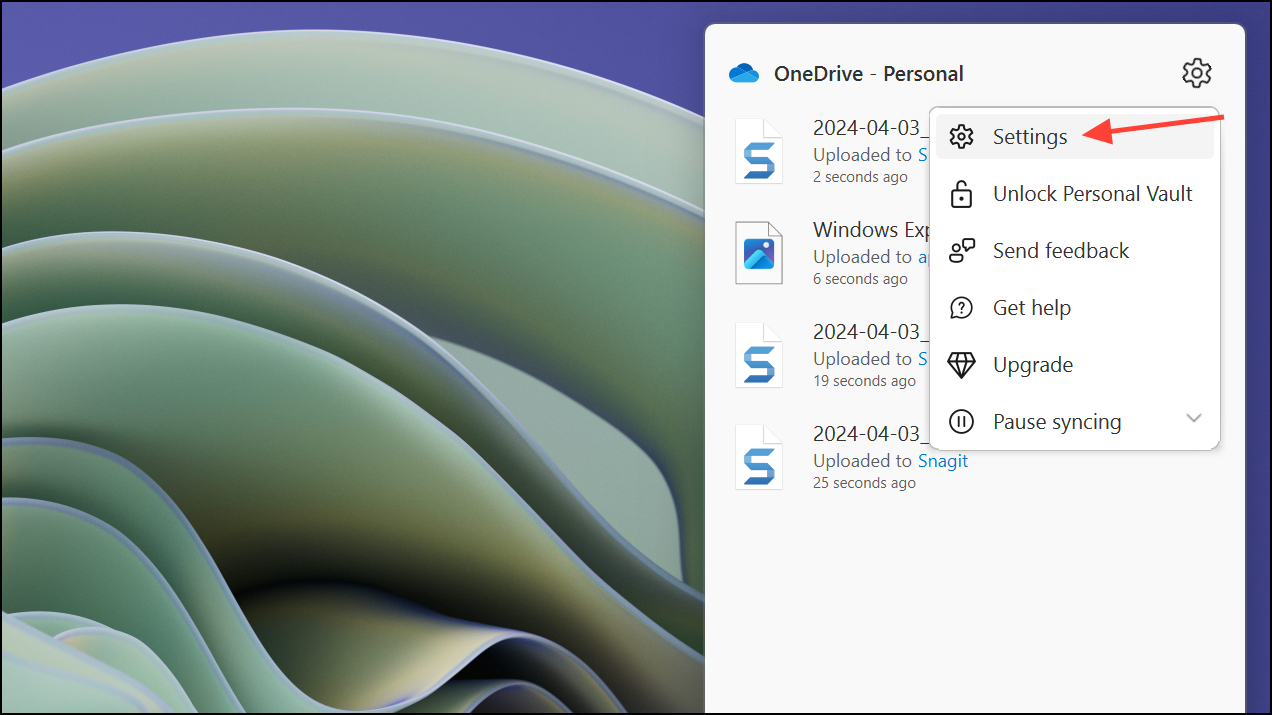

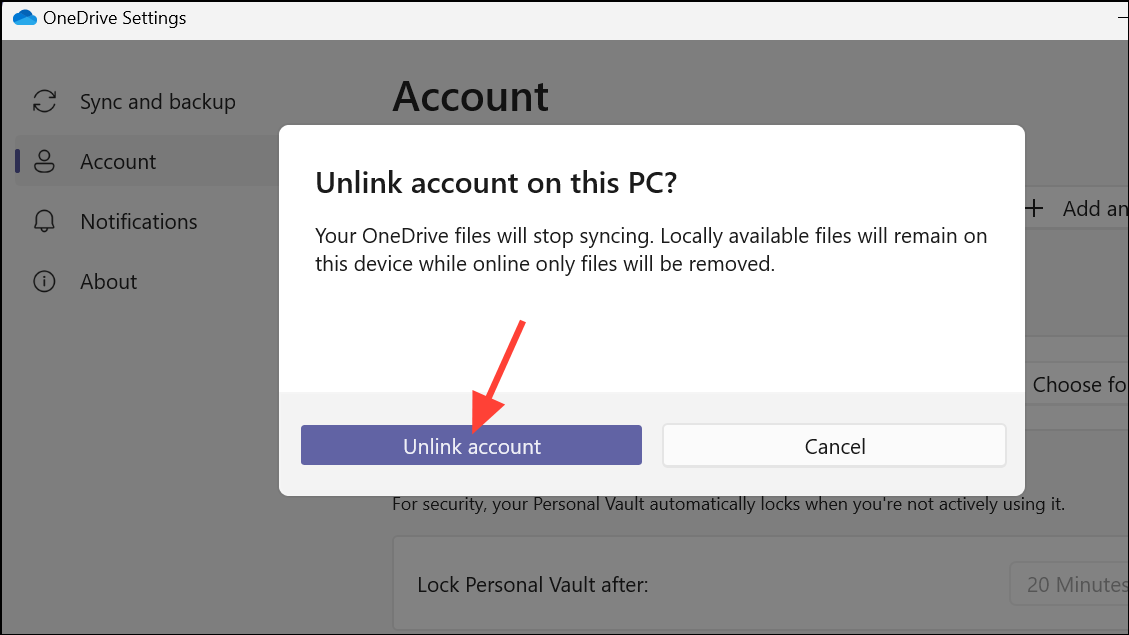
After unlinking, your OneDrive account will be disconnected from your PC. Your files will no longer sync between your computer and the cloud, even if the OneDrive app is running. To ensure OneDrive doesn’t run or consume system resources, you can quit the app and prevent it from starting automatically at boot, as described below.
Disable OneDrive
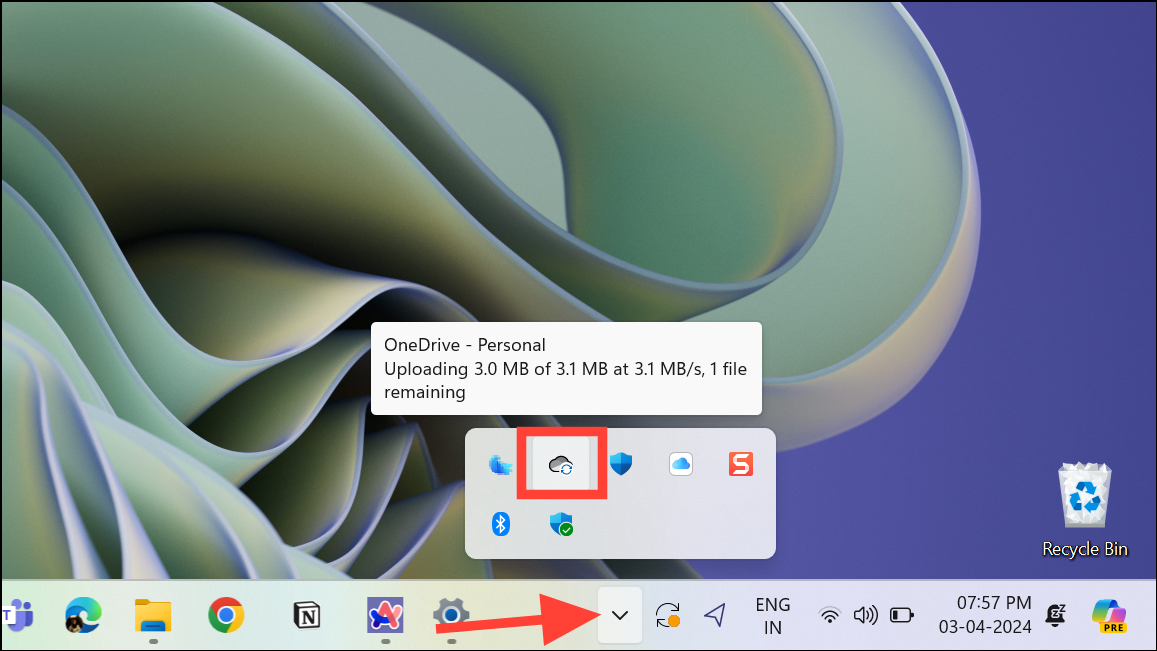
To disable OneDrive without uninstalling it or unlinking your account, you can quit the app and stop it from launching at startup. This method allows for easy reactivation if you decide to use OneDrive again later.
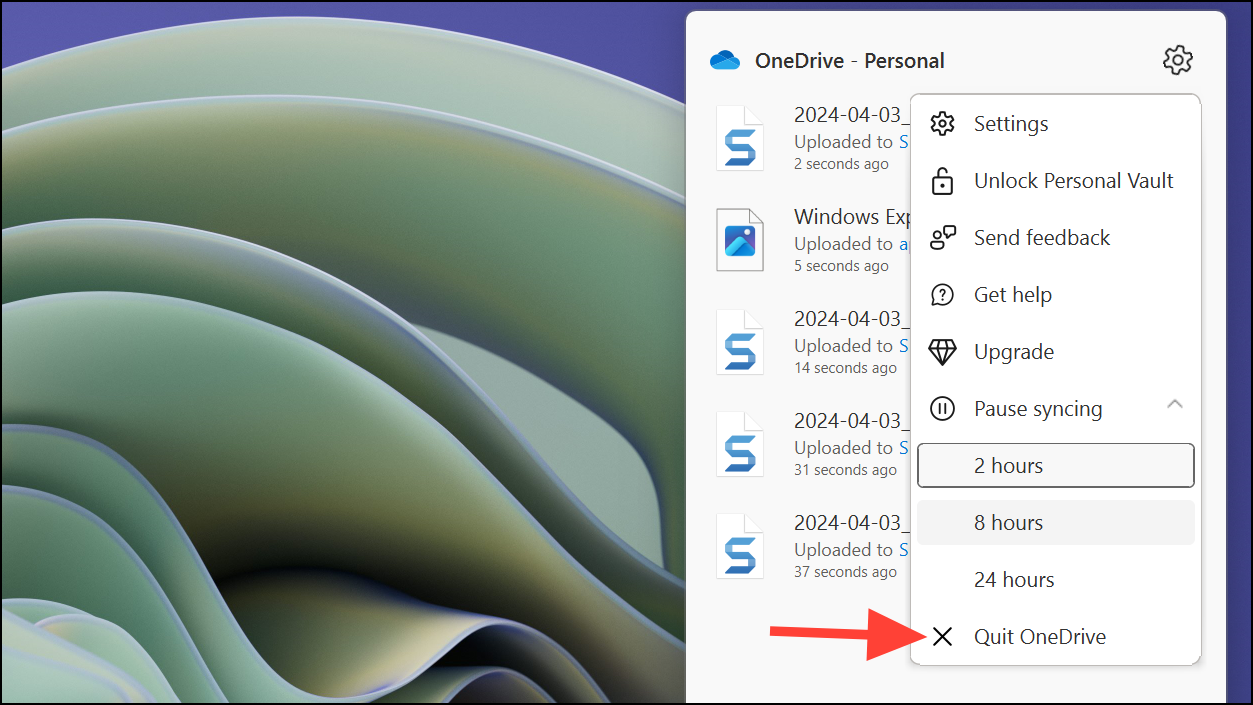
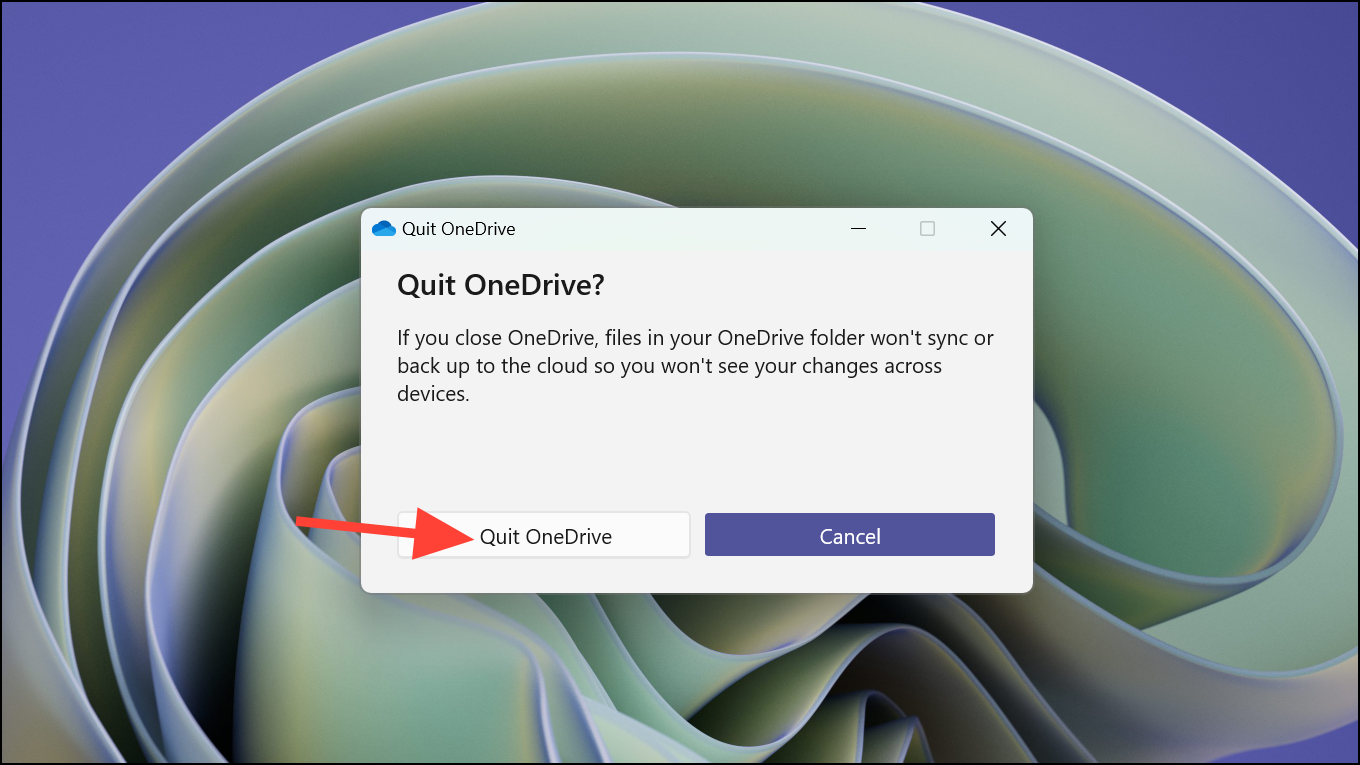
OneDrive will now be closed, and all syncing activities will stop until you launch the app again.
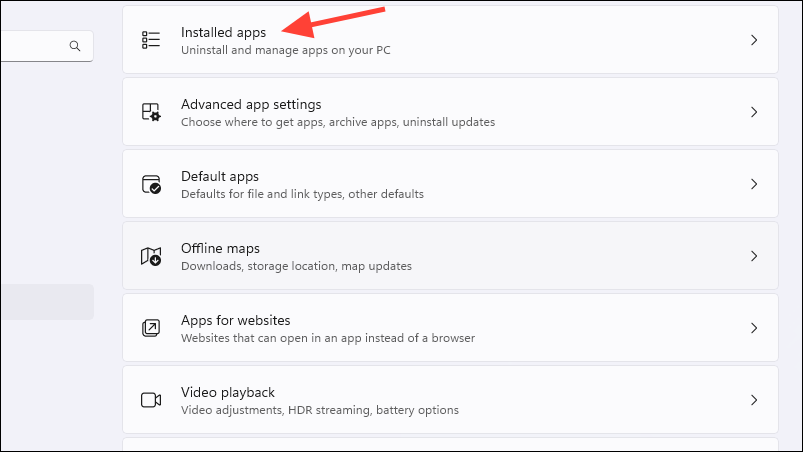
Windows + I, then select ‘Apps’ from the left-hand menu.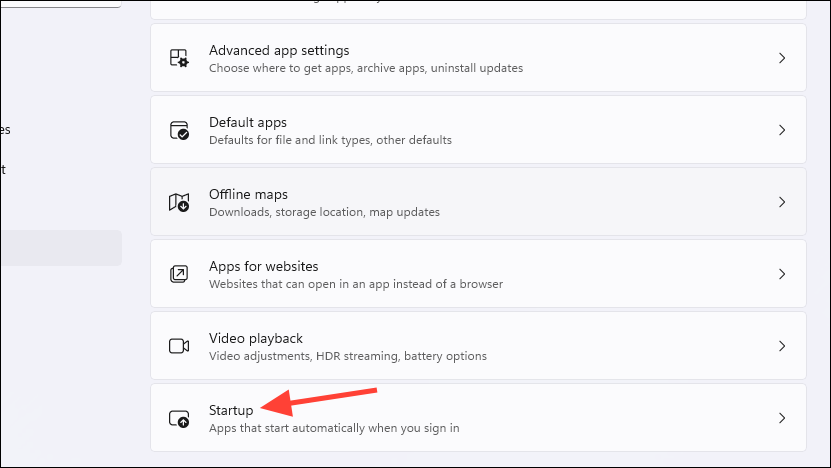
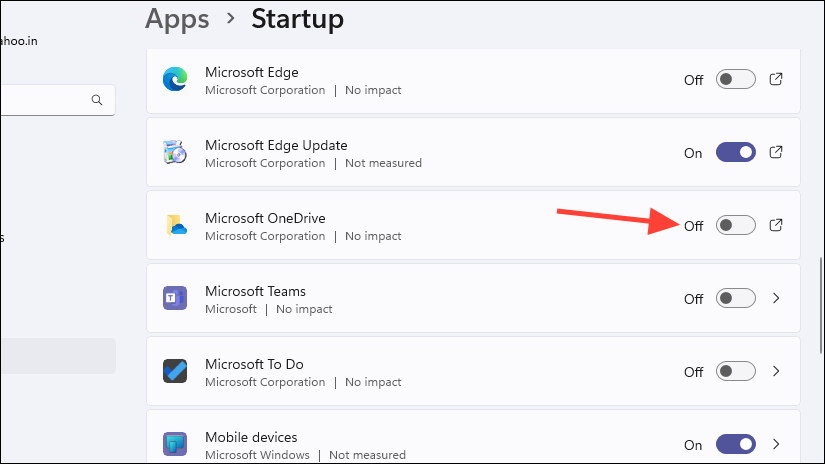
OneDrive will no longer launch automatically when you start your computer, and it will remain disabled unless you manually open the app.
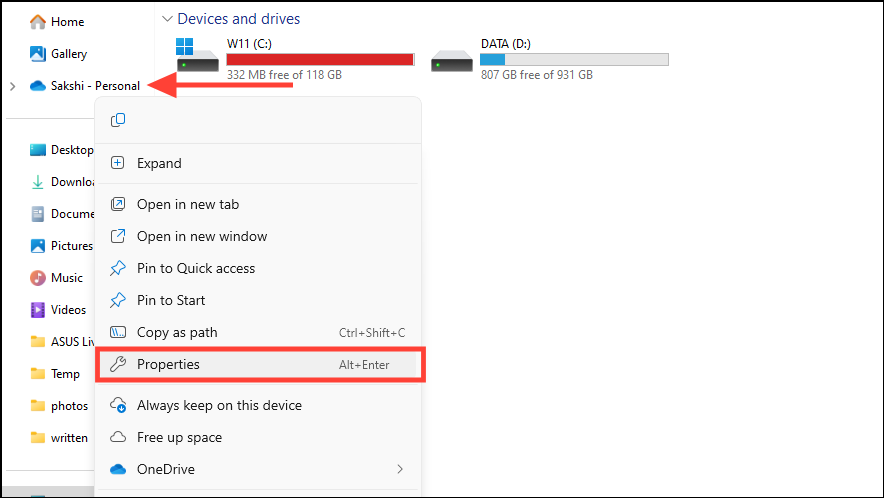
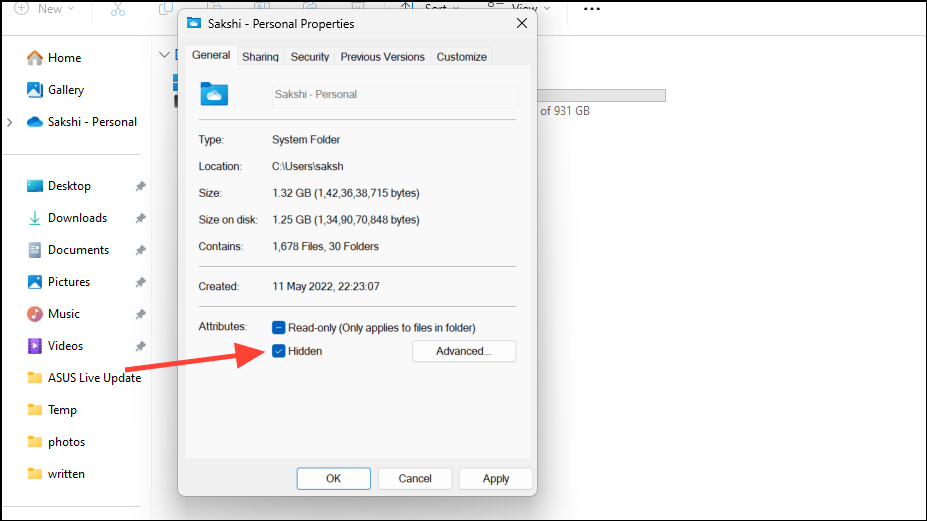
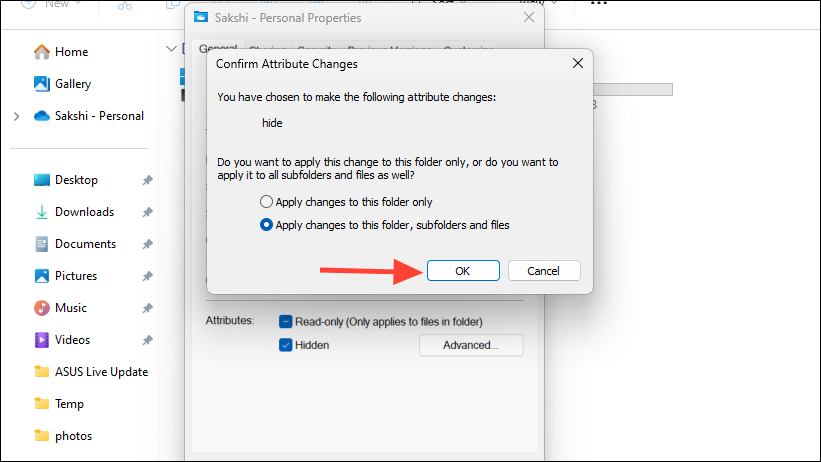
Hide OneDrive from File Explorer
If you wish to remove the OneDrive folder from the File Explorer sidebar, you can hide it to keep your navigation pane uncluttered.
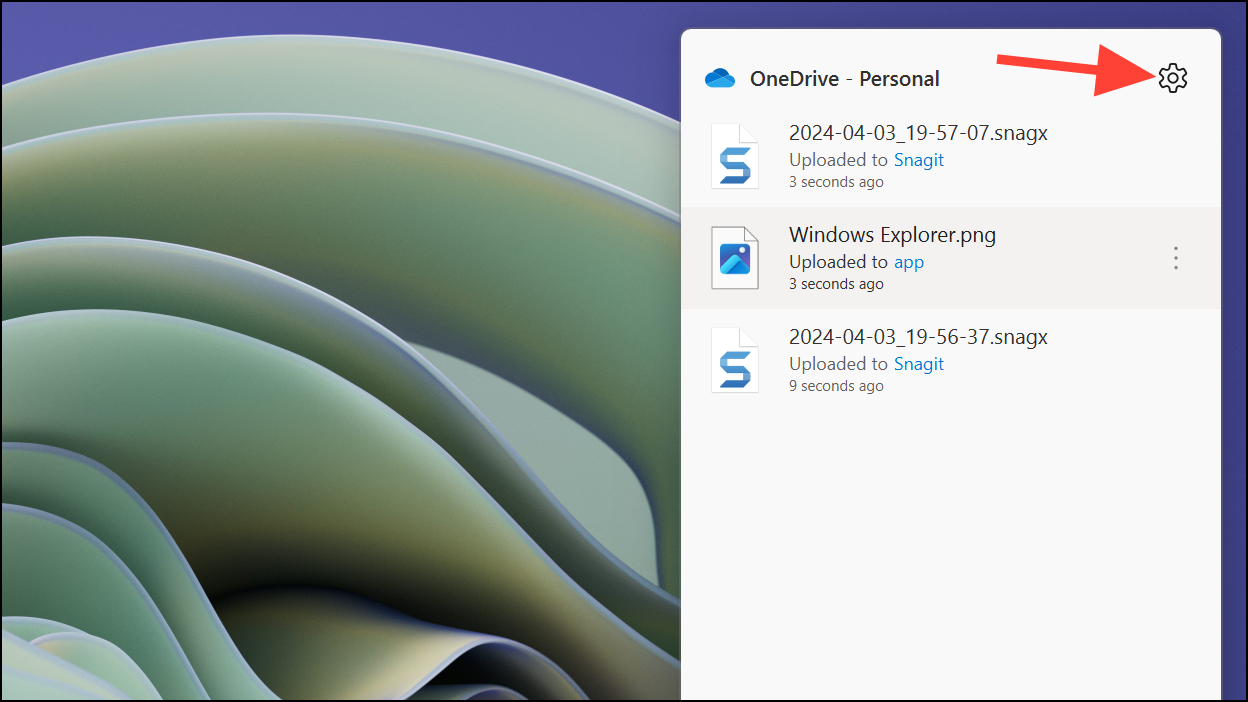
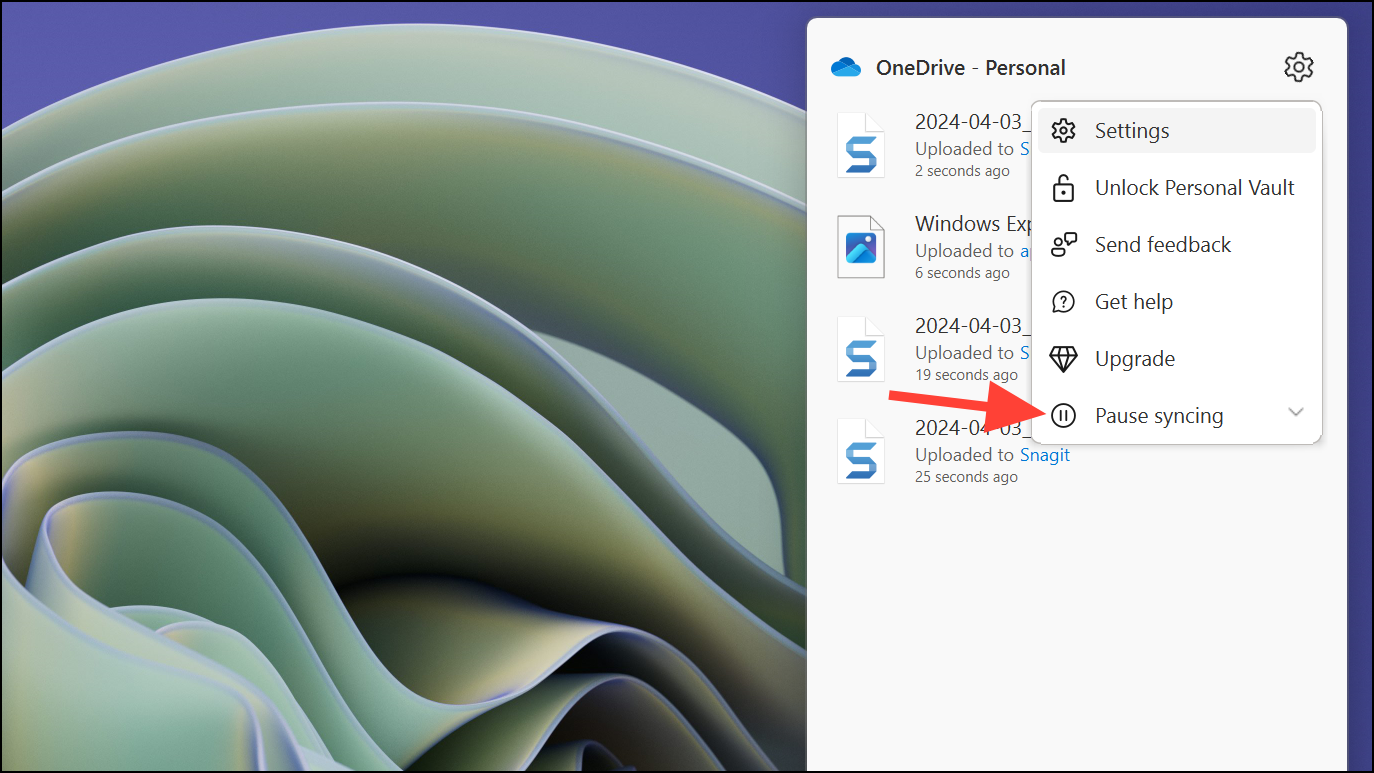
Pause OneDrive
If you want to temporarily stop OneDrive from syncing your files without disabling or uninstalling it, you can pause syncing for a set period.
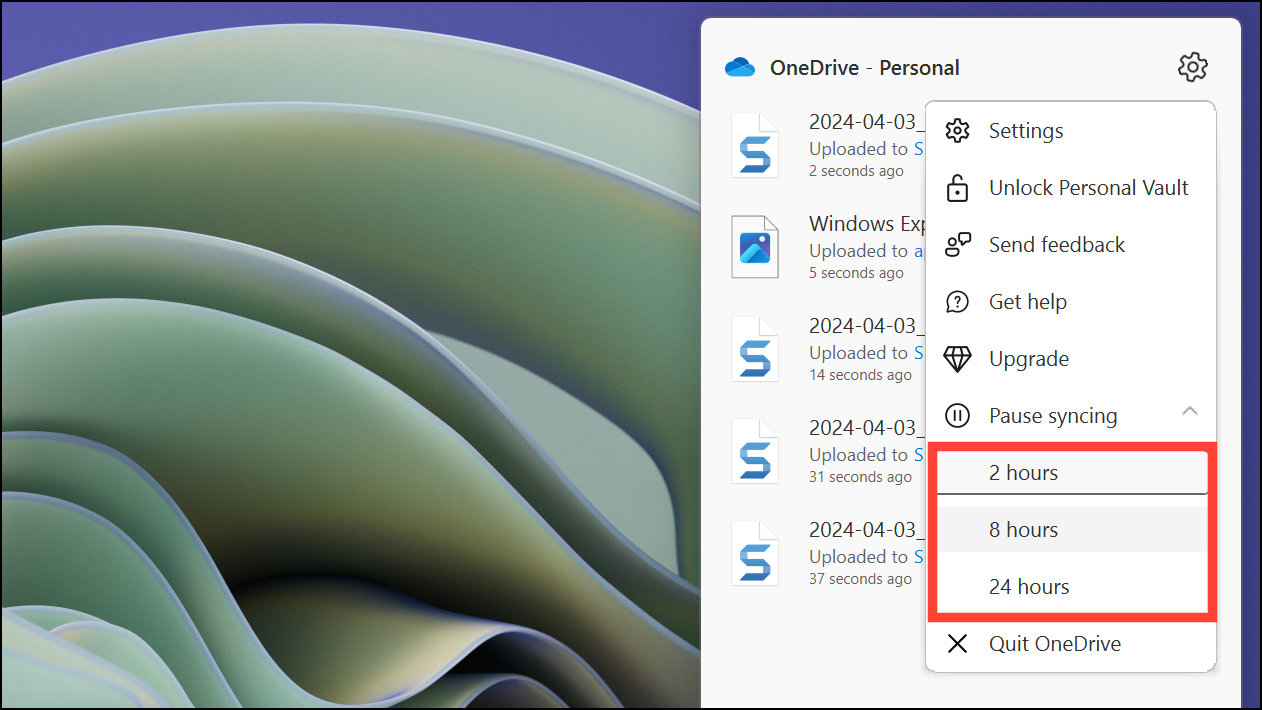
OneDrive will now pause syncing for the selected duration. After this time, it will automatically resume syncing your files.
By following these methods, you can effectively disable OneDrive on your Windows 11 PC according to your preferences. Whether you choose to uninstall, unlink, disable, or pause the app, each option offers a way to manage OneDrive’s presence on your system.


