There are several reasons why Microsoft Windows is one of the world’s most popular operating systems. It is easy to use, is compatible with different hardware, and has a huge number of software applications available for it.
However, since the OS is designed to run on a wide variety of machines from different manufacturers, it can sometimes run into issues. One common issue is related to Windows Metadata and Internet services. When they occur, you get the following error codes – 0x80070490 And 0x80072EFE in the Windows Event Viewer.
Depending on your system, these errors can cause your audio and video drivers to malfunction, or cause freezing and crashing problems. If you have run into these errors and want to know how to fix them, we’ve put together this guide to help you out.
1. Update Windows
The 0x80070490 and 0x80072EFE errors can sometimes occur due to a faulty Windows update. In that case, Microsoft may have released additional updates to fix the issue which you can install on your computer.
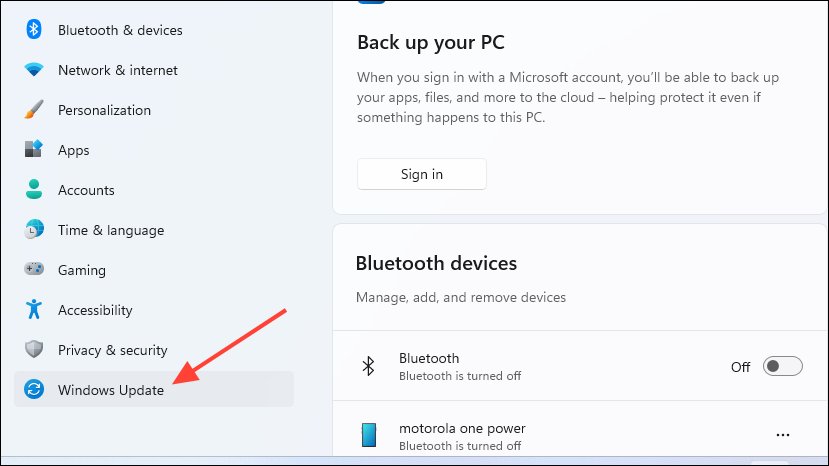
- Open the Settings app and click on the ‘Windows Update’ option on the left.
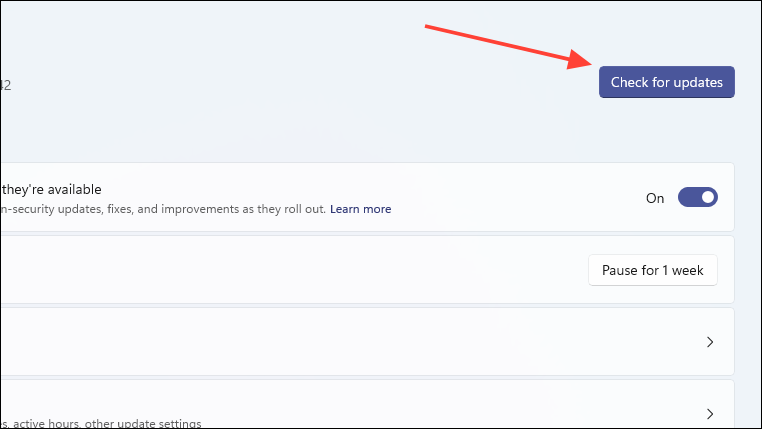
- Click on the ‘Check For Updates’ button on the Windows Update page. If updates are available, Windows will download and install them. You may need to reboot your PC to finish updating it.
2. Troubleshoot Windows Updates
If you are getting the error code 0x80070490, it can indicate a problem with Window Update. In such a situation, you need to run the Windows Update troubleshooter.
- Go to the Settings app on your Windows 11 PC and type
troubleshootin the search box on the left side.
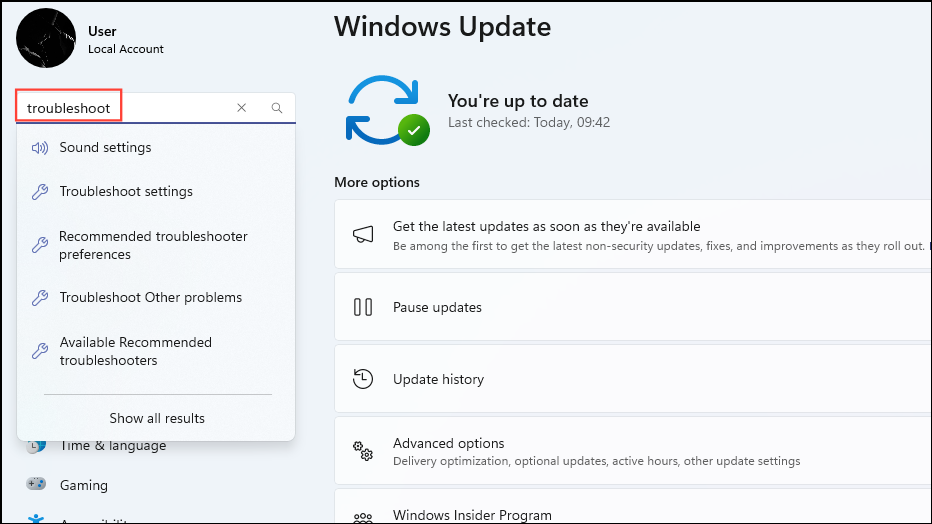
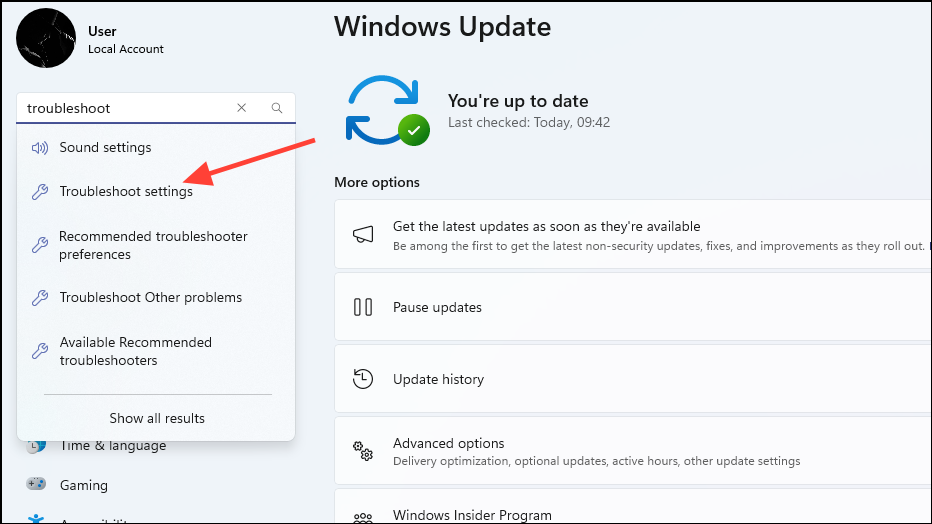
- Click on the ‘Troubleshoot Settings’ option to access troubleshooting settings.
- On the page that opens, you will find a few options. Click on ‘Other Troubleshooters’.
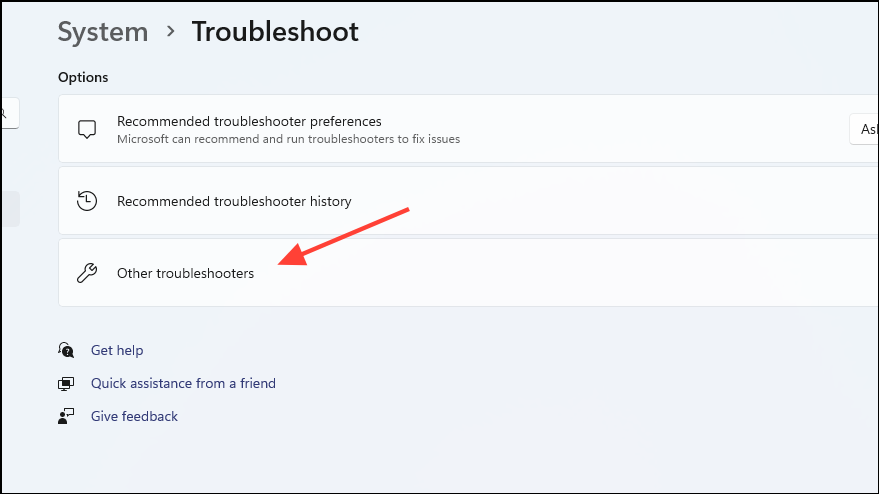
- You can troubleshoot different issues, such as audio, network, printer, and Windows update. Click on the ‘Run’ button to the right of the Windows Update option.
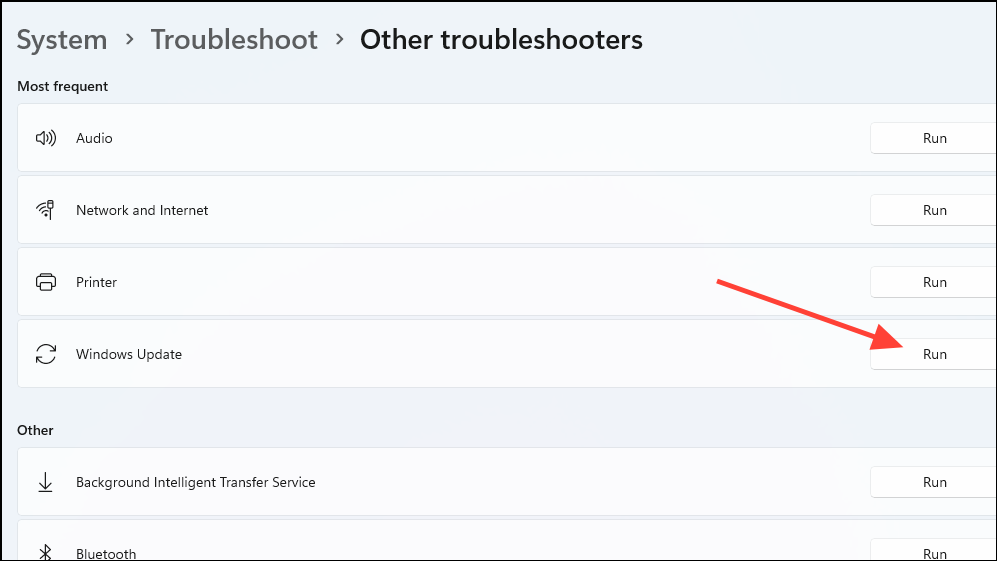
- When you click on the ‘Run’ button, the troubleshooter will check for issues and try to resolve them.

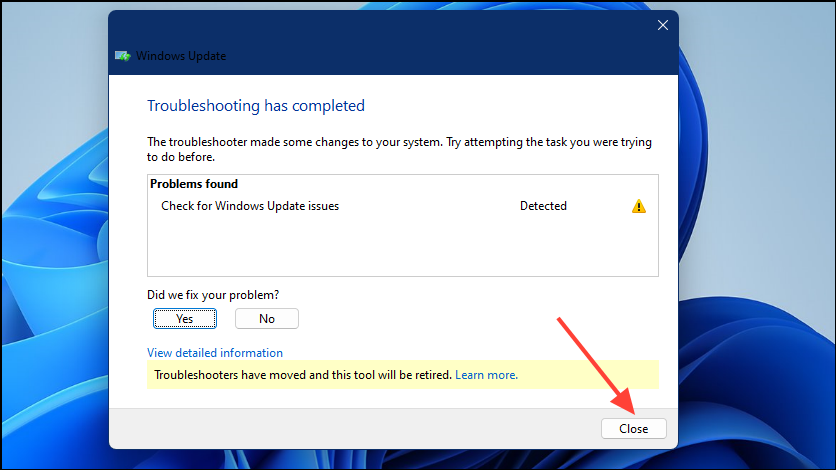
- Once the troubleshooter completes its operations, it will show you a message. Click on the ‘Close’ button, and hopefully your issue will have been resolved.
3. Perform a Clean Boot
Sometimes the 0x80070490 error may be caused by a third-party application and you may see error messages like ‘Metadata Staging Failed’ when it occurs. To fix it, you can try performing a clean boot that disables all services except those from Microsoft.
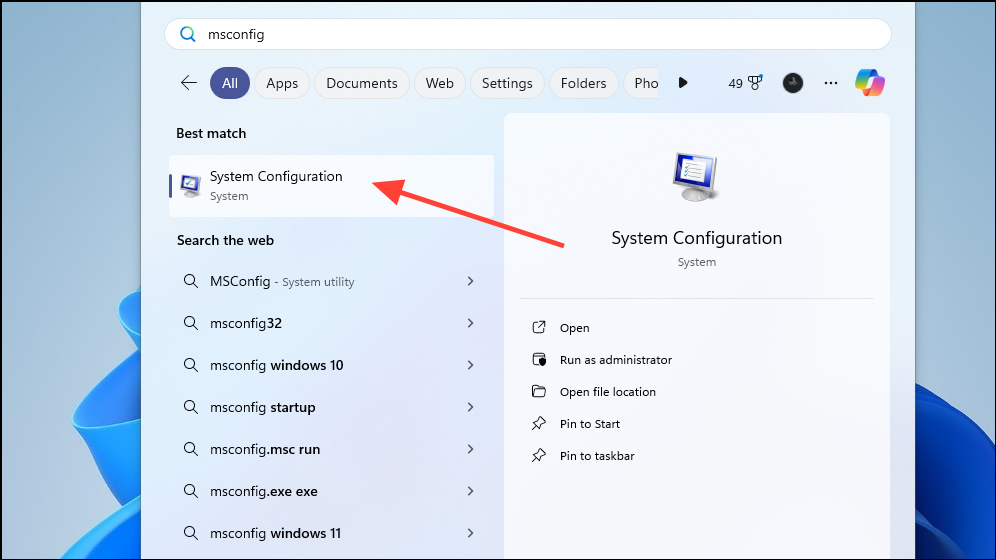
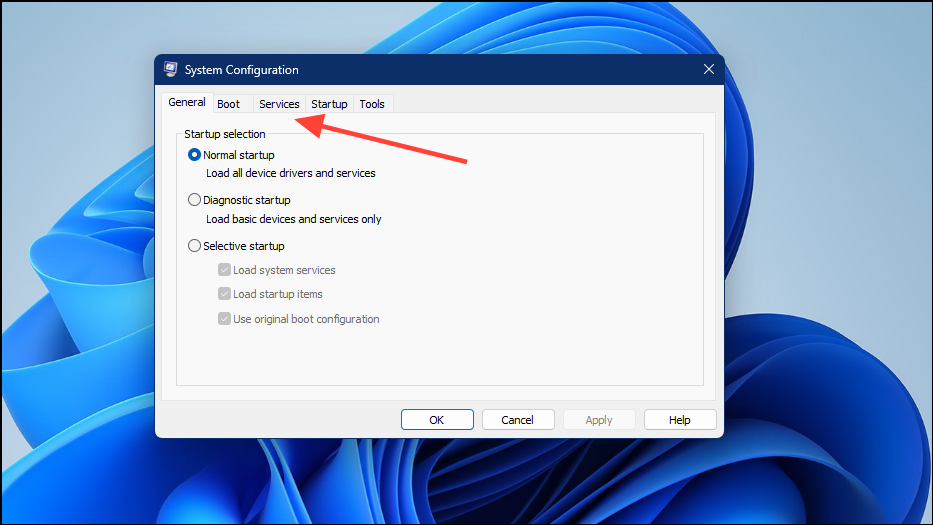
- Open the Start menu, type
msconfig, and click on the ‘System Configuration’ option in the results that appear.
- In the System Configuration utility, click on the ‘Services’ tab at the top.
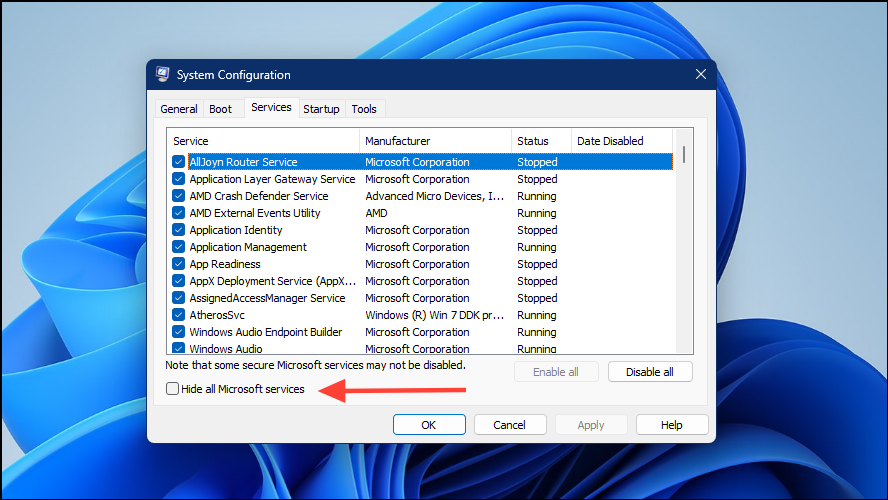
- On the ‘Services’ tab, you will see all the services active on your PC. Click on the ‘Hide All Microsoft Services’ check box to view only third-party services.
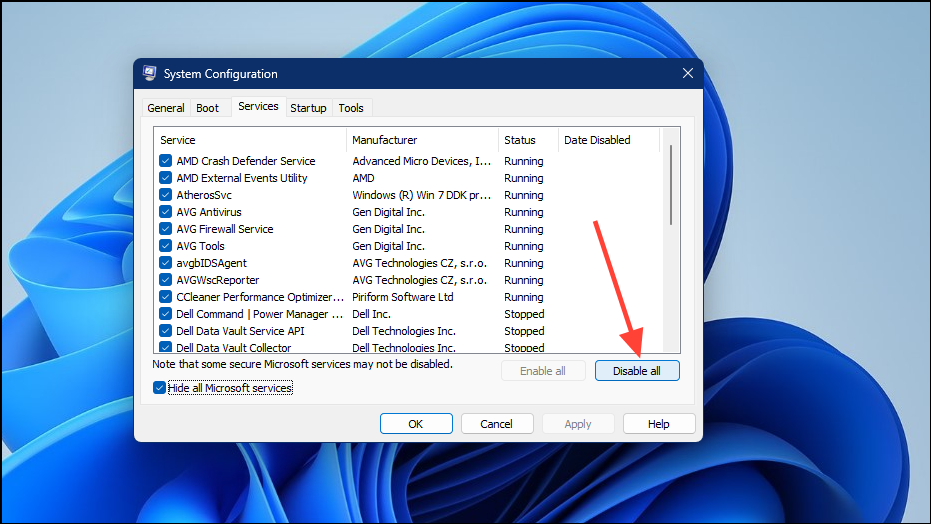
- Now click on the ‘Disable All’ button on the right to disable all third-party services, and then click on the ‘Apply’ button.
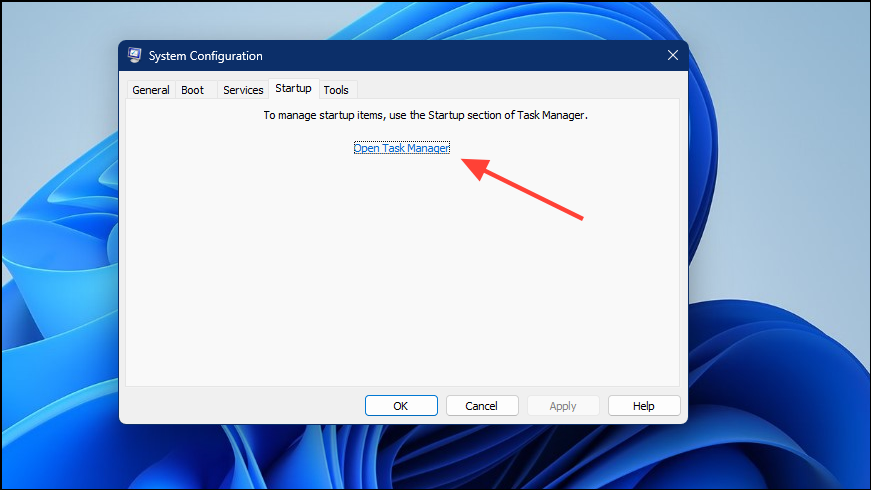
- Go to the ‘Startup’ tab at the top and click on the ‘Open Task Manager’ option now.
- When the Task Manager opens, go to the ‘Startup Apps’ tab to view the applications that launch when your system boots up.
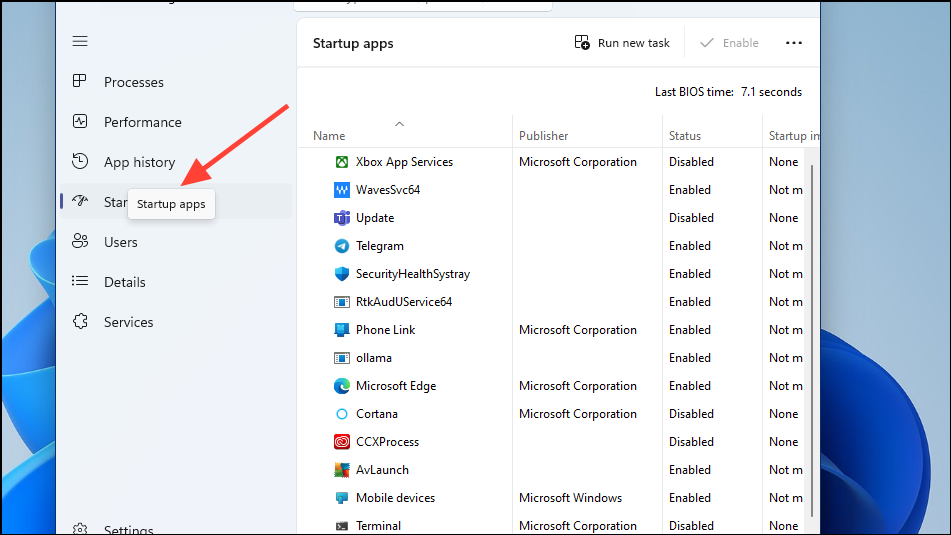
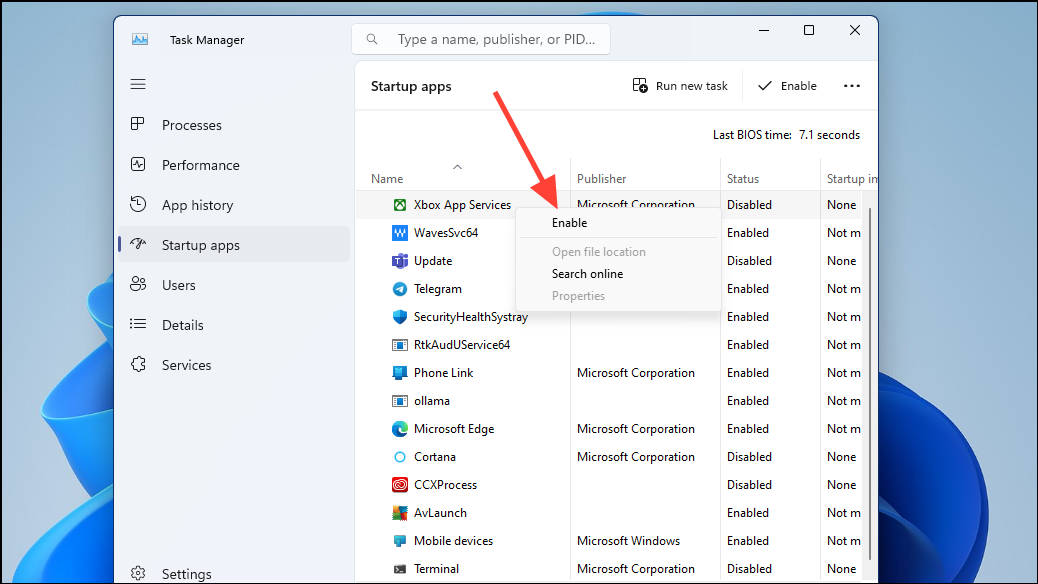
- Now, you will have to disable each enabled item from this list by right-clicking on it and clicking on the ‘Disable’ option. Make a note of which items you are disabling.

- Close the Task Manager after disabling the services and then click on the ‘OK’ button in the System Configuration utility.

- Reboot your computer after performing all these steps, and it will boot into a clean environment. Launch the Task Manager again, as explained above, and try enabling the services you disabled from the ‘Startup Apps’ tab earlier.
4. Disable Metadata Staging
Errors in the registry can also result in 0x80070490 and 0x80072EFE errors. Disabling Metadata Staging is another possible solution that might help in such a situation.
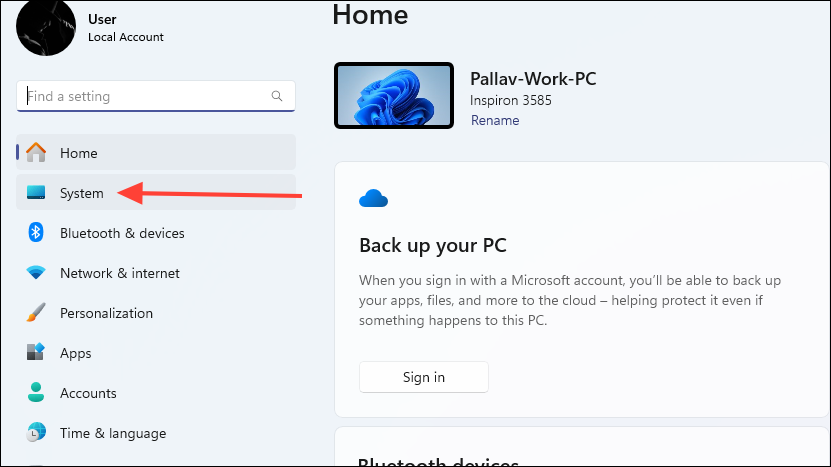
- Open the Settings app and click on the ‘System’ option on the left side.
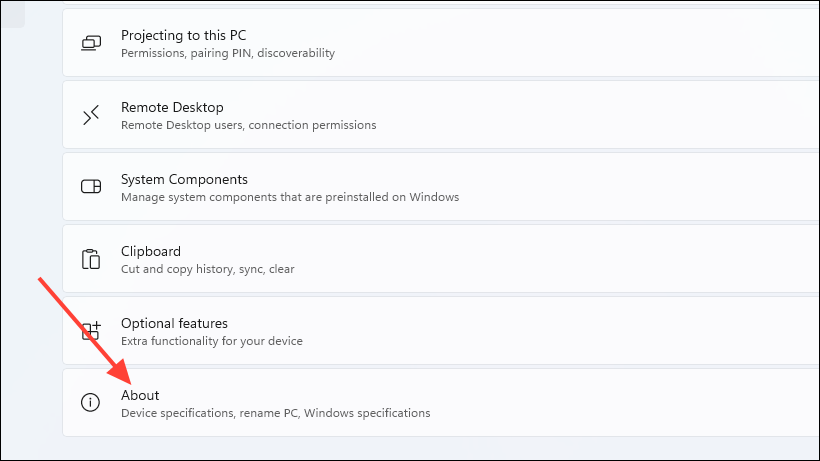
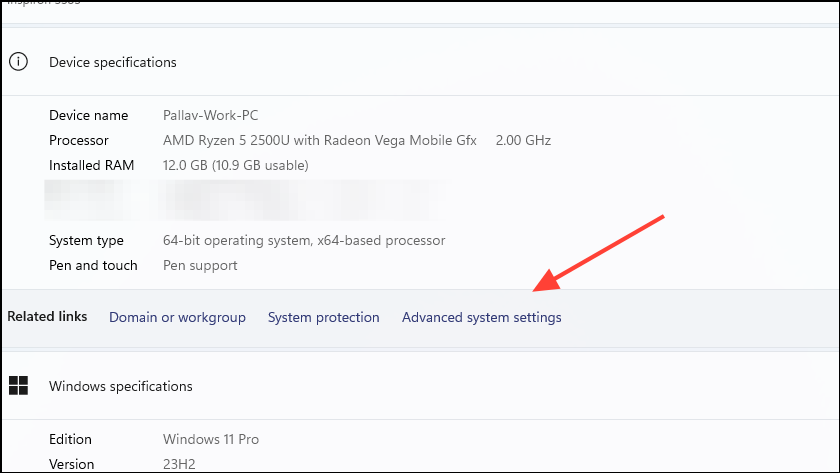
- On the ‘System’ page, scroll down to the very bottom and click on the ‘About’ option.
- Next, click on the ‘Advanced System Settings’ option to access the system properties.
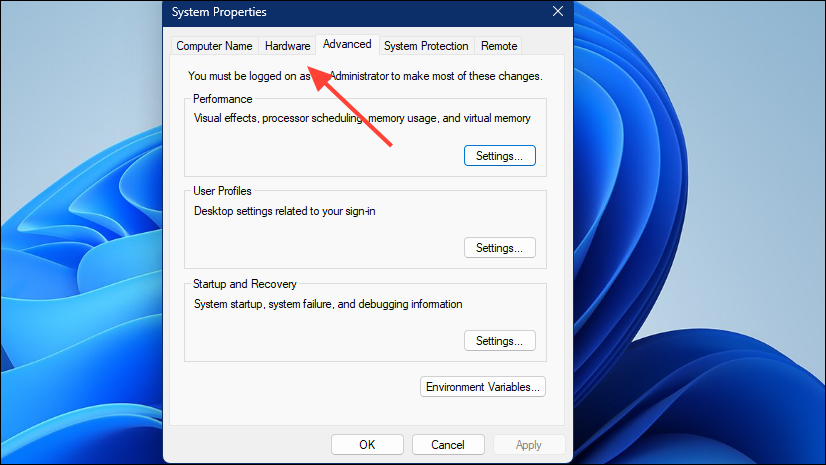
- When the ‘System Properties’ box appears, click on the ‘Hardware’ tab.
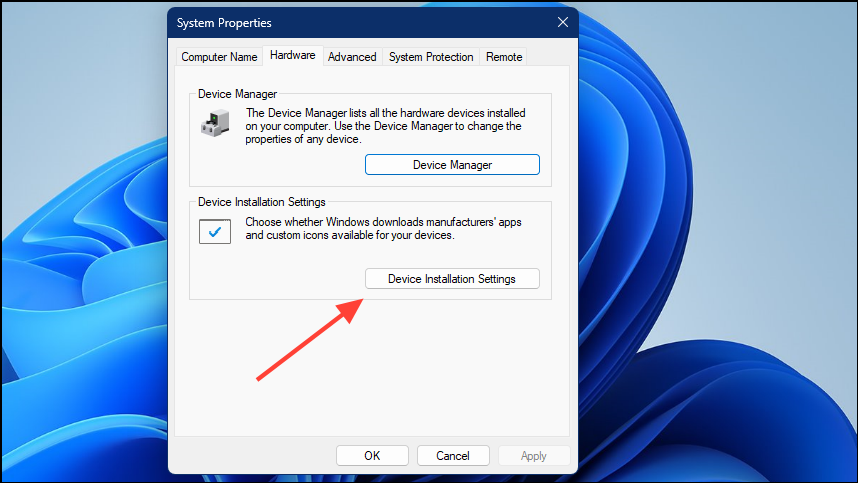
- Click on the ‘Device Installation Settings’ on the ‘Hardware’ tab.
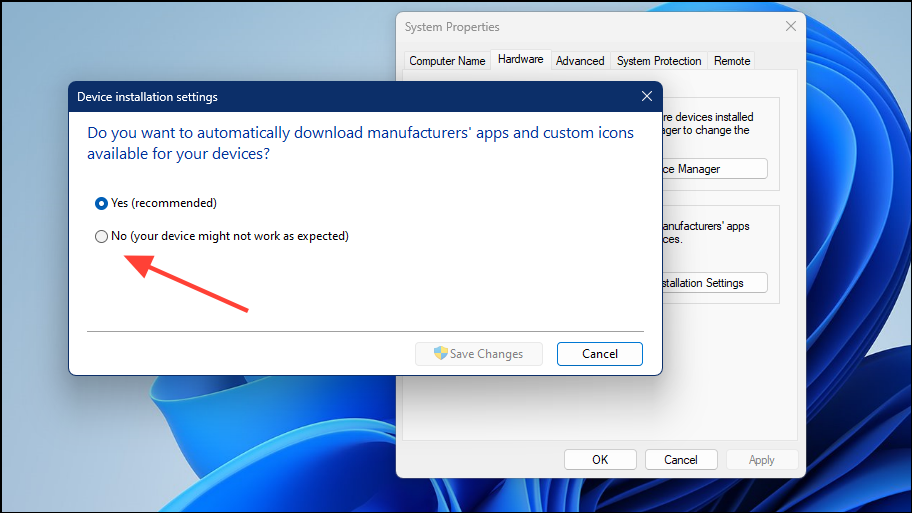
- The pop-up that appears will let you control whether you want Windows to automatically search for and install manufacturers’ applications. It will be enabled by default. Click on the ‘No’ button to disable it.
Keep in mind that this can cause your machine to function abnormally.
- Restart your device to check whether the issue is still present.
5. Edit the Registry
A temporary solution to the problem is editing the registry, which you can do through the Registry Editor.
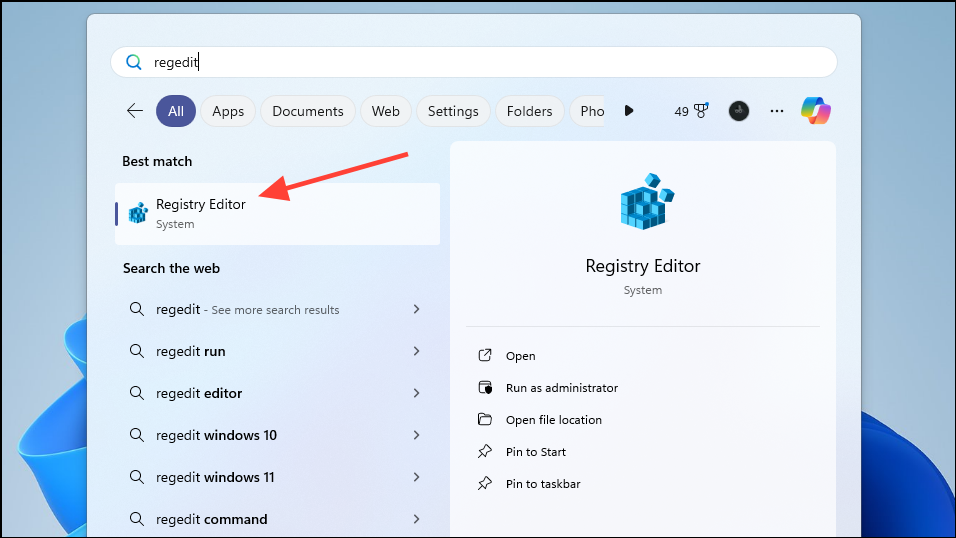
- Open the Start menu, type in
regedit, and select the ‘Registry Editor’ option from the results.
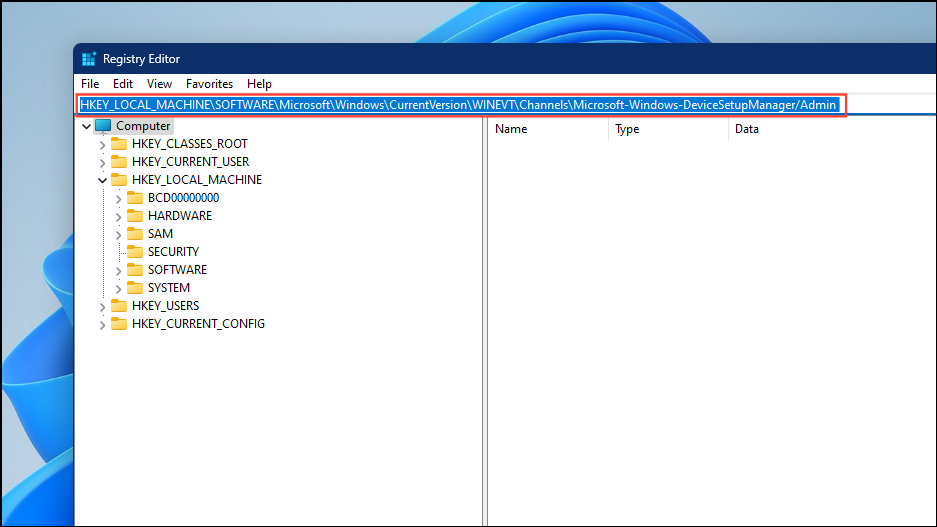
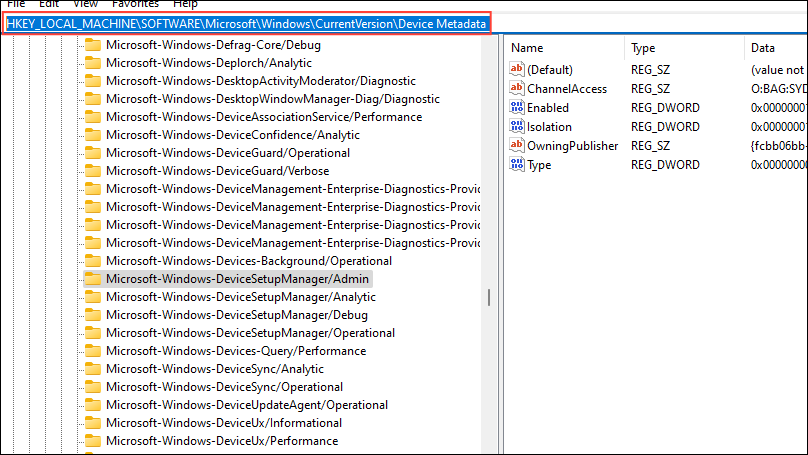
- When the editor opens, type in or paste
HKEY_LOCAL_MACHINE\SOFTWARE\Microsoft\Windows\CurrentVersion\WINEVT\Channels\Microsoft-Windows-DeviceSetupManager/Admininto the address bar at the top and press the ‘Enter’ key.
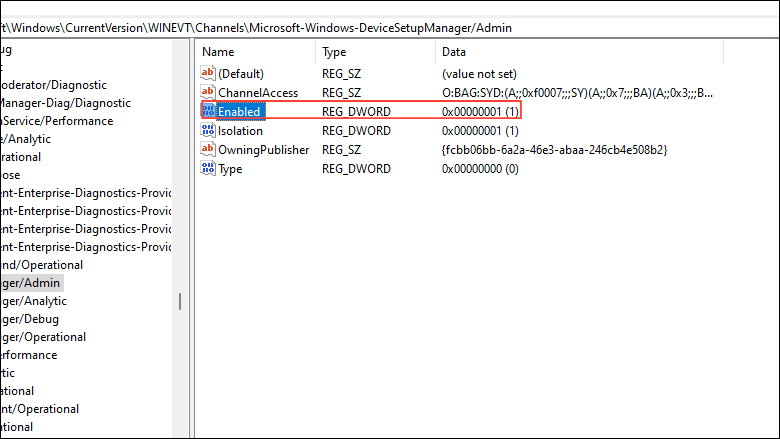
- In this registry key, look for the registry entry ‘Enabled’. When you find it, double-click on it to edit its value.
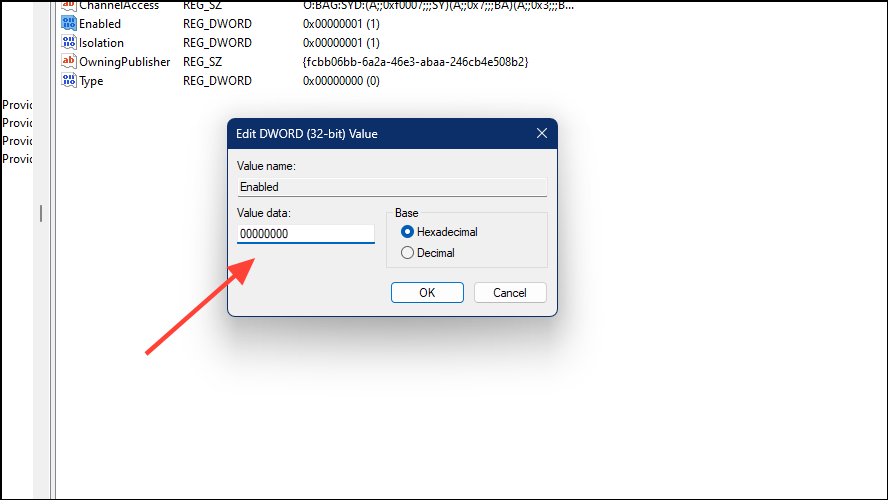
- Enter the value ‘00000000’ where it says ‘Value’ in the pop-up box that appears when you double-click on the entry and then click on the ‘OK’ button.
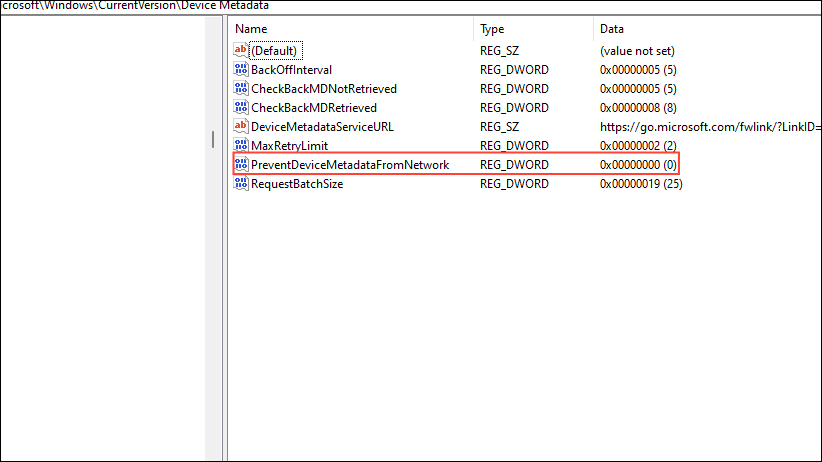
- Now go to the address bar again and paste this address
HKEY_LOCAL_MACHINE\SOFTWARE\Microsoft\Windows\CurrentVersion\Device Metadatabefore pressing the ‘Enter’ key.
- On the right side, search for the ‘PreventDeviceMetadataFromNetwork’ entry.
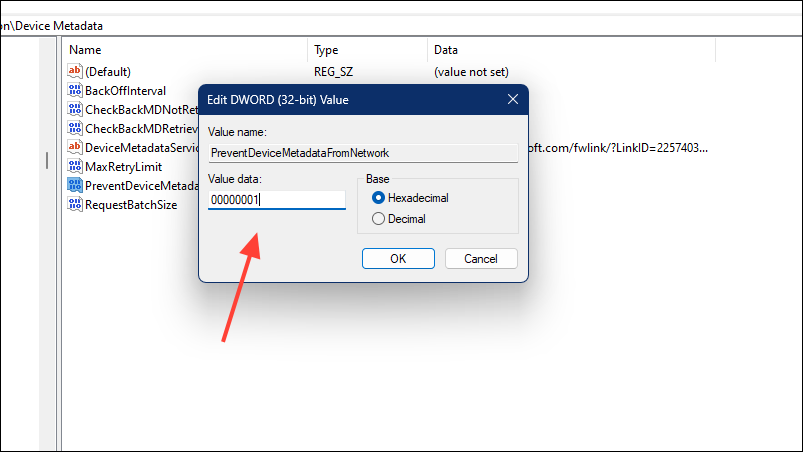
- Double-click on it and change its value to ‘00000001’ before clicking on the ‘OK’ button and closing the Registry Editor.
- Restart your PC to apply the changes and find out whether they had any effect in preventing the errors.
6. Perform SFC and DISM Scans
Windows comes with a built-in file checker utility that can scan your computer and identify issues that are causing it to malfunction. You can use it through the command prompt.
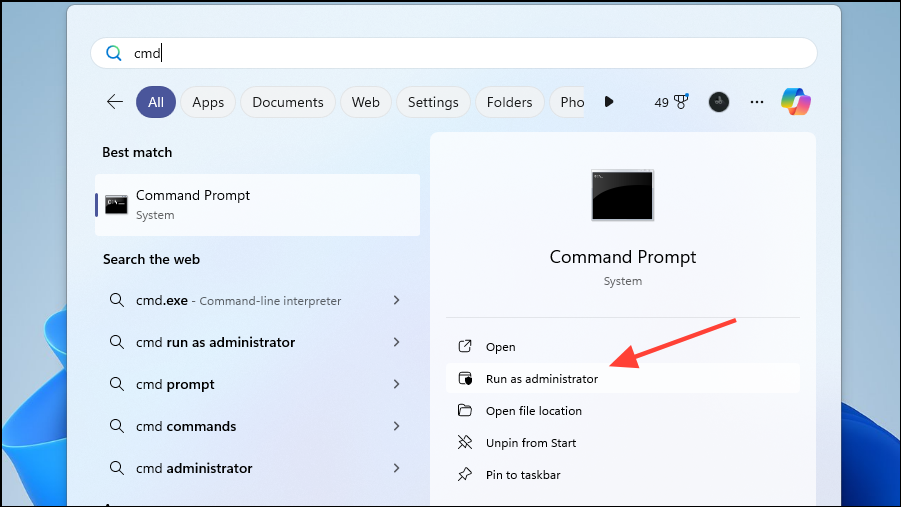
- Open the Start menu and type
cmdorcommand promptand click on the ‘Run As Administrator’ option to open it.
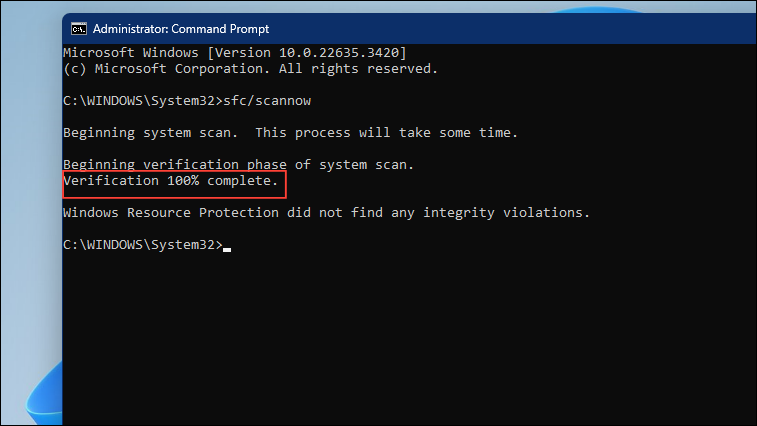
- Type
sfc /scannowand press the ‘Enter’ key in the command prompt window to start scanning your file system.

- It will take some time for the file checker to scan the entire system. If it finds any issues, it will try to fix them. Wait until the scan is 100% complete, and then move on to the DISM scan.
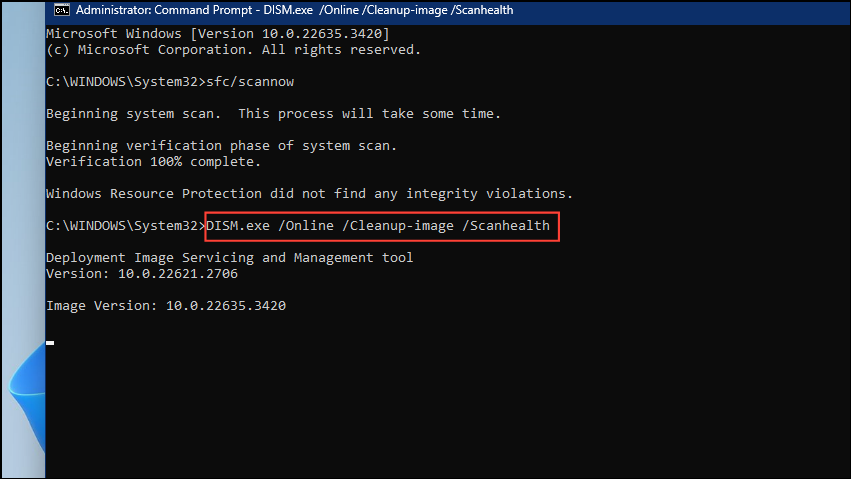
- To start the DISM scan, type
DISM.exe /Online /Cleanup-image /Scanhealthin the command prompt window and press the ‘Enter’ key.
- Wait until the scan is complete, and then type
DISM.exe /Online /Cleanup-image /Restorehealthin the window before pressing the ‘Enter’ key.
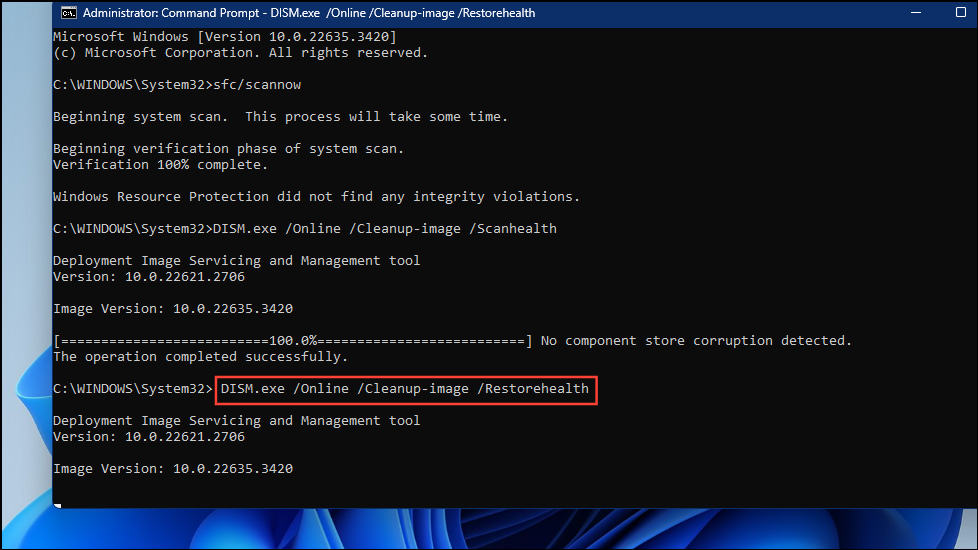
- When the scan is complete, close the window and restart your computer to see if the issue has been resolved.
7. Check Your PC’s Firewall
If your Firewall is not functioning properly or is disabled, it can result in 0x80070490 and 0x80072EFE errors. To prevent them, check your firewall and enable it if necessary.
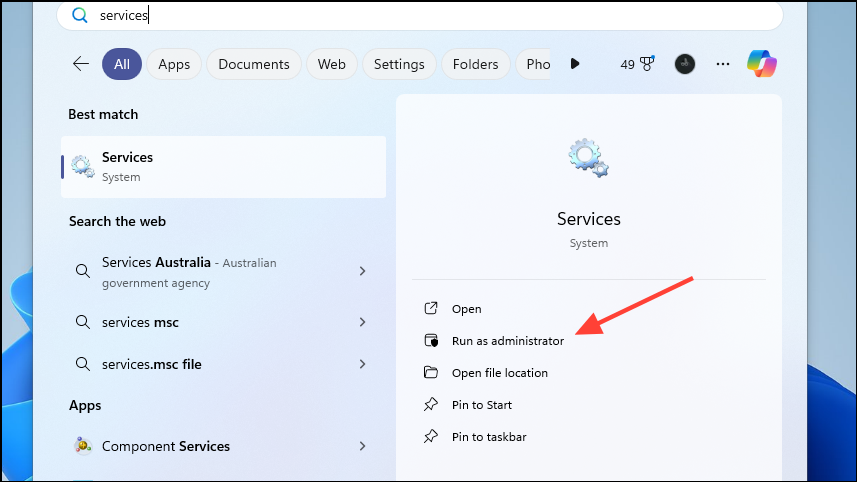
- Open the Start menu and type
servicesbefore clicking on the ‘Run As Administrator’ option on the right.
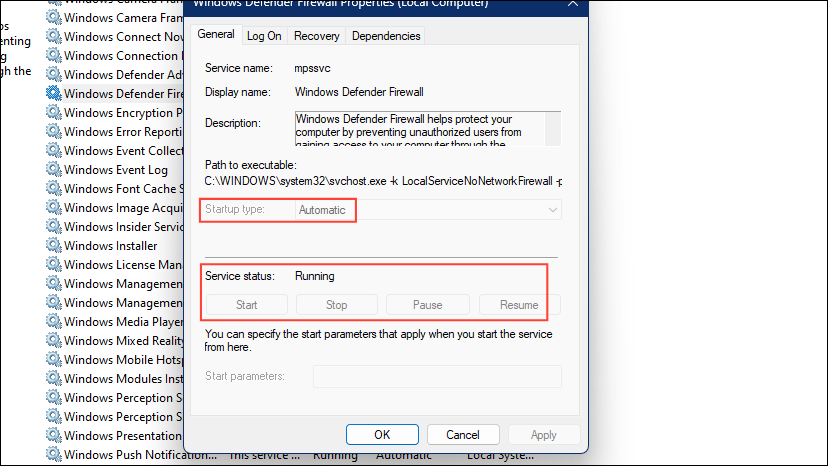
- Look for ‘Windows Defender Firewall’ in the services and make sure the Status shows ‘Running’ and the Startup Type is ‘Automatic’.

- In case it is not, double-click on it and change the Startup Type to ‘Automatic’ and Status to ‘Running’. Then click on the ‘OK’ button and close the utility.
8. Reset Your PC
Resetting your computer allows you to switch it back so it appears as if you have performed a fresh install of Windows. However, all your personal files are unaffected, which means this can be a useful method of getting rid of errors like 0x80070490 and 0x80072EFE.
- Open the Settings app and click on the ‘System’ option on the left side.
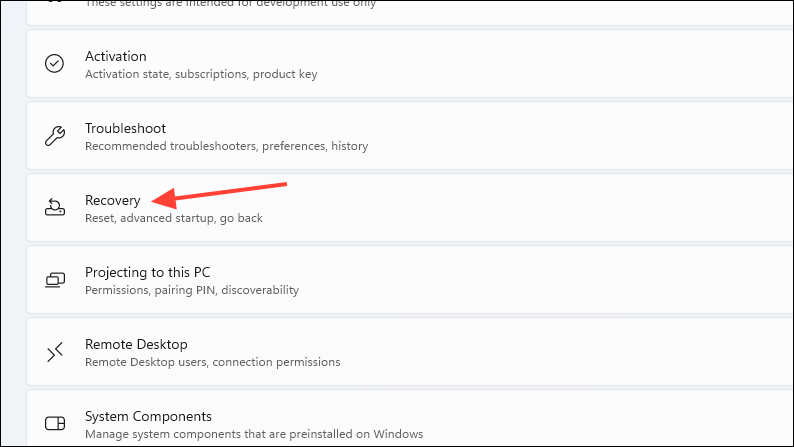
- On the ‘System’ page, scroll down to the ‘Recovery’ option and click on it.
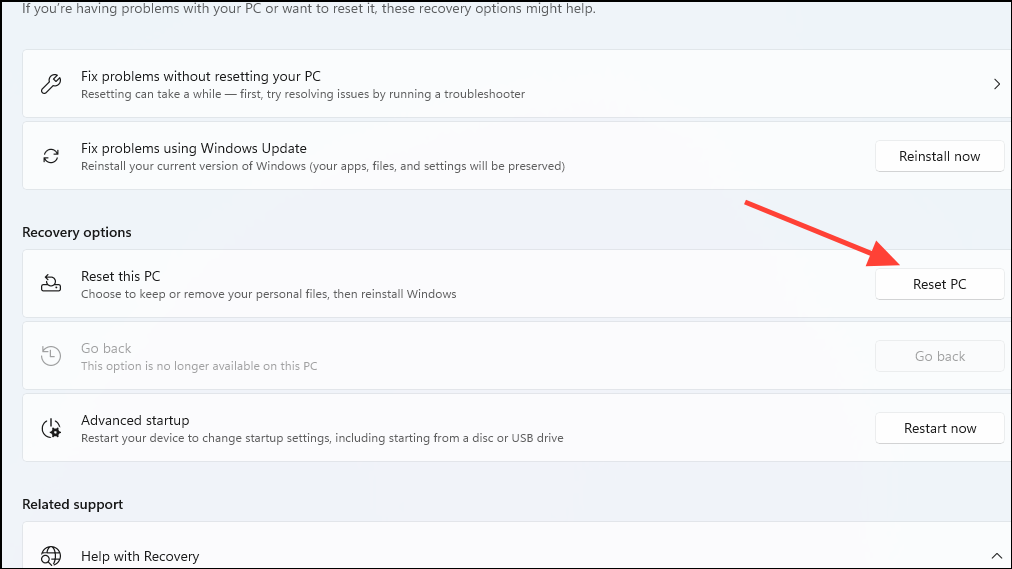
- You will find the option to reset your PC on this page. Click on the ‘Reset PC’ button on the right.
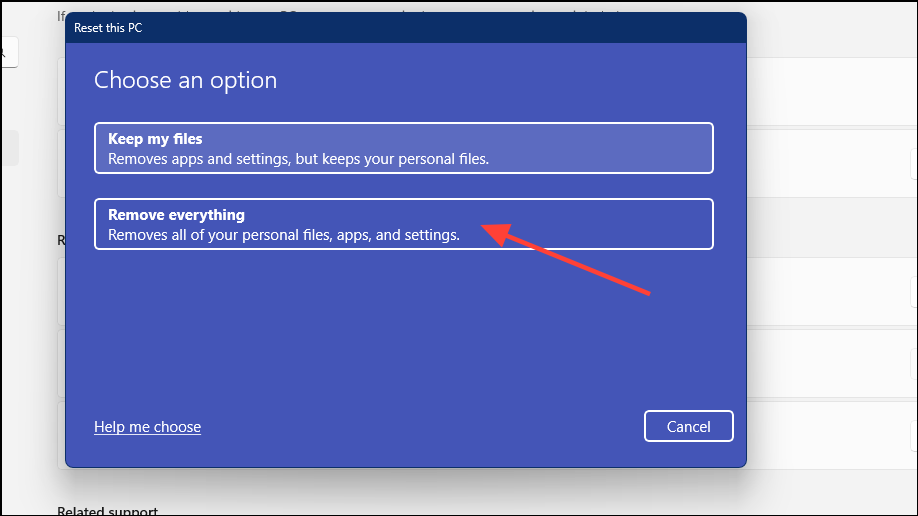
- This will bring up the ‘Reset PC’ window, which has two options. You can choose to keep your files or remove everything. We recommend going with the second option.
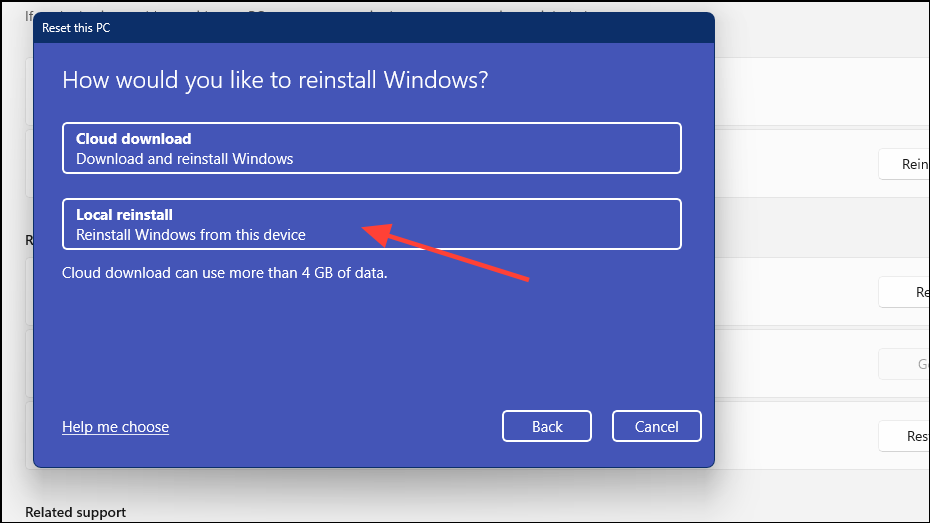
- On the next page, you will be able to choose whether to reinstall Windows from the cloud or locally. Click on the ‘Local Reinstall’ option.
- You can review your chosen settings on the next page. If you are satisfied, click on the ‘Next’ button.

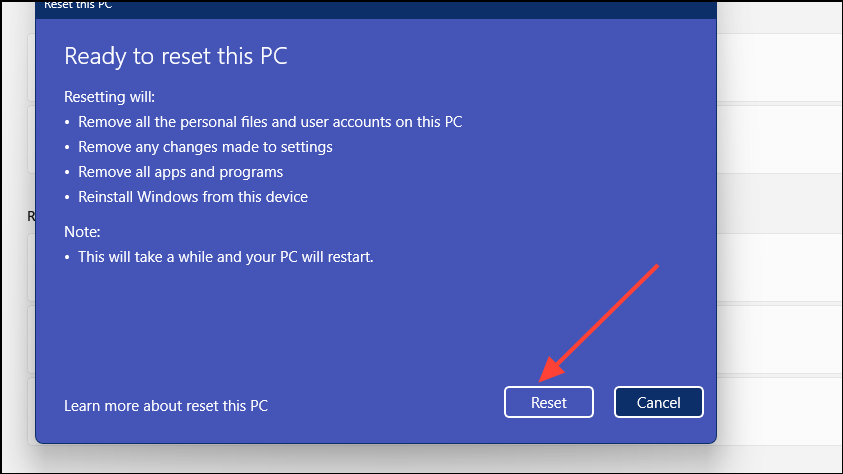
- Finally, click on the ‘Reset’ button. When you do so, Windows will restart and begin the reset process, which can take some time.
9. Disable the Device Setup Manager Service
To ensure that various devices are installed and configured properly, Windows comes with a Device Setup Manager Service. At times, this service can cause problems and lead to 0x80070490 and 0x80072EFE errors. You can disable the service to check whether that solves the issue.
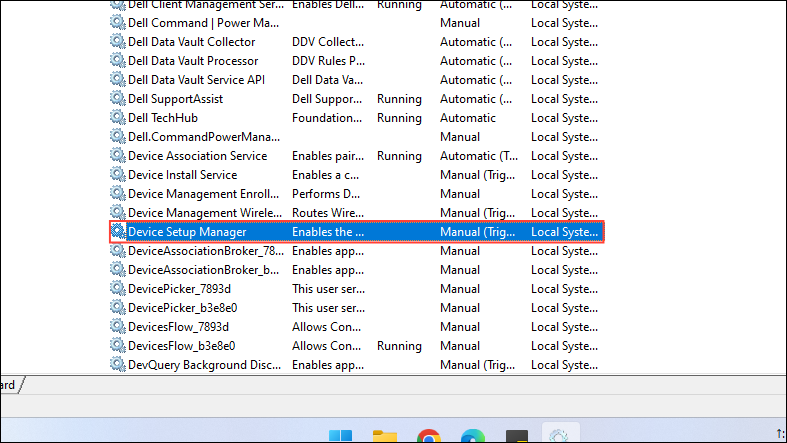
- Open the Start menu, type
services, and click on the utility to open it. - Look for the ‘Device Setup Manager’ in the list of services and double-click on it.
- By default, the Startup Type is Manual, and the service is enabled. You need to change the Startup Type to ‘Disabled’ and stop the service by clicking on the ‘Stop’ button.
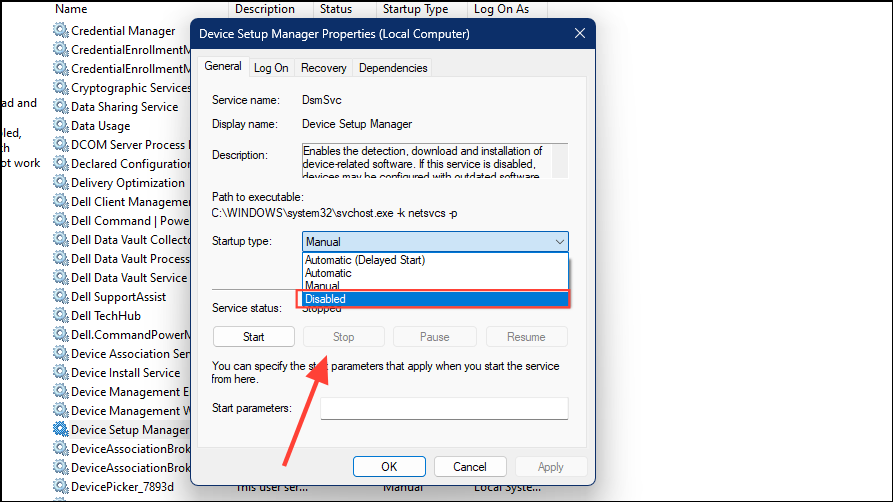
- Click on the ‘OK’ button and close the Services utility. Now, you should no longer be getting the 0x80070490 and 0x80072EFE errors.
10. Update or Reinstall Your Graphics Card Driver
Freezing and crashing issues related to the 0x80070490 and 0x80072EFE errors may sometimes be caused due to problems with your graphics card driver. The best solution in such cases is to update the driver or reinstall it if no updates are available.
Update Your GPU Driver
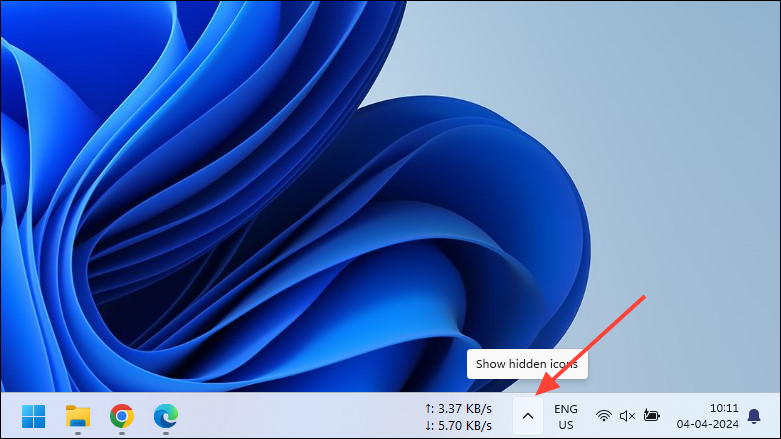
- Click on the ‘^’ icon on the taskbar to view hidden icons. Whether you are using Intel, AMD, or Nvidia drivers, you can access them from here.
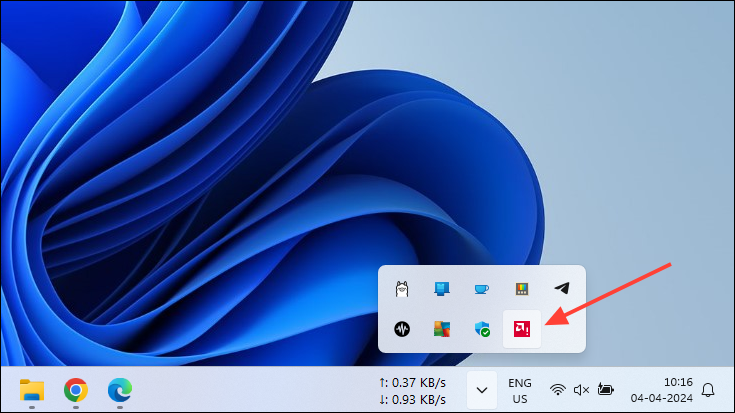
- Your GPU driver will be visible here. Right-clicking on it will give you a few options.
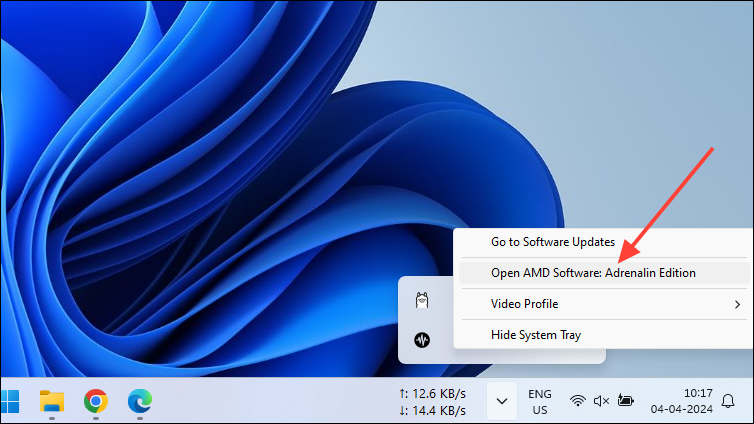
- Select the option to open it. The exact option may be worded differently depending on your GPU manufacturer, but it will allow you to access the driver settings.
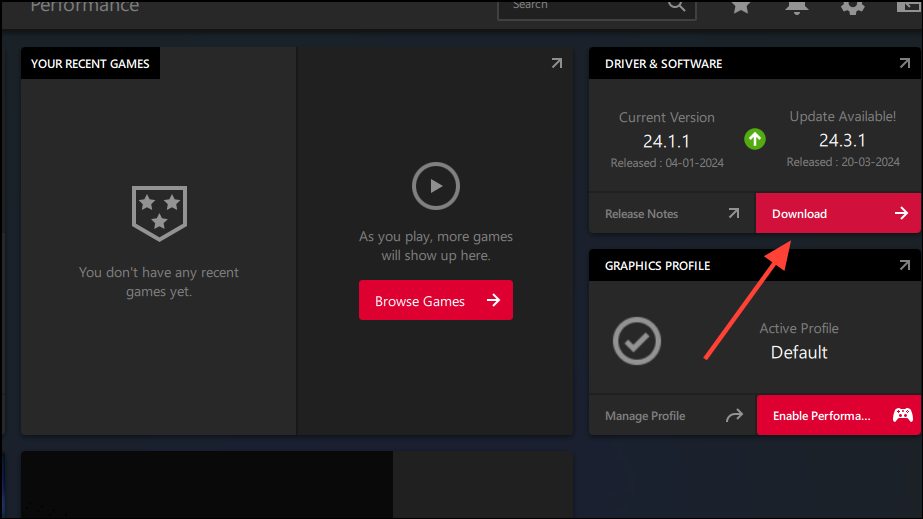
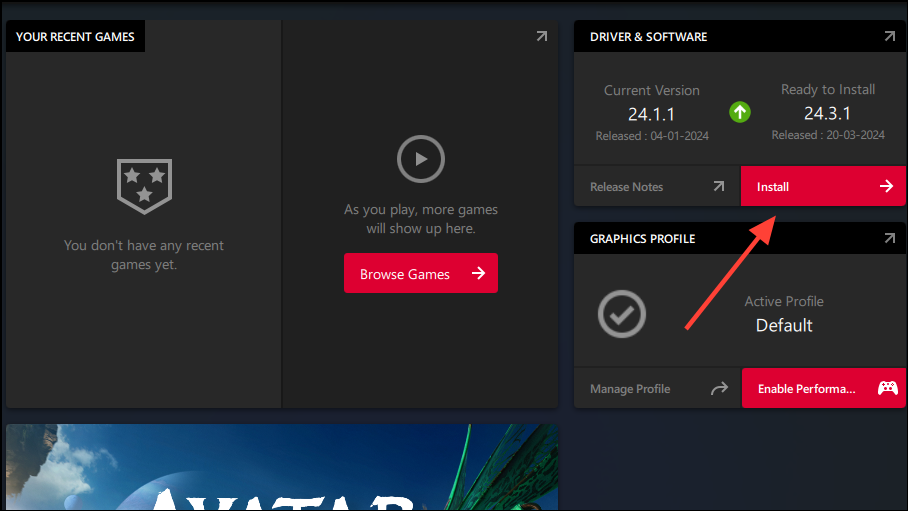
- When the graphics driver controls open up, look for an option to check for updates. In the case of AMD drivers, it appears on the Home tab in the ‘Driver and Software’ section on the right.

- Click on the ‘Check for Updates’ button, and the software will search for newer driver releases. If any update is available, click on the ‘Download’ button to download it.
- Once it is downloaded, click on the ‘Install’ button to start installing the new driver.
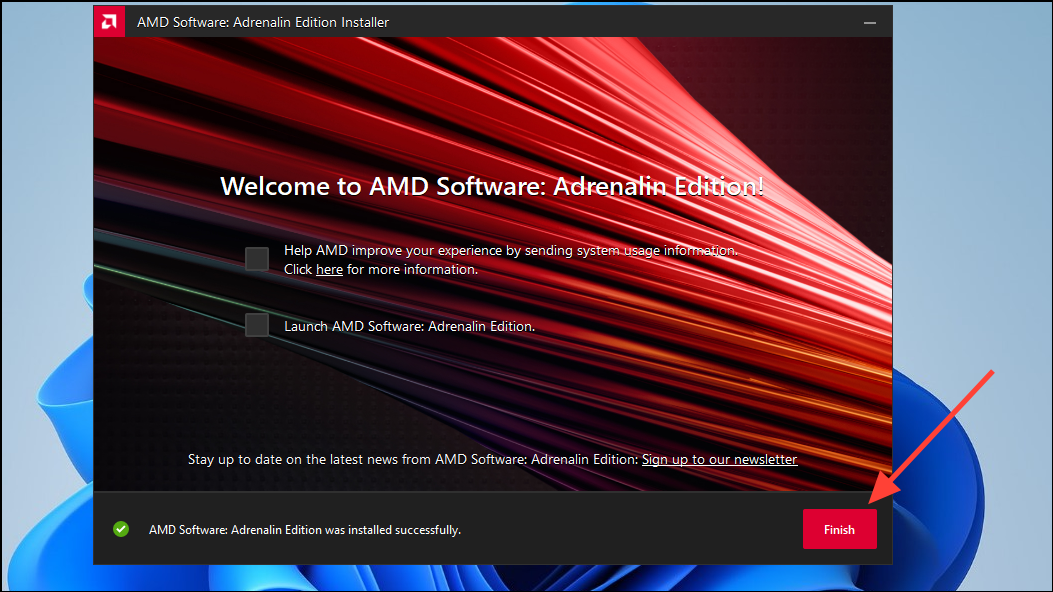
- When the installation is complete, click on the ‘Finish’ button and restart your computer.
Reinstall the Driver
If updating your graphics driver does not work, try removing the existing driver and reinstalling the latest one.
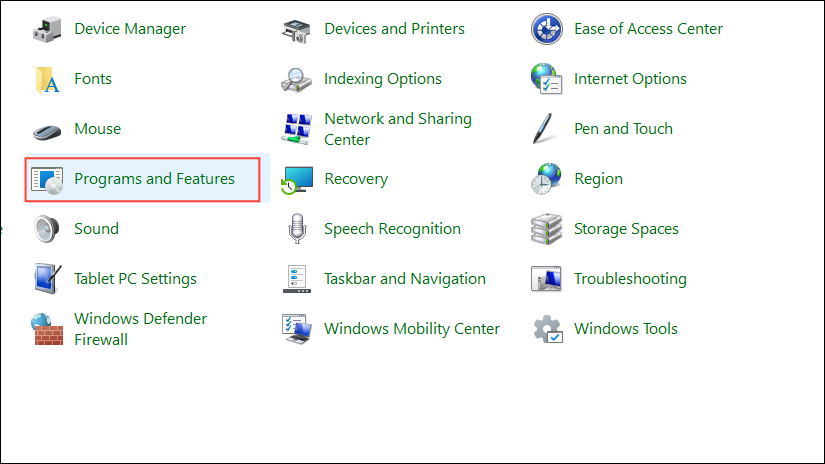
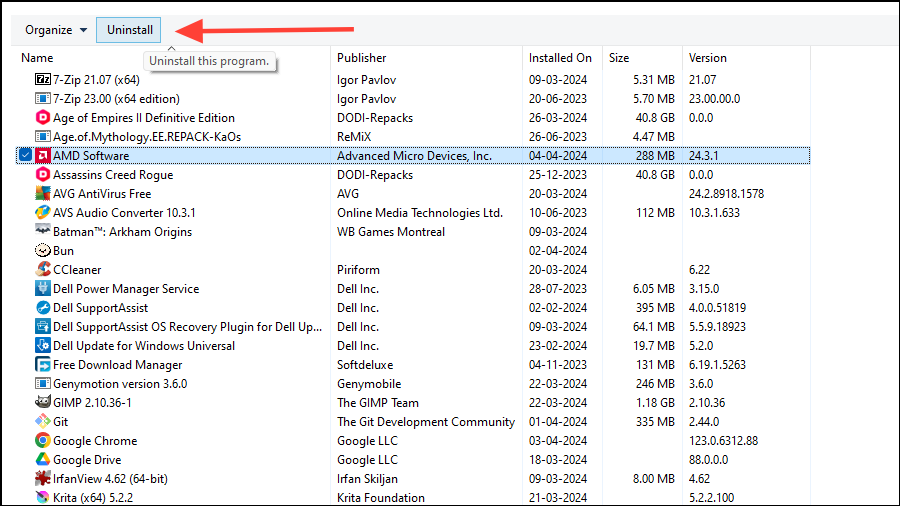
- Open the Control Panel on your PC and click on the ‘Programs and Features’ option.
- Look for your graphics drivers in the list of programs and click on it to select it.
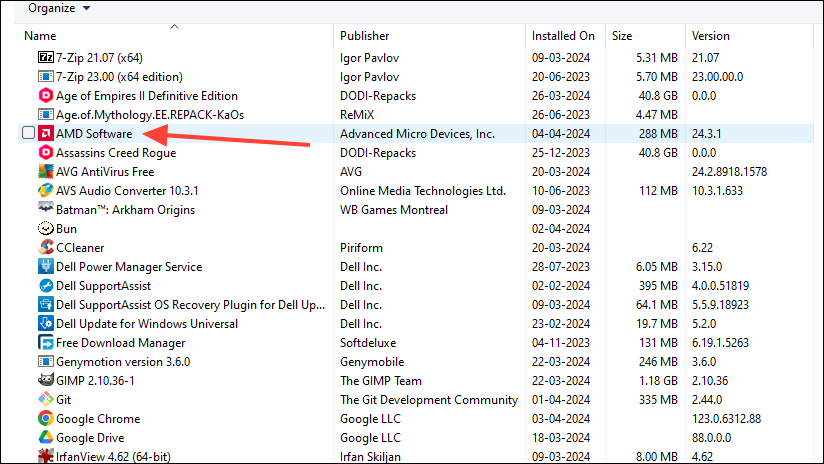
- Click on the ‘Uninstall/Change’ button at the top to remove the driver. Once the driver is removed, restart your computer before starting a fresh install.
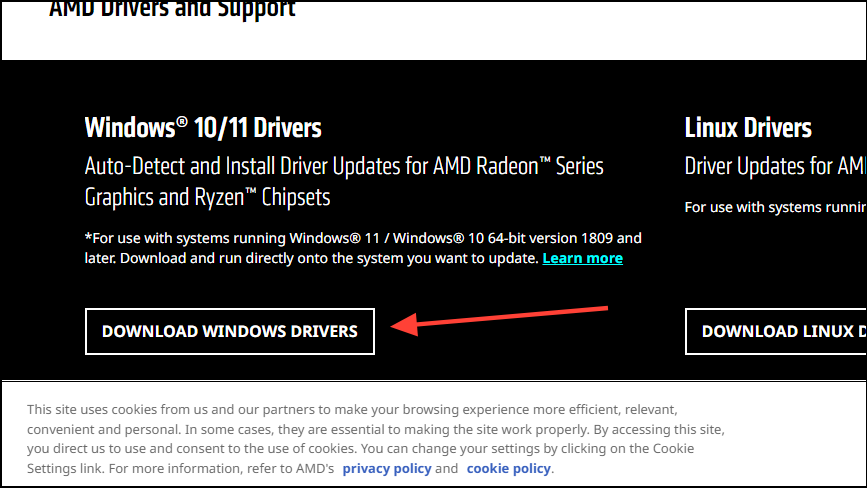
- To reinstall your graphics driver, visit the website of your graphics driver manufacturer to download the latest driver.
- In most cases, manufacturers offer a utility that can automatically detect the most suitable driver for your system and download it. For AMD drivers, you can visit the website and click on the ‘Download Windows Drivers’ button to get the utility.
- Once the utility finds the driver, follow the same procedure as above to download and install it before rebooting your PC.
11. Change the Internet Time Server
Changing the Internet Time Server is another possible solution that can help you fix the 0x80070490 And 0x80072EFE errors. Windows synchronizes with time.windows.com by default, but you can change its configuration easily.
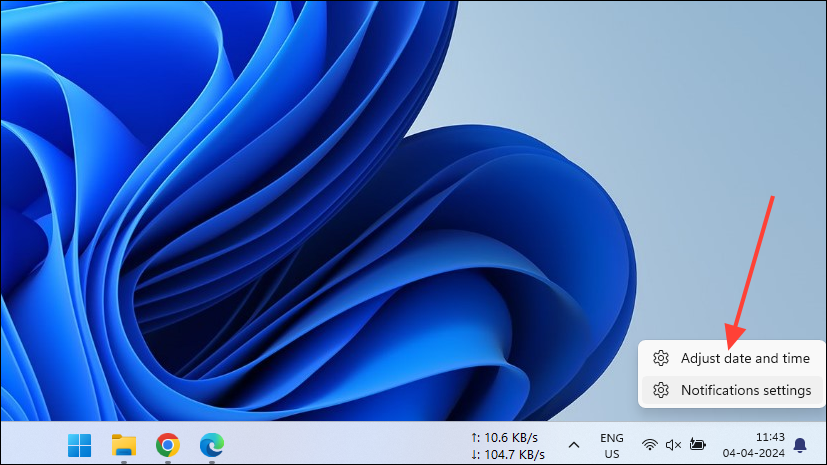
- Right-click on the date and time section on the taskbar and click on the ‘Adjust Date And Time’ option.
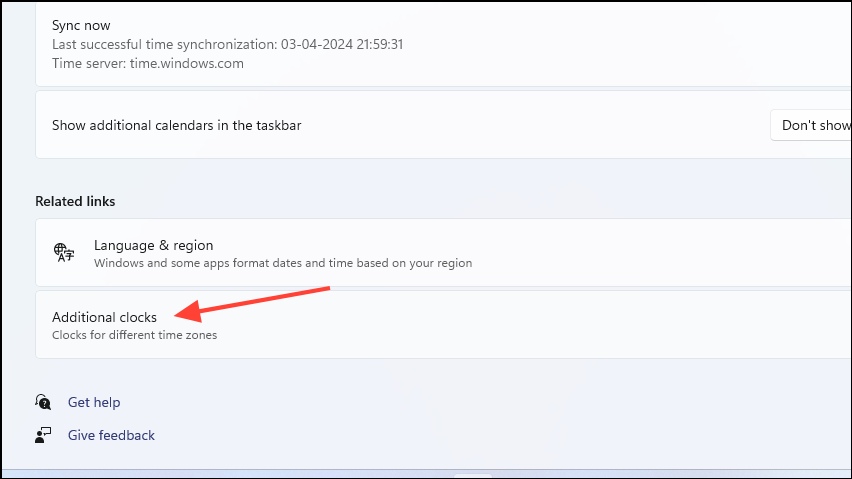
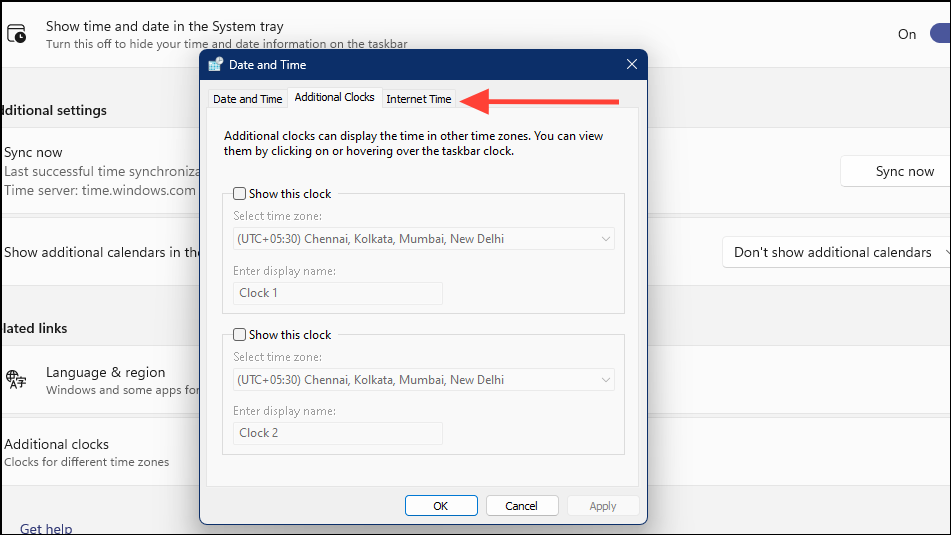
- On the Date and Time Settings page, scroll down and click on the ‘Additional Clocks’ option.
- From the pop-up window that appears, go to the ‘Internet Time’ tab.
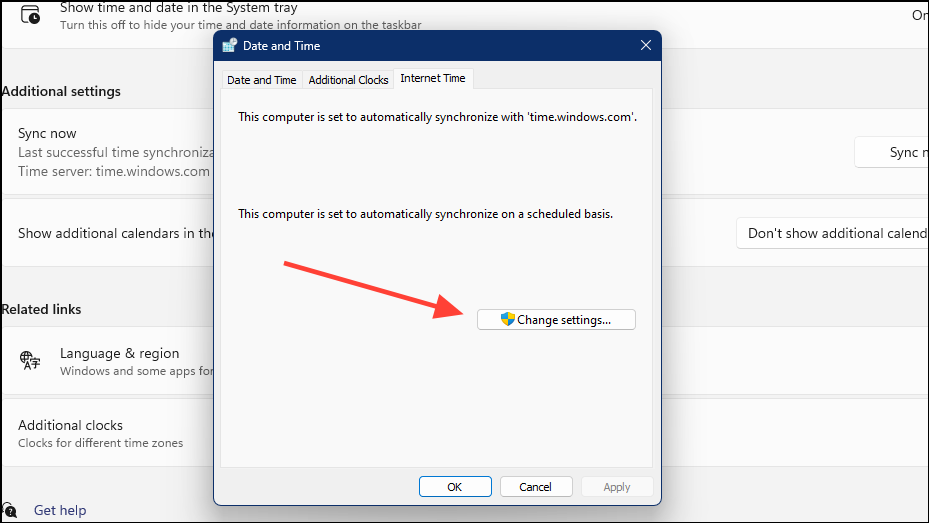
- Click on the ‘Change Settings’ button on this tab.
- Now, you can configure the Internet Time Server. Change it from ‘time.windows.com’ to ‘time.nist.gov’ and click on the ‘Update Now’ button.
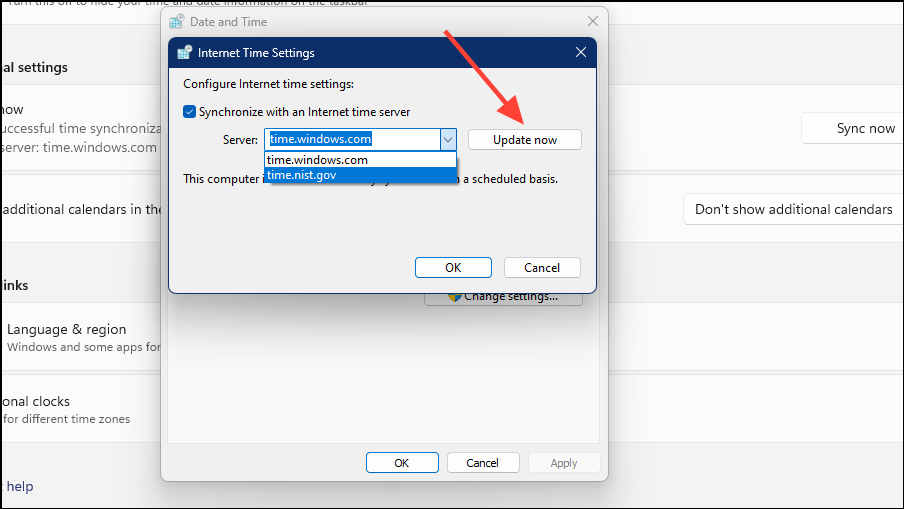
- Finally, click on the ‘OK’ button on both windows and close the Settings app.
The 0x80070490 And 0x80072EFE errors can occur due to a variety of causes, such as faulty Windows updates, out-of-date drivers, incorrect time settings, etc. The methods we’ve shared here can help you fix the problem if the errors are occurring due to these common causes.
That said, some of these fixes are temporary and may only work for a short time. If you run into these errors again, the only option left is to wait until Microsoft releases updates that contain fixes that resolve the problem.