Windows 11 introduced the Snap Layouts feature to help users organize multiple open windows more efficiently. While this can be a great tool for multitasking, some users might find it distracting or unnecessary. If you prefer not to use Snap Layouts, you can disable it through the Settings app or the Registry Editor. Here’s how to turn off Snap Layouts in Windows 11.
Related: How to Split Screen in Windows 11
Disable Snap Layout via Settings
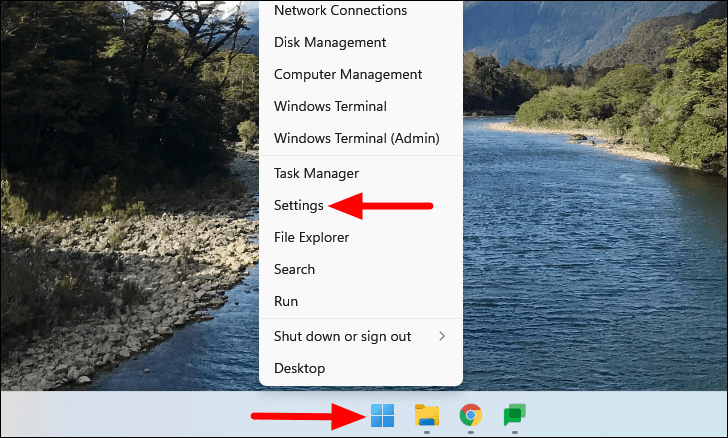
- Open the Settings app by right-clicking the Start button and selecting Settings, or press WINDOWS + I on your keyboard.
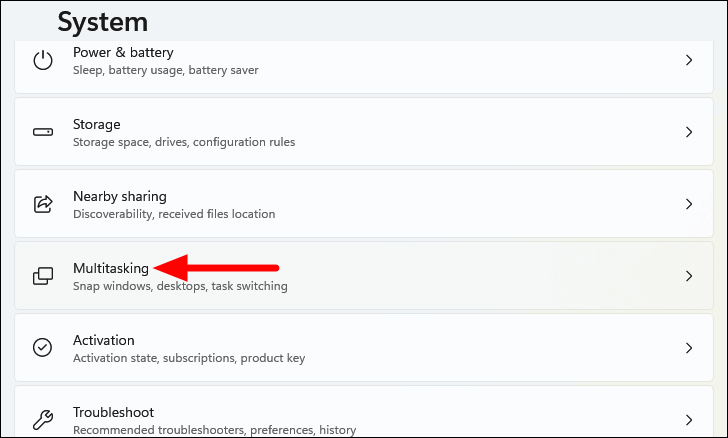
- In the System tab, which opens by default, click on Multitasking on the right side.
- Expand the Snap windows section by clicking on it.
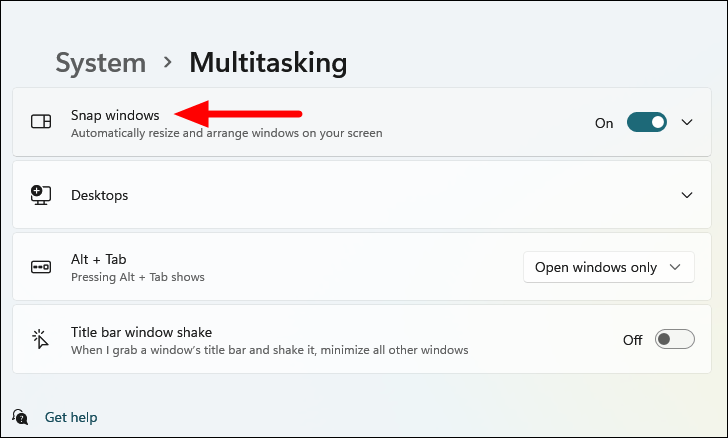
- Uncheck the option labeled Show snap layouts when I hover over a window’s maximize button.
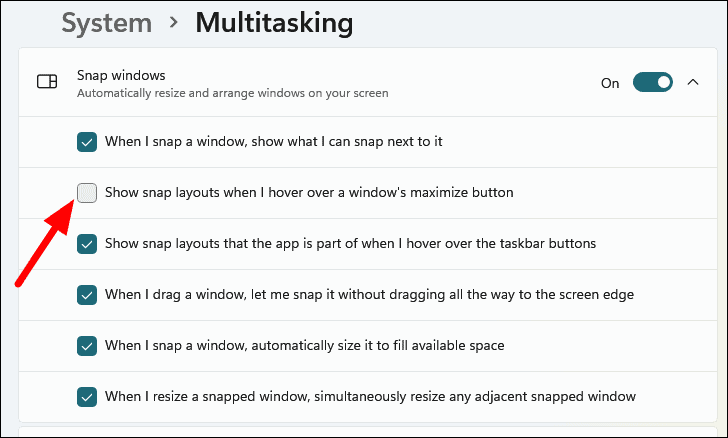
By completing these steps, the Snap Layouts flyout will no longer appear when you hover over the maximize button of an app window.
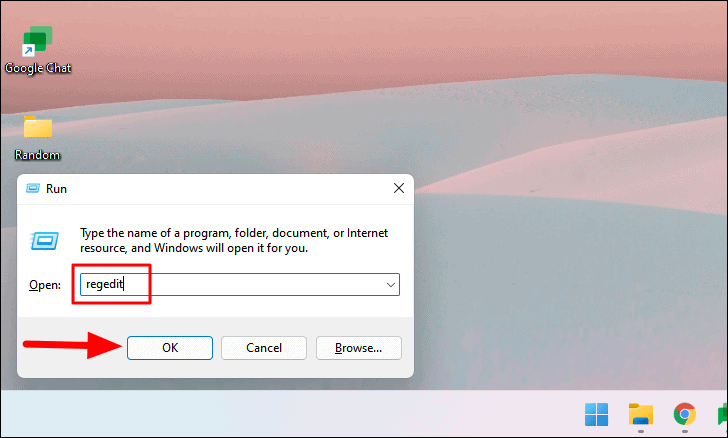
Disable Snap Layout via Registry Editor
- Press WINDOWS + R to open the Run dialog. Type
regeditand press ENTER to open the Registry Editor.
Navigate to the following path by expanding the folders in the left pane, or paste it into the address bar and press ENTER:
HKEY_CURRENT_USER\Software\Microsoft\Windows\CurrentVersion\Explorer\Advanced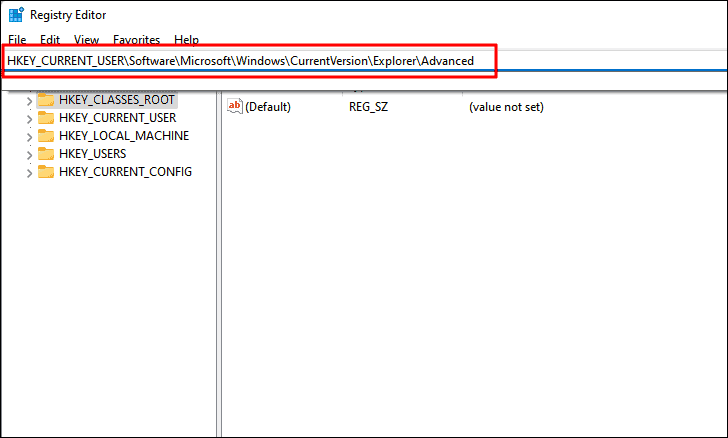
- In the right pane, look for a DWORD named EnableSnapAssistFlyout. If it doesn’t exist, create it by right-clicking on the Advanced key in the left pane, selecting New, then DWORD (32-bit) Value, and naming it EnableSnapAssistFlyout.

- Right-click on EnableSnapAssistFlyout and select Modify.
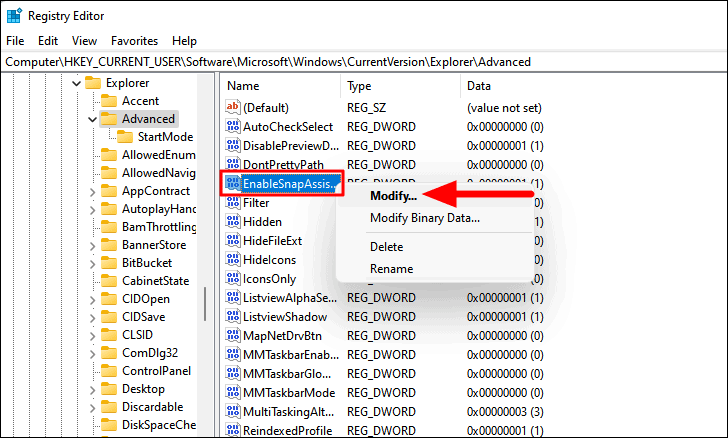
- Change the Value data to
0and click OK to save the changes.
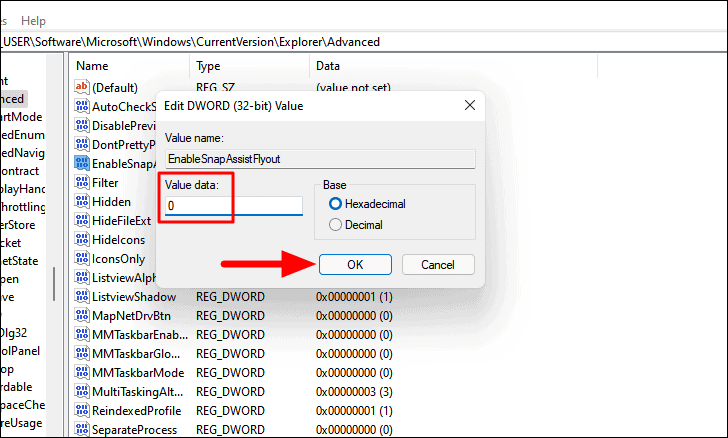
- Close the Registry Editor and restart your computer for the changes to take effect.
After restarting, the Snap Layouts feature will be disabled.
Disable Snap Windows Entirely
If you want to turn off the Snap Windows feature completely—which prevents windows from snapping when you drag them or use keyboard shortcuts—follow these steps:
- Open the Settings app by pressing WINDOWS + I or by right-clicking the Start button and selecting Settings.
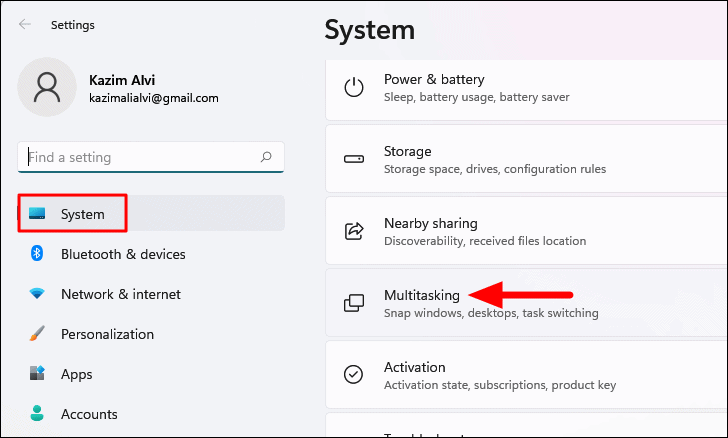
- In the System tab, click on Multitasking on the right side.
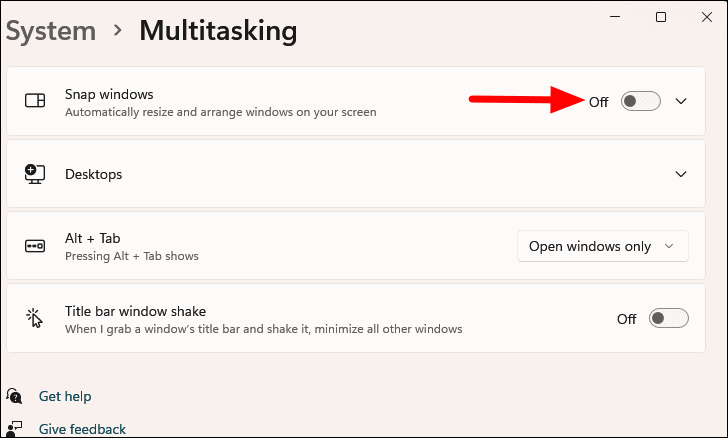
- Toggle off the switch next to Snap windows to disable the feature entirely.
With Snap Windows disabled, windows will no longer automatically snap to edges or corners, and the related keyboard shortcuts will be inactive.
While Snap Layouts and Snap Windows can enhance multitasking, they might not fit everyone’s workflow. Disabling these features can help create a more personalized and distraction-free computing experience.


