Double-spacing text in Microsoft Word enhances readability and makes documents appear more professional. While Word defaults to single-spacing, adding extra space between lines can be necessary for certain documents or formatting requirements. However, keep in mind that double-spacing can increase the length of your document, which may lead to higher printing costs and might not be suitable for all types of documents.
Double-space selected text
Using the 'Paragraph' dialog box
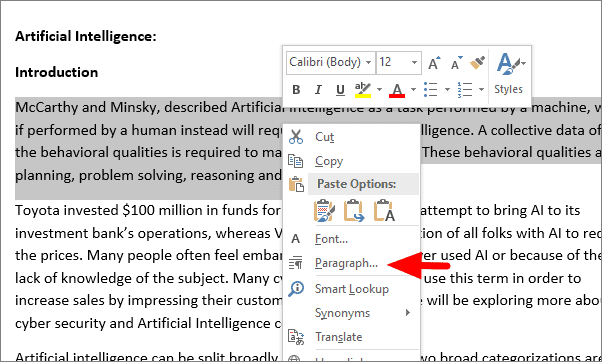
Step 1: Select the text you want to double-space. Right-click on the highlighted text and choose Paragraph from the context menu.
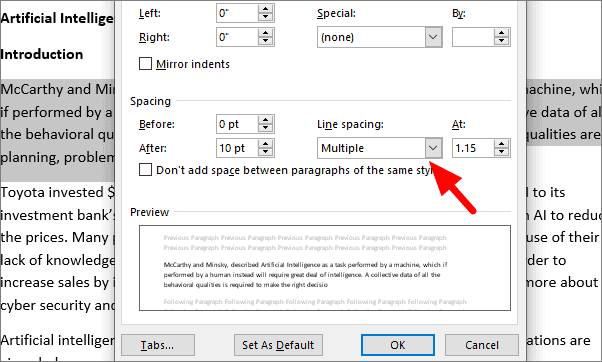
Step 2: In the Paragraph dialog box that appears, go to the Line spacing section and click on the dropdown menu.
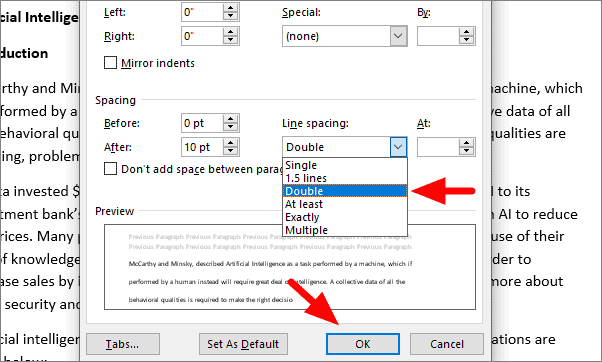
Step 3: Select Double from the dropdown options, then click OK to apply the changes.
The selected text will now be double-spaced, adding extra space between each line for improved readability.
Using the 'Home' tab
Step 1: Highlight the text you wish to double-space.
Step 2: On the Home tab in the ribbon, click on the Line and Paragraph Spacing icon, which looks like lines with up and down arrows.
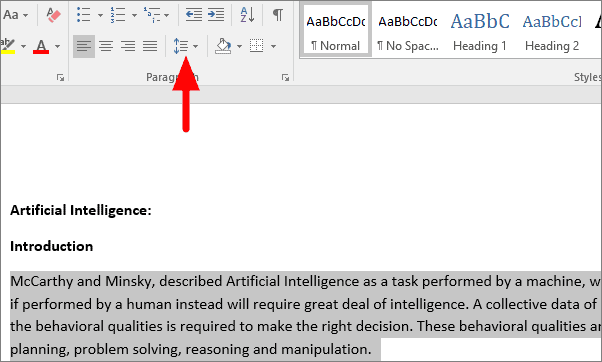
Step 3: From the dropdown menu, select 2.0 to apply double-spacing to the selected text.
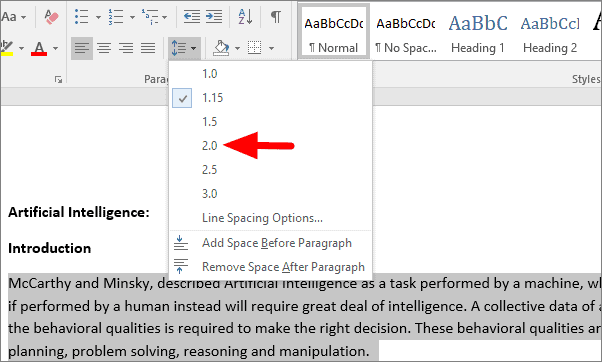
After selecting 2.0, the spacing between lines in the highlighted text will increase, applying the double-spacing format.
Double-space the entire document
You can also apply double-spacing to your entire document with a few simple steps.
Step 1: Navigate to the Design tab in the ribbon at the top of the Word window.
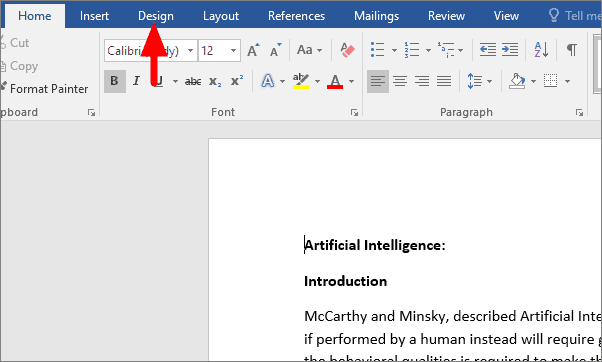
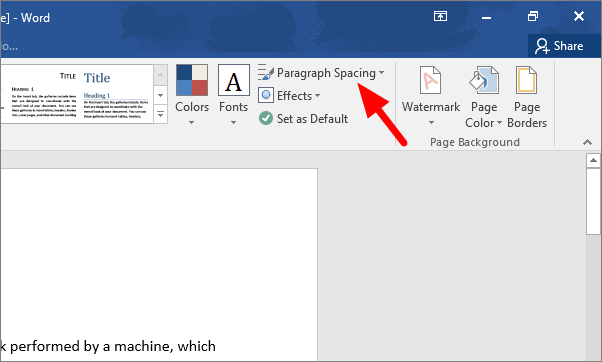
Step 2: In the Design tab, click on the Paragraph Spacing option located near the upper right corner.
Step 3: From the dropdown menu that appears, select Double to apply double-spacing to your entire document.
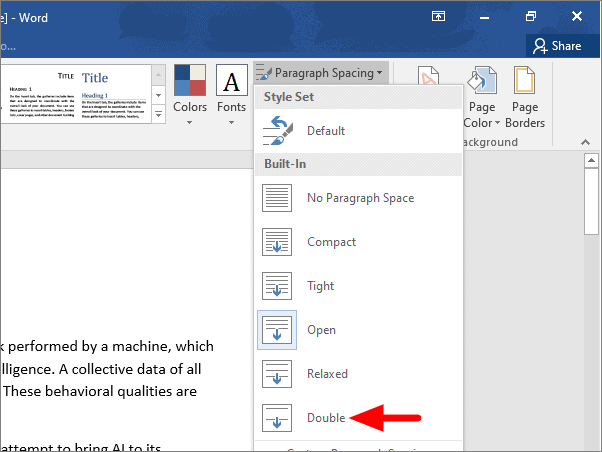
The entire document will now be formatted with double-spacing, increasing the space between all lines of text.
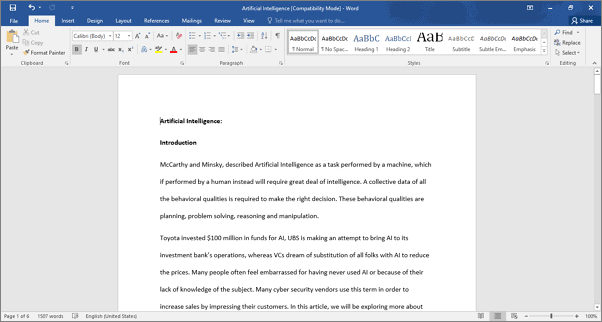
By following these methods, you can easily adjust line spacing in Microsoft Word to suit your document's needs, enhancing its readability and presentation.

