Windows 10 is probably the most advanced of the OS. It offers several customizing options that benefit a large section of users. However, some of the features may also cause trouble to many.
Auto adjustment of microphone level is one of the common problems faced by users. Several users want to adjust their microphones to a certain level but certain inbuilt or third-party apps adjust it as they deem fit. This could be due to many numerous reasons. Maybe while setting up the app, you unknowingly granted permission to adjust microphone level, or your device settings have auto adjustment enabled. We will discuss all possible solutions to the problem.
Disabling Microphone Auto Adjustment
Change Sound Settings
The sound settings on your system may be allowing apps to auto adjust the volume. You will need to make certain adjustments to the sound settings to disable auto adjustment. If you are facing issues with an external microphone, plug it in before proceeding with the next steps.
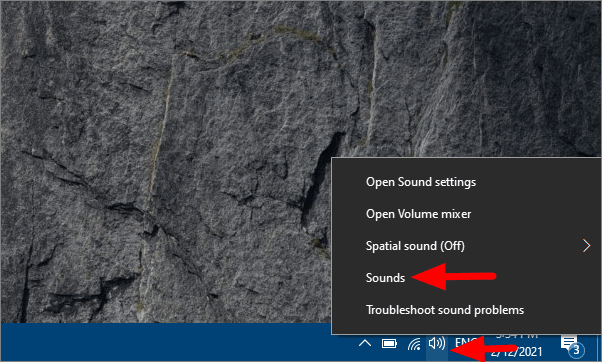
Right-click on the speaker icon at the right corner of the Taskbar and then select ‘Sounds’ from the menu.
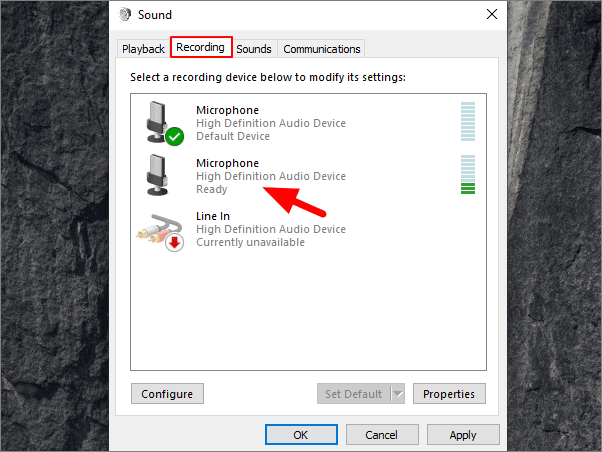
Head to the Recording tab and double-click on the microphone you are facing issues with.
When you double-click on the microphone, its properties window will open. Go to the Advanced tab and untick the checkbox right before ‘Allow applications to take exclusive control of this device’, and then click on ‘OK’ at the bottom.

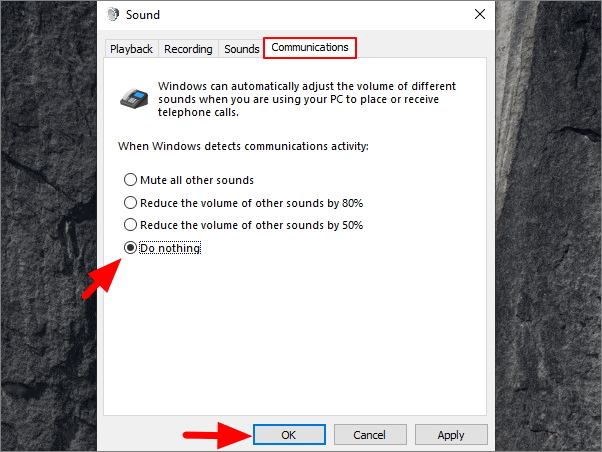
Now, in the Sound properties, head to the Communications tab, select ‘Do nothing’ under ‘When Windows detects communications activity’, and then click on ‘OK’.
Check if the issue is resolved. If not, we will have to modify the app settings.
Change App Settings
Skype is one of the apps where users face the issue with auto adjustment of microphone level.
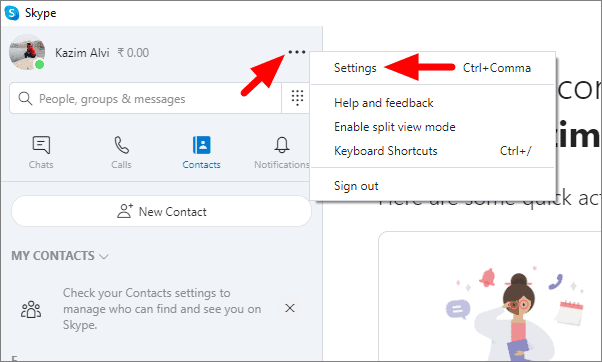
To disable the setting, open Skype, click on the three dots at the top and then select ‘Settings’ from the menu.
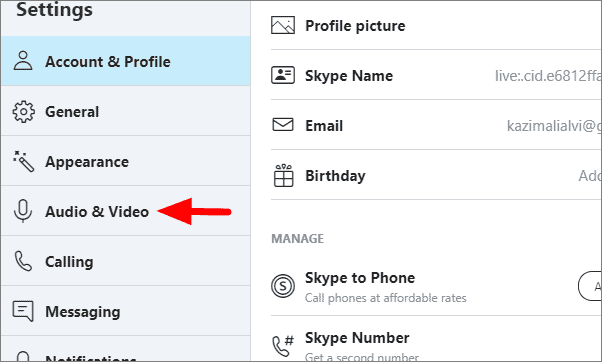
Head to the ‘Audio and Video’ tab in Skype Settings.
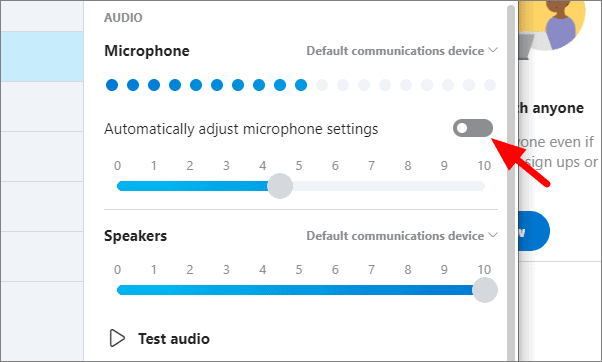
Click on the toggle next to ‘Automatically adjust microphone settings’ to disable it. The color of the toggle will change from blue to grey when it’s disabled.
Changing Microphone Levels Manually
Another option that has worked for several users is manually changing the microphone levels.
To manually change the microphone level, you will again have to head to Sound and open the Microphone properties for which you want to change the level as we did earlier.
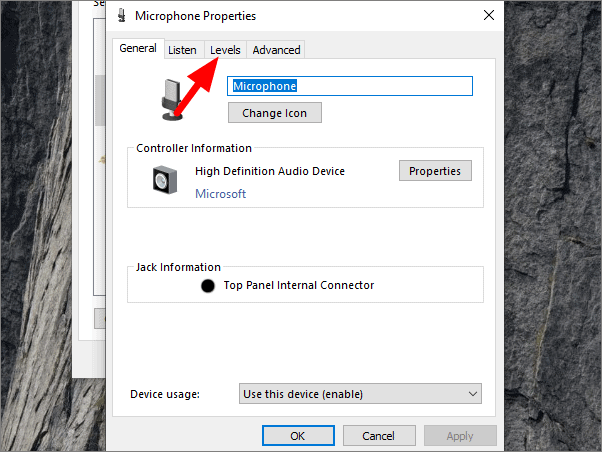
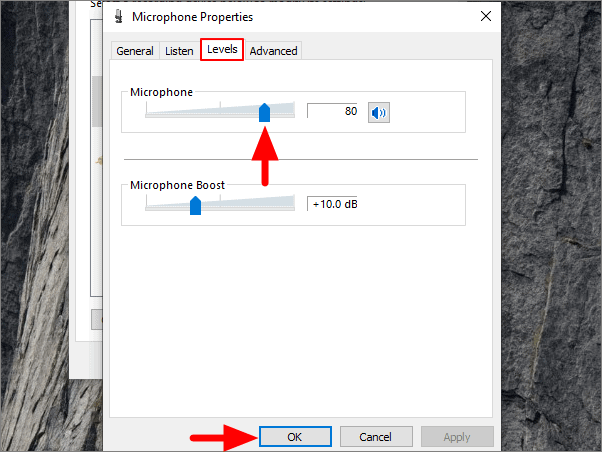
In Microphone Properties, go to the ‘Levels’ tab, the third option.
Now, drag and move the slider under the Microphone to adjust the level. Moving the slider to the right will increase the level while moving to the left will decrease it. Once you have got the optimal level, click on ‘OK’ at the bottom, and then close the window.
Windows Troubleshoot
One of the best features of Windows 10 is the troubleshoot option. When nothing works, you can always rely on troubleshooting to identify and fix the problem.
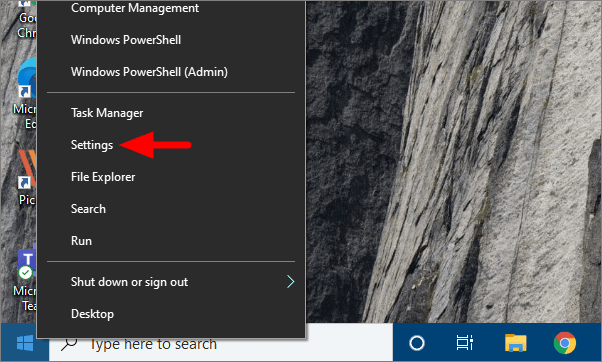
To run the troubleshooter, right-click on the Start Menu icon and select ‘Settings’ from the Quick Access Menu.
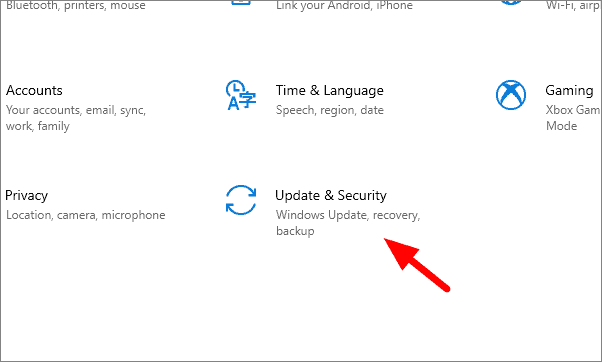
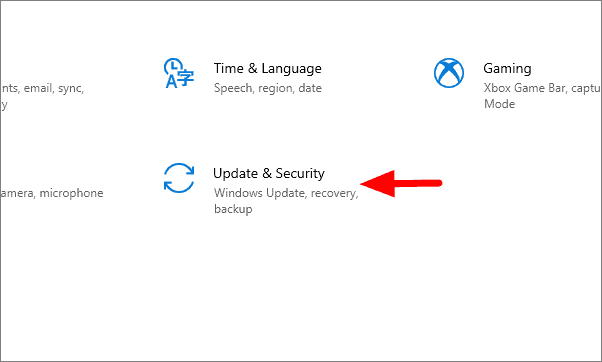
Select ‘Update & Security’ in the Settings window.
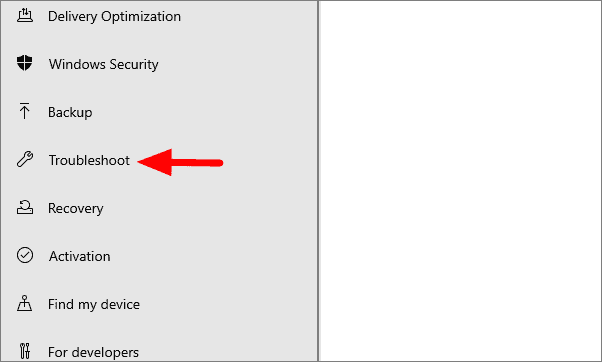
Now, click on ‘Troubleshoot’ from the list on the left to see the various troubleshooting options.
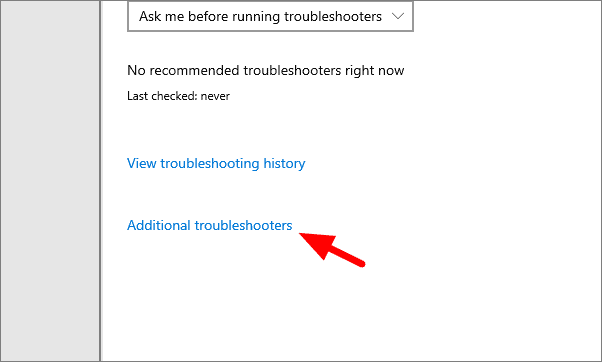
Click on ‘Additional troubleshooter’.
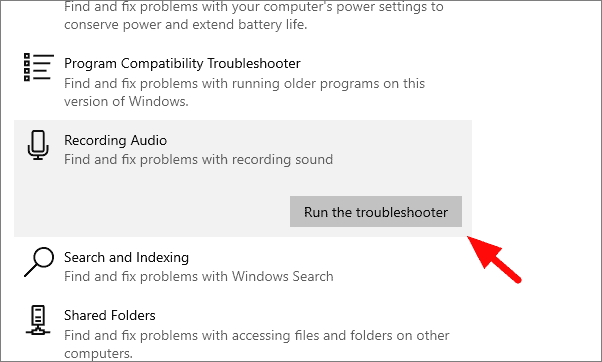
Scroll down, select ‘Recording Audio’ troubleshooter from the list, and then click on ‘Run the troubleshooter’.
Follow the instruction on the troubleshooter window to identify and fix the auto adjustment issue.
Update Sound Drivers
If you have not updated your drivers in a long time, it’s time you do. Outdated drivers can lead to several issues, and it’s necessary to update them. Generally, Windows look for driver updates and installs them automatically but sometimes it doesn’t, which may lead to the issue.
Search for ‘Device Manager’ in the Start Menu and click on it.

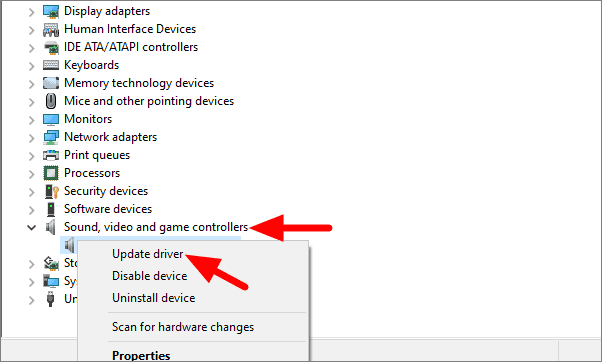
Now, look for ‘Sound, video and game controllers’ and click on it to see the various devices. Right-click on the device you are having trouble with and then select ‘Update Driver’ from the menu.
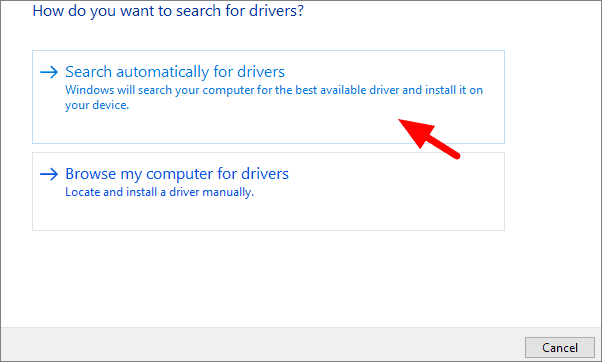
On the next window, select ‘Search automatically for drivers’ to let the Windows search for and update the driver.
If the issue is still unresolved, try updating the windows.
Update Windows
Running an older version of Windows can lead to the malfunctioning of many apps. It is recommended to always be on the latest version.
To update Windows, press WINDOWS + I to open settings and then click on ‘Update & Security’, the last section.
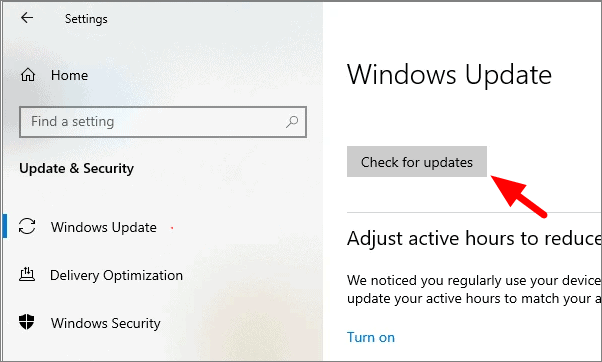
In Update & Security settings, the Windows Update tab will open by default. Click on ‘Check for updates’ at the right to see if there are any available updates.
If Windows find an update, download and install it to resolve the issue.
Now that we have discussed all the methods to stop the microphone from auto adjusting, you can easily do the same in your system.


