A Hanging Indent in Microsoft Word formats a paragraph so that every line after the first is indented. This style is commonly used in bibliographies, reference lists, and citations. There are two primary methods to create a Hanging Indent: using the Paragraph dialog box or the ruler.
Using the Paragraph dialog box
Step 1: Select the paragraph where you want to apply the Hanging Indent.
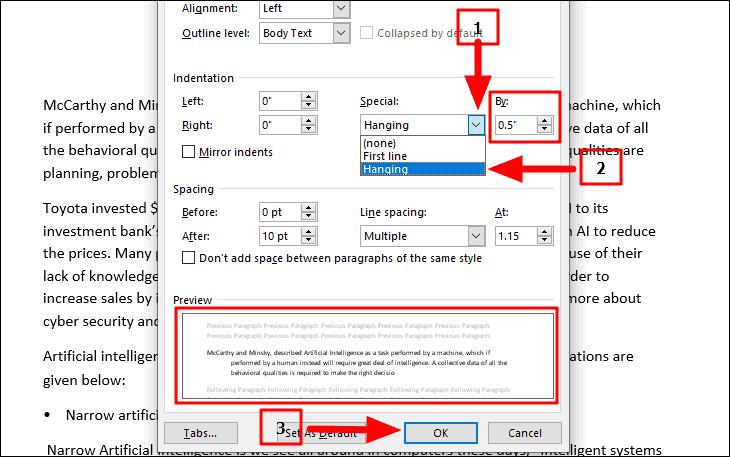
Step 2: Click on the small arrow at the bottom right corner of the "Paragraph" group on the ribbon to open the Paragraph dialog box.

Step 3: In the "Indentation" section, find the "Special" dropdown menu and select "Hanging". Adjust the indent depth using the "By" field if needed.

Step 4: Click "OK" to apply the changes. You can preview the formatting in the "Preview" section before confirming.

Using the ruler
Step 1: Ensure the ruler is visible by going to the "View" tab and checking the "Ruler" option in the "Show" group.

Step 2: Highlight the paragraph you want to format with a Hanging Indent.
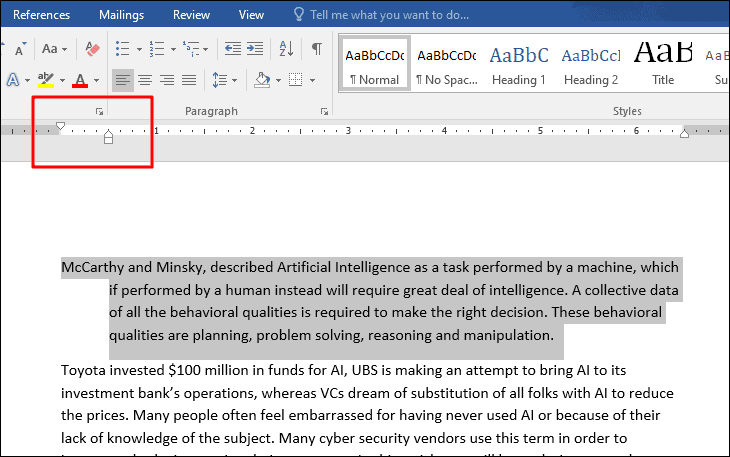
Step 3: On the ruler, locate the upward-facing triangle, which represents the Hanging Indent marker. Click and drag it to the right to set the desired indent distance.

In this example, the lines are indented by 0.5 inches, as indicated on the ruler.

By following these methods, you can create a Hanging Indent in Microsoft Word to enhance the presentation of your documents.

