Ensuring the security of confidential meetings held over Zoom is paramount for organizations. Unauthorized recordings can lead to sensitive information being shared without permission, risking the privacy and integrity of corporate communications. To mitigate this risk, Zoom offers an ‘Audio Watermark’ feature that helps track recordings back to specific users.
What is the audio watermark in Zoom recordings?
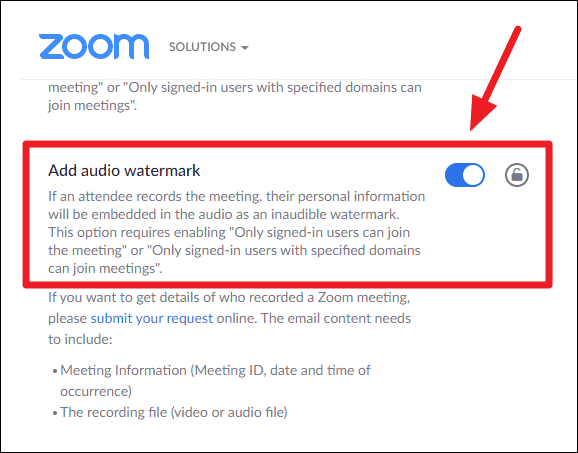
The audio watermark is a hidden digital signature embedded within the audio of a Zoom meeting recording. This watermark contains personal information of the user who records the meeting, such as their Zoom account details. While it is neither visible nor audible to participants, it enables Zoom administrators to identify who recorded a meeting if the recording is shared or leaked without authorization.
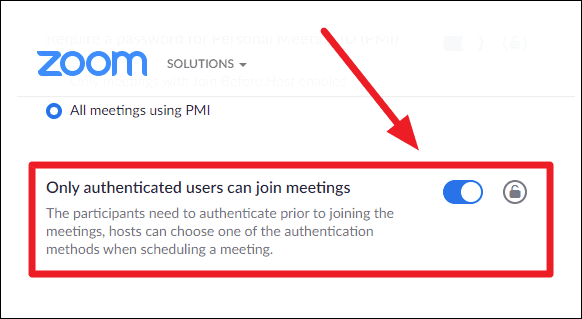
It’s important to note that the audio watermark feature is effective only when the option to allow only authenticated users to join meetings is enabled. Additionally, recordings submitted to Zoom for investigation must be at least two minutes long for the watermark to be analyzed.
How to enable ‘Add audio watermark’ in Zoom recordings
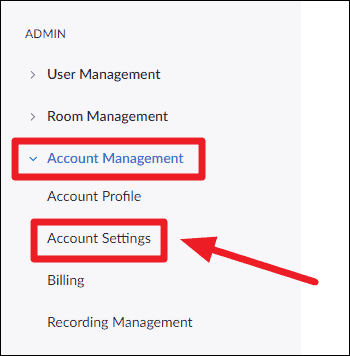
To activate the audio watermark feature, you must be logged into a Zoom account with administrative privileges within your organization. This feature is not available for basic Zoom accounts. Follow the steps below to enable it:
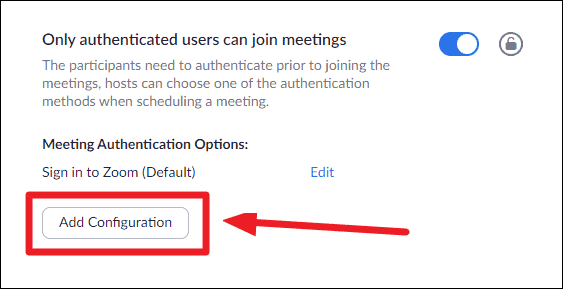
Optional: You may also configure additional meeting authentication options by clicking on the “Add Configuration” button. This allows you to restrict meeting access to users with specific domains, such as your company’s email domain, enhancing the security of your meetings.
By following these steps, you enhance the security of your Zoom meetings, ensuring that any unauthorized sharing of recordings can be traced back to the specific user responsible.
Implementing the audio watermark feature adds an extra layer of protection to your confidential meetings, promoting a safer and more secure communication environment within your organization.