

Microsoft brings the high-anticipated tabs for File Explorer starting from Windows 11 Insider Build 25136 (Dev Channel). The feature is still in the testing phase and so it is being slowly rolled out to the broader audience. It allows you to open different folders and drives in individual tabs inside one File Explorer window just like different webpages in one browser window.
In addition to that, Microsoft also redesigned the layout for the left navigation pane of the tabbed File Explorer. The new design makes it easy to access the pinned library folders (Documents, Downloads, Music, Pictures, etc.) and frequently used folders. Also, the Windows library folders are longer located under the This PC tree instead the library folders and the frequently used folders are given a separate section in the left navigation panel.
As of now, the feature is only available to Windows 11 Insider Preview build 25136 and later builds. If it’s not available in your latest insider preview of Windows 11, the feature will be automatically enabled in future updates. But if you want to get your hands on the tabbed File Explorer now, you can enable it with the help of a third-party tool called ViveTool. In this post, we will show you how to enable the tabs in File Explorer on Windows 11.
Enabling Tabs for File Explorer in Windows 11
First, ensure that you have registered in the Windows 11 Insider Program’s Dev Channel and have updated your PC to the latest OS build (Windows 11 Dev build 25136 or later builds).
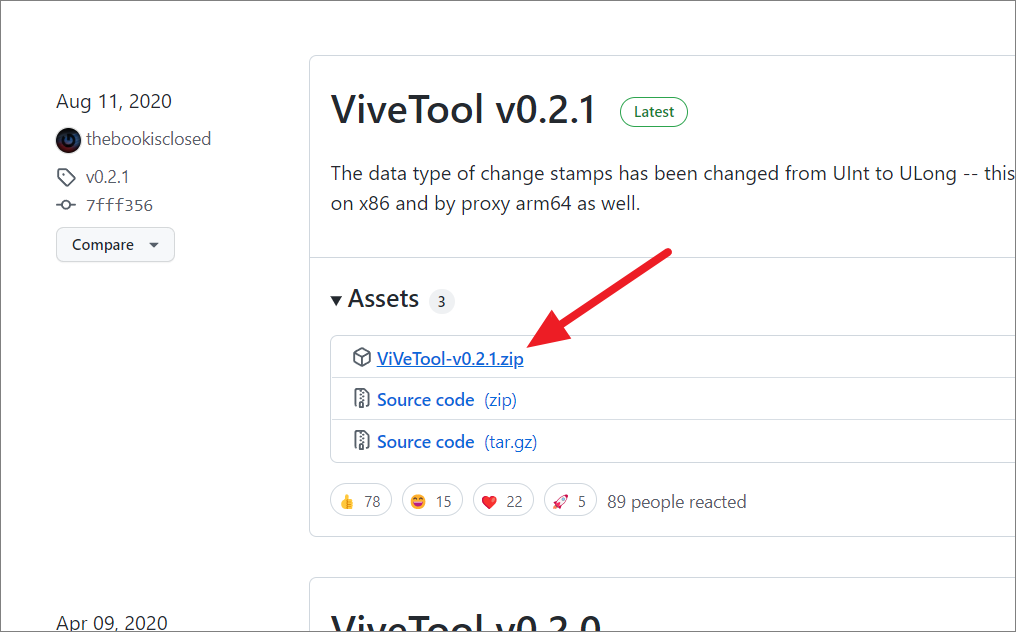
Next, go to ViveTool’s GitHub page and download the latest version of the tool (the zip file). Click on the ‘ViveTool-vx.x.x.zip’ link to download the zip file.
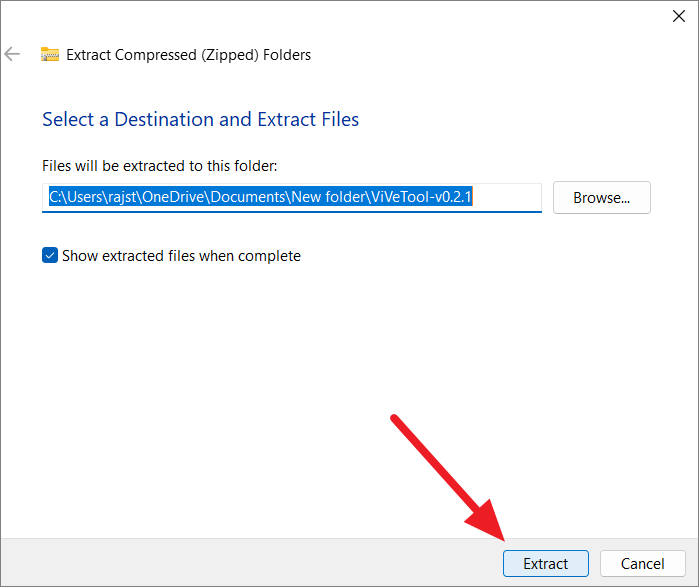
Then, right-click on the download zip file and choose ‘Extract All…’ from the context menu.

In the Extract window, choose a destination folder and click the ‘Extract’ button to extract the files.
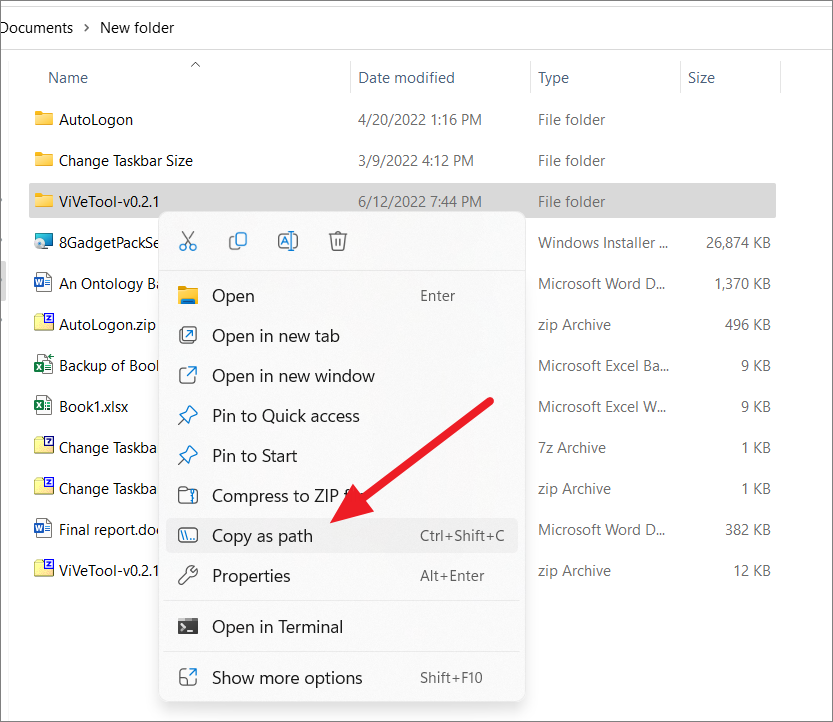
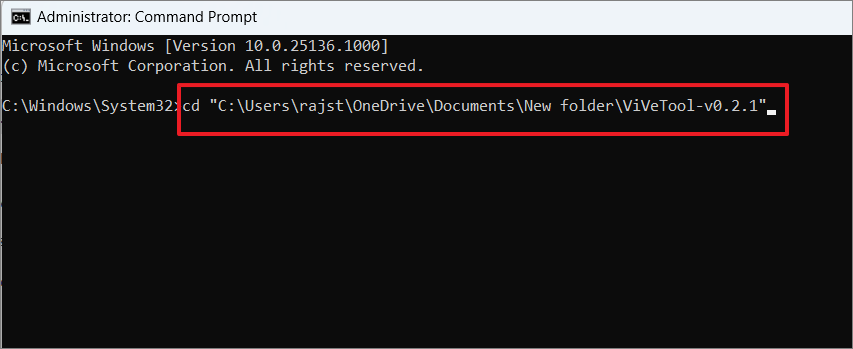
Then, right-click the extracted folder and select the ‘Copy as path’ option.
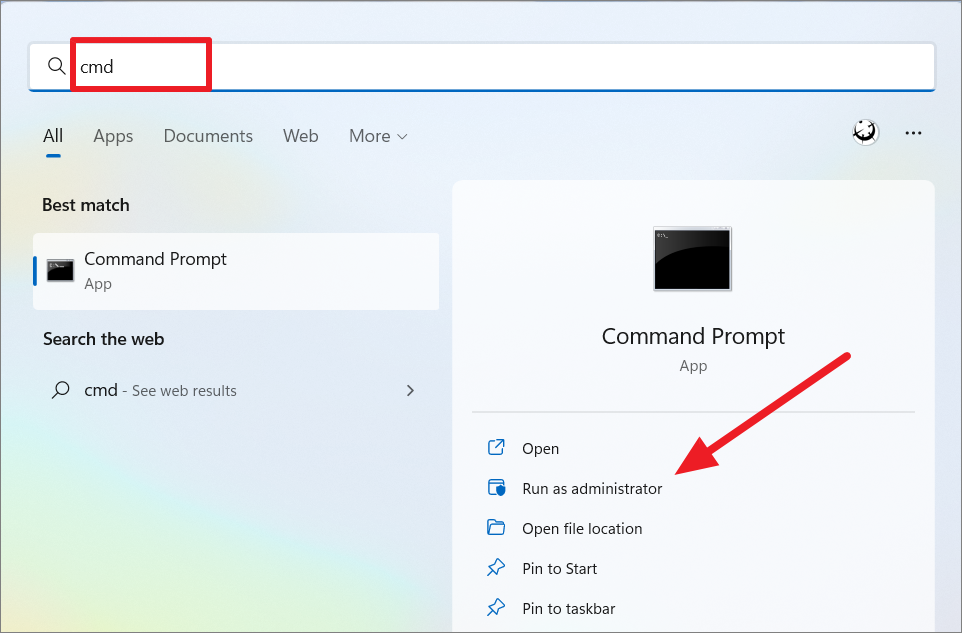
After that, open Command Prompt with Administrator privileges on your PC. To do that, search for ‘Command Prompt’ or ‘cmd’ in the Windows Search and select the ‘Run as Administrator’ option for the result.
Once the command prompt opens, you need to change the directory to the folder where the extracted ViveTool is located. To do that, type cd, a space, and then paste the copied path of the extracted folder. Simply right-click on the command prompt to paste the path and then press Enter.
Then, run the following command to enable tabs for File Explorer:
vivetool addconfig 37634385 2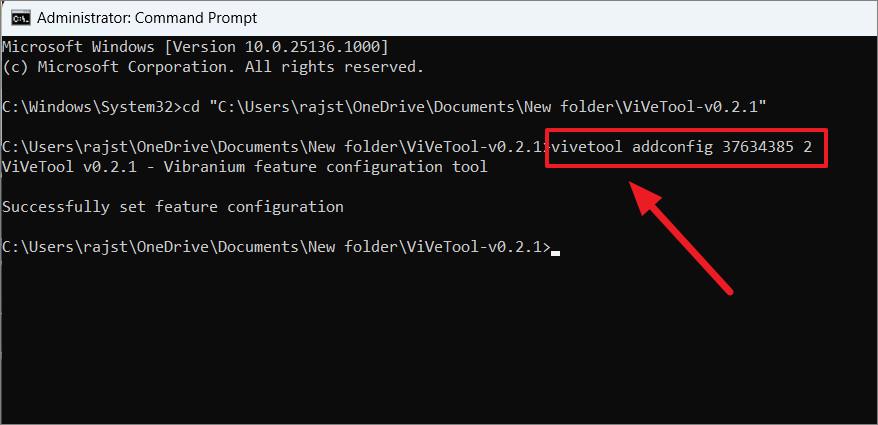
If you want to run the tool in PowerShell, open the PowerShell with administrative privileges and execute this command:
.\vivetool.exe addconfig 37634385 2If you are using an older build (older than Build 25136), run the below command instead:
vivetool addconfig 34370472 2 However, it will only work for Windows 11 Insider Preview build 22572 or newer.
After successfully executing the command, restart your PC to apply the changes. Now, your File Explorer will have tabs and the new left navigation pane.
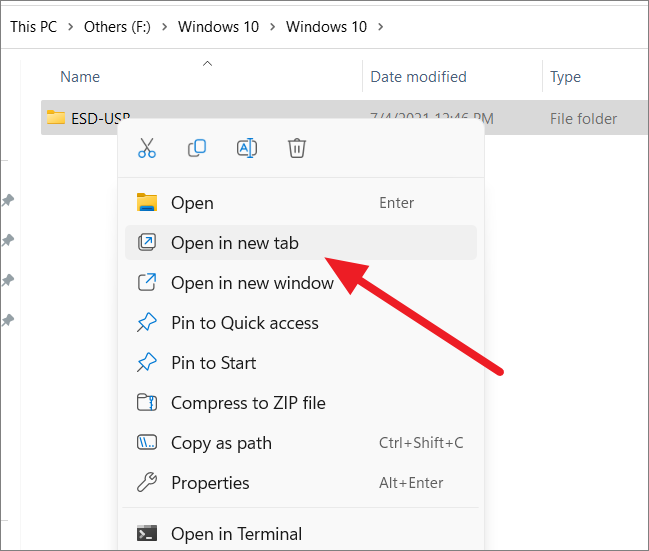
Similar to the browser, you can open any folder in a new tab inside the same window by right-clicking a folder and selecting the ‘Open in new tab’ option from the context menu.
Here are a few keyboard shortcuts that you can use in the new File Explorer:
- Ctrl+T – To open a new tab
- Ctrl+W – To close the current tab
- Ctrl+Tab / Ctrl+Shift+Tab – Switch between tabs.
Disabling the Tabs for File Explorer in Windows 11
If you don’t want tabs for your File Explorer anymore you can easily disable it. First, open the Command prompt with administrative privileges, then run the following command:
vivetool.exe delconfig 37634385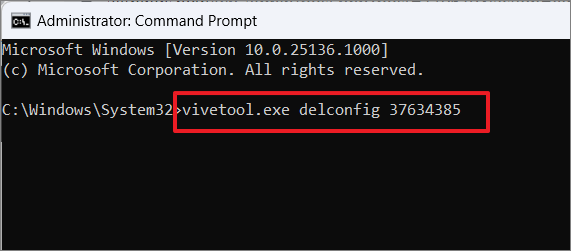
To disable File Explorer tabs for builds older than 25136, enter this command and hit Enter:
vivetool delconfig 34370472That’s it.


Member discussion