
Hyper-V, Microsoft’s hardware virtualization technology, allows you to run multiple virtual machines (VMs) on your Windows 11 PC without the need for additional hardware or third-party software. This feature enables you to create and manage several VMs, each with its own operating system and dedicated resources like virtual hard drives and network switches.
Because virtualization can seem complex, many users overlook this powerful feature. However, enabling and using Hyper-V is straightforward, and it can provide significant benefits if you need to work with different operating systems or test software across platforms.
Why you need hardware virtualization
There are several reasons why you might want to enable Hyper-V on your Windows 11 PC:
- If your work involves operating multiple operating systems, Hyper-V lets you create virtual machines and install different OSes on each.
- You can run software that isn’t compatible with your current OS by installing a suitable one in a virtual machine.
- If you’re developing software, you can test your applications across various operating systems without needing multiple physical machines.
With these advantages in mind, enabling Hyper-V on Windows 11 can enhance your computing experience. Here’s how to do it.
Check if hardware virtualization is enabled in BIOS
Before enabling Hyper-V, it’s important to verify that hardware virtualization is enabled in your system’s BIOS settings. If it’s disabled, the Hyper-V options in Windows will be unavailable.
Follow these steps to check and enable hardware virtualization in the BIOS:
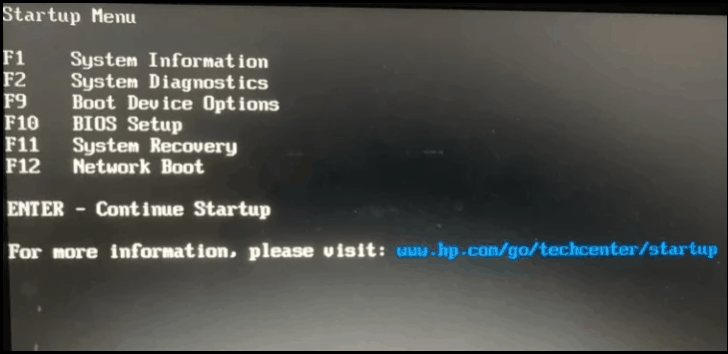
- Shut down your computer completely.
- Turn on your computer, and immediately press the
ESCkey as soon as the screen lights up to access the startup menu. - From the startup menu, press
F10to enter the BIOS setup utility.
- In the BIOS setup utility, navigate to the Advanced tab using the arrow keys.
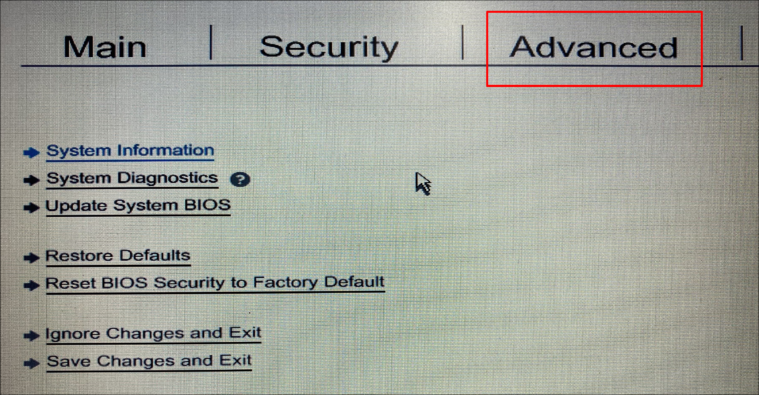
- Select Device Configurations under the Device Settings section.
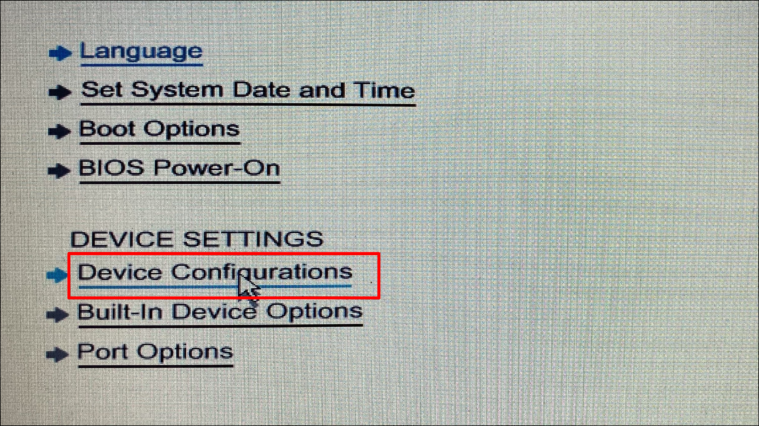
- Scroll down and locate the option labeled Virtualization Technology (VTx). Check the box or set it to Enabled to enable hardware virtualization.
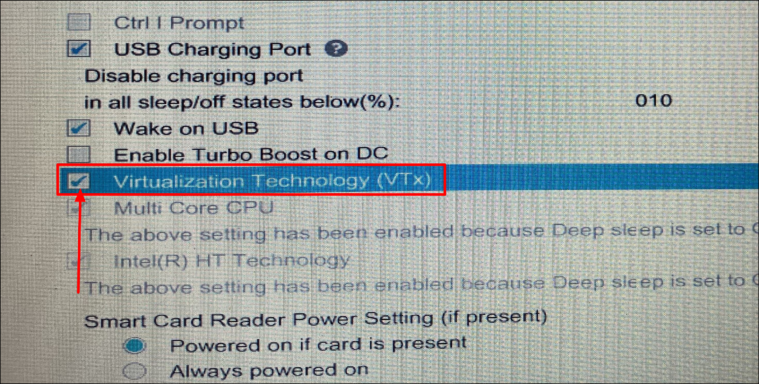
- Press Save at the bottom of the screen to save your changes.

- Confirm the changes by selecting Yes when prompted.
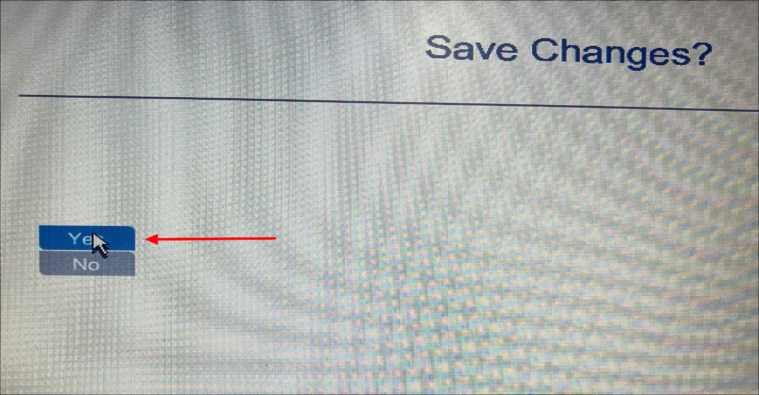
- Exit the BIOS settings to restart your computer.
Your system will now restart, and it may take a few minutes for the changes to take effect. Once completed, Windows 11 will boot normally.

With hardware virtualization enabled in the BIOS, you can proceed to enable Hyper-V in Windows 11 using one of the following methods: Control Panel, Command Prompt, or Windows PowerShell.
Enable Hyper-V from Control Panel
To enable Hyper-V using the Control Panel:
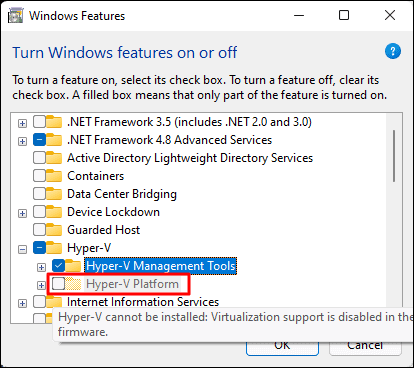
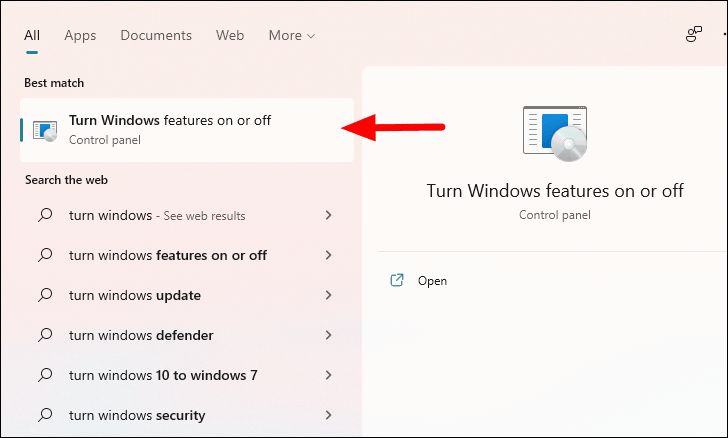
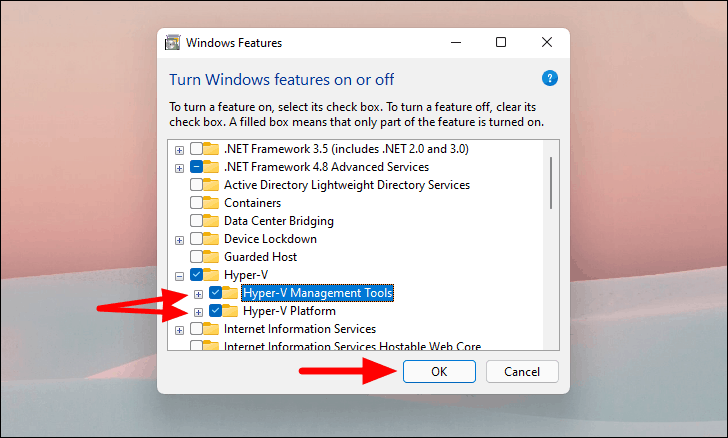
- Click the Start button and type Turn Windows features on or off, then select it from the search results.
- In the Windows Features dialog, scroll down and find the Hyper-V option. Click the ‘+’ icon or double-click to expand it and view its components.
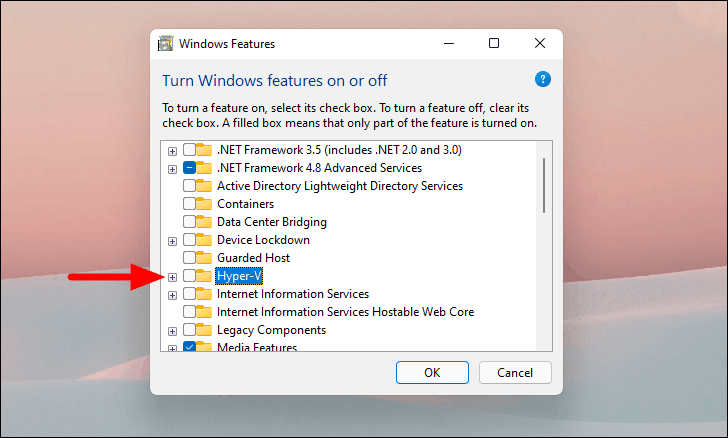
- Check the boxes for both Hyper-V Management Tools and Hyper-V Platform to enable all Hyper-V features.
- Click OK to apply the changes.
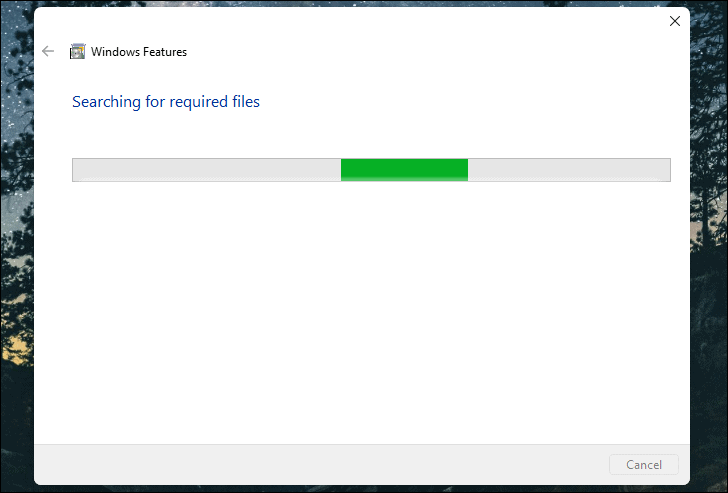
Windows will begin applying the requested changes, which may take a few minutes.
- After the changes are applied, click Restart now to reboot your computer and complete the installation.
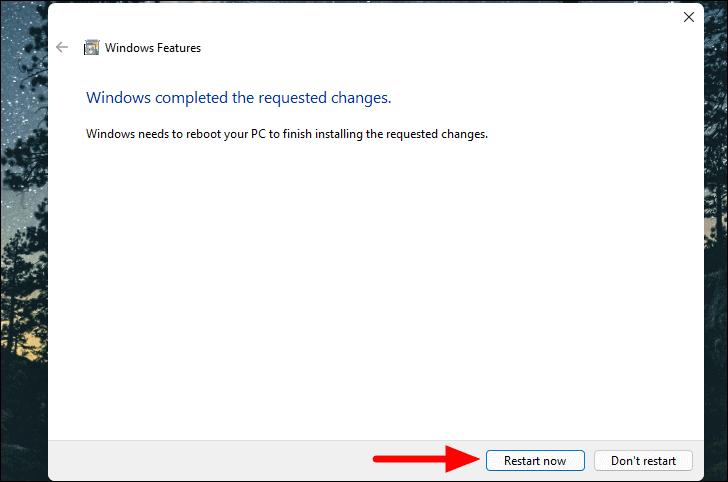
Once your PC restarts, Hyper-V will be enabled, and you can start using it to create and manage virtual machines.
Enable Hyper-V with Command Prompt
Alternatively, you can enable Hyper-V using the Command Prompt, which is a quick method for those comfortable with command-line tools.
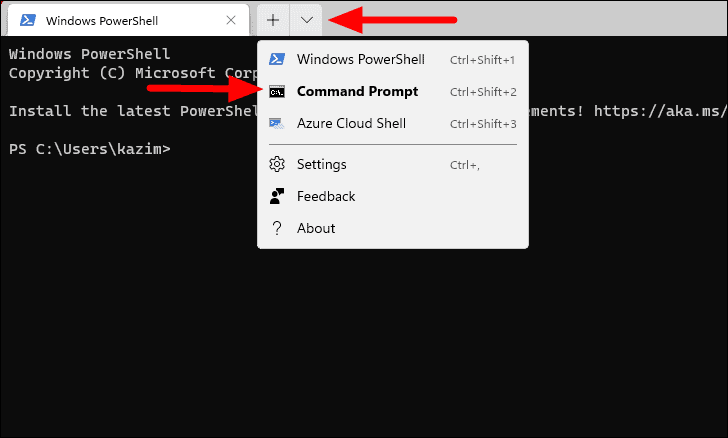
- Open the Start menu, type Windows Terminal, right-click on it, and select Run as administrator. Confirm if prompted.

- In Windows Terminal, click the down arrow next to the plus tab button, and select Command Prompt from the dropdown menu.
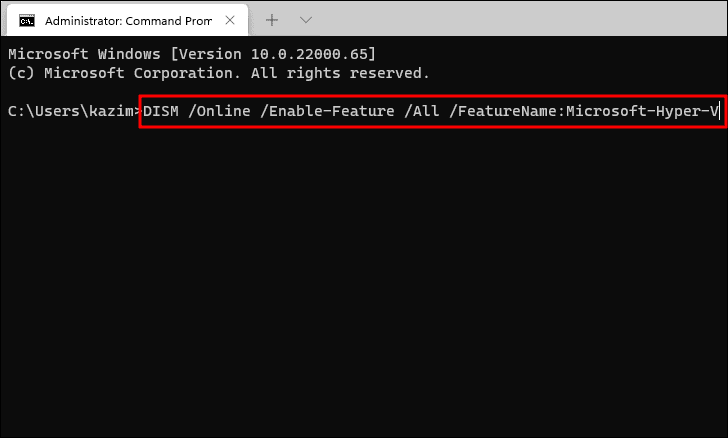
- In the Command Prompt window, type or paste the following command and press
ENTER:
DISM /Online /Enable-Feature /All /FeatureName:Microsoft-Hyper-V
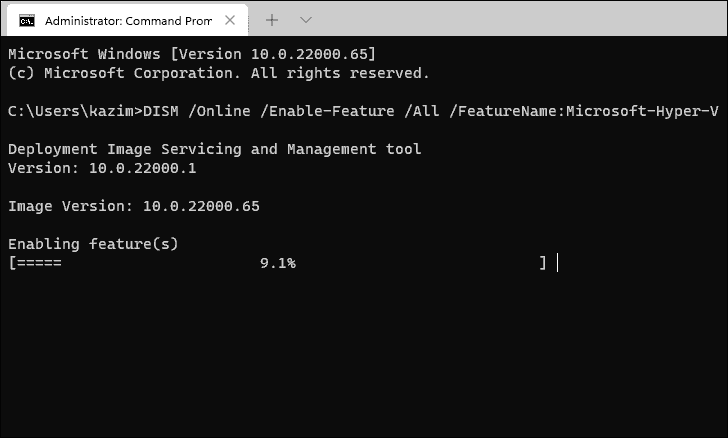
After running the command, the system will begin enabling the Hyper-V feature and display the progress in the Command Prompt window.
- When prompted to restart, type
Yand pressENTERto reboot your computer immediately.
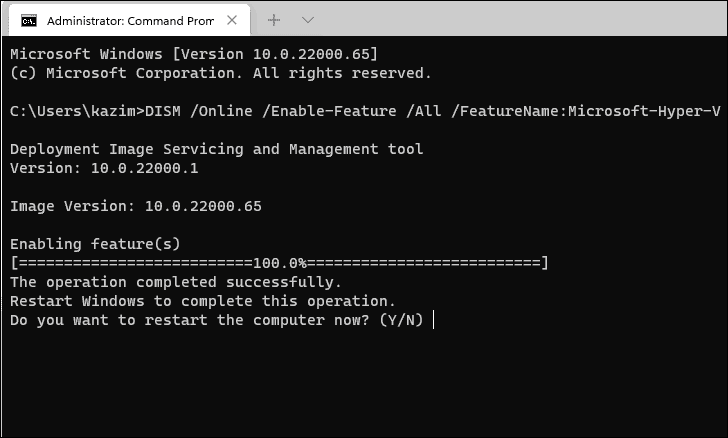
After your computer restarts, Hyper-V will be enabled and ready to use.
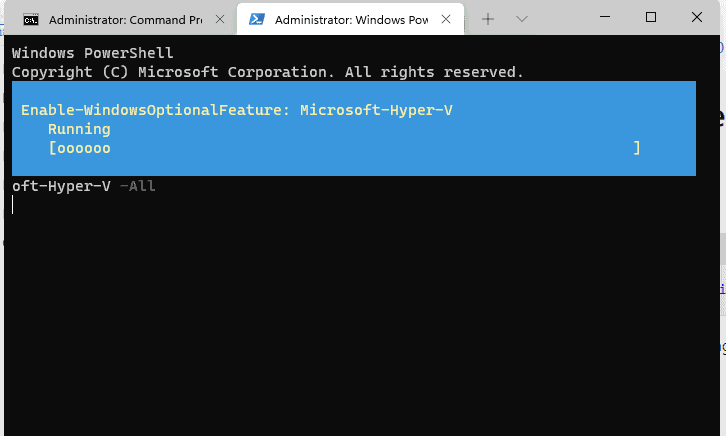
Enable Hyper-V with Windows PowerShell
You can also use Windows PowerShell to enable Hyper-V through a simple command.
- Open Windows Terminal as an administrator, as described earlier.
- Ensure that the PowerShell tab is open. If not, click the down arrow and select Windows PowerShell.
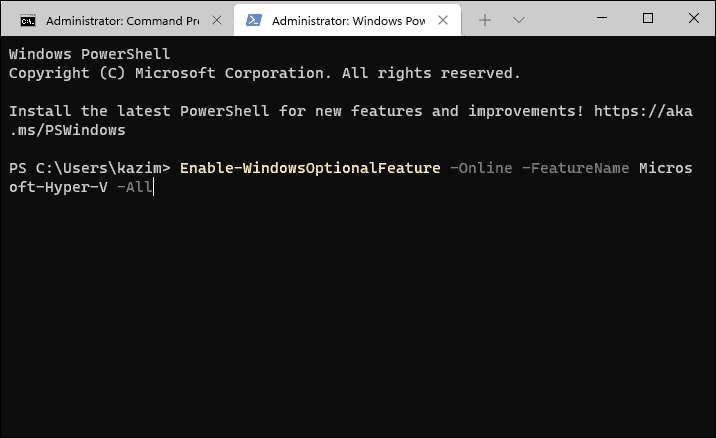
- In the PowerShell window, type or paste the following command and press
ENTER:
Enable-WindowsOptionalFeature -Online -FeatureName Microsoft-Hyper-V -All
PowerShell will begin enabling Hyper-V, displaying progress in the console.
- When prompted to restart, type
Yand pressENTERto reboot immediately.
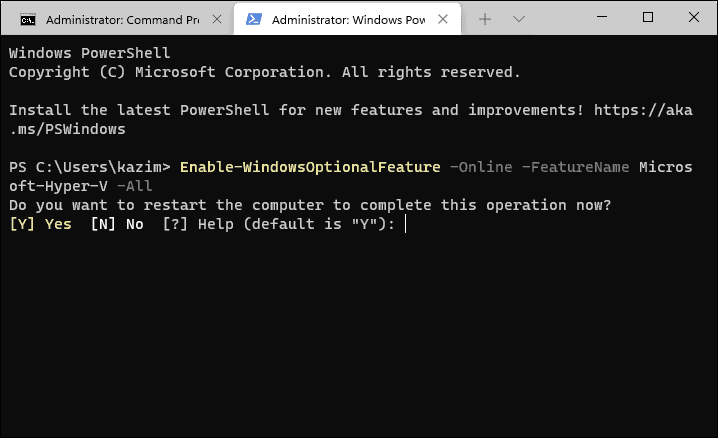
Your system may take longer than usual to restart as Windows configures the necessary components for Hyper-V.


