
Microsoft Defender Antivirus is an integral part of Windows 11, offering robust protection against viruses, malware, and other security threats. While it’s designed to keep your system secure, there may be occasions when you need to disable it temporarily or adjust its settings—for instance, when installing software that requires it or if you’re using an alternative antivirus solution. This guide will walk you through various methods to enable or disable Microsoft Defender and manage its features in Windows 11.
Enable or Disable Microsoft Defender Temporarily via Settings
If you need to turn off Microsoft Defender Antivirus for a short period, perhaps to install an application that’s being blocked, you can disable real-time protection through the Windows Security settings. Here’s how:
- Press
Windows+Ito open the Settings app. Alternatively, right-click the Start button and select Settings.
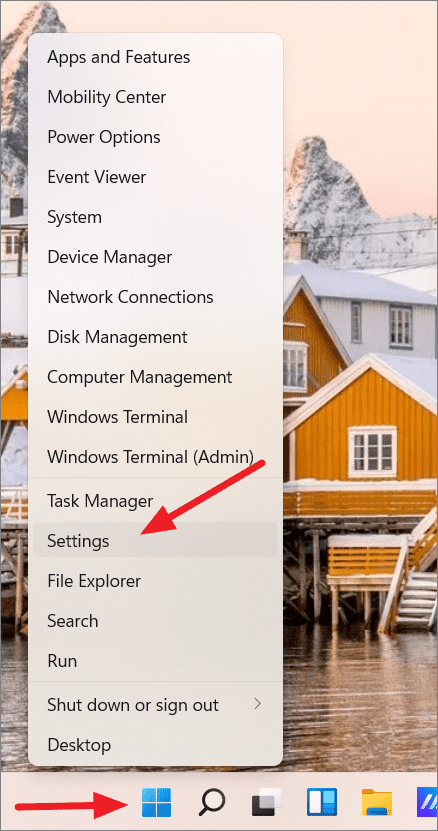
- In Settings, select Privacy & security from the left sidebar, then click on Windows Security on the right.
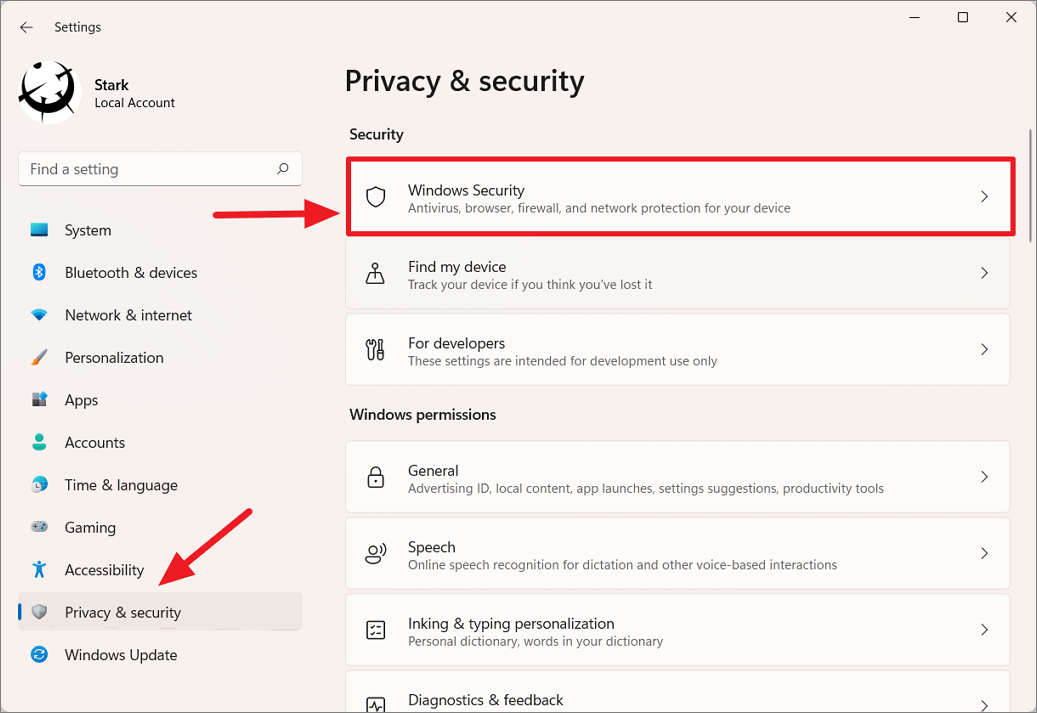
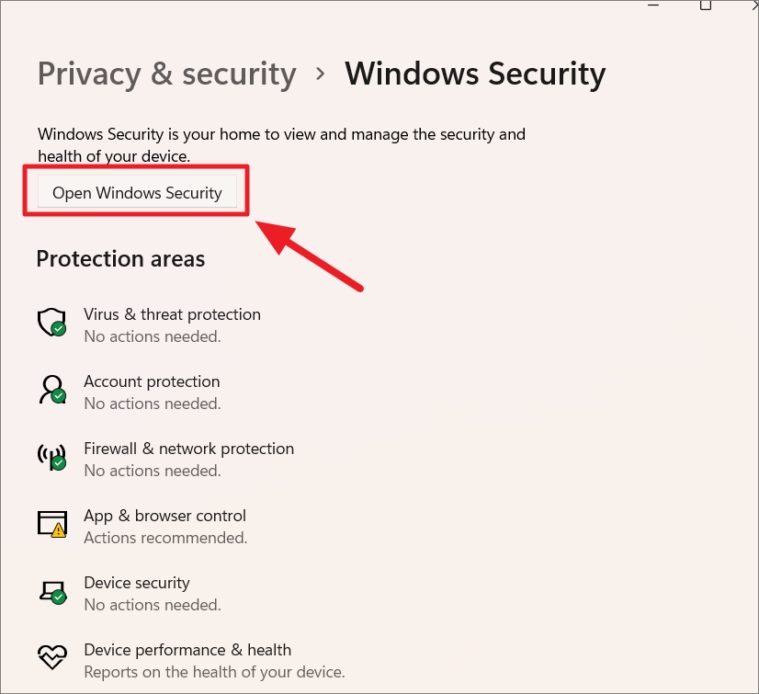
- Click on Open Windows Security to launch the Windows Security app.
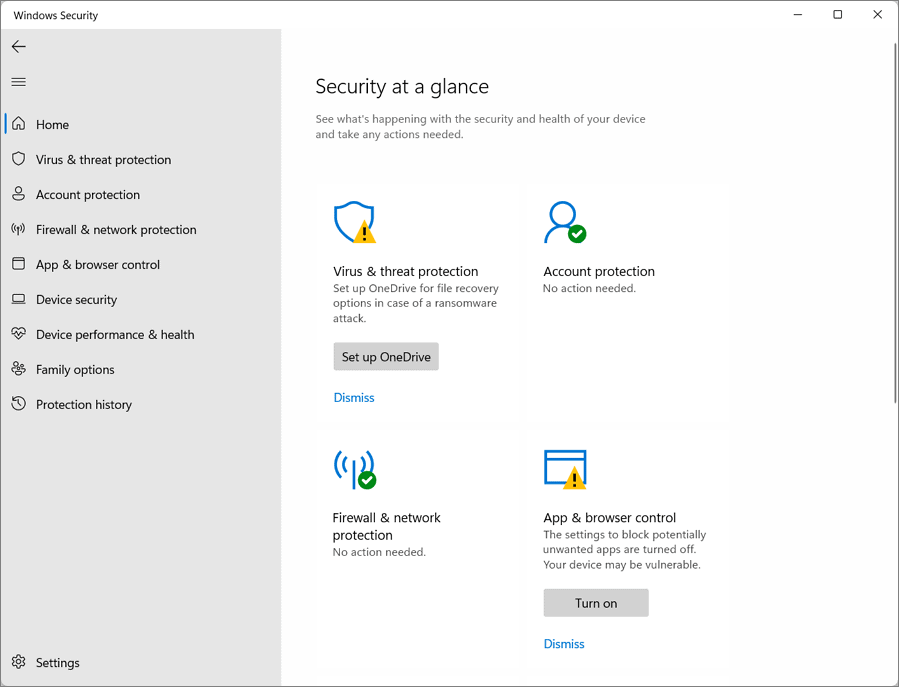
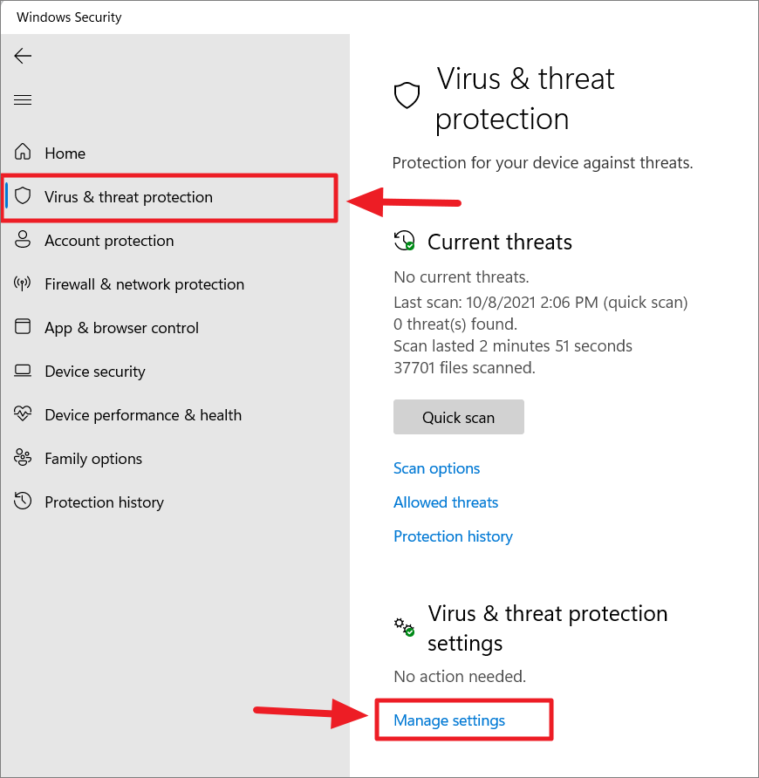
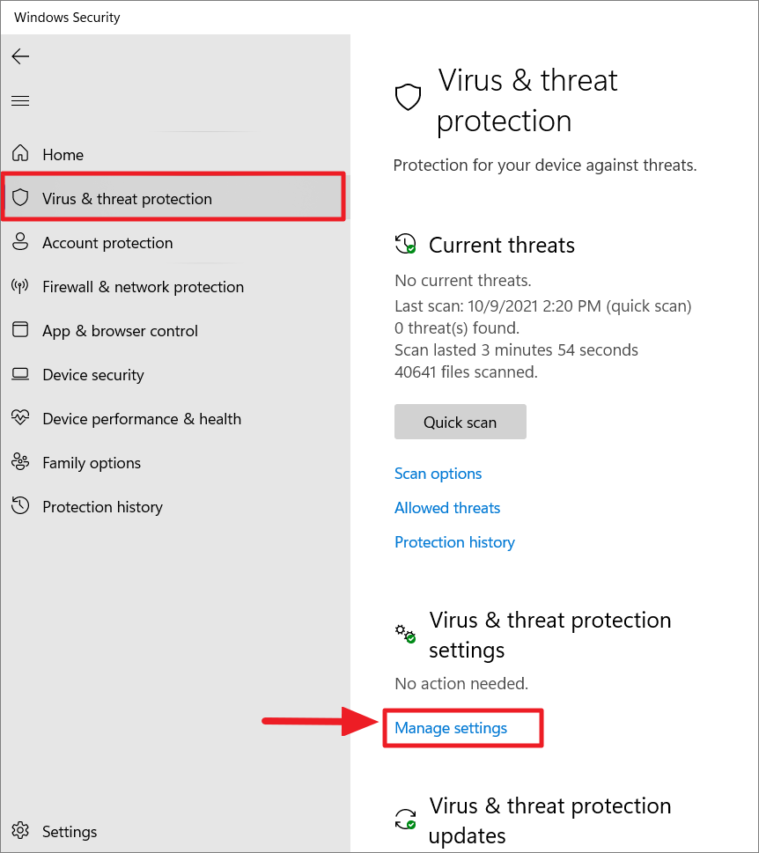
- In Windows Security, select Virus & threat protection from the left panel.
- Under the Virus & threat protection settings section, click on Manage settings.
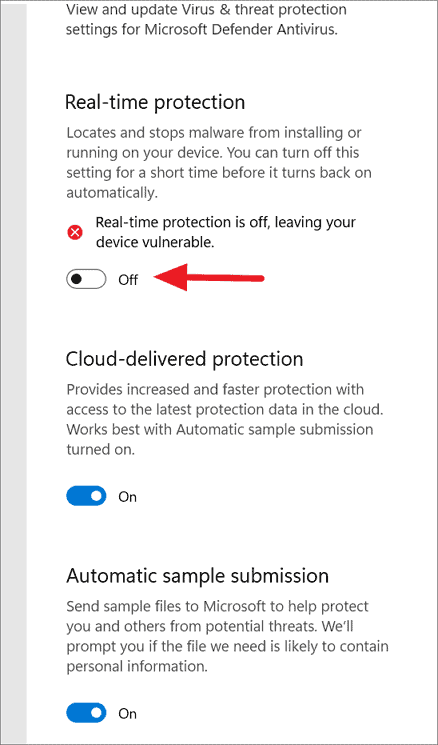
- Toggle off the switch under Real-time protection to disable Microsoft Defender temporarily. If prompted by User Account Control (UAC), click Yes.
- To re-enable real-time protection, toggle the switch back to On.
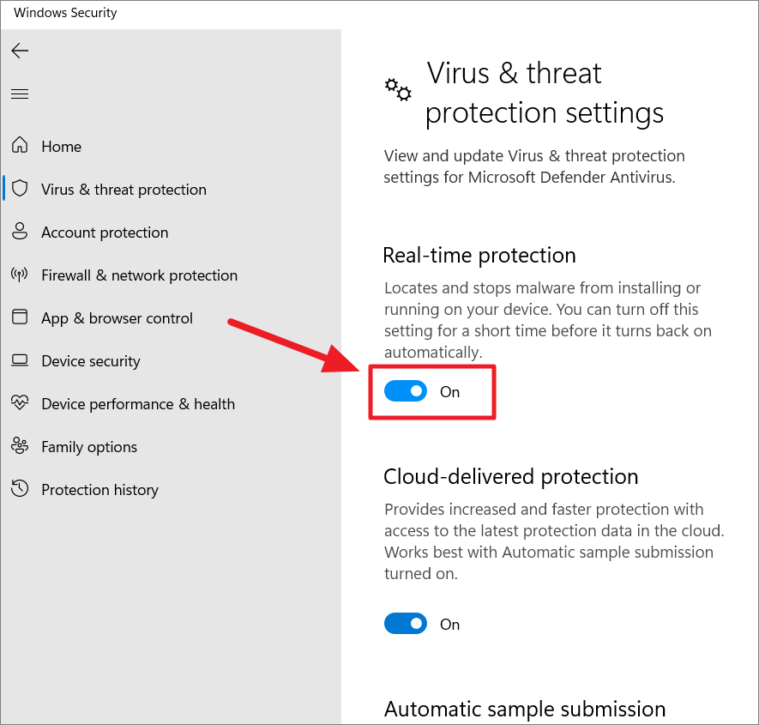
Keep in mind that turning off real-time protection is only temporary. Microsoft Defender will automatically turn it back on after a short while or when you restart your computer.
Turn Microsoft Defender Firewall On or Off in Windows 11
Microsoft Defender Firewall helps protect your device by blocking unauthorized network traffic. If you need to disable it temporarily to troubleshoot network issues or allow specific applications, follow these steps:
- Open the Windows Security app by clicking the Start button, typing Windows Security, and selecting it from the search results.
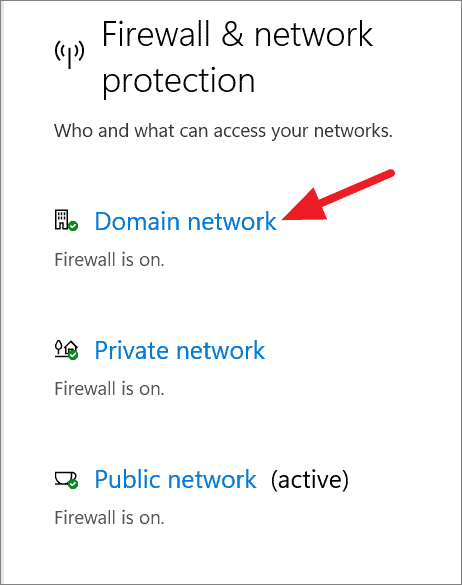
- In Windows Security, select Firewall & network protection from the left sidebar.
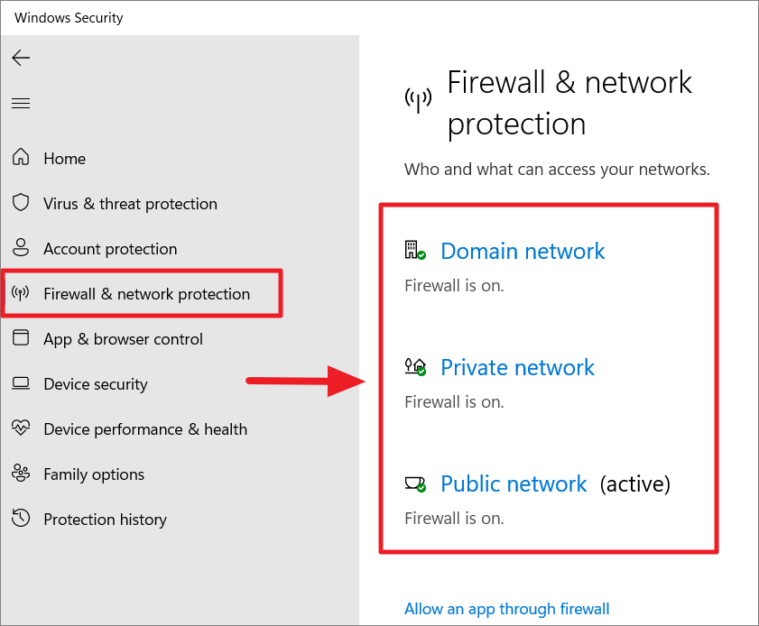
- Choose the network profile you want to modify: Domain network, Private network, or Public network. For most home users, select Private network.
- Under the Microsoft Defender Firewall section, toggle the switch to Off to disable the firewall. Confirm any prompts that appear.
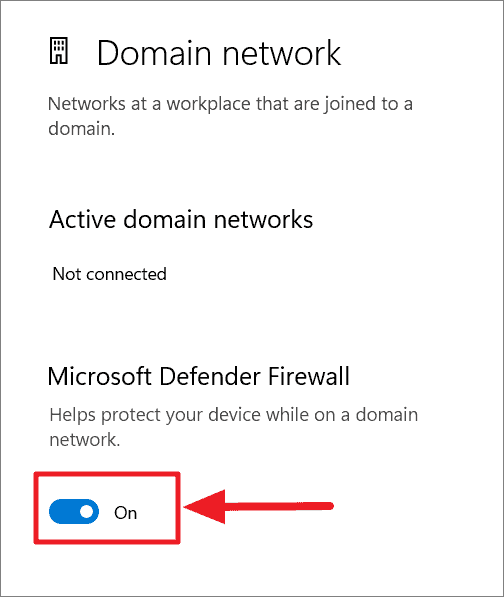
- To re-enable the firewall, return to the same settings and toggle the switch back to On.
Manage App & Browser Control Settings
The App & Browser Control settings in Windows Security allow you to adjust protection levels for apps, files, and web content. This includes configuring Windows Defender SmartScreen, which helps protect your device from potentially dangerous websites and downloads. To modify these settings:
- Open the Windows Security app and select App & browser control from the left sidebar.
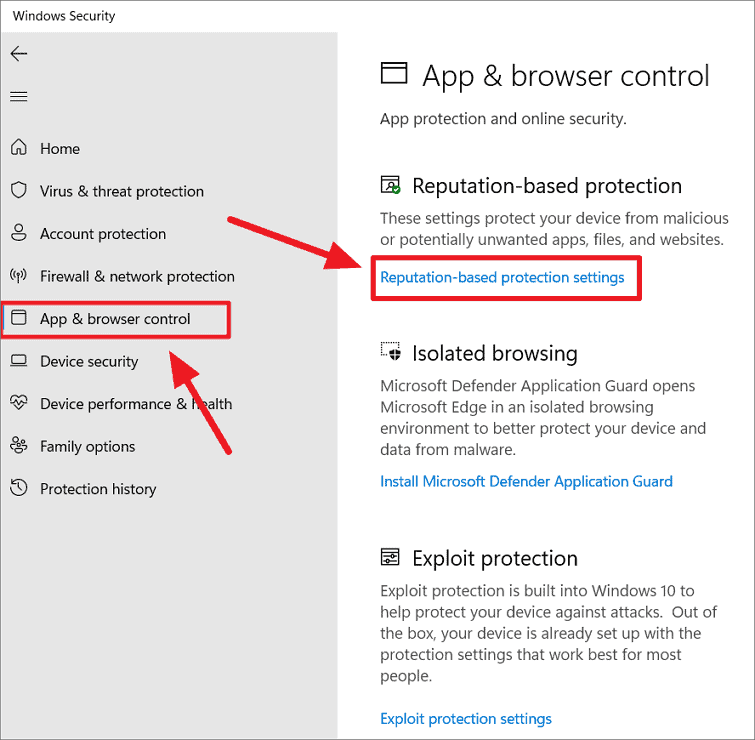
- Under Reputation-based protection, click on Reputation-based protection settings.
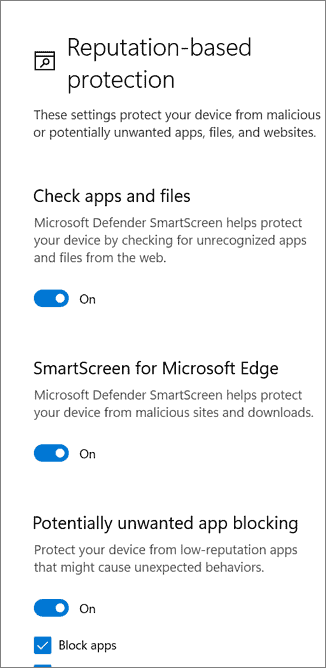
- Adjust the settings based on your preferences. You can toggle features like SmartScreen for Microsoft Edge, Potentially unwanted app blocking, and more.
Be cautious when changing these settings, as they provide added security against malicious content. Disabling them might leave your device vulnerable.
Enable or Disable Microsoft Defender Using PowerShell
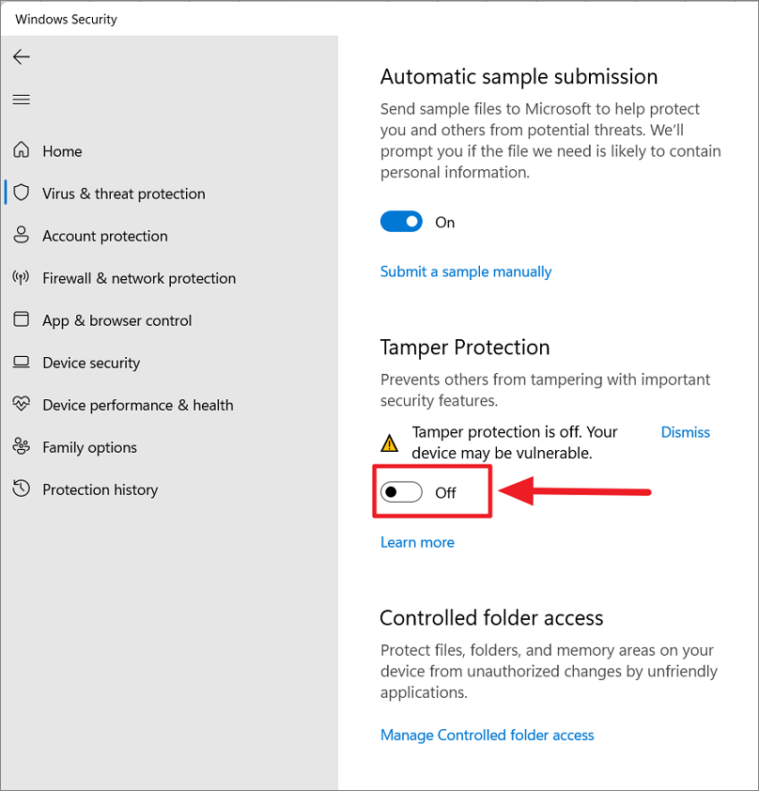
You can use PowerShell commands to manage Microsoft Defender features. Before proceeding, you need to disable Tamper Protection in Windows Security, which prevents unauthorized changes to security settings.
- Open Windows Security and click on Virus & threat protection.
- Click on Manage settings under Virus & threat protection settings.
- Scroll down to Tamper Protection and toggle it to Off.
After disabling Tamper Protection:
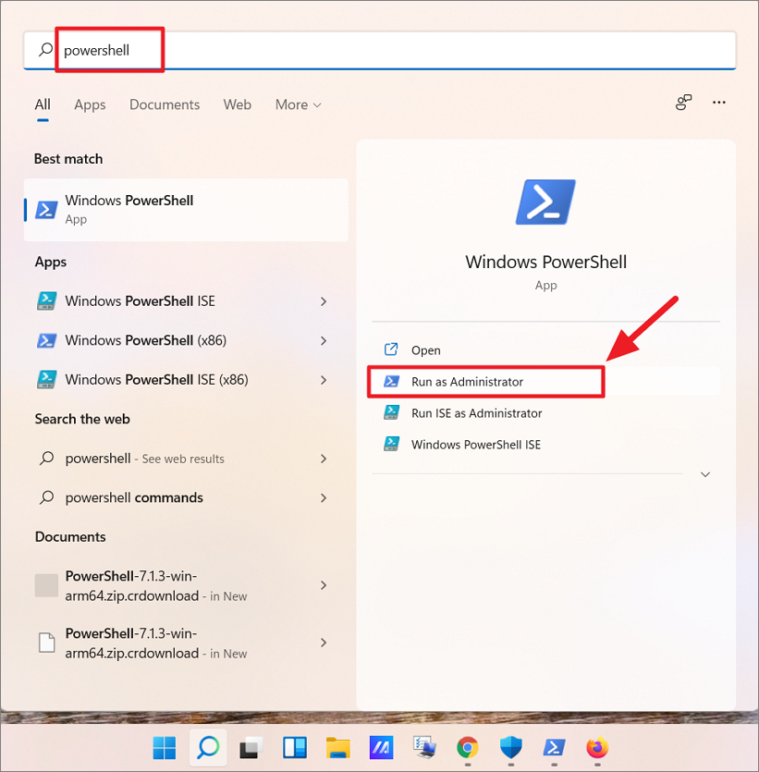
- Press the
Windowskey, type PowerShell, right-click on Windows PowerShell, and select Run as administrator.
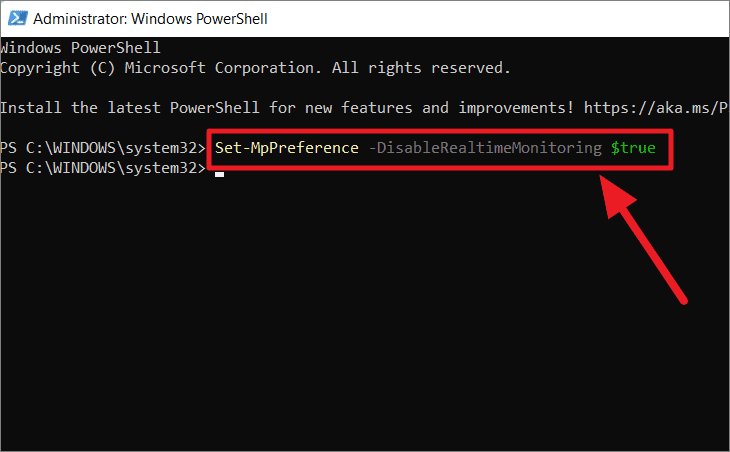
- In the PowerShell window, enter the following command to disable real-time protection:
Set-MpPreference -DisableRealtimeMonitoring $true
- To re-enable real-time protection, run this command:
Set-MpPreference -DisableRealtimeMonitoring $false
Remember to turn Tamper Protection back on after you’re done to ensure your security settings remain safe.
Disable Microsoft Defender Using Group Policy Editor
If you’re using Windows 11 Pro or a higher edition, you can disable Microsoft Defender permanently using the Group Policy Editor. This method is not available in Windows 11 Home.
Warning: Disabling Microsoft Defender leaves your system unprotected. Proceed only if you have an alternative antivirus installed.
- Disable Tamper Protection in Windows Security as described earlier.
- Press
Windows+R, typegpedit.msc, and pressEnterto open the Local Group Policy Editor. - Navigate to:
Computer Configuration > Administrative Templates > Windows Components > Microsoft Defender Antivirus
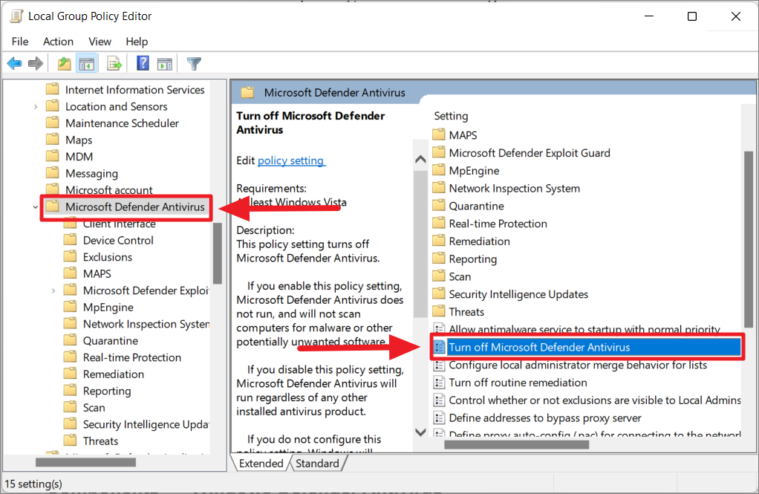
- In the right pane, double-click on Turn off Microsoft Defender Antivirus.
- Select Enabled, then click Apply and OK.
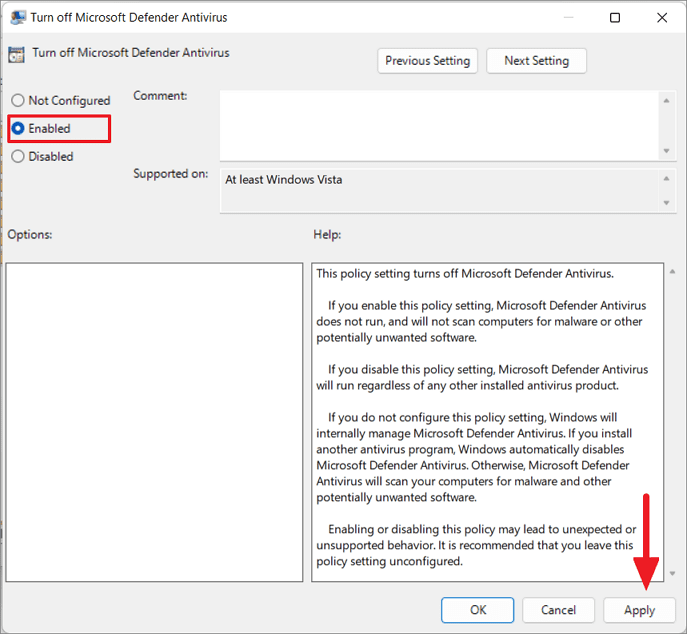
- Restart your computer for the changes to take effect.
To re-enable Microsoft Defender, change the Turn off Microsoft Defender Antivirus setting to Disabled or Not Configured and restart your PC.
Disable Microsoft Defender Using Registry Editor
Users of Windows 11 Home can disable Microsoft Defender using the Registry Editor. Exercise caution when editing the registry, as incorrect changes can cause system instability.
- Disable Tamper Protection in Windows Security.
- Press
Windows+R, typeregedit, and pressEnterto open the Registry Editor. - Navigate to:
HKEY_LOCAL_MACHINE\SOFTWARE\Policies\Microsoft\Windows Defender
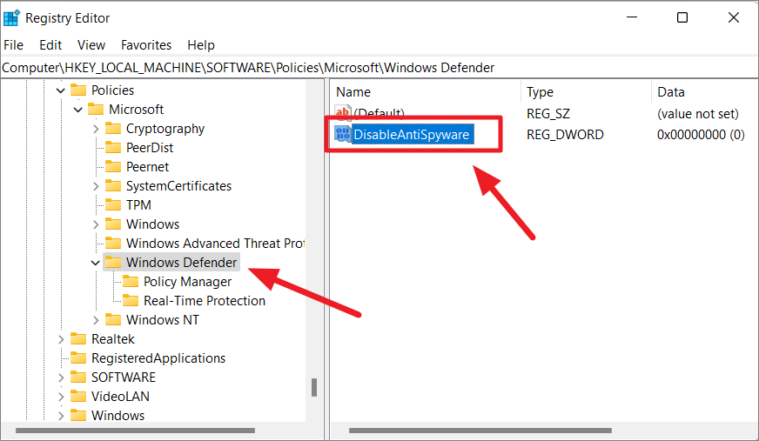
- In the right pane, right-click and select New > DWORD (32-bit) Value. Name it
DisableAntiSpyware. - Double-click on
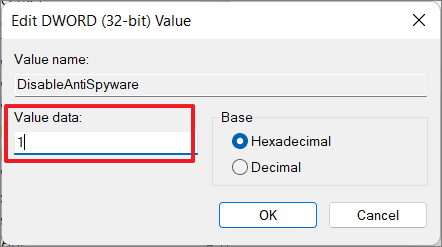
DisableAntiSpywareand set the Value data to1. Click OK.
- Restart your computer to apply the changes.
To re-enable Microsoft Defender, delete the DisableAntiSpyware entry or set its value to 0 and restart your PC.
Adjusting Microsoft Defender settings allows you to tailor your security to your needs. Whether you choose to disable it temporarily or modify specific features, always ensure your device remains protected, either by re-enabling Microsoft Defender or installing a trusted third-party antivirus solution.


