
Windows 11 offers several features and enhancements designed to make it easy to use the OS. However, certain bugs can make this difficult. For instance, one common problem that Windows 11 users often face is the blurry screen issue, where everything on your display appears blurry. This can be due to outdated graphics drivers, incorrect scale and resolution settings, and other causes. If you're facing this problem, here are some fixes that can help you.
Fix 1: Change display scale and resolution
An incorrect display resolution or scale can cause your Windows 11 screen to appear blurry. Here is how you can fix it.
- Open the Settings app using the
Win + Ishortcut and click on 'System'.
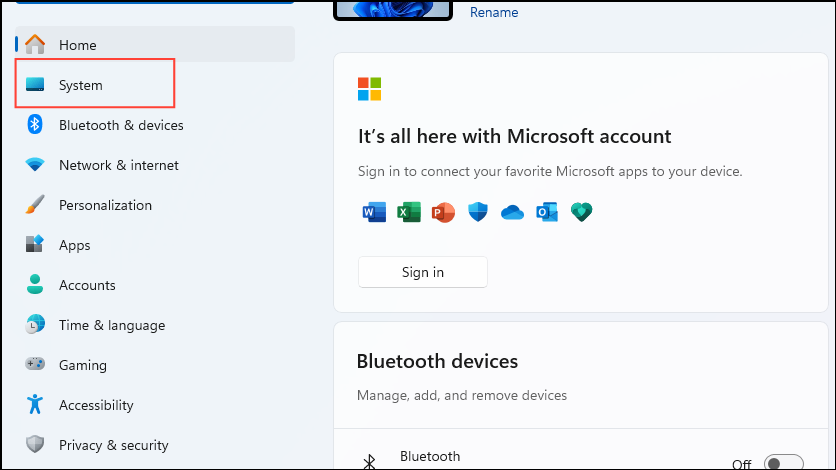
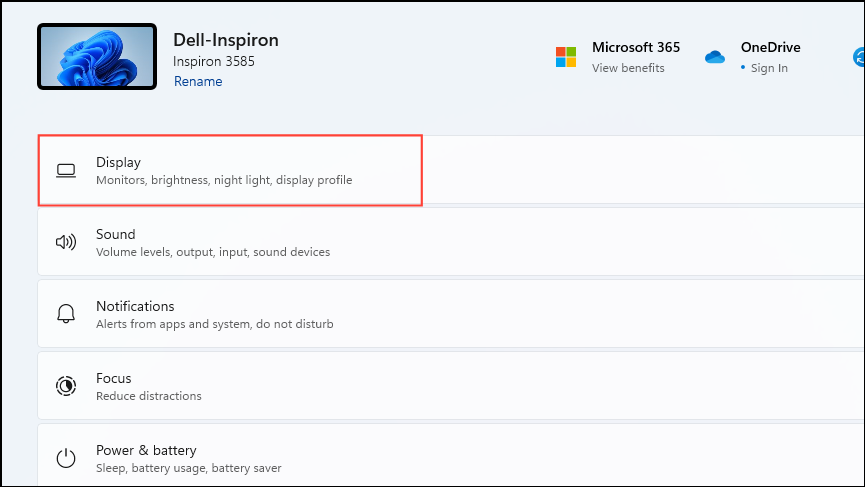
- On the System page, click on 'Display'.
- Now click on the 'Scale' dropdown menu under the 'Scale and Layout' section and select any of the recommended options.
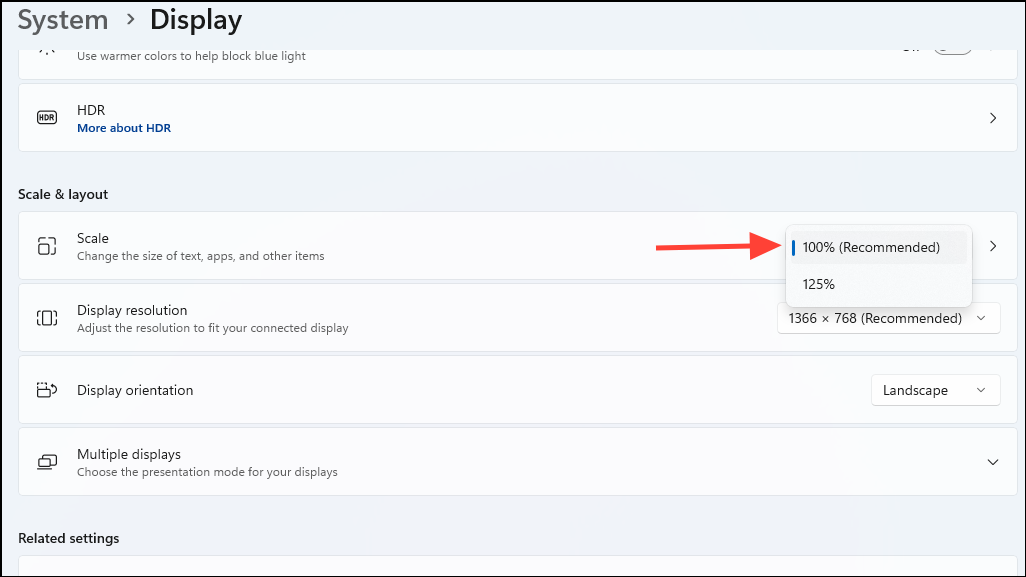
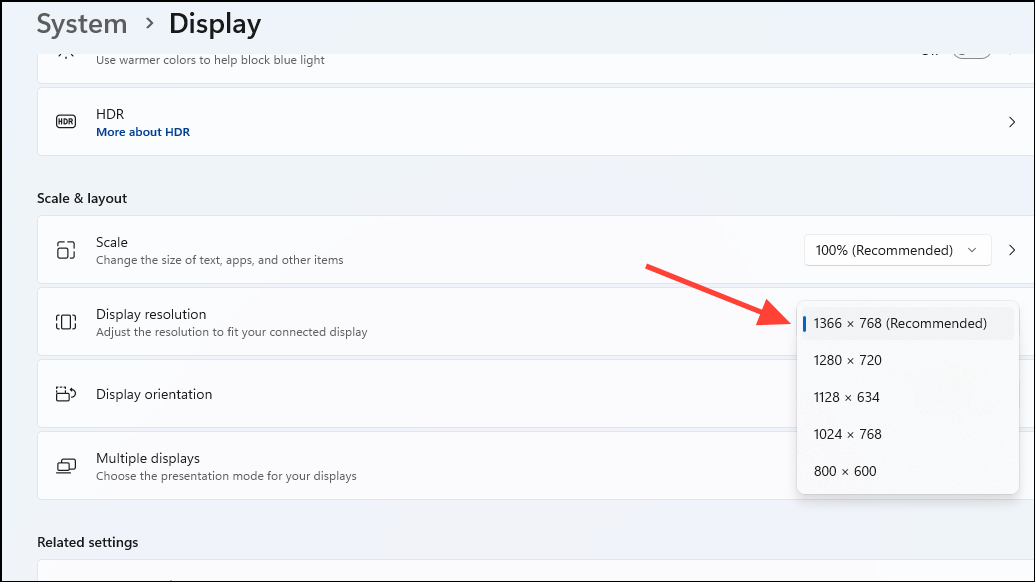
- Then do the same for the Display Resolution.
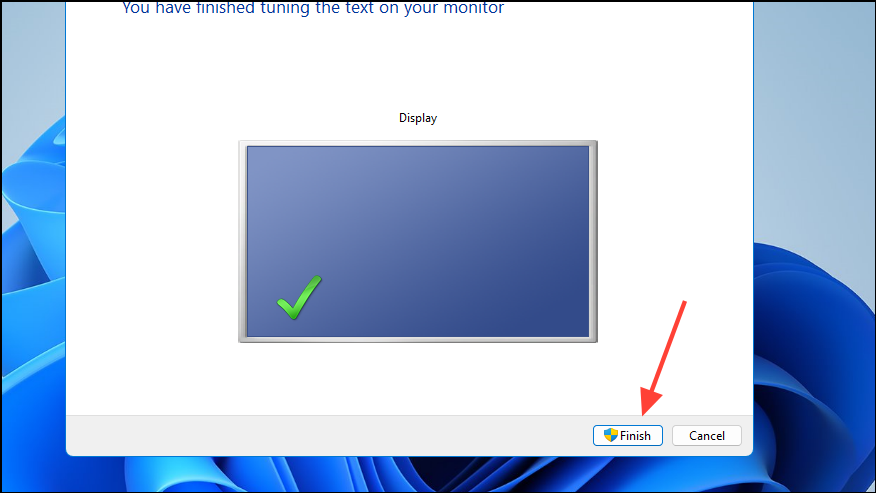
Fix 2: Enable ClearType Text
The ClearType Text Tuner can help make text appear sharper on your Windows 11 computer.
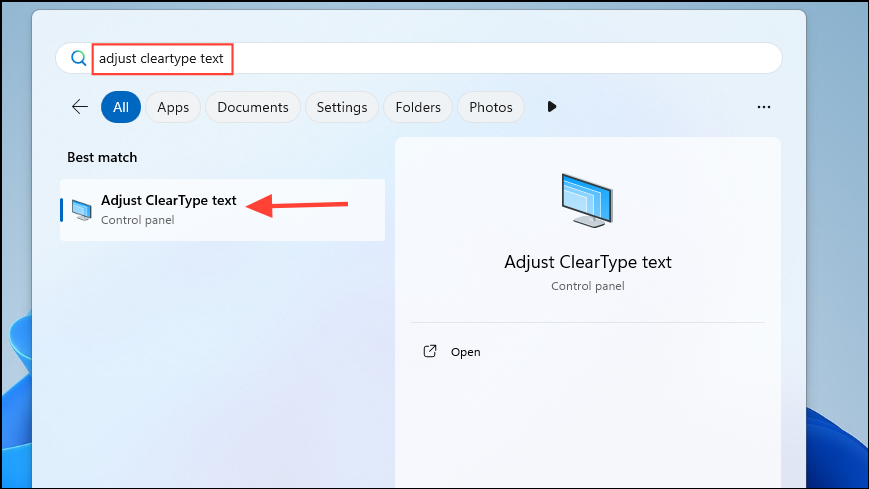
- Open the Start menu, type
adjust cleartype textand click on the utility when it appears in the search results.
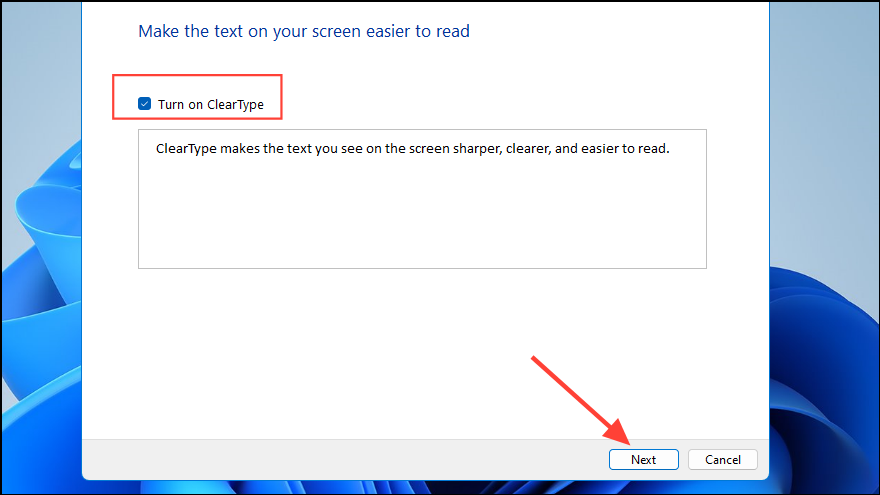
- Click on the 'Turn on ClearType' checkbox and then click on the 'Next' button.
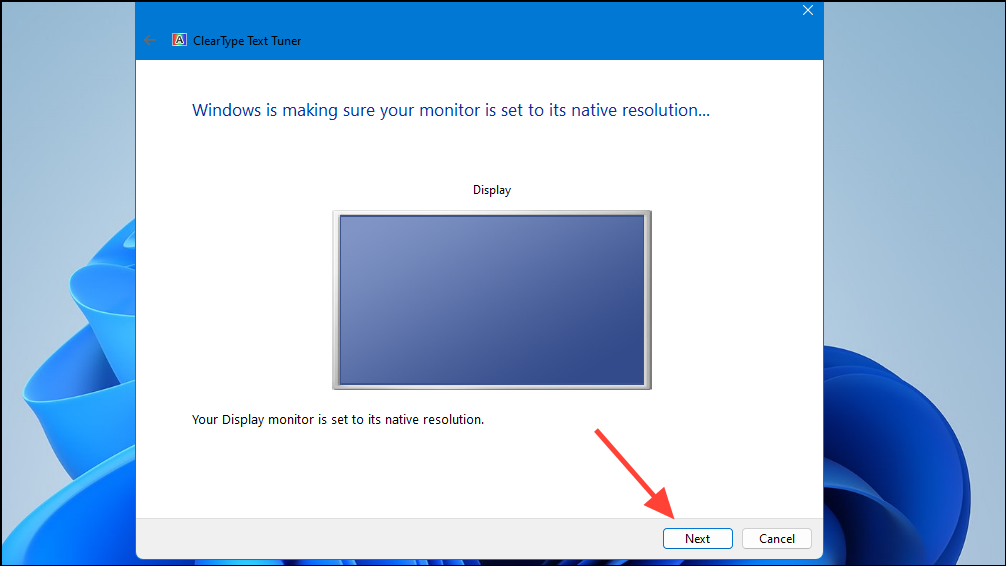
- The next page will show you the display resolution your screen is set to. Click on the 'Next' button again.
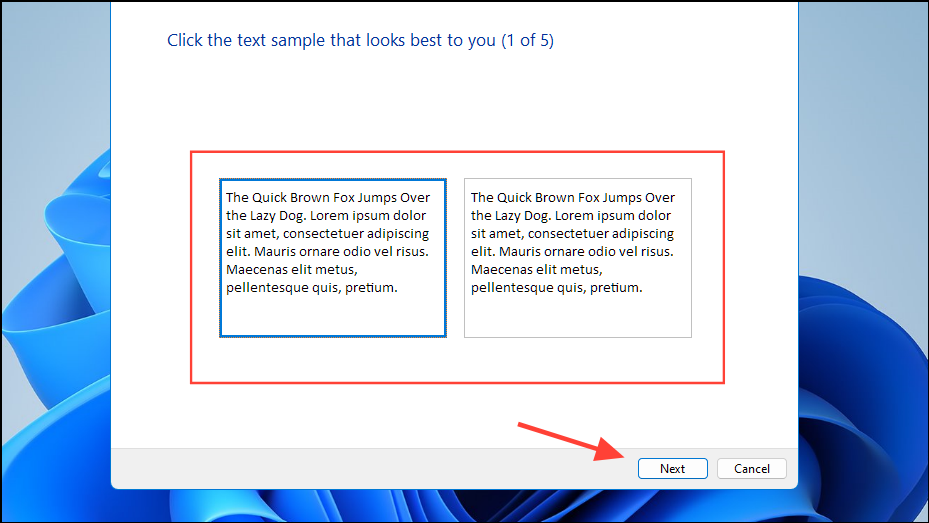
- Now you will see two text samples. Click on the one that looks better to you and then click on the 'Next' button again.
- You will have to select text samples from other samples on the next few pages. Then click on the 'Finish' button.
Fix 3: Change DPI settings
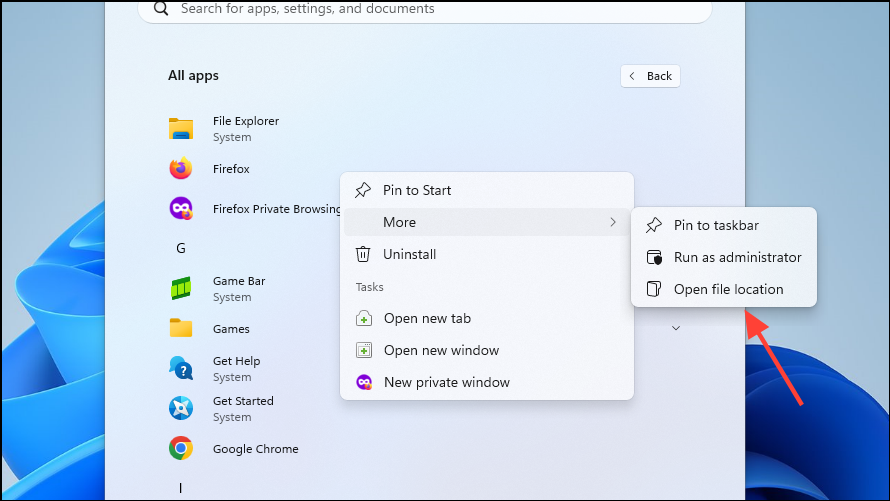
- Open the Start menu, type the name of the program that is appearing blurry, right-click on it, and go to 'Open file location'.
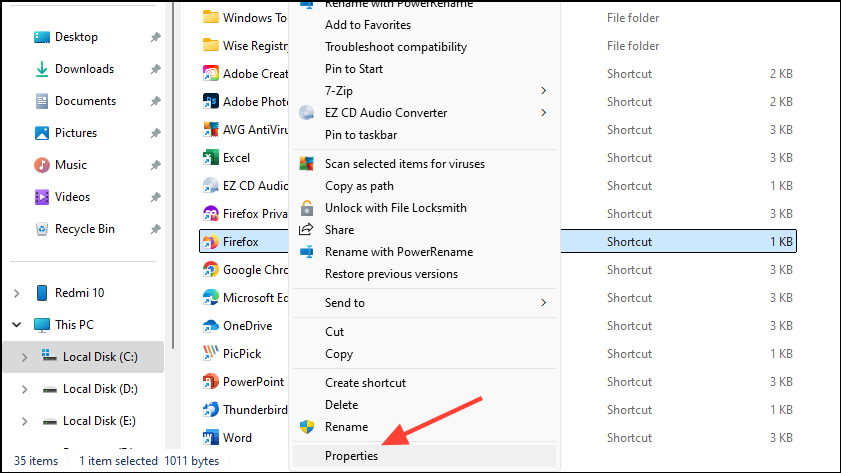
- When the File Explorer opens, right-click on the program and click on 'Properties'.
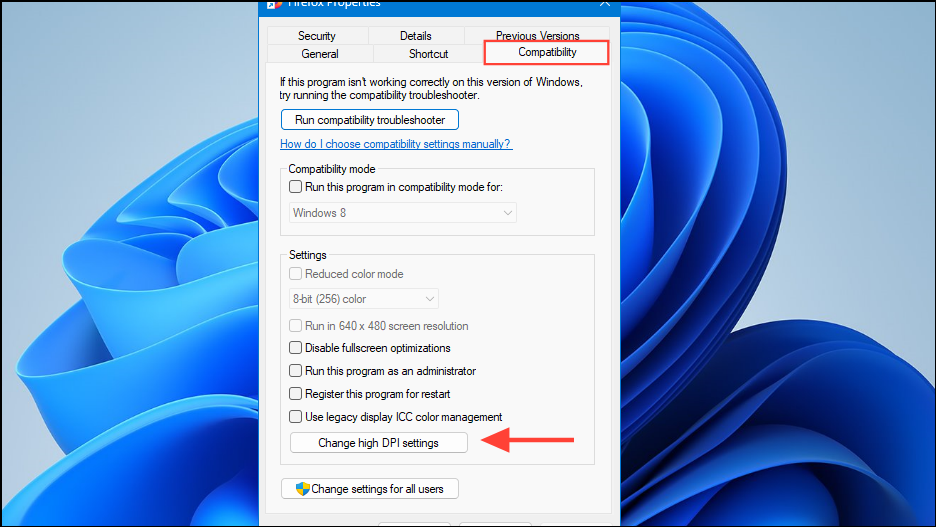
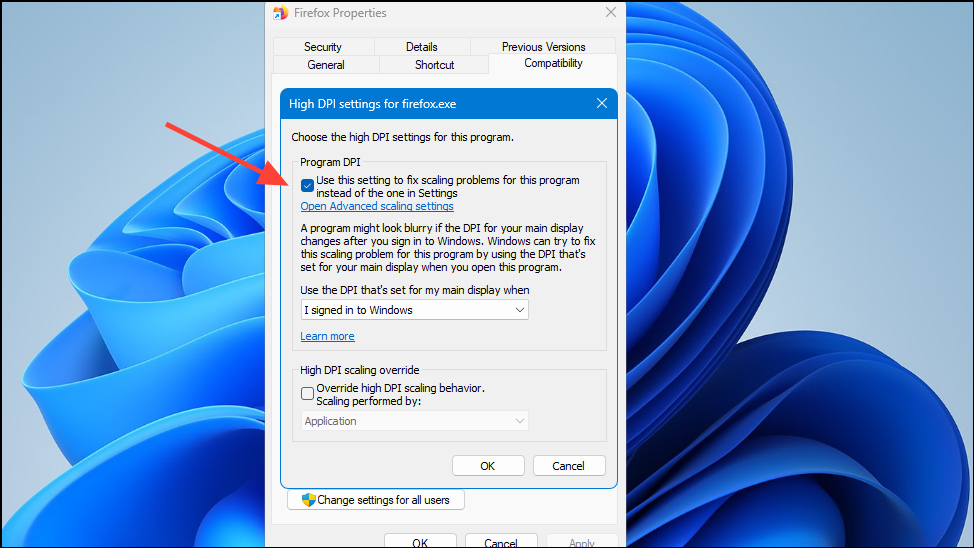
- In the dialog box that opens, click on the 'Compatibility' tab at the top and then on the 'Change high DPI settings' button.
- Click on the 'Use this setting to fix scaling problems for this program instead of the one in Settings' checkbox to enable it.
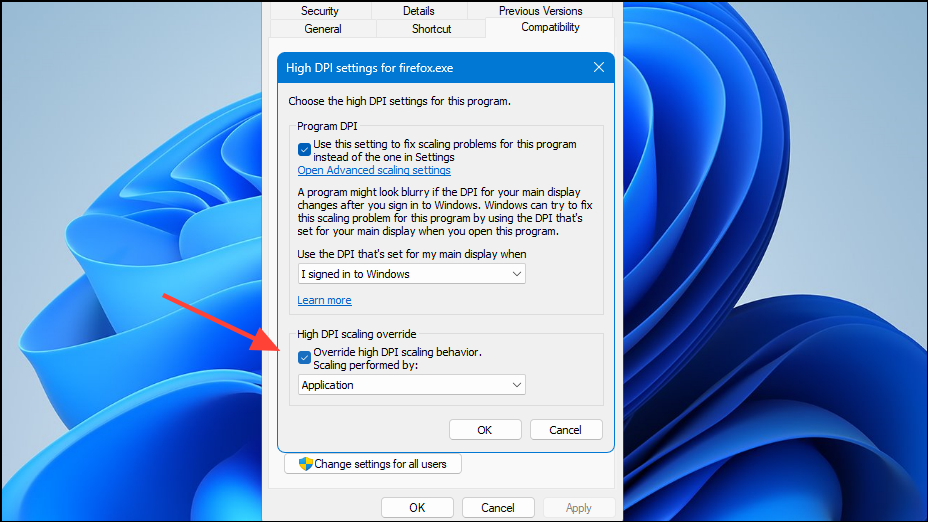
- Then enable the 'Override high DPI scaling behavior' option in the same manner.
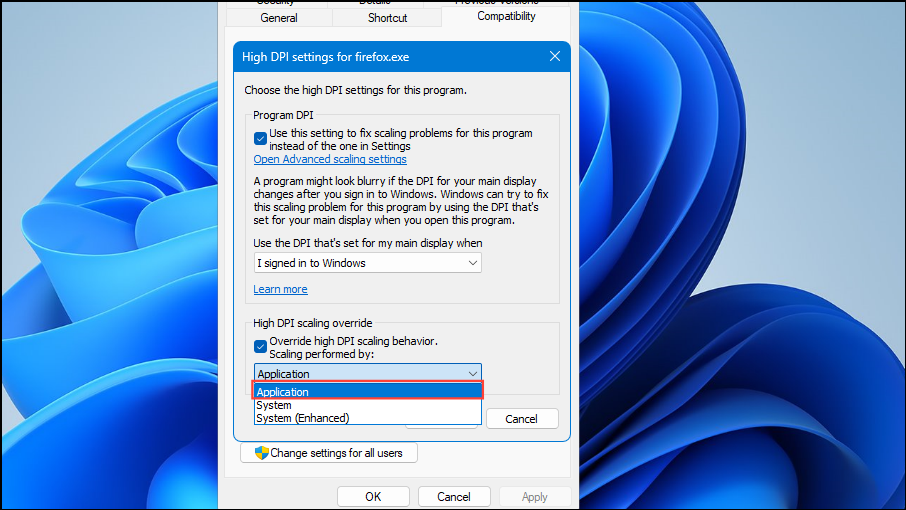
- Now click on the 'Override high DPI scaling behavior, Scaling performed by' dropdown menu, and select 'Application'. Then click on the 'OK' and 'Apply' buttons in the Firefox Properties dialog box.
Fix 4: Adjust performance options
Menus and text in Windows may also appear blurry if you have adjusted certain settings like disabling animations and effects. You can fix this in the following manner.
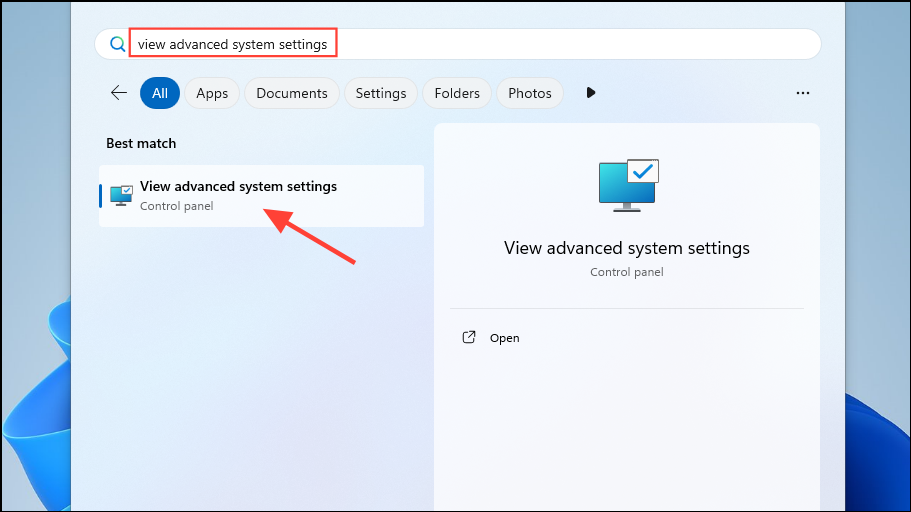
- Open the Start menu, type
view advanced system settingsand click on the first result.
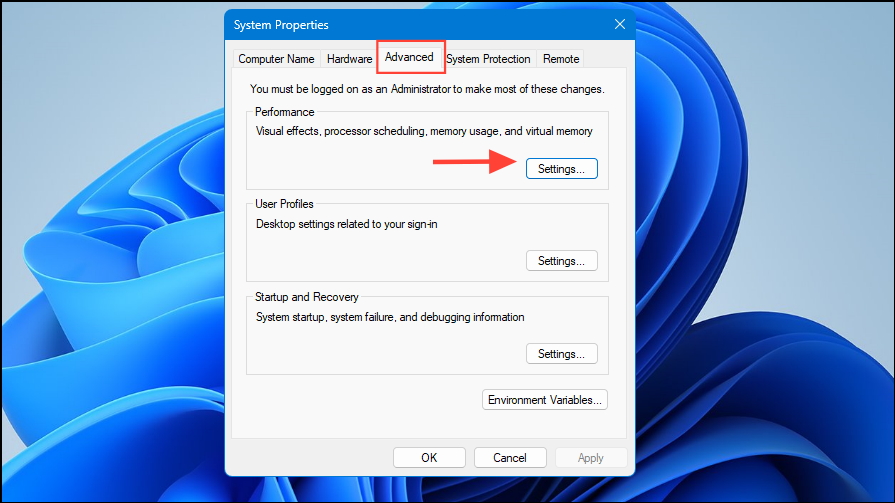
- When the System Properties dialog box opens, click on the 'Advanced' tab and then on 'Settings' under the Performance section.
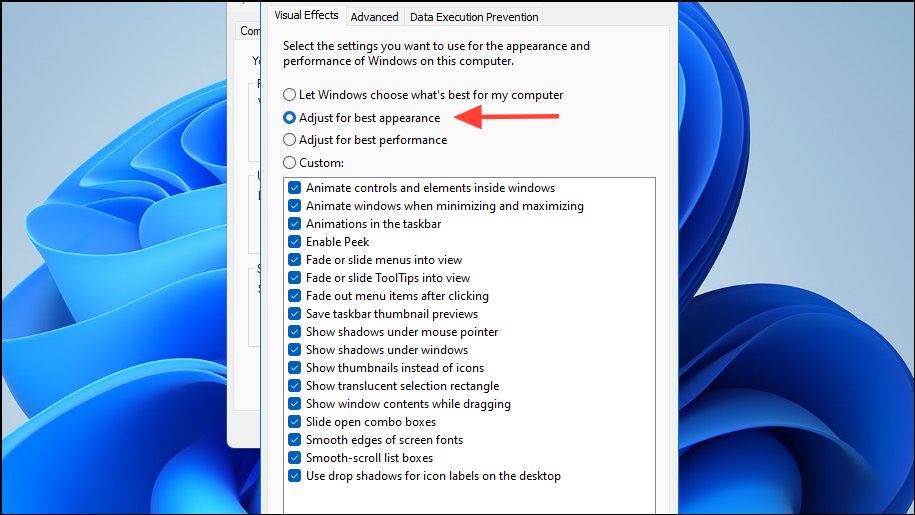
- Then click on the 'Adjust for best appearance' option to select it. Then click on the 'Apply' button.
Fix 5: Update graphics drivers
Another reason your screen appears blurry is if your graphics drivers are outdated or corrupted. You can update the drivers to get rid of the problem.
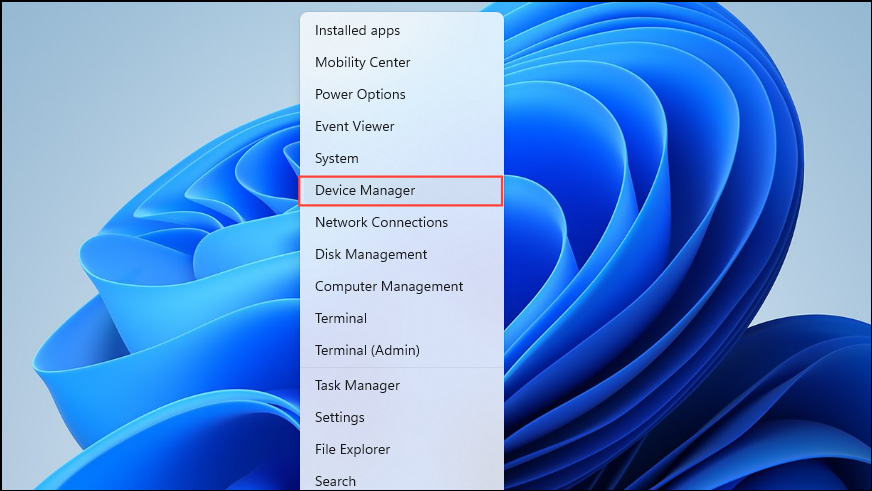
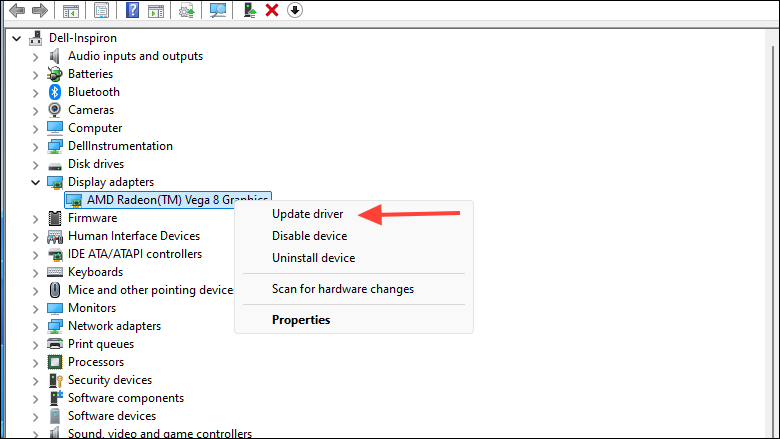
- Right-click on the Start button and click on 'Device Manager'.
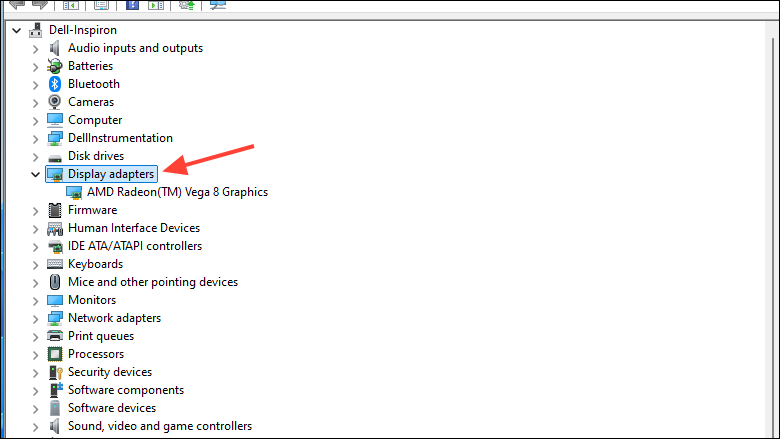
- When the Device Manager opens, click on 'Display adapters' to expand it.
- Right-click on the display driver and click on 'Update driver'.
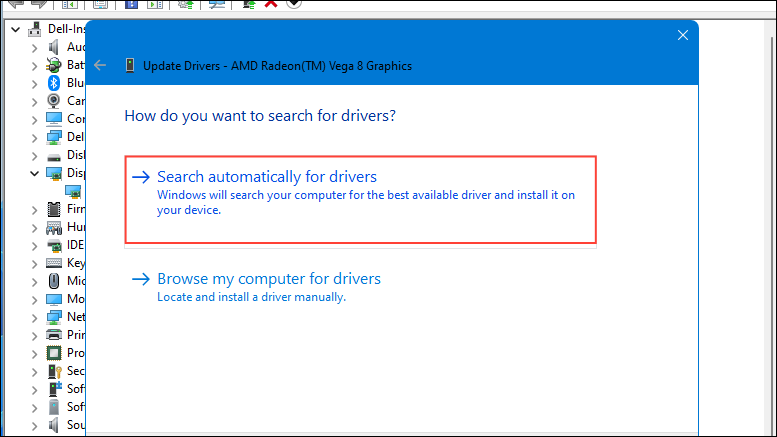
- Then click on 'Search automatically for drivers' in the pop-up that appears. Wait for Windows to search for suitable drivers. If any are available, it will download and install them. You may have to reboot your PC afterward.
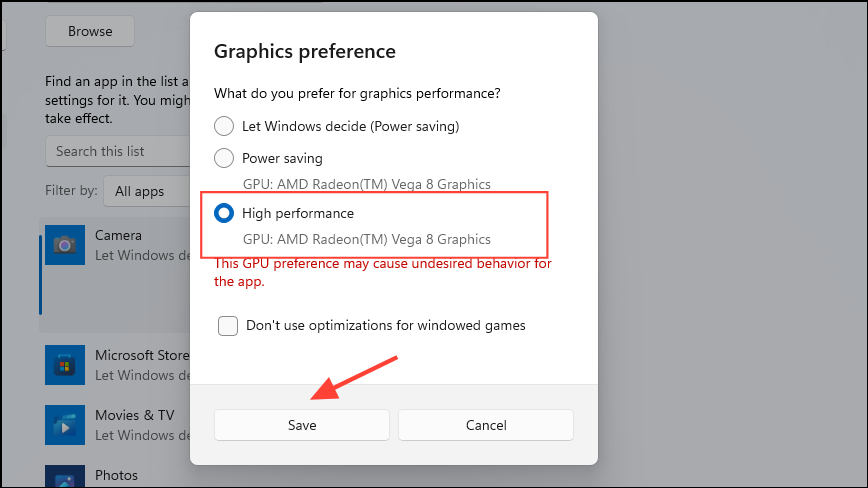
Fix 6: Change graphics preference for programs
Adjusting the graphics preference can help push more power to the GPU and may help solve the blurry screen problem in specific programs.
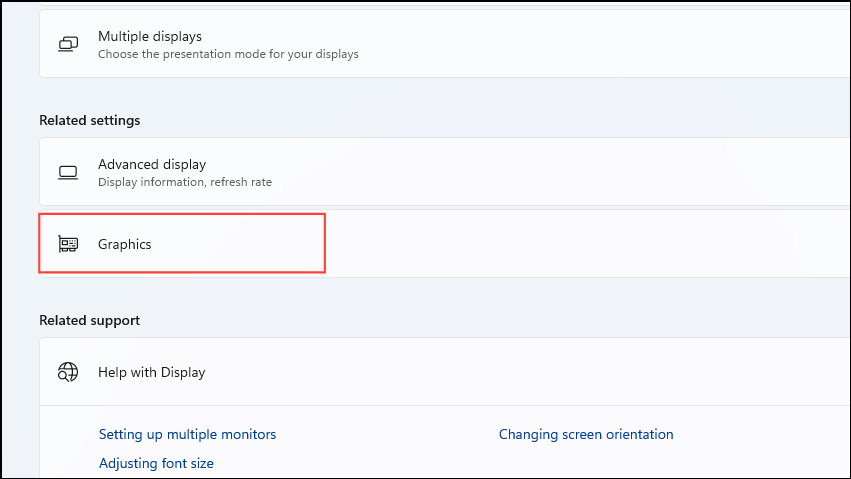
- Open the Display page in the Settings app.
- Scroll down to the 'Related settings' section and click on 'Graphics'.
- Select the application that appears blurry and click on the 'Options' button.
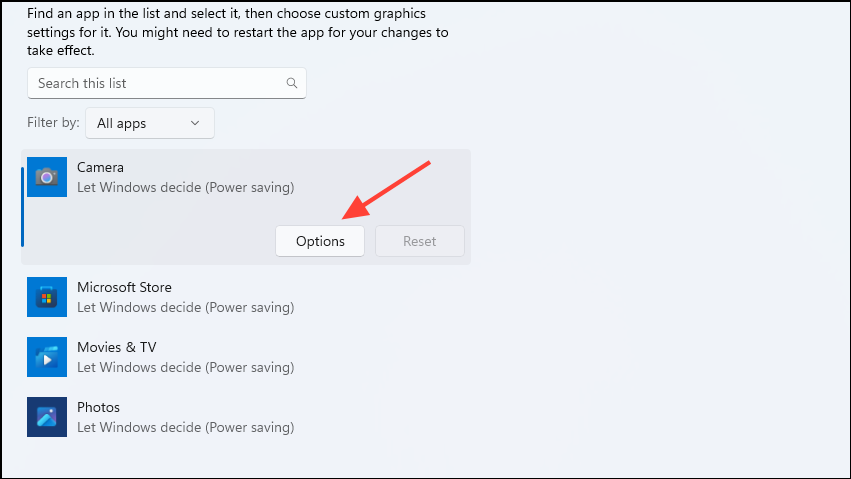
- Then click on 'High-performance' in the list of graphics options before clicking on the 'Save' button.
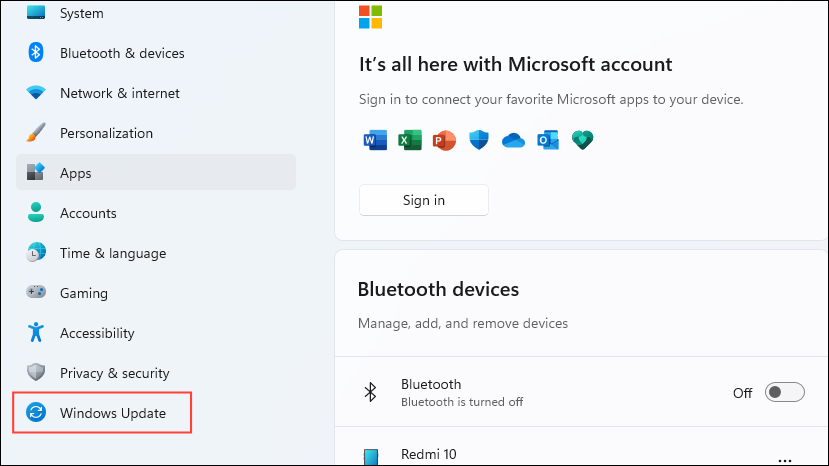
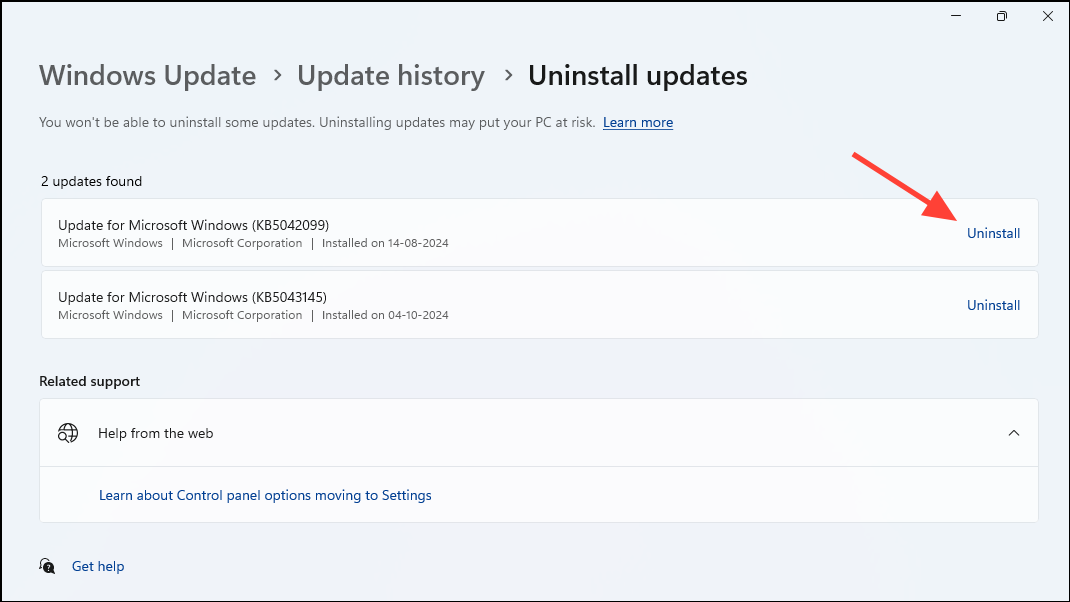
Fix 7: Uninstall recent Windows updates
If your screen started appearing blurry after installing a Windows Update, uninstalling the update may help sort out the issue.
- Open the Settings app and click on 'Windows Update' on the bottom left.
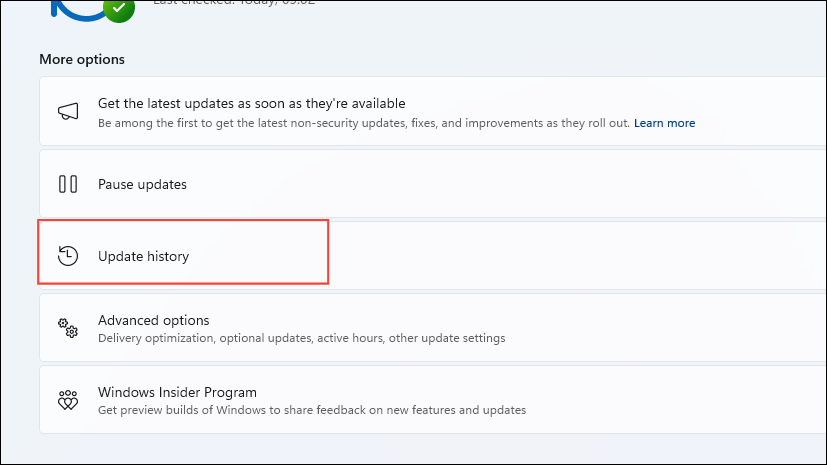
- On the Windows Update page, click on 'Update history'.
- Then scroll down to the 'Related settings' section and click on 'Uninstall updates'.
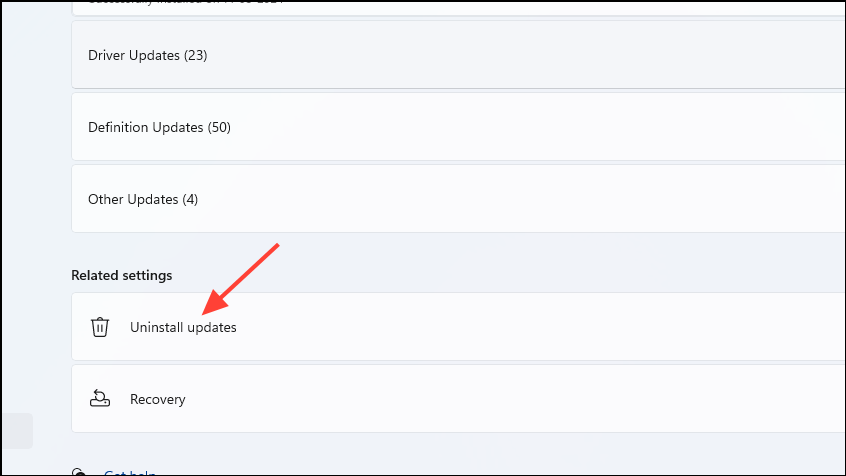
- Here you will see the recently installed updates that can be removed. Click on the 'Uninstall' option to the right of an update to remove it.
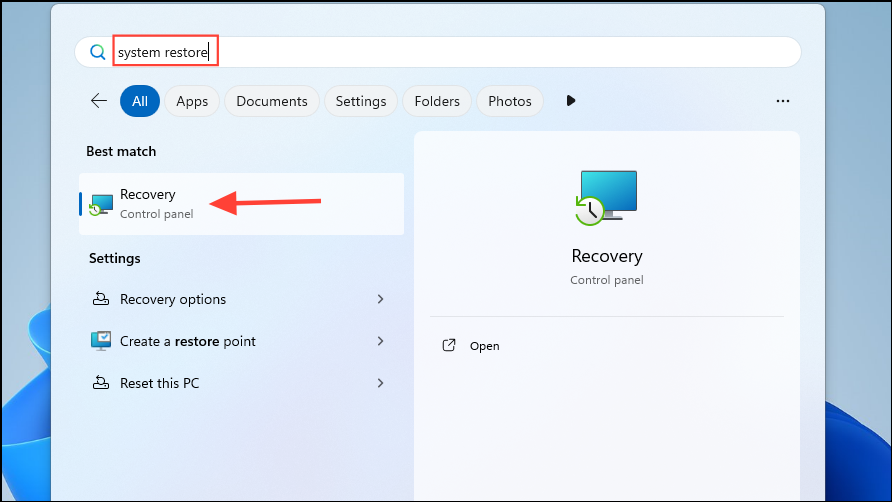
Fix 8: Use System Restore
If you have set up a restore point, you can use it to revert your system to an earlier time when your screen was not appearing blurry.
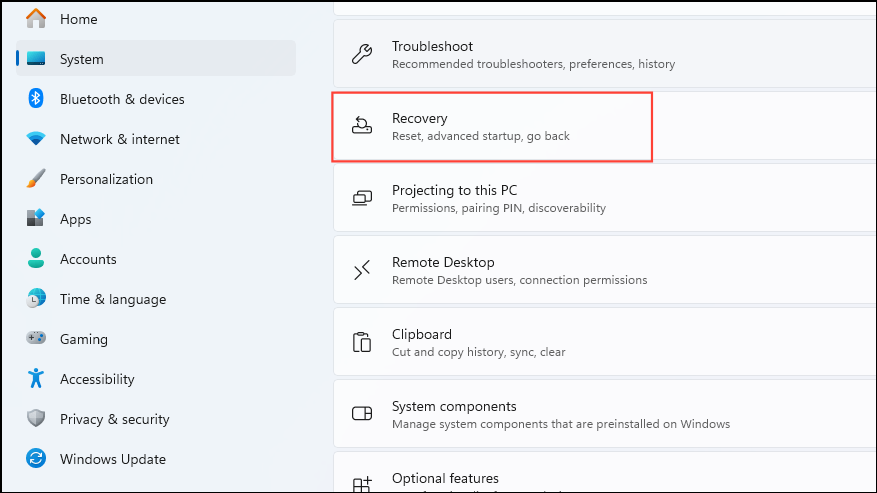
- Open the Start menu, type
system restoreand click on 'Recovery'.
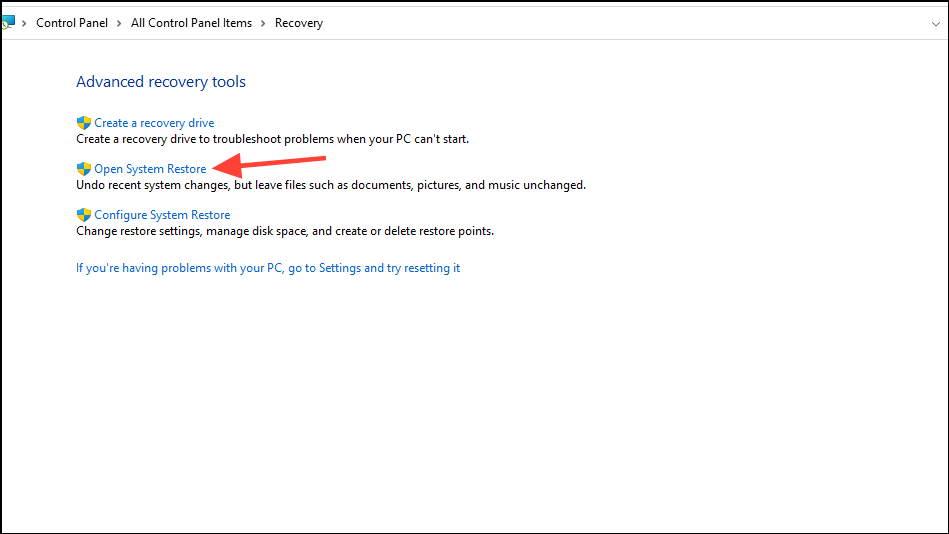
- Next, click on 'Open System Restore' when the Control Panel opens up.
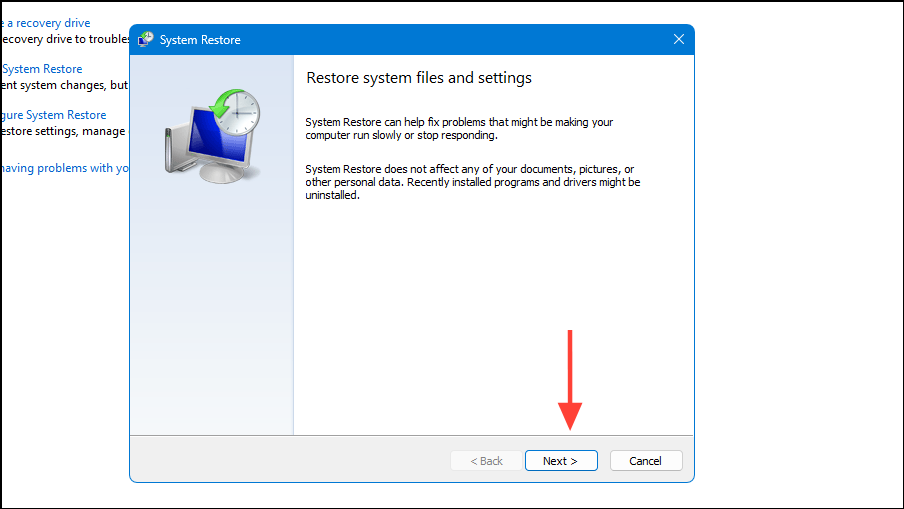
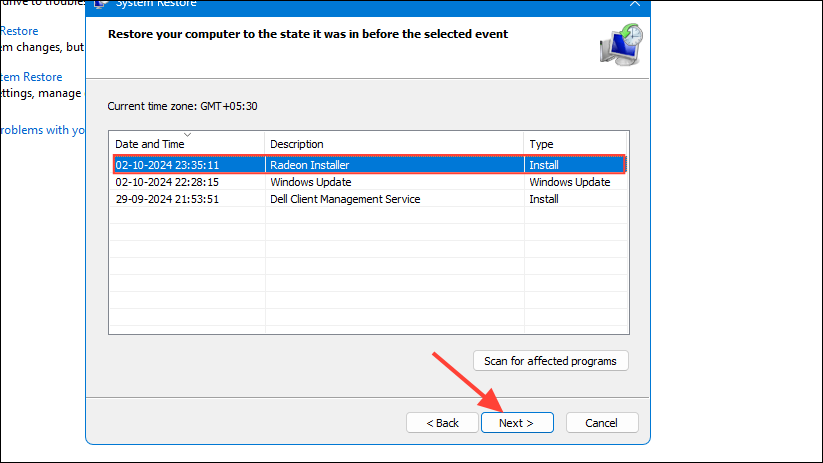
- When the System Restore dialog box appears, click on the 'Next' button.
- Now, you will see the list of available restore points. Click on the one you want to use and then click on the 'Next' button again.
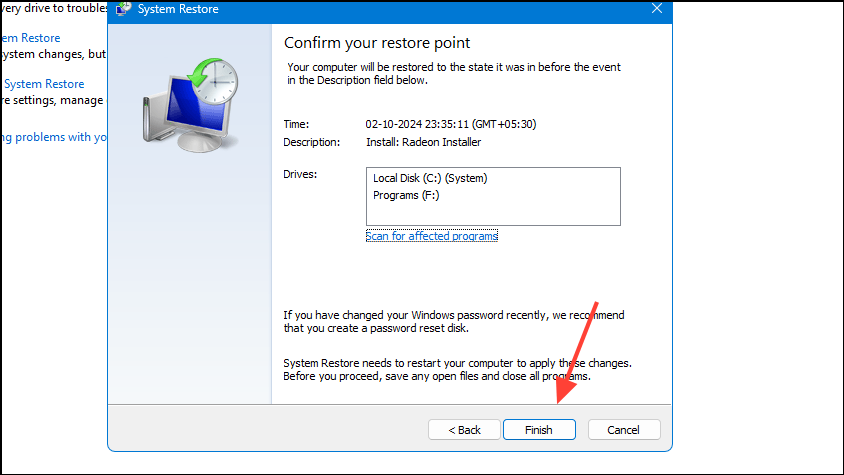
- Finally, click on the 'Finish' button, and your PC will restart as it reverts itself to the selected restore point.
Fix 9: Reset your computer
If nothing else works, you may have to reset your PC, which will remove all your settings and customizations and apply the defaults.
- Open the System page in the Settings app and click on 'Recovery'.
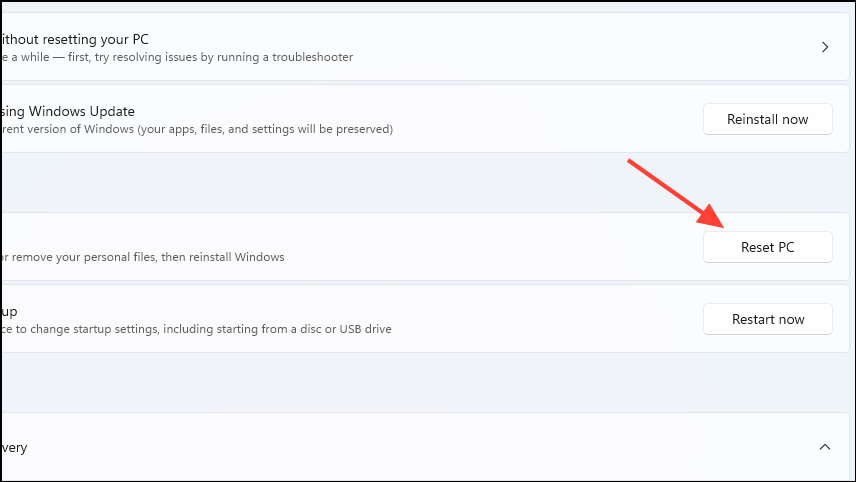
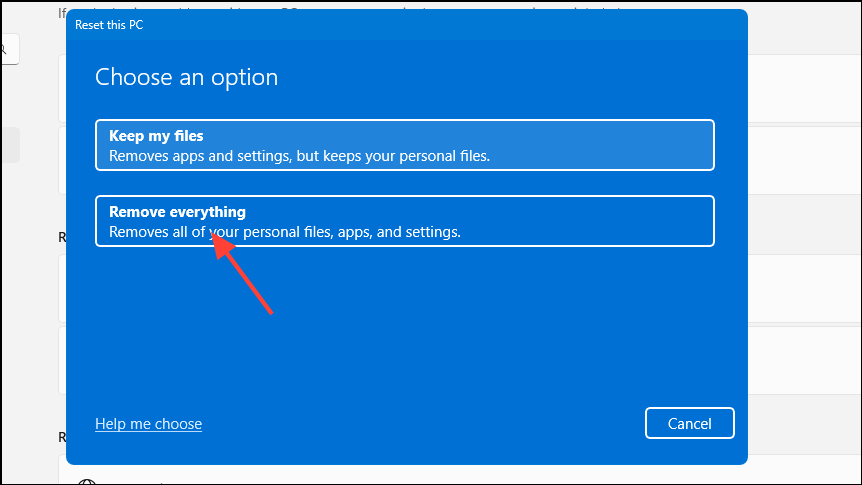
- On the Recovery page, click on the 'Reset PC' button on the right.
- When the 'Reset this PC' dialog box appears, click on 'Remove everything', which will ensure that the process goes smoothly.
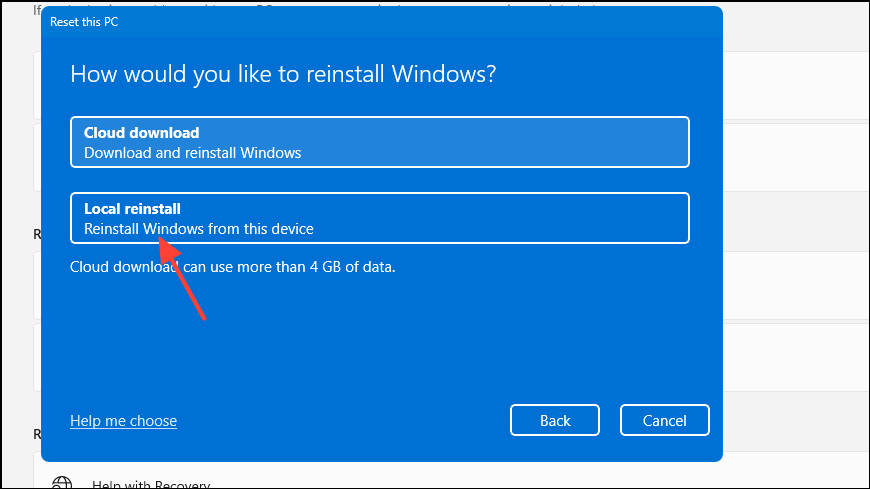
- Finally, select 'Local reinstall' to reinstall Windows locally. If you want the latest updates, you can select the 'Cloud download' option but it requires a stable and fast internet connection.
- The reset process will start and can take some time. Once it is complete, you can set up your system as you like.
Fix 10: Run Windows Memory Diagnostic
Issues with the RAM can prevent programs from loading correctly, resulting in display-related issues. You can check this by running the Windows Memory Diagnostic.
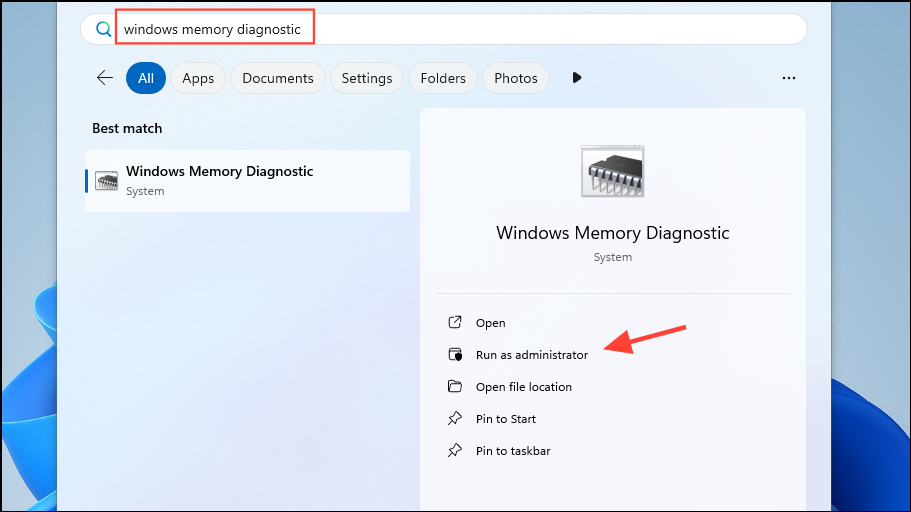
- Open the Start menu, type
Windows Memory Diagnosticand click on the utility when it appears.
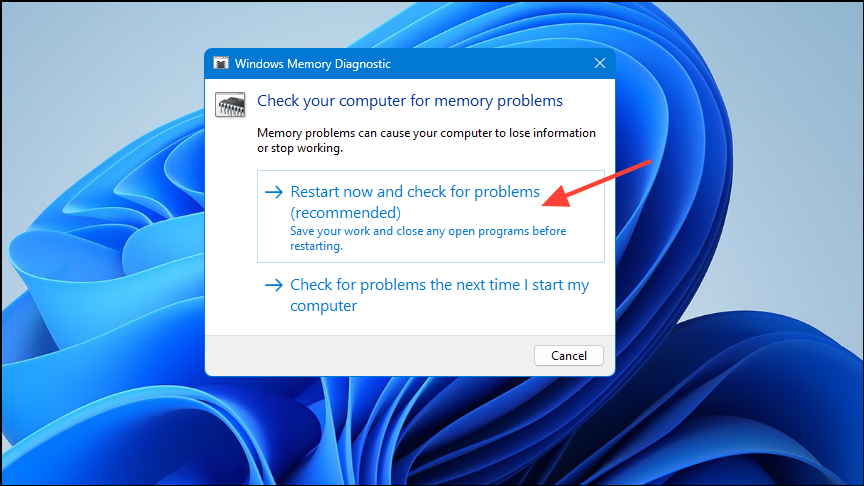
- Click on 'Restart now and check for problems (recommended)' when the Memory Diagnostic tool launches. Your PC will reboot and run diagnostics for memory issues. If it finds any, you may be able to fix them by following the steps on your screen or by replacing your RAM.
Things to know
- You should always check for hardware problems when you run into display-related problems. It may be that your display cable is faulty or loose, and simply attaching it securely or replacing it may be the solution you need.
- If you do not use a multi-monitor setup, connecting your PC to a different monitor can help you know whether the problem is with your hardware or software. In case the problem is also present on the separately connected monitor, it is most likely a software problem.
- Sometimes, viruses and malware can infect your computer and cause various issues. It is a good idea to use Windows Defender or a third-party antivirus program to scan for malware and check that your PC is safe from such threats.
- If you use a discrete GPU, try switching the display between the GPU and the native graphics adapter. It might be that your GPU is not working as it should and is responsible for the problem.