An Apple ID verification error can be a major inconvenience, disrupting access to iCloud, the App Store, and other Apple services. This can be especially frustrating during critical times like after a software update or iPhone upgrade. Thankfully, this guide offers several methods to help you resolve the issue permanently.
Ensure you are connected to the internet
If the Internet on your iPhone is working slowly or the connectivity is sporadic, the network issue could be the culprit behind the ‘Apple ID verification failed’ error.
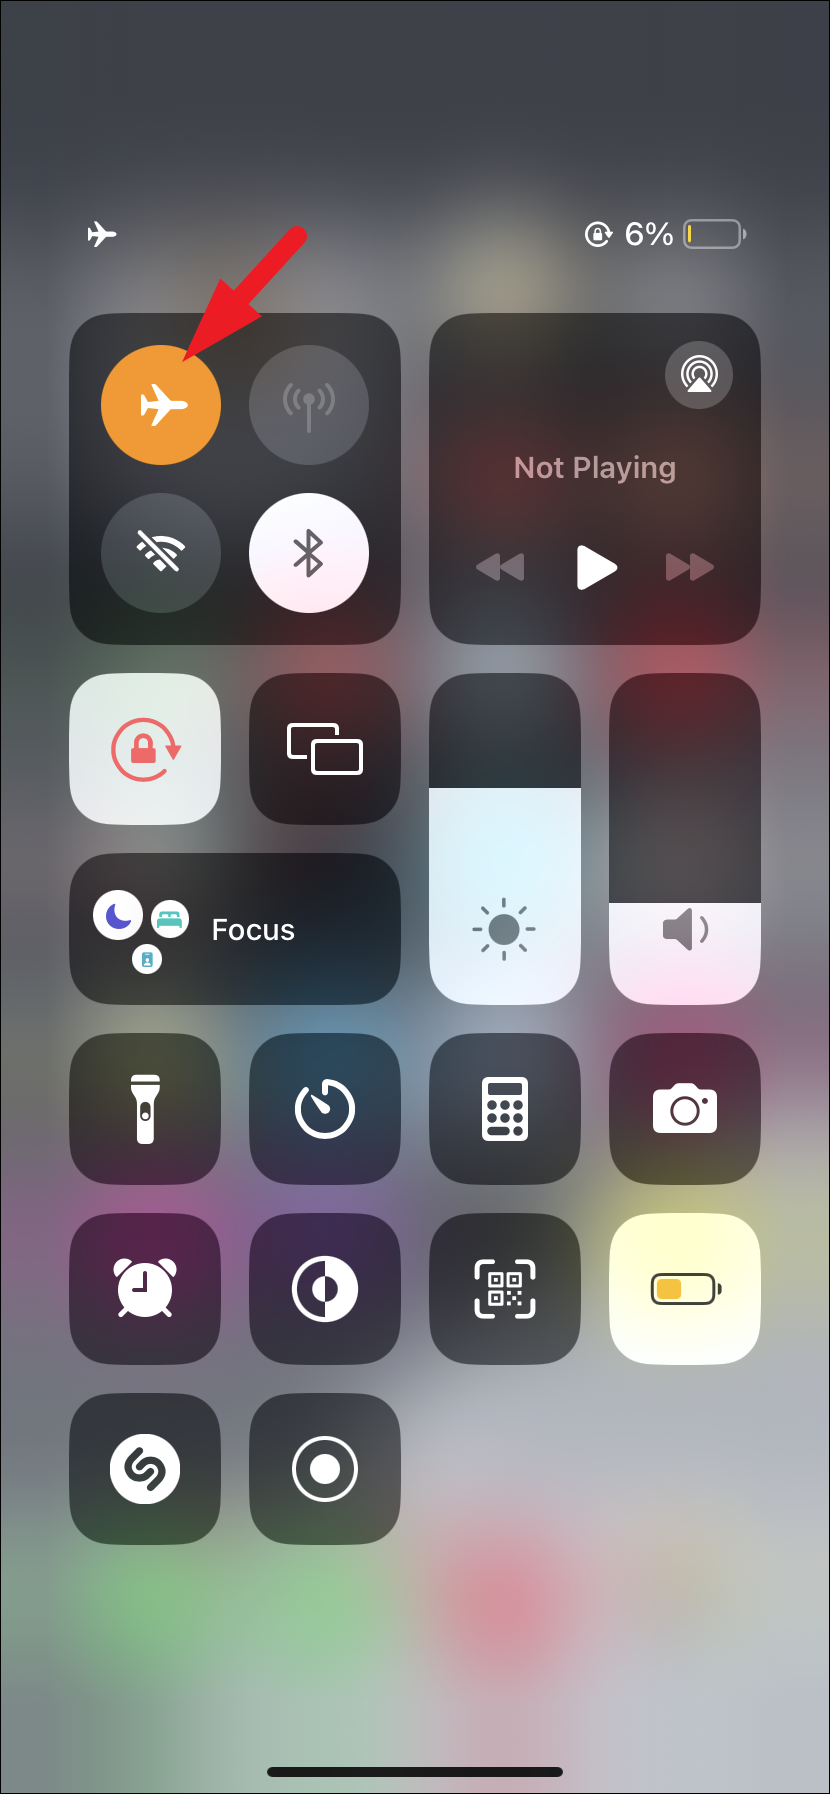
A quick fix to reset cellular network connectivity is to toggle the Airplane mode On and Off. You can easily do that from the Control Center.
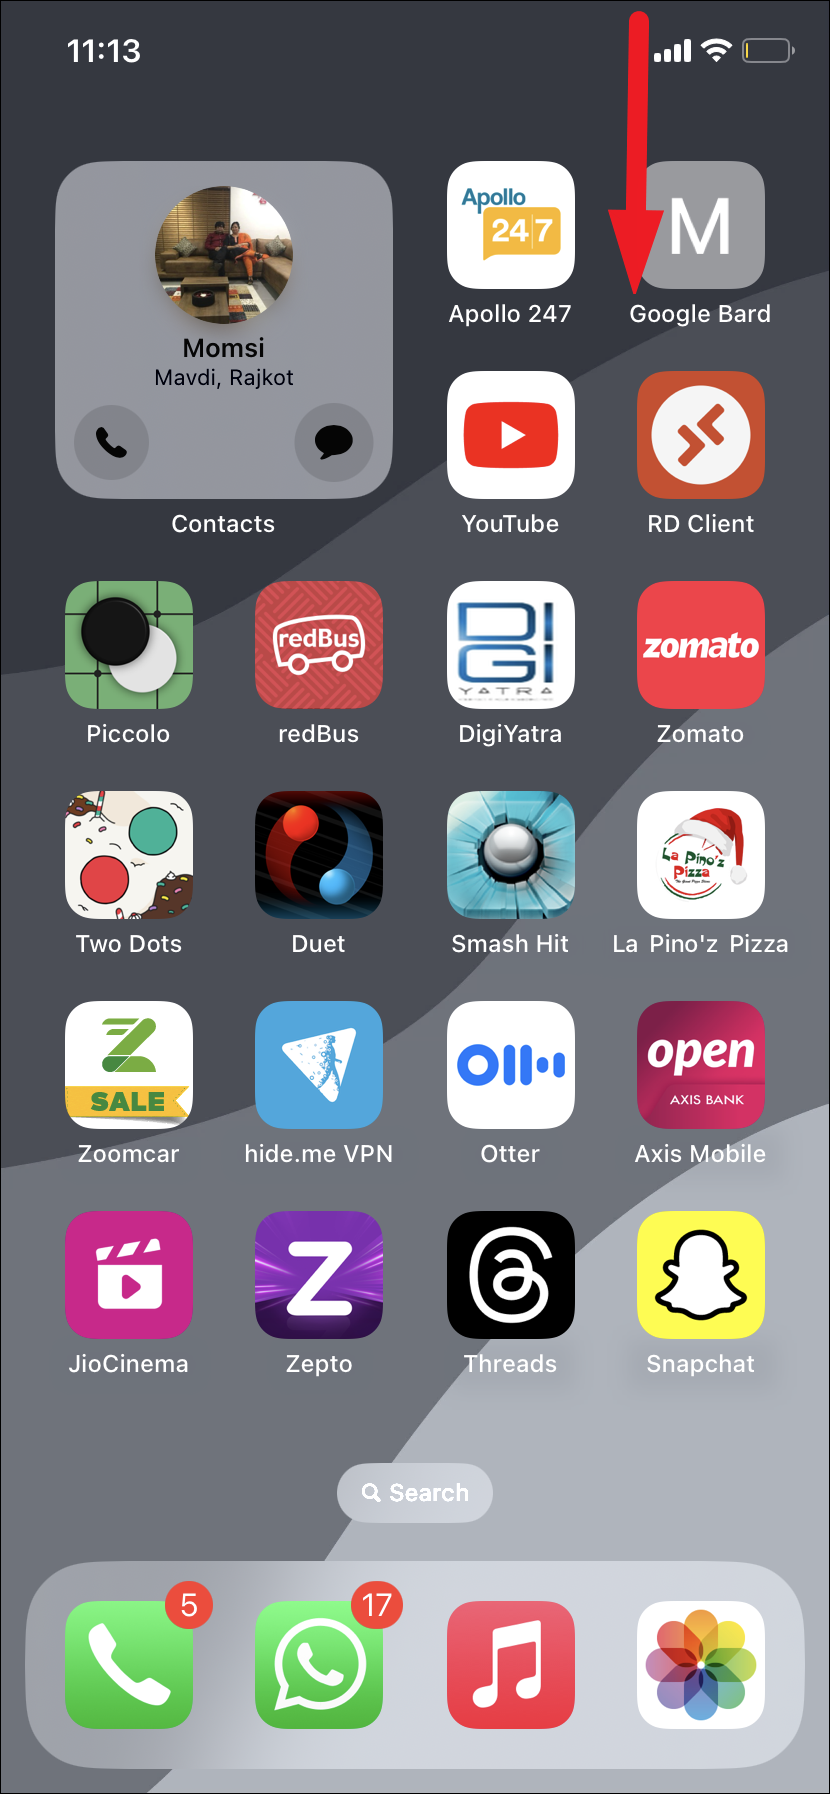
- Swipe down from the top right corner to access the ‘Action Center’ on your iPhone.
- Tap on the ‘Airplane’ icon to enable ‘Airplane Mode’. Wait for a couple of minutes and tap the icon again to disable it. This should help with any network connectivity issues on your iPhone.
If your network connectivity is limited, you can try restarting the router or contacting the ISP regarding the issue.
Disable VPNs (Virtual Private Network)
VPN (Virtual Private Network) is great for protecting your online privacy but it can cause regional mismatch that could lead to the Apple ID authentication issue as your iPhone region might not match your IP address.
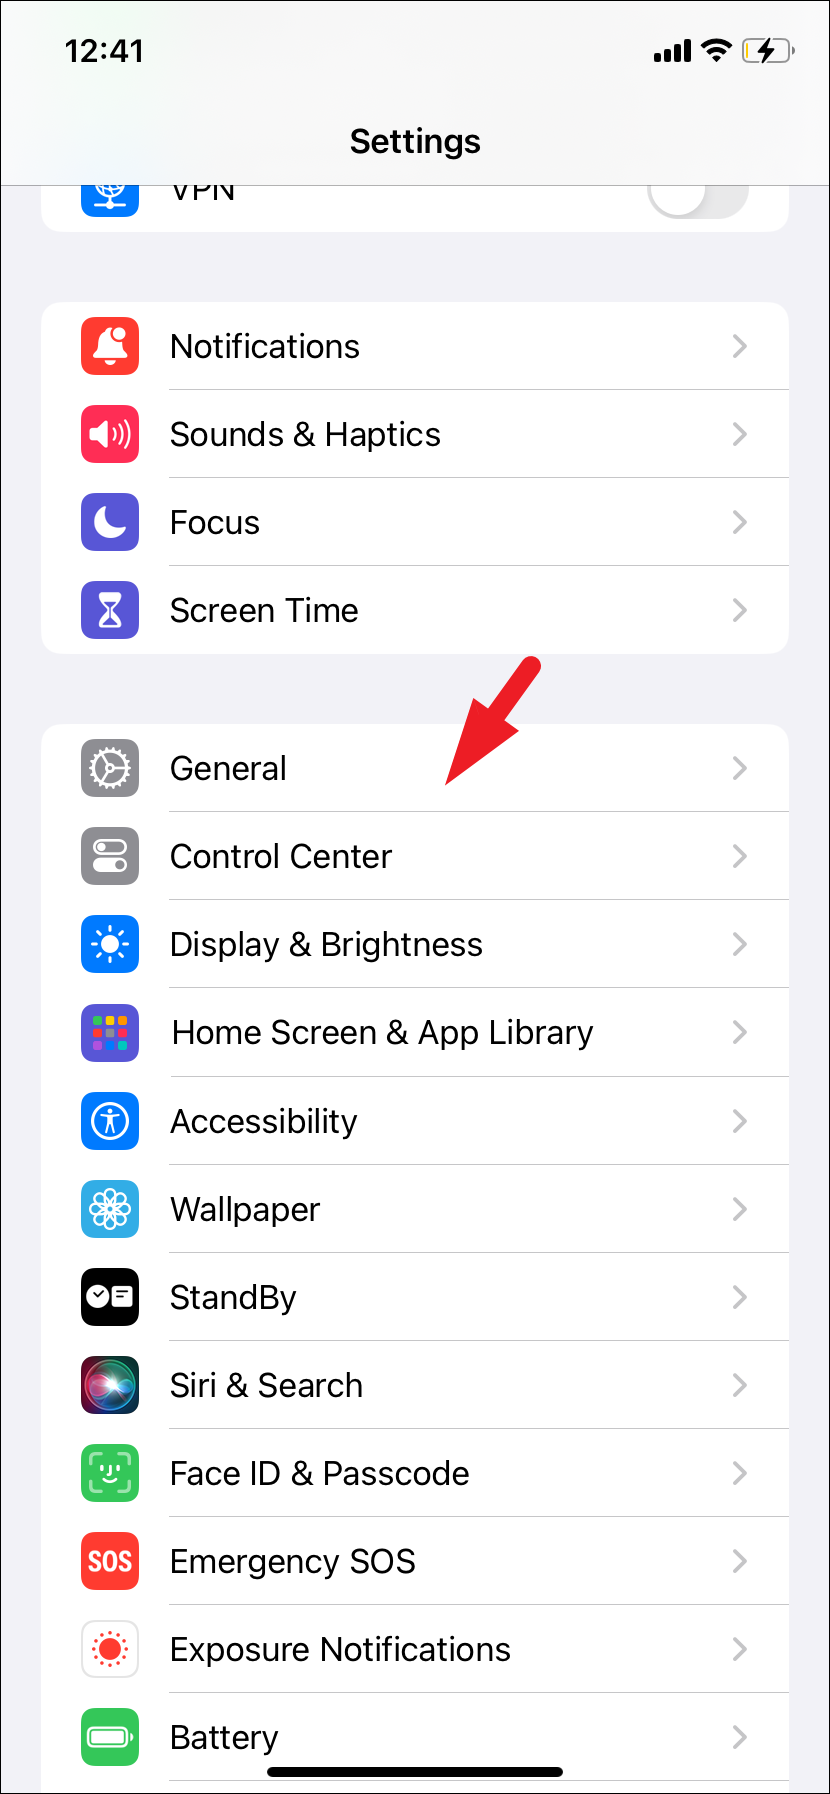
- Open the Settings app from the Home Screen or the App Library.
- Select the ‘General’ option from the list to continue.
- Choose the ‘VPN & Device Management’ option to proceed.

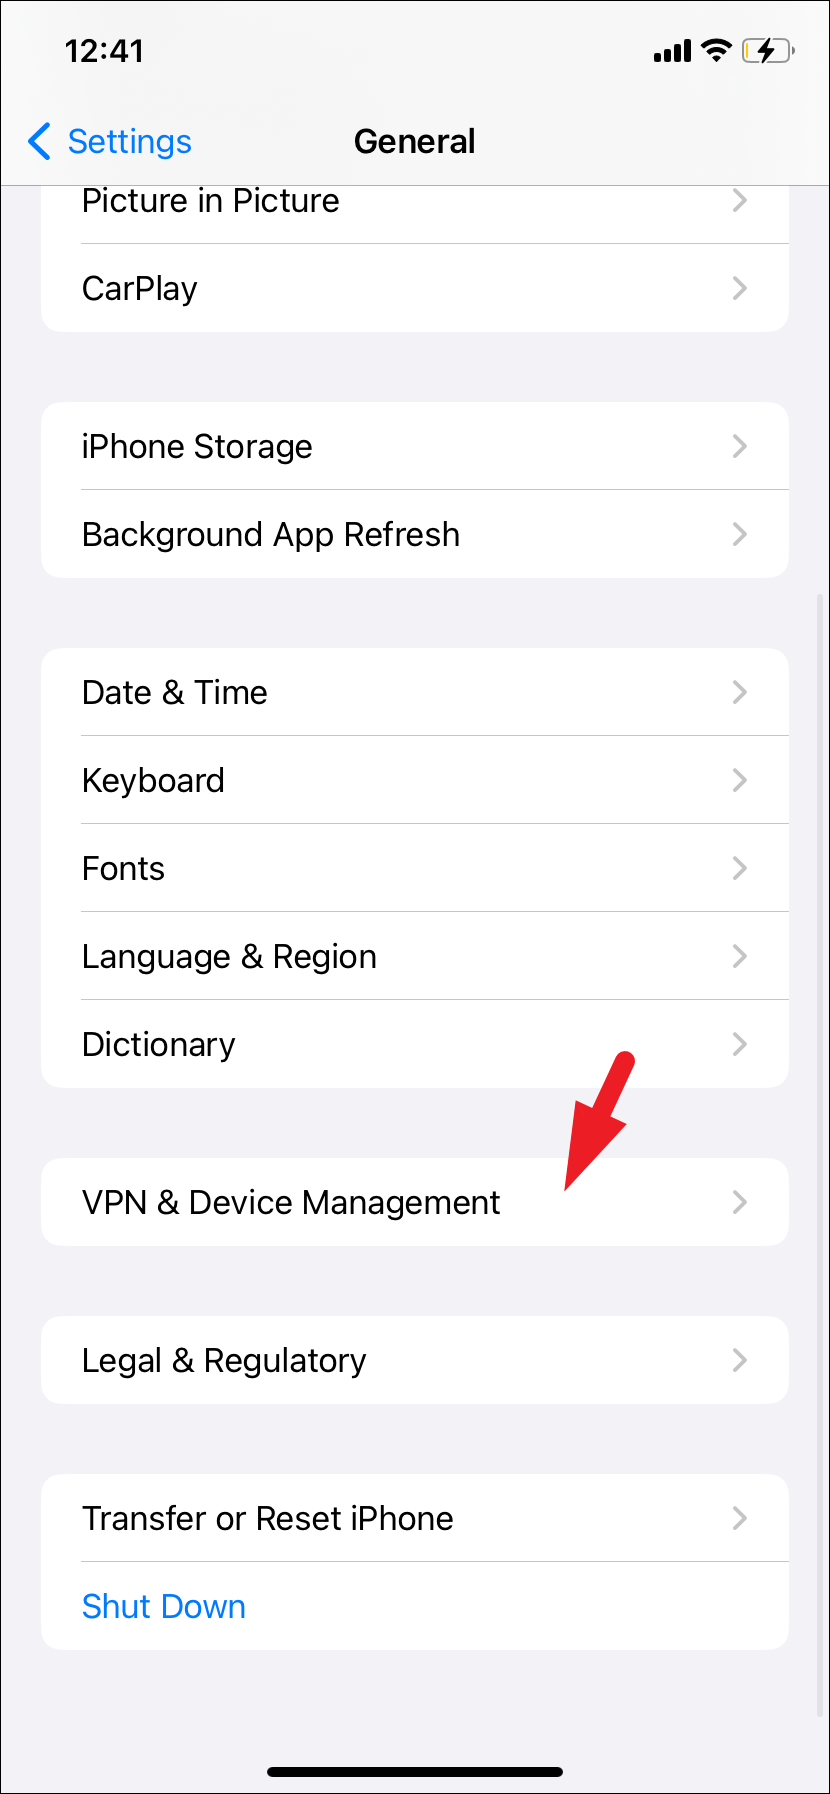
- Tap on the ‘VPN’ option to proceed.
- Ensure the Status toggle is in the ‘Not Connected’ position.

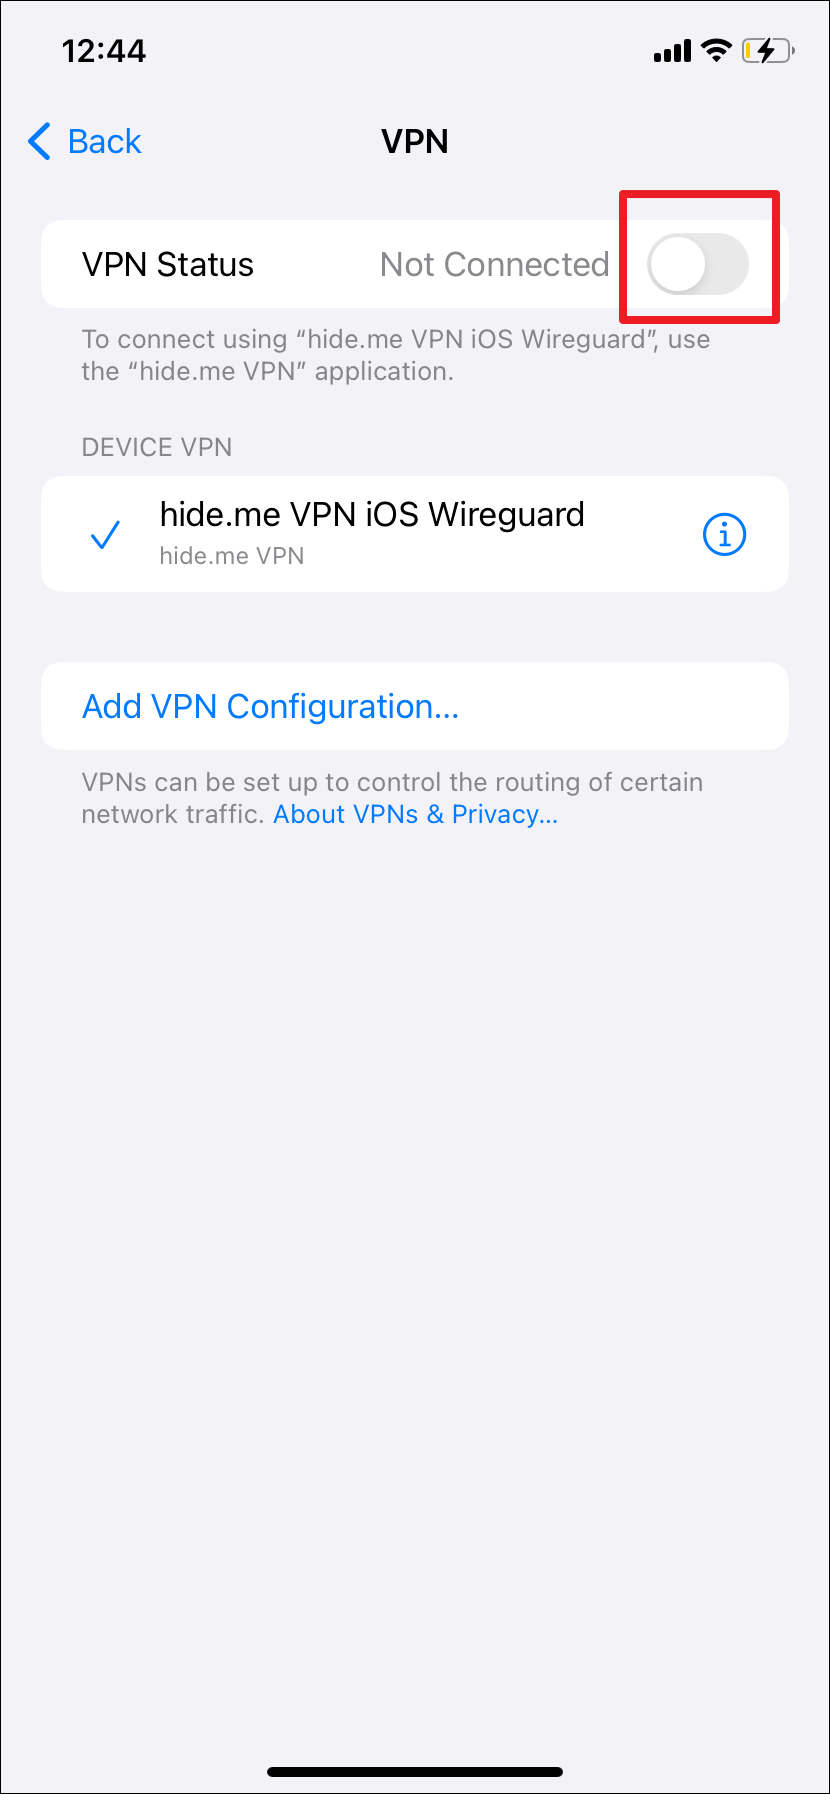
If VPN was enabled on your device, check if you are still facing the Apple ID authentication error on your device after disabling VPN.
Check the Apple ID Server Status
It is very rare that Apple Server goes down. However, it is entirely possible.
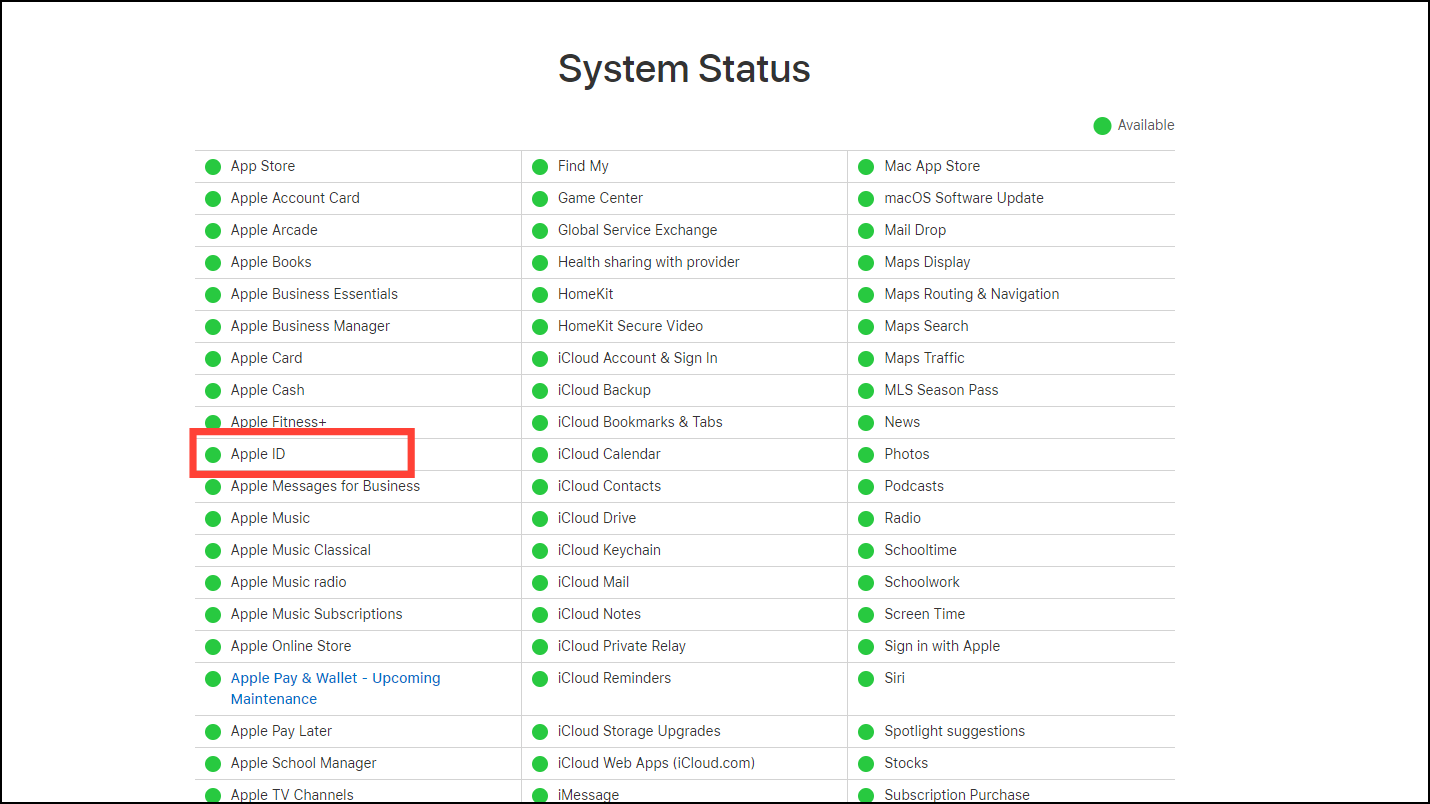
- To check Apple server status, head to www.apple.com/systemstatus using your preferred browser.
- Click on the ‘+’ icon to expand the service status list if you are on a handheld device. Ensure the ‘Apple ID’ status reads ‘Available’. If the service status is ‘Not Available’, try again when it becomes ‘Available.
Sign Out from the App Store and Sign Back In
- Head to the App Store either from the Home Screen or the App Library.
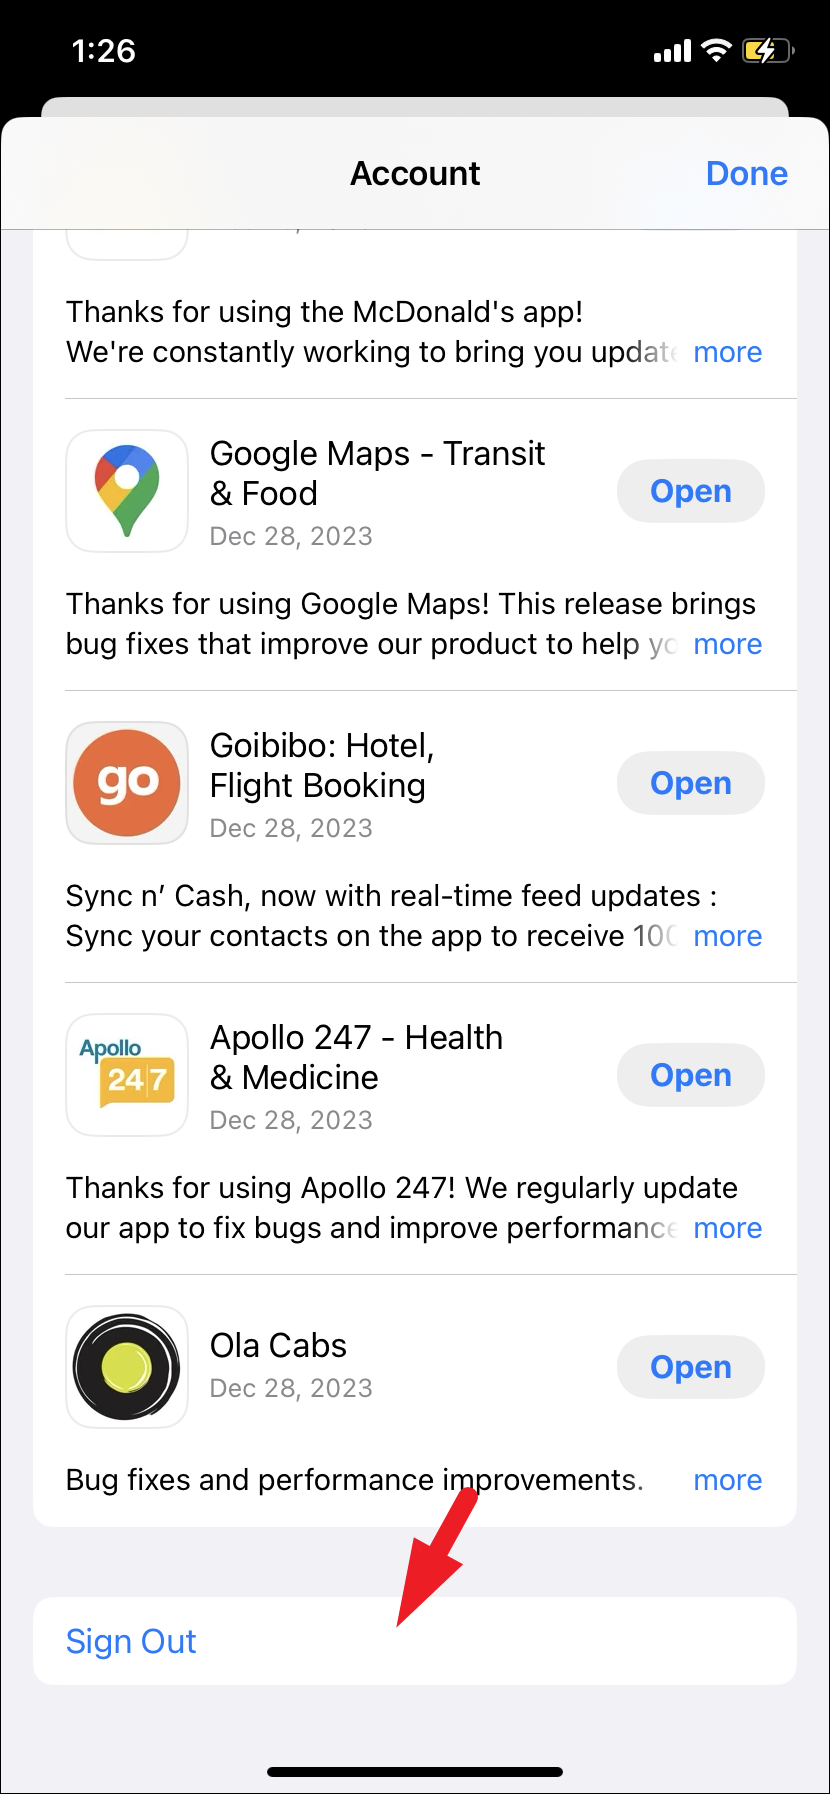
- Tap on your ‘Account picture’ or initials from the top right corner to proceed.
- Scroll to the bottom of the screen and tap on the ‘Sign Out’ button.

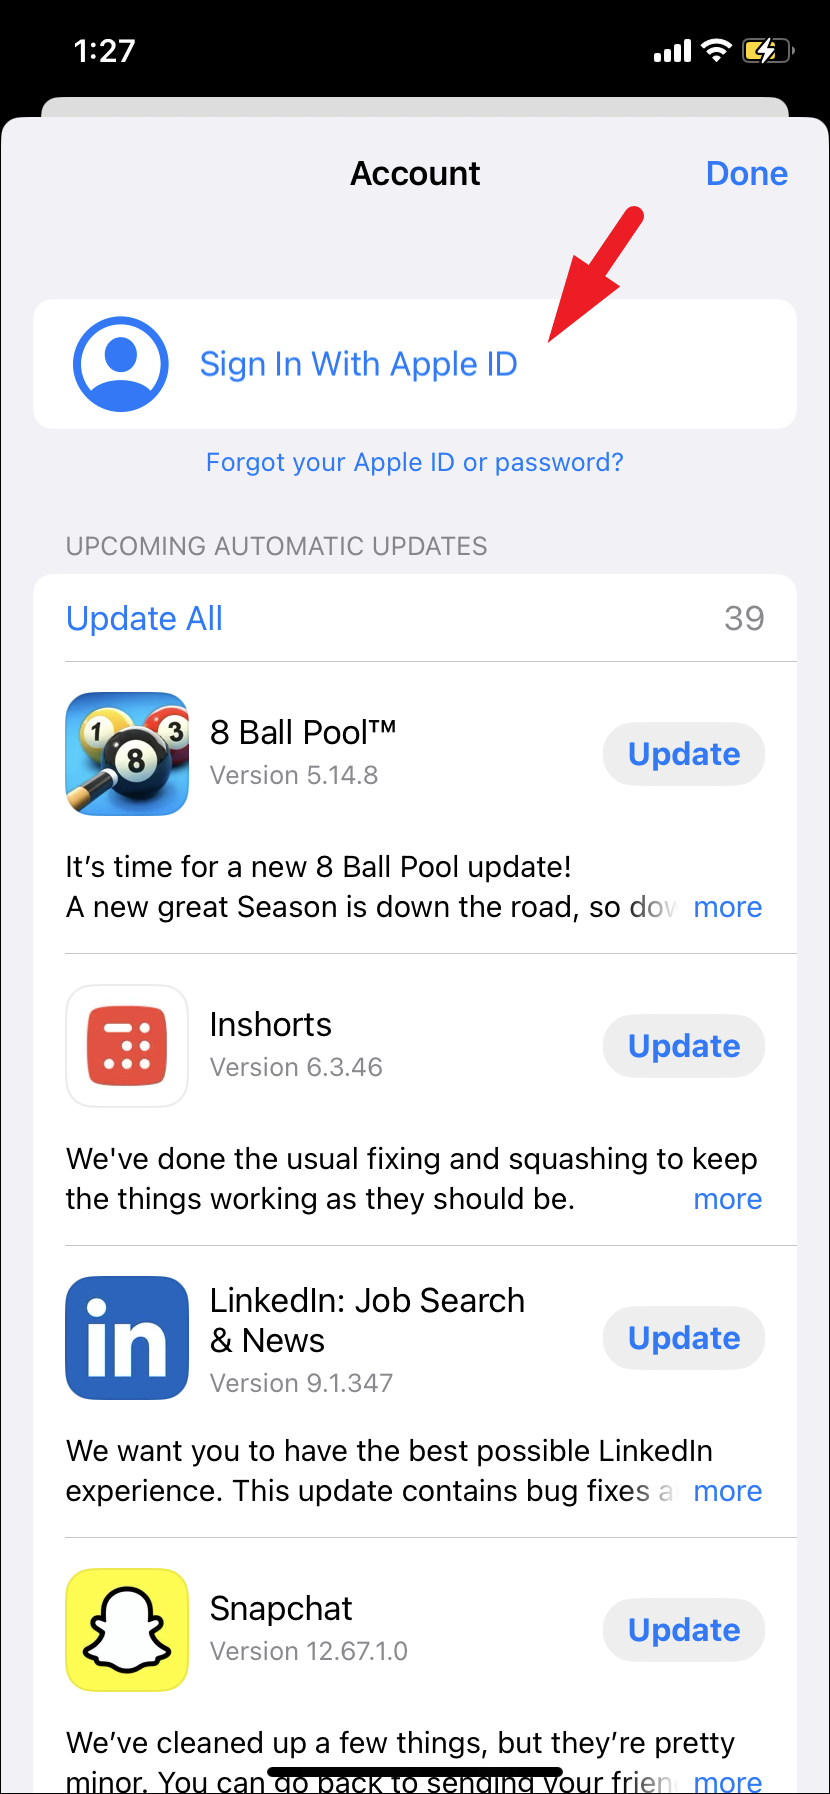
- Once signed out, restart your iPhone. Then, head to the App Store and tap on the ‘Continue’ button. If you are not presented with a splash screen, tap on the ‘Account picture’ in the top right.
- Tap on ‘Sign in with Apple ID’ and provide your login credentials.

Fix the Date and Time on your iPhone
If your iPhone is displaying the incorrect date and time with respect to your current time zone, it could be the culprit behind the issue.
- Head to the ‘Settings’ app either from the Home Screen or the App Library.
- Tap on the ‘General’ option from the list to proceed.
- Select the ‘Date & time’ option to continue.
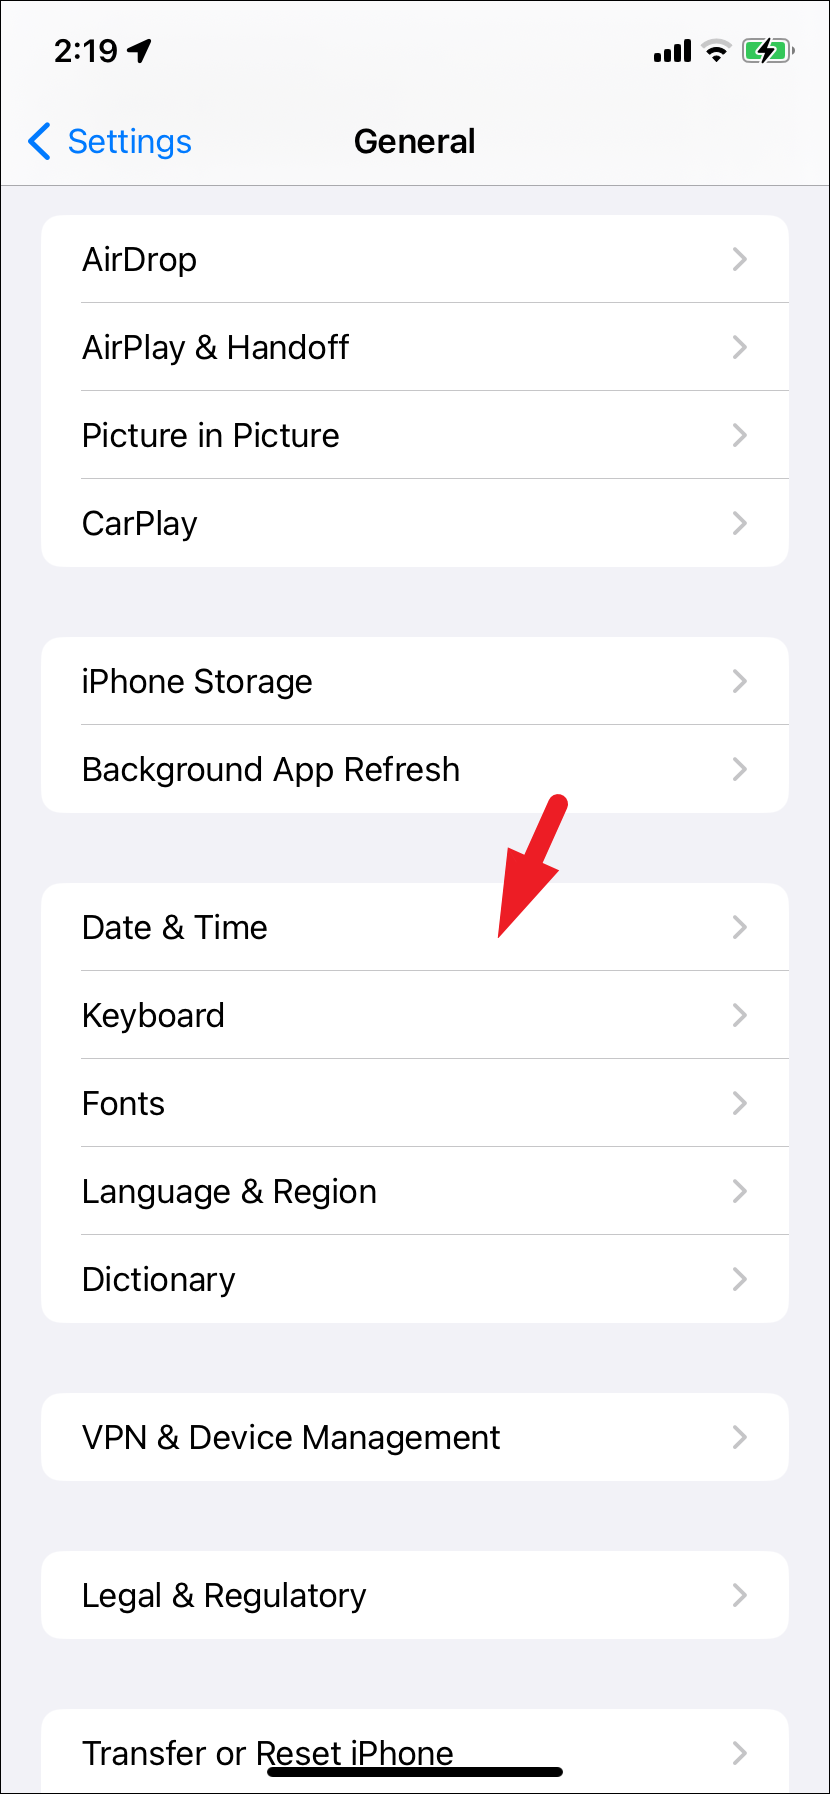
- Ensure the toggle following the ‘Set Automatically’ option is in the ‘On’ position.

Use a WiFi Connection Instead of a Cellular
WiFi connection is much more stable than a cellular connection
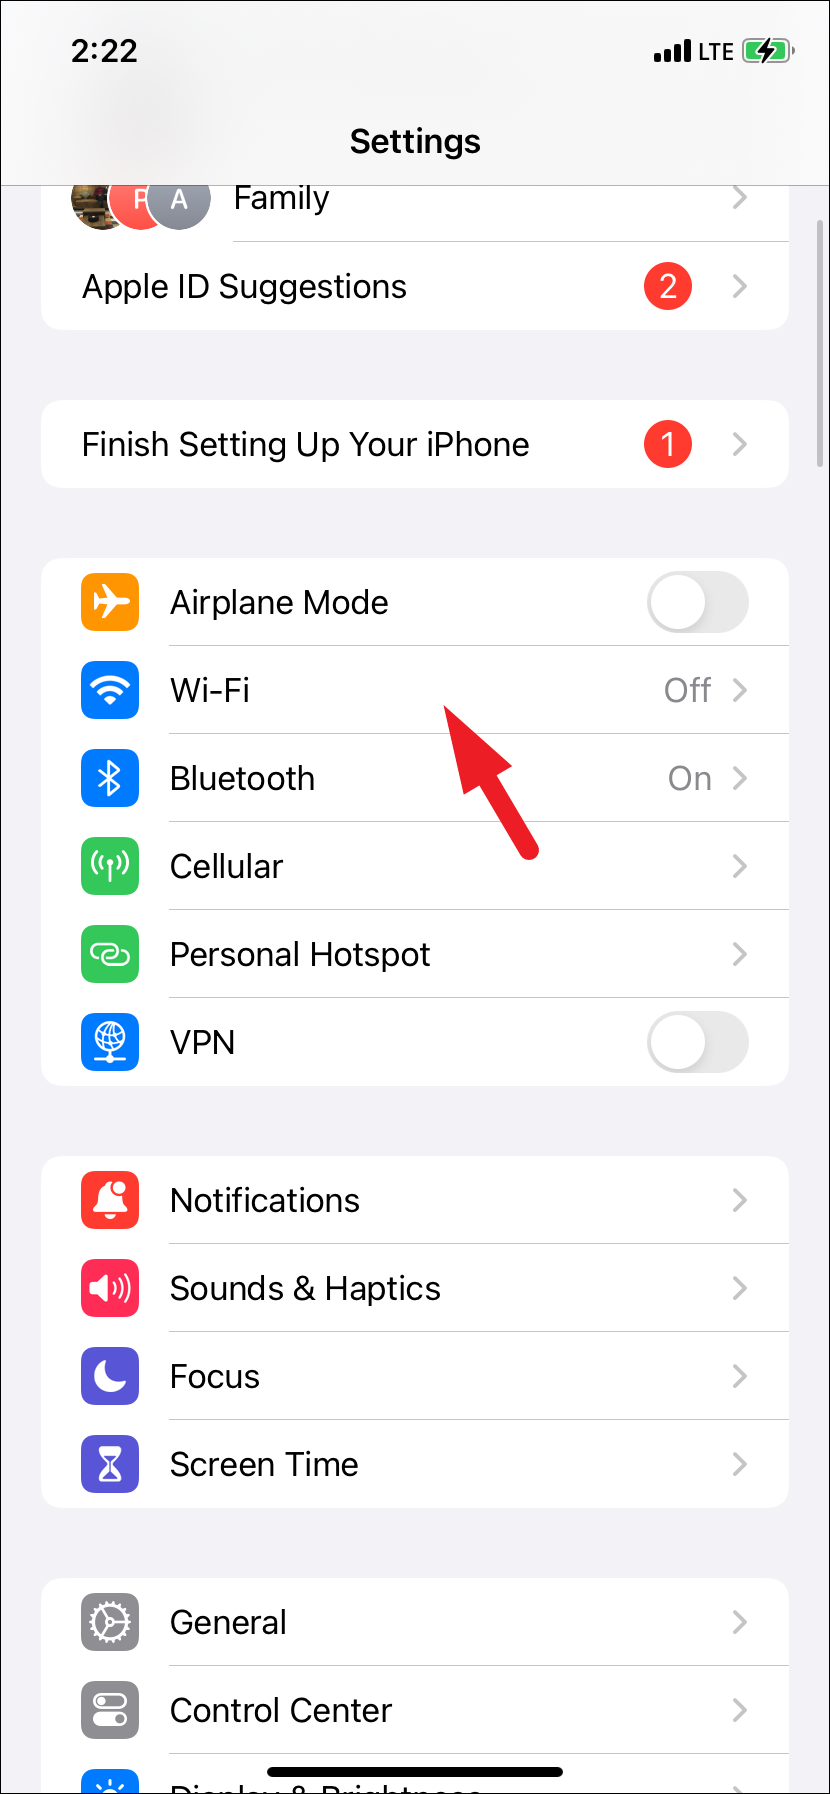
- To connect to WiFi, launch the Settings app and tap on ‘WiFi’.
- Turn on the toggle for ‘WiFi’ if it is turned off. You shall be able to see all available networks, tap on your recognized WiFi network, and provide authentication to connect to it.
- Once connected, try logging in to your Apple ID again.
Reconnect to a Wi-Fi network
Many users have been able to resolve the issue by forgetting the WiFi connection and connecting it back again. This error was usually faced by users connected to the same WiFi network for extended periods.
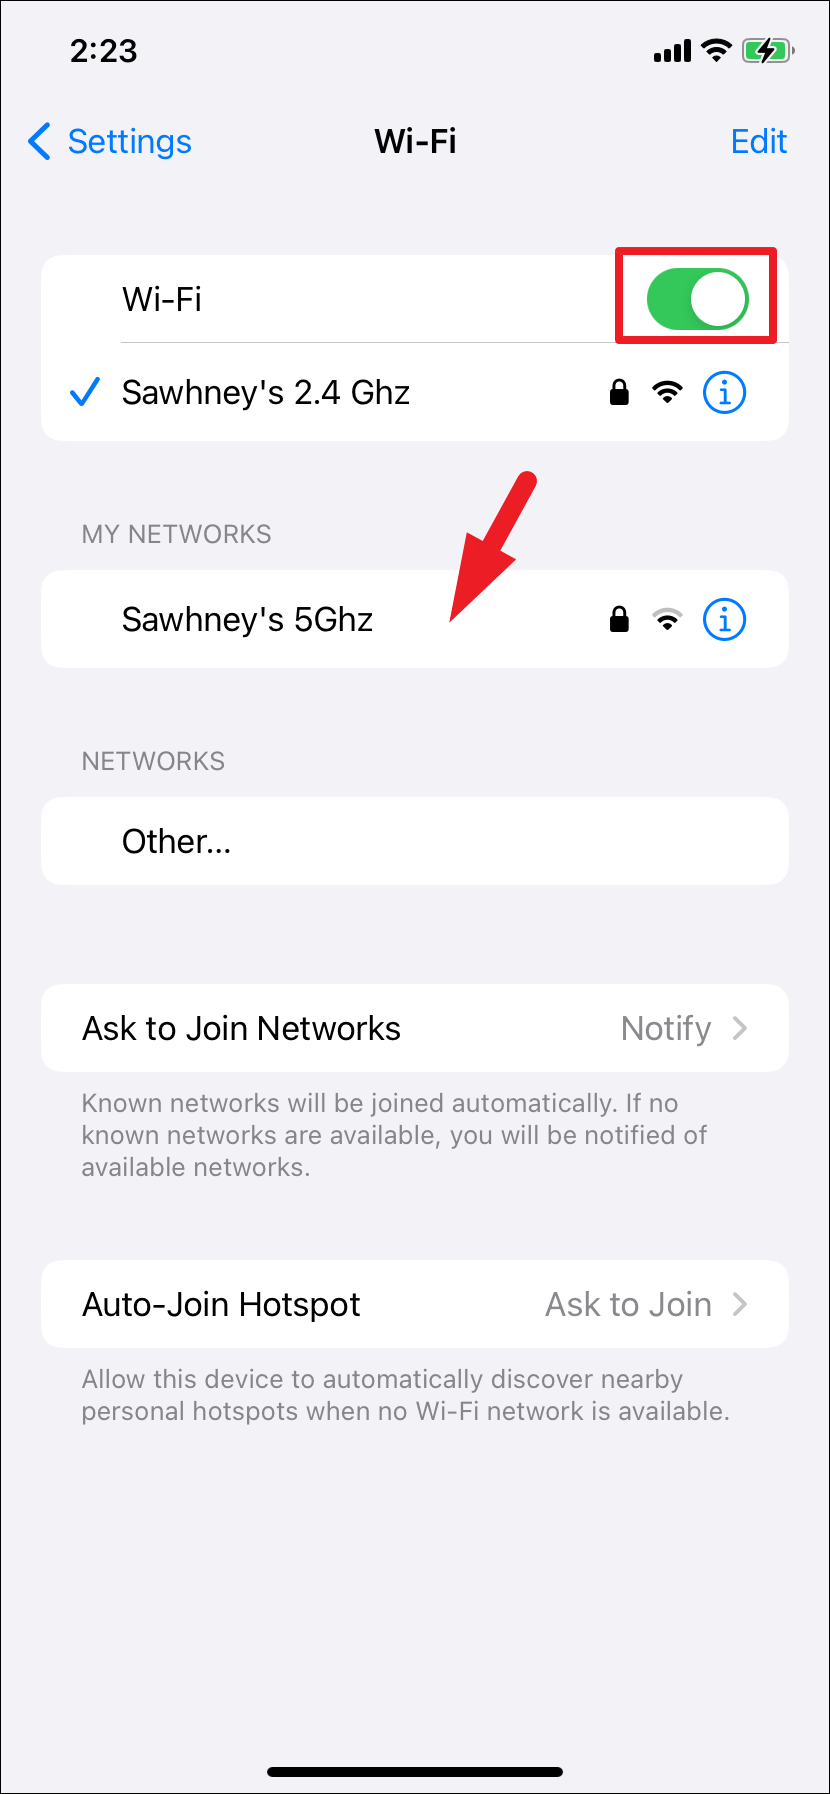
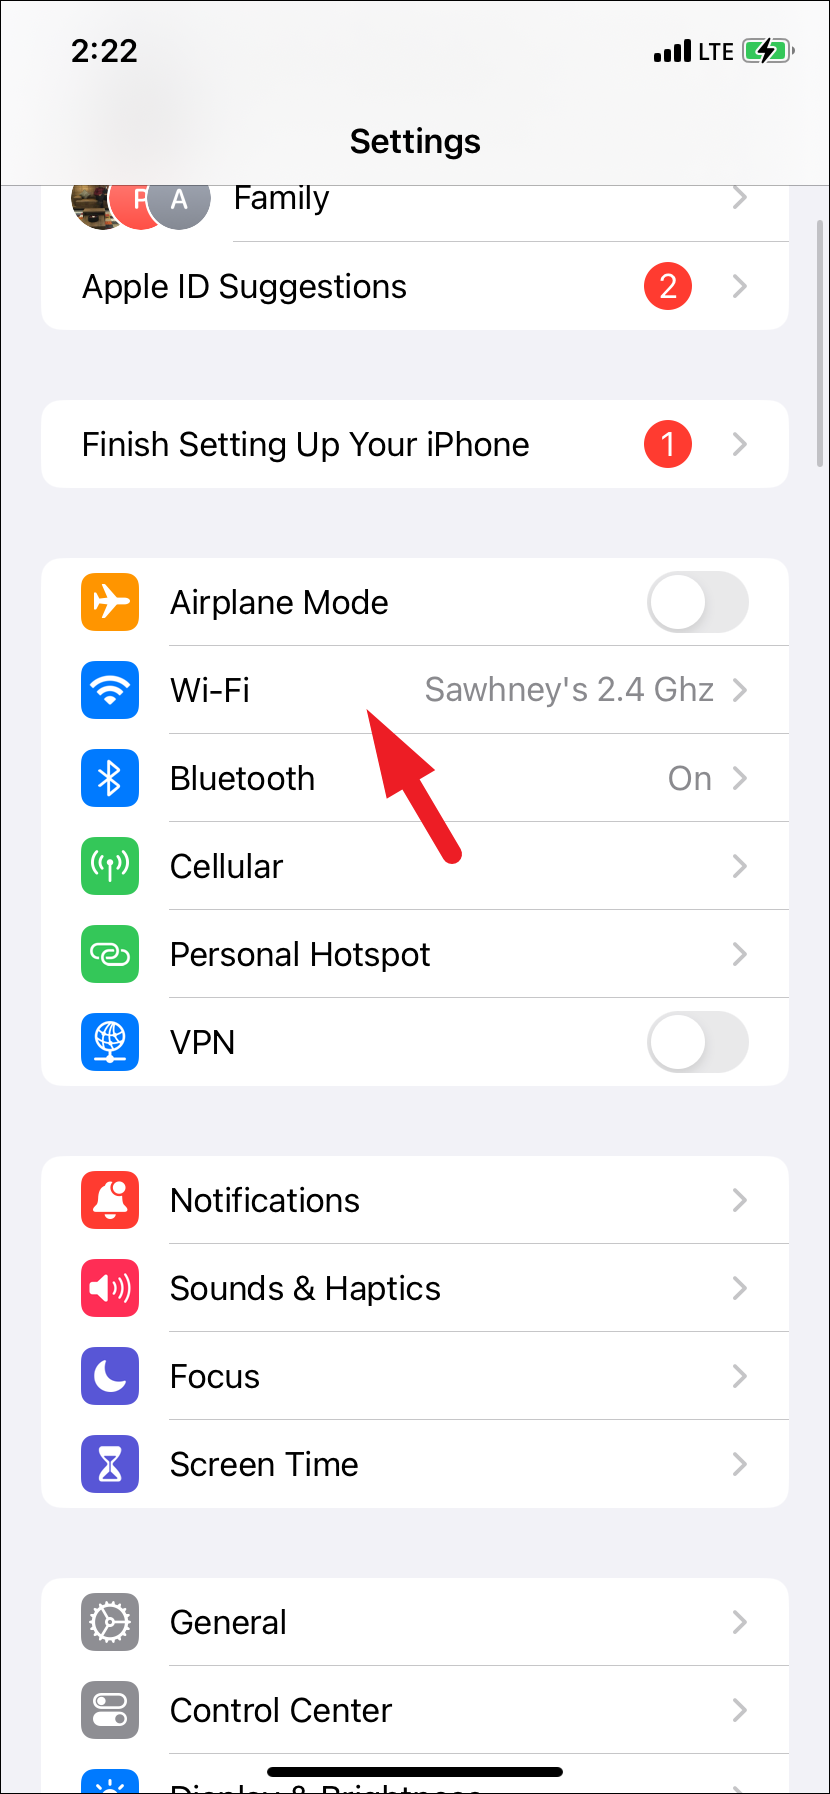
- Open your iPhone’s ‘Settings’ app and select ‘Wi-Fi’ to proceed.
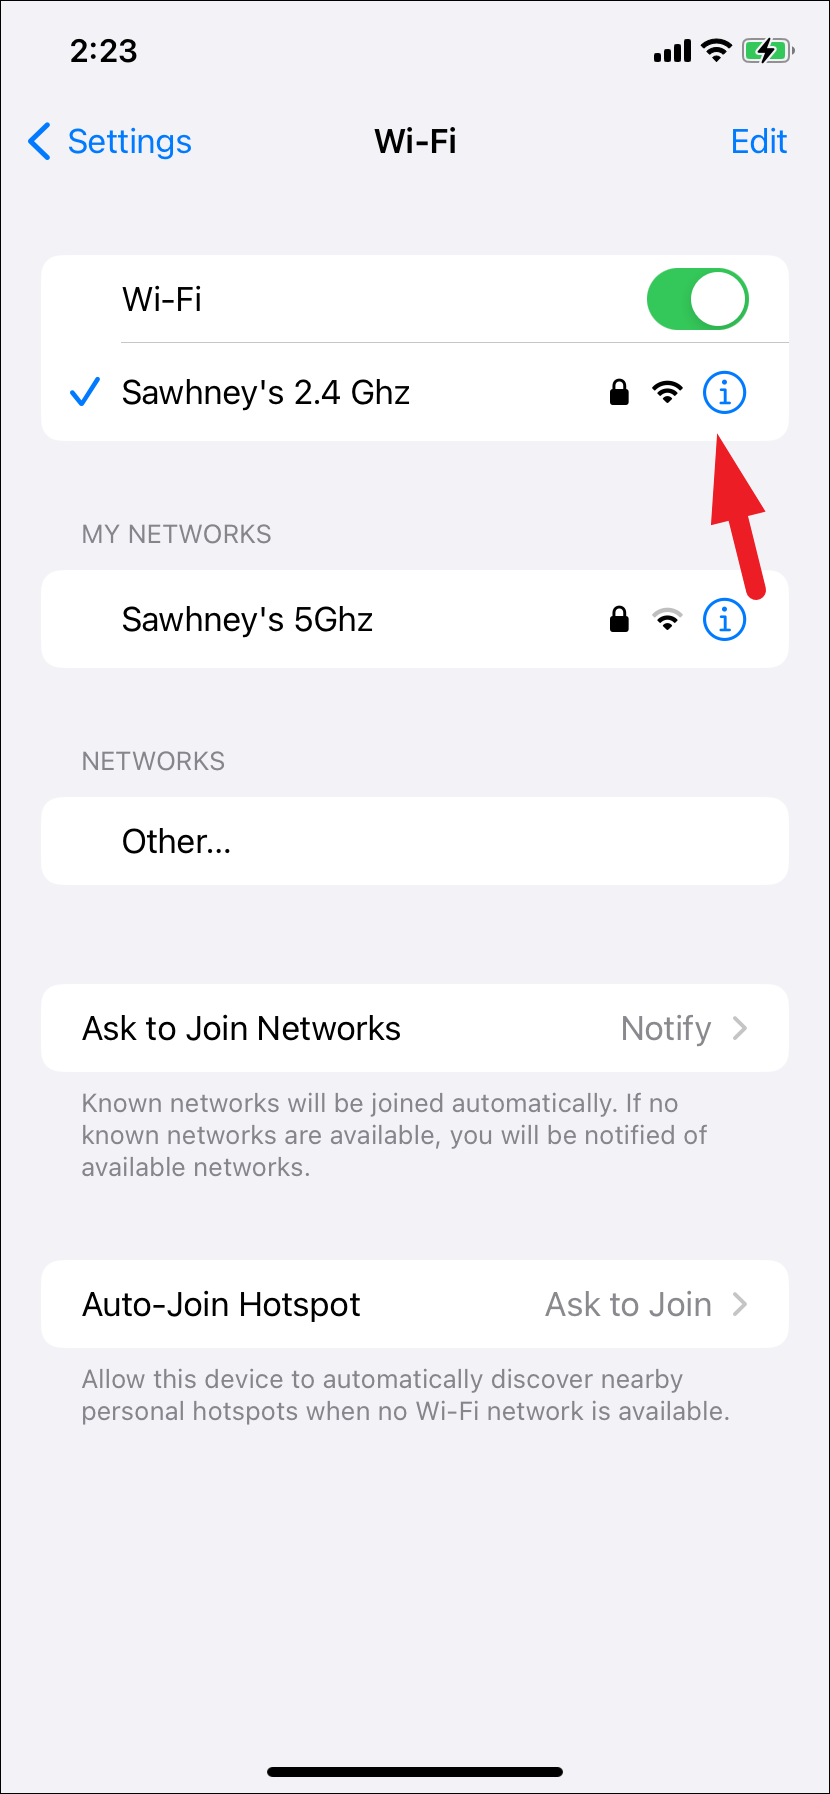
- Tap on the ‘i’ button on the network you are currently connected to.
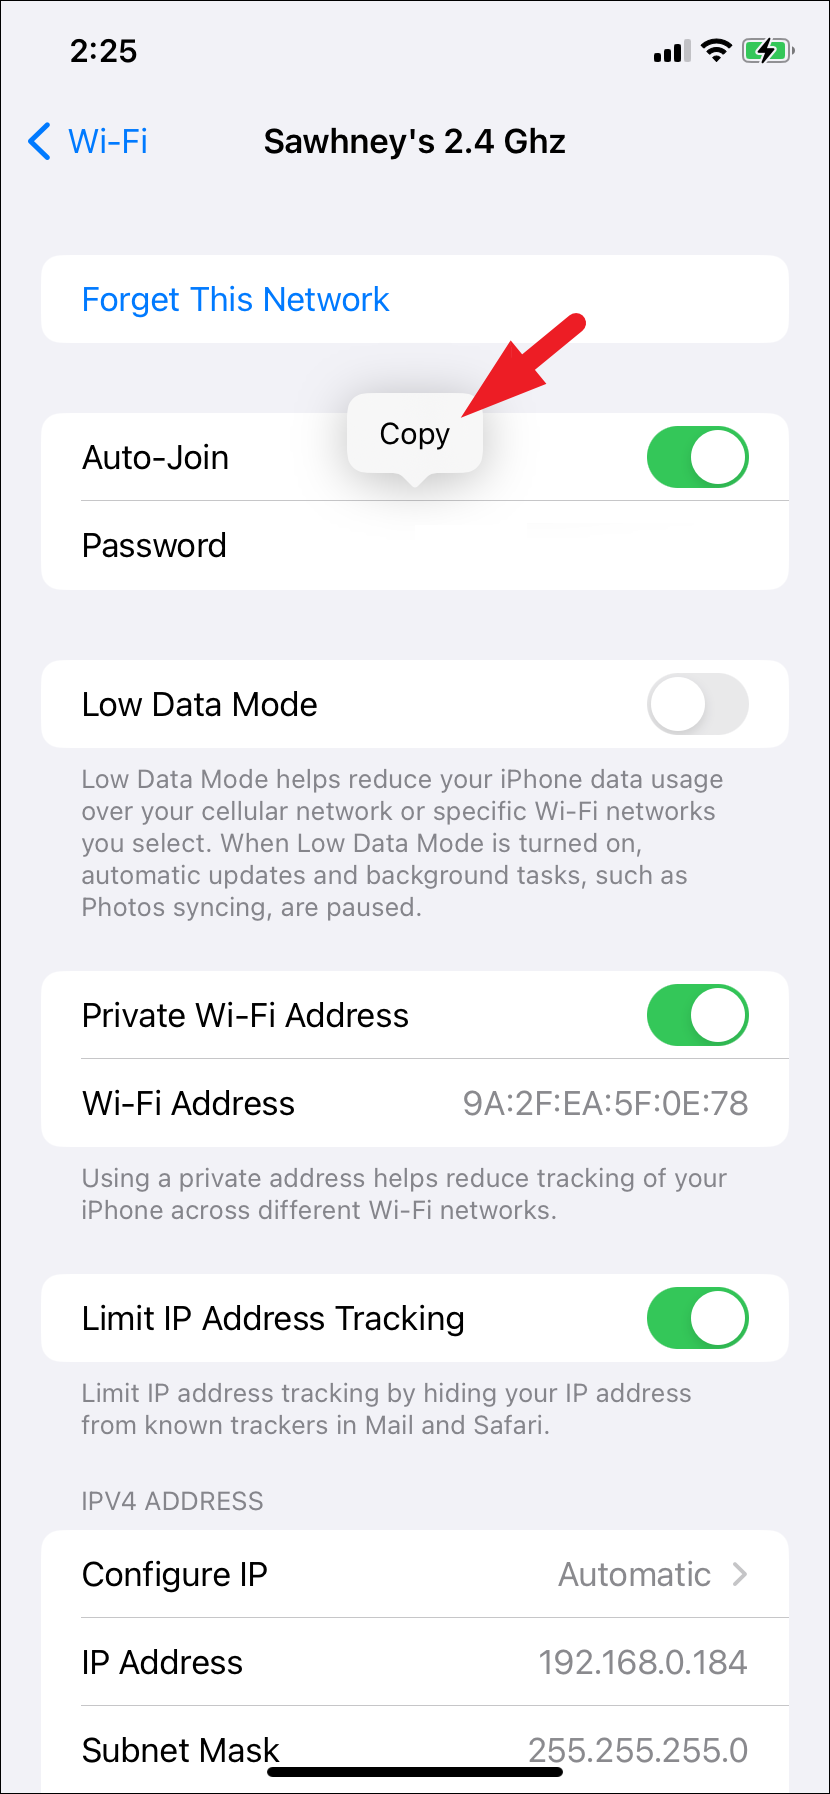
- Tap on the ‘Password’ field to reveal it. Then, select ‘Copy’. You will need this password to connect with this network again. If there’s no ‘Password’ field, the network does not require a password to connect.
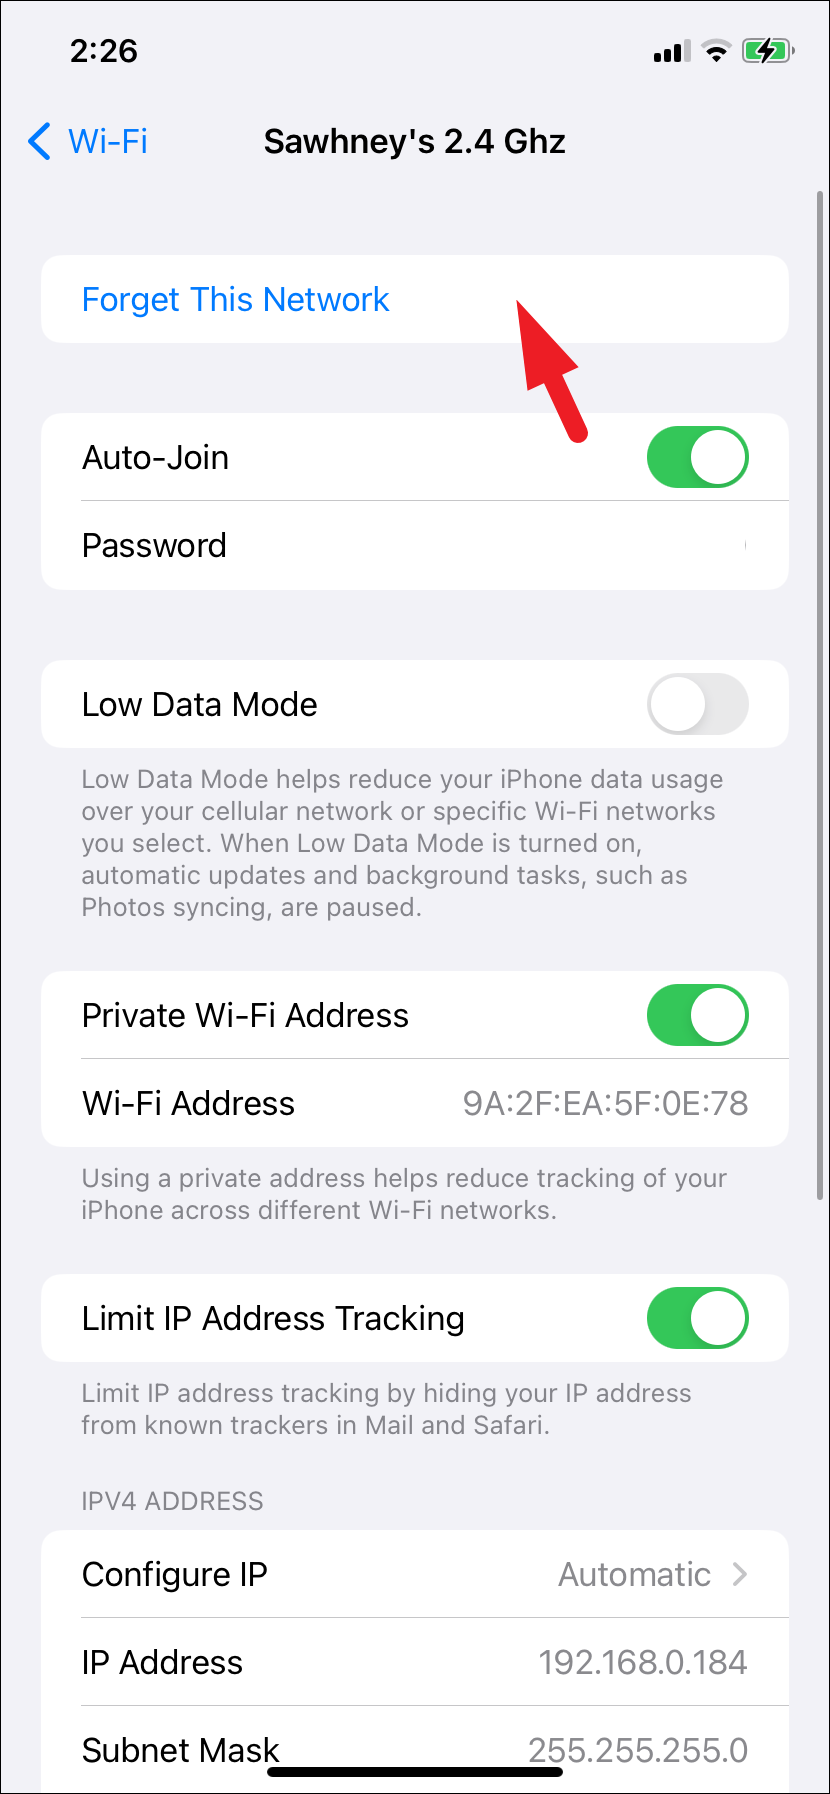
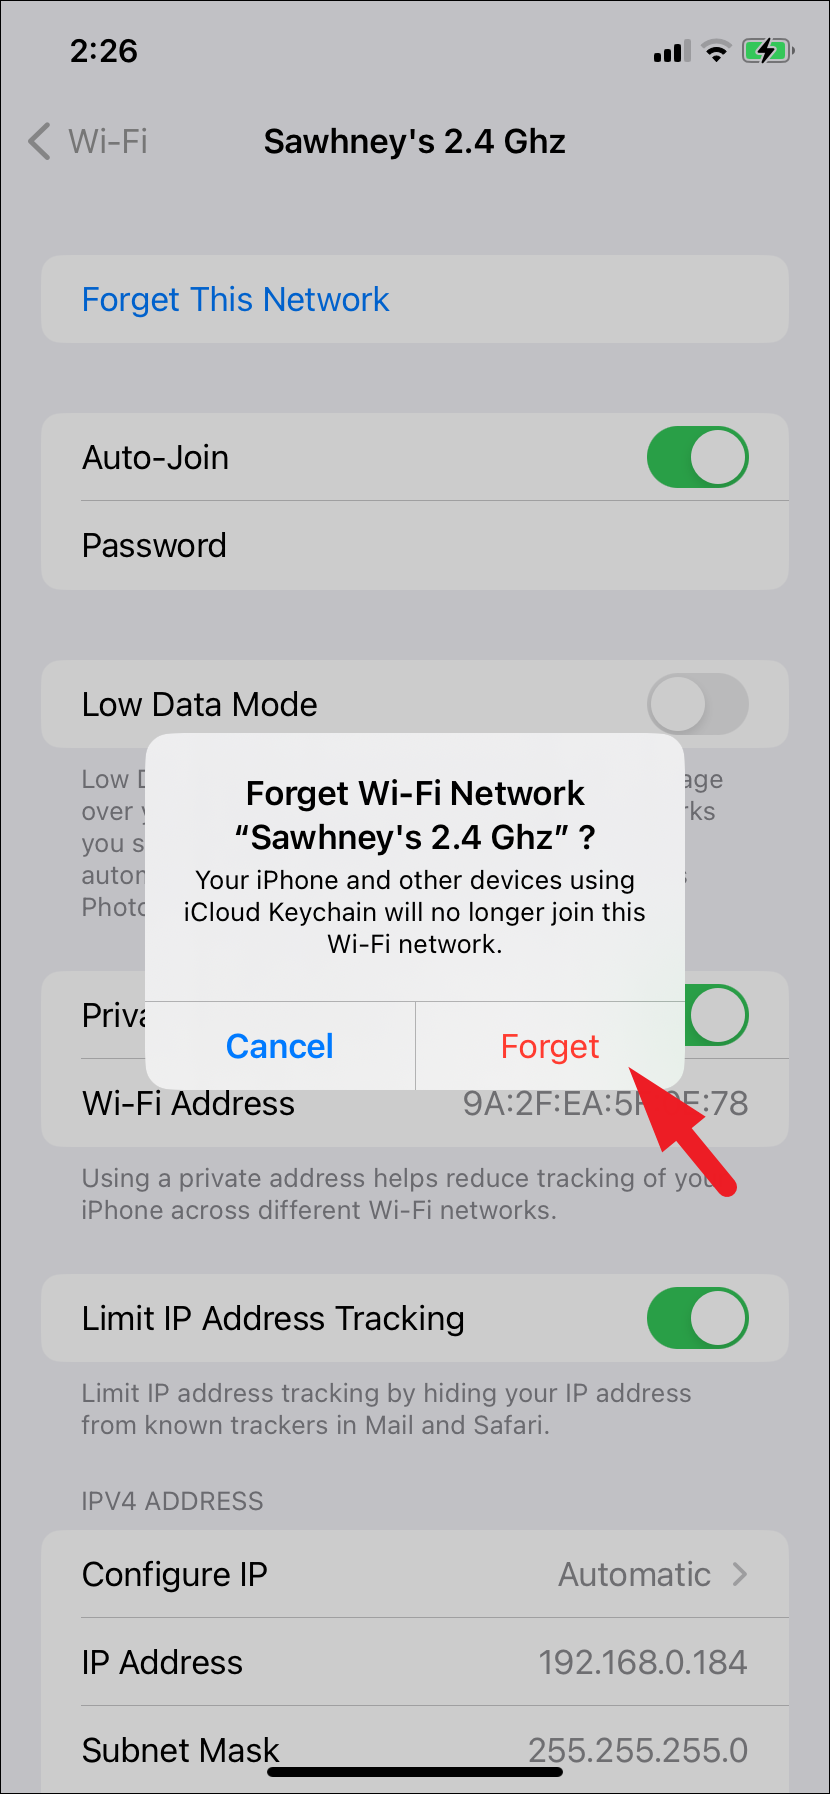
- Select ‘Forget This Network’ on the subsequent screen.
- An alert will appear on your screen. Choose ‘Forget’ again to confirm your intent.
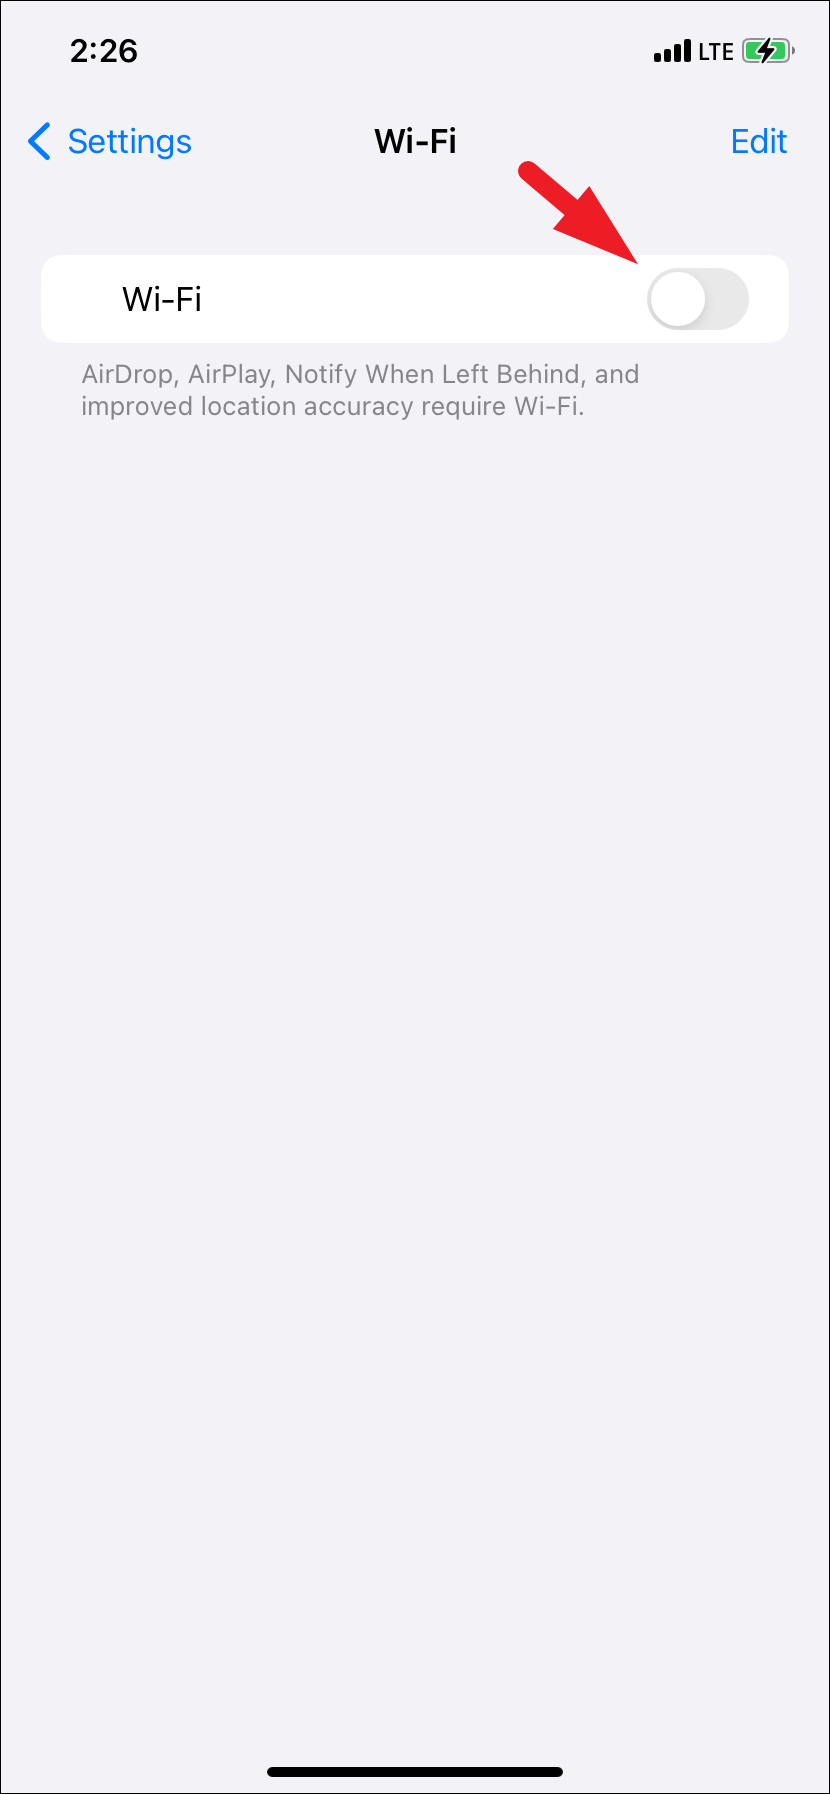
- Once the network is forgotten, turn off the toggle for ‘Wi-Fi’. Wait for a minute and turn it back on.
- Tap on the network you were originally connected with. Type or paste the password you copied earlier to re-connect to the network.
Force Restart your iPhone
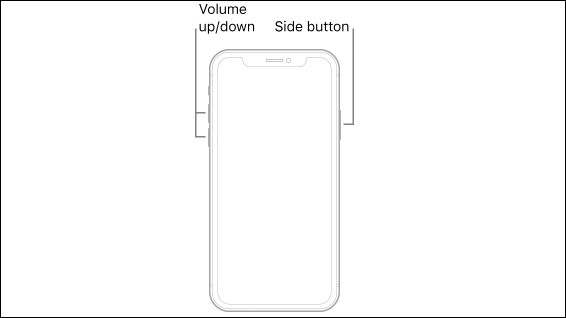
- Quickly press and release the ‘Volume Up’ button.
- Press and release the ‘Volume down’ button.
- Press and hold the ‘Lock/Side’ button until the Apple logo appears on your screen.
- Once the iPhone has restarted, try logging in again.
Reset your Apple ID Password
While you can reset your Apple ID password directly from your iPhone if you’re facing a verification error, the strongest recommendation is to do it from a different device where the error isn’t happening. This is because an outdated password might be the culprit, and using a non-affected device ensures a smoother process.
- Head to iforgot.apple.com using your preferred browser. Then, click on the ‘Reset password’ option to proceed.
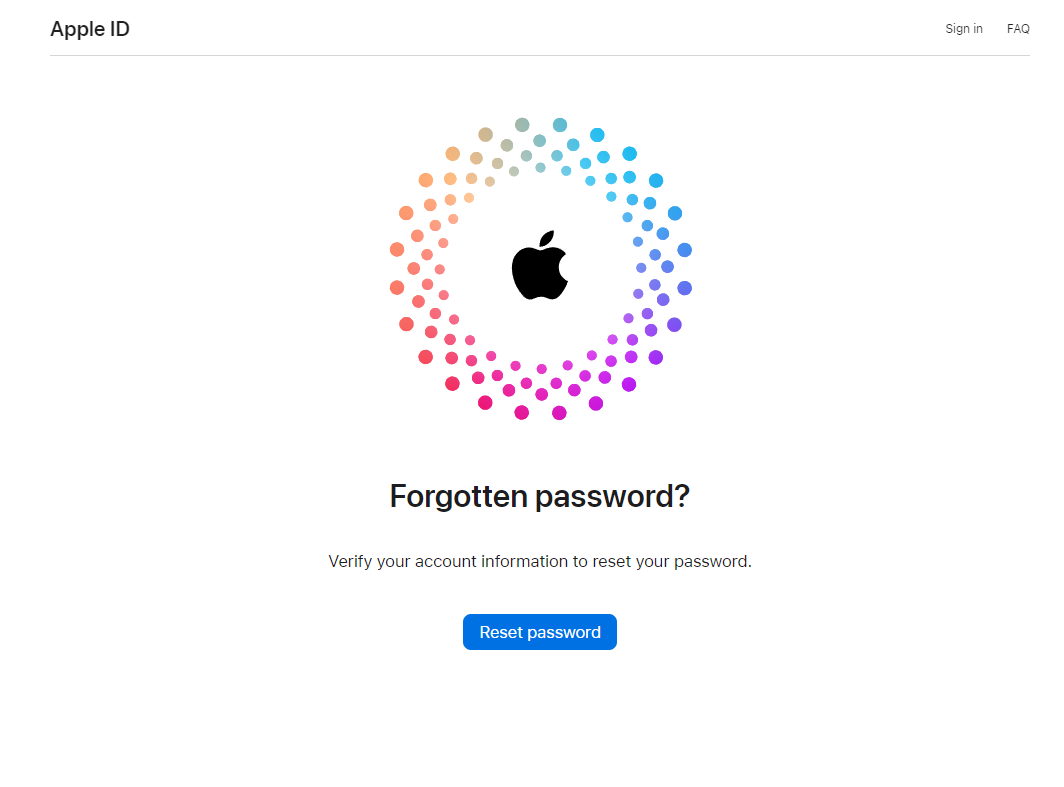
- Follow the on-screen instructions and provide a number or email address associated with your Apple ID which you are facing the issue with. Once the password is reset, check if the problem still persists.
Ask Siri to Disable the WiFi
If you are stuck with the error at the setup assistant screen after a major update, and you are not able to move back to proceed to the next screen, you can simply ask Siri to disable your WiFi by saying, “Hey Siri, turn off WiFi“.
Once Siri disables WiFi, you will have the option to skip logging in to your Apple ID, and you will be taken to the Home Screen. You can then try logging in to your Apple ID again.
Reset Network Settings
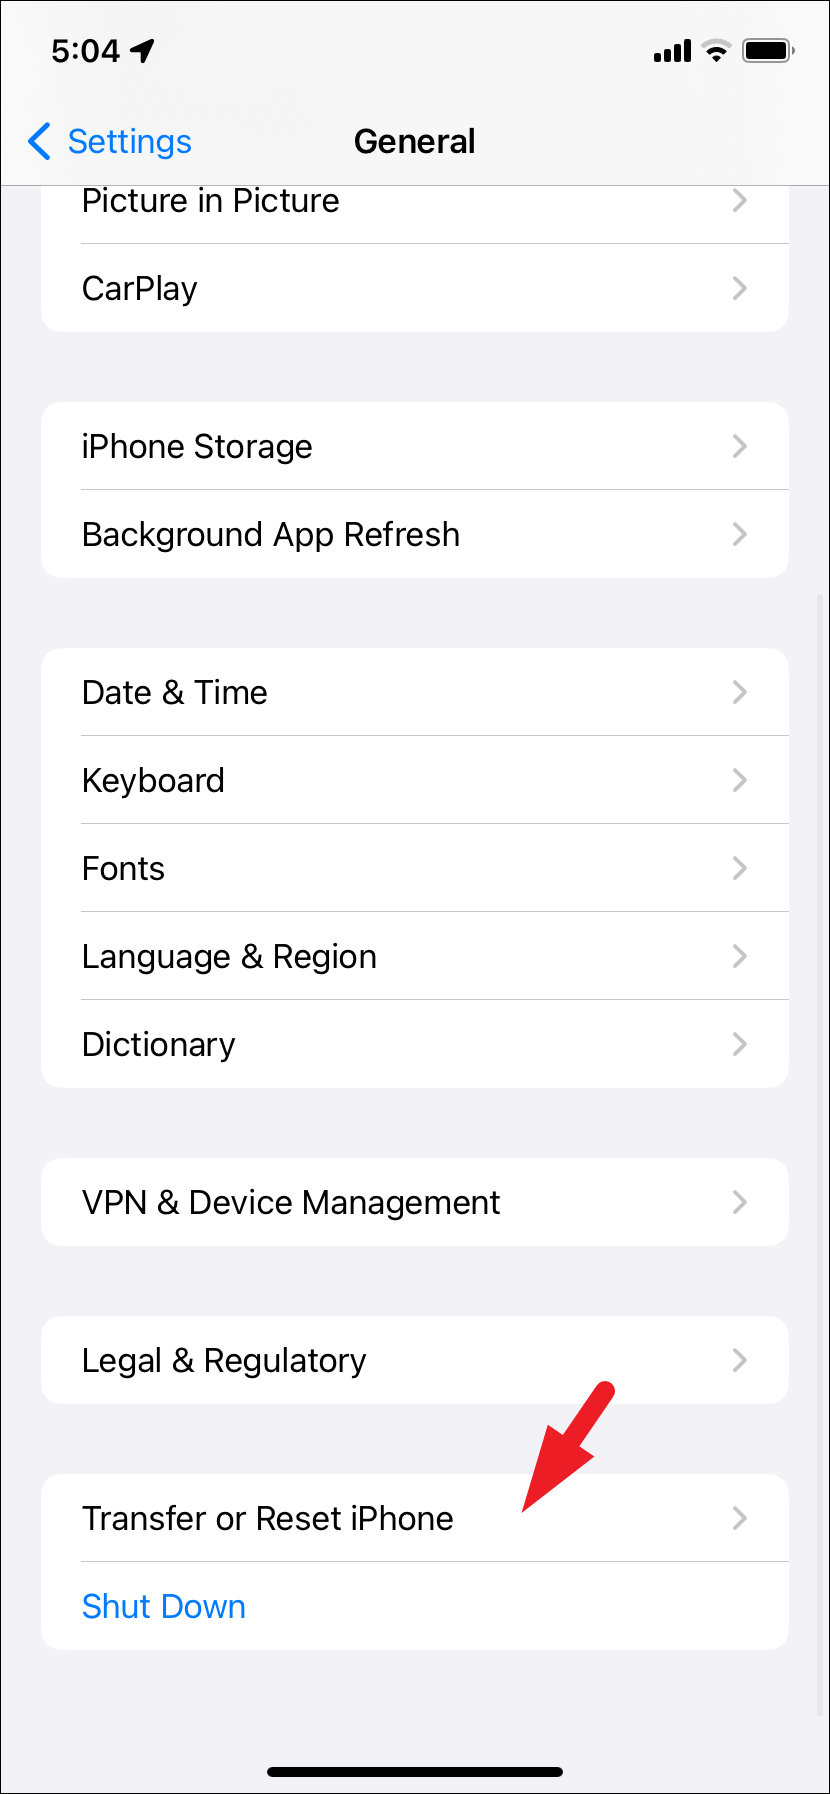
- Head to the ‘Settings’ app from the Home Screen or the App library.
- Select the ‘General’ option from the list.
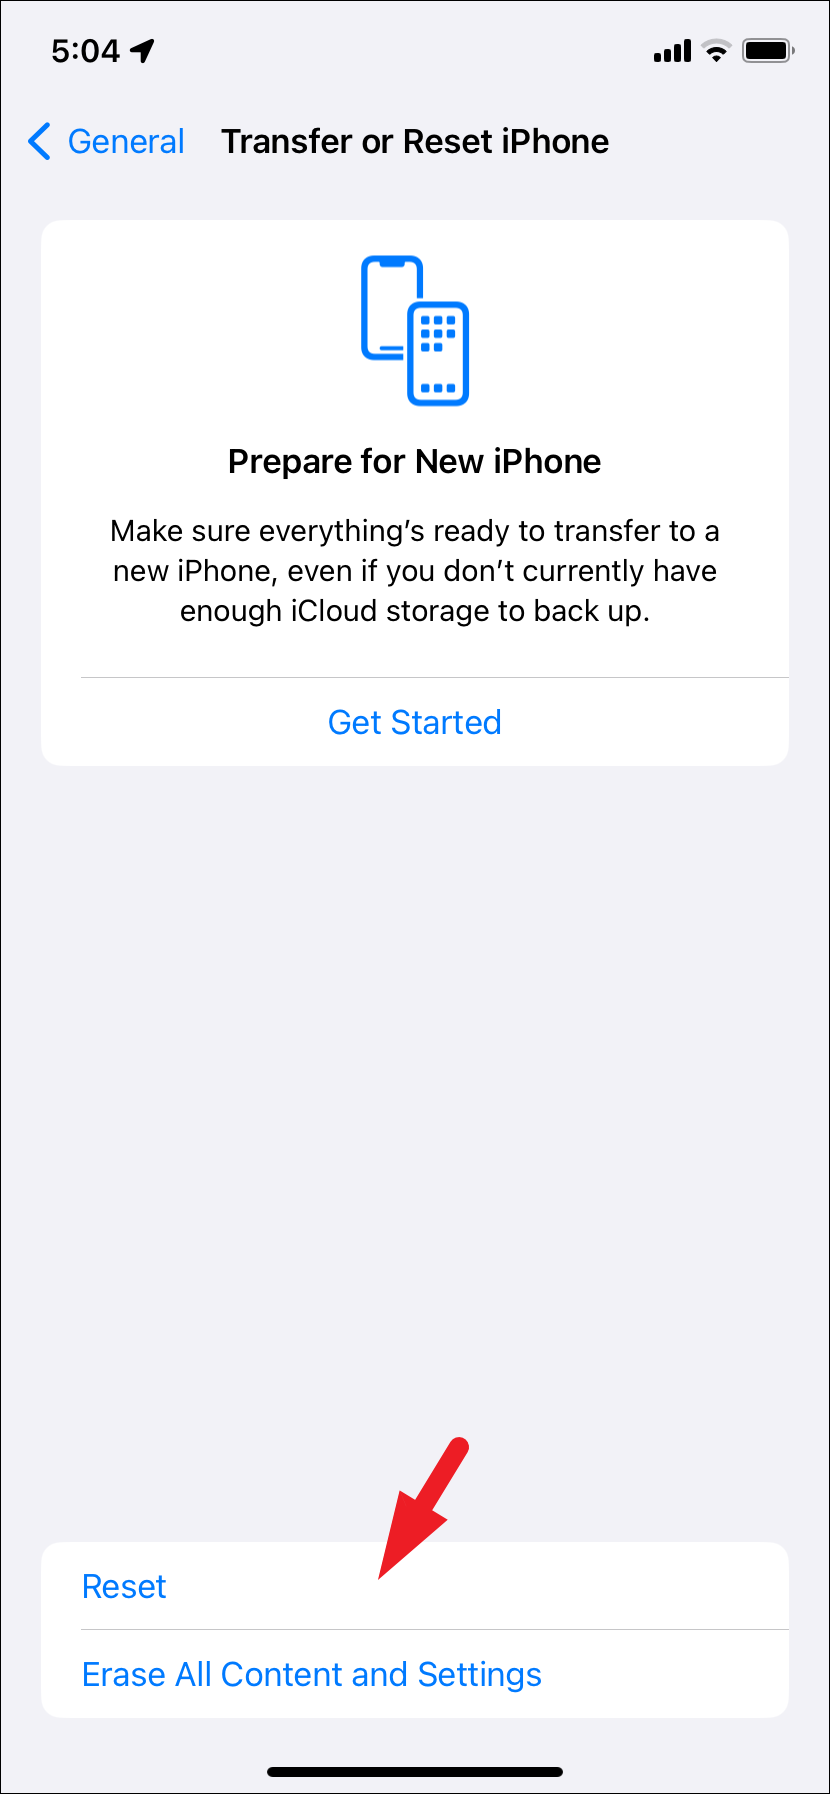
- Tap on the ‘Transfer or Reset iPhone’ to continue.

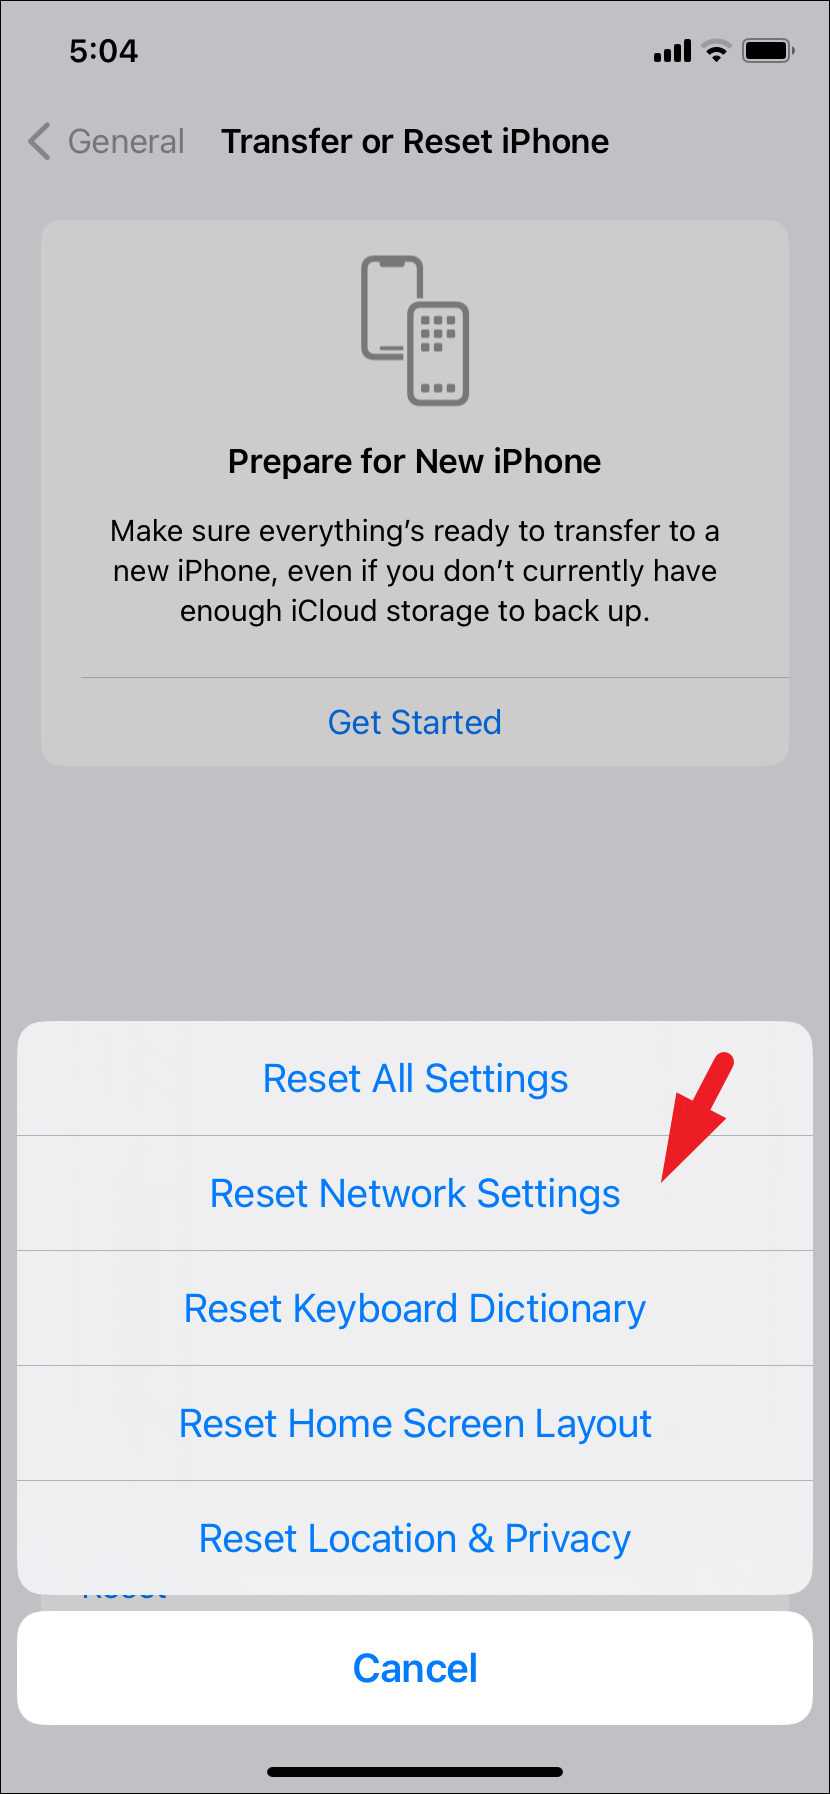
- Choose the ‘Reset’ option on the subsequent screen to proceed.
- Tap on ‘Reset Network Settings’ from the overlay menu. You will need to enter your passcode to provide authentication. Your iPhone will then restart.
- Once restarted, connect with the WiFi network again you were originally connected to and perform the operation again that was leading up to the error.
Contact Apple Support
If no fix has been able to help you until now, contact Apple Support before you jump to measures time-consuming measures like resetting your iPhone. You can either get their help online by heading to getsupport.apple.com/products using your preferred browser or visit the Genius Bar at your local Apple Store to get help in person.
The ‘Apple ID Verification Error’ can appear out of nowhere and has the potential to become frustrating real soon. Thankfully, the methods mentioned above will help you resolve the error in no time.


