"Automatic tuning was interrupted" is an NVIDIA application error that prevents your graphics card from optimizing its performance settings automatically. This interruption typically occurs due to software conflicts, outdated drivers, or incorrect application settings. Addressing this issue promptly ensures your GPU operates at peak efficiency, improving gaming performance and stability.
Method 1: Update NVIDIA Drivers Using GeForce Experience
Step 1: Open the NVIDIA GeForce Experience application from your desktop or the system tray. GeForce Experience regularly provides driver updates that fix common errors, including automatic tuning interruptions.
Step 2: Navigate to the "Drivers" tab at the top of the GeForce Experience window. Click "Check for Updates" to search for the latest graphics drivers available for your GPU.
Step 3: If an update is found, click "Download" and wait until the driver finishes downloading. Once downloaded, select "Express Installation" to automatically install the updated driver with recommended settings and minimal user input.
Step 4: After installation completes, restart your computer to apply the new driver settings. Once rebooted, open your NVIDIA app again and attempt to run automatic tuning. The interruption error should now be resolved.
Method 2: Disable Background Applications Temporarily
Sometimes, third-party applications running in the background can interfere with NVIDIA's automatic tuning process. Temporarily disabling these applications may resolve the issue.
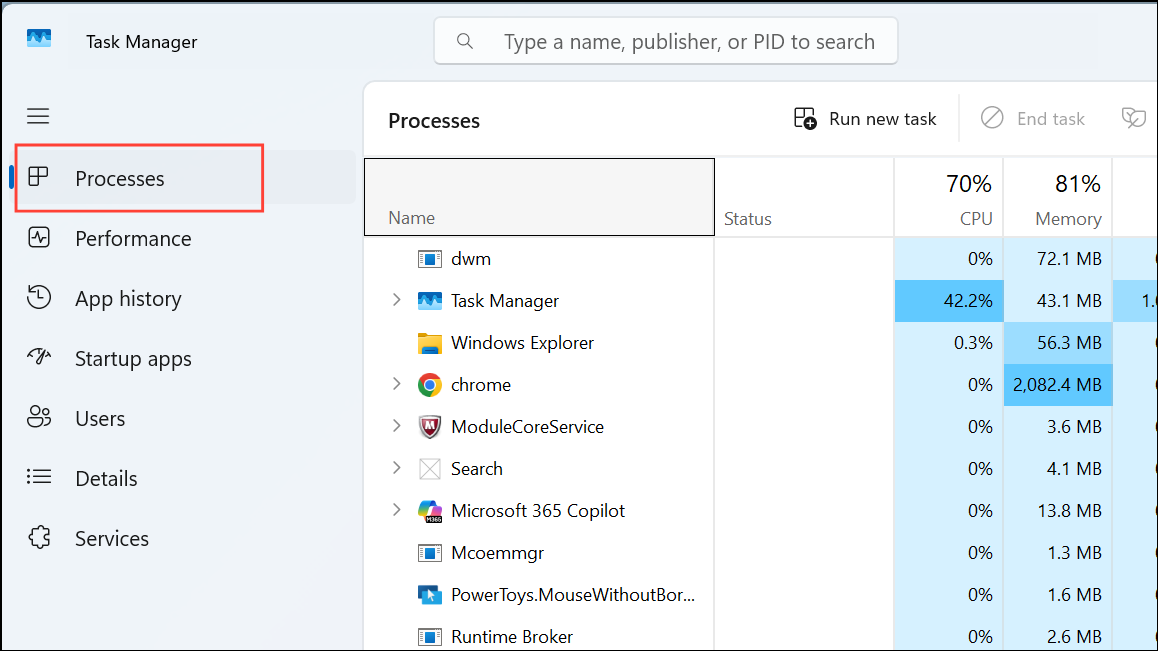
Step 1: Press Ctrl + Shift + Esc to open Task Manager. Navigate to the "Processes" tab.

Step 2: Identify non-essential background applications that might conflict with NVIDIA software, such as overlay or monitoring applications (e.g., MSI Afterburner, Discord Overlay, RivaTuner Statistics Server).
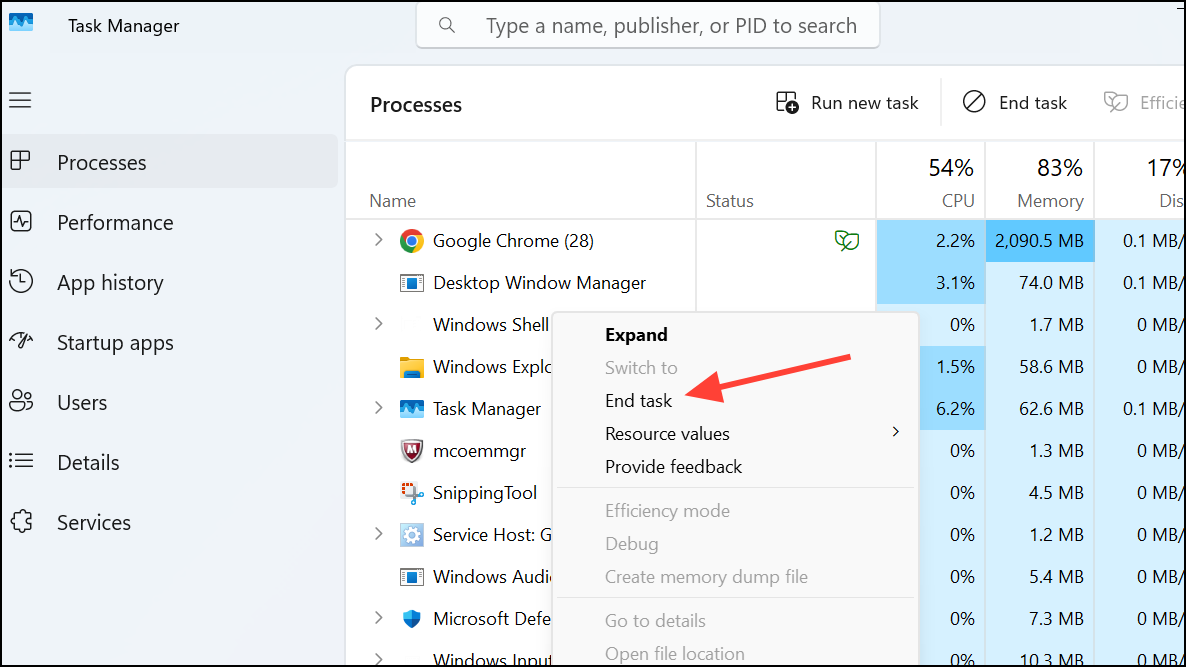
Step 3: Right-click the conflicting applications and select "End Task" to close them temporarily. Be cautious not to close critical system processes.

Step 4: With conflicting applications disabled, open your NVIDIA app again and initiate automatic tuning. This should allow the tuning process to complete successfully.
After completing the automatic tuning, you can safely restart the closed applications if needed.
Method 3: Reset NVIDIA Control Panel Settings to Default
If custom settings within the NVIDIA Control Panel are causing conflicts, resetting to default can clear these issues.
Step 1: Right-click your desktop and select "NVIDIA Control Panel" from the context menu.
Step 2: In the NVIDIA Control Panel, click "Manage 3D Settings" under the "3D Settings" section on the left sidebar.
Step 3: Click the "Restore" button located in the upper-right corner to revert all settings to their default configuration. Confirm the action if prompted.
Step 4: Apply the changes by clicking "Apply" at the bottom-right corner. Restart your computer afterward to ensure settings are fully refreshed.
Once your system restarts, launch the NVIDIA app and attempt automatic tuning again to check if the interruption issue has been resolved.
After following these methods, your NVIDIA app's automatic tuning should function smoothly, optimizing your GPU's performance without interruptions. Regularly updating drivers and monitoring background applications helps prevent similar issues in the future.


