The dreaded Blue Screen of Death (BSOD) can strike fear into any Windows user. One particularly frustrating BSOD error is the DRIVER_POWER_STATE_FAILURE, which often occurs when waking from sleep or during startup. While alarming, this error is usually fixable with some troubleshooting. Let’s explore the causes and most effective solutions for resolving the Driver Power State Failure error in Windows 11.
What is the DRIVER_POWER_STATE_FAILURE Error?
This BSOD typically appears with the error code 0x0000009F. It occurs when Windows sends a signal to wake up a driver, but the driver either fails to respond or takes too long to come out of sleep mode. Common triggers include:
- Outdated, faulty, or incompatible device drivers
- Incorrect power management settings
- Hardware issues
- Sudden power state transitions
- Conflicting software or malware
Now let’s look at the most effective ways to resolve this error, starting with the simplest solutions.
1. Restart Your Computer
Often, a simple restart is all it takes to clear this error. Restarting reinitializes all drivers and can resolve temporary glitches.
2. Update Your System Drivers
Outdated drivers are a leading cause of this error. Here’s how to update them:
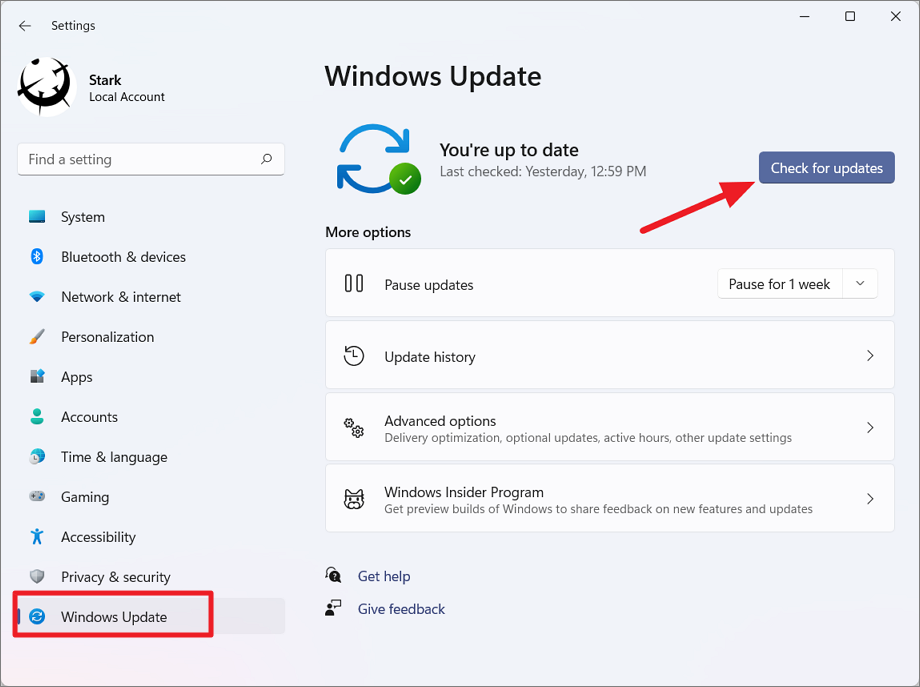
Use Windows Update
- Open Settings (Win + I)
- Go to Windows Update
- Click “Check for updates”
- Install any available driver updates
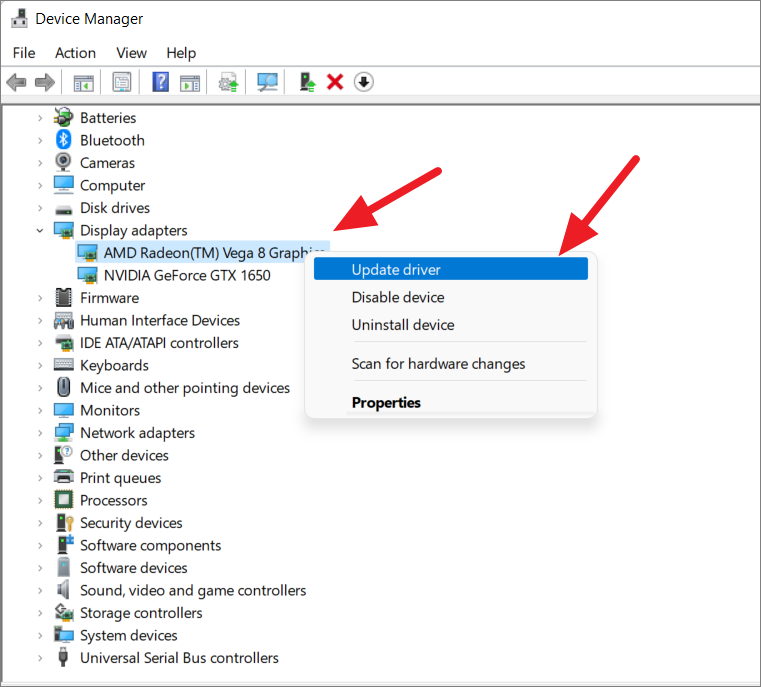
Use Device Manager
- Right-click Start and select “Device Manager”
- Expand categories and right-click on devices
- Choose “Update driver”
- Select “Search automatically for drivers”
Download from Manufacturer’s Website
For the most up-to-date drivers, visit your device manufacturer’s website and download the latest Windows 11 drivers for your specific hardware.
3. Adjust Power Settings
Incorrect power settings can trigger this error. Here’s how to optimize them:
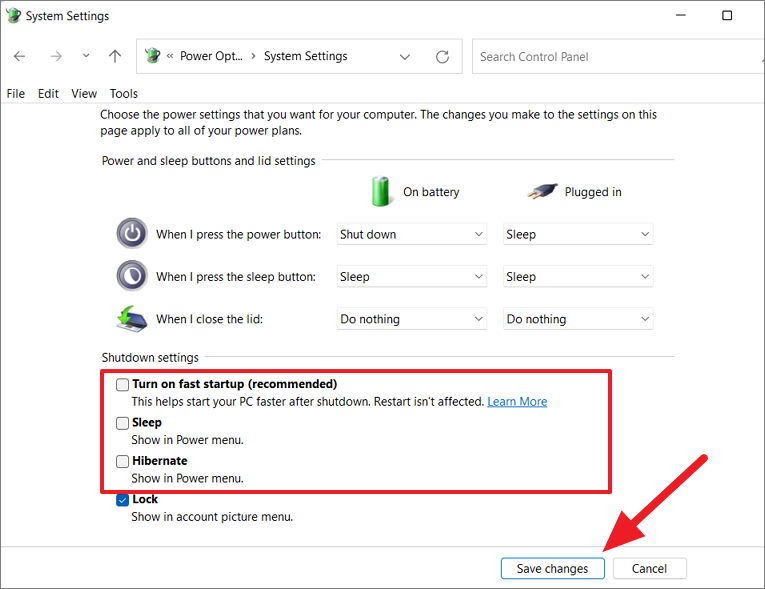
- Open Control Panel > Power Options
- Click “Choose what the power button does”
- Select “Change settings that are currently unavailable”
- Uncheck “Turn on fast startup”, “Sleep”, and “Hibernate”
- Save changes and restart
4. Run System File Checker (SFC)
Corrupted system files can cause driver issues. Use the SFC tool to scan and repair them:
- Open Command Prompt as administrator
- Type
sfc /scannowand press Enter - Wait for the scan to complete and restart if needed

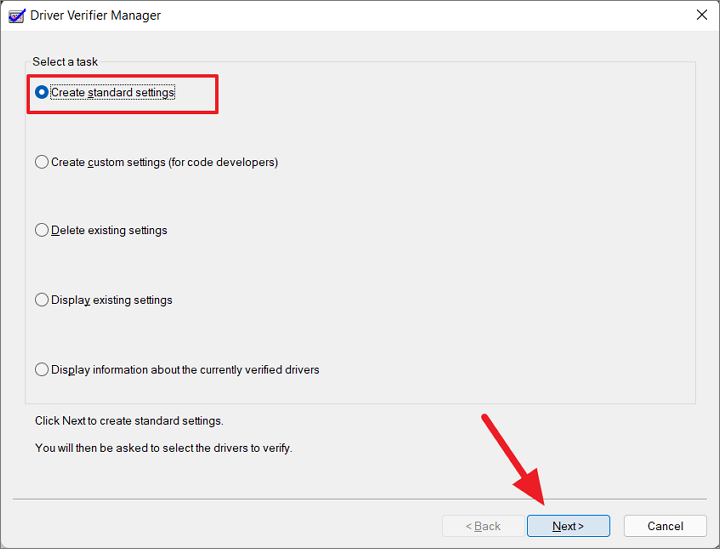
5. Use Driver Verifier
This built-in tool can help identify problematic drivers:
- Open Command Prompt as administrator
- Type
verifierand press Enter - Choose “Create standard settings”
- Select “Automatically select all drivers installed on this computer”
- Restart your PC
Remember to disable Driver Verifier after troubleshooting to prevent system slowdowns.
6. Perform a Clean Boot
A clean boot helps identify if third-party software is causing conflicts:
- Press Win + R, type
msconfig, and press Enter - Go to the “Services” tab
- Check “Hide all Microsoft services”
- Click “Disable all”
- Go to the “Startup” tab and disable all startup items
- Restart your PC
If the error doesn’t occur in clean boot, gradually re-enable services and startup items to identify the culprit.
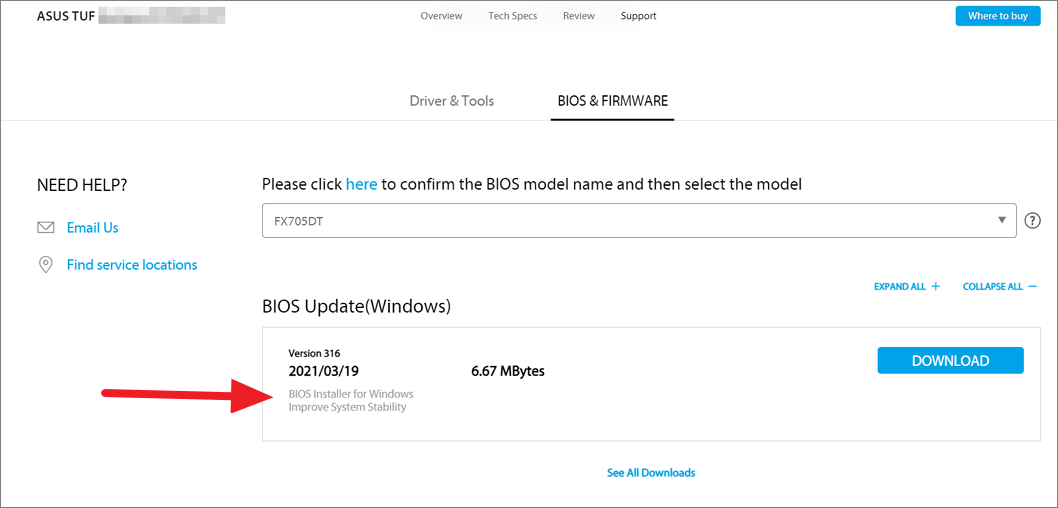
7. Update BIOS/UEFI
An outdated BIOS can cause driver conflicts. Updating it can help, but proceed with caution:
- Visit your motherboard/PC manufacturer’s website
- Download the latest BIOS version for your model
- Follow the manufacturer’s instructions carefully to flash the BIOS
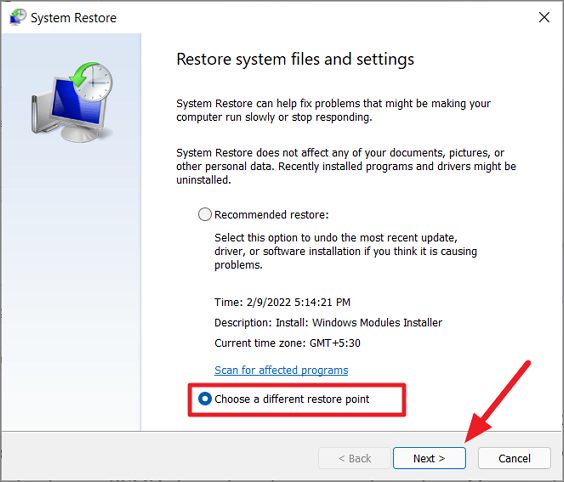
8. Perform a System Restore
If the error started recently, rolling back to a previous system state might help:
- Search for “Create a restore point” and open it
- Click “System Restore”
- Choose a restore point from before the error started occurring
- Follow the prompts to complete the restore
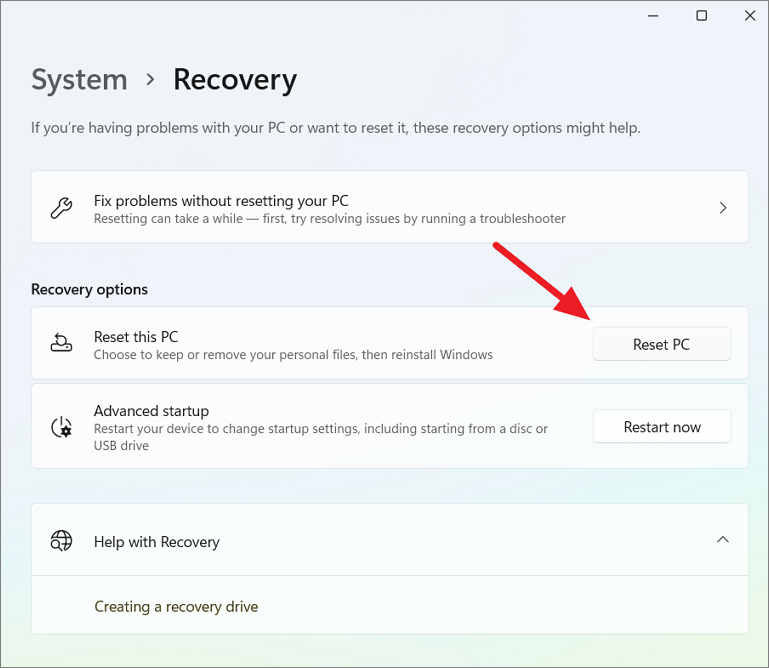
9. Reset Windows (Last Resort)
If all else fails, resetting Windows can resolve persistent driver issues:
- Go to Settings > System > Recovery
- Click “Reset PC”
- Choose to keep or remove your files
- Follow the prompts to reset Windows
By working through these solutions, you should be able to resolve the Driver Power State Failure error and get your Windows 11 system running smoothly again. Remember to create backups before making significant changes, and if you’re unsure about any steps, consult with a professional technician.
Which solution worked for you? Share your experiences in the comments below to help others facing similar issues!


