
Windows 11 updates may fail with error code 0xc1420121, often blocking cumulative or feature updates and leaving your system without critical security patches or new features. This error typically points to issues with update components, system file corruption, or interference from third-party software. Addressing the root cause restores system reliability and ensures access to the latest Windows improvements.
Run the Windows Update Troubleshooter
Windows 11 includes a built-in troubleshooter designed to automatically detect and resolve common update issues. This is the most direct way to address update failures caused by stuck services or minor configuration problems.
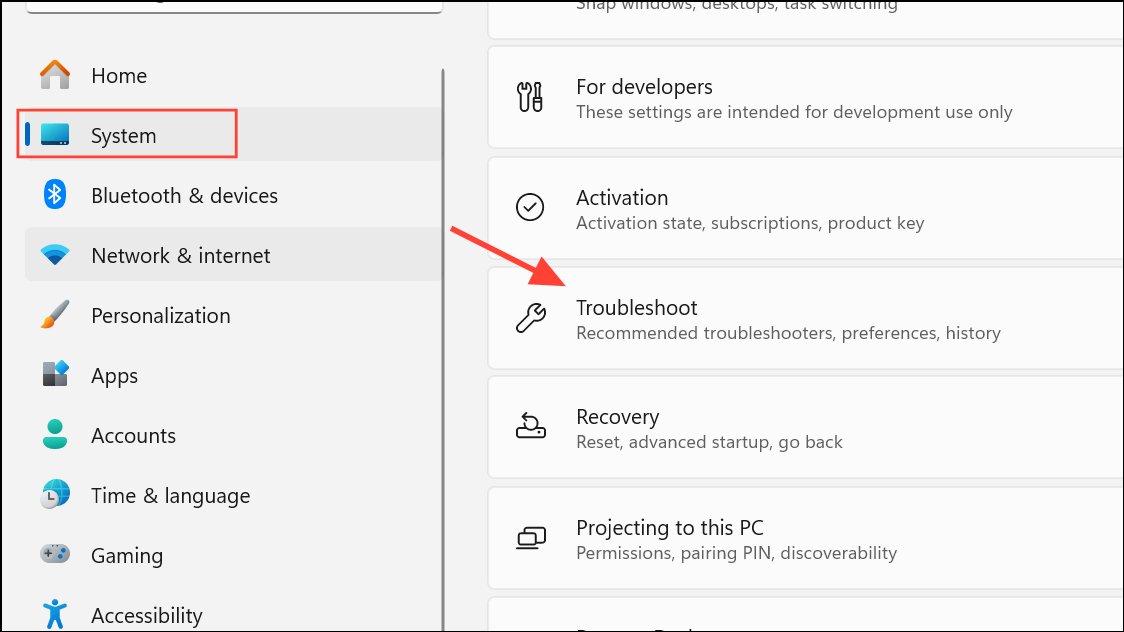
Step 1: Open the Settings app by pressing Windows + I. In the sidebar, select System, then click Troubleshoot.
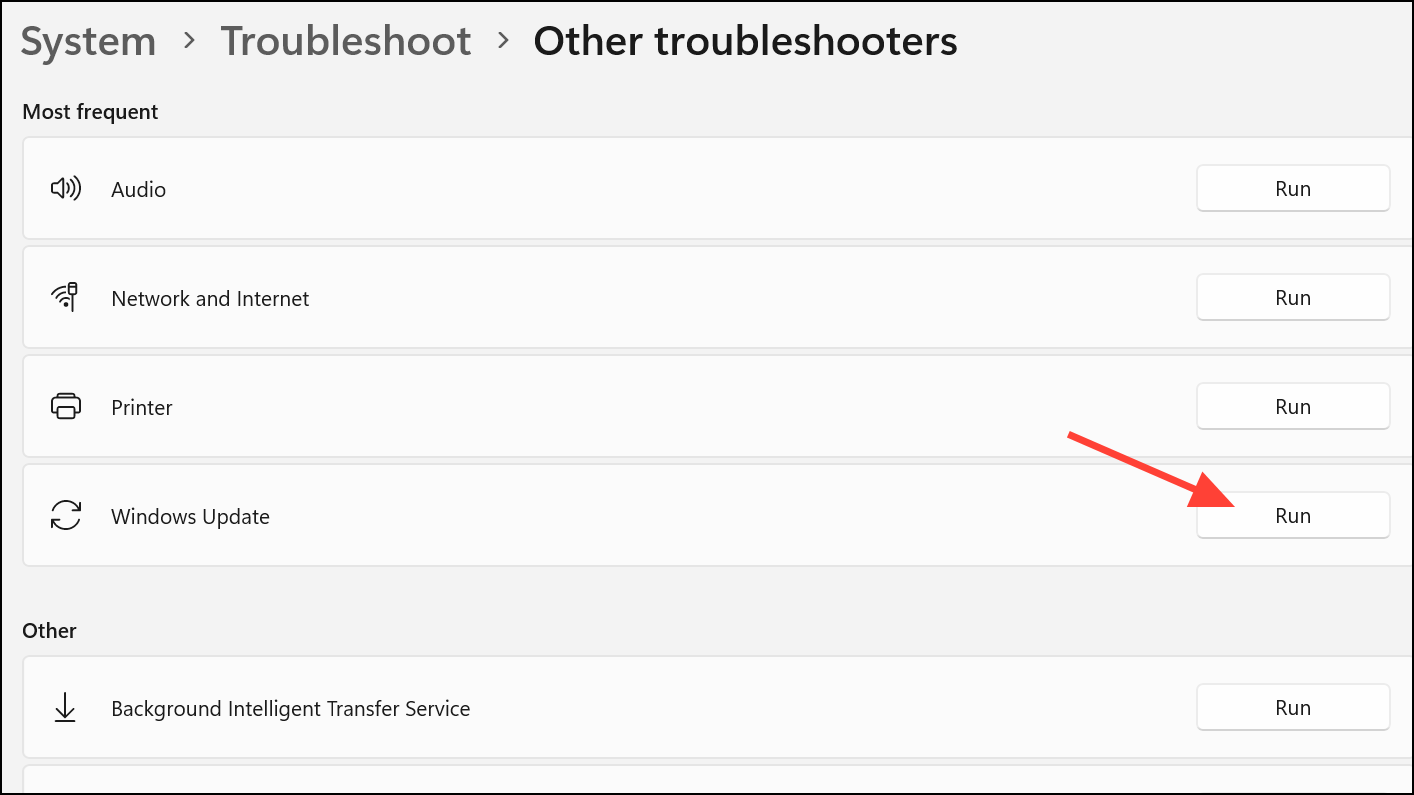
Step 2: Click Other troubleshooters. Find Windows Update in the list and click Run next to it.
Step 3: Allow the troubleshooter to scan for problems. Follow any on-screen instructions to apply recommended fixes. Restart your computer when prompted, then try installing updates again.
Reset Windows Update Components Manually
Corrupted update components can block updates and cause persistent error codes. Manually resetting these components clears out problematic files and restarts key update services, providing a clean slate for Windows Update.
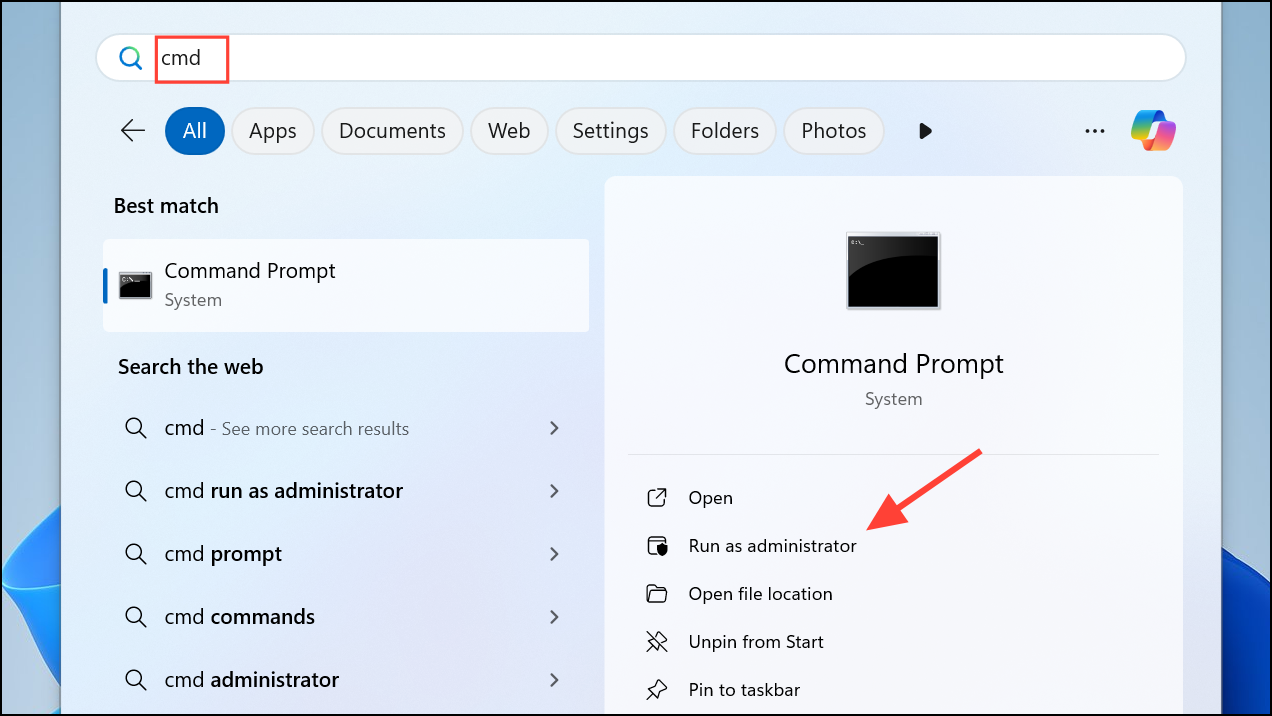
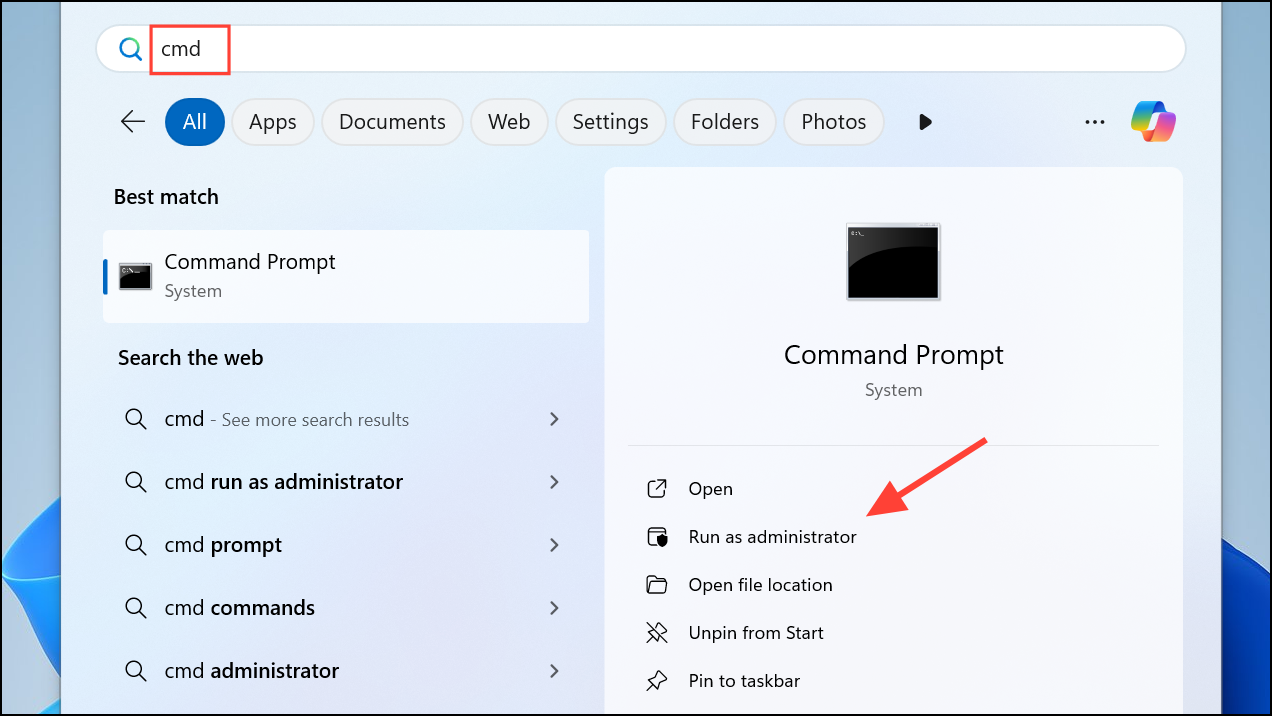
Step 1: Open the Start menu, type cmd, right-click Command Prompt, and choose Run as administrator.
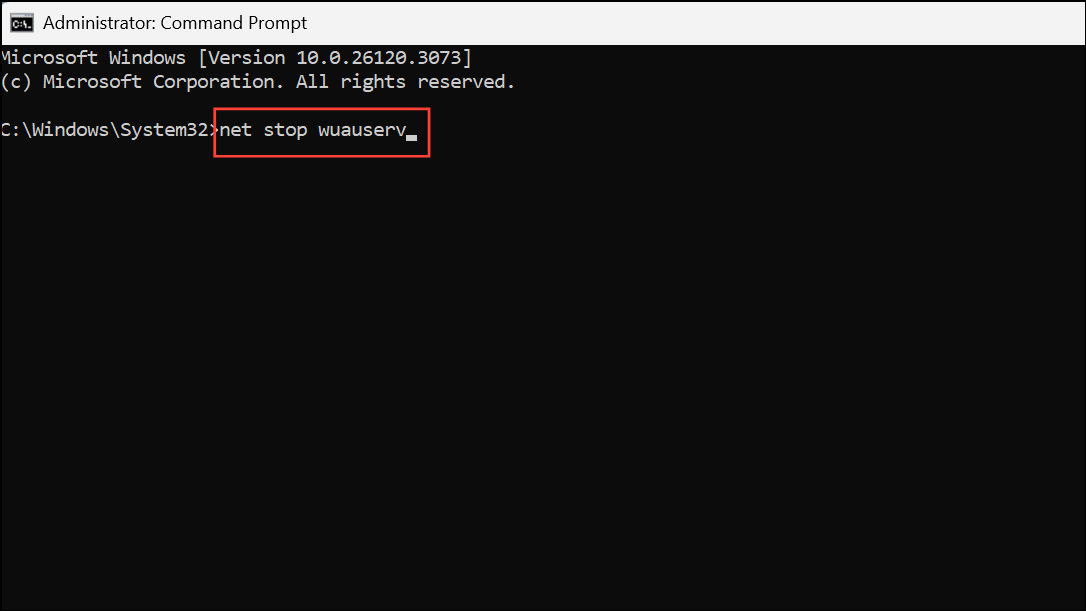
Step 2: Stop the update services by entering each of these commands, pressing Enter after each:
net stop wuauserv
net stop cryptSvc
net stop bits
net stop msiserver
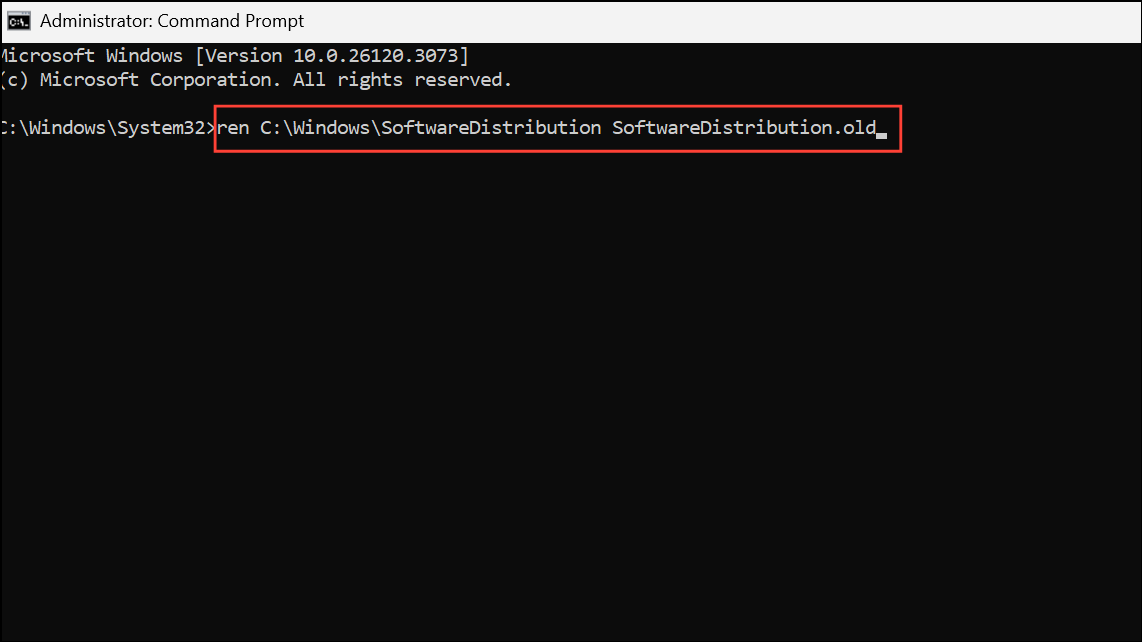
Step 3: Rename the SoftwareDistribution and Catroot2 folders to back up old update data:
ren C:\Windows\SoftwareDistribution SoftwareDistribution.old
ren C:\Windows\System32\catroot2 catroot2.old
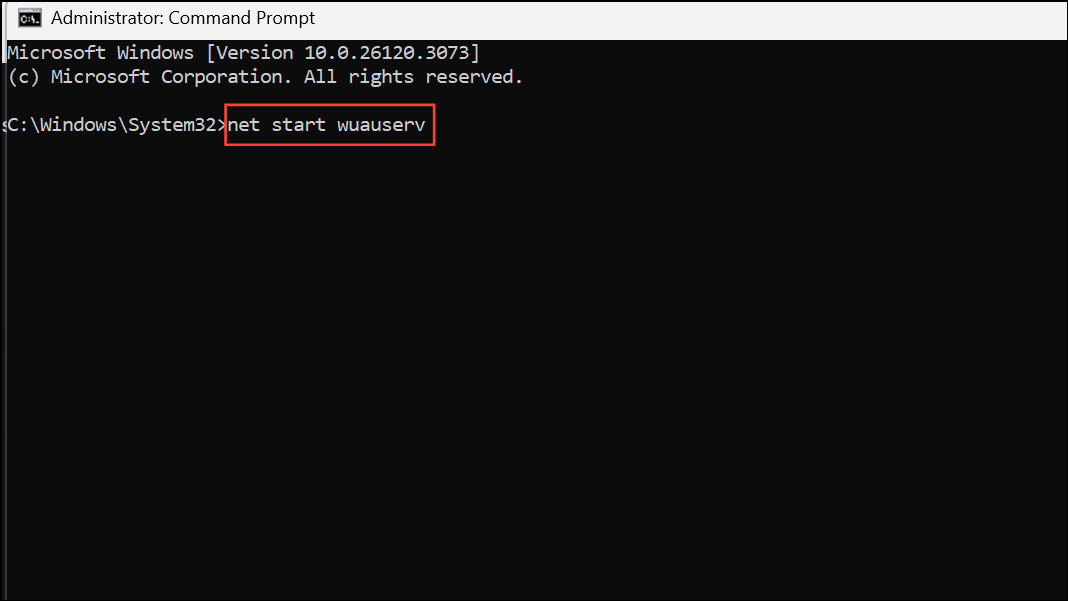
Step 4: Restart the services you stopped earlier:
net start wuauserv
net start cryptSvc
net start bits
net start msiserver
Step 5: Close the Command Prompt and restart your PC before retrying the update process.
Repair System Files with SFC and DISM
Corrupted or missing system files can prevent Windows from installing updates. The System File Checker (SFC) and Deployment Imaging Service and Management Tool (DISM) scan for and repair these files, restoring system integrity.
Step 1: Open Command Prompt as administrator.
Step 2: To scan and repair system files, enter:
sfc /scannow
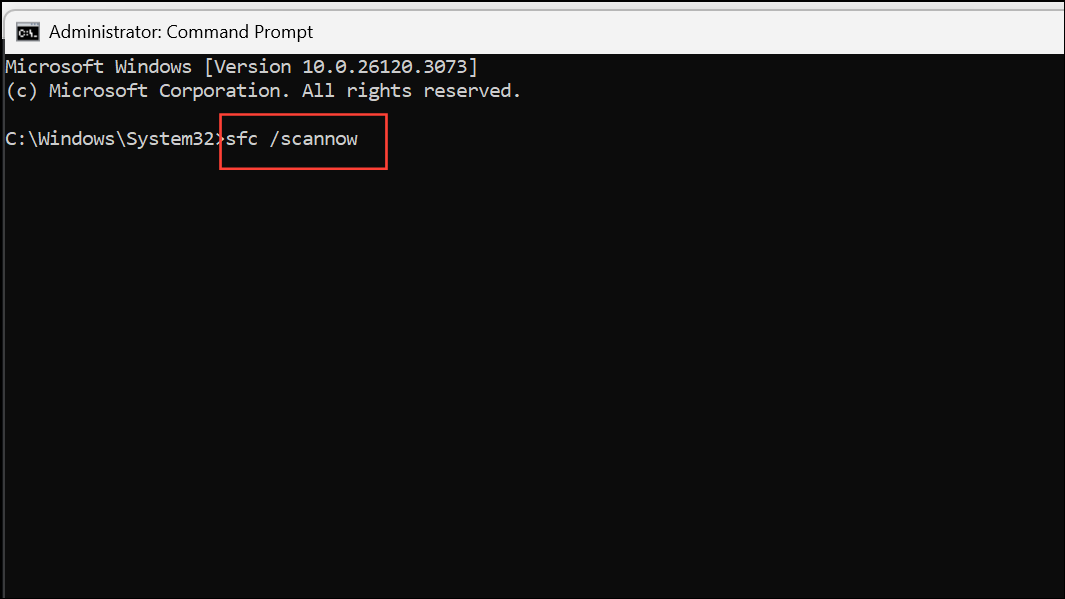
Wait for the scan to finish. If issues are found, SFC will attempt to replace corrupted files automatically.
Step 3: After SFC completes, run the DISM command to repair the Windows image:
DISM /Online /Cleanup-Image /RestoreHealth
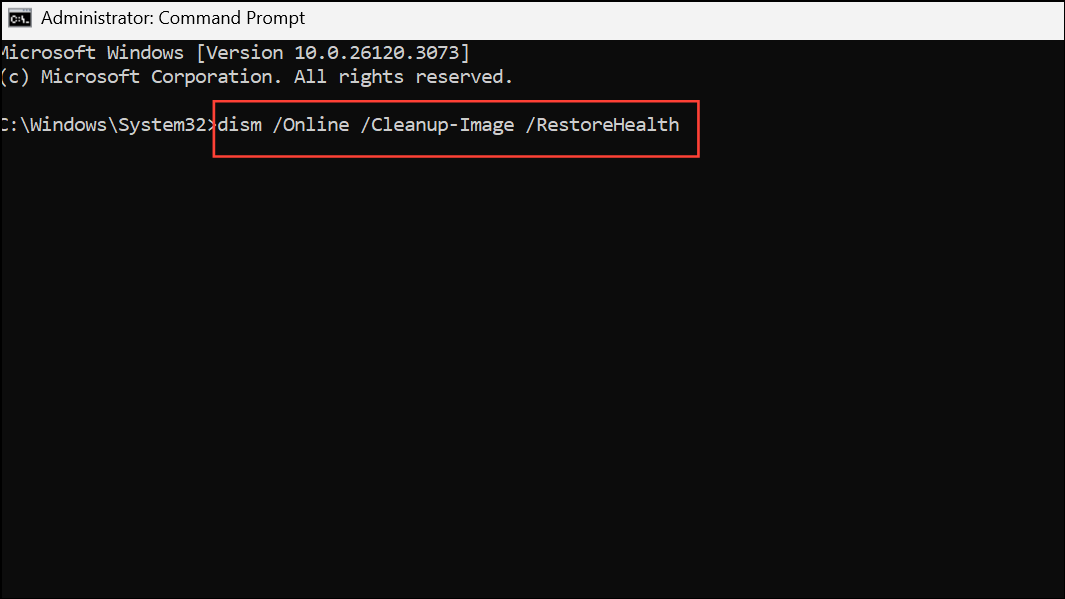
This process may take several minutes. Once finished, restart your computer and check for updates again.
Temporarily Disable Third-Party Antivirus Software
Some antivirus programs interfere with Windows Update by blocking required services or files. Temporarily disabling or uninstalling third-party security software can resolve update errors, especially if the error appears after installing or updating antivirus solutions.
Step 1: Locate your antivirus icon in the system tray, right-click it, and choose the option to disable real-time protection or exit the application. Refer to your antivirus provider's documentation if you do not see these options.
Step 2: Try running Windows Update again. If the update succeeds, consider switching to Windows Security (Defender) for better compatibility, or contact your antivirus vendor for a permanent workaround.
Free Up Disk Space
Insufficient disk space can prevent Windows from downloading and installing updates, especially major feature updates. Freeing up space allows updates to proceed without interruption.
Step 1: Open File Explorer and right-click your system drive (usually C:), then select Properties.
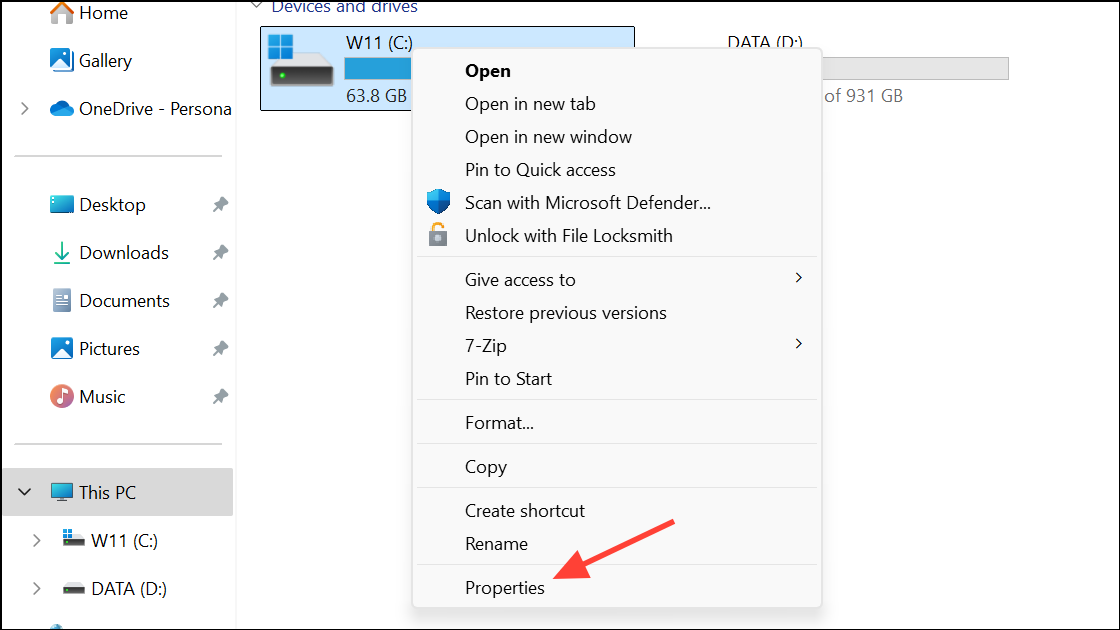
Step 2: Click Disk Cleanup. Select temporary files, previous Windows installations, and other unnecessary items, then click OK to remove them.
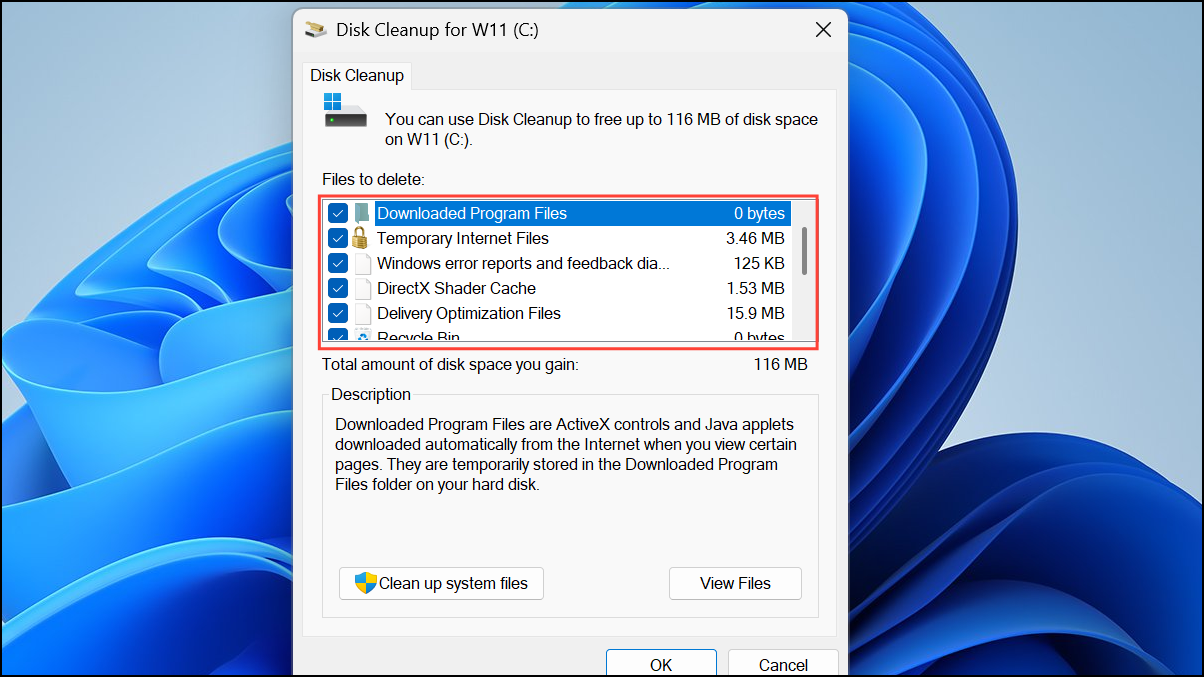
Step 3: For a deeper cleanup, click Clean up system files, select additional items, and confirm. Aim for at least 20 GB of free space for feature updates.
Use the Windows Update Assistant
When built-in update tools fail, the Windows Update Assistant provides an alternative way to install the latest version of Windows 11, bypassing some internal checks that may be causing the error.
Step 1: Visit the official Microsoft Windows 11 download page and download the Update Assistant tool.
Step 2: Run the tool and follow the on-screen instructions. The Update Assistant will check your system and guide you through the update process.
Step 3: Allow the tool to complete the update. This process may take some time and will require several restarts.
Check Windows Update Log for Error Details
When standard fixes do not resolve the issue, reviewing the Windows Update log can reveal more specific causes, such as missing drivers or registry errors.
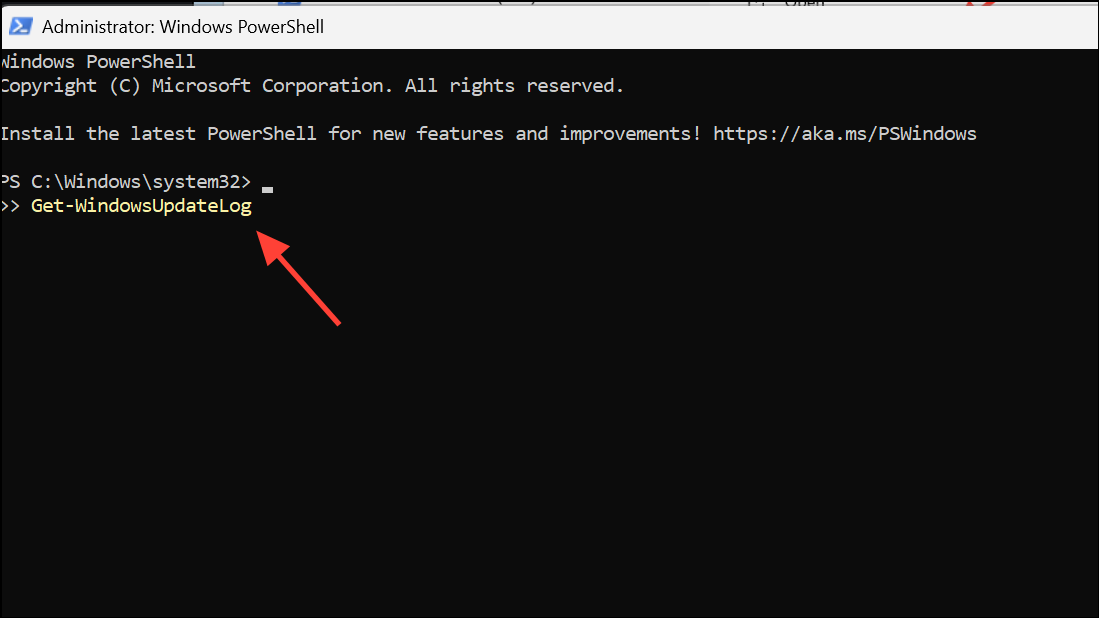
Step 1: Open PowerShell as administrator.
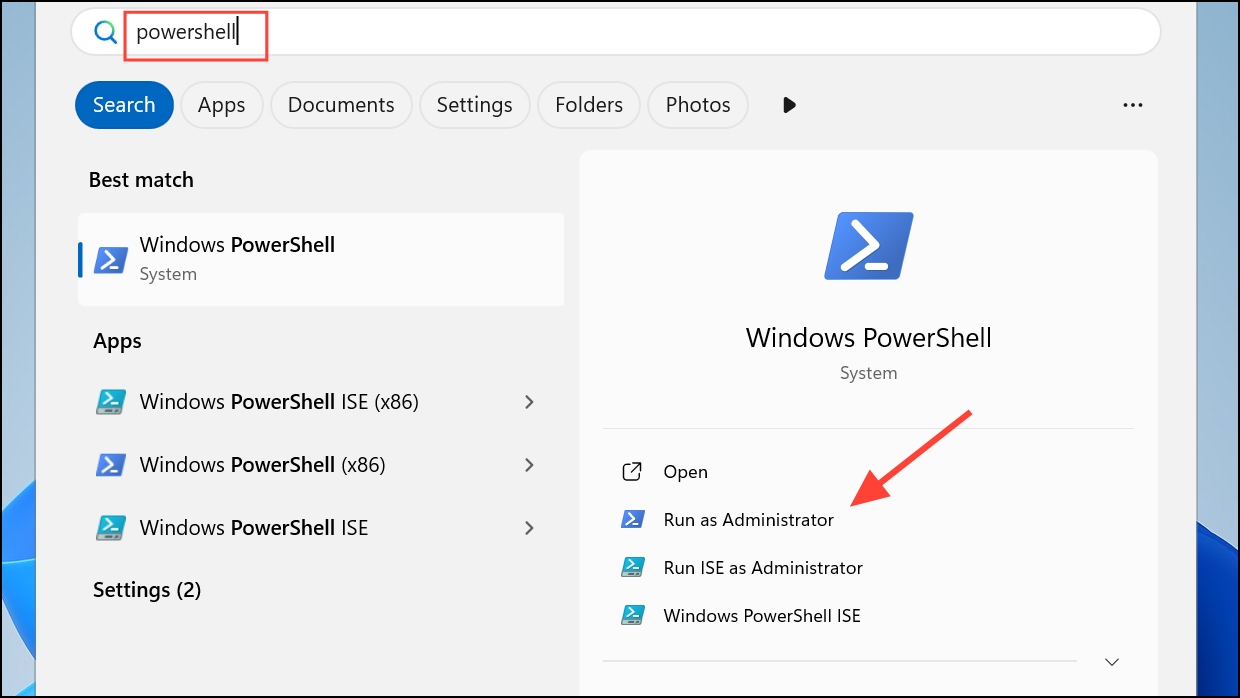
Step 2: Enter the following command to generate the update log:
Get-WindowsUpdateLog
This will create a log file on your desktop. Open it and search for 0xc1420121 to locate relevant error entries.
Step 3: If the log points to a specific file, service, or registry entry, address that issue directly. For example, if the log references a missing or corrupted wimmount.sys driver, you may need to restore or repair this component using registry editing or driver replacement steps.
Advanced: Restore the WIMMount Driver Service
On some systems, especially those that previously used backup or imaging tools, the wimmount.sys driver or its registry service entry may be missing or misconfigured, blocking updates. Restoring this service can resolve the error.
Step 1: Download a known-good wimmount.reg registry file or create one that restores the WIMMount service entry in HKEY_LOCAL_MACHINE\SYSTEM\CurrentControlSet\Services\WIMMount. The ImagePath should be set to system32\drivers\wimmount.sys.
Step 2: Double-click the wimmount.reg file and confirm the registry merge.
Step 3: Restart your PC and attempt the update again.
Step 4: If the update still fails, check for a newer BIOS version from your device manufacturer, as outdated firmware can sometimes conflict with update installation.
Perform an In-Place Upgrade (Media Creation Tool)
If all other methods fail, performing an in-place upgrade reinstalls Windows 11 while keeping your files and apps intact. This process repairs system files and update components in a single operation.
Step 1: Download the Media Creation Tool from Microsoft's official website.
Step 2: Run the tool and select Upgrade this PC now. Follow the prompts and choose to keep personal files and applications.
Step 3: Allow the upgrade process to complete. This will refresh Windows system files and often resolves persistent update errors.
Resolving error 0xc1420121 in Windows 11 typically restores smooth update functionality and system security. If the issue persists after these steps, consider consulting Microsoft support or preparing for a clean installation as a last resort.